10 Face-Framing Layered Hair Ideas
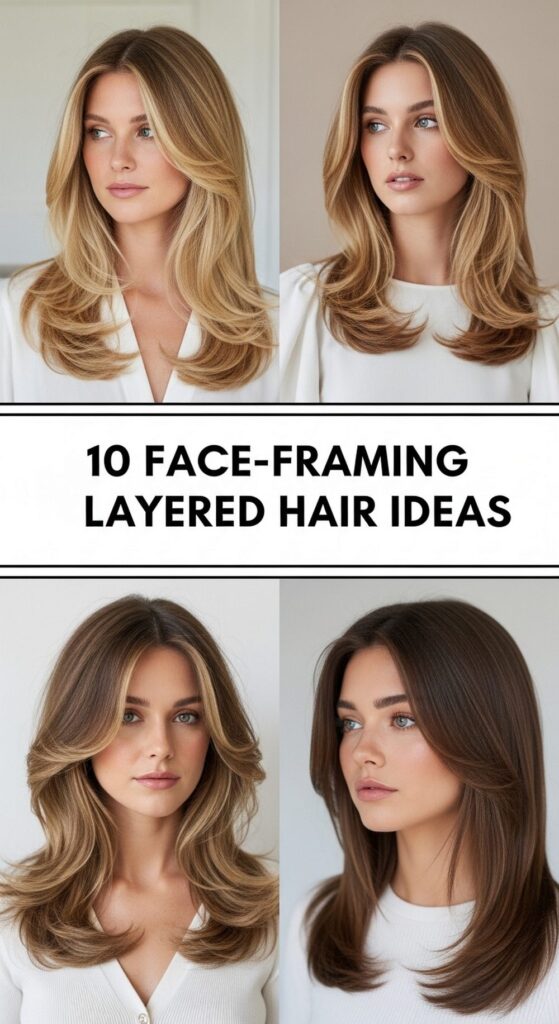
Face-framing layers are one of the easiest ways to refresh your haircut without changing everything. They add shape around your cheeks, jawline, and chin, which helps your features stand out in a soft and flattering way. This list covers 10 layered looks that work well for everyday readers who want a style that feels fresh, wearable, and easy to manage at home. You will find ideas for straight, wavy, and curly hair, with options that suit oval, round, heart, and long face shapes. Some looks feel polished and smooth, while others lean more loose and airy. Before styling, it helps to start with clean hair, a heat protectant, a round brush or wide-tooth comb, and a light finishing product for hold and shine. These ideas are practical, pretty, and simple enough to try for daily wear or special plans.
Quick List
- Soft Curtain Face-Framing Layers Hairstyle
- Chin-Skimming Feathered Layers Hairstyle
- Long Face-Framing Butterfly Layers Hairstyle
- Wispy Cheekbone Layers Hairstyle
- Collarbone Layered Blowout Hairstyle
- Soft Shag Face-Framing Layers Hairstyle
- Sleek U-Cut Face-Framing Layers Hairstyle
- Wavy Mid-Length Framing Layers Hairstyle
- Curly Face-Framing Layered Shape Hairstyle
- Side-Parted Flipped Layers Hairstyle
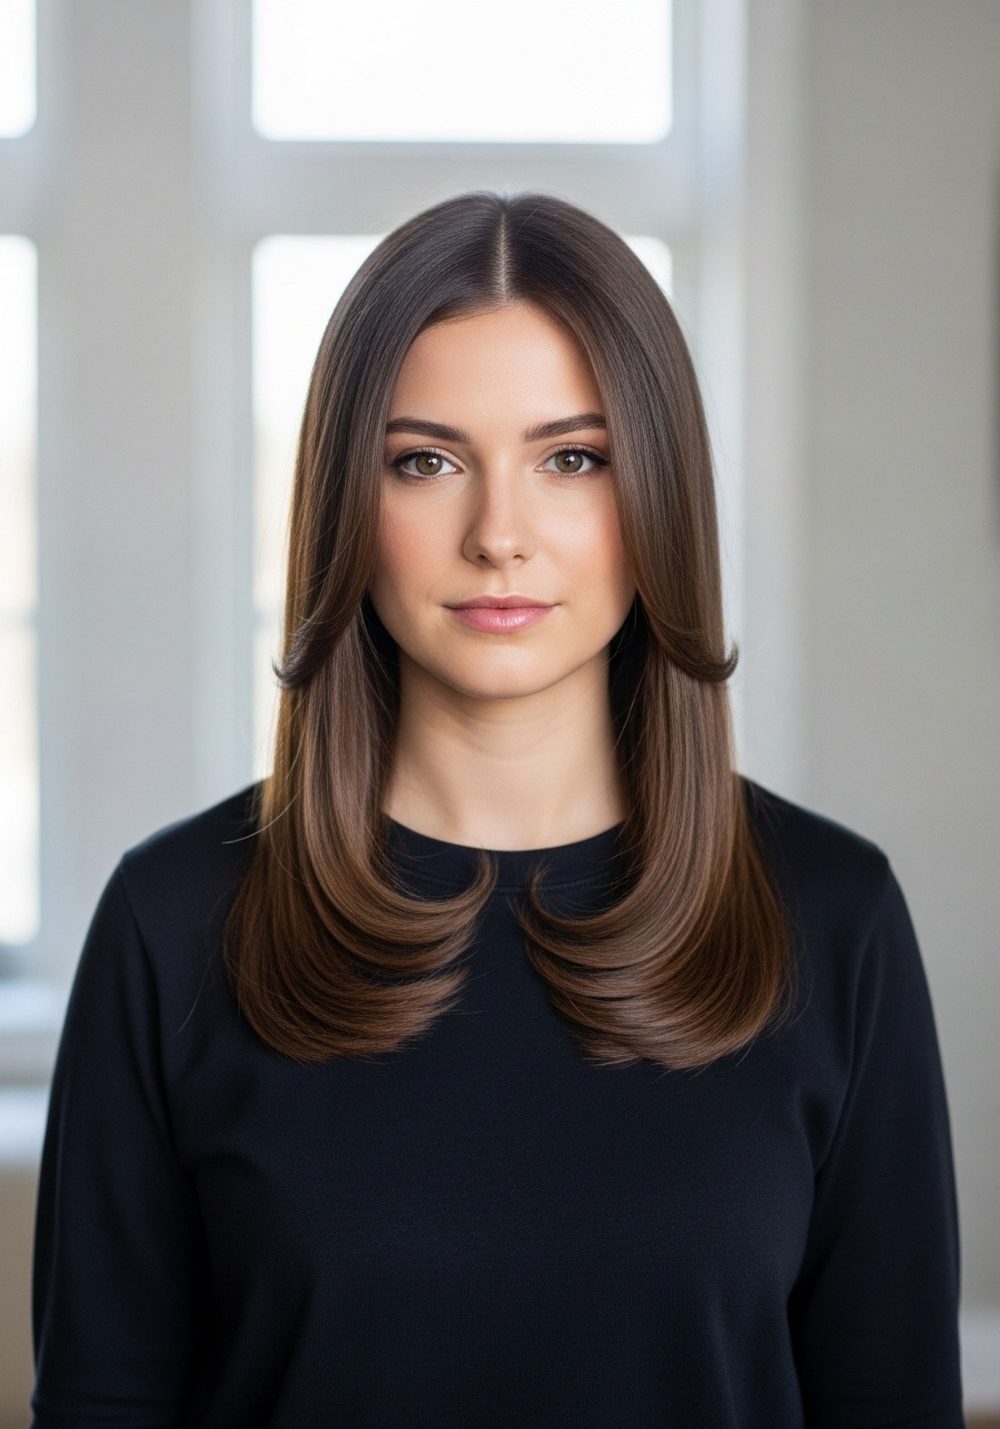
Soft Curtain Face-Framing Layers Hairstyle
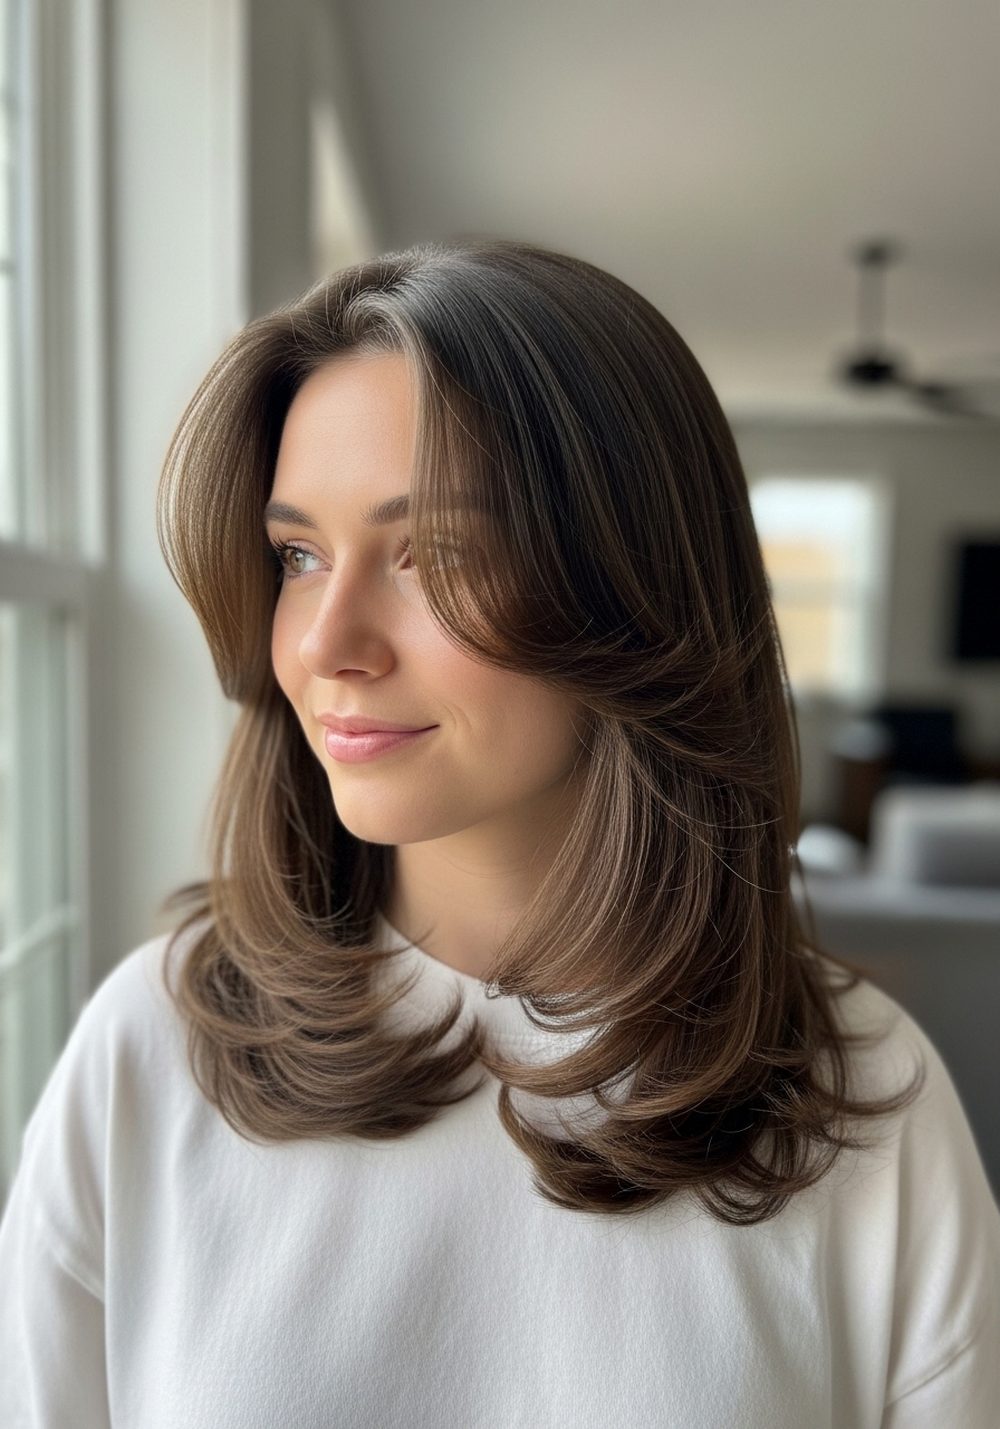
This look gives you soft pieces that open around the face and blend into the rest of the hair with an easy, balanced shape. It works especially well if you want movement without losing length. The center part keeps it modern, while the curtain effect draws attention to the eyes and cheekbones in a gentle way. It can feel relaxed for daytime, but still polished enough for dinner plans or photos. On straight hair, it looks smooth and clean. On wavy hair, it feels airy and effortless. A light bend at the front helps the layers sit nicely and stops them from falling flat. Pro tip: dry the front pieces away from your face first to keep that open, soft sweep.
How To Style
Part hair down the middle.
Blow-dry the front layers away from the face with a round brush.
Add a soft bend with a curling iron if needed.
Finish with a light mist for hold.
Best For
Oval, heart, round faces; straight to wavy hair
Tools & Products
Round brush, blow dryer, heat protectant, light hairspray, shine serum
Pinterest Hashtags:
#FaceFramingLayers #CurtainLayers #LayeredHair #SoftHairstyle #HairIdeas
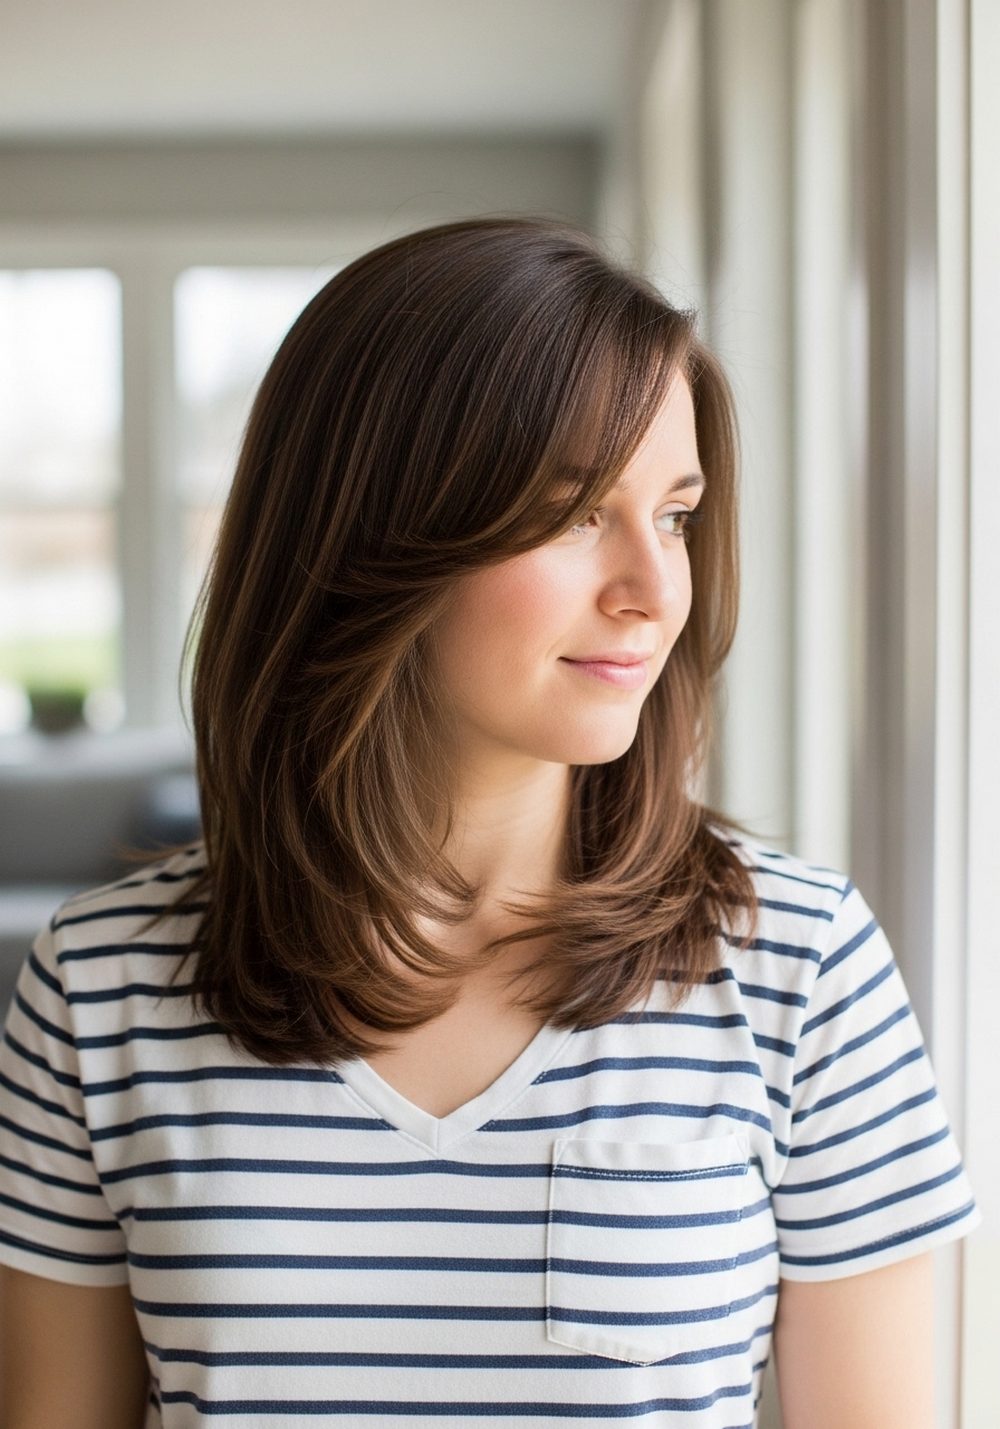
Chin-Skimming Feathered Layers Hairstyle
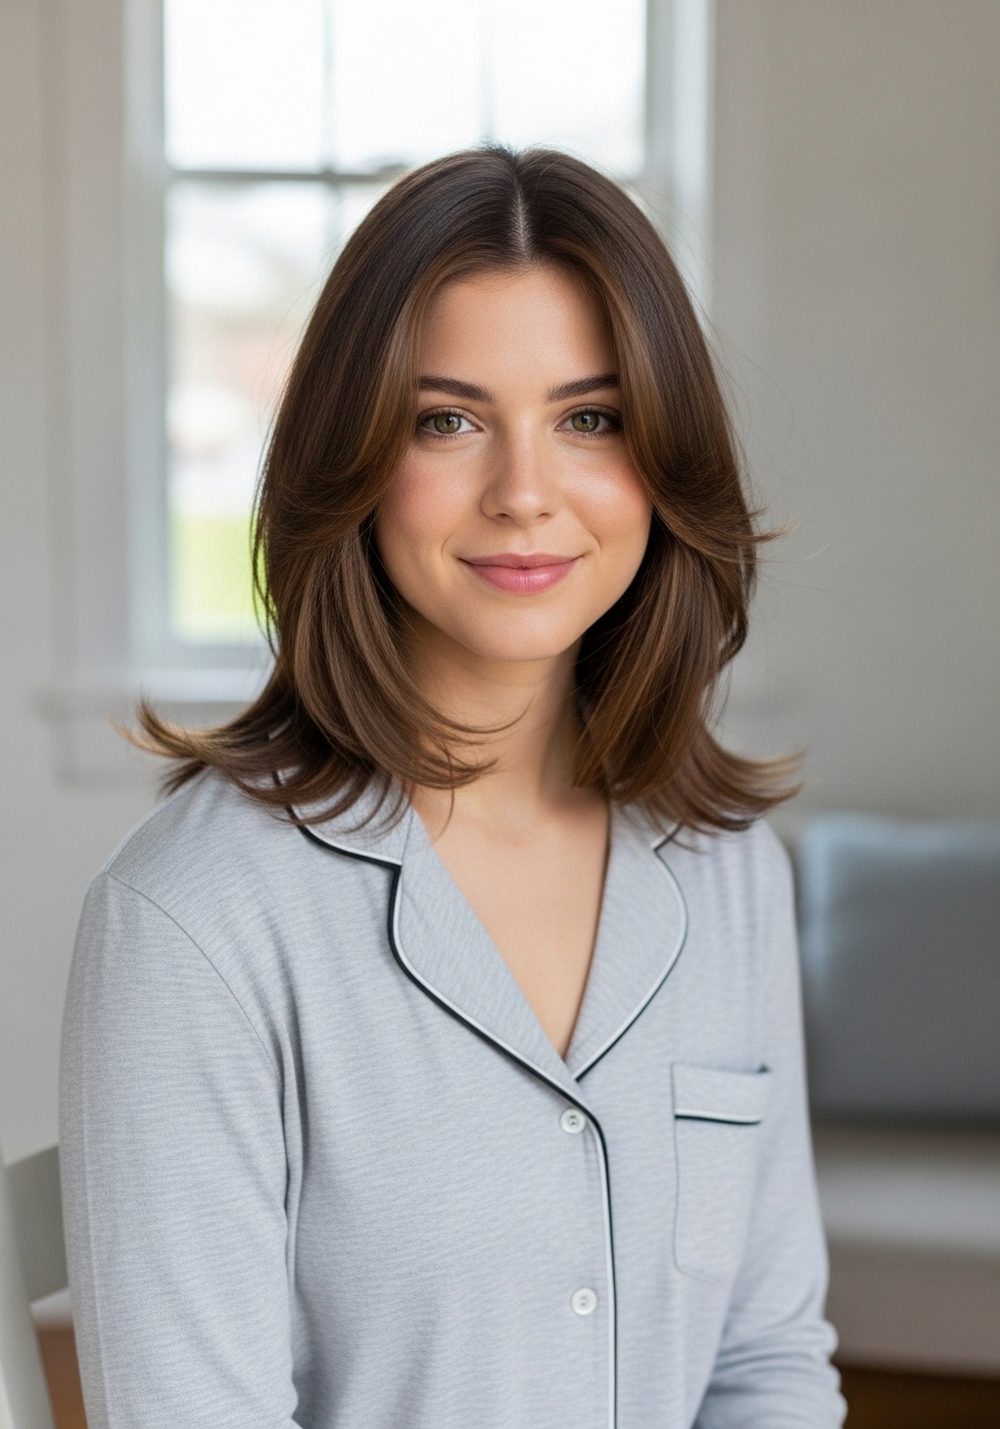
This haircut places light, feathered pieces right around the chin to create shape and softness without looking heavy. It is a great pick if you want your jawline area to feel more open and defined. The feathered finish adds movement, so the style feels light and fresh instead of blunt. It suits everyday wear because it is easy to touch up and does not need too much product. On fine hair, it can help create a fuller look around the front. On medium hair, it gives a pretty swing when you move. It looks neat with a blowout but also holds up well with natural texture. Pro tip: keep the ends light and flicked outward for a more airy finish.
How To Style
Create a soft side or middle part.
Use a round brush to turn the chin pieces slightly out.
Smooth the top for a neat finish.
Use a tiny amount of serum on the ends.
Best For
Oval, long, heart faces; straight to softly wavy hair
Tools & Products
Round brush, blow dryer, heat protectant, smoothing cream, light serum
Pinterest Hashtags:
#FeatheredLayers #FaceFramingHair #LayeredHairstyle #HairInspo #EverydayHair
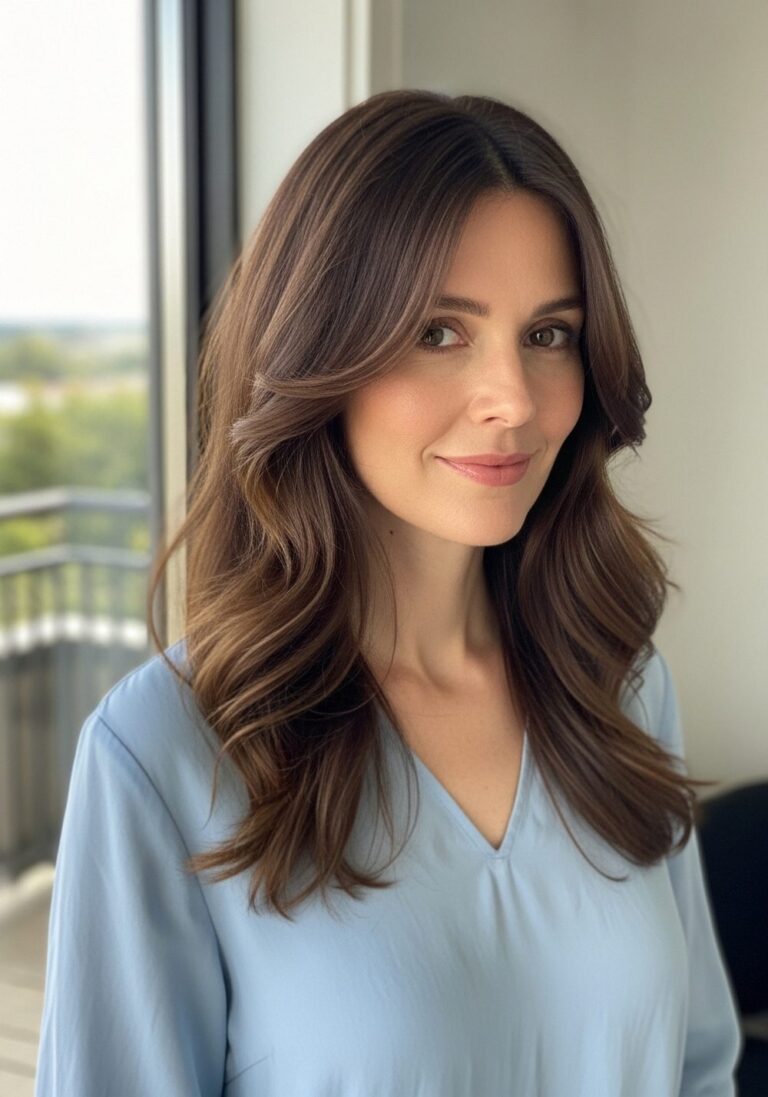
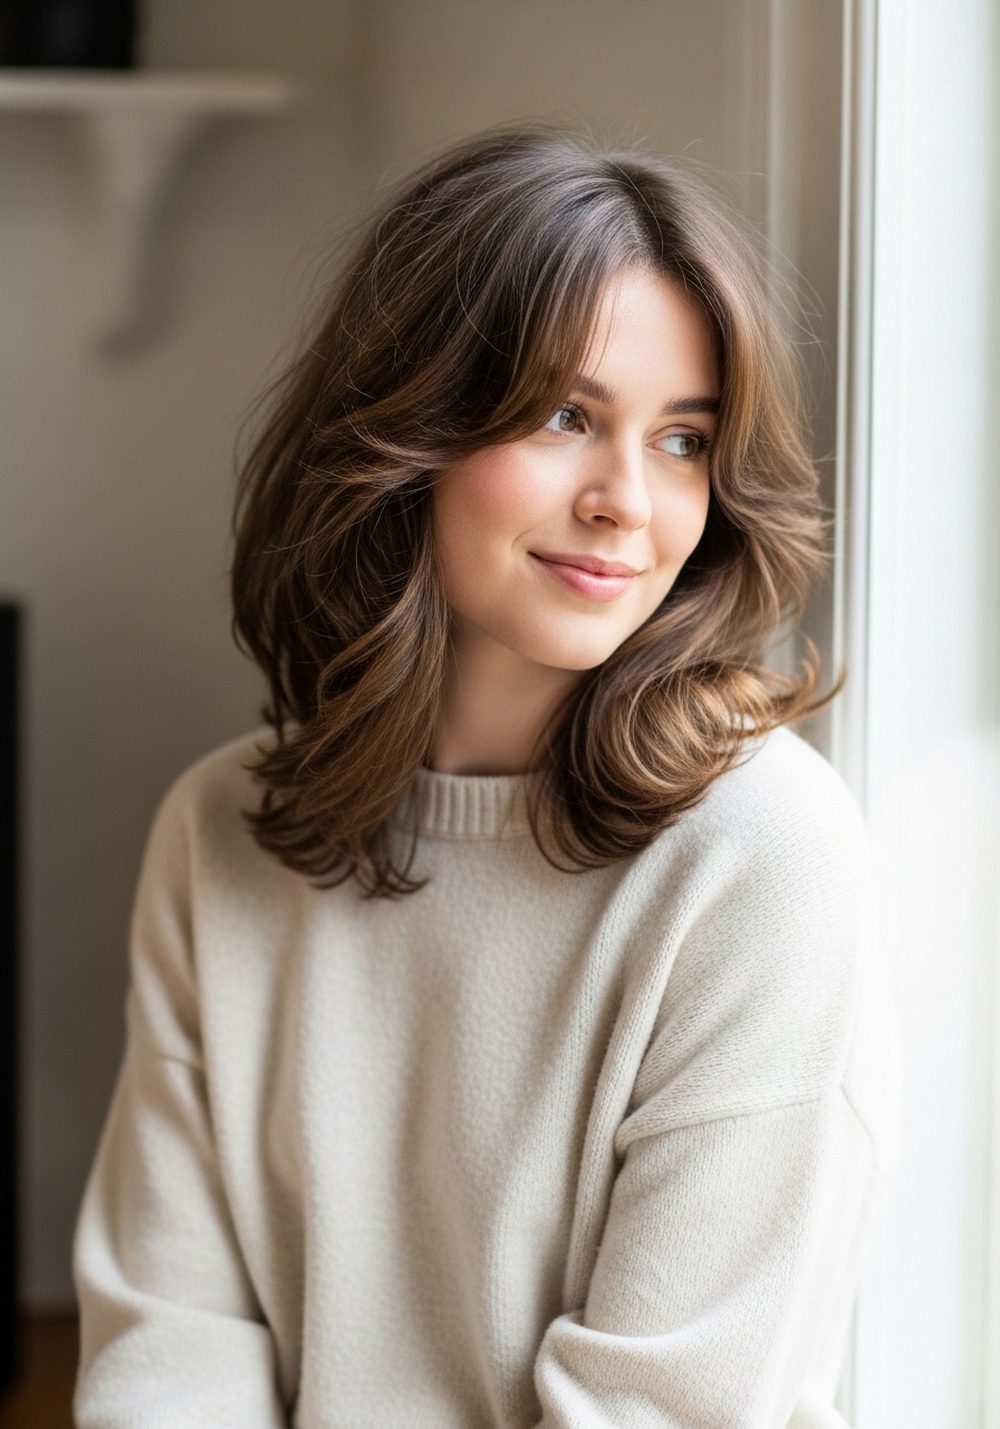
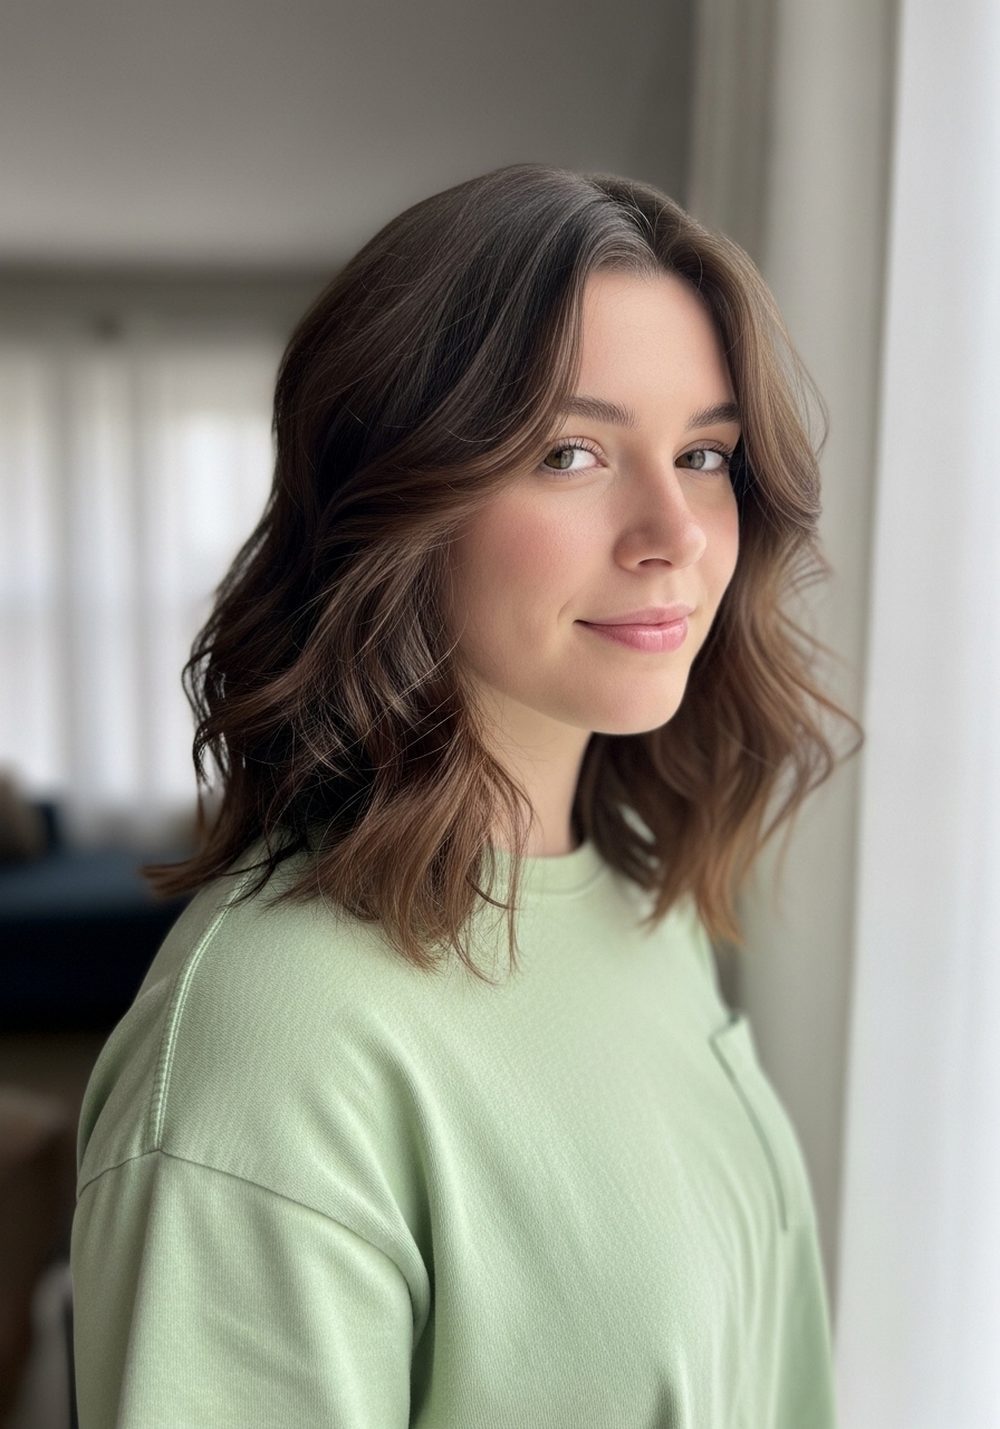
Long Face-Framing Butterfly Layers Hairstyle
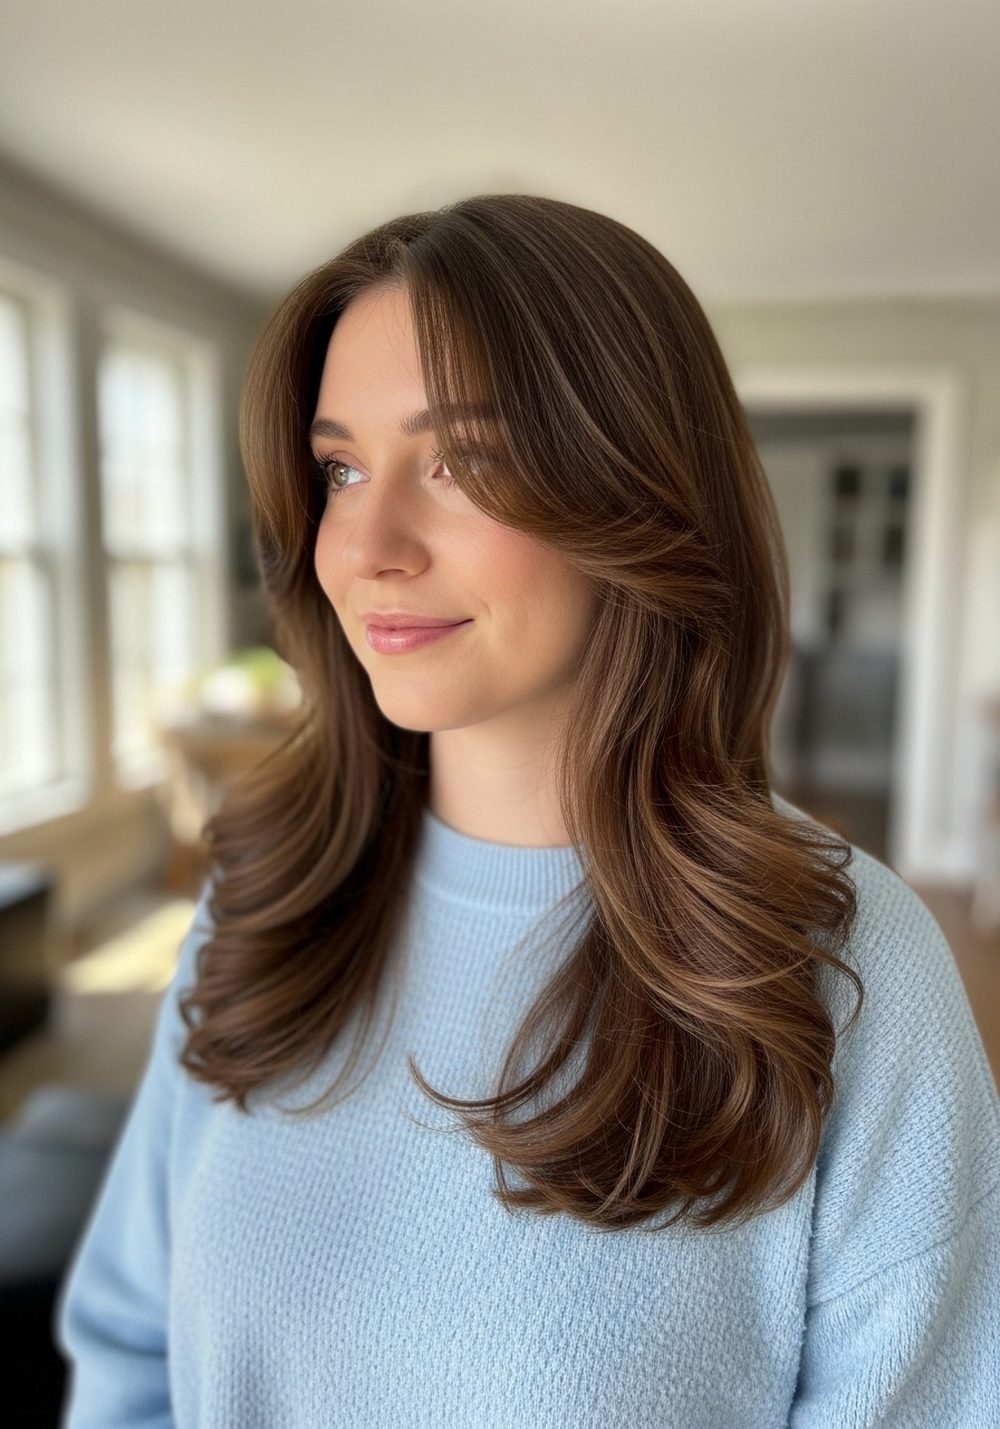
Butterfly layers give you that full, bouncy look while keeping the overall length long and soft. The shorter pieces around the front create lift near the cheeks and collarbone, which makes the haircut feel lively and shaped. This is a nice option if you want volume without a short haircut. It works beautifully for blowouts because the layered sections separate easily and show movement. The style feels feminine, light, and a little glamorous, but still very wearable for daily life. It suits medium to thick hair best, though it can also work on finer hair with a root-lifting product. Pro tip: curl the front layers away from the face so each section stays visible and airy.
How To Style
Blow-dry with a round brush for lift.
Curl the front sections away from the face.
Brush through gently to soften the shape.
Set with a flexible hold spray.
Best For
Round, oval, long faces; straight to wavy hair
Tools & Products
Blow dryer, large round brush, heat protectant, volumizing mousse, flexible hairspray
Pinterest Hashtags:
#ButterflyLayers #LongLayeredHair #FaceFramingStyle #HaircutIdeas #BouncyHair
Wispy Cheekbone Layers Hairstyle
Wispy cheekbone layers are perfect if you want a lighter, softer frame around the face without a big haircut change. These pieces fall around the upper cheek area and help bring attention upward, which can brighten the whole look. The finish is soft and airy, so it feels easy rather than overdone. This style is great for finer hair because it adds detail around the front without taking away too much fullness. It also works well with loose waves, a light blowout, or natural texture. The result is subtle, flattering, and easy to wear every day. Pro tip: use only a little product near the front so the wispy layers keep their light shape.
How To Style
Part hair where it falls best.
Lightly bend the face-framing pieces with a small iron.
Brush them out for a soft finish.
Use a light texturizing spray at the ends.
Best For
Heart, oval, round faces; fine to medium straight or wavy hair
Tools & Products
Small curling iron, heat protectant, texturizing spray, light serum, paddle brush
Pinterest Hashtags:
#WispyLayers #CheekboneLayers #FaceFramingCut #SoftHairIdeas #LayeredLook
Collarbone Layered Blowout Hairstyle
This collarbone-length cut pairs soft layers with a full blowout for a clean, lifted shape that frames the face beautifully. The front pieces blend from the cheek area down into the length, which keeps the style smooth and flattering from every angle. It is a great choice if you like hair that looks styled but not stiff. The collarbone length is practical, easy to manage, and long enough for different finishes. The blowout effect adds body and bounce, especially at the roots and ends. It can help thin hair look fuller and give medium hair a polished swing. Pro tip: roll the brush under at the ends, then cool the section before releasing for better shape.
How To Style
Apply mousse to damp roots.
Blow-dry in sections with a medium round brush.
Shape the front layers away from the face.
Finish with a light shine mist.
Best For
Oval, round, heart faces; fine to medium straight or wavy hair
Tools & Products
Medium round brush, blow dryer, volumizing mousse, heat protectant, shine spray
Pinterest Hashtags:
#CollarboneHair #LayeredBlowout #FaceFramingLayers #MediumHairIdeas #FreshHair
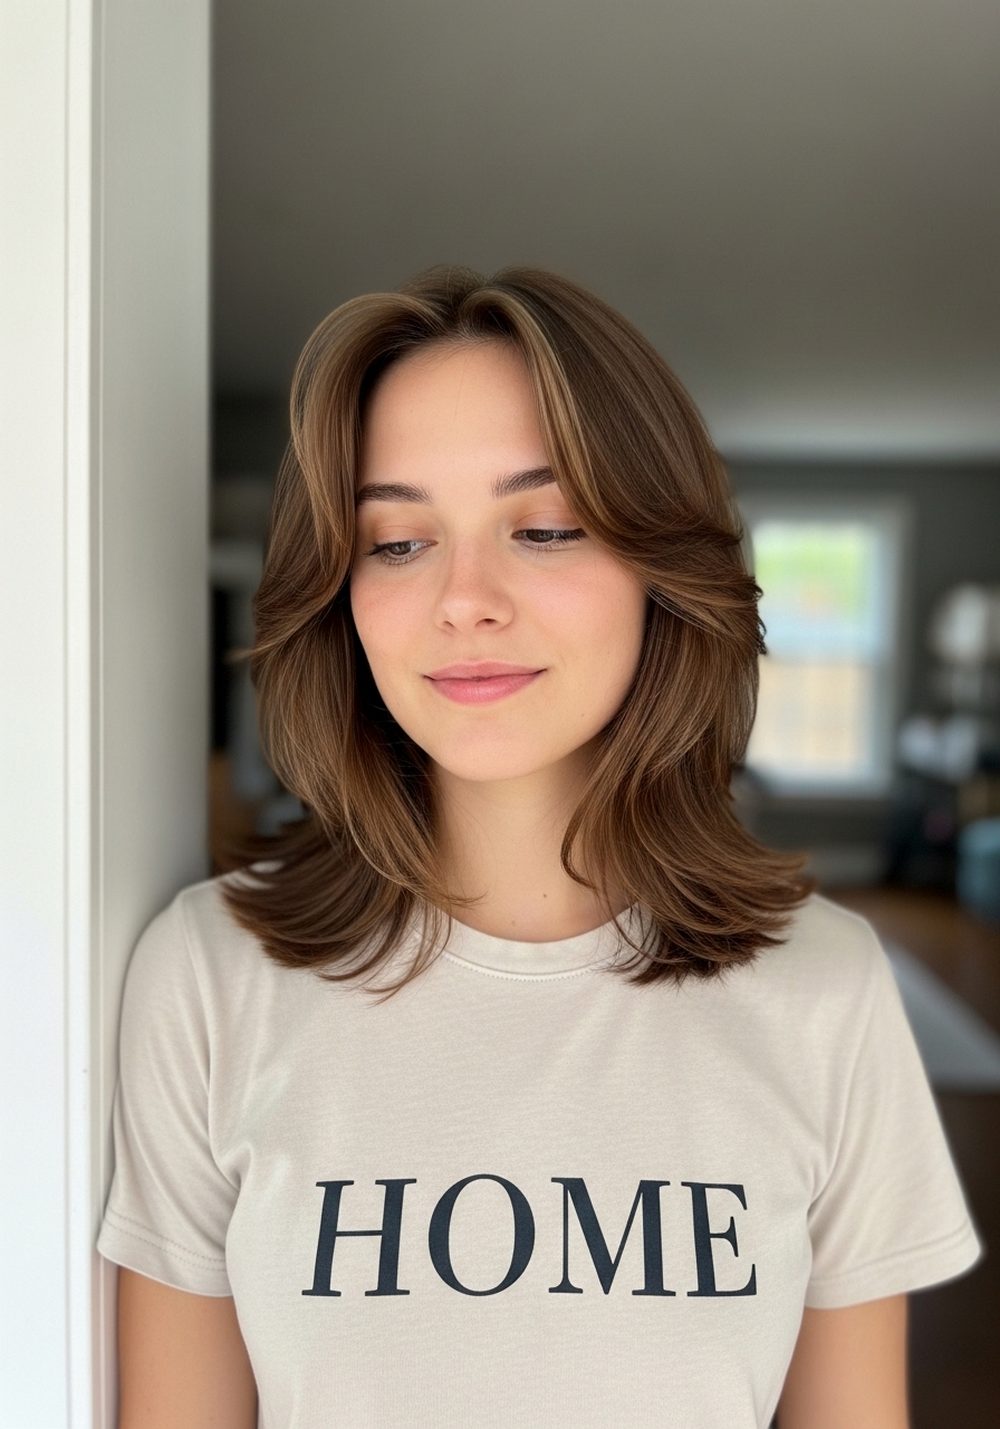
Soft Shag Face-Framing Layers Hairstyle
A soft shag gives you relaxed layers around the face with a bit more texture and movement through the whole cut. It feels modern, light, and easygoing without looking messy. The shorter front pieces soften the cheeks and eyes, while the layered body keeps the style full and lively. This is a strong choice for naturally wavy hair, but it also works on straight hair with a little texture added. It has an undone feel that suits casual days, weekends, and low-effort styling routines. The shape looks best when it keeps some air and separation. Pro tip: scrunch a light styling cream into the mid-lengths so the layers stay soft instead of puffy.
How To Style
Work styling cream through damp hair.
Diffuse for natural texture or air-dry.
Twist a few front pieces for shape.
Fluff gently at the roots.
Best For
Round, oval, heart faces; wavy to lightly curly hair
Tools & Products
Diffuser, styling cream, texturizing spray, wide-tooth comb, light mousse
Pinterest Hashtags:
#SoftShag #ShagLayers #FaceFramingHairstyle #TexturedHair #WavyHairIdeas
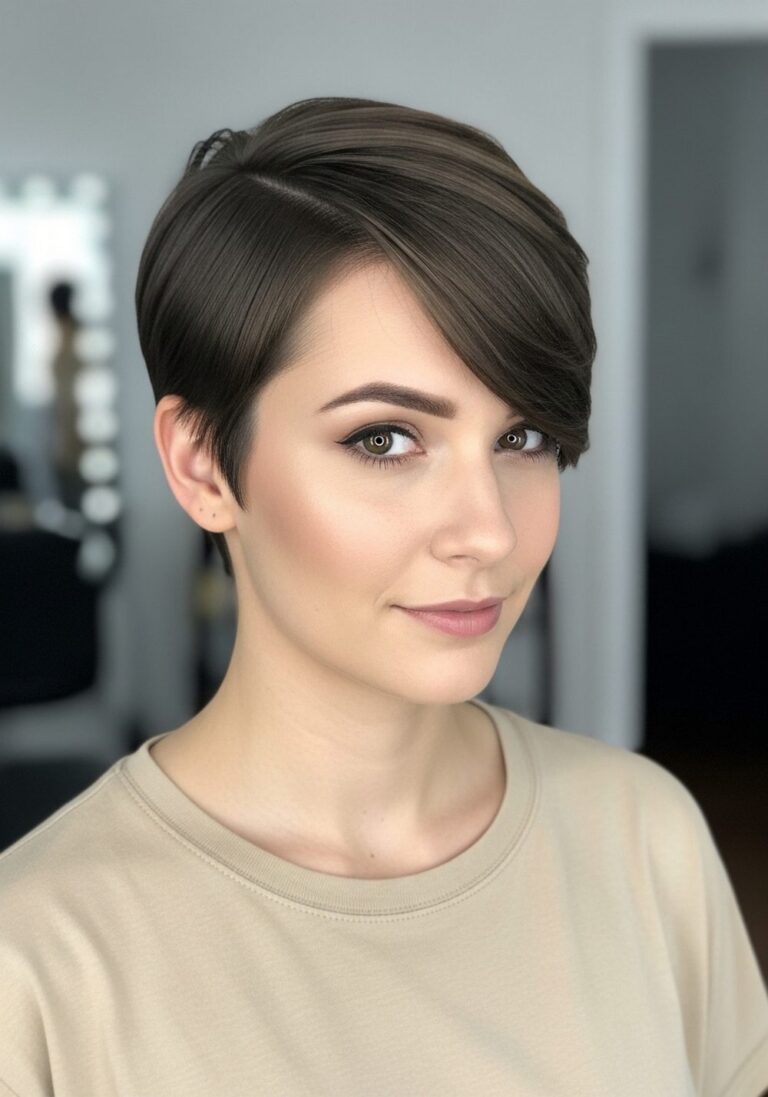
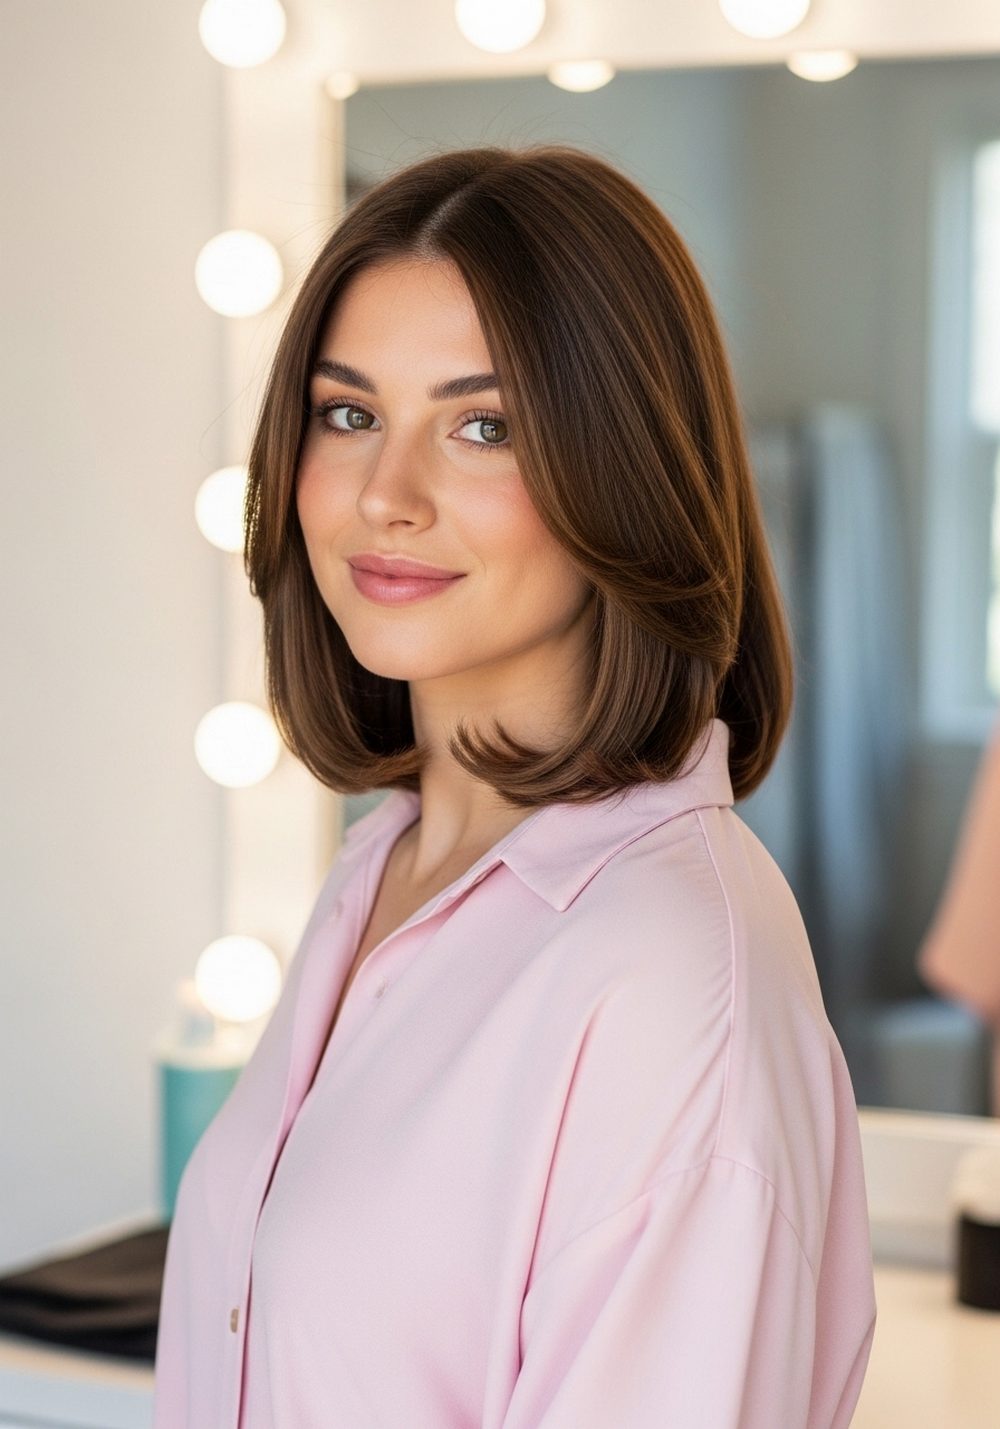
Sleek U-Cut Face-Framing Layers Hairstyle
This hairstyle combines a soft U-shaped back with smooth face-framing layers in the front for a clean and elegant finish. It is ideal if you like polished hair that still has shape around the face. The front layers help break up long lengths, making the style feel lighter and more balanced. The U-shape keeps the ends looking neat and full, which works especially well on medium to thick hair. This cut looks refined for work, events, or simple daily styling, and it holds its shape well with minimal effort. Straight hair shows the lines best, while softly wavy hair adds a gentle touch. Pro tip: smooth the front sections last so they stay glossy and defined.
How To Style
Straighten or blow-dry hair smooth.
Curve the front layers slightly inward.
Apply serum from mid-length to ends.
Tuck one side behind the ear for shape.
Best For
Long, oval, heart faces; straight to softly wavy hair
Tools & Products
Flat iron, blow dryer, paddle brush, heat protectant, smoothing serum
Pinterest Hashtags:
#UCutHair #SleekLayers #FaceFramingHaircut #LongHairIdeas #SmoothHairstyle
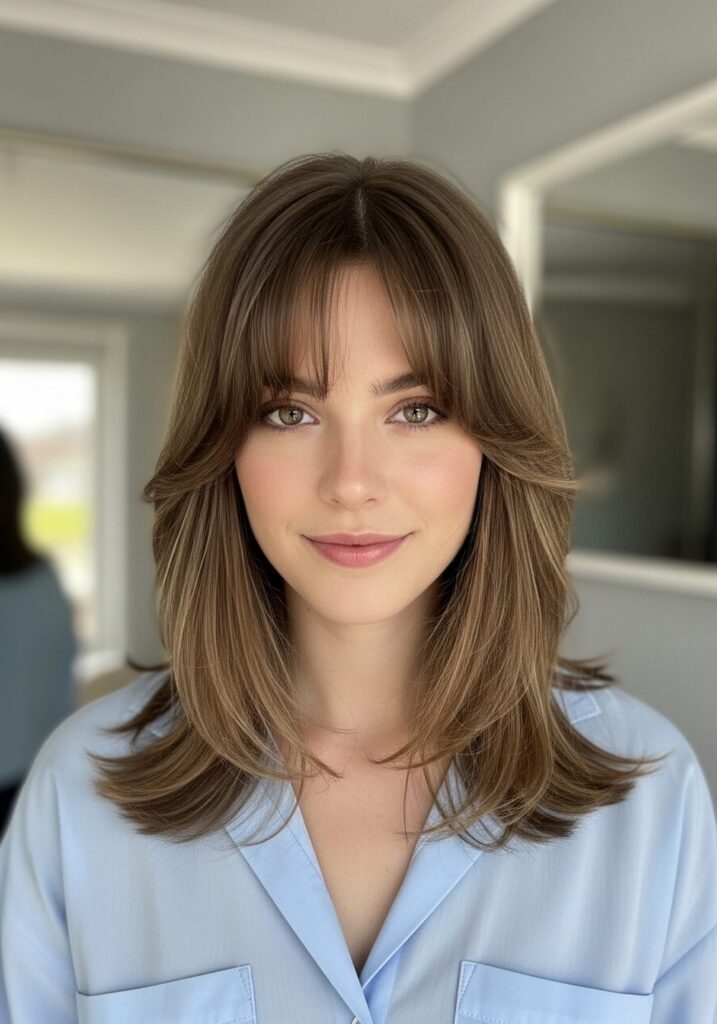
Wavy Mid-Length Framing Layers Hairstyle
This mid-length style uses soft layers around the face to make loose waves look more shaped and flattering. It is an easy choice if you want a natural look with a little extra detail near the cheeks and jawline. The front pieces help the waves sit better and stop the style from feeling too heavy around the face. It suits everyday wear because the texture hides small styling changes and still looks good as the day goes on. The overall effect is relaxed, pretty, and easy to maintain. It works well with natural waves or heat-styled bends. Pro tip: leave the ends slightly straighter than the middle sections so the layers stay visible and not too round.
How To Style
Add heat protectant to dry hair.
Wave sections with a medium barrel iron.
Leave the front layers slightly softer.
Rake through with fingers and finish with spray.
Best For
Round, oval, long faces; wavy or straight hair
Tools & Products
Curling iron, heat protectant, texture spray, light hair oil, section clips
Pinterest Hashtags:
#WavyLayers #MidLengthHair #FaceFramingWaves #LayeredHaircut #HairStyleIdeas
Curly Face-Framing Layered Shape Hairstyle
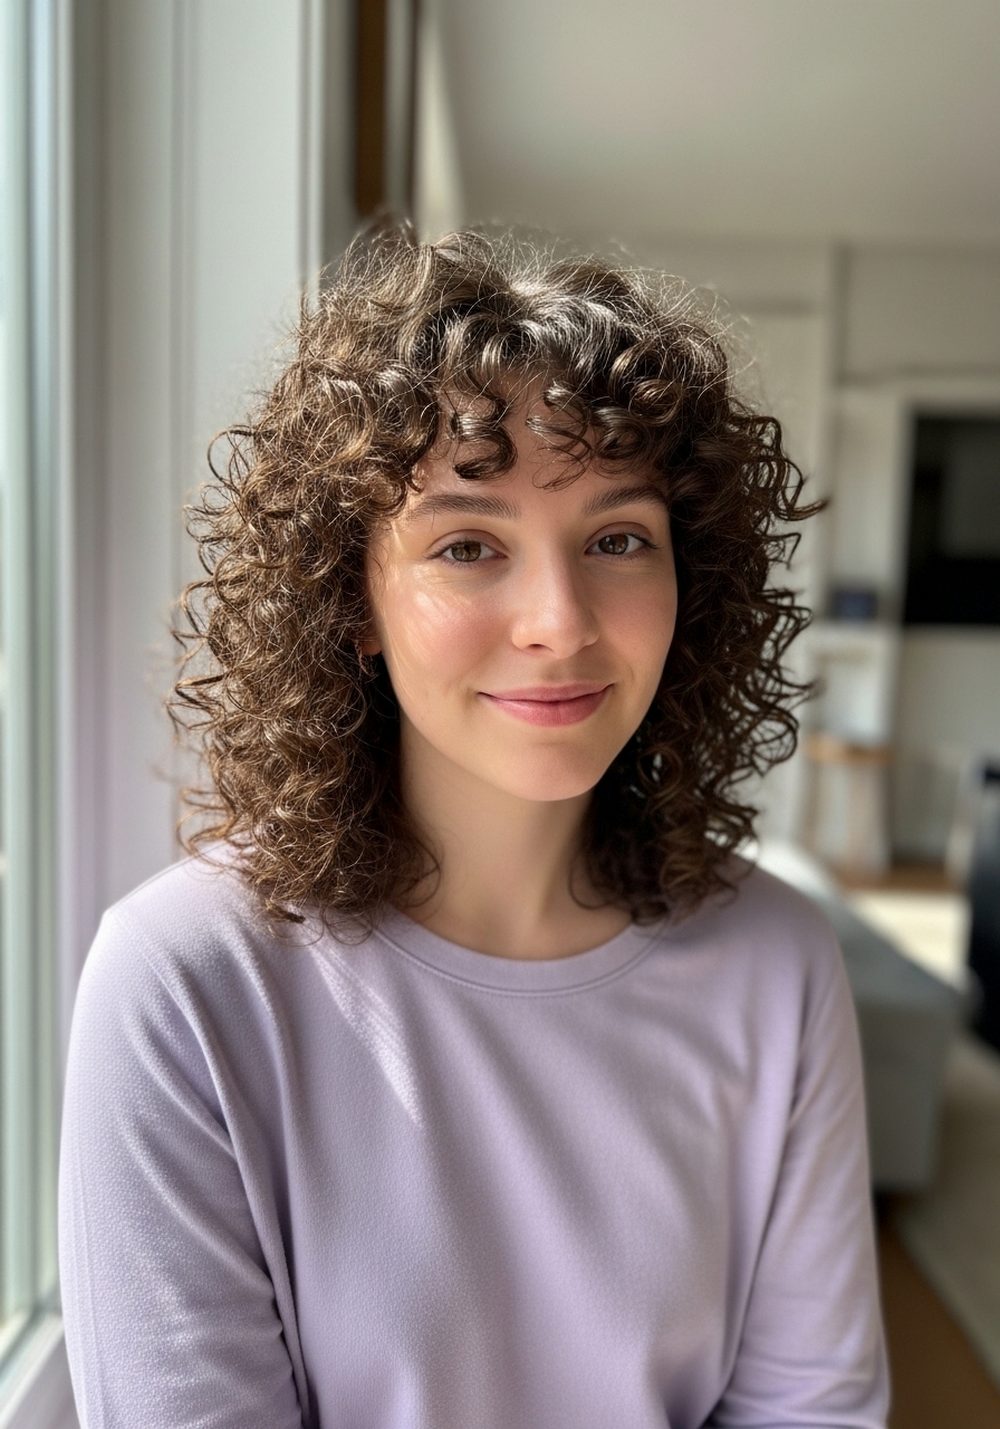
This layered curly cut is all about shaping the front so your curls frame the face in a soft and balanced way. The shorter pieces around the cheeks and jaw help define the haircut and stop the front from looking too heavy. It gives curls more bounce and lets your natural texture stand out clearly. This style feels fresh, lively, and flattering without needing a perfect finish. It can work for daily wear, social plans, or photos because the shape does most of the work for you. Keeping the layers blended is the key to a soft result. Pro tip: style curls in their natural pattern and avoid brushing them out once dry.
How To Style
Apply curl cream on wet hair.
Use a diffuser or air-dry.
Shape the front curls with your fingers.
Finish with a light oil on the ends if needed.
Best For
Heart, oval, round faces; curly to coily hair
Tools & Products
Diffuser, curl cream, leave-in conditioner, wide-tooth comb, light hair oil
Pinterest Hashtags:
#CurlyLayers #FaceFramingCurls #CurlyHairstyle #LayeredCurlCut #NaturalHairIdeas
Side-Parted Flipped Layers Hairstyle
This style uses a deep or soft side part with flipped face-framing layers to create lift and movement right where you need it most. The side part changes the balance of the haircut, making it great for adding fullness and shape around the front. The flipped layers give the look a playful finish without feeling too styled. It works very well for medium-length and long hair, especially if you like a soft blowout look with easy movement. This hairstyle can help open up the face and highlight the cheek and eye area. It feels polished for day plans, dinner, or weekend photos. Pro tip: flip only the front sections so the hairstyle stays soft and modern.
How To Style
Create a side part.
Blow-dry the roots for lift.
Flip the front layers outward with a brush or iron.
Set lightly to keep the shape.
Best For
Round, oval, heart faces; straight to wavy hair
Tools & Products
Round brush, blow dryer, heat protectant, root lift spray, light hairspray
Pinterest Hashtags:
#SidePartHair #FlippedLayers #FaceFramingStyle #LayeredHairstyle #HairCutIdeas
Conclusion
Face-framing layers are an easy way to make your haircut feel softer, fresher, and more flattering without giving up the length or texture you already like. The best choice depends on how much movement you want, how you usually style your hair, and which areas of your face you want to highlight. Pick one look from this list, save the matching prompt, and use the styling steps as your starting point at home.
CTA: Save your favorite face-framing layered hairstyle and try it for your next haircut refresh.
FAQs
1. Are face-framing layers good for all hair lengths?
Yes, they can work on short, medium, and long hair. The main difference is where the shortest pieces begin and how softly they blend into the rest of the cut.
2. Do face-framing layers make thin hair look thinner?
Not always. When placed carefully, they can actually make thin hair look lighter and more lifted around the face without removing too much fullness.
3. Which face shapes suit face-framing layers best?
Oval, round, heart, and long face shapes can all wear them well. The key is choosing the right starting point, such as cheekbone, chin, or collarbone length.
4. Do I need to heat-style face-framing layers every day?
No, you do not. Many of these cuts still look good with air-dried texture, though a quick bend or blow-dry can help show the shape more clearly.
5. How often should I trim face-framing layers?
A trim every 6 to 10 weeks usually helps keep the front shape neat. If your layers are very soft and blended, you may be able to wait a little longer.