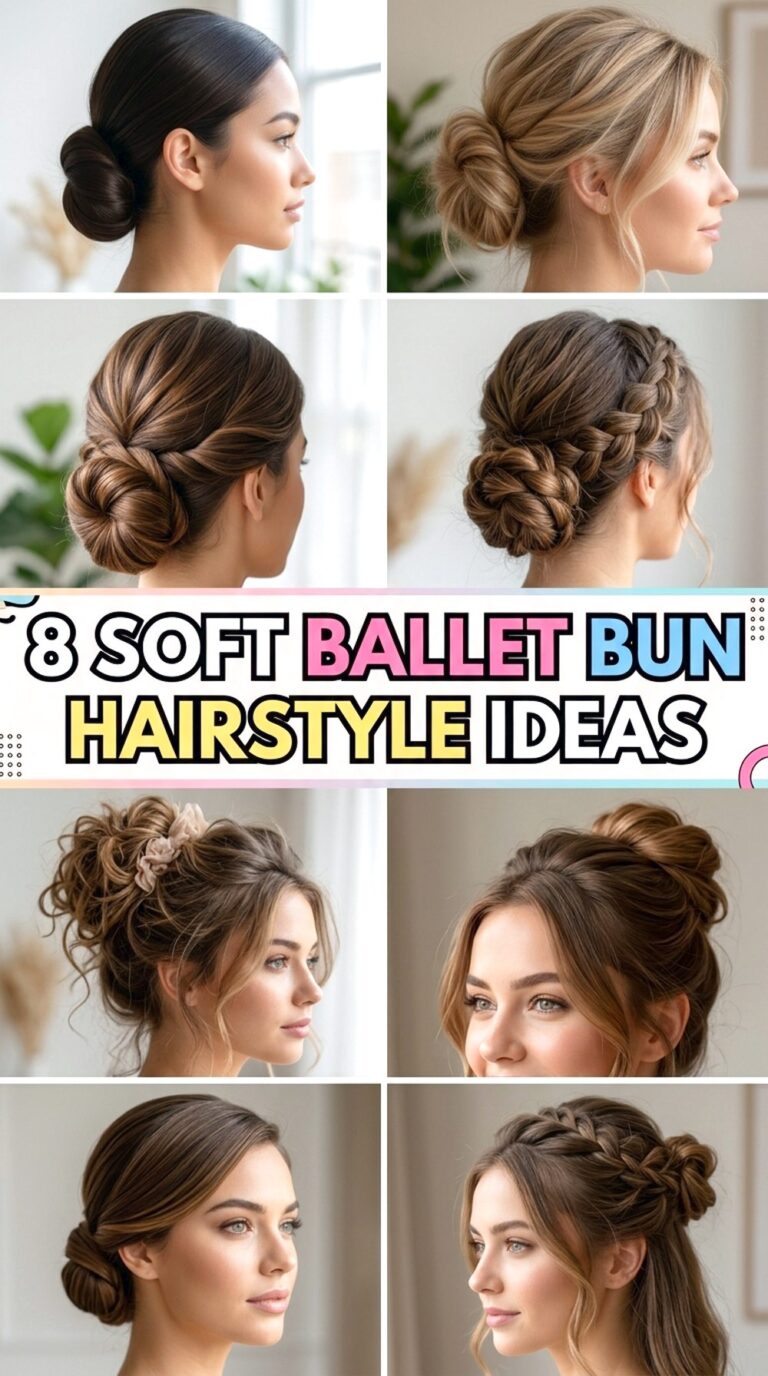
20 Princess Updo Hairstyle Ideas
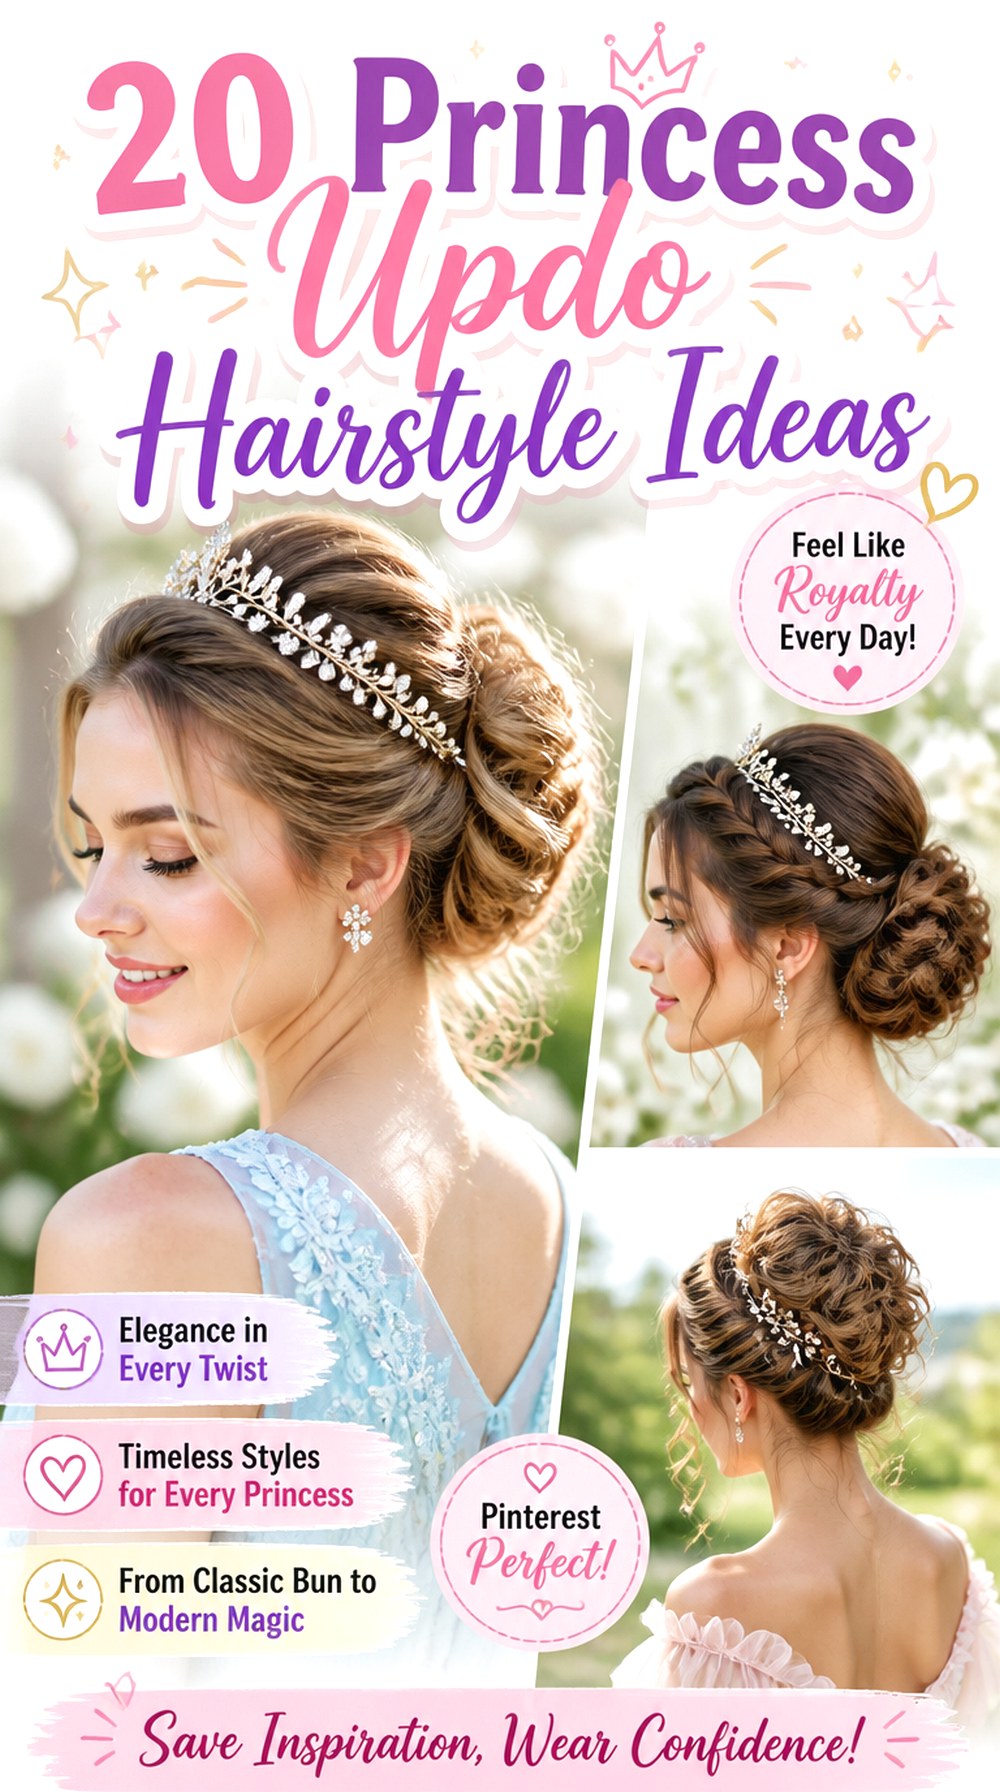
Princess updos combine polished structure with softer details such as curls, braids, twists, face-framing pieces, and decorative accessories. Some sit low at the nape for an understated royal finish, while others use height at the crown or a full bun to create a more formal silhouette. These 20 Princess Updo Hairstyle Ideas range from sleek knots to airy braided shapes, so the overall effect can be adjusted without losing the elegant character of the hairstyle.
Medium and long hair usually provides the easiest base, although shorter lengths can sometimes be pinned into compact twists with the help of discreet extensions or padding. Fine hair often benefits from mousse, texture spray, or gentle backcombing, while thick hair may need internal weight control and stronger pins. Straight, wavy, and curly textures can all work, but the amount of preparation varies. Face-framing sections, crown height, and the position of the bun can also be changed to complement different face shapes.
Most formal updos need moderate preparation and more styling time than an everyday ponytail. Before choosing one, consider hair length, density, accessories, comfort, weather, and how long you need the shape to stay secure. A trial appointment is especially useful for weddings, proms, photographs, and other long events.
Quick List
- Classic Low Chignon Princess Updo
- Braided Crown Princess Updo
- Soft Curly High Bun Princess Updo
- Twisted Rose Bun Princess Updo
- Pearl-Pinned French Twist Princess Updo
- Side-Swept Braided Bun Princess Updo
- Tiara-Topped Romantic Princess Updo
- Loose Tendril Low Bun Princess Updo
- Regal Rope-Braid Princess Updo
- Sleek Royal Knot Princess Updo
- Fishtail Crown Bun Princess Updo
- Textured Mid-Bun Princess Updo
- Vintage Rolled Princess Updo
- Flower-Adorned Twisted Princess Updo
- Side-Parted Low Twist Princess Updo
- Double Dutch Halo Princess Updo
- Voluminous Bouffant Princess Updo
- Cascading Braid-to-Bun Princess Updo
- Jeweled Sleek Bun Princess Updo
- Soft Wavy Knotted Princess Updo
Classic Low Chignon Princess Updo
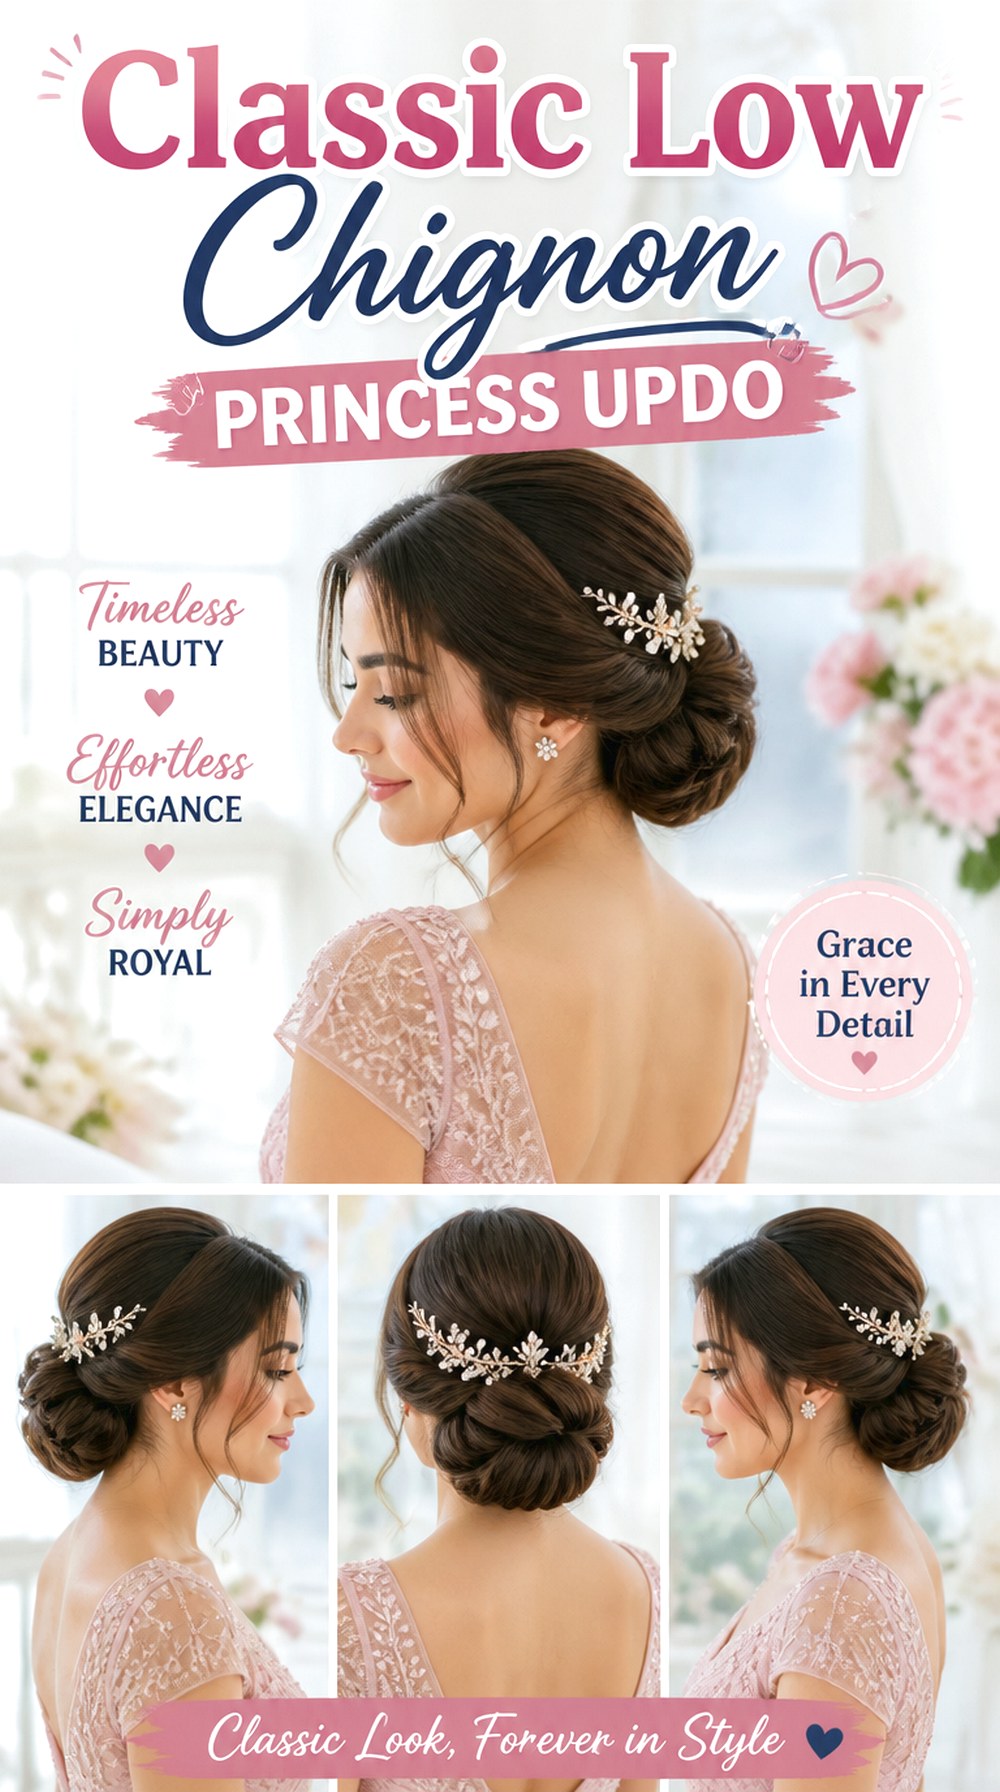
A classic low chignon gathers the hair neatly at the nape and keeps the silhouette smooth without making the crown completely flat. A soft center or side part can make it feel less severe, while a few controlled face-framing pieces add movement. Medium to thick hair works especially well, although fine hair can gain fullness from gentle texture preparation. Styling normally takes moderate time because the bun needs secure pinning and balanced placement. Use a smoothing serum, boar-bristle brush, and light-hold hairspray for a clean finish. Maintenance during the day is minimal once secured. At the salon, show exactly how low and wide you want the chignon to sit.
Pro tip: Keep a little width through the sides of the chignon rather than rolling it into a tiny tight knot; this gives the back of the hairstyle a softer, more regal proportion.
Braided Crown Princess Updo
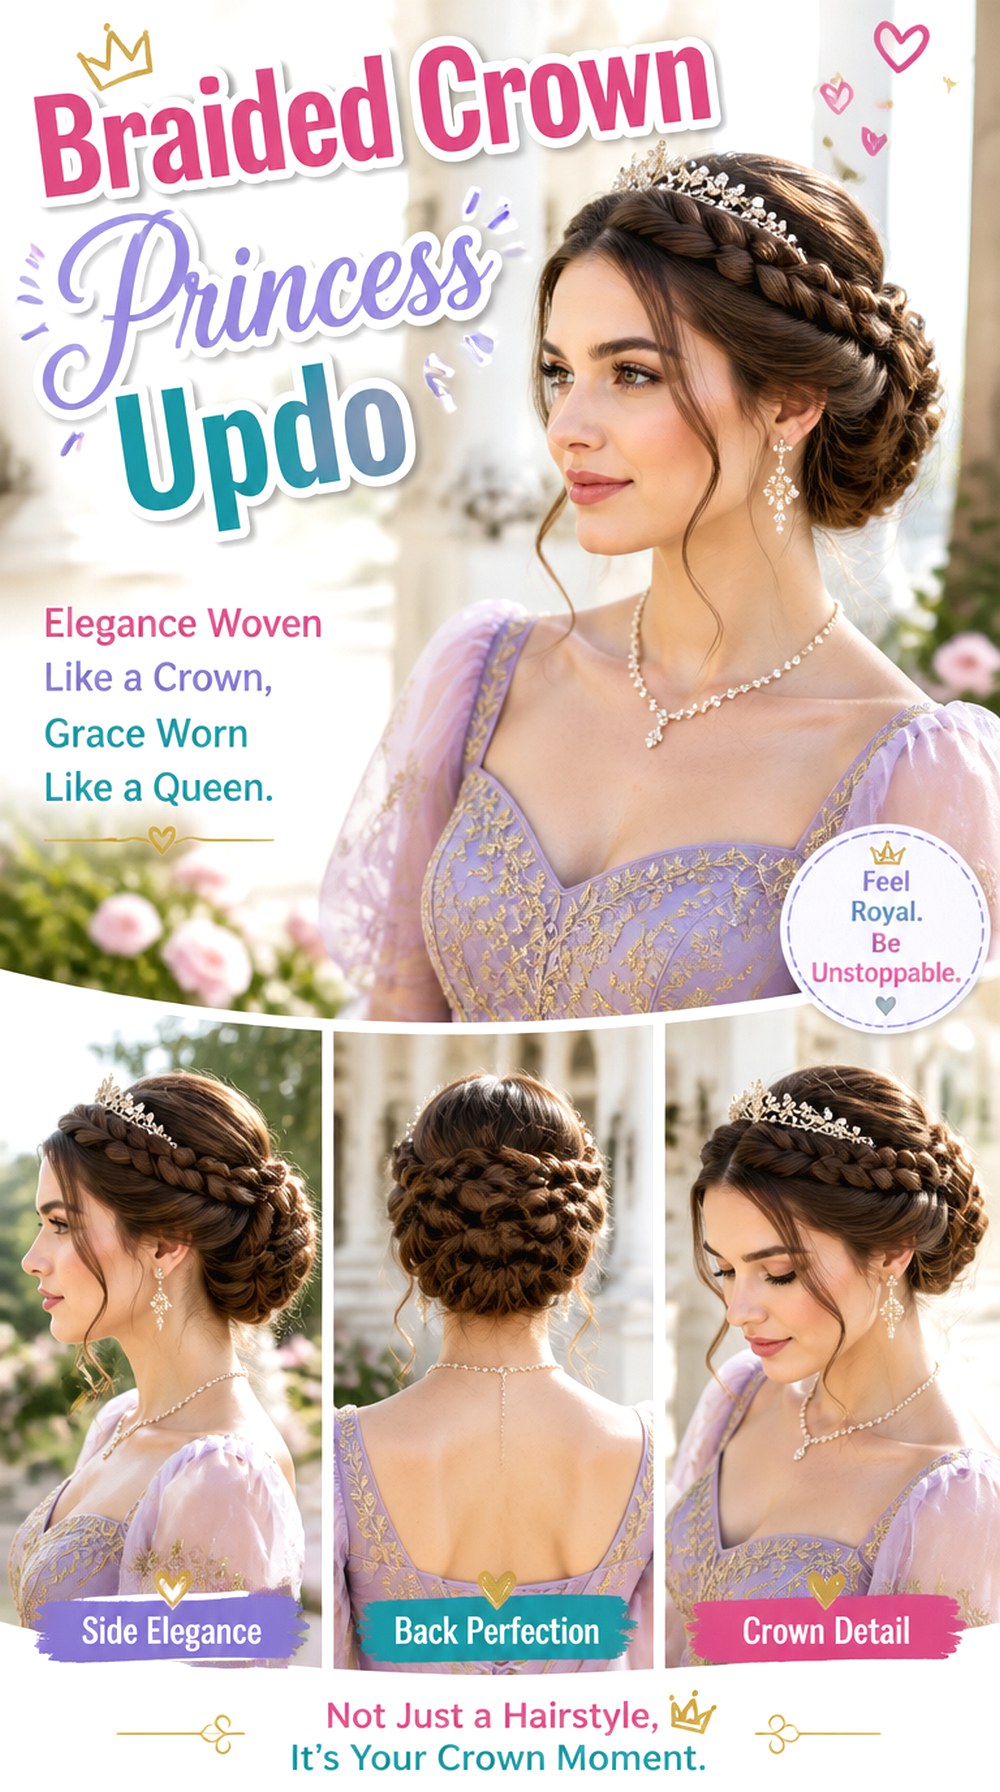
A braided crown wraps one or more braids around the head, creating a halo-like outline that keeps most of the hair completely off the neck. It works particularly well on medium to long hair because extra length makes it easier to create a continuous-looking crown. Natural waves and curls add useful grip, while very straight hair may need preparation before braiding. A texturizing spray, tail comb, and flexible hairspray help control flyaways without making the braid stiff. Styling is moderate to time-consuming depending on braid complexity, but daily maintenance is low once pinned. Ask your stylist to keep the braid slightly relaxed around the temples rather than pulling it tightly against the scalp.
Pro tip: Gently widen only the outer loops of the braid after pinning. This creates fullness without loosening the sections that actually hold the updo together.
Soft Curly High Bun Princess Updo
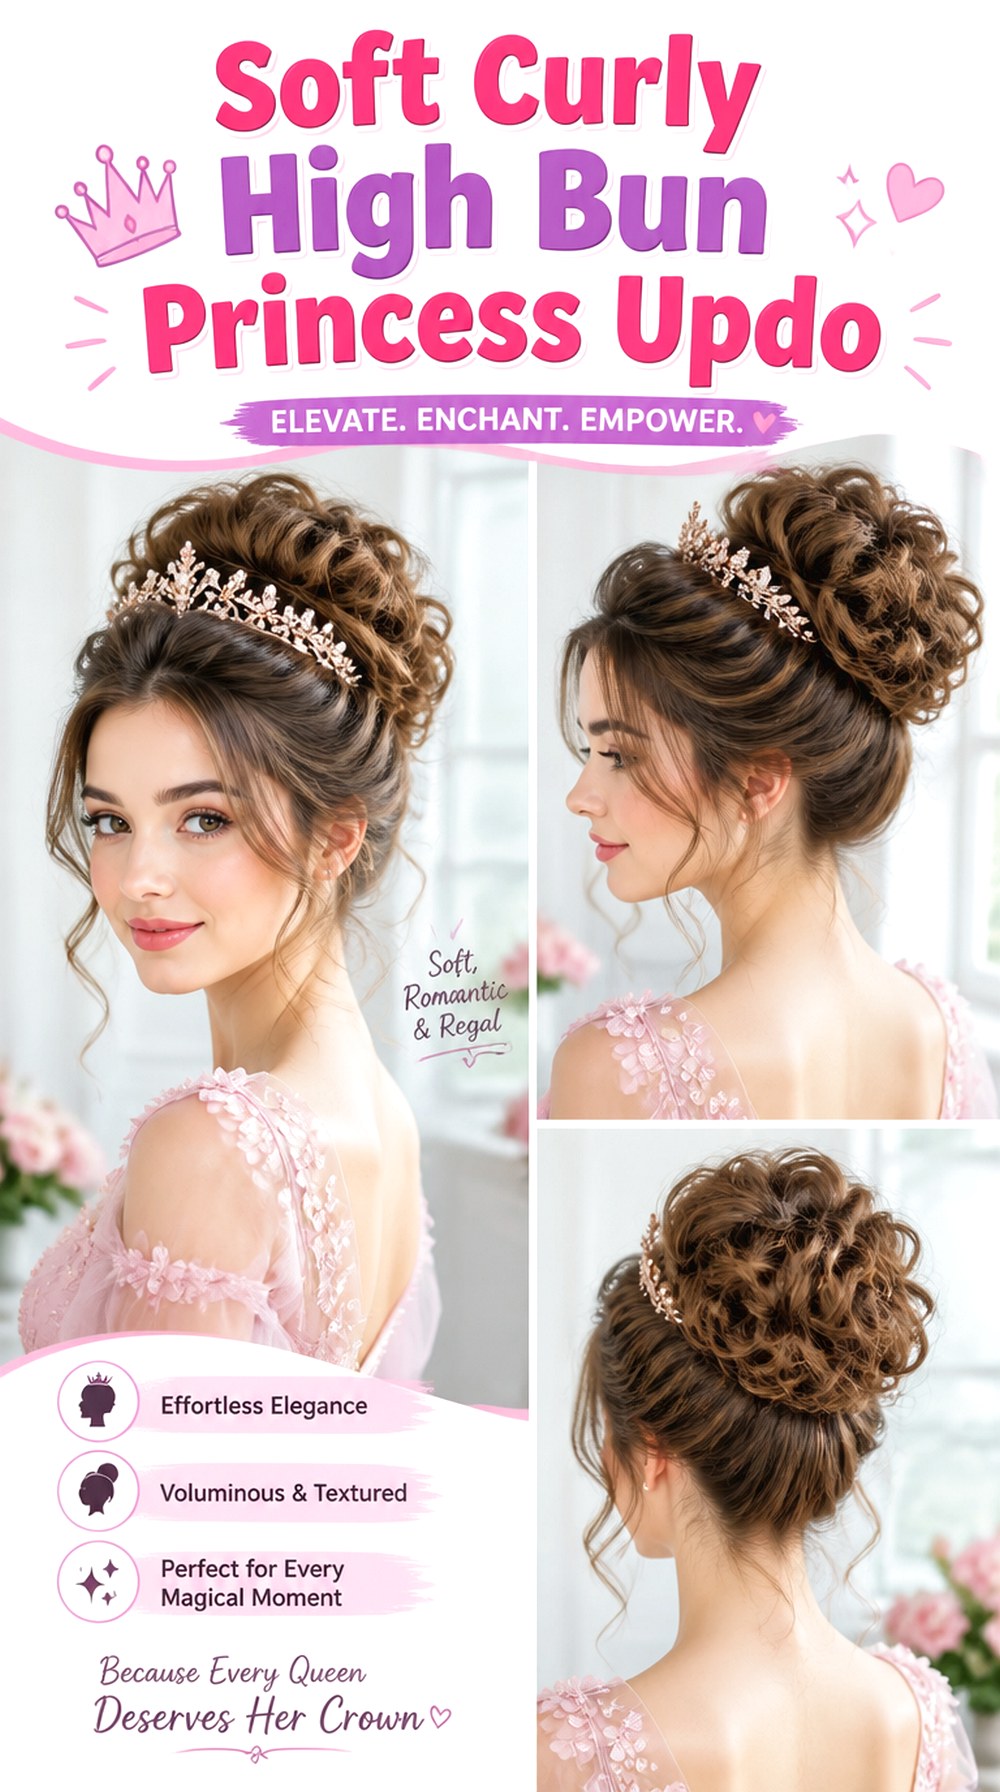
This high bun uses individually shaped curls rather than one smooth coil, giving the top and back of the head a fuller, airy finish. Leaving a few delicate pieces around the temples can soften the height. It is useful for medium or long hair and can give fine-to-medium density a fuller appearance when the curls are pinned strategically. Thick hair may need a compact foundation so the bun does not become too heavy. Prepare with heat protectant, a medium curling iron, and light-hold hairspray. Expect more styling time because each curl needs shaping and pinning. Ask the stylist to place the bun high enough to be visible from the front without sitting directly on the hairline.
Pro tip: Keep the widest part of the bun slightly behind the crown; too much width directly on top can make the shape look unbalanced in photographs.
Twisted Rose Bun Princess Updo
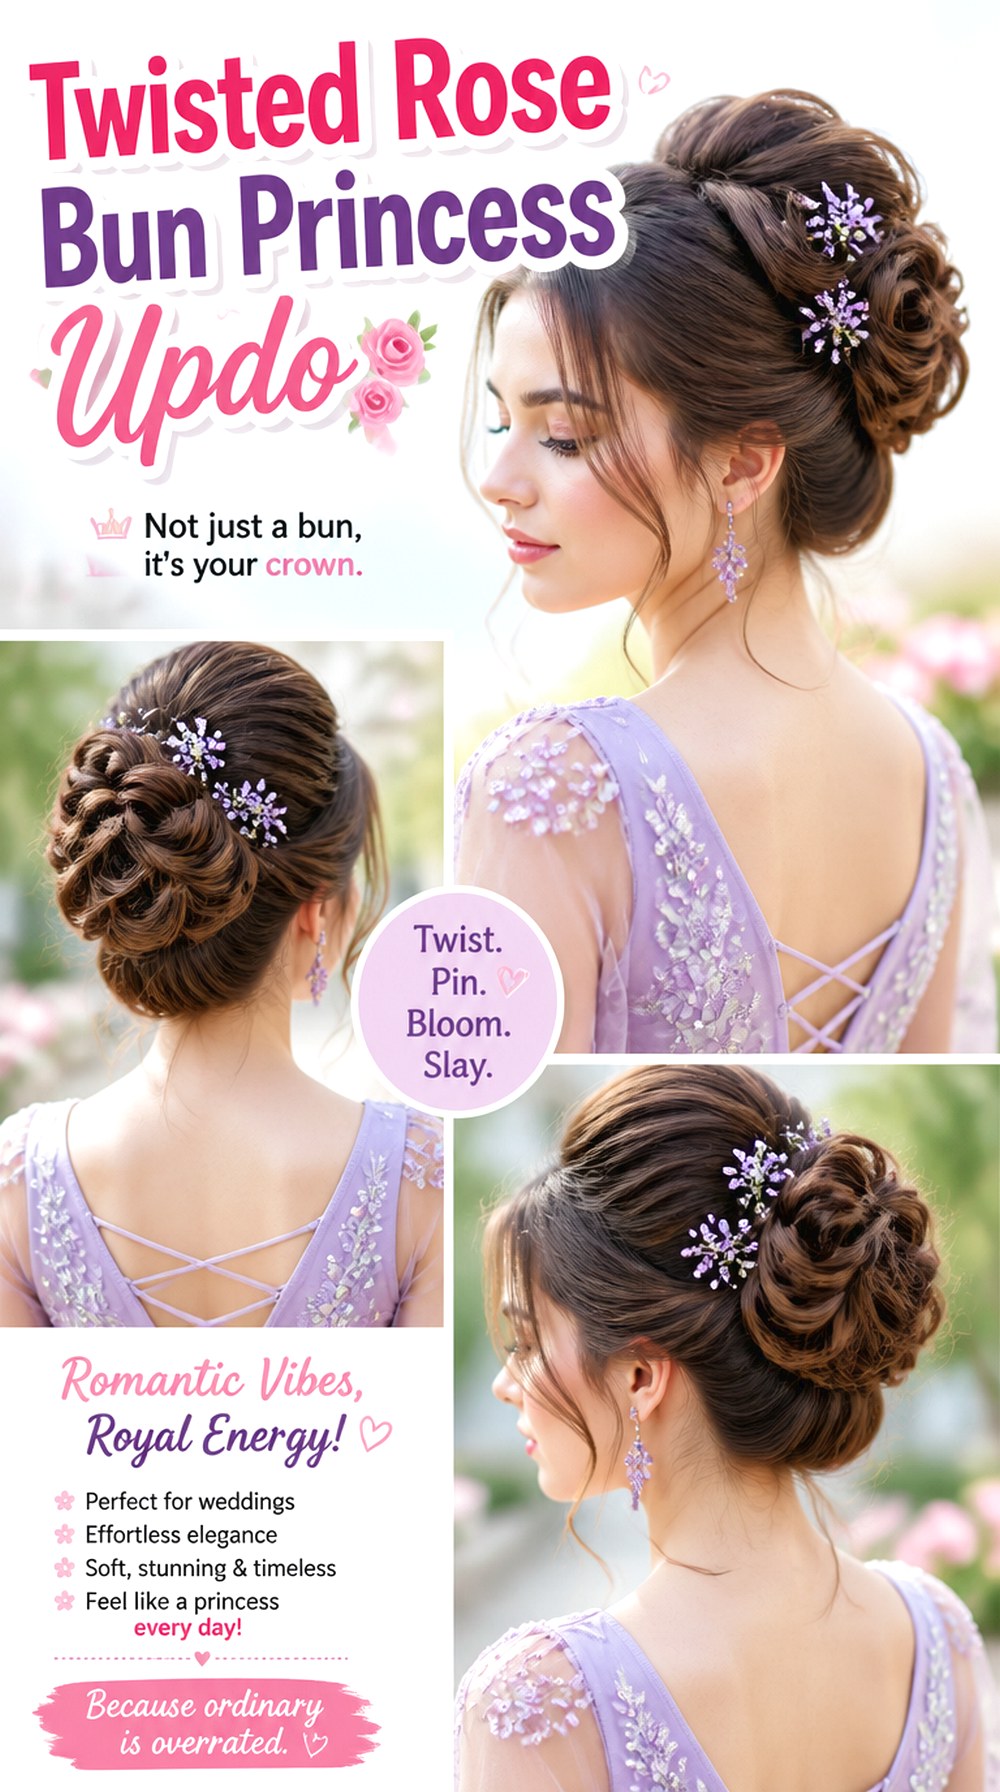
The twisted rose bun is built from curved sections that spiral around one another to resemble overlapping petals. It has more visible detail than a standard bun, so it suits formal events where the back of the hairstyle will be noticeable. Medium to long straight or softly wavy hair is easiest to arrange into defined twists. Fine hair can work well if each section is gently expanded, while very thick hair may require smaller subdivisions. Useful supplies include volumizing mousse, sectioning clips, and strong bobby pins. Styling takes longer than a basic chignon because the shape needs careful placement. Show your stylist whether you want a compact rose or a wider, flatter flower shape.
Pro tip: Ask for the center coil to remain tight while the outer twists gradually become broader. That progression creates a more convincing petal effect.
Pearl-Pinned French Twist Princess Updo
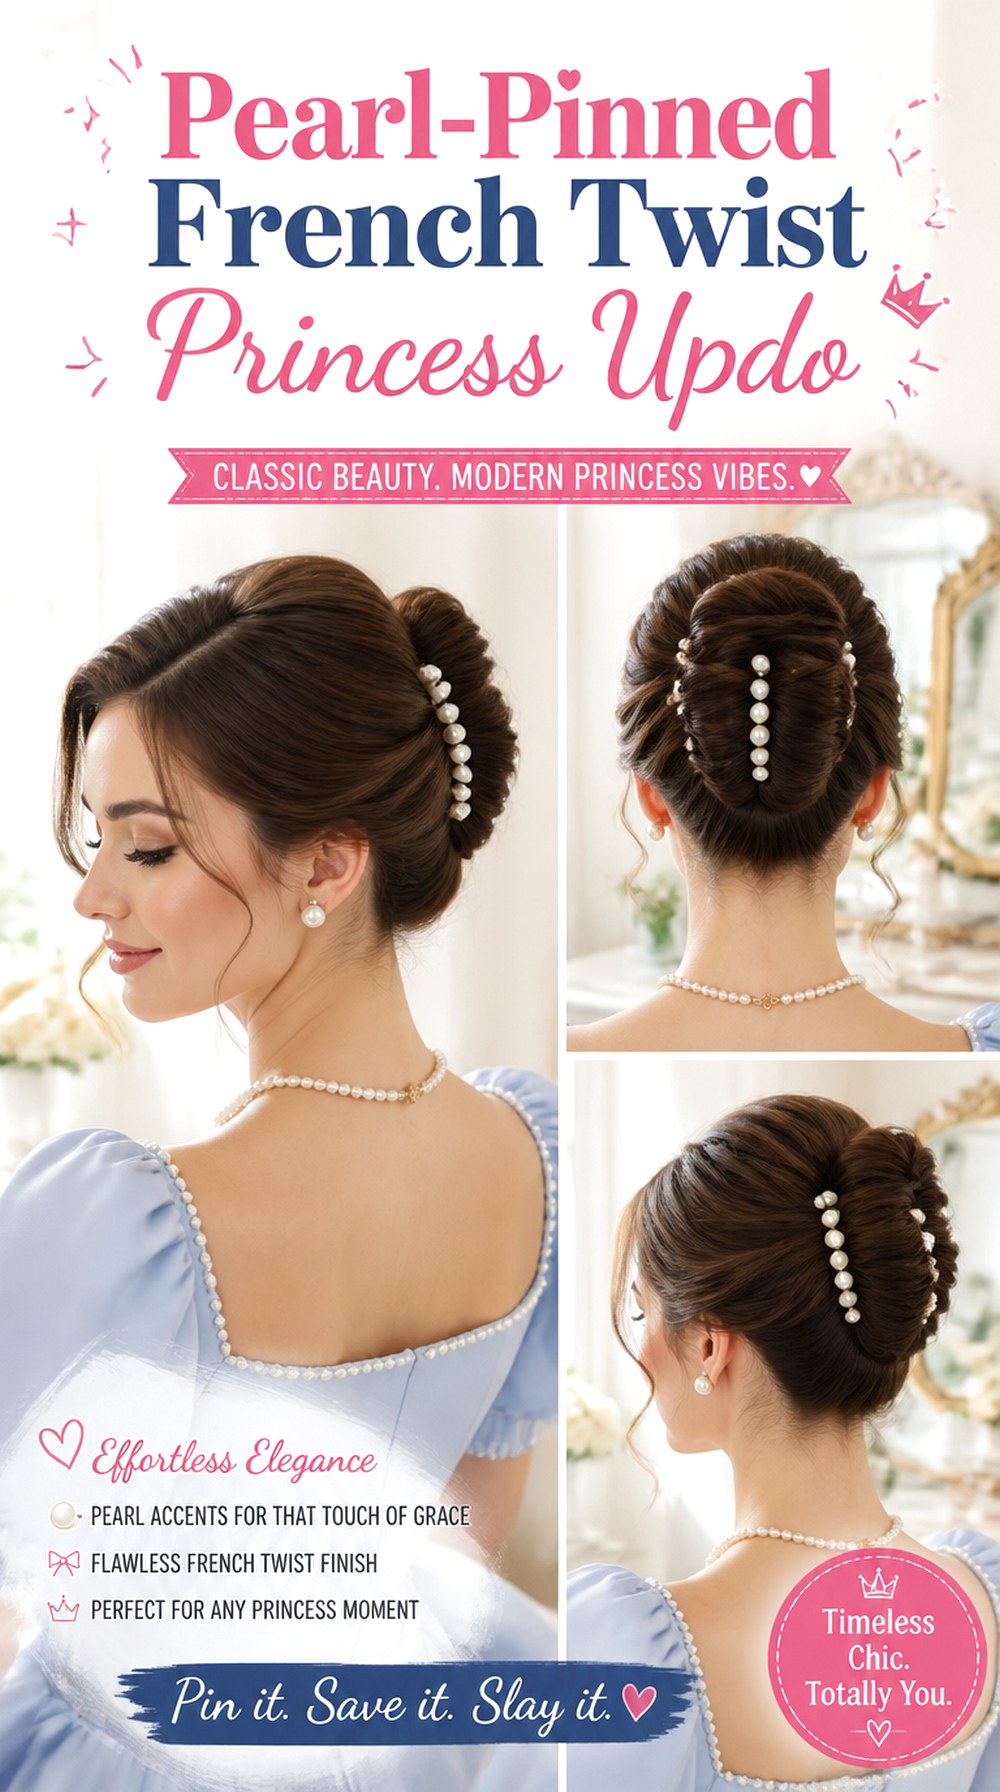
A French twist creates a vertical line through the back of the head, and scattered pearl pins add a softer princess-inspired finish without changing the basic structure. It works especially well on medium-length hair because too much length can make the internal roll bulky. Straight or lightly waved hair gives the cleanest outline, while fine hair often benefits from extra grip. Use dry texture spray, a fine-tooth comb, and pearl hairpins for preparation and decoration. Styling takes moderate time and generally stays secure for hours if the inner twist is anchored correctly. At the salon, explain whether you prefer a sleek crown or gentle height before the roll begins.
Pro tip: Place pearls in an irregular trail rather than evenly spacing them. A slightly scattered arrangement usually looks softer and less like a rigid row of accessories.
Side-Swept Braided Bun Princess Updo
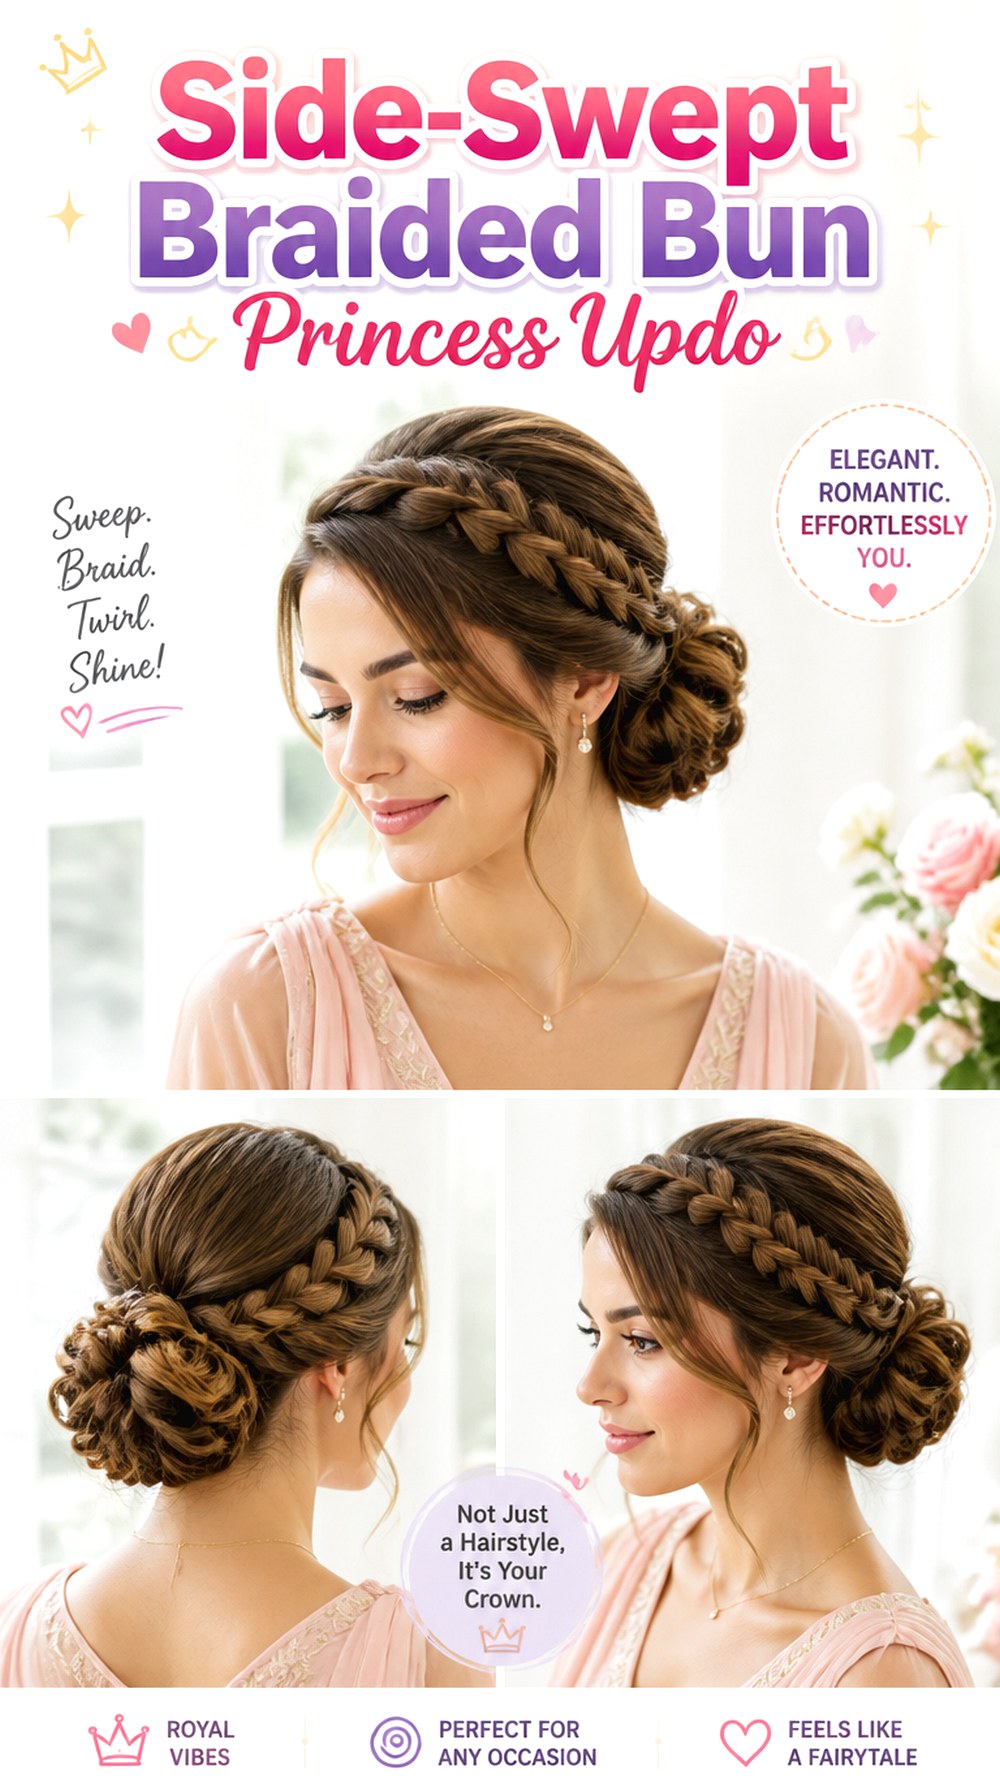
A side-swept braid travels diagonally toward a low bun, creating movement across the back rather than keeping every section symmetrical. The design is useful for showing off dimensional hair color because the braid exposes different strands as it crosses the head. Medium and long hair provide enough length to make both the braid and bun substantial. Wavy texture is especially easy to work with. Prepare using curl cream, texturizing spray, and flexible hairspray. Styling is moderately time-consuming, while touch-ups are usually unnecessary once everything is pinned. Tell your stylist which shoulder you want the bun closest to, especially if your dress has asymmetrical straps or embellishment.
Pro tip: Start the braid a little above the opposite temple rather than directly behind the ear; the longer diagonal line gives the hairstyle more graceful movement.
Tiara-Topped Romantic Princess Updo
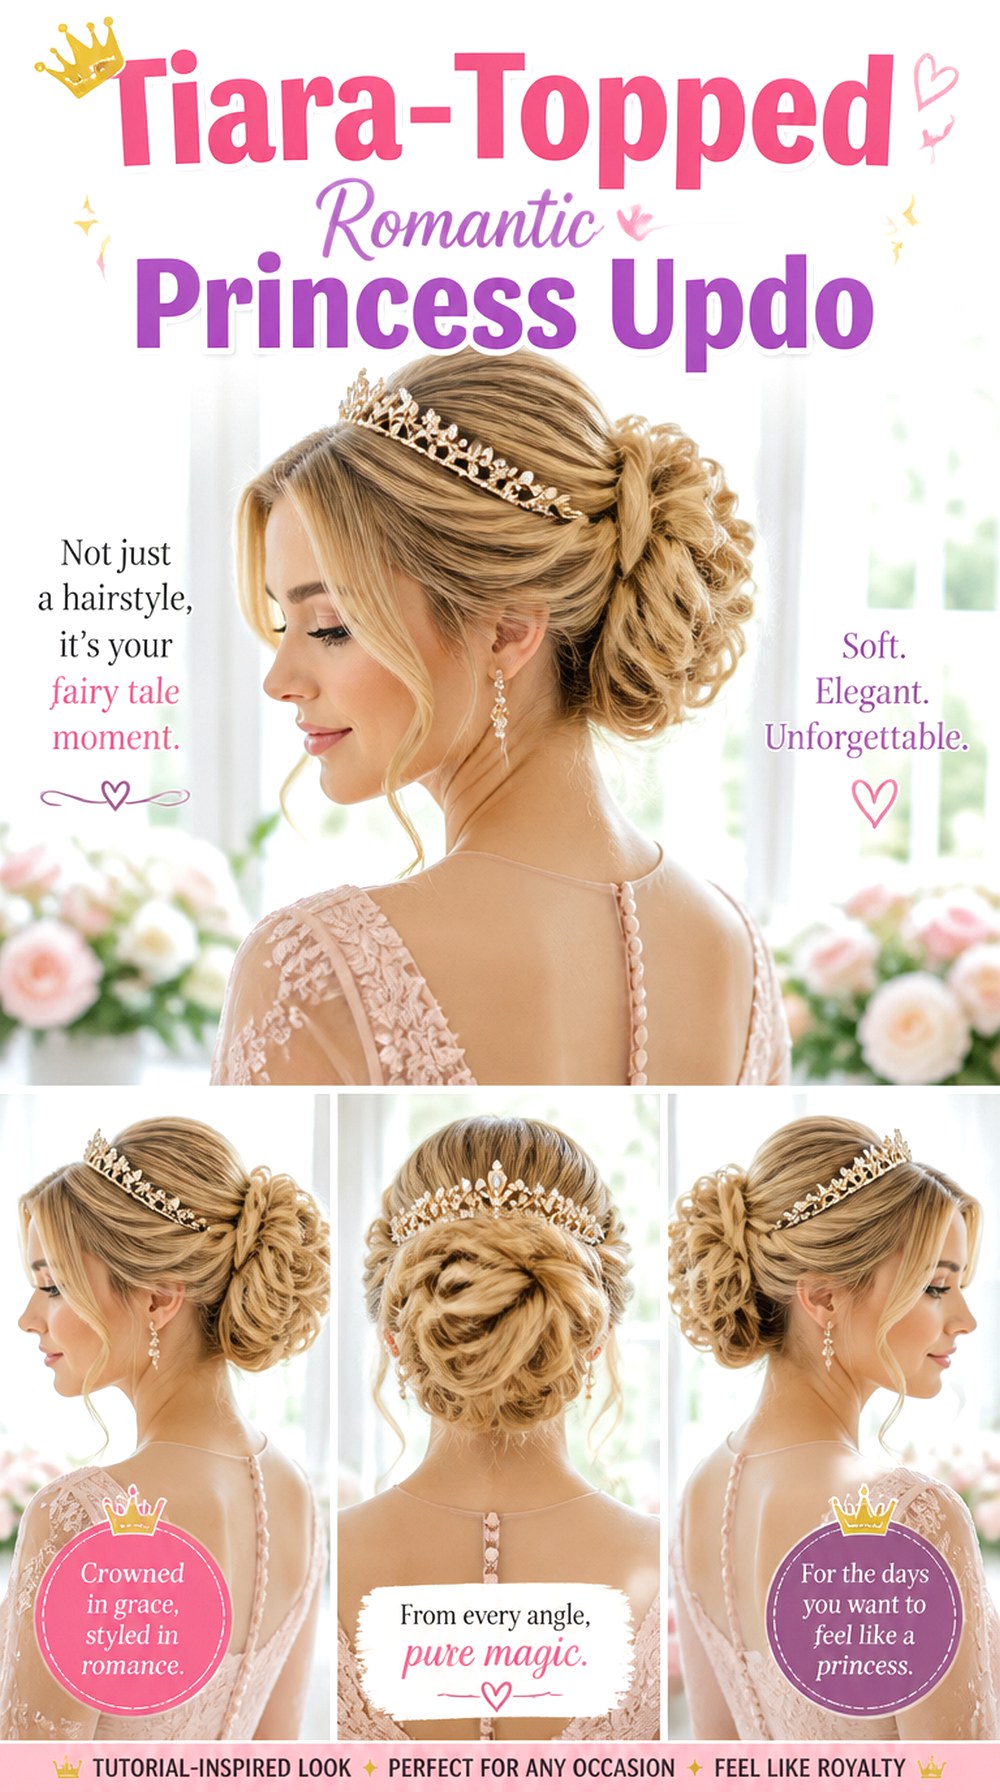
A tiara-topped updo needs enough height and structure to support the accessory without competing with it. Soft volume at the crown, a rounded bun at the back, and loose face-framing pieces create a balanced base. This works best on medium to long hair and can be adapted for fine, medium, or thick density by changing the size of the bun. Preparation may include gentle waves for extra grip. A volumizing spray, teasing comb, and strong-hold pins are especially useful. Styling takes more time because the tiara must be anchored comfortably and symmetrically. Bring the actual accessory to your salon trial so your stylist can build the hairstyle around its width and attachment points.
Pro tip: Decide on tiara placement before the final pinning begins; adding it at the end can crush crown volume or force the bun into the wrong position.
Loose Tendril Low Bun Princess Updo
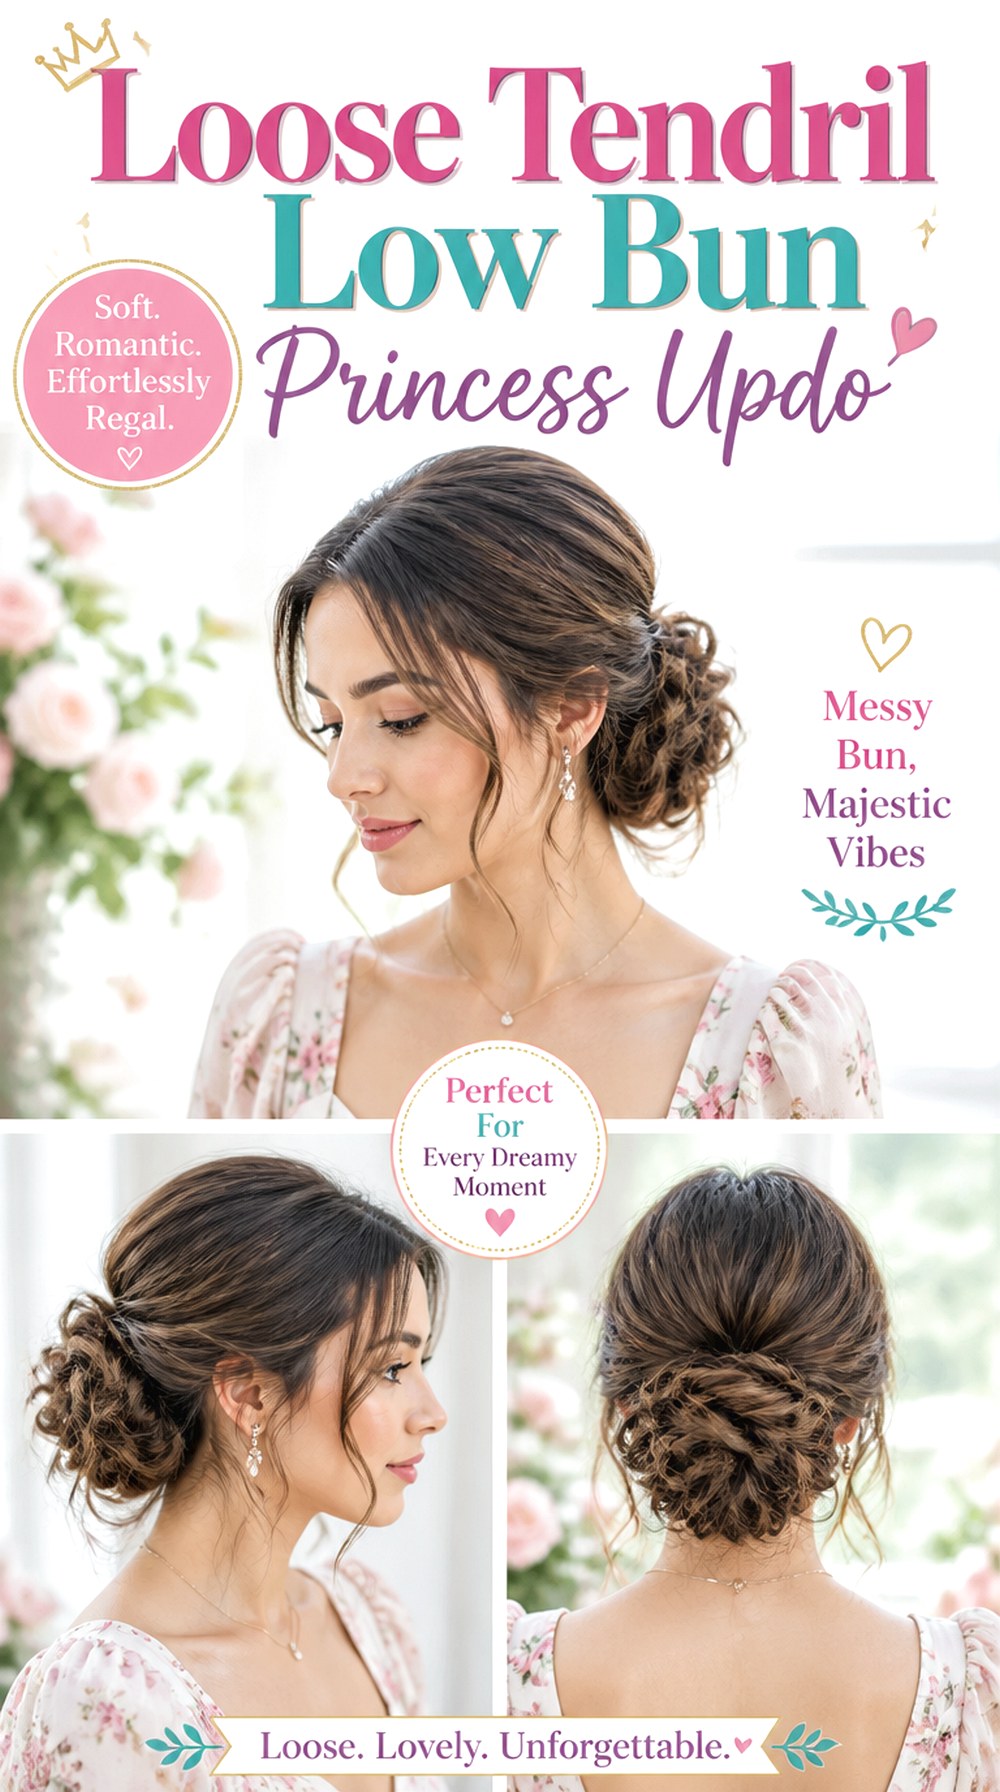
A loose tendril bun keeps the main shape low and controlled while leaving slim curled pieces around the temples, cheekbones, or ears. It has a softer outline than a polished chignon and works well when you want formality without a severe finish. Wavy and curly hair adapt naturally, although straight hair can be curled first. Medium density is particularly easy to balance, while thick hair may need some internal bulk removed. Use heat protectant, a curling wand, and lightweight mousse. Styling takes moderate time, and the loose sections may need a small refresh in humid weather. Ask your stylist to keep the bun secure underneath even if the surface appears relaxed.
Pro tip: Choose only a few deliberate tendrils. Pulling out too many pieces can quickly change the finish from soft and romantic to messy.
Regal Rope-Braid Princess Updo
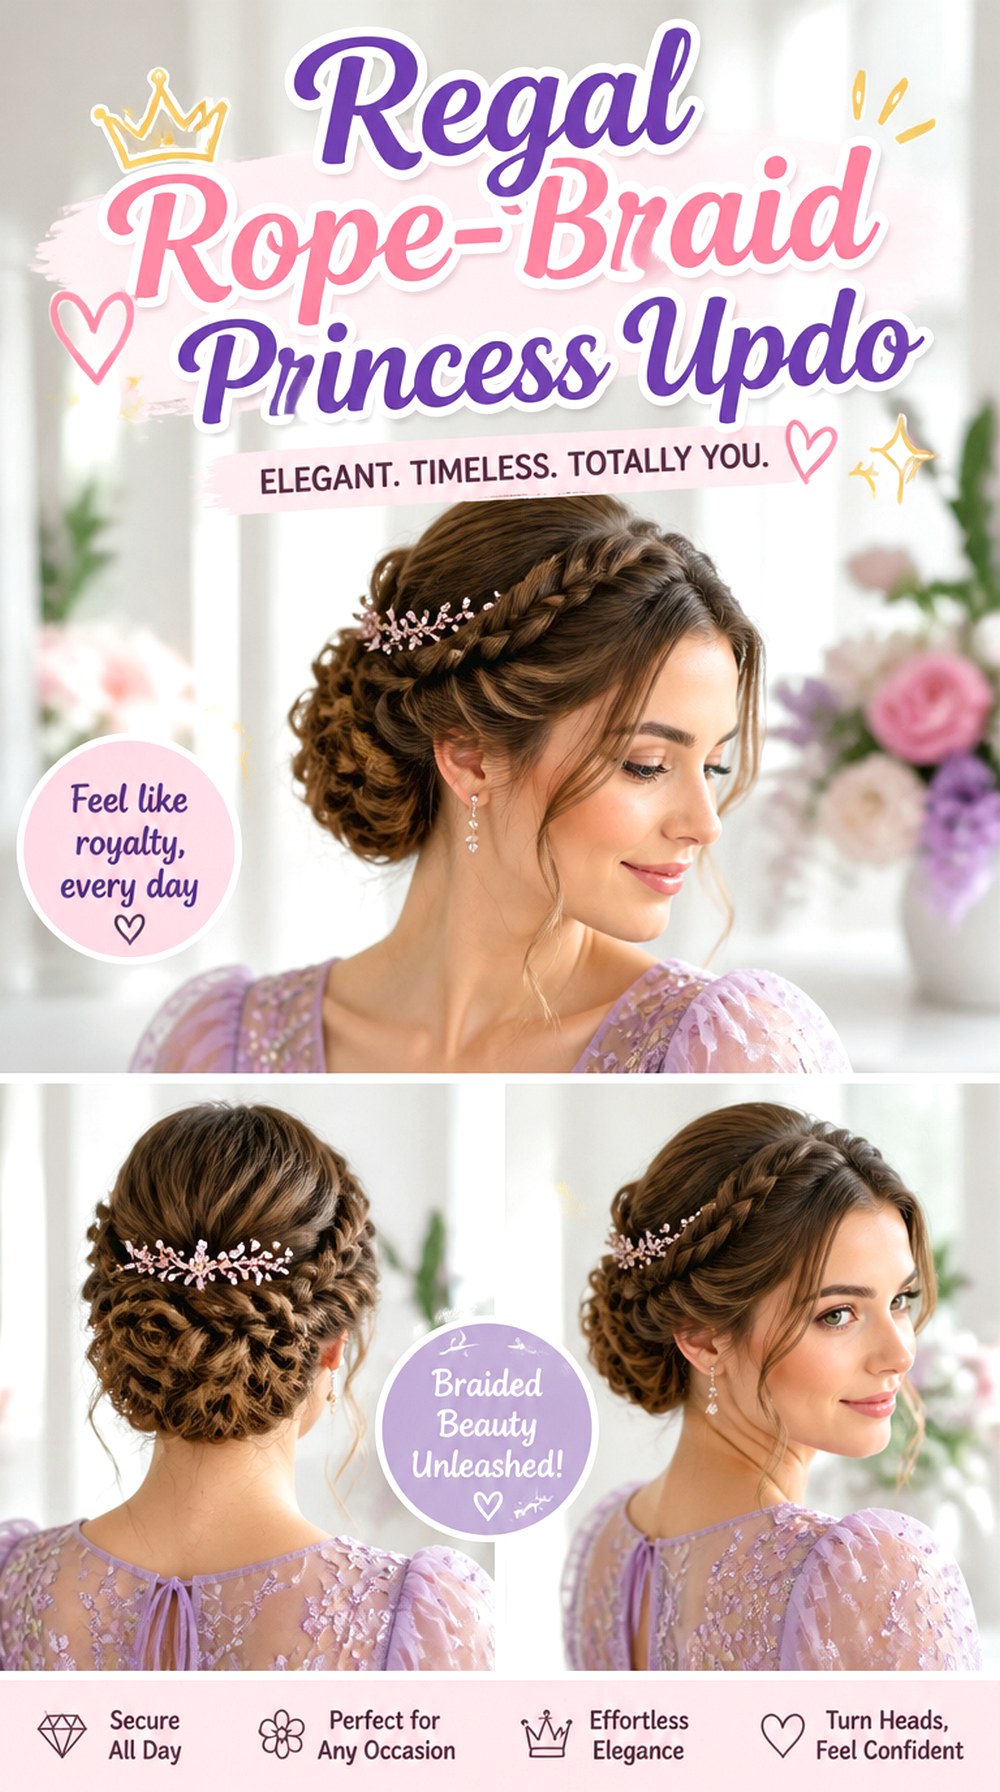
Rope braids are formed by twisting sections around each other, creating a clean raised texture that can be wrapped into a crown, knot, or low bun. This princess updo works well for straight and wavy hair because the twisting pattern remains easy to see. Medium to thick density gives the ropes strong definition, while fine hair may need texturizing product before styling. A lightweight mousse, smoothing cream, and firm bobby pins help keep each twist controlled. The style requires moderate preparation but can be quicker than a detailed multi-strand braid. Ask your stylist to show the rope texture rather than hiding most of it inside the bun.
Pro tip: Twist each individual section in one direction and wrap the two sections together in the opposite direction; this helps the rope hold its shape instead of unraveling.
Sleek Royal Knot Princess Updo

The sleek royal knot relies on clean lines, a controlled parting, and a compact knot positioned at the back of the head. Unlike softer princess updos, it has very little visible texture, making shine and precision more important. Straight hair is easiest to smooth, but wavy or curly hair can be stretched with a blow-dry first. It suits medium and thick density particularly well, provided excess bulk is hidden inside the knot. Use a smoothing serum, paddle brush, and strong-hold hairspray. Styling takes moderate time because every surface section needs refining. Tell your stylist whether you prefer a middle part, side part, or fully swept-back front before the knot is built.
Pro tip: Use only a small amount of serum near the roots. Too much product can make the sleek finish appear oily instead of polished.
Fishtail Crown Bun Princess Updo
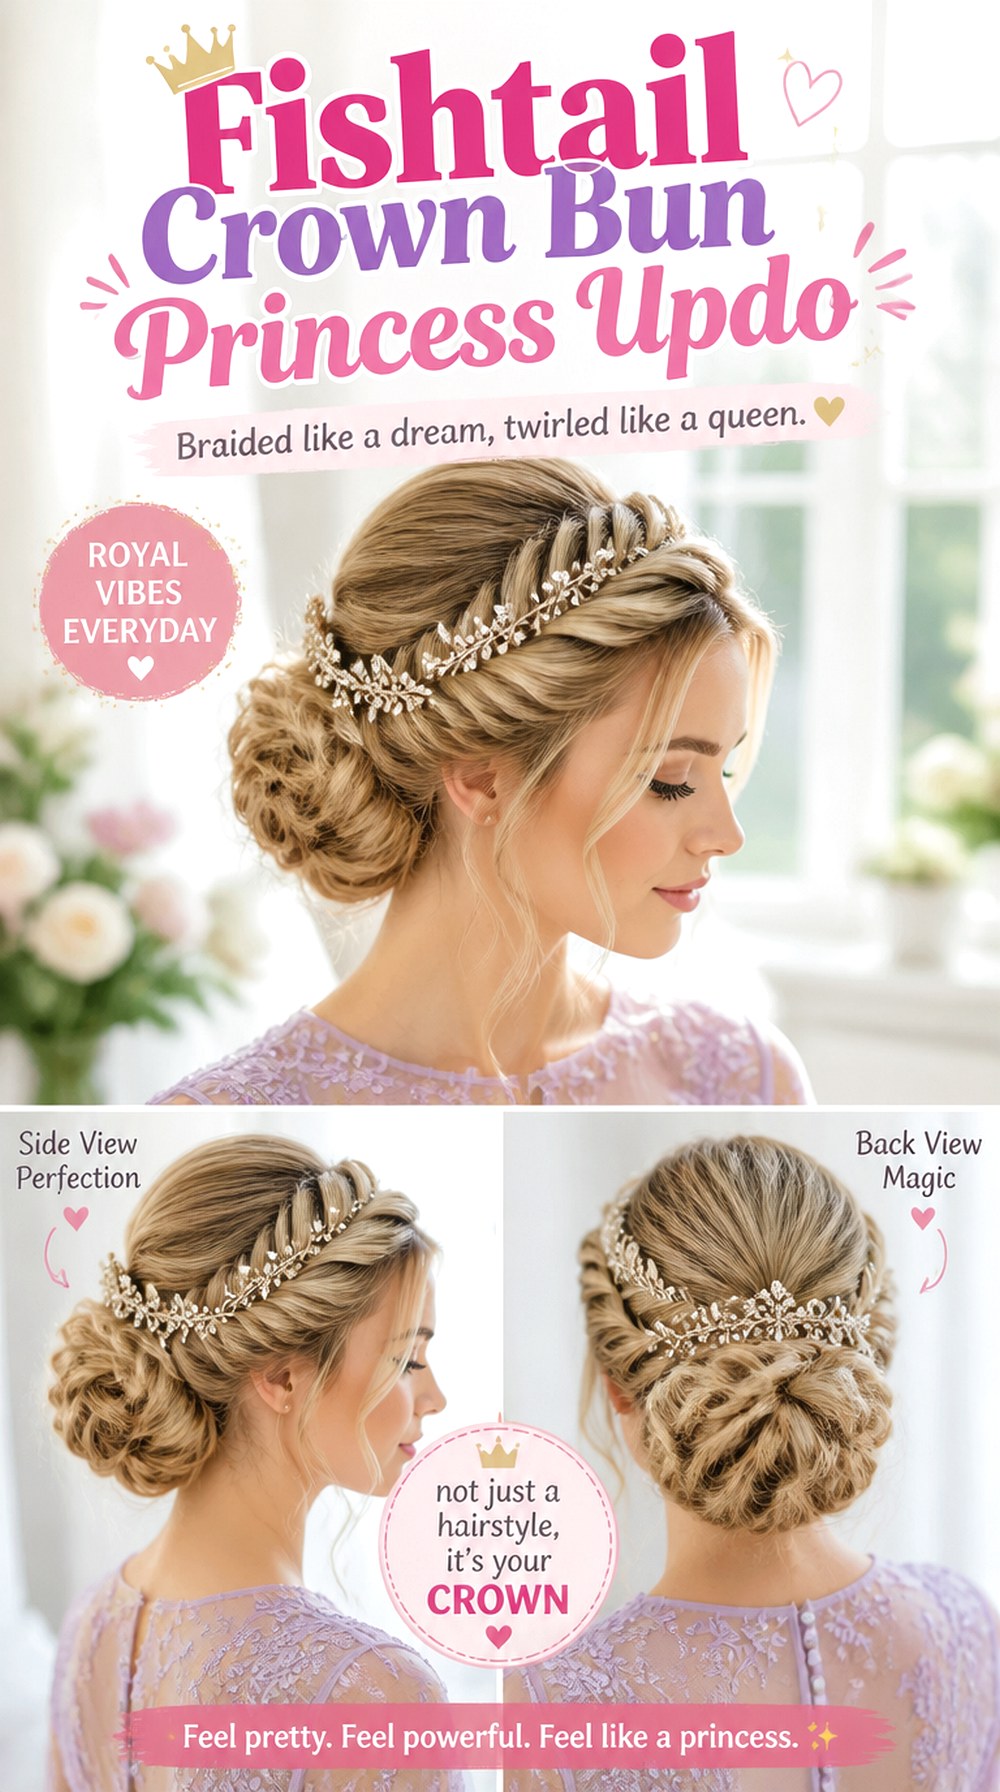
A fishtail braid gives the crown more intricate texture than a traditional three-strand braid, especially when the sections are gently expanded. Wrapping it into or around a bun creates a detailed formal updo that works best on medium to long hair. Fine hair can still suit the design if the braid is loosened carefully, while thick hair creates a stronger woven pattern. Useful supplies include dry texture spray, small clear elastics, and flexible hairspray. Styling needs extra time because fishtail braiding involves smaller sections. Once secured, maintenance is fairly low. Show your stylist whether you want the braid to circle the entire bun or appear mainly across the crown.
Pro tip: Work with slightly larger fishtail sections if your hair is very thick; tiny sections can make the braid unnecessarily heavy and slow to construct.
Textured Mid-Bun Princess Updo
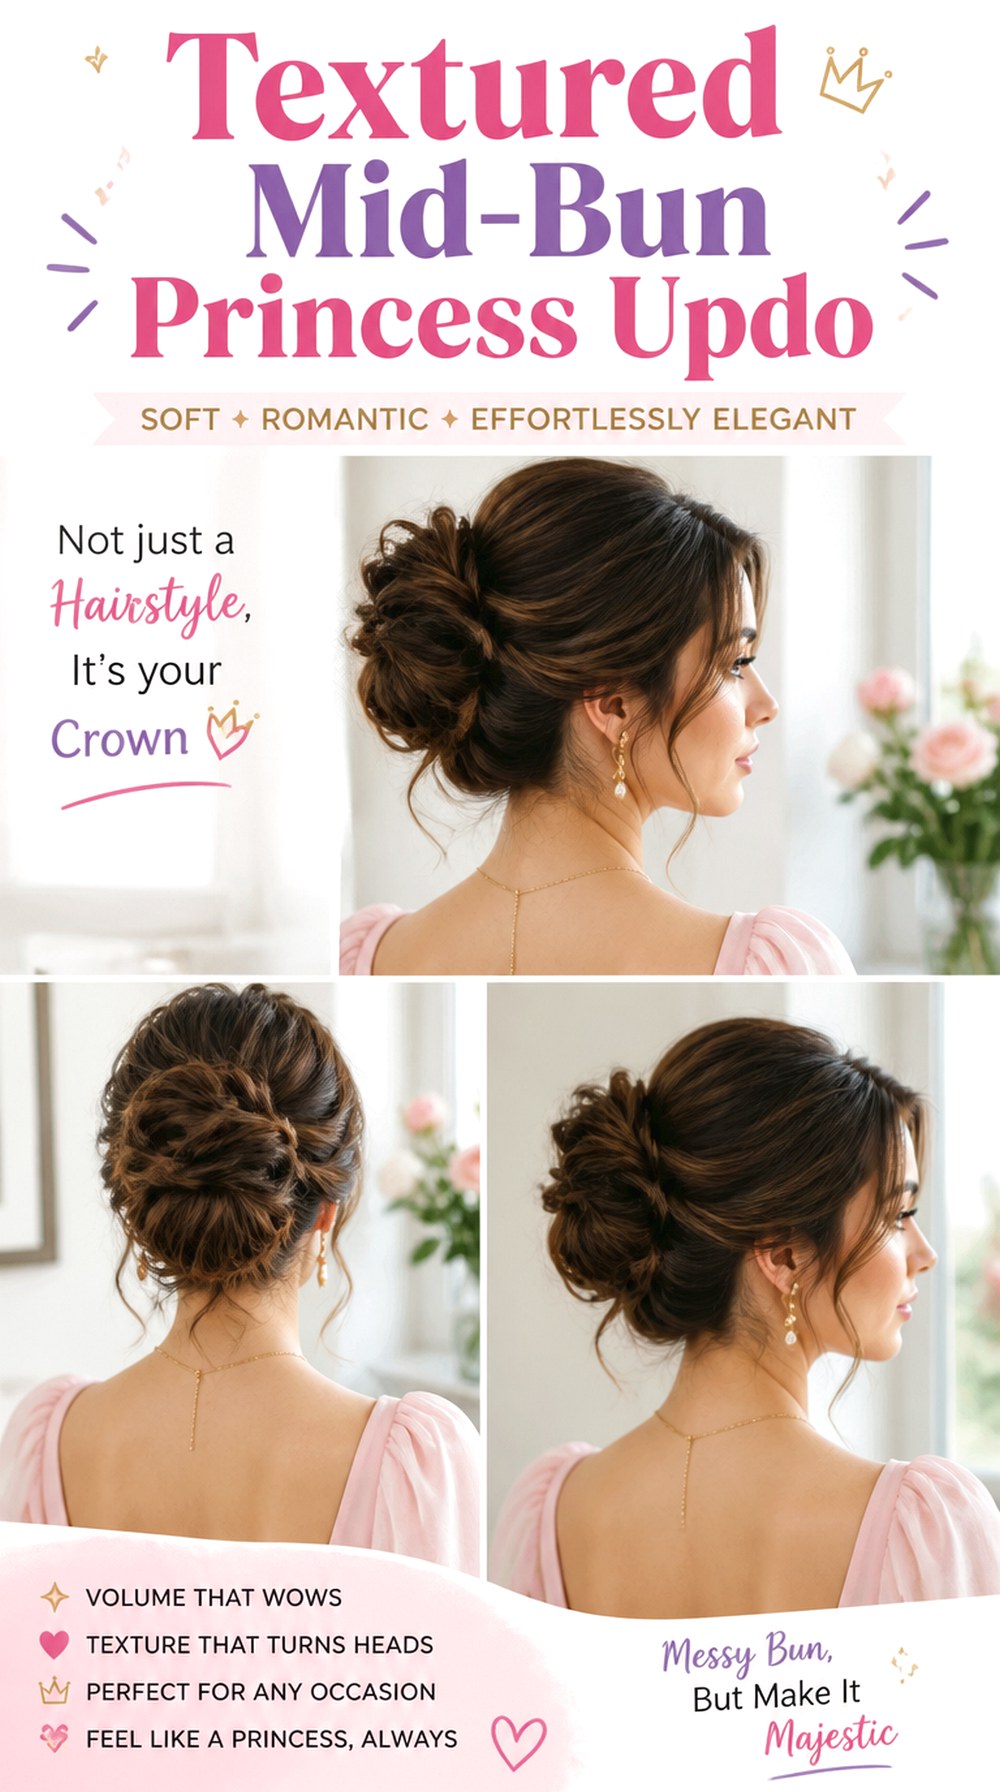
Positioned between a high bun and a nape-level chignon, a textured mid-bun gives balanced volume without adding too much height. The surface can include soft twists, loops, and slightly separated sections that create dimension from different angles. It works with straight, wavy, or curly hair once the texture is prepared, and it is particularly forgiving for medium or thick density. Use volumizing mousse, texturizing spray, and U-shaped hairpins to build flexible fullness. Styling is moderate in both time and maintenance. Humidity may actually enhance a slightly undone surface, although flyaways still need control. Ask your stylist to keep the bun centered around the occipital bone rather than letting it drop toward the neck.
Pro tip: Leave some internal texture untouched instead of smoothing every strand; the contrast between controlled shape and softer surface detail gives this bun its character.
Vintage Rolled Princess Updo
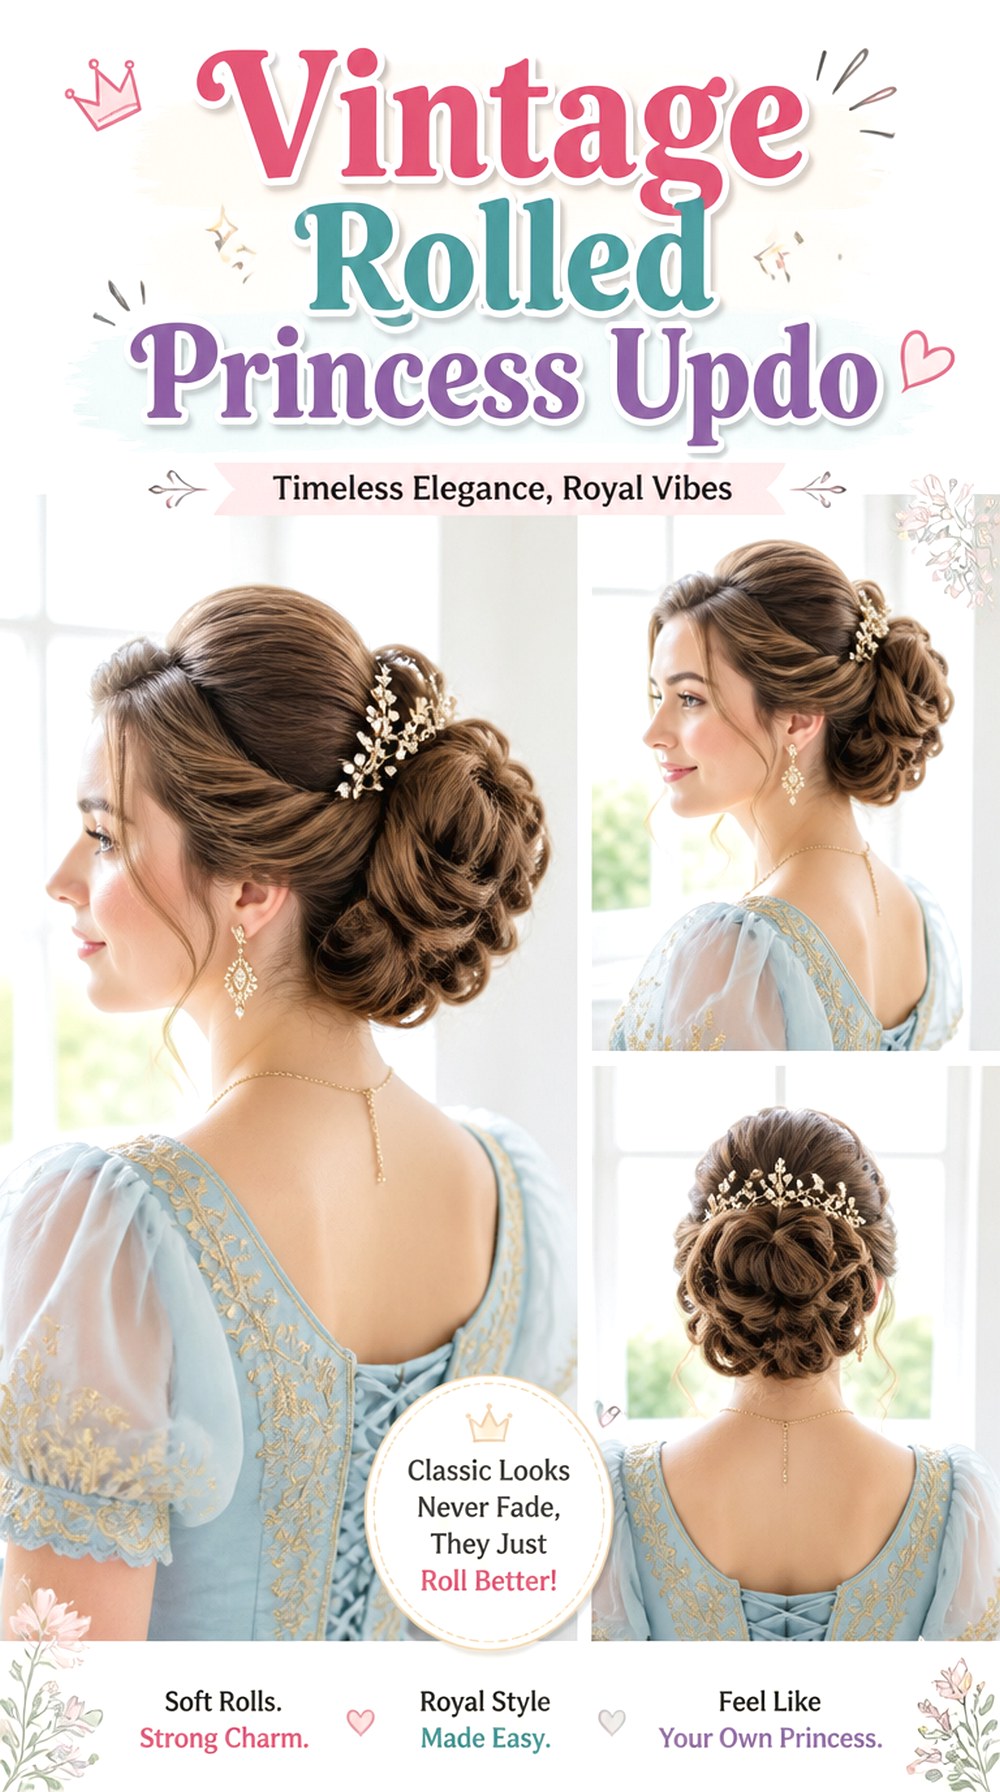
A vintage rolled updo uses curved sections tucked inward to create smooth rolls at the sides or back of the head. The result feels formal and structured, making it useful for gowns, themed events, or classic bridal styling. Medium-length hair is often easier than extremely long hair because the ends can be hidden without excessive bulk. Straight and softly waved textures work especially well. Prepare with setting spray, a round brush, and strong bobby pins. Styling usually takes more time because the rolls must look balanced from both sides. Maintenance is low once securely pinned. Bring a reference photo showing the direction and size of the rolls, since small placement changes can produce very different silhouettes.
Pro tip: Keep the visible surface of each roll smooth while hiding the pins underneath the fold; exposed pin lines can interrupt the clean vintage shape.
Flower-Adorned Twisted Princess Updo
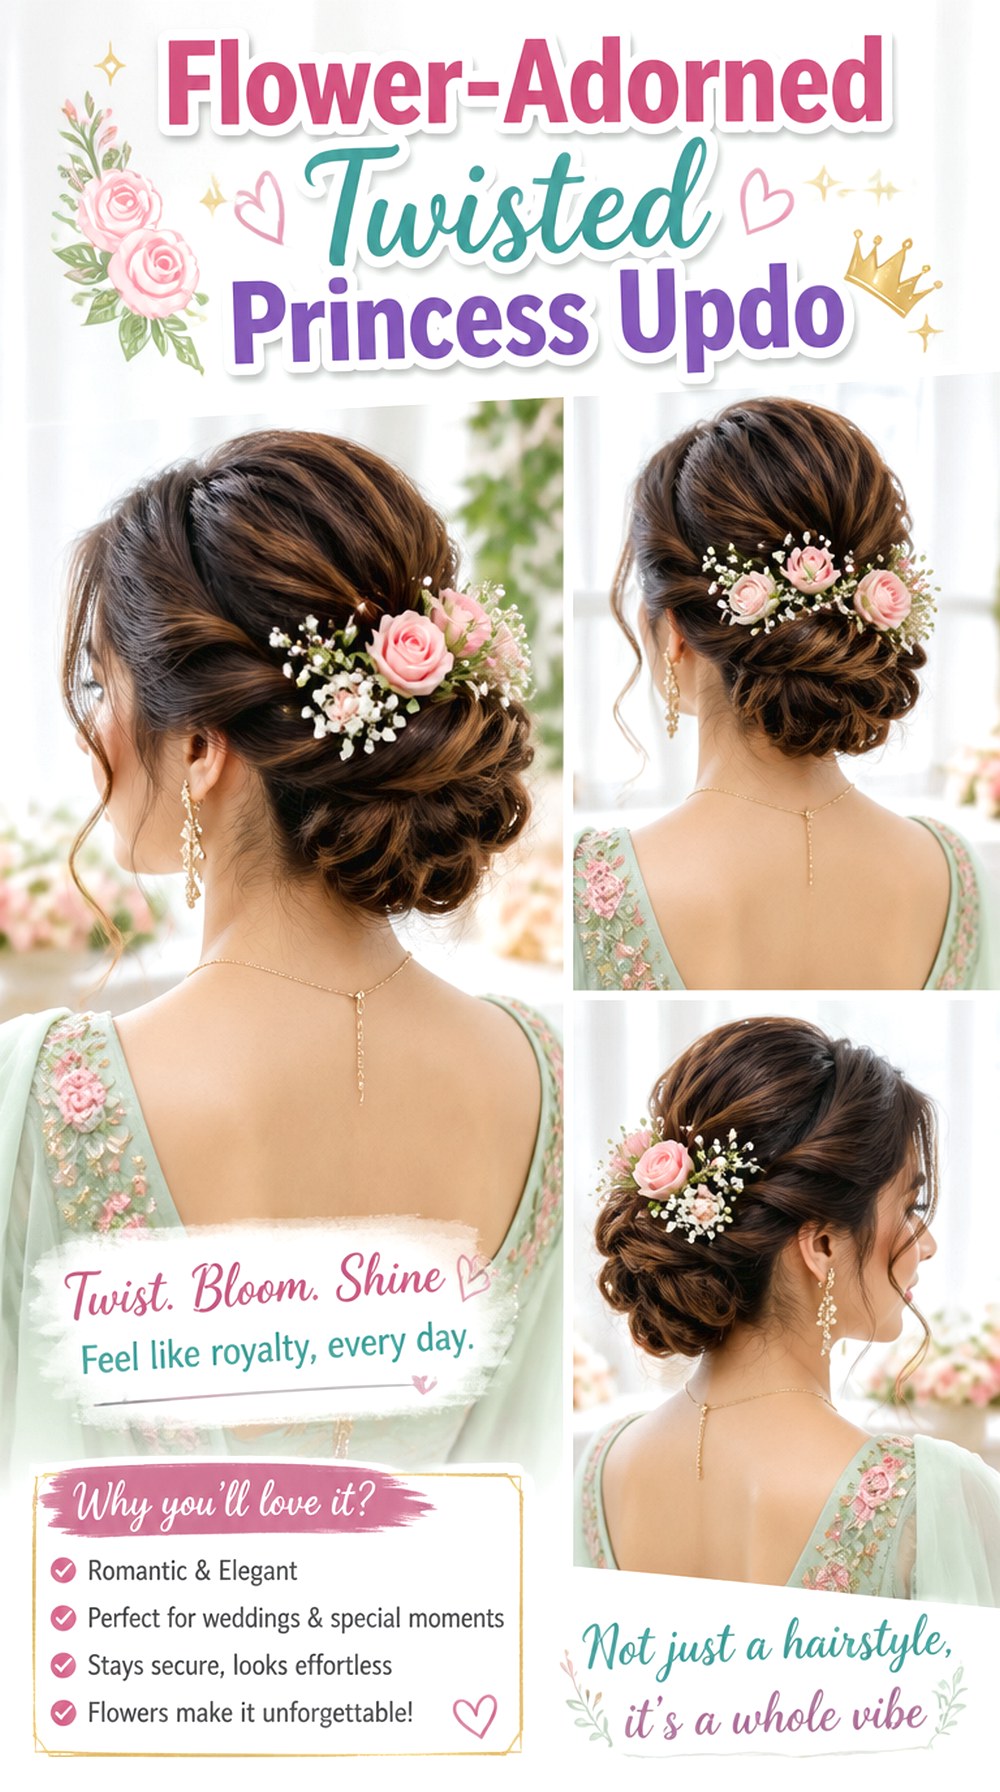
Twisted sections gathered into a low or mid-height bun create natural spaces for small flowers, floral pins, or delicate botanical accessories. The twist pattern gives the decoration somewhere to sit instead of placing flowers randomly over a smooth bun. Medium and long hair work best, and natural waves can make the preparation quicker. Fine hair may need added texture, while very thick hair benefits from dividing the twists into manageable sections. Use texture spray, leave-in conditioner, and sturdy hairpins. Styling takes moderate to high effort depending on the accessories. Tell your stylist exactly which flowers will be used so the bun can be sized appropriately.
Pro tip: Concentrate flowers along one curve of the updo rather than covering the entire bun; leaving some visible hair texture keeps the design balanced and detailed.
Side-Parted Low Twist Princess Updo
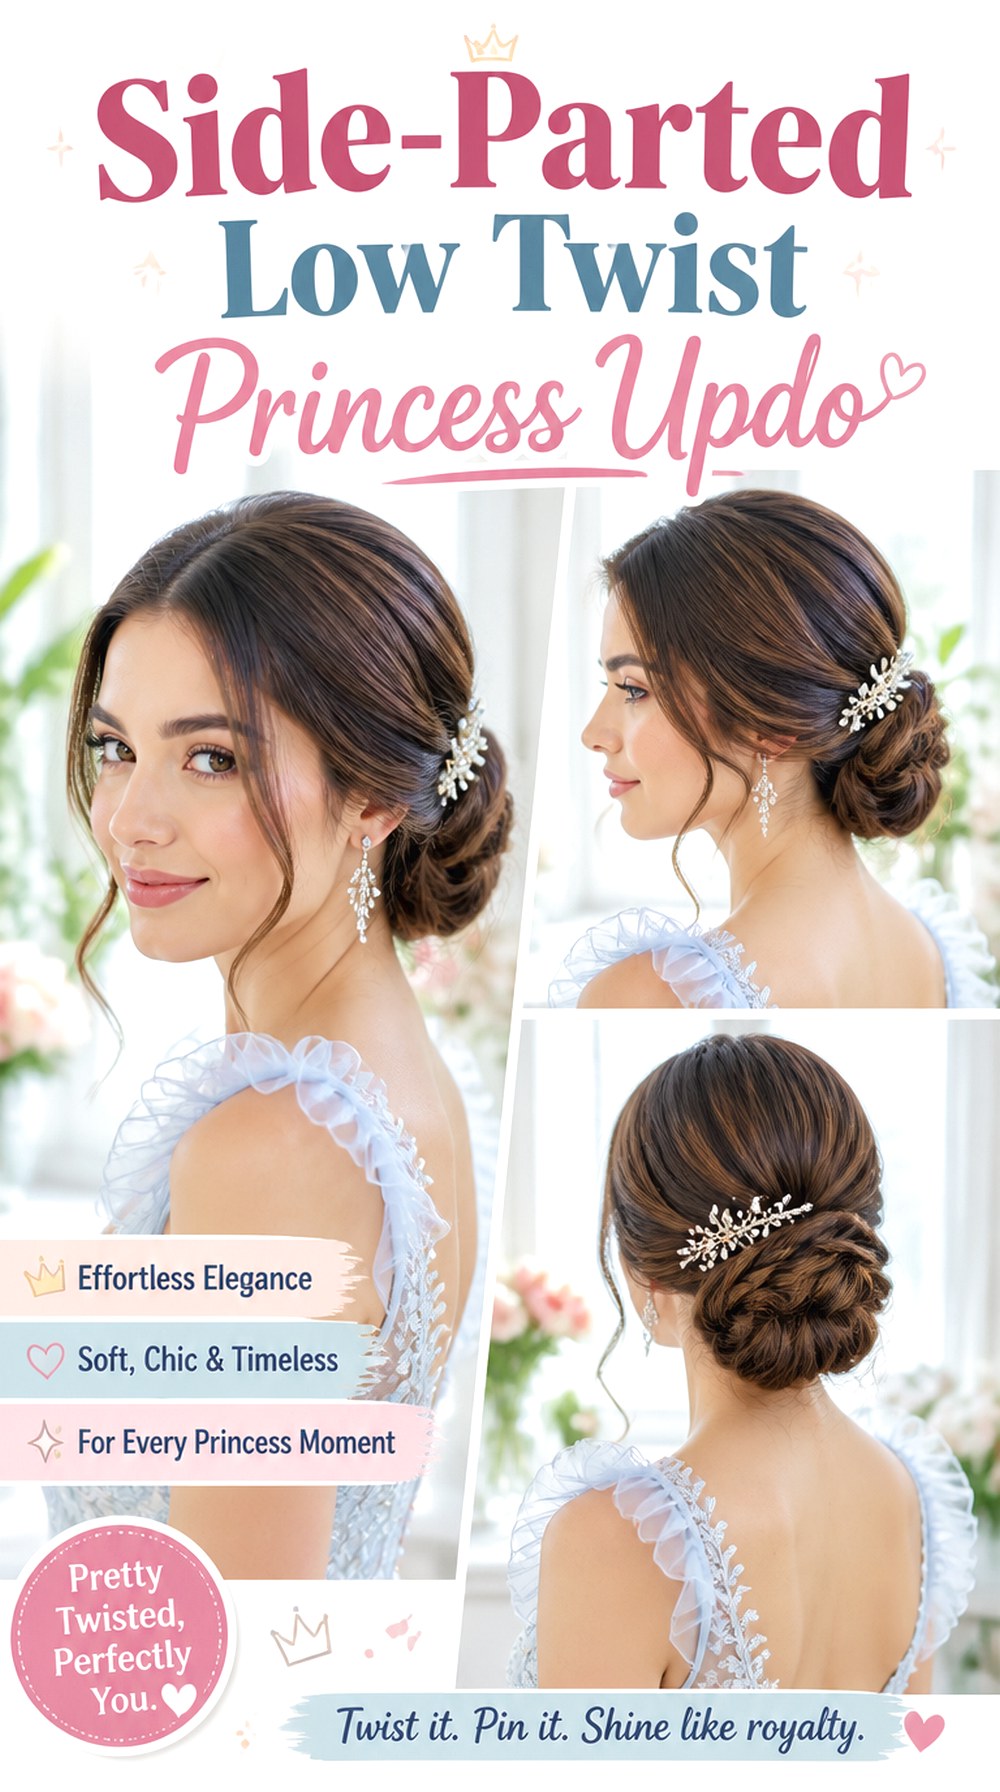
A defined side part leads into smooth or softly textured sections that twist toward a low gathering at the nape. The asymmetry can soften a formal updo and allows one side of the hairline to remain slightly fuller than the other. It is suitable for straight, wavy, and gently curly textures, while medium-length hair is usually enough to create the back twist. Use a tail comb, smoothing cream, and light-hold hairspray to maintain the part and control flyaways. Styling is moderate and usually lasts well throughout an event. Ask your stylist to decide the part depth before shaping the sides, since a very deep part produces a more dramatic result.
Pro tip: Keep a little lift just behind the heavier side of the part; flattening this area can make the asymmetrical front look unbalanced.
Double Dutch Halo Princess Updo
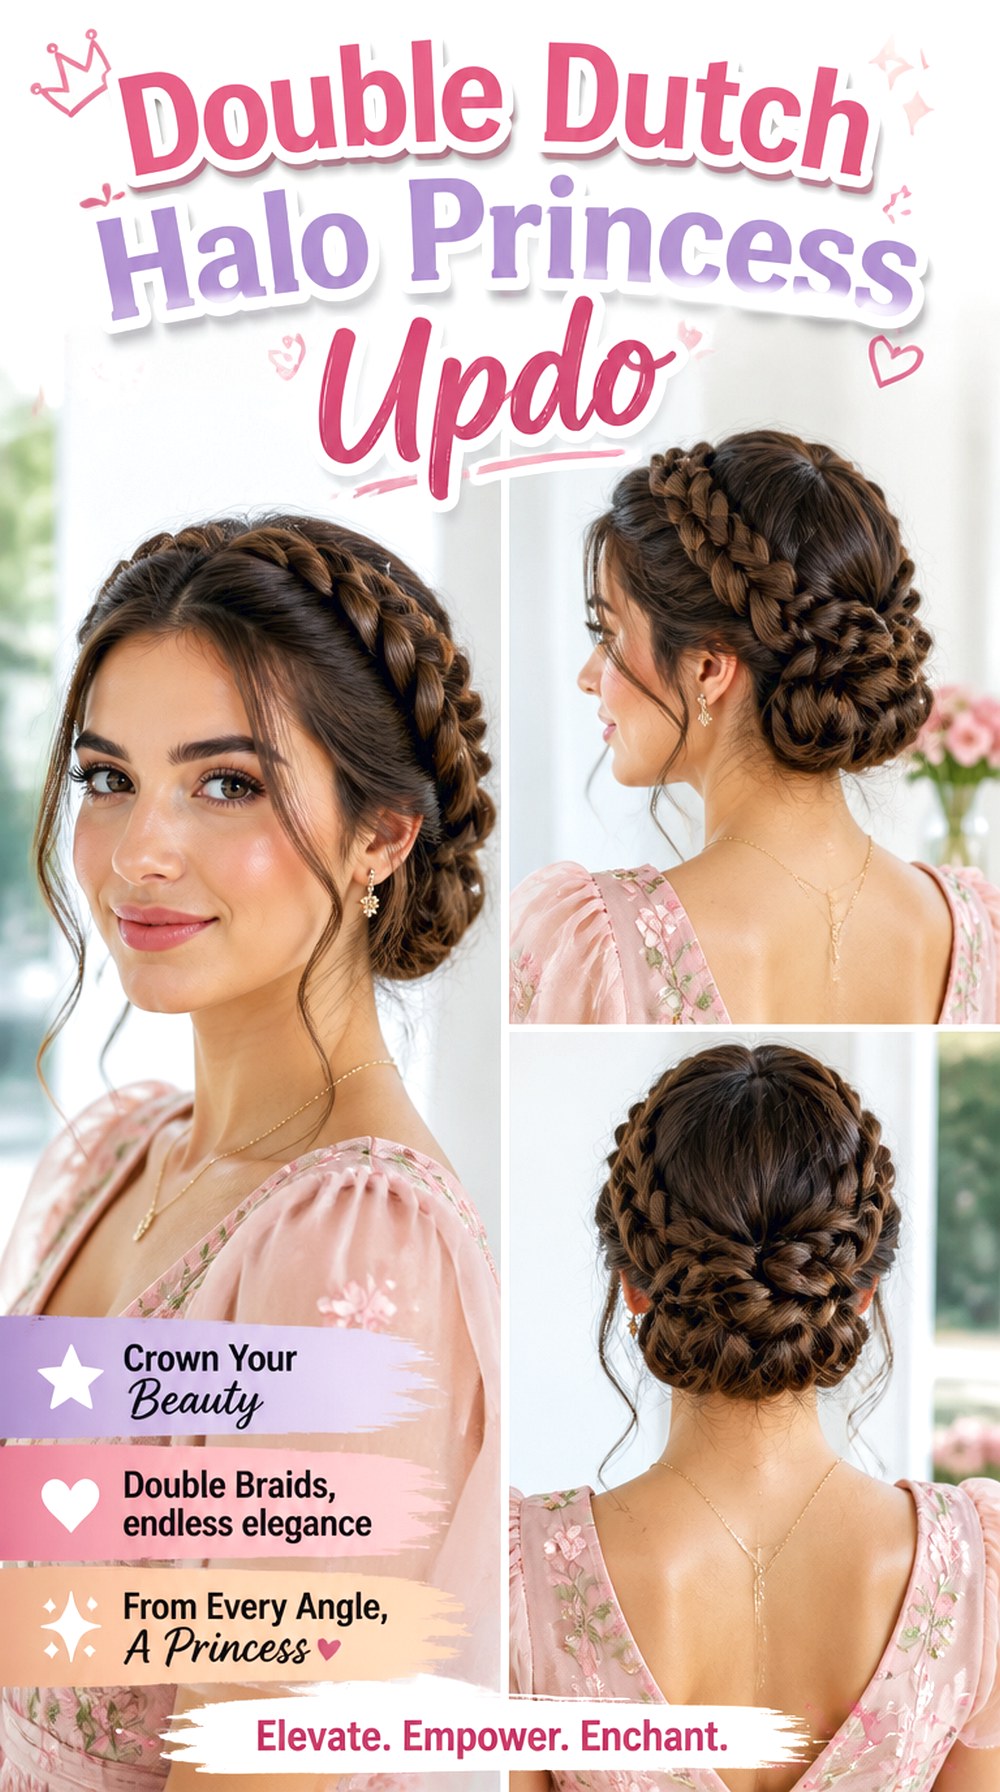
Two Dutch braids create raised texture around the head before meeting at the back in a tucked bun or concealed braid. Because the strands cross underneath, the braids sit visibly above the surrounding hair and produce a stronger halo effect. This works particularly well on medium to long hair with enough density to keep both braids substantial. Fine hair can be expanded after braiding for added width. Use grip spray, a wide-tooth comb, and clear elastics during styling. The updo takes extra time but holds well for active events once anchored. At the salon, request equal braid thickness on both sides even if your natural parting makes one section larger.
Pro tip: Loosen the Dutch braids from the outer edges only after they are secured; pulling them apart too early can make the crown uneven.
Voluminous Bouffant Princess Updo
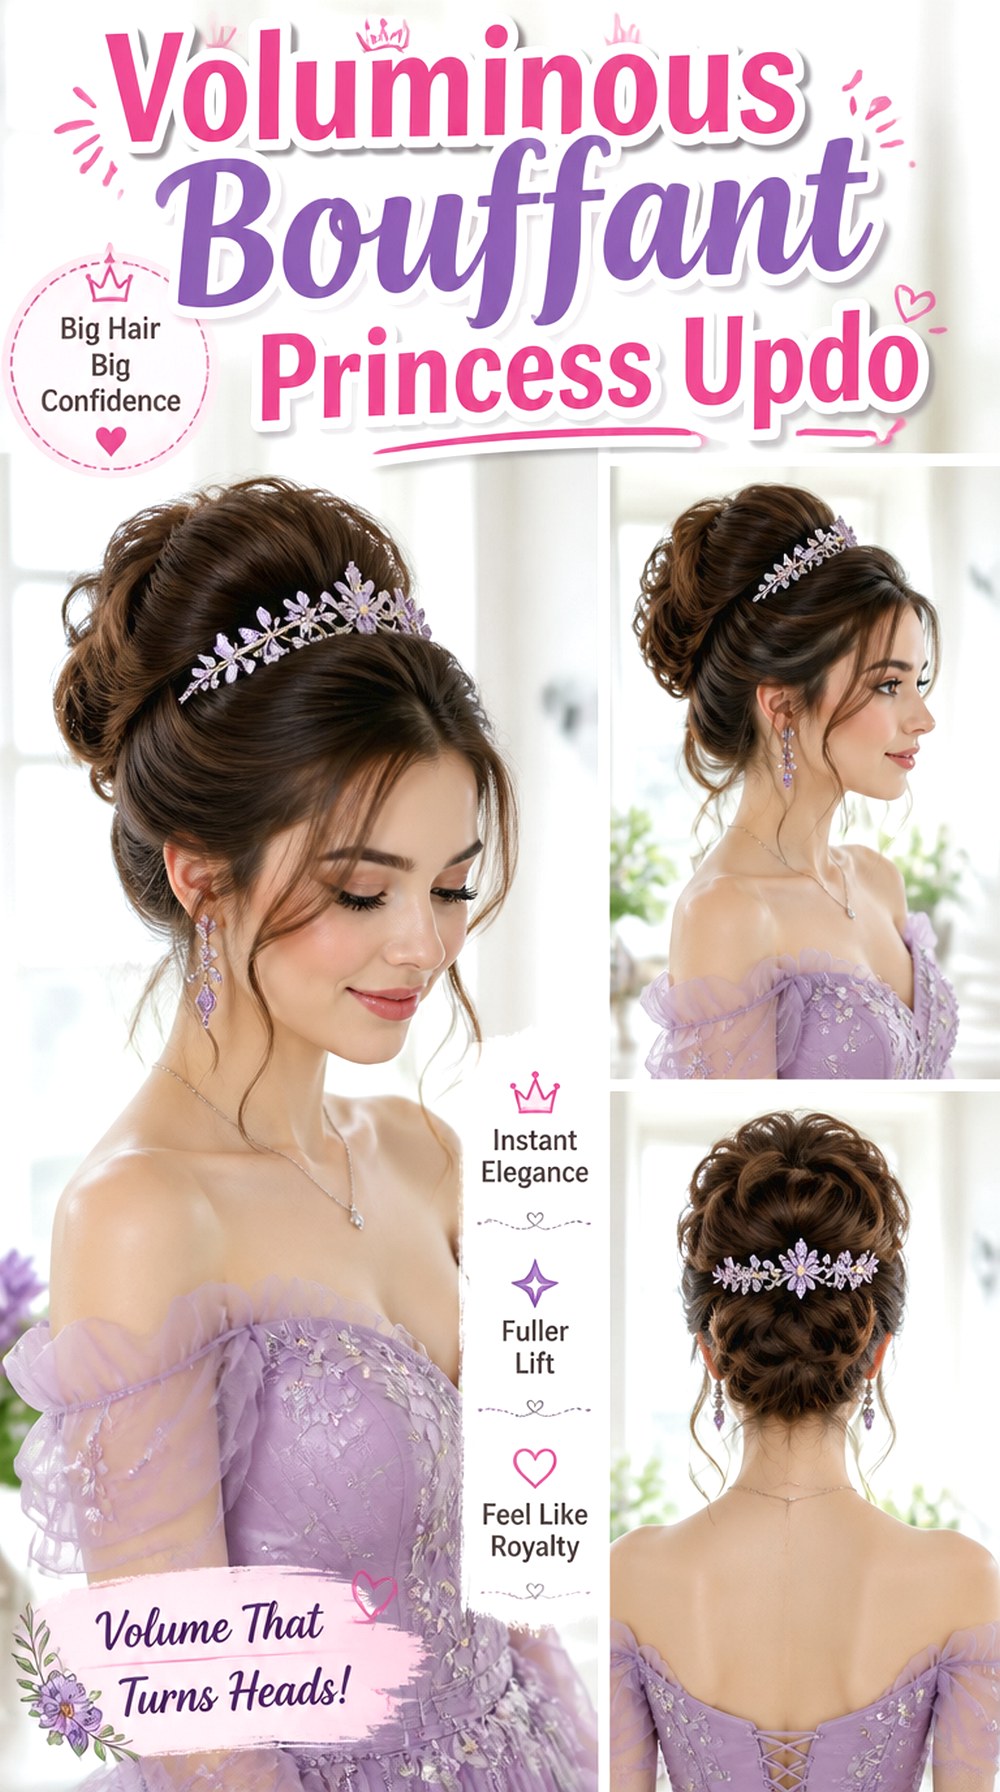
The bouffant princess updo concentrates lift through the crown before gathering the remaining hair into a bun or twist. It can visually lengthen a rounder face shape, while oval or longer faces may need less height and slightly more side fullness. Fine and medium hair often respond well to this design because strategic teasing creates body without requiring extremely dense hair. Thick hair should be lifted carefully to avoid an oversized shape. Use root-lifting spray, a teasing brush, and flexible hairspray. Styling is more time-consuming and may require touch-ups if the crown loses support. Show your stylist the exact amount of height you like from the side profile.
Pro tip: Backcomb only the hidden underside of the crown sections, then smooth the surface lightly so you keep volume without visible teasing.
Cascading Braid-to-Bun Princess Updo
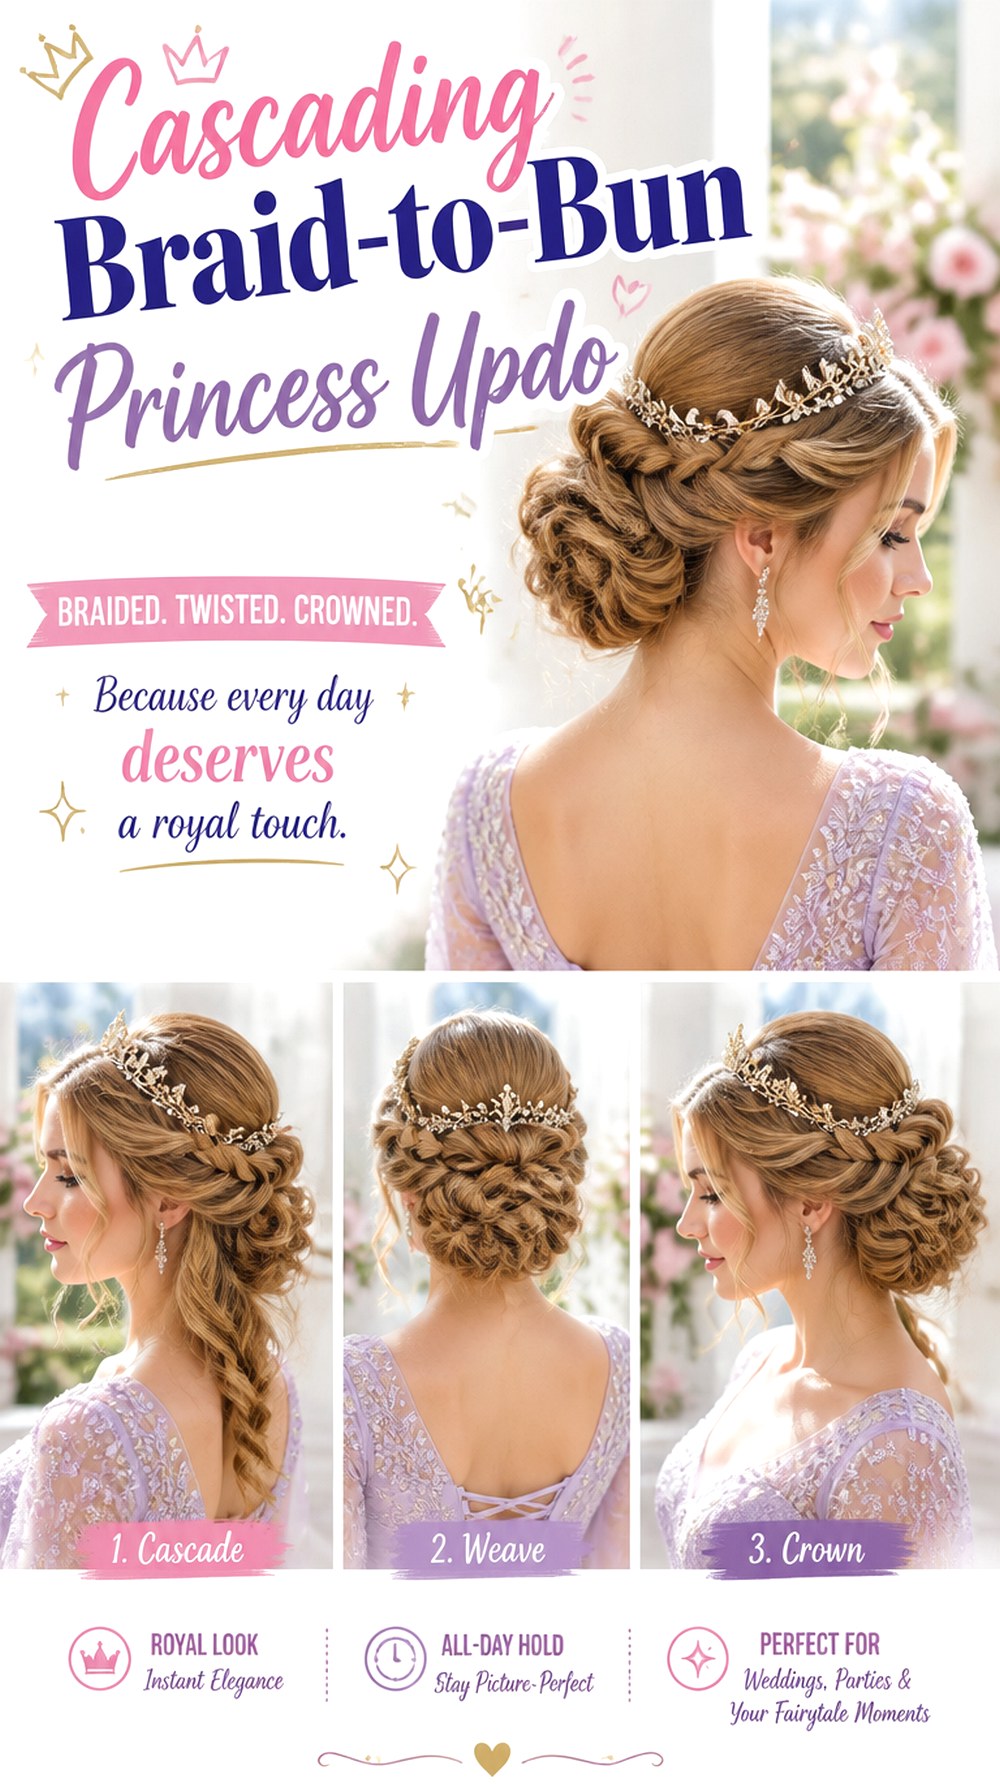
A cascading braid begins near the front or upper side of the head and gradually travels into a fuller bun at the back. The transition between braid and bun creates movement that looks particularly detailed on highlighted or dimensional hair. Long hair is ideal because it provides enough length for both elements, although medium hair can work with a smaller bun. Natural waves help the braid stay soft and flexible. Prepare with lightweight mousse, curl-enhancing spray, and flexible-hold hairspray. Expect moderate to high styling time because the braid must flow cleanly into the bun. Ask your stylist to leave the braid visible at the connection point rather than burying it completely.
Pro tip: Keep the braid slightly tighter near the hairline and gradually widen it toward the bun; the progression makes the cascade look more natural.
Jeweled Sleek Bun Princess Updo

A smooth bun paired with jeweled clips, pins, or a decorative comb creates a formal princess finish without relying on lots of curls or braids. The hair is usually gathered tightly enough to create a clean shape, so healthy-looking shine and neat edges are important. Straight or blow-dried hair works best, and medium to thick density can create a substantial bun. Fine hair may need a discreet bun foundation. A heat protectant, smoothing brush, and shine serum help create the polished surface. Styling takes moderate time but needs very little maintenance afterward. Bring your jewelry or hairpiece to the appointment so your stylist can position the bun around it.
Pro tip: Let the accessory sit beside or above the bun rather than directly in its center if you want the shape of the hairstyle to remain visible.
Soft Wavy Knotted Princess Updo
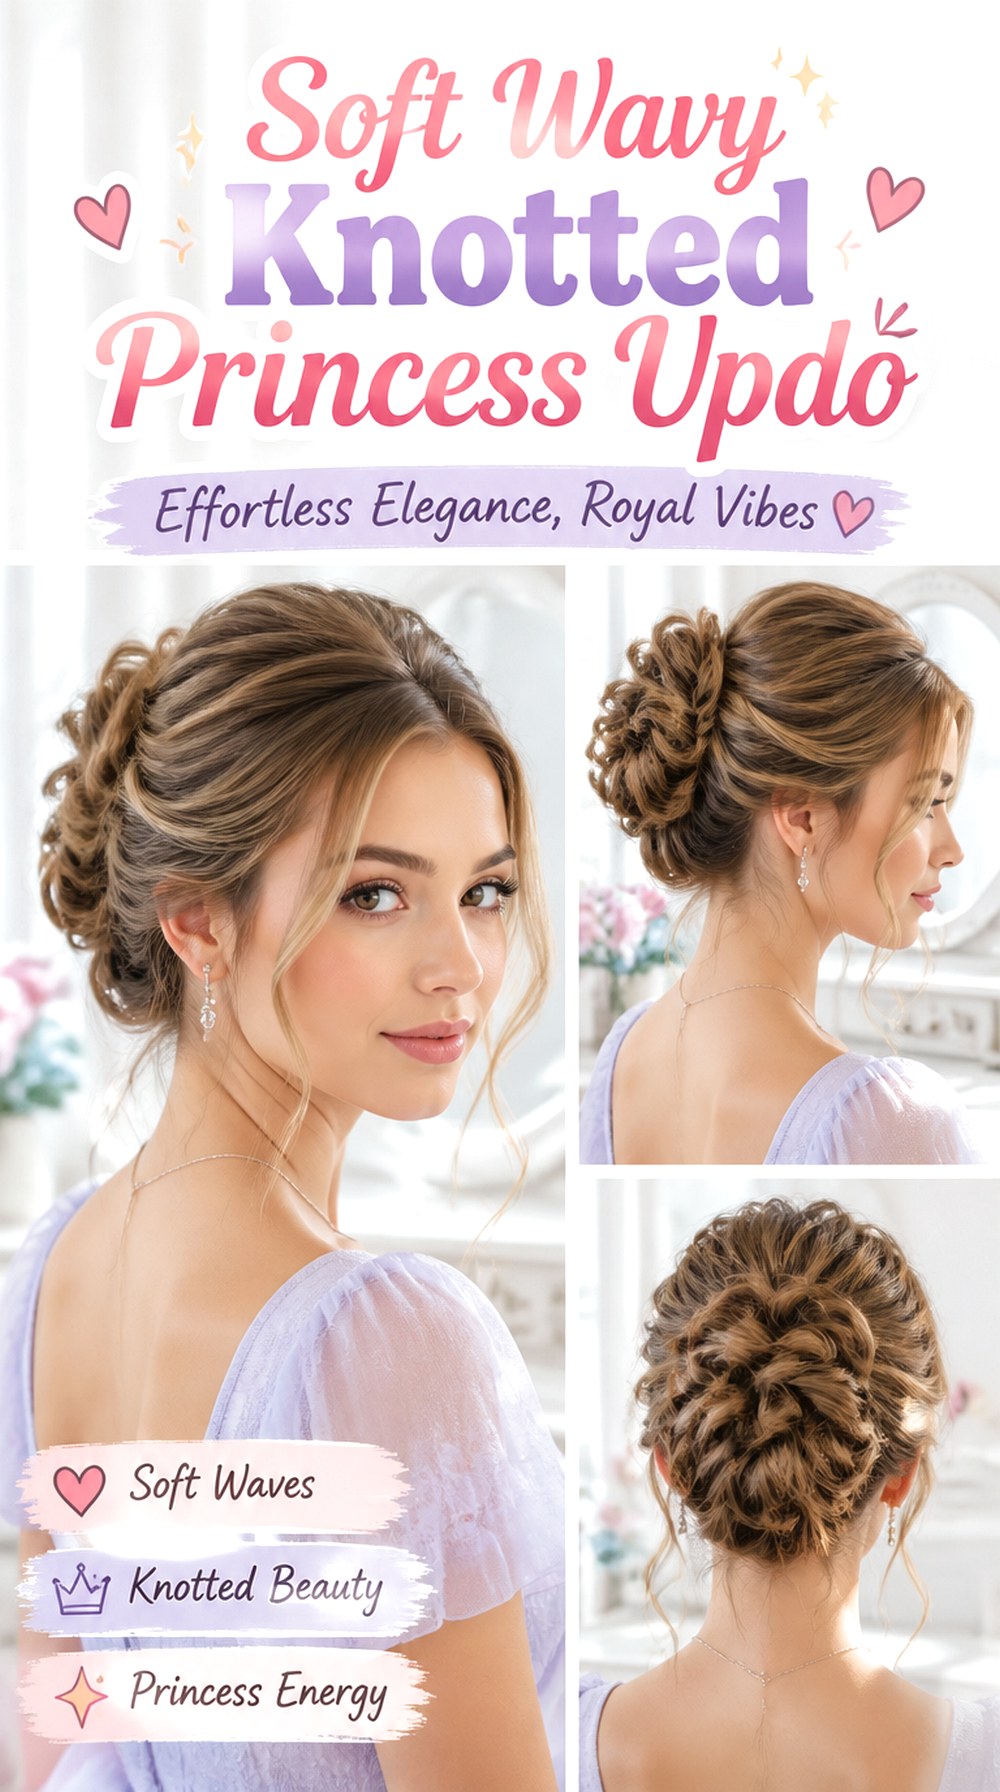
Soft waves can be divided into loose sections and knotted or looped together, creating an updo with organic texture rather than a single obvious bun. This approach suits medium to long hair and is especially attractive on naturally wavy textures because the finish does not need to be perfectly smooth. Fine hair gains dimension from the overlapping sections, while very thick hair may require fewer, larger knots. Use heat protectant, a large-barrel curling iron, and texturizing spray during preparation. Styling takes moderate to high effort because each section needs secure placement. Ask your stylist to keep the knots visible instead of pinning them into one compact mass.
Pro tip: Curl the hair in alternating directions before forming the knots; this prevents the entire updo from collapsing into one uniform wave pattern.
Conclusion
These 20 Princess Updo Hairstyle Ideas show how much the same elegant theme can change through placement, texture, and detail. A princess-inspired updo can sit low, high, or through the middle of the head, and it can be smooth, braided, curled, twisted, or softly undone. Length and density affect how large the finished shape can be, while layers, bangs, fringe, volume, parting, and accessories influence the overall balance.
The best choice depends on your face shape, natural hair texture, hair density, styling ability, maintenance preference, and daily or event routine. Instead of choosing only by the finished photograph, pay attention to where the volume sits, how firmly the hair is secured, and how much preparation the style requires.
CTA
Choose one or two favorite ideas and save clear photo references before your salon visit. Discuss your face shape, natural texture, hair density, preferred length, maintenance level, and normal styling routine with your stylist. Point out the exact details you want to copy—such as the braid width, crown height, face-framing pieces, fringe softness, bun position, amount of volume, or polished versus textured finish. That gives your stylist much more useful direction than simply asking for a “princess updo.”
FAQs
What Hair Length Is Best For Princess Updos?
Medium to long hair gives the most styling options because there is enough length for braids, twists, buns, and decorative sections. Some medium-short hair can also be pinned into compact updos, especially with strategic sectioning.
Can Fine Hair Hold A Princess Updo?
Yes. Fine hair often benefits from lightweight mousse, dry texture spray, gentle backcombing, or a discreet bun foundation. Avoid heavy oils before styling because too much slip can make pins and braids harder to secure.
How Long Does A Princess Updo Usually Take To Style?
A simple chignon may take around 30–45 minutes, while detailed braids, curls, accessories, or sculpted sections can require considerably more time. Formal event styles are worth testing beforehand if the finished shape needs to last for many hours.
Which Princess Updo Works Best In Humid Weather?
Sleeker knots, structured chignons, braided crowns, and firmly pinned buns generally handle humidity better than very loose curls and delicate tendrils. Using humidity-resistant hairspray and keeping fewer pieces around the face can also help the hairstyle maintain its shape.