16 Jewel Tone Headband Hairstyle Ideas
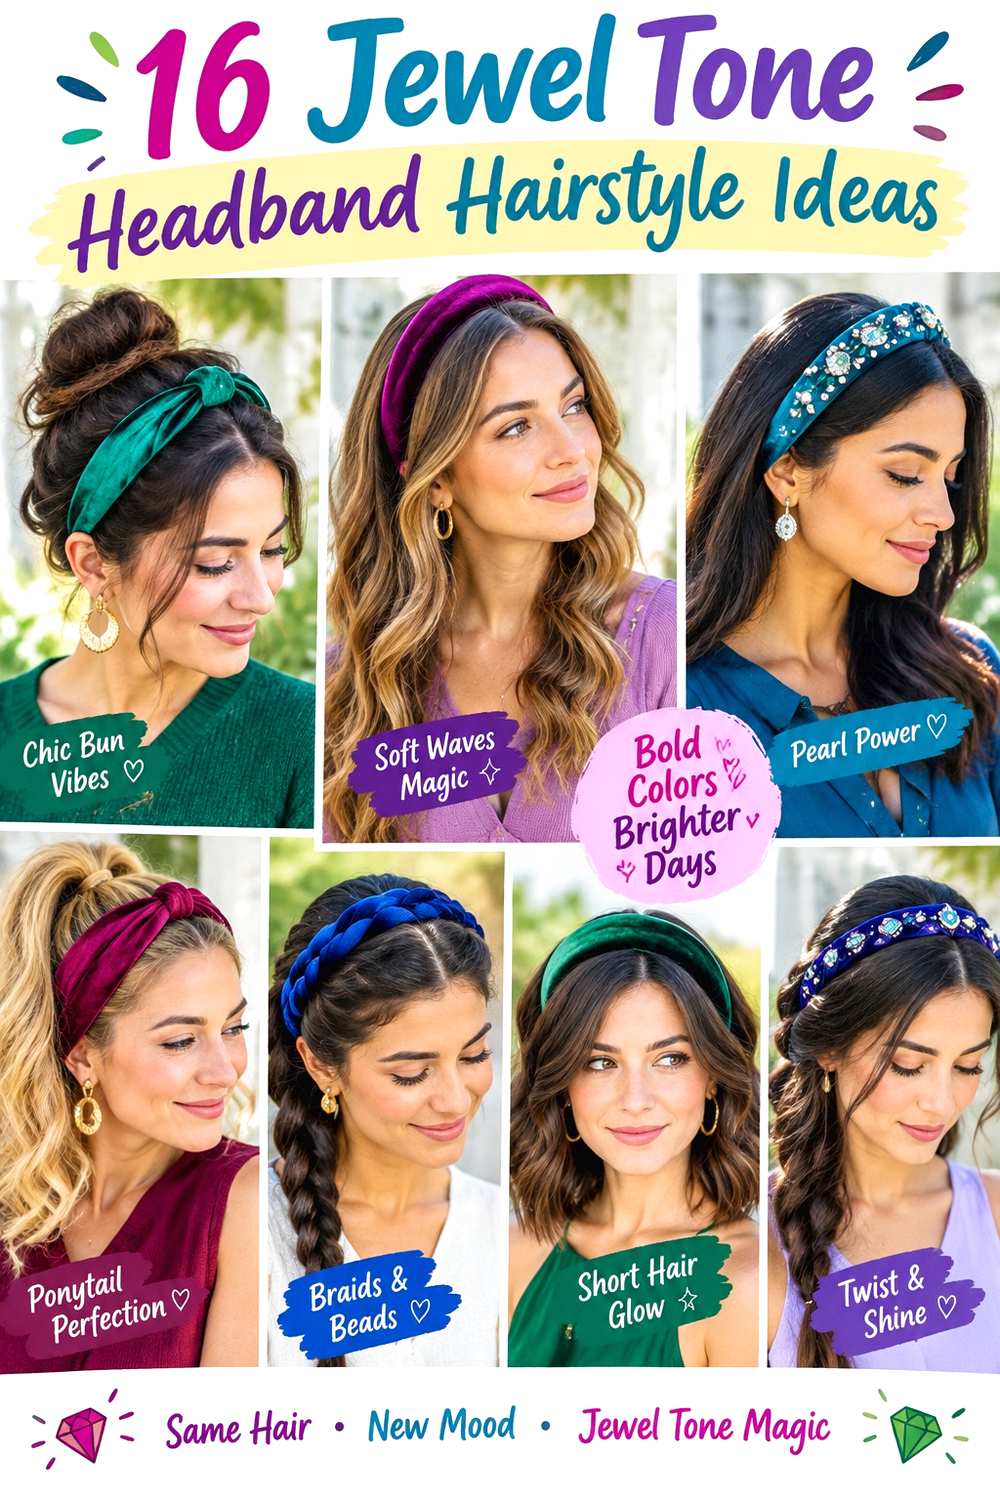
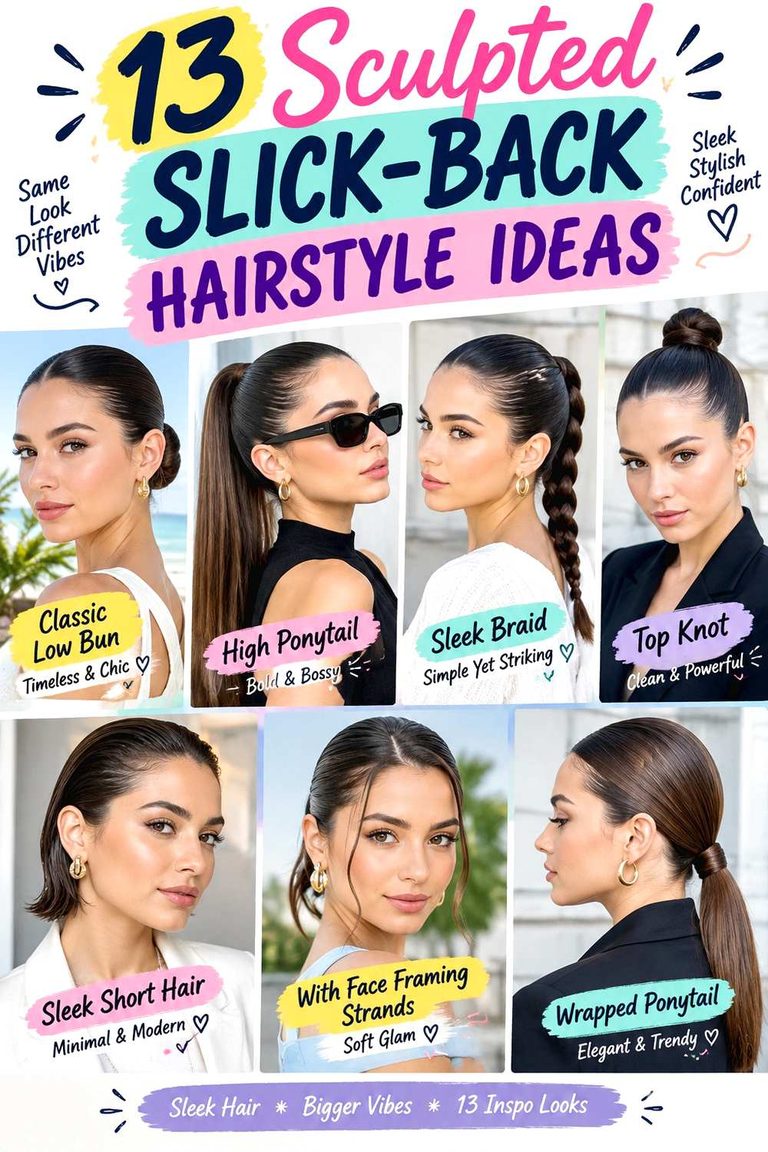
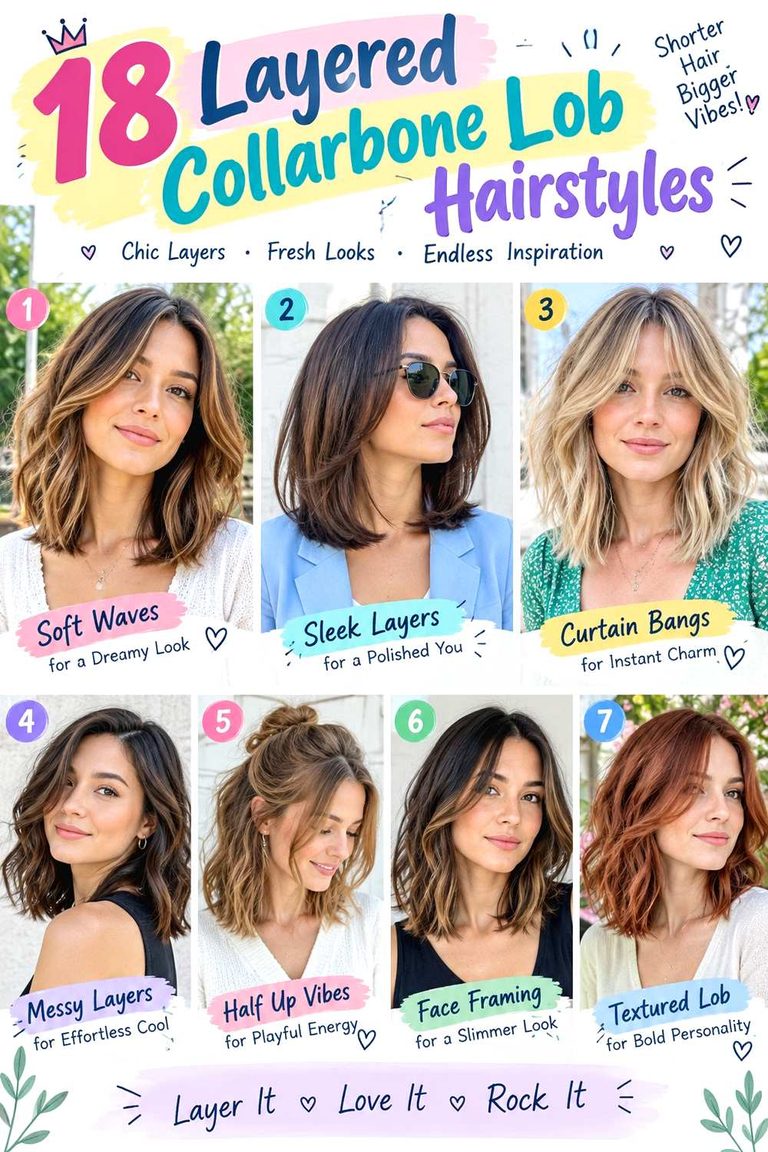
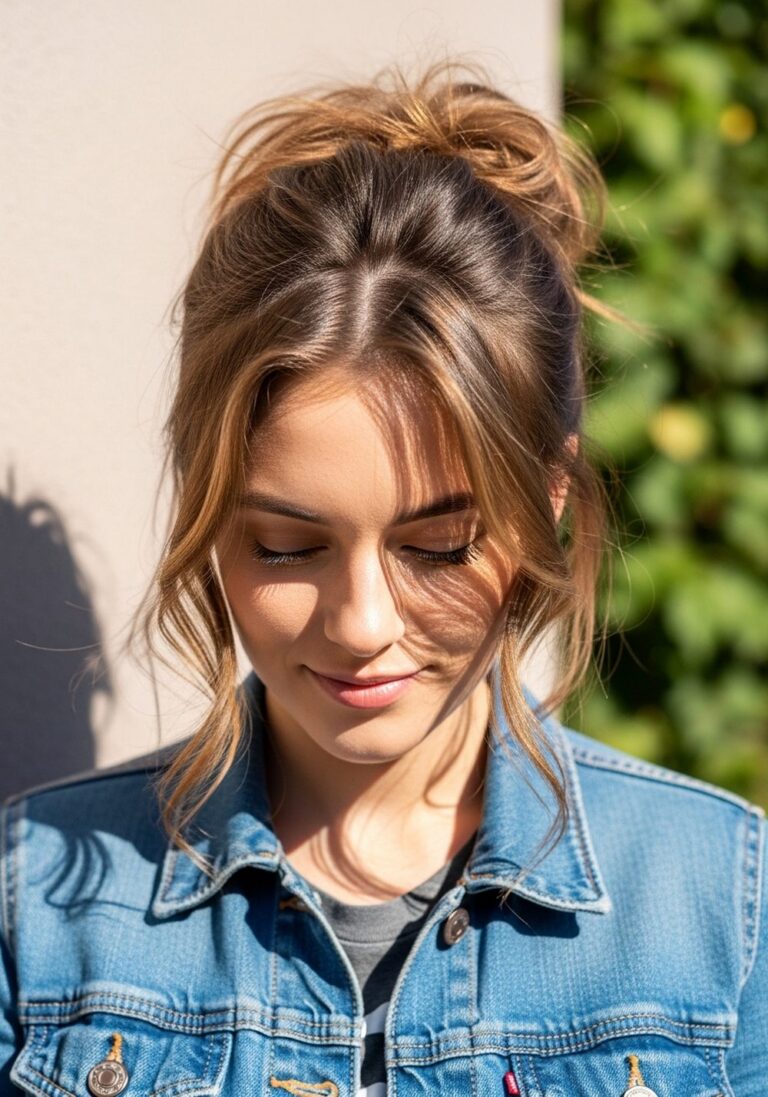
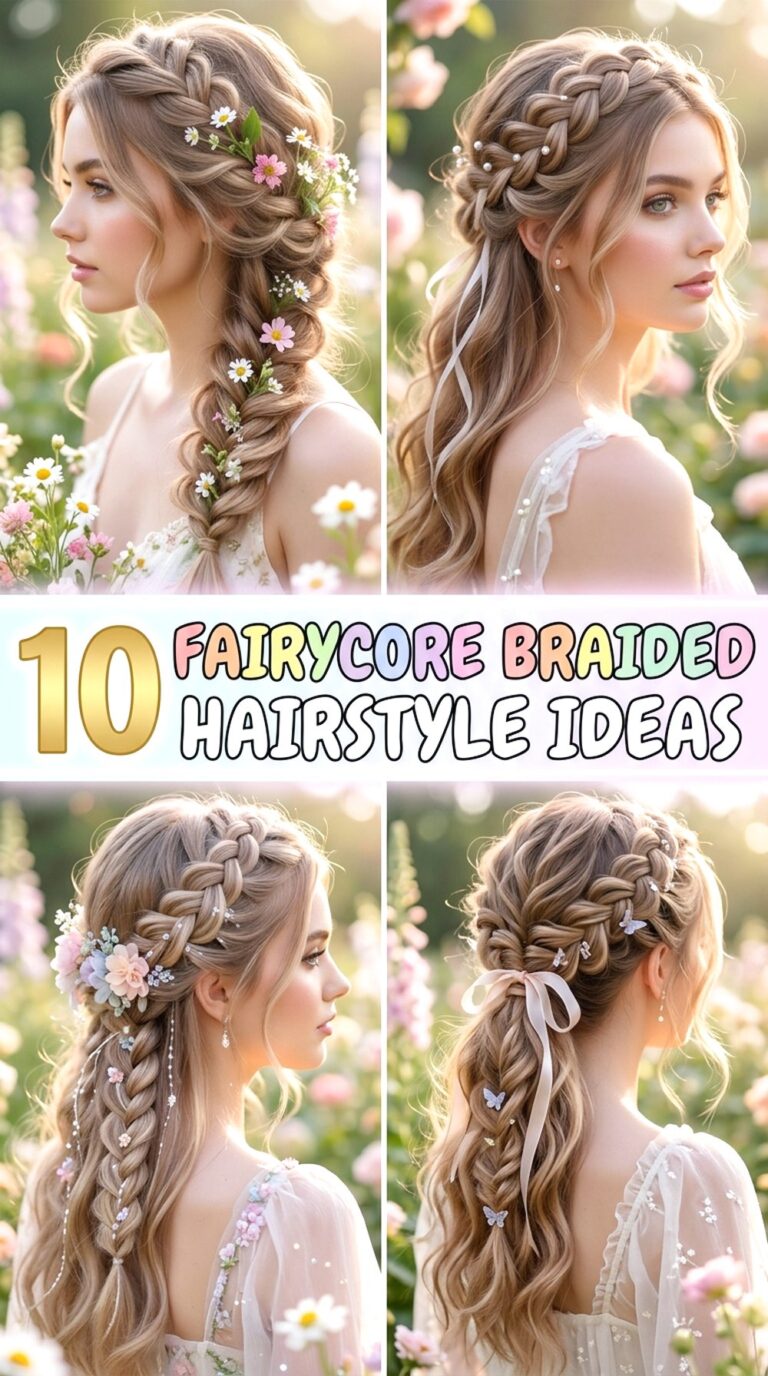
Jewel tone headband hairstyle ideas use saturated shades such as emerald, sapphire, ruby, amethyst, garnet, teal, and plum to create a strong accessory detail without changing the haircut itself. The headband can sit over smooth roots, waves, curls, coils, braids, a ponytail, or an updo. Width and placement matter: a slim band gives a lighter line across the crown, while a padded or wide band creates more visual weight. Fringe, layers, face-framing pieces, parting, volume, and loose ends can remain visible around it.
Most lengths can work. Bobs benefit from compact placement and visible ends, while medium and long hair allow ponytails, buns, braids, and half-up sections behind the band. Straight, wavy, curly, and coily textures do not need the same styling method. Lower-density hair may suit a lighter band that does not flatten the crown, while dense hair can often support wider accessories. Comfort around the temples and behind the ears is as important as appearance.
A quick refresh may involve resetting the part, reshaping the front, and sliding the headband back into place. Full wash-day styling takes longer when defined curls, waves, or a polished updo are part of the design. Grip should come from sensible placement rather than excessive pressure.
Quick List
- Emerald Velvet Center-Part Headband Hairstyle
- Sapphire Padded Wave Headband Hairstyle
- Ruby Satin Sleek Headband Hairstyle
- Amethyst Braided Crown Headband Hairstyle
- Garnet Low Pony Headband Hairstyle
- Teal Curly Volume Headband Hairstyle
- Plum Coily Puff Headband Hairstyle
- Emerald Bob Tuck Headband Hairstyle
- Sapphire Half-Up Twist Headband Hairstyle
- Ruby Low Bun Headband Hairstyle
- Amethyst Side-Part Headband Hairstyle
- Deep Teal Loose Braid Headband Hairstyle
- Garnet High Pony Headband Hairstyle
- Plum Soft Updo Headband Hairstyle
- Emerald Wide Band Natural Texture Headband Hairstyle
- Sapphire Thin Band Layered Headband Hairstyle
Emerald Velvet Center-Part Headband Hairstyle
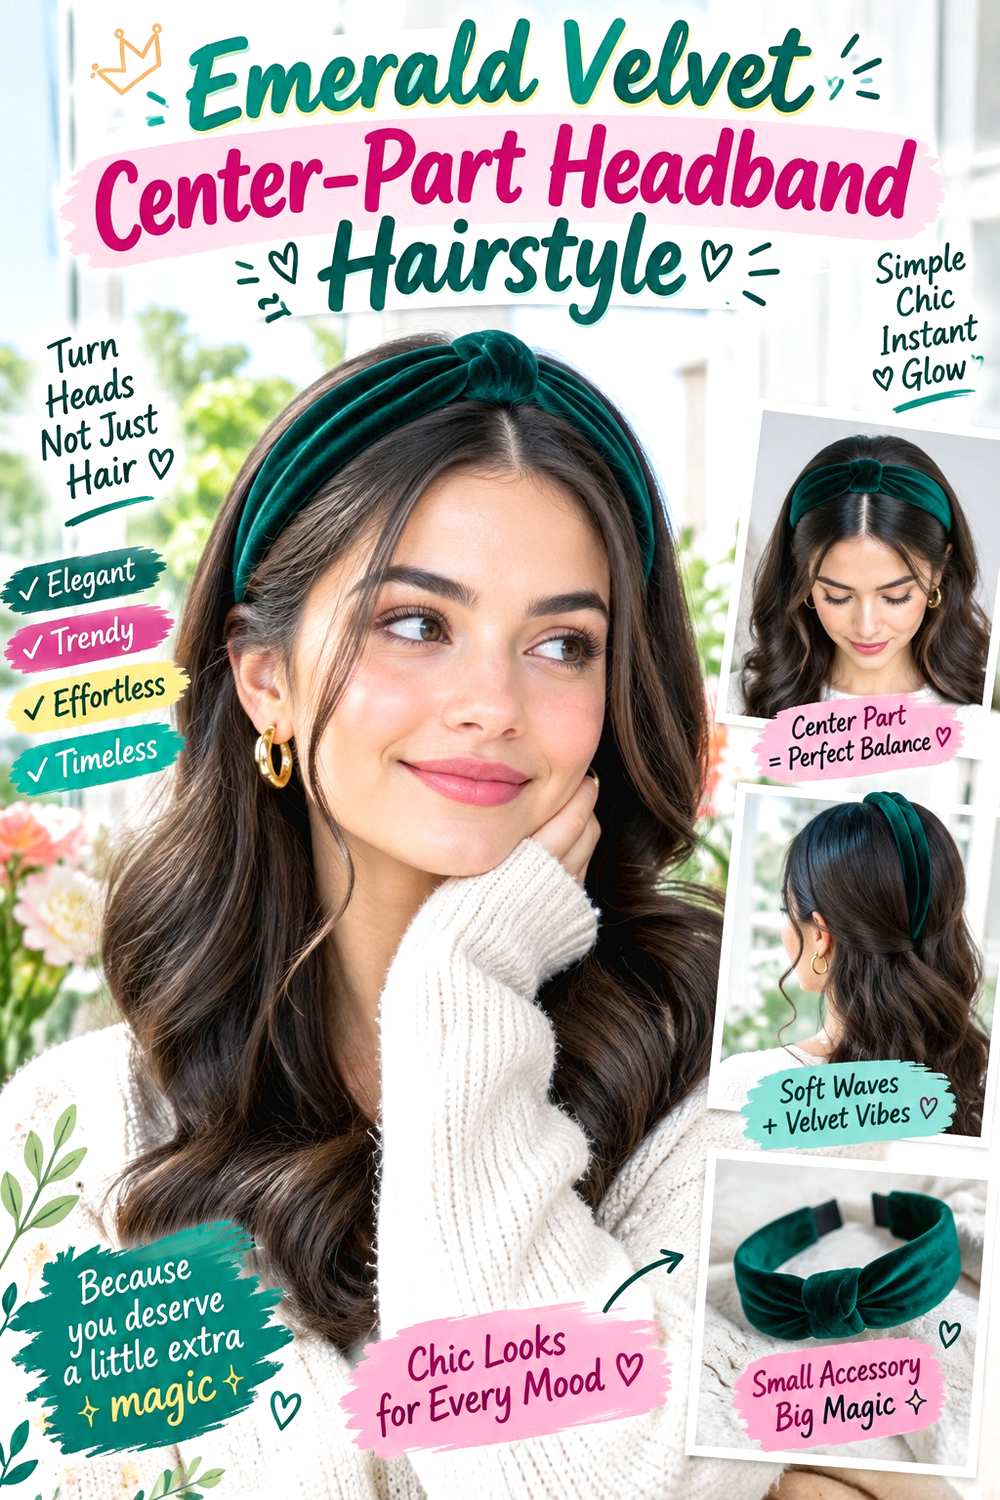
A deep emerald velvet band works especially well with a clear center part because the rich fabric creates a strong line behind a simple front shape. Position the headband slightly behind the hairline so the part remains visible, then let the lengths fall naturally below the shoulders or around a bob. Keep the crown softly lifted rather than pressed flat, and allow curtain fringe or cheekbone-length pieces to sit in front of the band when they frame the face more naturally. Straight, wavy, curly, or coily lengths can remain in their usual texture.
Use the emerald velvet headband as the main accessory and light texturizing spray only where extra grip is needed near the crown. Lower-density hair usually benefits from keeping the band slightly farther back so more root volume remains visible, while dense hair can support a wider velvet profile. A quick refresh means redefining the center part and correcting any band movement; a complete wash-day style takes longer only if the loose texture also needs resetting. If the band creeps forward, change its placement rather than forcing it tightly against the temples. At a styling appointment, specify how much of the center part and face-framing hair you want visible in front of the band.
Pro tip:
Set the center part before positioning the velvet band, then slide the accessory back gently from the hairline so the roots stay smooth without losing all crown lift.
Make It Work for You:
If your hair is fine or lower density, choose a medium-width velvet band and keep the crown slightly airy. The emerald color remains noticeable without visually flattening the top.
Watch Out For:
Avoid placing a thick velvet band directly over bulky fringe roots. Let shorter front pieces sit in front so the accessory does not create an unwanted ridge.
Sapphire Padded Wave Headband Hairstyle
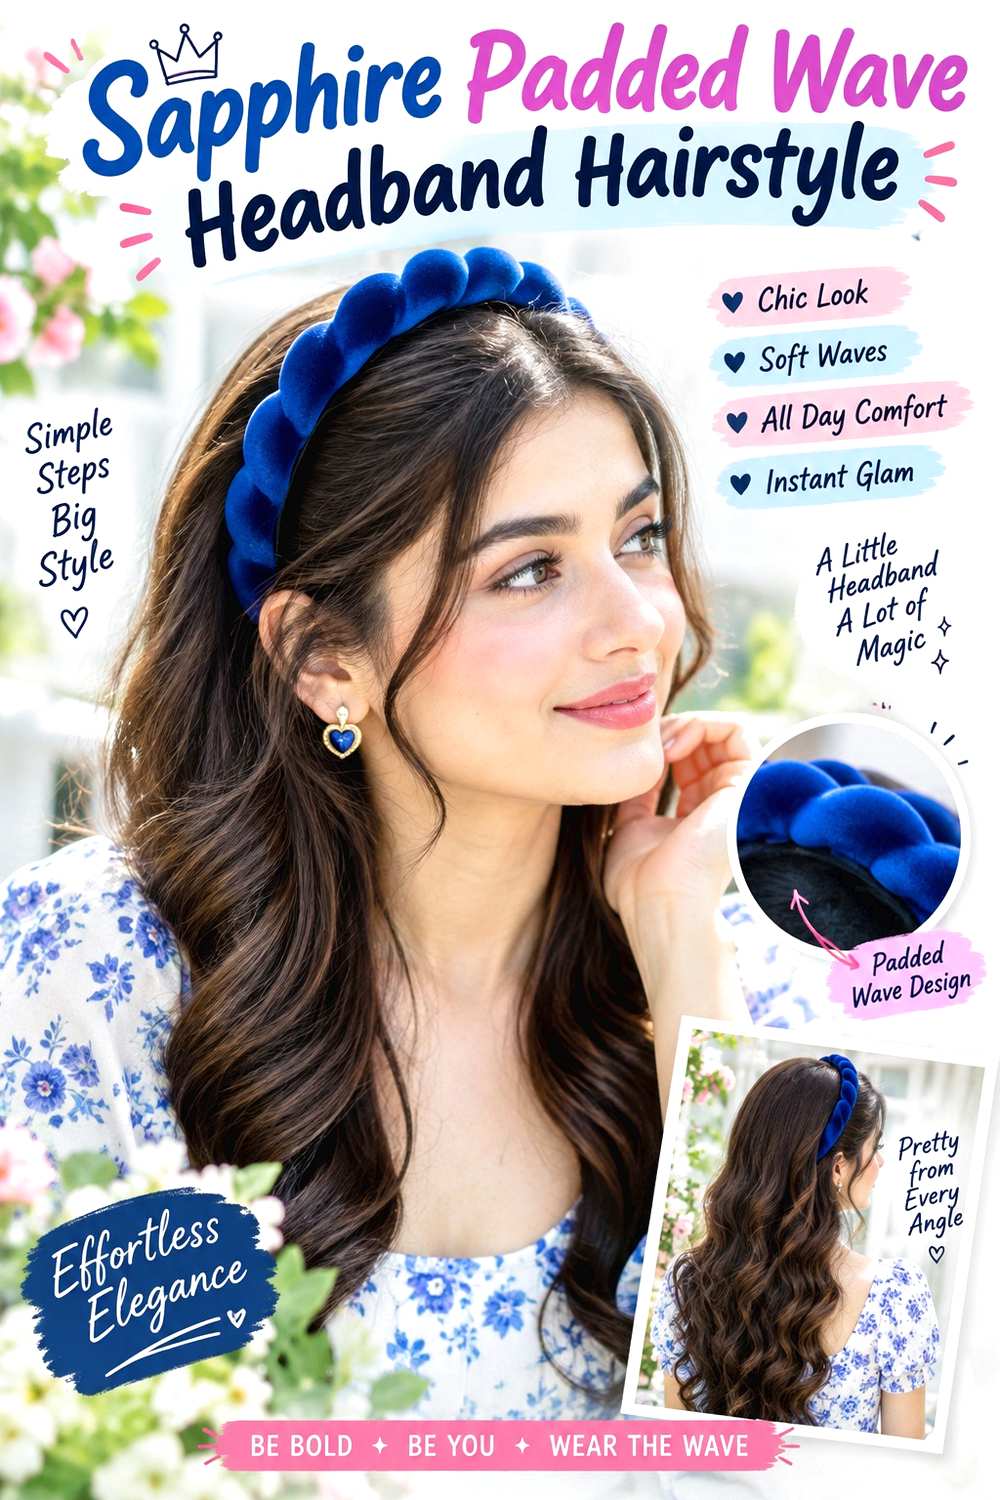
A sapphire padded headband gives broad waves a defined focal point while allowing most of the movement to remain below the crown. Keep the roots relatively smooth, place the band a little behind the hairline, and shape large bends from around cheek or jaw level through the mid-lengths. The ends can stay softly curved rather than tightly curled. A center part creates symmetry in front of the padded band, while an off-center part gives one face-framing section more movement.
For heat-shaped waves, use heat protectant before styling, a curling iron for the broad bends, and the sapphire padded headband after the hair has cooled. Medium and long hair show the contrast between the structured accessory and loose lengths most clearly. A quick next-day refresh usually involves reshaping only a few front bends and resetting the headband; a full wash-day set takes longer because the hair must be dried and waved again. Natural waves can stay as they are, reducing the need for heat. If the padded band flattens the upper wave pattern, move it slightly closer to the hairline rather than compressing the crown. At a styling appointment, point out where you want the first visible bend and how much height should remain behind the band.
Pro tip:
Let heat-shaped waves cool completely before adding the padded band. Warm sections can flatten under pressure and lose the broad curve you intended to keep.
Make It Work for You:
If your hair already has a natural wave pattern, keep those bends and focus only on arranging the front sections. The sapphire band can provide structure without extra heat.
Watch Out For:
Do not push the padded band repeatedly backward if it catches the waves. Lift it slightly before repositioning so you do not drag or stretch the styled sections.
Ruby Satin Sleek Headband Hairstyle
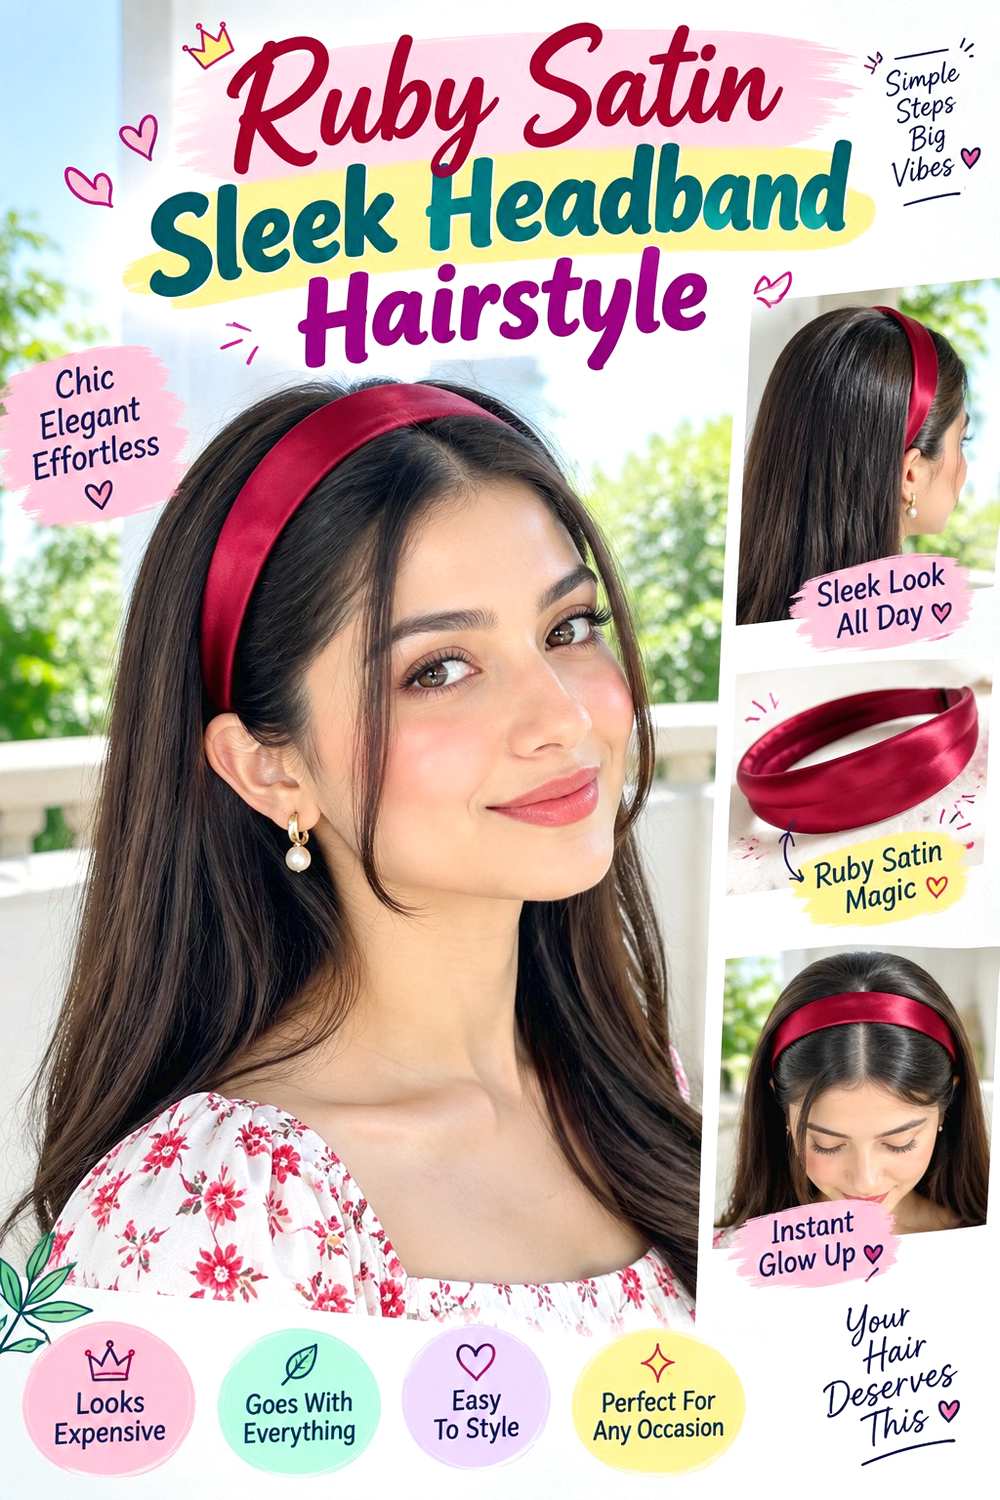
A ruby satin headband stands out against a sleek surface because the smooth fabric reflects light differently from the hair. Create a clean center or side part, keep the crown close to the head, and place the band just behind the front section so the part stays visible. The lengths can fall straight, tuck behind the shoulders, or remain naturally smooth. Existing fringe may sit in front of the band, while longer face-framing pieces can be guided behind it for a more controlled outline.
Use lightweight smoothing cream to manage surface flyaways and the ruby satin headband as the accessory. This approach is easiest on naturally straight or gently wavy hair, but curly and coily textures can also wear a sleek gathered surface without needing complete straightening. A short refresh usually involves redefining the part, smoothing the top, and repositioning the band. Full wash-day styling takes longer if your preferred finish involves stretching or smoothing the lengths. Too much product near the band can increase slipping, so keep the roots lightly coated. At a styling appointment, specify whether you want the crown completely flat or with a small amount of lift behind the accessory, plus whether shorter front sections should remain visible.
Pro tip:
Apply smoothing product sparingly around the band’s contact points. A polished surface needs control, but too much slip can make a satin accessory move more easily.
Make It Work for You:
For curly or coily hair, smooth only the front and crown if desired while leaving the lengths textured. The ruby band still gives a clean line without requiring full straightening.
Watch Out For:
Avoid pushing the band too tightly against the scalp to keep it still. If satin slips, adjust placement and reduce product around the anchor area instead.
Amethyst Braided Crown Headband Hairstyle
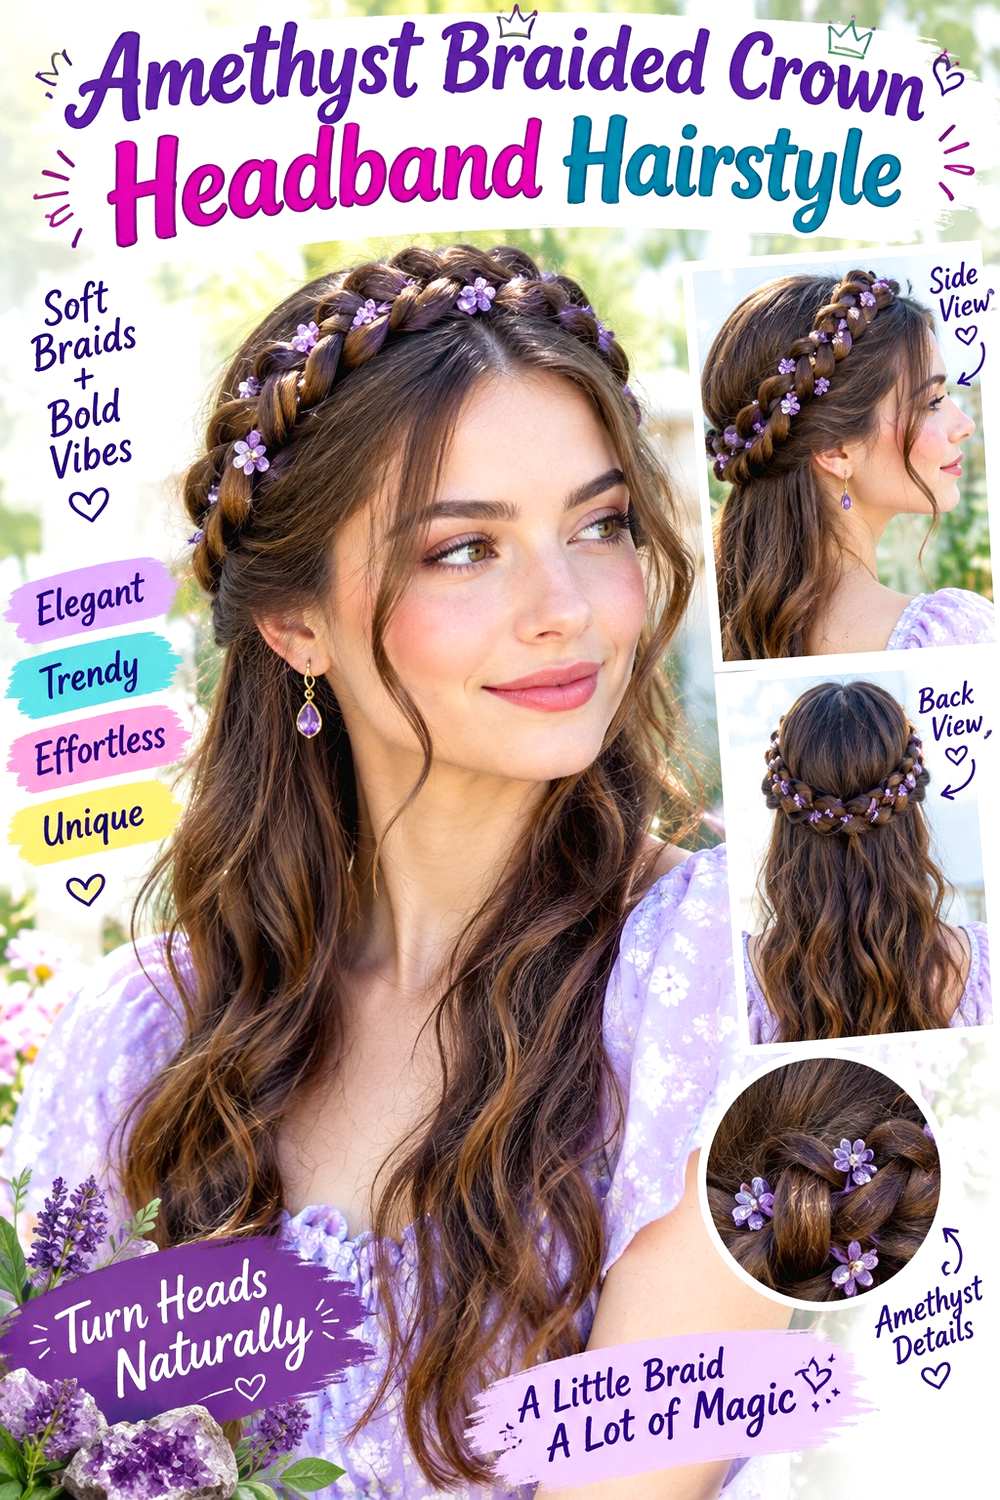
An amethyst headband can sit just in front of a braided crown, creating two parallel details across the upper head. Form two slim braids from the temple area and guide them toward the back crown, keeping the braid line visible behind the band rather than hiding it. The lower hair can remain loose in a straight, wavy, curly, or coily texture. A center part works well with balanced braids, while a soft side part creates a less symmetrical front.
Use mini elastics to secure the braid ends, the amethyst headband as the color accent, and light texturizing spray when extra grip is helpful. Medium and long hair make it easiest for the side braids to reach the back, though a lob can support shorter sections that meet higher. A quick refresh may involve smoothing one braid and resetting the band; a full wash-day version takes longer because both the loose texture and braided crown must be rebuilt. If the headband hides too much of the braid, move it slightly forward instead of making the braids wider. At a styling appointment, explain the braid width, meeting point, and desired gap between the amethyst band and braided crown so both details remain visible.
Pro tip:
Finish both braids before positioning the headband. Once their height is balanced, place the amethyst band just forward enough to create a clear parallel line.
Make It Work for You:
If your hair is shorter, begin the braids farther back at the temples and let them meet high on the crown. The headband-and-braid combination stays recognizable.
Watch Out For:
Do not widen the braid edges after the headband is in place. Pulling on them can disturb the anchor and make the crown sit unevenly.
Garnet Low Pony Headband Hairstyle
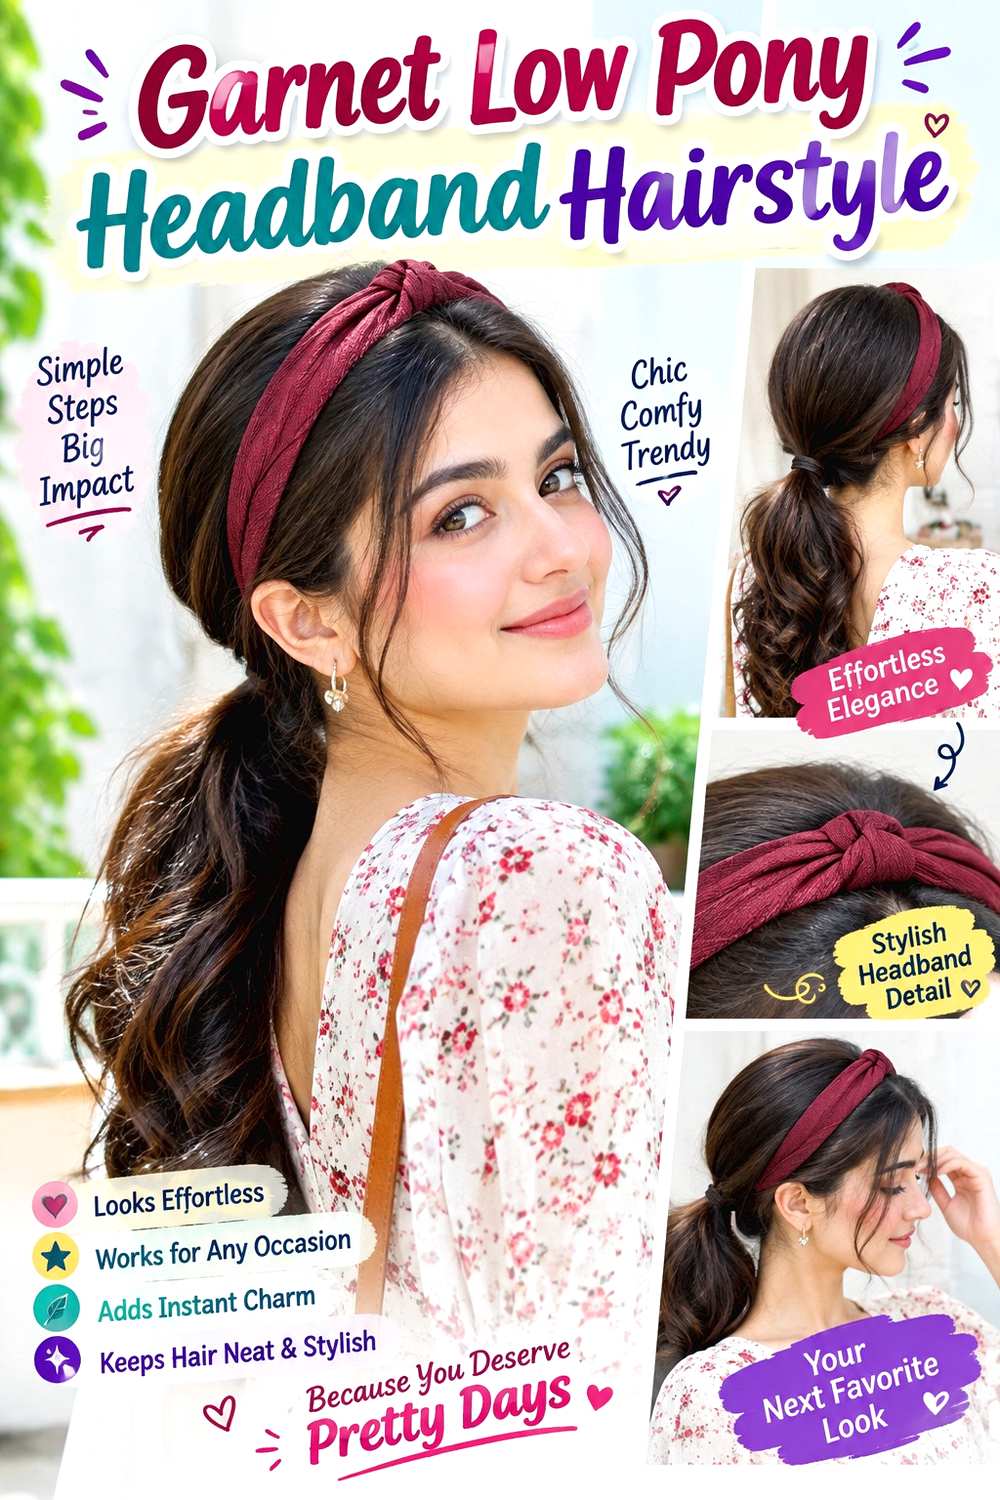
A garnet headband paired with a low ponytail keeps the front structured while placing the weight of the hair close to the nape. Set a center or side part, slide the band into place behind the hairline, then gather the lengths into a low ponytail. Leave a few face-framing sections in front of the band if you prefer a softer outline. The ponytail can stay straight, wavy, curly, or coily, and the crown can remain smooth or gently lifted behind the accessory.
Use the garnet headband for the color detail, a fabric-covered elastic to support the ponytail, and light styling cream to control flyaways. Medium and long hair work best because the ponytail remains clearly visible below the band. A quick refresh generally means smoothing the front, reseating the accessory, and checking the ponytail base; a full wash-day version takes longer only if the tail also needs definition or reshaping. If the headband begins pushing against the ponytail’s upper section, move the band slightly forward instead of raising the ponytail. At a styling appointment, specify the ponytail height and how much crown volume should remain between the band and nape.
Pro tip:
Secure the low ponytail after the headband is positioned. This lets you judge how much crown fullness remains and prevents the two anchors from competing.
Make It Work for You:
For dense hair, keep the ponytail low and broad at the base rather than pulling it tightly upward. The garnet band remains distinct from the heavier back section.
Watch Out For:
Avoid placing the band so far back that it presses against the ponytail transition. Give both elements enough space to sit comfortably and independently.
Teal Curly Volume Headband Hairstyle
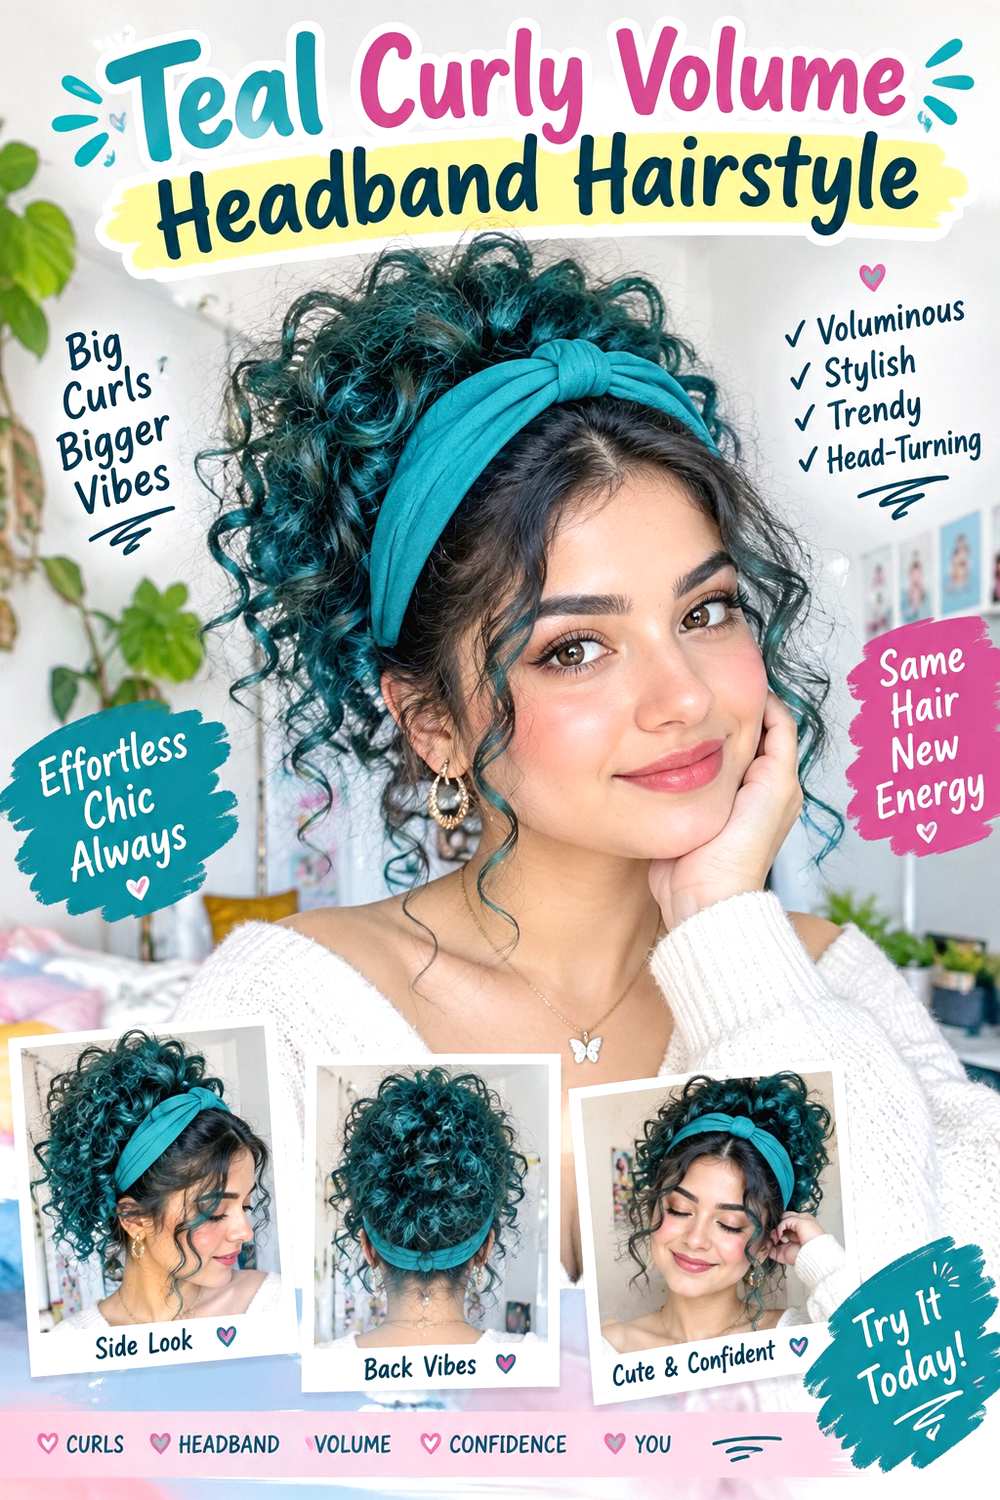
A teal headband can frame curly hair without reducing the volume that makes the texture distinctive. Place the band a short distance behind the hairline, keep curls lifted at the crown, and let selected shorter curls remain in front if they naturally frame the forehead or temples. The lengths can expand freely at the sides and back, while the band creates a clean color line across the top. A visible center or side part is optional because the curl pattern itself can lead the shape.
Use lightweight curl gel to define the sections around the face, the teal headband for placement, and a diffuser if your normal drying routine uses one. This style works across many curl patterns, and density mainly affects how wide or firm the band should be. A short refresh may involve redefining a few front curls and reseating the headband; full wash-day styling takes longer because the curl pattern needs to dry into its finished volume before final placement. If the accessory compresses the crown too much, move it forward or choose a lighter position rather than forcing the curls underneath. At a styling appointment, explain how much crown height and temple volume you want to preserve around the headband.
Pro tip:
Position the band after the curls have reached their usual dry volume. That makes it easier to preserve height instead of guessing how much the texture will expand.
Make It Work for You:
For tighter curls, leave more front sections outside the band and use a shallower placement. The teal accent stays visible while the natural hairline texture remains soft.
Watch Out For:
Do not drag the headband backward through dry curls when repositioning it. Lift the accessory away first so the fabric or teeth do not disturb curl groups.
Plum Coily Puff Headband Hairstyle
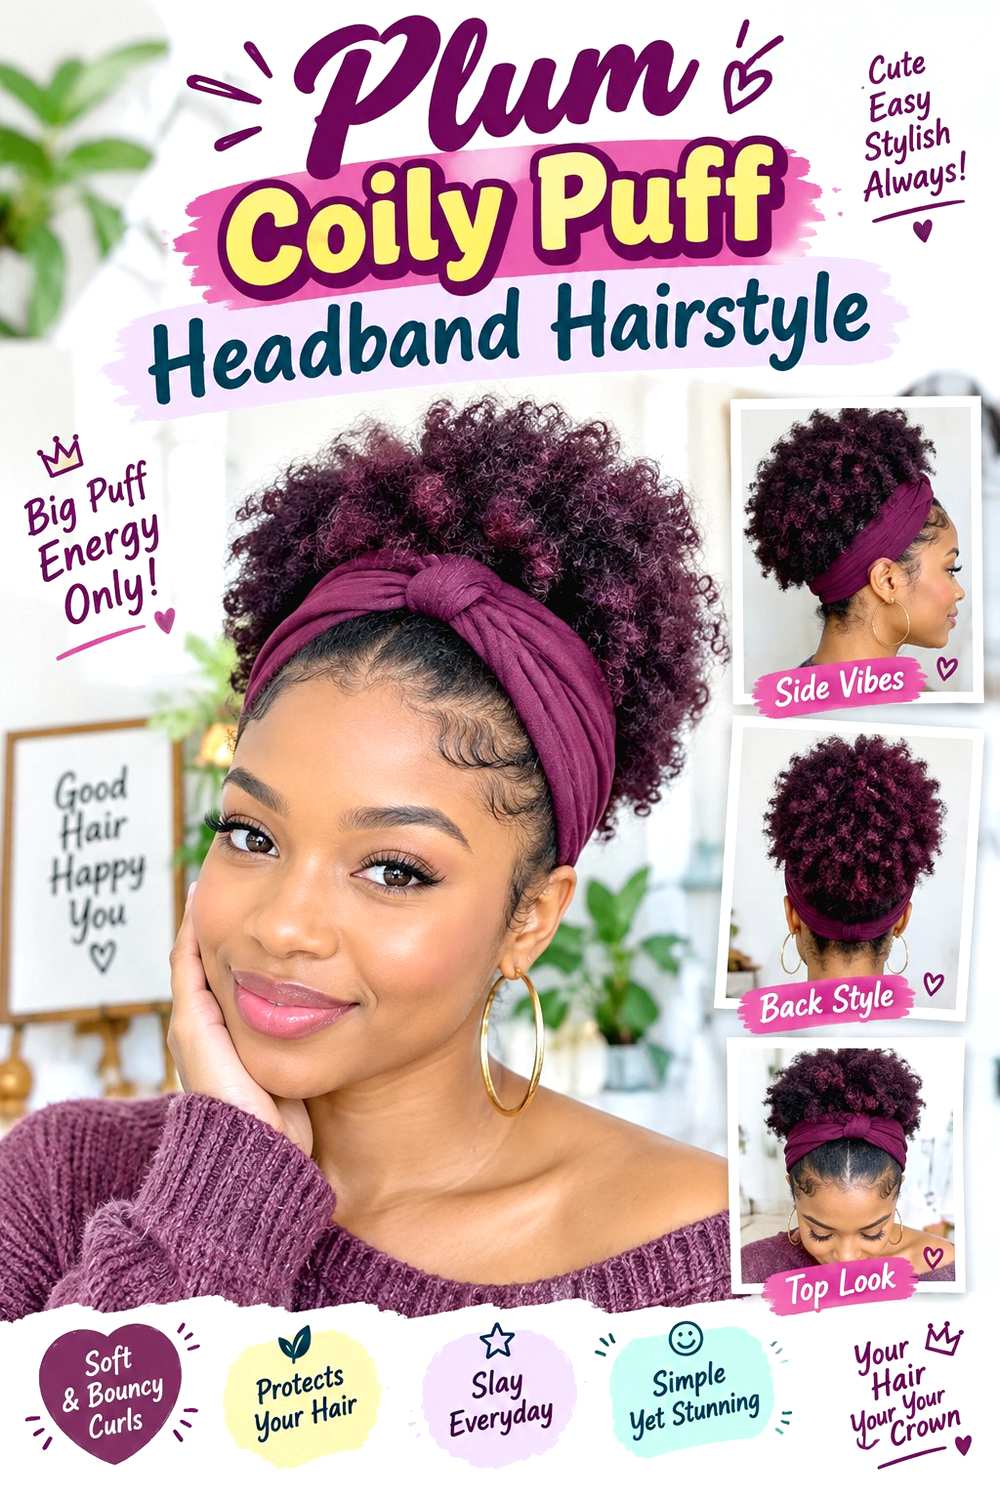
A plum headband paired with a puff creates clear separation between the front section and the expanded texture behind it. Place the band near the hairline or slightly farther back, then gather the remaining hair into a high or mid-height puff without flattening the coils. Shorter pieces can stay free around the edges, and the front can remain smooth, softly textured, or naturally coiled. The rich plum color works as a visible border rather than as the main source of hold.
Use moisturizing leave-in conditioner for pliability, a fabric-covered elastic to secure the puff, and the plum headband as the finishing accessory. The style suits coily and tightly curled textures particularly well, though the puff size should match density and comfortable tension. A quick refresh may involve reshaping the puff and resetting the headband; full wash-day styling takes longer because shrinkage and final volume should be judged after drying. If the band presses hard behind the ears, change its position or width instead of pulling the puff tighter. At a styling appointment, specify the puff height, how much front texture should remain visible, and the distance you want between the hairline and headband.
Pro tip:
Shape the puff fully before making the final headband placement. This lets you balance the plum band against the finished volume rather than an unfinished stretched shape.
Make It Work for You:
For very dense coils, place the band slightly forward and keep more crown volume behind it. The accessory stays visible without compressing the puff’s upper edge.
Watch Out For:
Do not use the headband to tighten a loose puff. Reset the puff base separately so the accessory does not create unnecessary pressure around the temples.
Emerald Bob Tuck Headband Hairstyle
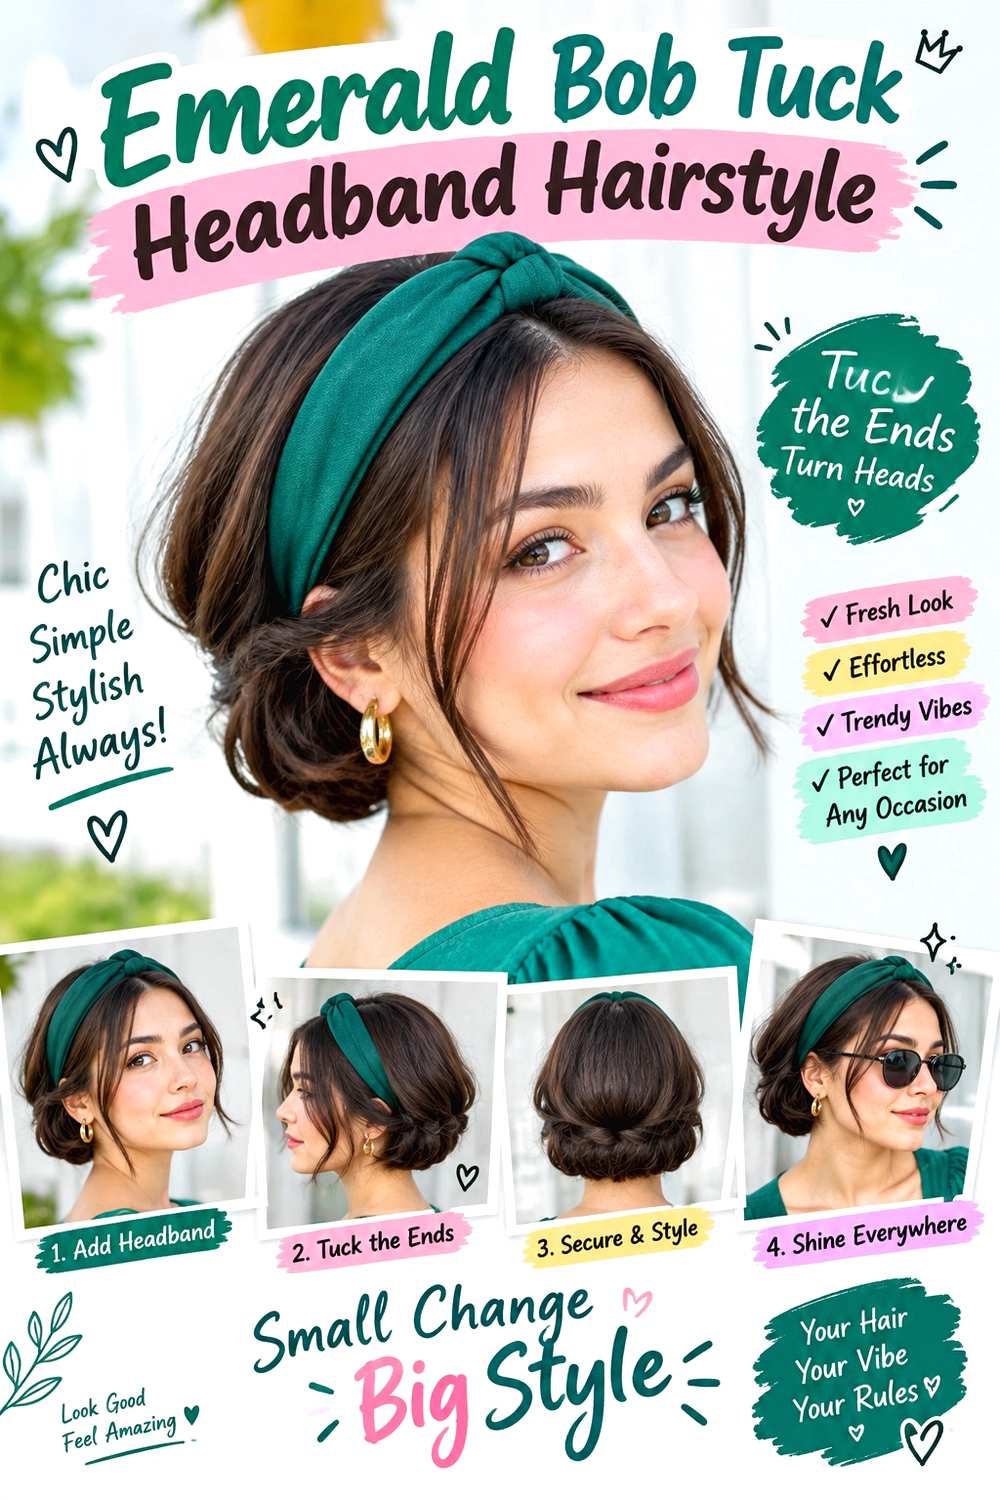
A bob gains a simple graphic detail from an emerald headband when the ends and perimeter stay visible below it. Set a center or soft side part, place the band behind the front hairline, and tuck one or both sides behind the ears if the length allows. Let the bottom edge of the bob remain free rather than sweeping the entire cut backward. Fringe can sit in front of the band, while cheekbone-length pieces may be tucked or left loose depending on the desired frame.
Use light texturizing spray for grip and an emerald headband scaled to the shorter length. Straight, wavy, curly, and coily bobs can all work; the important choice is accessory width. A very bulky band can visually dominate a short cut, while a medium or slim band usually leaves more of the silhouette visible. A quick refresh may take only a few minutes because the headband and ear tuck are easy to reset. Full wash-day styling takes longer only if the bob itself needs drying or definition. At a styling appointment, specify whether the ears should remain exposed and exactly which front layers you want in front of the band.
Pro tip:
Position the headband before making the ear tuck. That way you can see which shorter pieces naturally reach without stretching them backward or disturbing the bob’s outline.
Make It Work for You:
If your bob has a strong curl pattern, leave the ends and temple curls free while using the band only at the crown. The haircut keeps its natural shape.
Watch Out For:
Avoid forcing short face-framing layers behind the ears if they spring free immediately. Leave them intentional rather than adding tension that changes the front silhouette.
Sapphire Half-Up Twist Headband Hairstyle
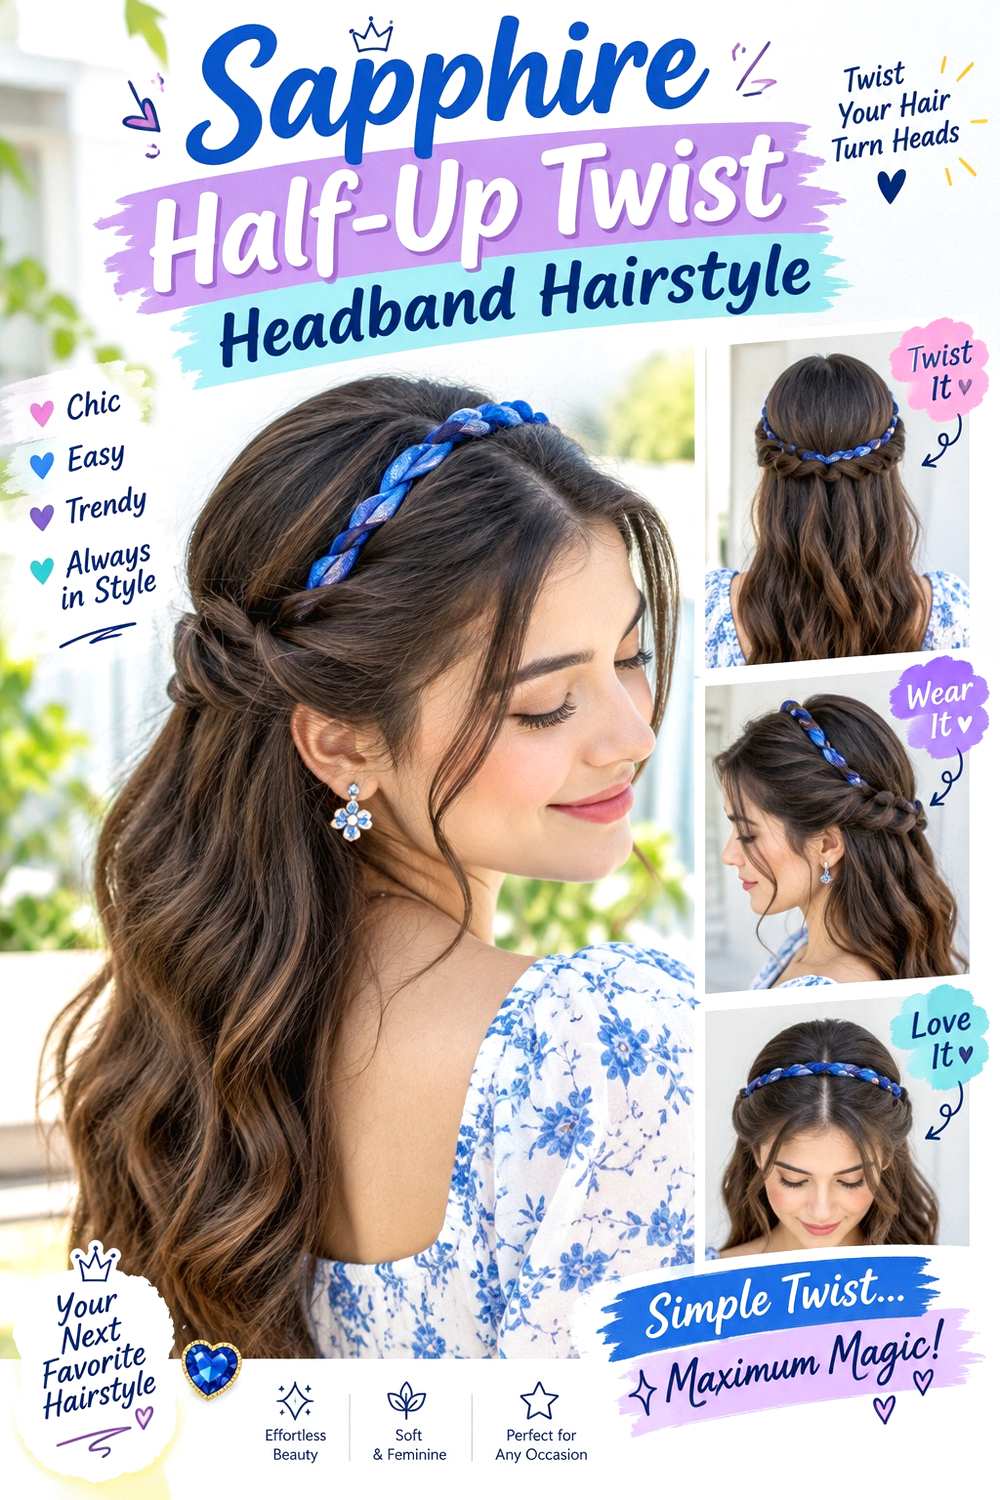
A half-up twist behind a sapphire headband creates two separate layers of structure: the band frames the front, while the twist controls the upper back. Place the headband just behind the hairline, gather small sections from above the ears, twist them toward the center, and join them at the rear crown. Leave the lower lengths loose with straight, wavy, curly, or coily movement. Fringe and shorter face-framing pieces can remain in front of the band.
Use a mini elastic to secure the twist, the sapphire headband for the front accent, and light texturizing spray where grip is needed. Medium and long hair work best, though a lob can support a compact twist if the side sections reach comfortably. A quick refresh usually means retwisting one side and resetting the headband; full wash-day styling takes longer when the loose lengths also need drying or definition. If the twist sits too close to the band, lower the rear anchor rather than pushing the accessory forward. At a styling appointment, specify the twist thickness, rear-crown meeting point, and how much space you want between the headband and half-up section.
Pro tip:
Set the headband first, then build the half-up twist behind it. This helps you judge the spacing and prevents the rear section from crowding the accessory.
Make It Work for You:
For fine hair, use narrow side sections and keep most of the length loose. The sapphire band provides color while the smaller twist preserves overall body.
Watch Out For:
Do not make the twist extremely tight just to stop it touching the band. Move its anchor lower so both elements can sit securely without competing.
Ruby Low Bun Headband Hairstyle
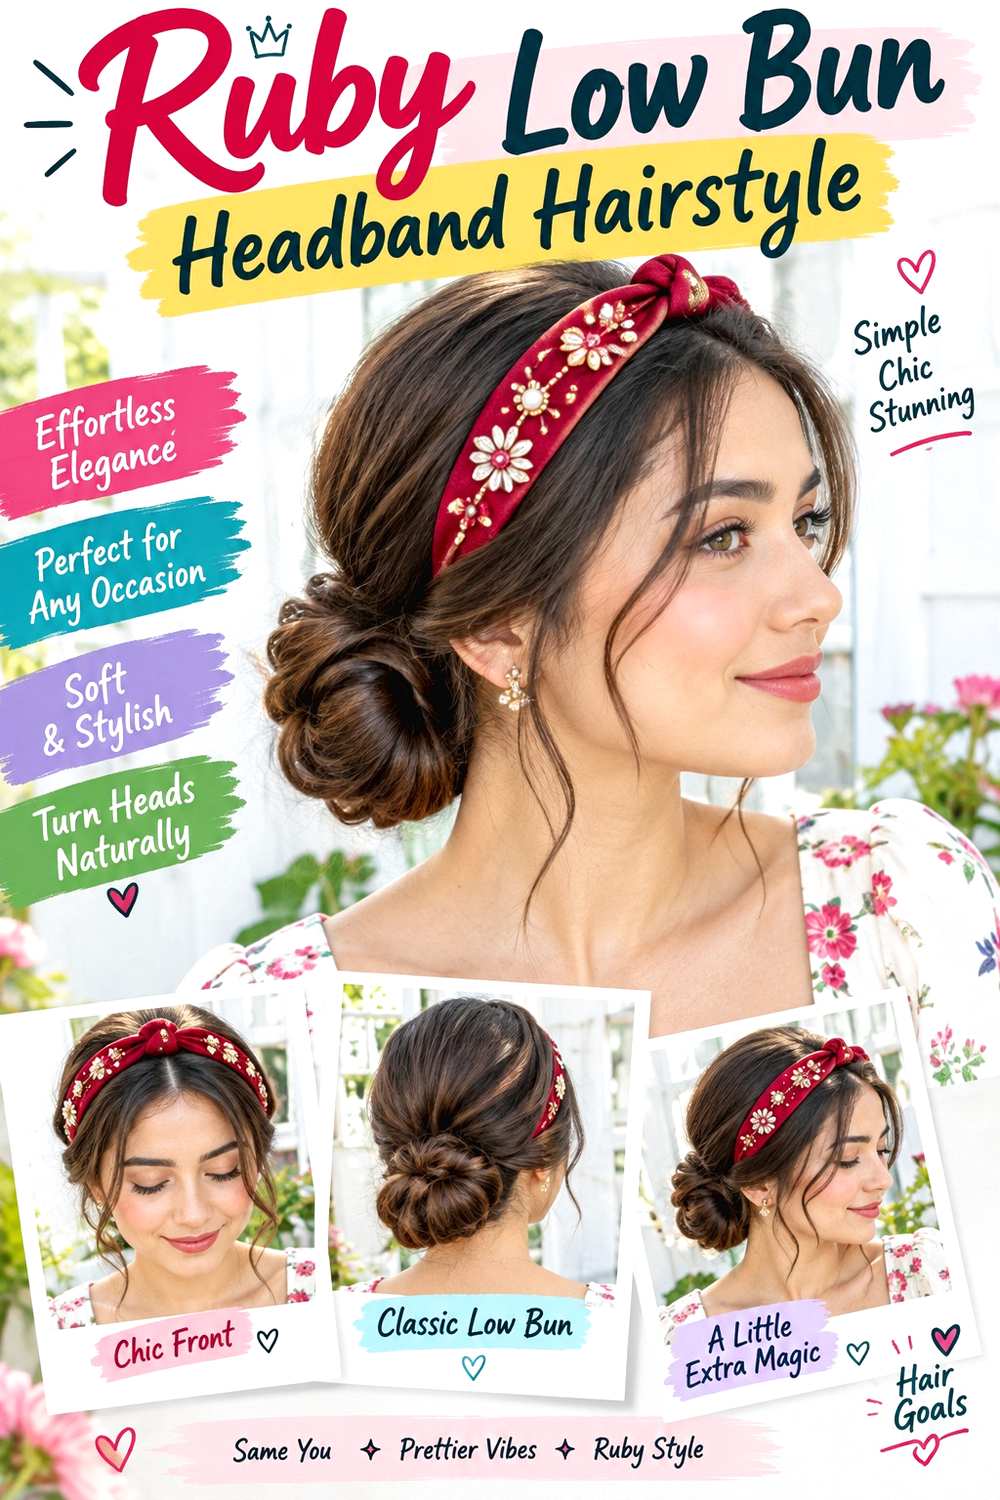
A ruby headband brings color to a low bun while keeping the updo itself simple. Position the band behind a center or side part, gather the hair at the nape, and form a compact coil or folded bun. Keep the crown smooth or softly lifted between the accessory and bun, and leave short face-framing sections in front if you prefer less tension around the hairline. The bun can sit centered or slightly off-center, but it should remain separate from the headband.
Use a fabric-covered elastic to establish the low base, bobby pins to secure the bun, and the ruby headband as the visible finishing detail. Medium and long hair are easiest because there is enough length to build the coil. A quick refresh may involve replacing one loose pin and reseating the band; full wash-day styling takes longer because the bun has to be rebuilt after the hair is prepared. If the accessory slides backward, correct its placement rather than tightening the bun. Dense hair may feel more comfortable in a broad, flatter coil. At a styling appointment, specify bun width, nape height, and how much crown volume should remain between the red-toned band and the updo.
Pro tip:
Finish the low bun before making the final headband adjustment. Once the back weight is settled, you can position the band without accidentally flattening the crown.
Make It Work for You:
For very dense hair, spread the bun wider along the nape rather than stacking it outward. The ruby headband then balances the shape without adding more height.
Watch Out For:
Do not place the band so far back that it presses into the bun’s upper edge. Leave enough crown space for both elements to move independently.
Amethyst Side-Part Headband Hairstyle
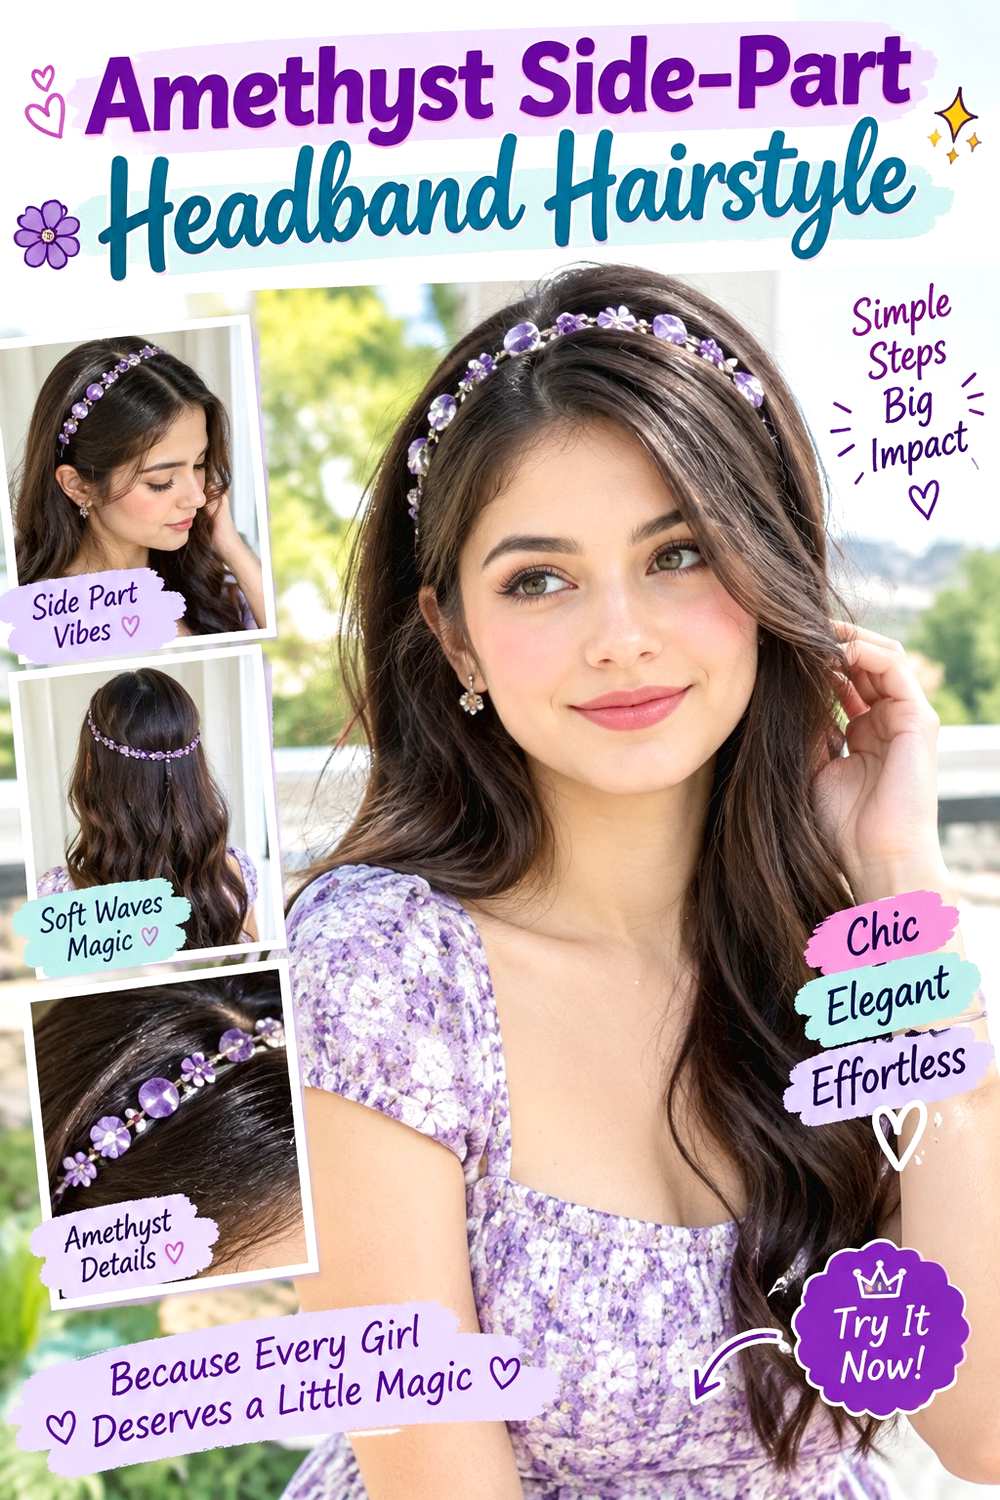
A deep side part and amethyst headband create asymmetry without requiring an updo. Part the hair off center, leave the fuller front section softly swept, and position the band slightly behind the part so the heavier side keeps some movement. The opposite temple can be tucked behind the ear or kept close to the head. Loose lengths may remain straight, wavy, curly, or coily, and shorter layers can follow the part naturally rather than being trapped underneath the band.
Use light styling cream to control flyaways and the amethyst headband as the accessory. This design works from bob length through long hair because only the front placement changes. A quick refresh means redefining the side part and resetting the band; full wash-day styling takes longer if the loose texture also needs shaping. If the fuller side keeps slipping under the band, leave more of it in front instead of adding pressure. At a styling appointment, show exactly how deep you want the part and how much front volume should stay visible before the accessory begins. Those two details determine the asymmetrical balance more than the width of the headband.
Pro tip:
Follow the natural direction of the fuller side when placing the band. Working with the growth pattern helps the front sweep stay smooth without repeated repositioning.
Make It Work for You:
If your front layers are short, keep them entirely in front of the amethyst band. The side-part shape remains clear without forcing pieces that will not stay tucked.
Watch Out For:
Avoid flattening the fuller side with the band just to make the accessory symmetrical. Preserve the parting and let the front remain intentionally unbalanced.
Deep Teal Loose Braid Headband Hairstyle
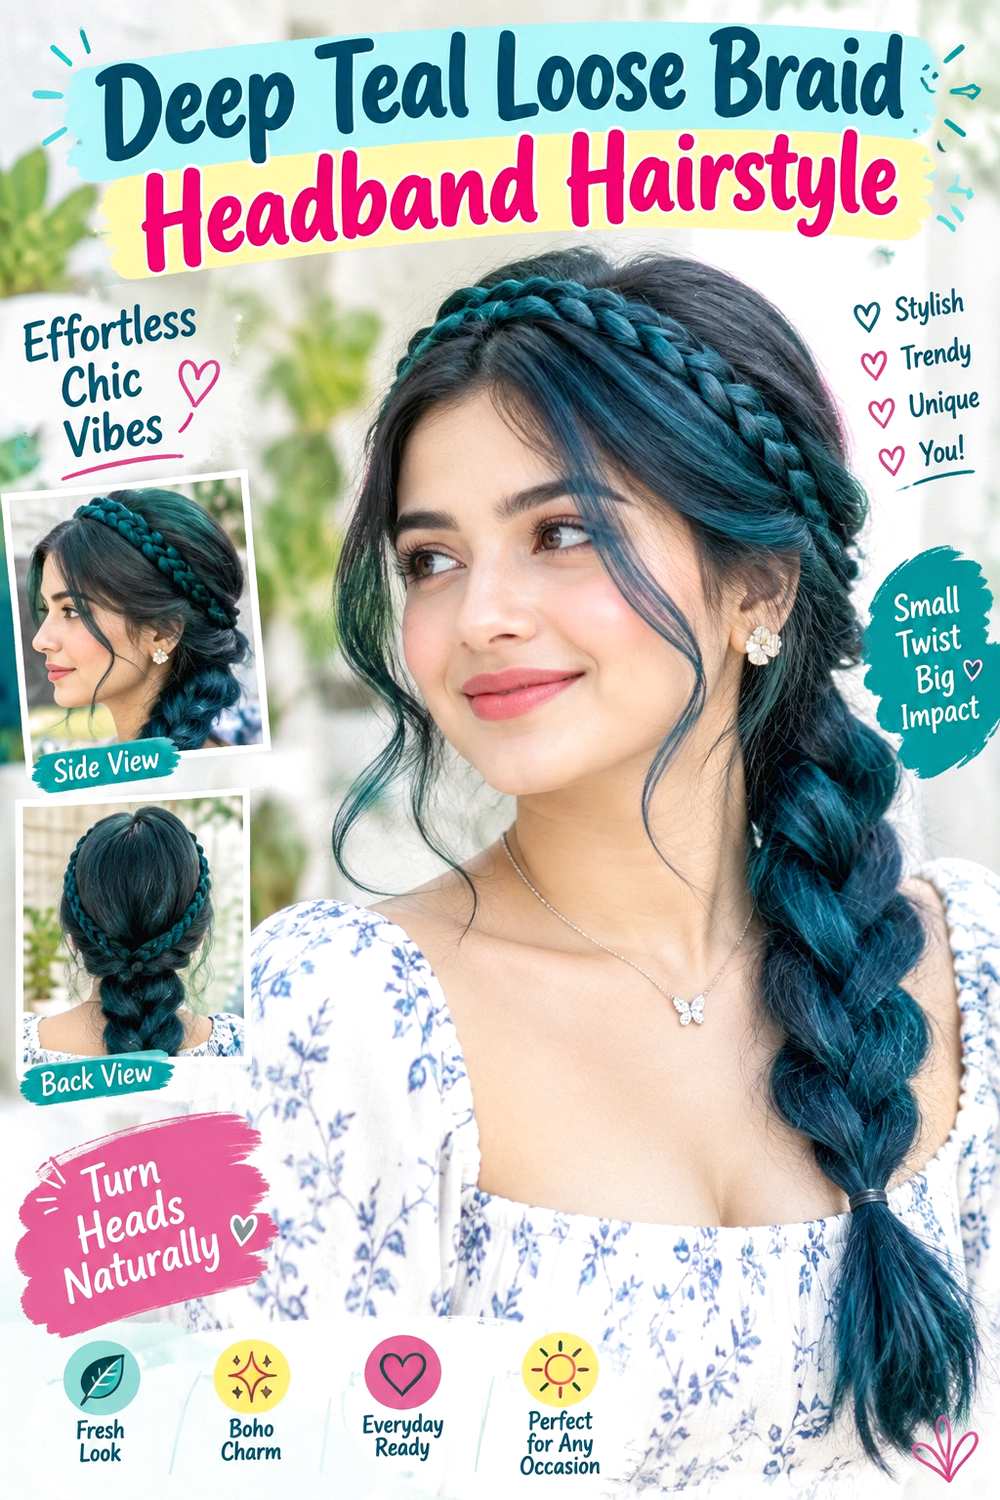
A deep teal headband adds a clean upper line to a loose braid that carries texture through the lower length. Position the headband behind a center or side part, gather the hair low, and create a relaxed three-strand braid beginning at the nape or over one shoulder. Keep the braid edges gently expanded rather than heavily pulled apart, and leave selected face-framing pieces outside the band if they soften the front. The contrast between a structured accessory and softer braid is the main visual feature.
Use light texturizing spray for grip, a mini elastic at the braid end, and the deep teal headband at the crown. Medium and long hair provide enough length for the braid to remain visible. A quick refresh may involve tightening the end, smoothing the upper section, and resetting the band; full wash-day styling takes longer when the texture also needs drying first. If the braid becomes too loose, rebuild it rather than relying on the headband to make the style feel secure. At a styling appointment, specify braid width, shoulder placement if worn to one side, and how much face framing should remain in front of the band.
Pro tip:
Position the headband before loosening the braid edges. Once the front is balanced, you can adjust the braid width without repeatedly disturbing the crown.
Make It Work for You:
For lower-density hair, keep the braid fairly compact and expand only the middle sections slightly. The teal band still adds presence while the braid keeps a fuller outline.
Watch Out For:
Do not over-expand sparse braid ends. Keep the lower sections tighter so the finish stays controlled rather than becoming thin and uneven near the elastic.
Garnet High Pony Headband Hairstyle
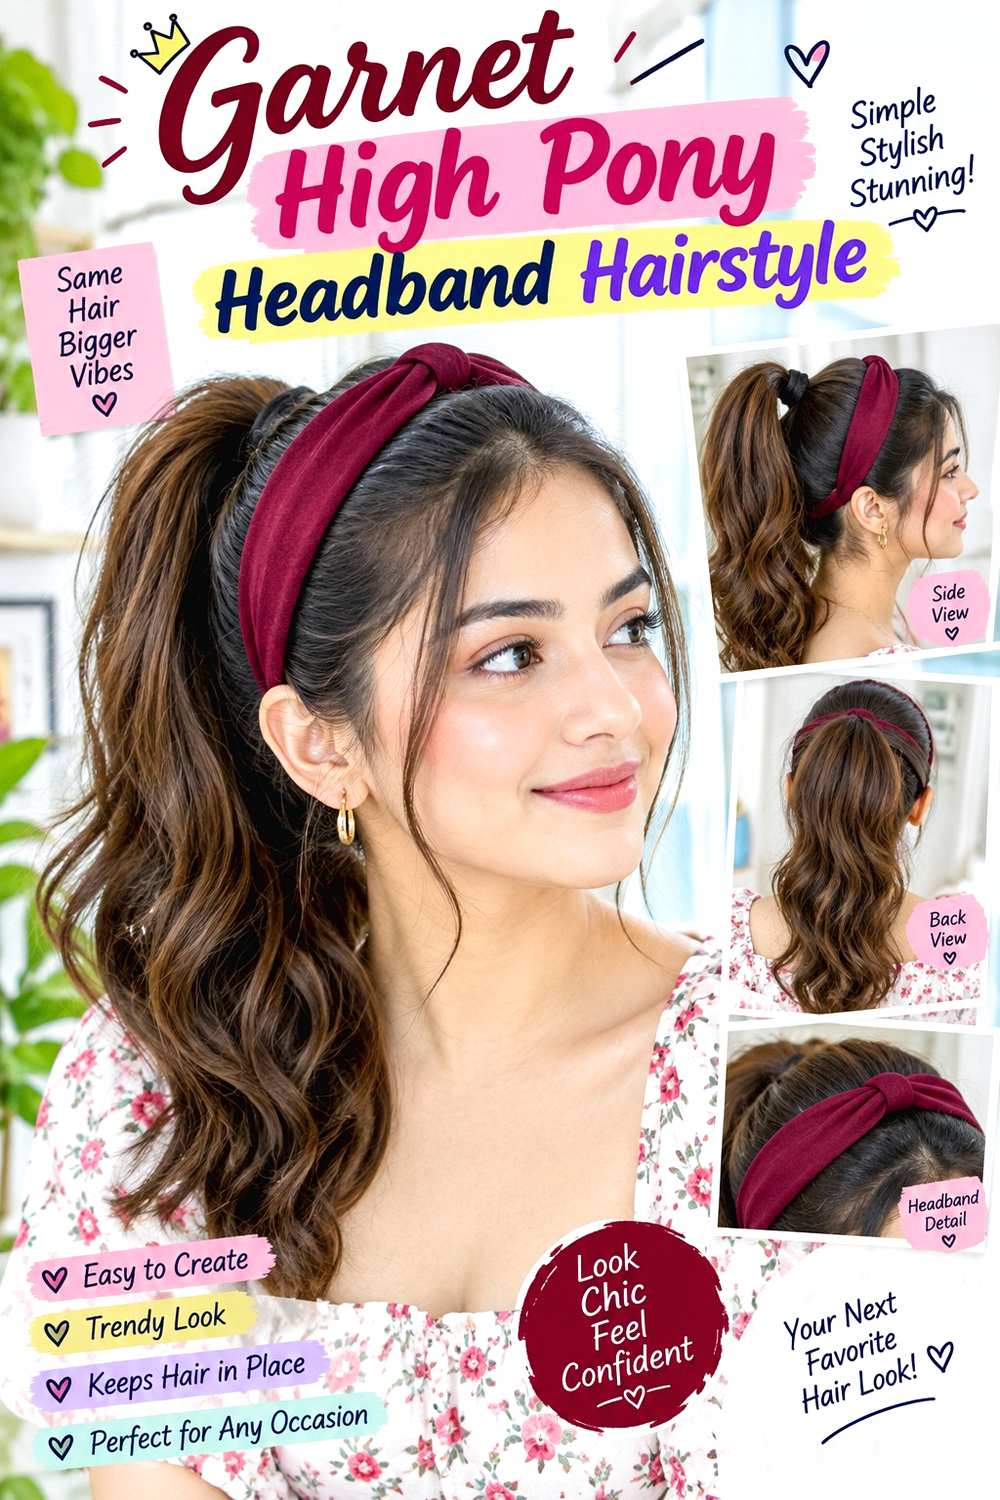
A garnet headband paired with a high ponytail creates height at the back while keeping the front clearly framed. Place the band behind the hairline, then gather the lengths into a ponytail at the crown or slightly below it. Keep a little space between the accessory and ponytail base so the crown does not feel compressed. Existing fringe or shorter front layers can remain in front of the band, while the ponytail itself may be straight, wavy, curly, or coily.
Use a fabric-covered elastic to secure the ponytail, the garnet headband for the color accent, and light styling gel only where surface flyaways need control. Medium and long hair work best because the tail stays visible above the back of the head. A quick refresh generally means reseating the band and tightening the ponytail only if its base has genuinely loosened; full wash-day styling takes longer if the tail also needs definition or reshaping. If the temples feel tight, lower the ponytail slightly rather than pushing the band forward. At a styling appointment, specify the ponytail height and how much crown space should remain behind the headband.
Pro tip:
Set the ponytail with your head upright before making the final headband placement. This helps you judge real tension around the temples and crown.
Make It Work for You:
For curly or coily hair, keep the ponytail full and textured rather than smoothing its lengths. The garnet band can frame the front while the tail preserves natural volume.
Watch Out For:
Avoid placing the ponytail base directly against the back edge of the headband. Crowding the two anchors can create pressure and flatten the crown.
Plum Soft Updo Headband Hairstyle
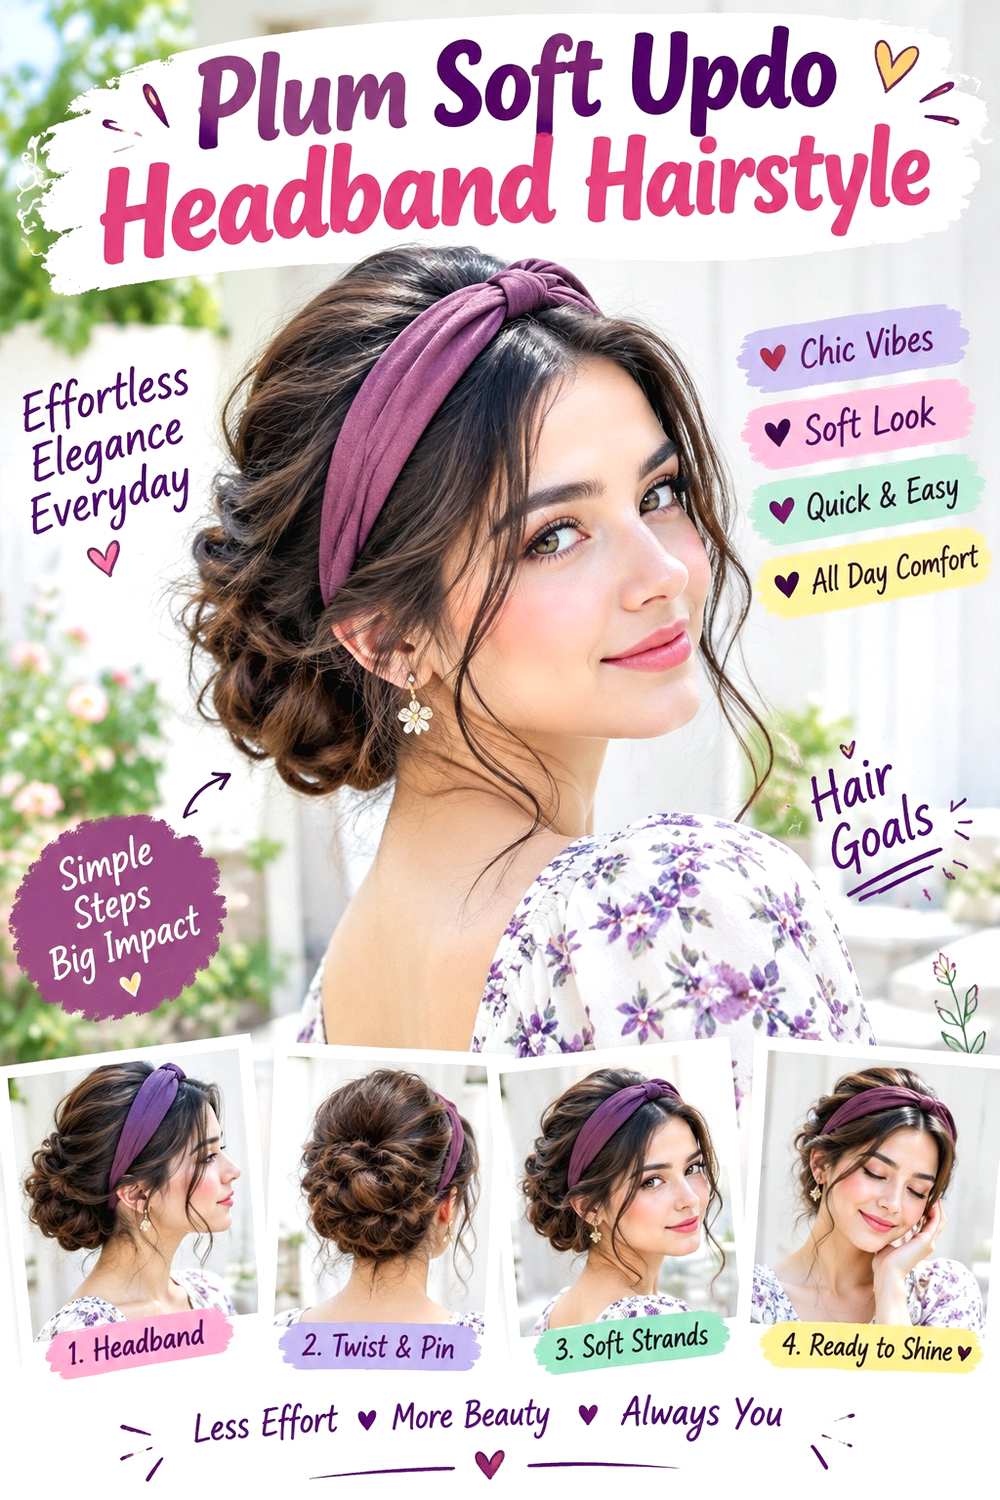
A plum headband can frame a softly pinned updo without making the overall shape feel overly structured. Set the band behind the hairline, gather the lengths loosely toward the lower back of the head, and form a relaxed twist or compact bun. Keep gentle crown fullness between the band and updo, and release only a few deliberate face-framing pieces. The finish can retain natural waves, curls, or slight irregularity rather than being smoothed into a rigid surface.
Use light texturizing spray to provide grip, bobby pins to build the updo, and the plum headband as the front accent. Medium and long hair give the easiest amount of length to fold and pin. A quick refresh may involve replacing one pin and correcting the band; a full wash-day style takes longer when natural texture first needs defining. If the updo shifts as a whole, rebuild the pins rather than using the headband to press the crown backward. At a styling appointment, specify the updo height, how much softness should remain at the crown, and which pieces you want loose around the face. A stable center should come before the deliberately relaxed finish.
Pro tip:
Secure the updo completely before loosening crown sections around the plum band. This keeps the soft finish intentional instead of weakening the back anchor.
Make It Work for You:
For fine hair, keep the updo compact and create softness mainly around the crown and temples. The headband adds color without requiring an oversized back shape.
Watch Out For:
Do not pull out random sections to make the updo look relaxed. If the center loosens, rebuild the anchor before restoring the softer outer texture.
Emerald Wide Band Natural Texture Headband Hairstyle
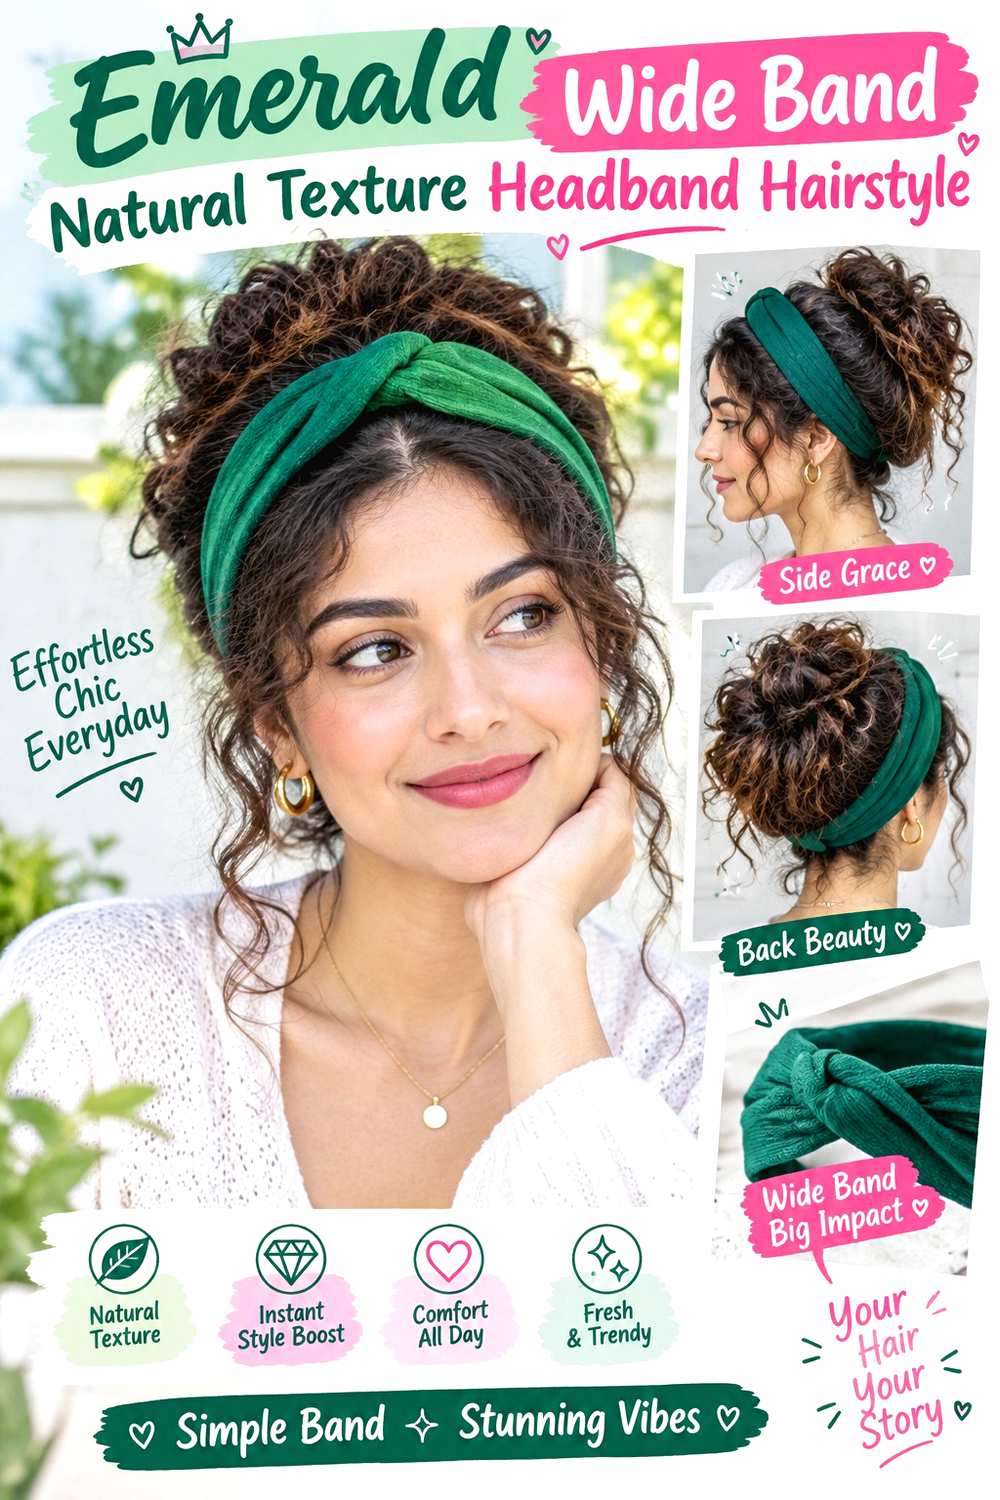
A wide emerald band makes a bold color statement while leaving natural texture fully visible behind it. Position the band near the hairline or slightly farther back depending on how much front texture you want to show. Straight, wavy, curly, or coily hair can remain loose, with the crown allowed to rise naturally behind the wider accessory. Fringe may sit in front, while longer face-framing pieces can either stay loose or move behind the band. The key is keeping the band proportional to the amount of visible hair.
Use the wide emerald headband as the main accessory and lightweight leave-in conditioner to keep textured lengths manageable without coating the roots heavily. Medium and long hair show the contrast clearly, though a bob can also support a wide band if the ends remain visible. A quick refresh usually means reshaping the front and resetting the accessory; full wash-day styling follows the needs of your natural texture rather than the headband itself. If the band flattens the crown too much, move it slightly forward instead of compressing more hair beneath it. At a styling appointment, specify how much front texture should remain visible and whether crown volume should rise immediately behind the band.
Pro tip:
Judge the wide band from the side as well as the front. The profile should leave enough crown height behind it to avoid a flattened transition.
Make It Work for You:
If your hair is lower density, wear the wide band closer to the hairline and preserve more volume behind it. The emerald color stays strong without covering too much hair.
Watch Out For:
Avoid tucking every face-framing piece under a wide band. Leaving selected sections free can prevent the accessory from visually overwhelming the front of the hairstyle.
Sapphire Thin Band Layered Headband Hairstyle
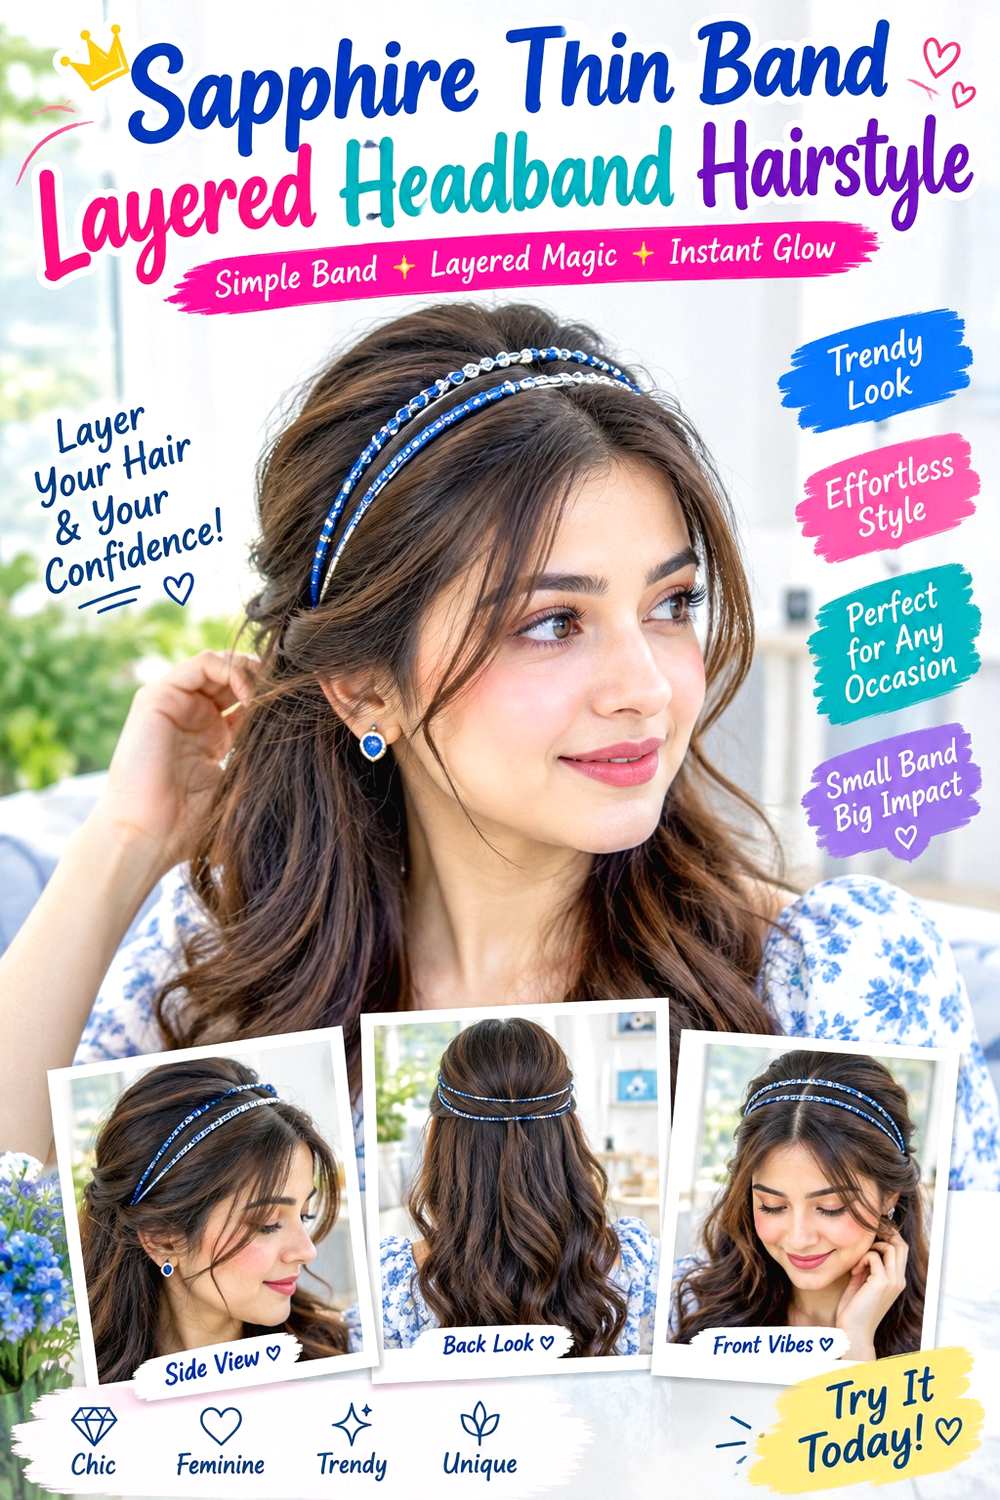
A thin sapphire headband works well with layered hair because it adds color without covering the movement created by shorter and longer pieces. Place the narrow band behind the hairline, then let face-framing layers fall naturally around the cheeks, jaw, or collarbone. A center part shows the layers evenly, while a side part lets one front section sweep more prominently. Keep the ends loose and mobile rather than tucking every layer behind the accessory.
Use the thin sapphire headband for the accent and lightweight smoothing cream only on flyaways that distract from the layered shape. Medium and long layered cuts show the most movement, although a layered lob can use the same placement. A quick refresh may require little more than resetting the part, separating the front layers, and repositioning the band. Full wash-day styling takes longer if the layers also need their usual blow-dry, curl, or texture routine. If the thin band disappears into dense hair, move it slightly forward rather than forcing the surrounding sections flat. At a styling appointment, point to the exact face-framing pieces you want left in front and explain how much crown volume you prefer behind the band.
Pro tip:
Separate the shortest face-framing layers before adding the thin band. This prevents them from being trapped unevenly and keeps their intended movement around the face.
Make It Work for You:
If your layers are very long, leave only the shortest front pieces outside the band. The sapphire line remains visible while the longer layers flow cleanly behind it.
Watch Out For:
Do not repeatedly tuck short layers under a thin band if they spring free. Let them remain intentional instead of disturbing the accessory every few minutes.
Conclusion
Jewel tone headband hairstyle ideas can be sleek, textured, braided, curled, coiled, tied into a ponytail, or built around a soft updo. A wide band creates more color and visual weight, while a thin band lets layers and texture remain dominant. Short hair often benefits from compact placement that preserves the perimeter, whereas medium and long hair give more options for buns, braids, and ponytails. Density affects accessory scale, and natural texture influences how much crown volume remains behind the band. Center parts create balance, while side parts add directional movement. Choose a style by considering comfort at the temples, how much face framing you want, your usual wash-day effort, and whether the headband can stay secure without flattening the shape you like.
Before Your Salon Visit
Choose one or two favorite references and point out the exact headband width, placement, parting, crown volume, face-framing pieces, texture, and finish you want. Discuss your natural texture, density, face shape, preferred length, upkeep, and everyday styling routine so the design can be adapted realistically. Because jewel tone headbands create temporary styles, focus on accessory comfort, grip, and placement rather than requesting a haircut unless you already want one. Save a reference that clearly shows the front and side whenever possible.
FAQs
Do Jewel Tone Headbands Work With Fine or Lower-Density Hair?
Yes. Lighter or slimmer headbands often preserve more crown volume on lower-density hair, but a wider band can also work when positioned closer to the hairline. Avoid pressing the crown flat simply to secure the accessory. Placement and weight usually matter more than the color or fabric itself.
Can Curly or Coily Hair Wear Wide Jewel Tone Headbands?
Yes. Wide bands can frame curls and coils while leaving volume visible behind them. Position the accessory after judging the hair’s dry shape and shrinkage, and avoid dragging it through finished texture. If the crown becomes compressed, move the band forward or reduce how much hair sits underneath it.
How Do I Stop a Headband From Slipping Back?
Start by checking placement rather than simply increasing pressure. Light texture at the contact area can improve grip, while excess smoothing product may make some bands slide. The headband should sit securely without pinching behind the ears. If it repeatedly shifts, a different width, lining, or shape may suit your hair better.
Do Jewel Tone Headband Hairstyles Require Heat Styling?
No. Headbands work with straight, wavy, curly, and coily hair in its natural styled state. Heat is optional when you specifically want shaped waves or a smoother finish. If you use hot tools, include suitable heat protection and treat that process as a separate styling choice rather than a requirement for the accessory.