10 Face-Framing Layered Cuts for Long Hair That Look Full All Day
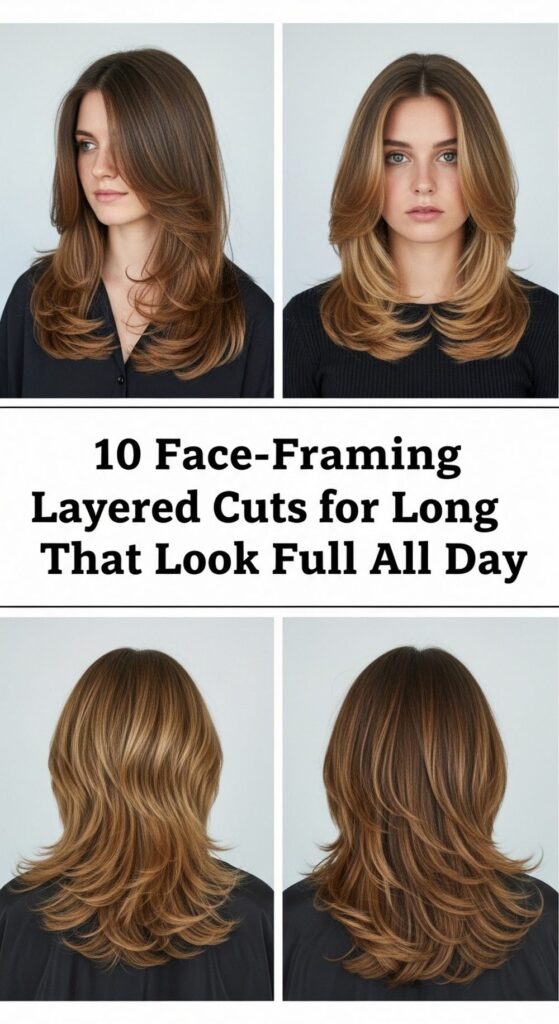
Face-framing layers are one of the easiest ways to make long hair look full, lifted, and “done” without a ton of effort. This list is packed with layered cuts that keep your length while adding shape around your face and movement through the mid-lengths and ends. These ideas work beautifully on straight, wavy, and softly curly hair, and flatter most face shapes when you adjust the starting point of the layers. You’ll only need simple tools you probably already own: a blow-dryer, round or paddle brush, a large curling iron or wand, a few clips, and lightweight volumizing products. Use a heat protectant every time you style, focus your root-lifter at the crown, and you’ll get long hair that looks full from morning to night.
Quick List
- Soft Curtain Layers with Long Face Frame
- Rounded U-Cut with Swoopy Front Layers
- Long Shag Layers with Jaw-Softening Pieces
- Feathered V-Cut with Flipped Face Frame
- Money-Piece Layers for Extra Front Volume
- Blended Front Layers with Wispy Ends
- Rounded Volume Layers with Side Part
- Long Layers with Soft Bangs and Face Frame
- Angel-Wing Face-Framing Layers
- Long Layers with Flipped, Bouncy Ends
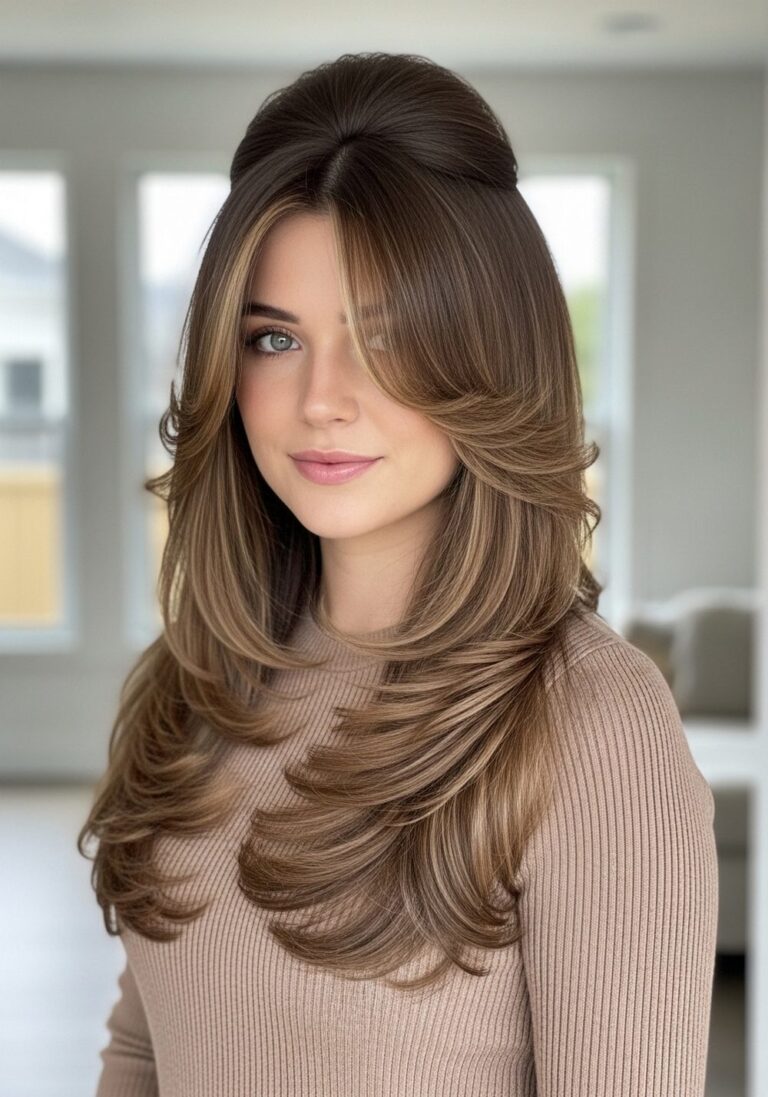
1. Soft Curtain Layers with Long Face Frame

Soft curtain layers with a long face frame give you that effortless, full-looking finish without sacrificing length. The layers start around the cheekbones or just below, then blend down into the rest of your hair so everything moves together instead of hanging flat. The curtain effect opens up your face and looks great with middle or slightly off-center parts. This cut feels romantic but still polished enough for work, dates, or everyday wear. It’s especially helpful if your ends feel thin or stringy. Pro tip: ask your stylist to keep the shortest front pieces below your nose if you want maximum versatility for up-dos and ponytails.
How To Style
- Apply volumizing mousse to damp roots and mid-lengths.
- Blow-dry with a round brush, rolling the front pieces away from your face.
- Flip your head upside down for a quick blast of air at the roots.
- Finish with a light texturizing or flexible-hold spray.
Best For
Oval, heart, and round faces; straight or softly wavy hair.
Tools & Products
- Heat protectant spray
- Medium round brush
- Blow-dryer with nozzle
- Lightweight volumizing mousse
- Flexible-hold hairspray or texturizing spray
2. Rounded U-Cut with Swoopy Front Layers
A rounded U-cut with swoopy front layers keeps your length but builds fullness through the ends and sides. The back hem is slightly longer in the center, curving up at the sides so your hair never looks flat or heavy at the bottom. Swoopy front layers start around the cheekbones, then sweep away from your face to highlight your features and give your hair that “blowout” feel. This cut works perfectly if your hair tends to fall limp when it’s all one length. Pro tip: ask for soft, blended layers rather than choppy ones if you want your hair to look thick and smooth.
How To Style
- Apply root-lifting spray to the crown and a light cream through the lengths.
- Blow-dry in sections with a round brush, lifting at the roots and rolling the ends under.
- Wrap front sections around a large curling iron away from your face, then brush through.
Best For
Oval, long, and heart faces; straight or wavy hair.
Tools & Products
- Root-lifting spray
- Large round brush
- Blow-dryer
- Large-barrel curling iron or hot brush
- Light smoothing cream
3. Long Shag Layers with Jaw-Softening Pieces

Long shag layers bring airy volume and movement while leaving your length intact. The layering starts around the jawline with face-framing pieces that soften sharp angles and help fuller cheeks look lifted. Through the back, the layers are staggered so your hair always looks like it has natural shape, even when it air-dries. This style has a relaxed, slightly tousled vibe that’s perfect for casual days, music nights, or weekends. It’s especially great if your hair tends to puff at the ends but fall flat at the roots. Pro tip: embrace a little natural bend or wave instead of fighting for pin-straight hair; this makes the shag look intentional and full.
How To Style
- Apply a curl cream or wave foam to damp hair, scrunching through the mid-lengths.
- Rough-dry with the blow-dryer or let air-dry for more natural texture.
- Touch a few face-framing pieces with a curling wand if needed, alternating directions.
Best For
Round, square, and heart faces; wavy or lightly curly hair.
Tools & Products
- Wide-tooth comb
- Wave foam or curl cream
- Blow-dryer with diffuser (optional)
- 1–1.25″ curling wand
- Lightweight texturizing spray
4. Feathered V-Cut with Flipped Face Frame

A feathered V-cut creates a soft point at the back while keeping the layers light and floaty. At the front, face-framing pieces are cut to gently flip away from your cheeks, which visually opens your features and makes the overall shape look fuller. The feathering at the ends prevents the hair from feeling heavy and stiff, so it swishes when you move. This cut is ideal for straight or slightly wavy hair that needs lift without losing smoothness. It’s a great choice for both office days and evenings out because it holds its shape well. Pro tip: keep the shortest front layer around your chin if you want lifting without committing to bangs.
How To Style
- Apply a volumizing spray to damp roots and a smoothing serum to the ends.
- Blow-dry with a round brush, rolling the front pieces away from your face.
- Flip out the very ends with a flat iron or curling iron, then mist with light-hold spray.
Best For
Oval, heart, and long faces; straight or slightly wavy hair.
Tools & Products
- Blow-dryer
- Medium round brush
- Heat protectant
- Lightweight smoothing serum
- Flexible-hold hairspray
5. Money-Piece Layers for Extra Front Volume
Money-piece layers combine brightened front strands (if you color your hair) with smart layering around the face to create a fuller, lifted look. The layers start around the cheekbones and blend into long lengths, drawing the eye to the front while keeping the back looking thick. Even without color, this cut makes the front of your hair look bouncy and “done,” which is perfect for video calls and photos. It’s especially flattering if you like to wear your hair down most days. Pro tip: when you style, focus extra lift and curl only on the front third of your hair; it instantly makes everything look fresher and fuller.
How To Style
- Apply volumizing mousse from roots to mid-lengths, focusing on the front sections.
- Blow-dry with a round brush, over-directing the front pieces away from your face.
- Use a large curling iron on the front layers only, then brush them into soft waves.
Best For
Heart, round, and oval faces; straight or wavy hair.
Tools & Products
- Volumizing mousse
- Round brush
- Blow-dryer
- Large-barrel curling iron
- Light shine spray
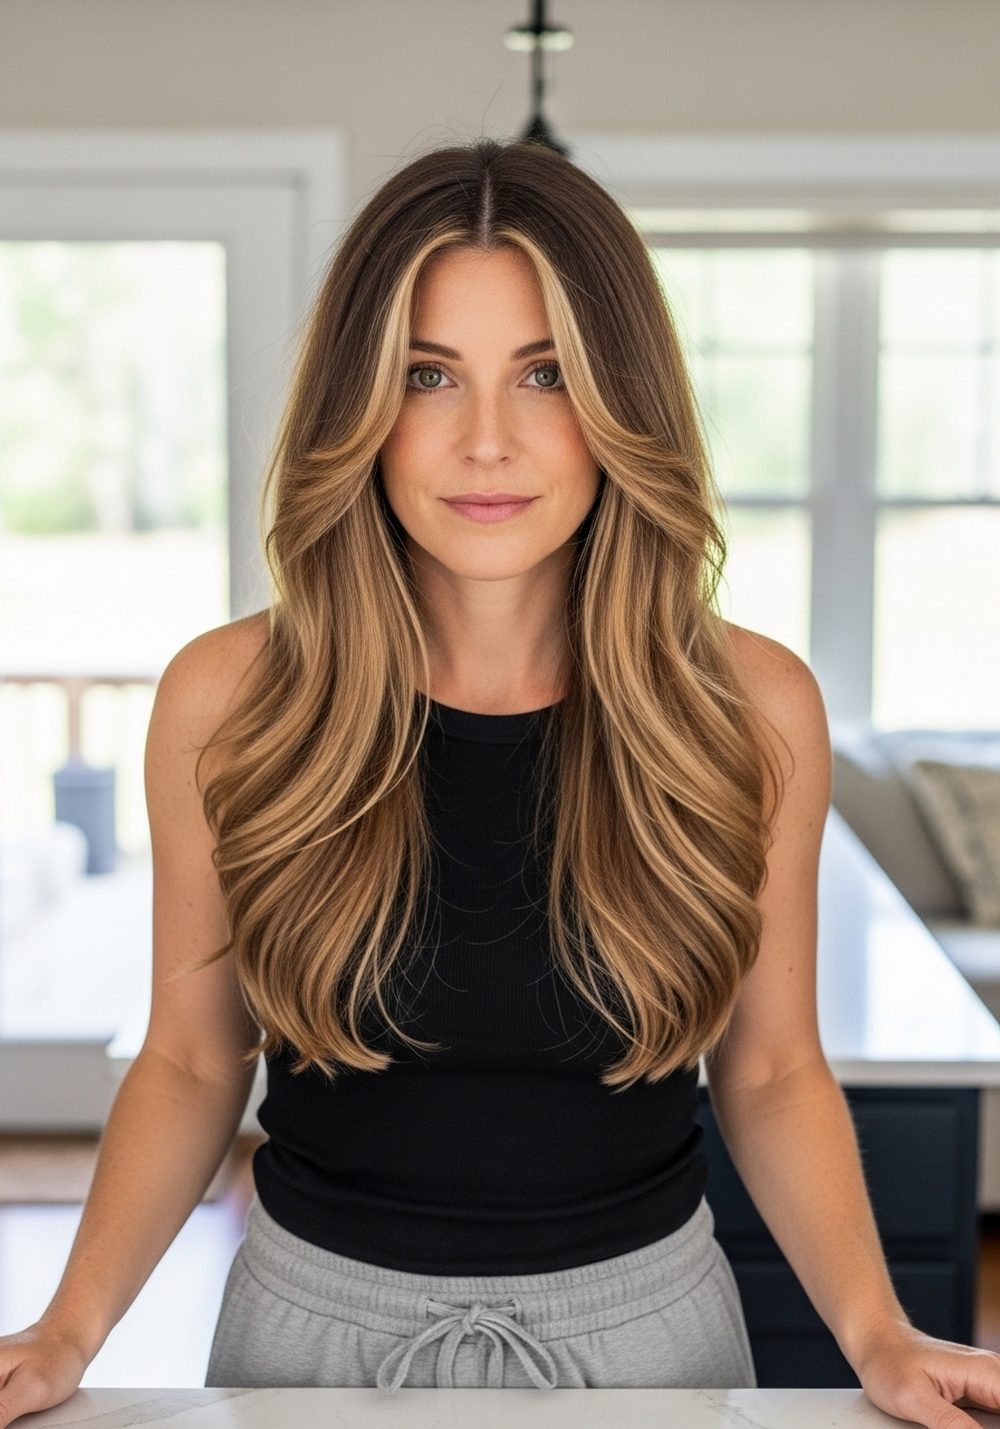
6. Blended Front Layers with Wispy Ends

Blended front layers with wispy ends give long hair a soft, airy outline that still looks full. The layers around your face are subtle and well-blended, tapering gently into the rest of your hair so there’s no harsh step. Wispy ends keep the shape light, which helps your hair move and swing instead of hanging heavy. This cut is great if you’re worried about layers making your hair look thin, because everything is soft and gradual. It’s perfect for everyday life, from school runs to casual dinners. Pro tip: ask your stylist to keep the bulk of the weight around the mid-lengths so the wispy tips don’t feel sparse.
How To Style
- Apply a lightweight thickening spray to damp hair.
- Blow-dry with a paddle brush, stretching the hair smooth while lifting at the roots.
- Add a few loose waves through the mid-lengths with a large iron, leaving the last inch straight.
Best For
Round, square, and oval faces; straight or slightly wavy hair.
Tools & Products
- Heat protectant
- Paddle brush
- Blow-dryer
- Thickening spray
- Large-barrel curling iron or wand
7. Rounded Volume Layers with Side Part

Rounded volume layers with a side part are made to cheat fuller-looking hair. The layers are cut in soft tiers that follow the shape of your head, with slightly shorter pieces around the crown and face. A deep or medium side part instantly adds height on top and lets the hair fall over one side, which makes it look thicker. This style is perfect for fine or medium hair that collapses quickly. It’s polished enough for work but still simple to style before a busy day. Pro tip: switch your side part from time to time to keep your roots from going flat in one direction.
How To Style
- Apply root-lifting spray at the crown and a light foam through the lengths.
- Blow-dry with a round brush, over-directing hair opposite your chosen part.
- Let hair cool in that direction, then flip to your usual side and tousle with your fingers.
Best For
Oval, long, and heart faces; fine to medium straight or wavy hair.
Tools & Products
- Root-lifting spray
- Round brush
- Blow-dryer
- Lightweight styling foam
- Dry texturizing spray
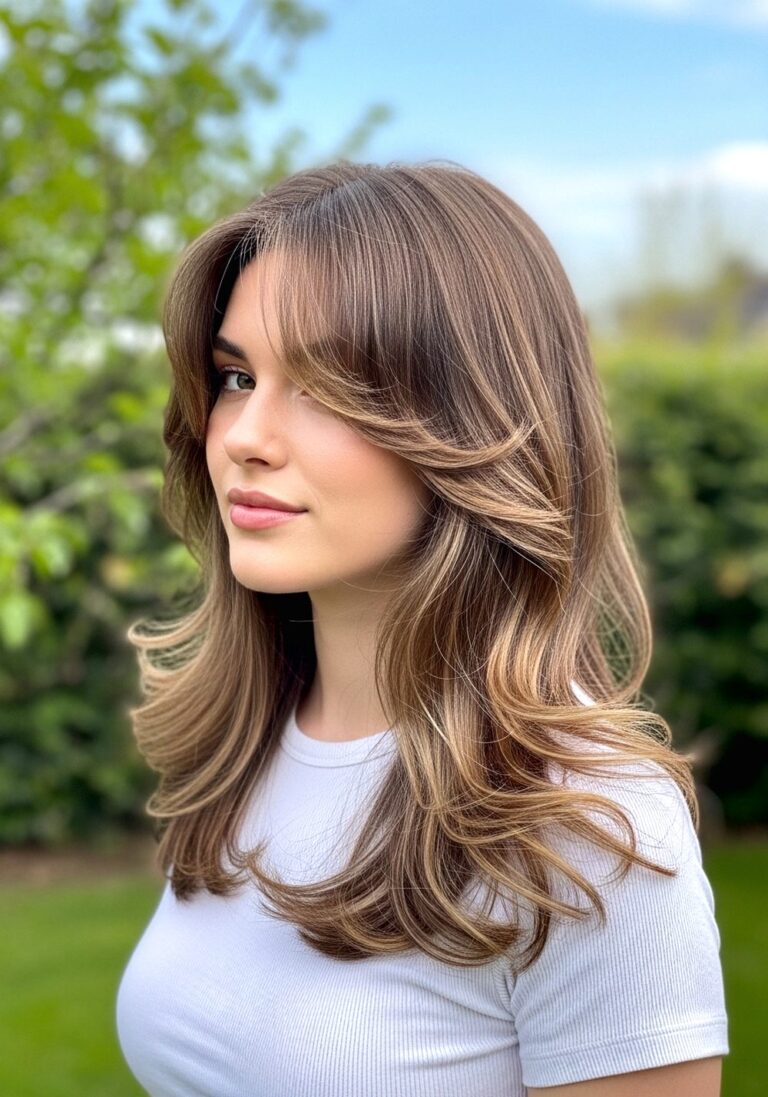
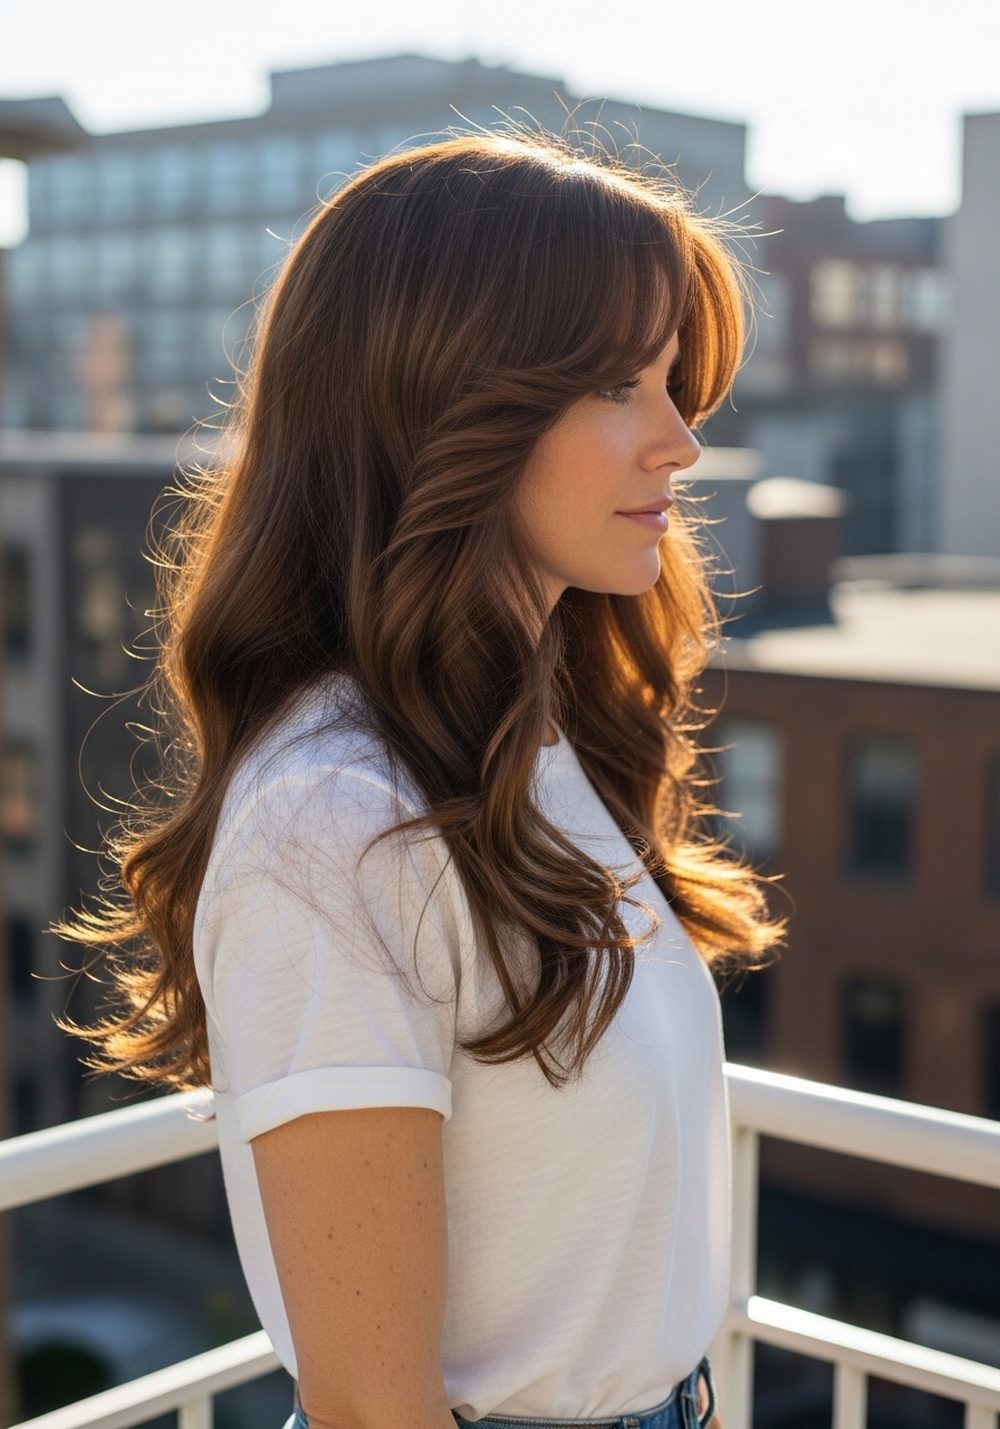
8. Long Layers with Soft Bangs and Face Frame
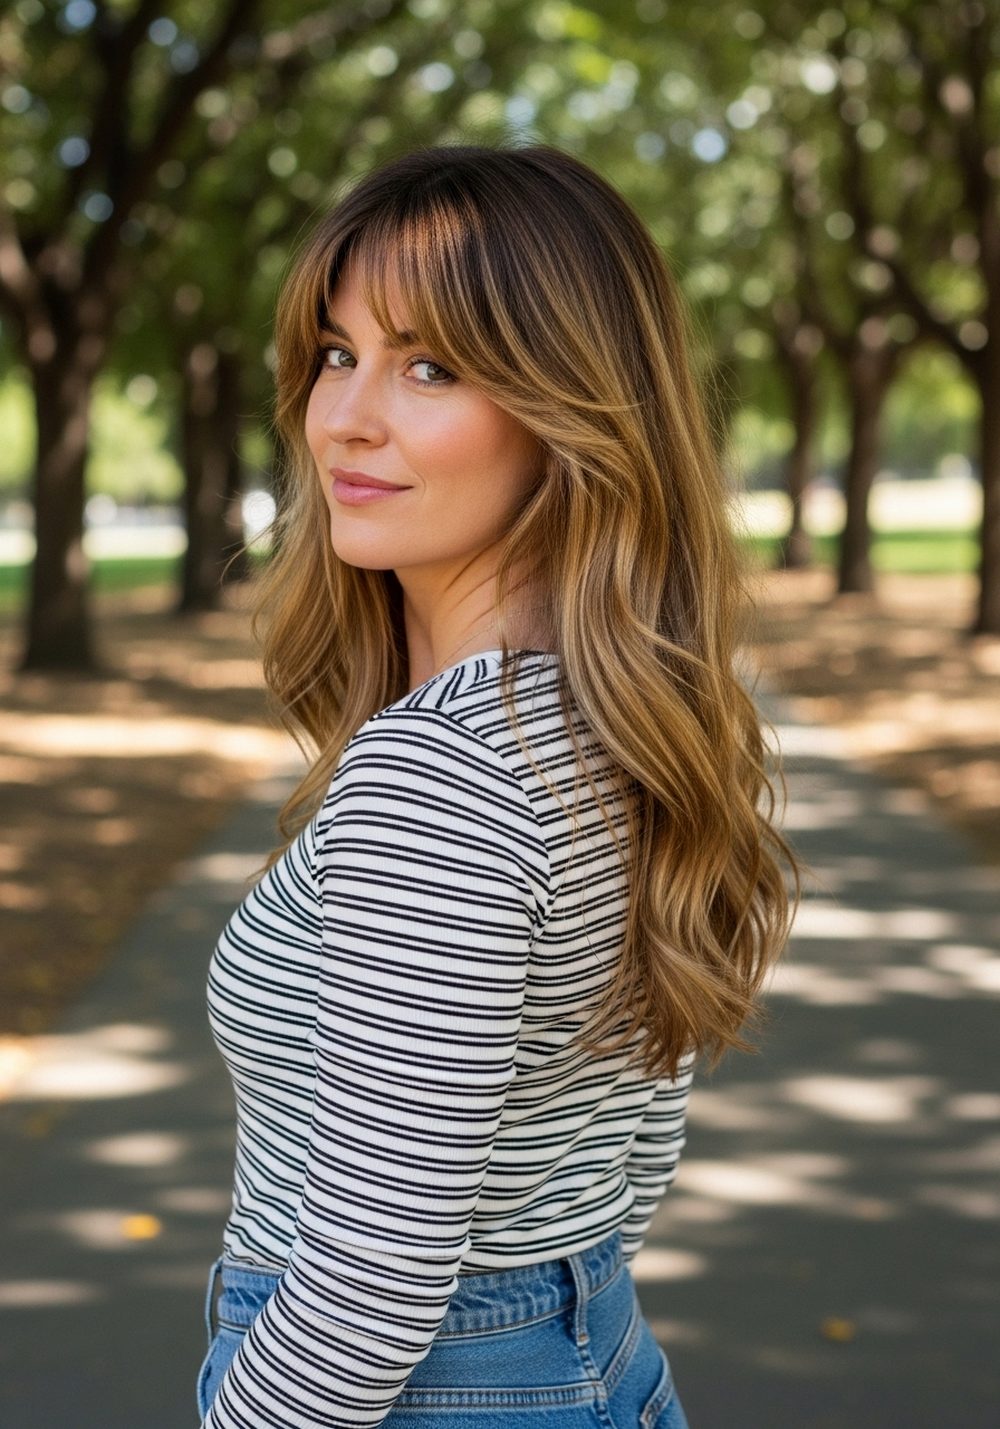
Long layers with soft bangs and a face frame give a full, youthful look without chopping your length. The bangs are light and feathery, gently skimming the brows and then melting into longer pieces at the sides. The layers through the rest of the hair are long and blended, which helps keep thickness while adding movement. This cut can balance a longer face and soften a strong forehead. It looks especially pretty with a bit of wave or bend through the lengths. Pro tip: if you’re nervous about bangs, ask for longer “curtain” bangs that can be pushed to the sides while you get used to them.
How To Style
- Blow-dry bangs first with a small round brush, rolling them forward then back.
- Apply a light mousse to the rest of your hair and blow-dry with a round or paddle brush.
- Add loose waves from mid-length to ends, avoiding too much bend in the bangs.
Best For
Long, heart, and oval faces; straight, wavy, or lightly curly hair.
Tools & Products
- Small and medium round brushes
- Blow-dryer
- Lightweight mousse
- Curling iron or wand
- Light-hold hairspray
9. Angel-Wing Face-Framing Layers

Angel-wing layers are long face-framing pieces that flip back from your cheeks like soft wings, giving your hair big, flowy movement around the front. The rest of the hair is layered just enough to support that shape, so everything looks full and bouncy rather than flat. This cut shines when you style the front sections away from your face, revealing your cheekbones and jawline. It’s a great option if you like a glamorous, blowout look but still want something wearable for daily life. Pro tip: ask your stylist to cut the front pieces with a slight outward bevel so they naturally flip when blown dry.
How To Style
- Apply volumizing mousse and heat protectant to damp hair.
- Blow-dry with a large round brush, rolling the front sections away from your face.
- Set the front in large rollers while the hair cools, then brush out for wings.
Best For
Oval, heart, and round faces; straight or wavy hair.
Tools & Products
- Volumizing mousse
- Heat protectant spray
- Large round brush
- Blow-dryer
- Large Velcro or foam rollers
10. Long Layers with Flipped, Bouncy Ends

Long layers with flipped, bouncy ends keep your hair looking full and lively all day. The layers are placed mainly through the lower half of your hair, taking out just enough weight so the ends can flip and move without looking thin. When styled, the ends can be turned under or flicked out, either way giving that salon-fresh finish. This is perfect if you love a classic, “big hair” look that still feels modern. It works especially well on straight or gently wavy hair. Pro tip: focus your styling effort on the bottom third of your hair; that’s where the flip and fullness really show.
How To Style
- Apply a blow-dry cream and root spray to damp hair.
- Blow-dry with a round brush, rolling the ends under or out depending on your preference.
- Touch up the bottom sections with a curling iron, then comb through with your fingers.
Best For
Oval, square, and heart faces; straight or wavy hair.
Tools & Products
- Blow-dry cream
- Root-lifting spray
- Round brush
- Blow-dryer
- Medium-barrel curling iron
Long Layered Soft Spiral Curls

Long, champagne-blonde layers fall in soft spiral curls, giving that effortless ‘glam but natural’ vibe. The side sweep adds lift at the crown, while the curls start mid-length and finish in bouncy ringlets for a polished, photo-ready look. Perfect for weddings, parties, or a cozy dinner date, this style moves beautifully and keeps its shape all night. Pair it with a sleek outfit and minimal jewelry—let the hair do the talking. Ask your stylist for long face-framing layers and a 1-inch wand curl, brushed softly.
Conclusion
Face-framing layered cuts are a smart way to keep your length while making your hair look full, light, and styled all day. The key is getting the right starting point for your front layers and choosing a layering pattern that works with your natural texture, not against it. Save the ideas that match your hair type, then notice where the shortest pieces hit on the face. Take a couple of photos or notes to your next appointment so you and your stylist can customize a version that fits your lifestyle and styling routine.
CTA
Pick your top two cuts from this list, screenshot them, and show them to your stylist so you can plan a long, face-framing layered style that stays full from morning to night.
FAQs
1. Will face-framing layers make my long hair look thinner?
Not if they’re cut correctly. Soft, blended layers that start around the cheekbones or jaw can actually make long hair look thicker by adding movement and shape. Ask your stylist to keep the bulk of the weight through the mid-lengths so the ends don’t look too light.
2. How often should I trim layered long hair to keep it full?
Every 8–12 weeks works for most people with long layers. This keeps the ends from splitting and thinning out while still letting you maintain length. If your hair is fine or fragile, lean closer to the 8-week mark so the shape doesn’t collapse.
3. Can I get face-framing layers without losing much length?
Yes. Face-framing layers mostly affect the front and sides, while the overall length in the back stays long. Ask your stylist to keep the back length almost as is and just open up the front, starting the shortest layer at or below your nose or chin.
4. Which products help these layered cuts stay full all day?
Lightweight volumizing products are your best friends: root-lifting sprays, mousses, and thickening sprays. Use them mainly at the roots and mid-lengths, then keep the ends protected with a small amount of serum. Avoid heavy oils or thick creams that can weigh your layers down.
5. How do I explain this kind of cut to my stylist?
Bring photos and be specific about where you want the shortest face-framing layer to hit—cheekbones, lips, or chin. Mention that you want long layers through the length to add movement, but you still want your hair to feel full and thick. Sharing how much time you realistically spend styling each day also helps them tailor the cut.