18 Glossy Chignon Hairstyles

Glossy chignon hairstyles combine the neat structure of a classic bun with a smooth, light-reflective finish. The chignon normally sits at the nape, although it can also be positioned higher or shifted to one side. Hair may be twisted, folded, braided, looped, or knotted before it is pinned into place. What separates a glossy chignon from a softer textured updo is the controlled surface: flyaways are reduced, sections remain defined, and the finished hair has shine without looking greasy or overloaded with product.
Medium and long hair usually provides enough length for most versions, while shorter hair can sometimes be adapted with smaller twists or added hair. Straight and wavy textures are generally easy to smooth, but curly and coily hair can also create a polished chignon with suitable preparation and moisture. Fine hair may benefit from discreet padding or root volume, while very thick hair often needs careful sectioning so the bun does not become bulky.
The shape can be adjusted around round, oval, square, heart, and longer faces by changing the part, crown height, side volume, or face-framing pieces. Styling can take roughly 10 to 40 minutes depending on complexity. Before choosing one, consider your hair length, density, preferred amount of tension, event length, and how sleek you want the finish.
Quick List
- Sleek Low Glossy Chignon
- Center-Part Glossy Chignon
- Side-Part Glossy Chignon
- Glossy Knotted Chignon
- Twisted Glossy Chignon
- Braided Glossy Chignon
- French Twist Glossy Chignon
- Pearl-Accented Glossy Chignon
- Glossy Chignon With Soft Tendrils
- Wet-Look Glossy Chignon
- High Glossy Chignon
- Side Glossy Chignon
- Double-Twist Glossy Chignon
- Voluminous Crown Glossy Chignon
- Face-Framing Glossy Chignon
- Tucked Glossy Chignon
- Ribbon-Wrapped Glossy Chignon
- Sculpted Loop Glossy Chignon
Sleek Low Glossy Chignon
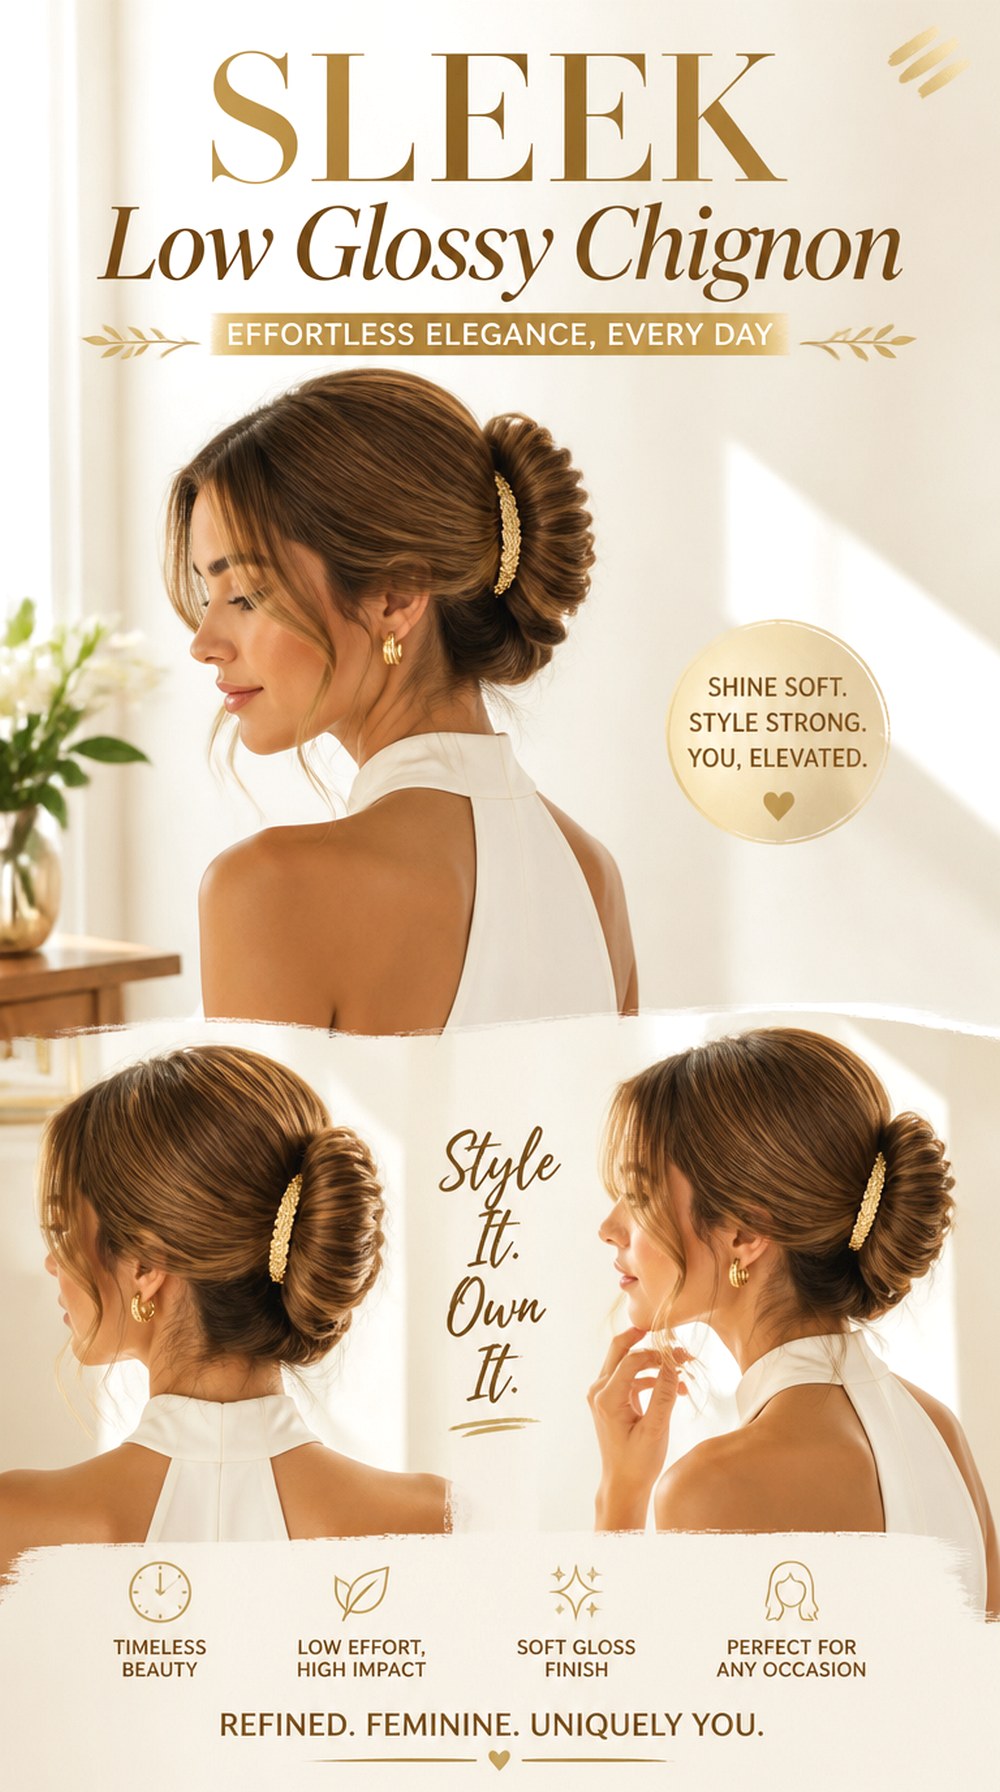
A sleek low chignon sits closely against the nape with the front and sides brushed back into a smooth, controlled shape. It works especially well on straight or gently wavy medium-to-long hair and suits anyone wanting a neat updo for work, weddings, or formal evenings. Thick hair may need to be divided into smaller sections before the bun is pinned to prevent excess bulk. Apply smoothing serum, use a boar-bristle brush, and finish with light-hold hairspray. Styling is moderately quick once the hair is prepared. At the salon, show your stylist exactly how flat and compact you want the chignon to sit.
Pro tip: Keep the bun slightly above the lowest hairline so pins have enough hair to grip and the shape remains secure.
Center-Part Glossy Chignon
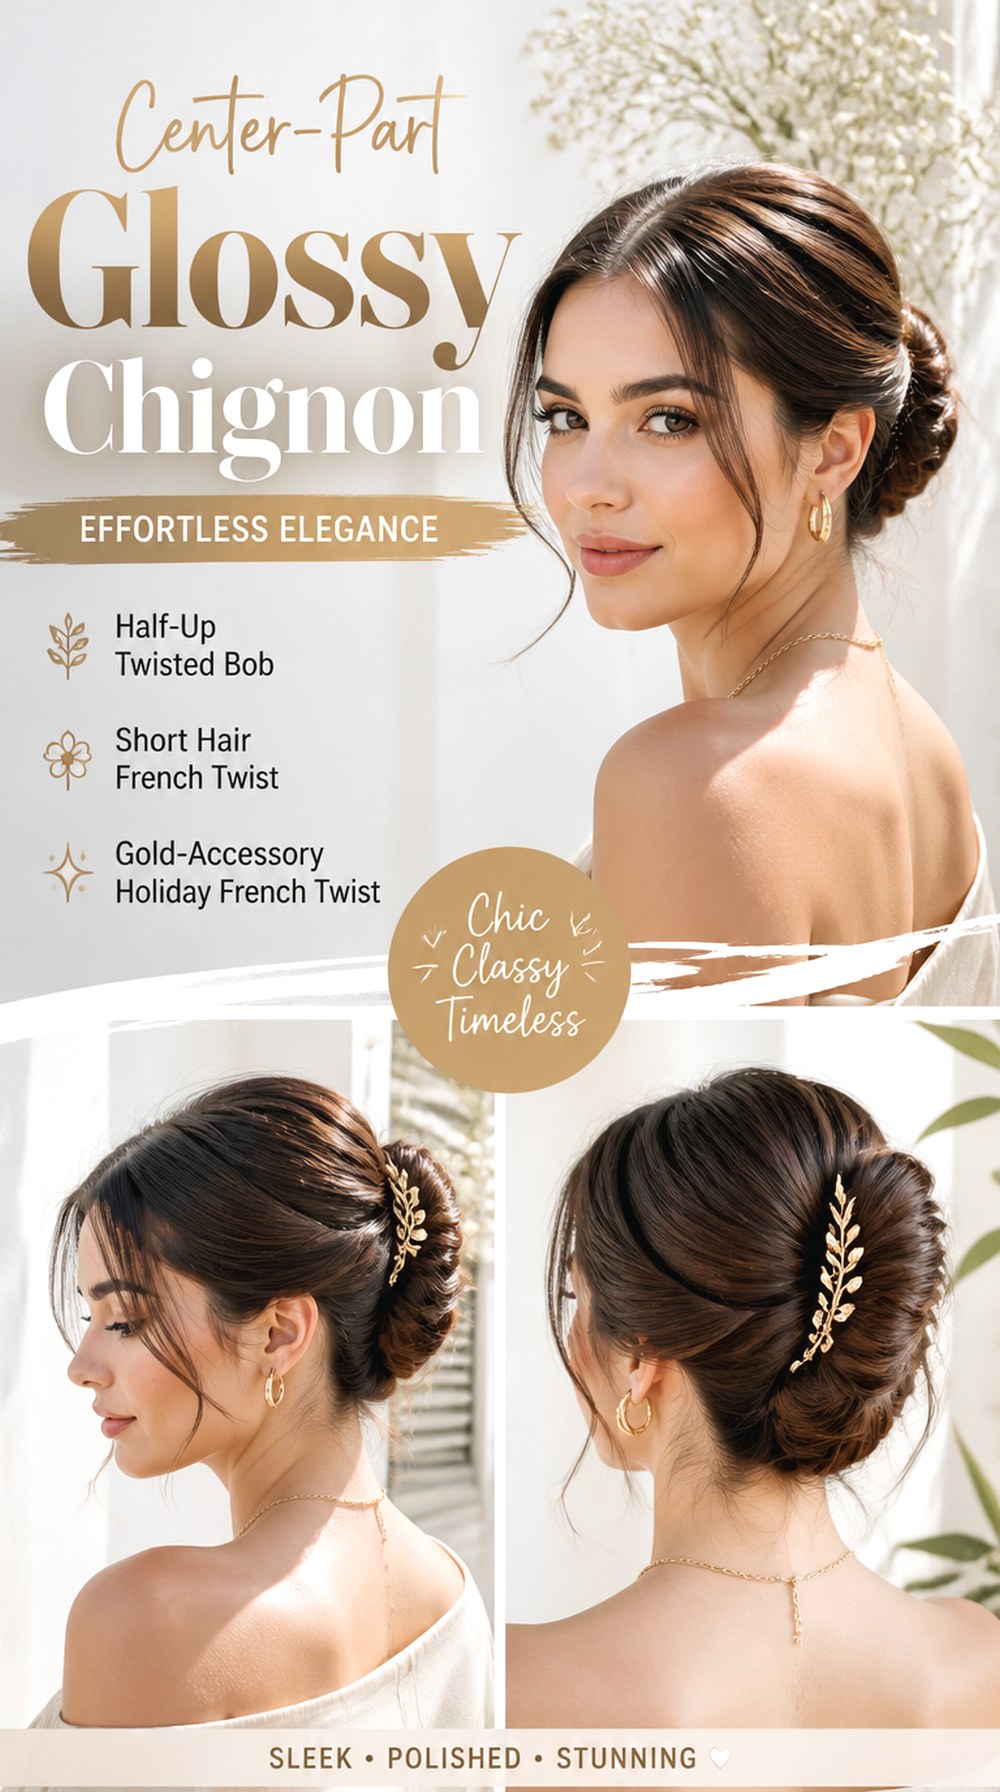
A precise center part gives a glossy chignon a balanced, clean appearance, particularly when both front sections follow the head closely before meeting at the back. The symmetry can complement oval, heart, and softly rounded faces, although the front can be loosened slightly if a completely flat shape feels too severe. Straight and wavy hair are easy to prepare, while textured hair may require additional smoothing depending on the desired finish. A fine-tooth comb, heat protectant, and smoothing cream help create controlled sections. Allow moderate styling time for a crisp result. Tell your stylist whether you want the part to stop at the crown or continue farther back.
Pro tip: Check the center part from the front before securing the bun; even a small shift becomes noticeable with such a symmetrical finish.
Side-Part Glossy Chignon
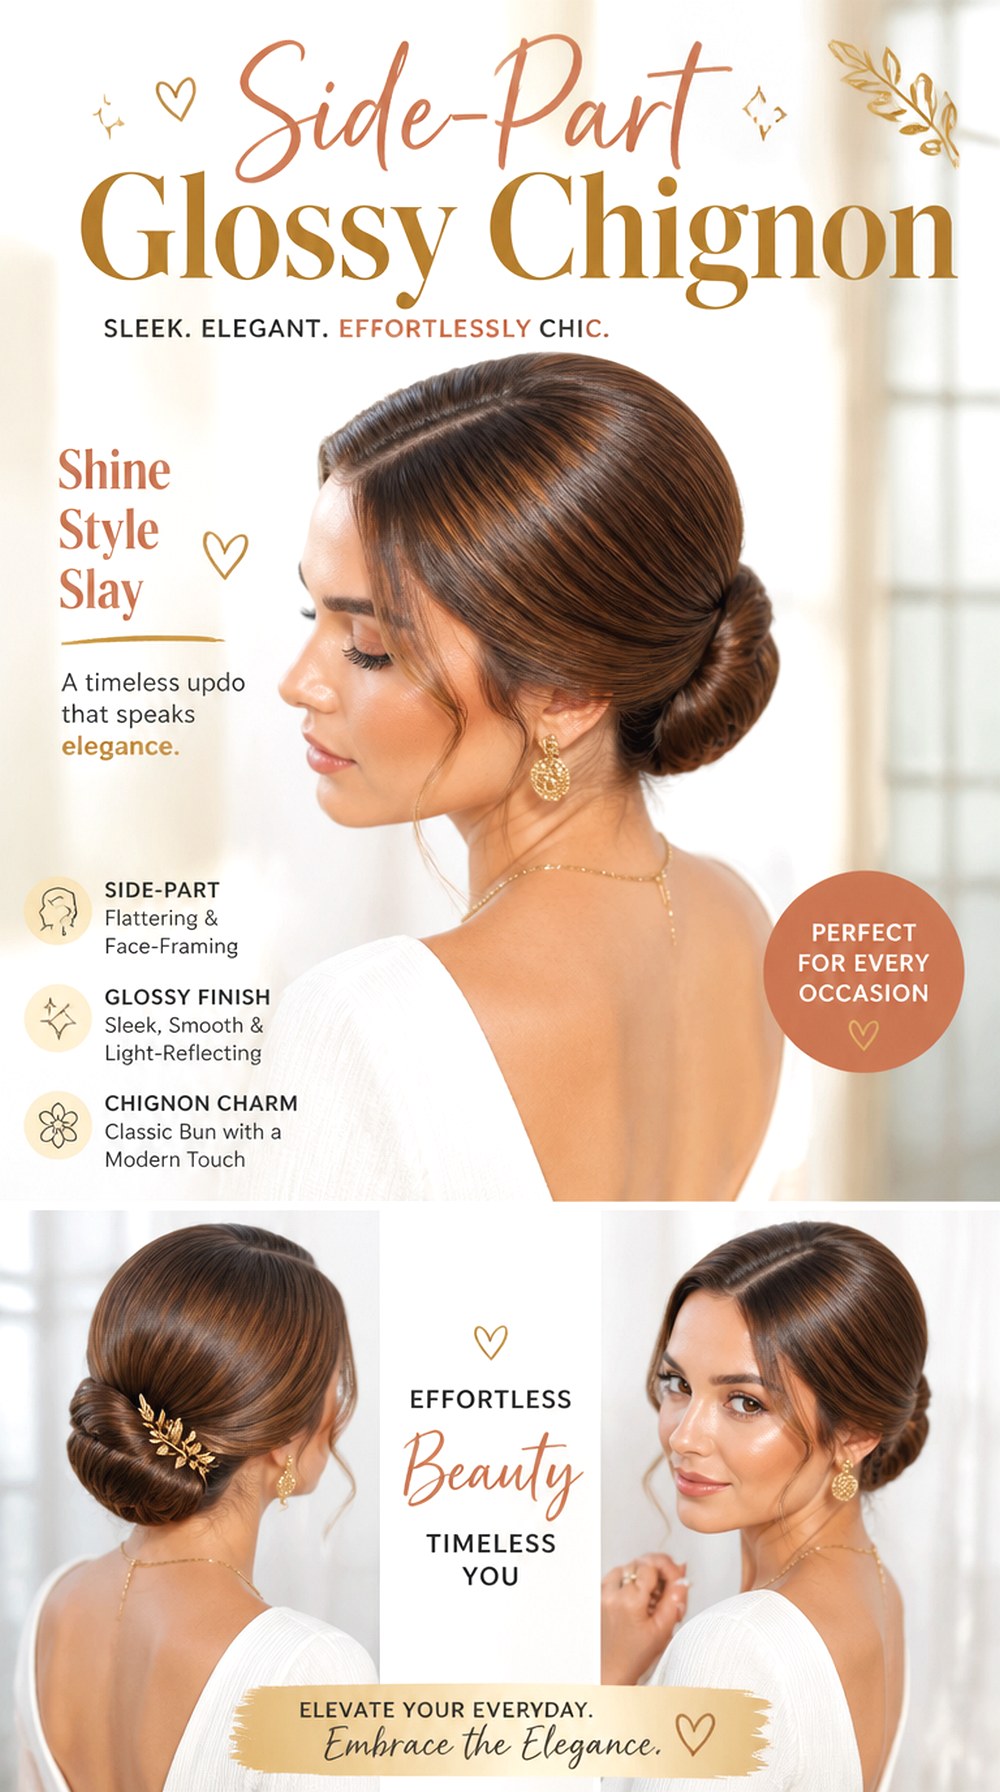
A side part introduces an elegant sweep across the forehead before the hair is gathered into a polished chignon. It can soften the symmetry of round or square faces and is useful when you naturally have more volume or direction on one side. Medium and thick hair hold the sweeping section particularly well, although fine hair can gain body with a light root product. Use volumizing spray, a paddle brush, and lightweight shine serum rather than heavy oils that can flatten the roots. Styling usually takes moderate time because the front sweep needs careful placement. Show your stylist where you normally part your hair so the finished shape works with its natural growth pattern.
Pro tip: Keep a little lift just behind the deeper side of the part instead of brushing the entire crown completely flat.
Glossy Knotted Chignon
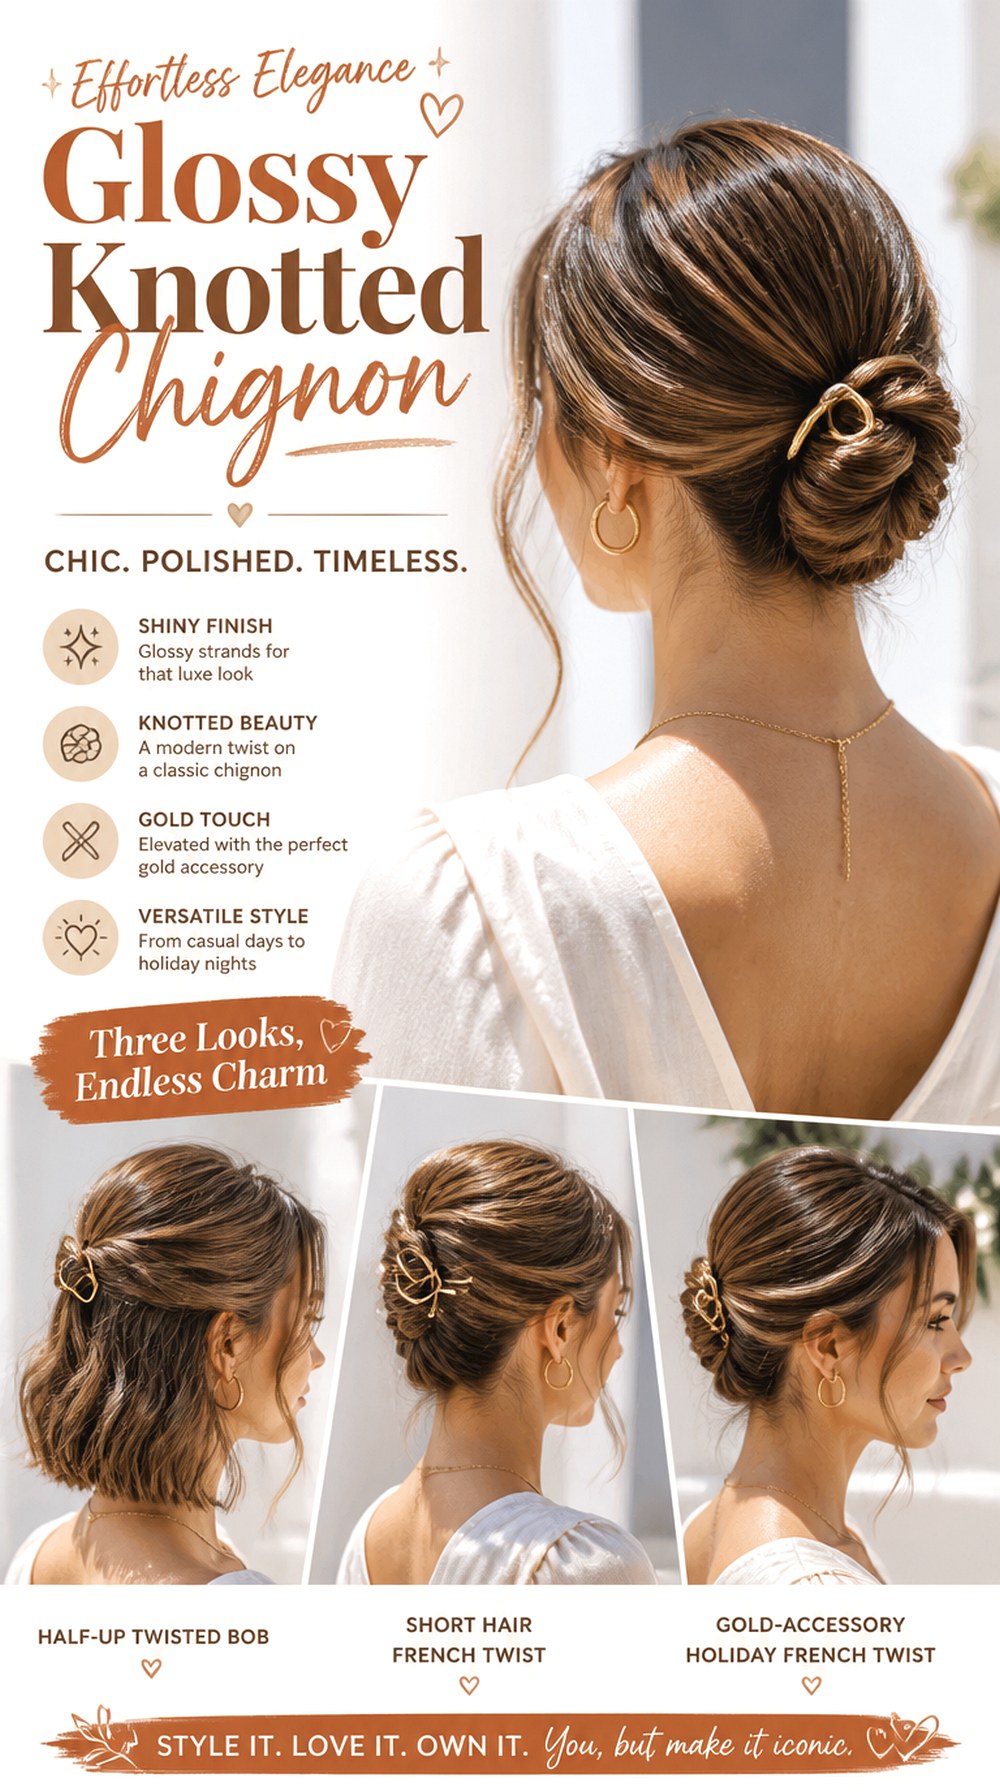
The knotted chignon turns the bun itself into a visible design feature. Hair is gathered smoothly, divided or twisted, and arranged into a compact knot that shows curved sections rather than forming a simple round bun. Medium-to-long hair with medium or thick density provides enough material to make the knot clear, while fine hair may need gentle backcombing inside the hidden sections. A smoothing balm, tail comb, and strong U-shaped hairpins are useful for controlling and securing the shape. Expect moderate styling time because the knot must be balanced before pinning. Ask your stylist to keep the surface glossy while leaving the individual sections visible.
Pro tip: Avoid coating every strand with heavy gel before forming the knot; too much slip can make the sections harder to pin securely.
Twisted Glossy Chignon
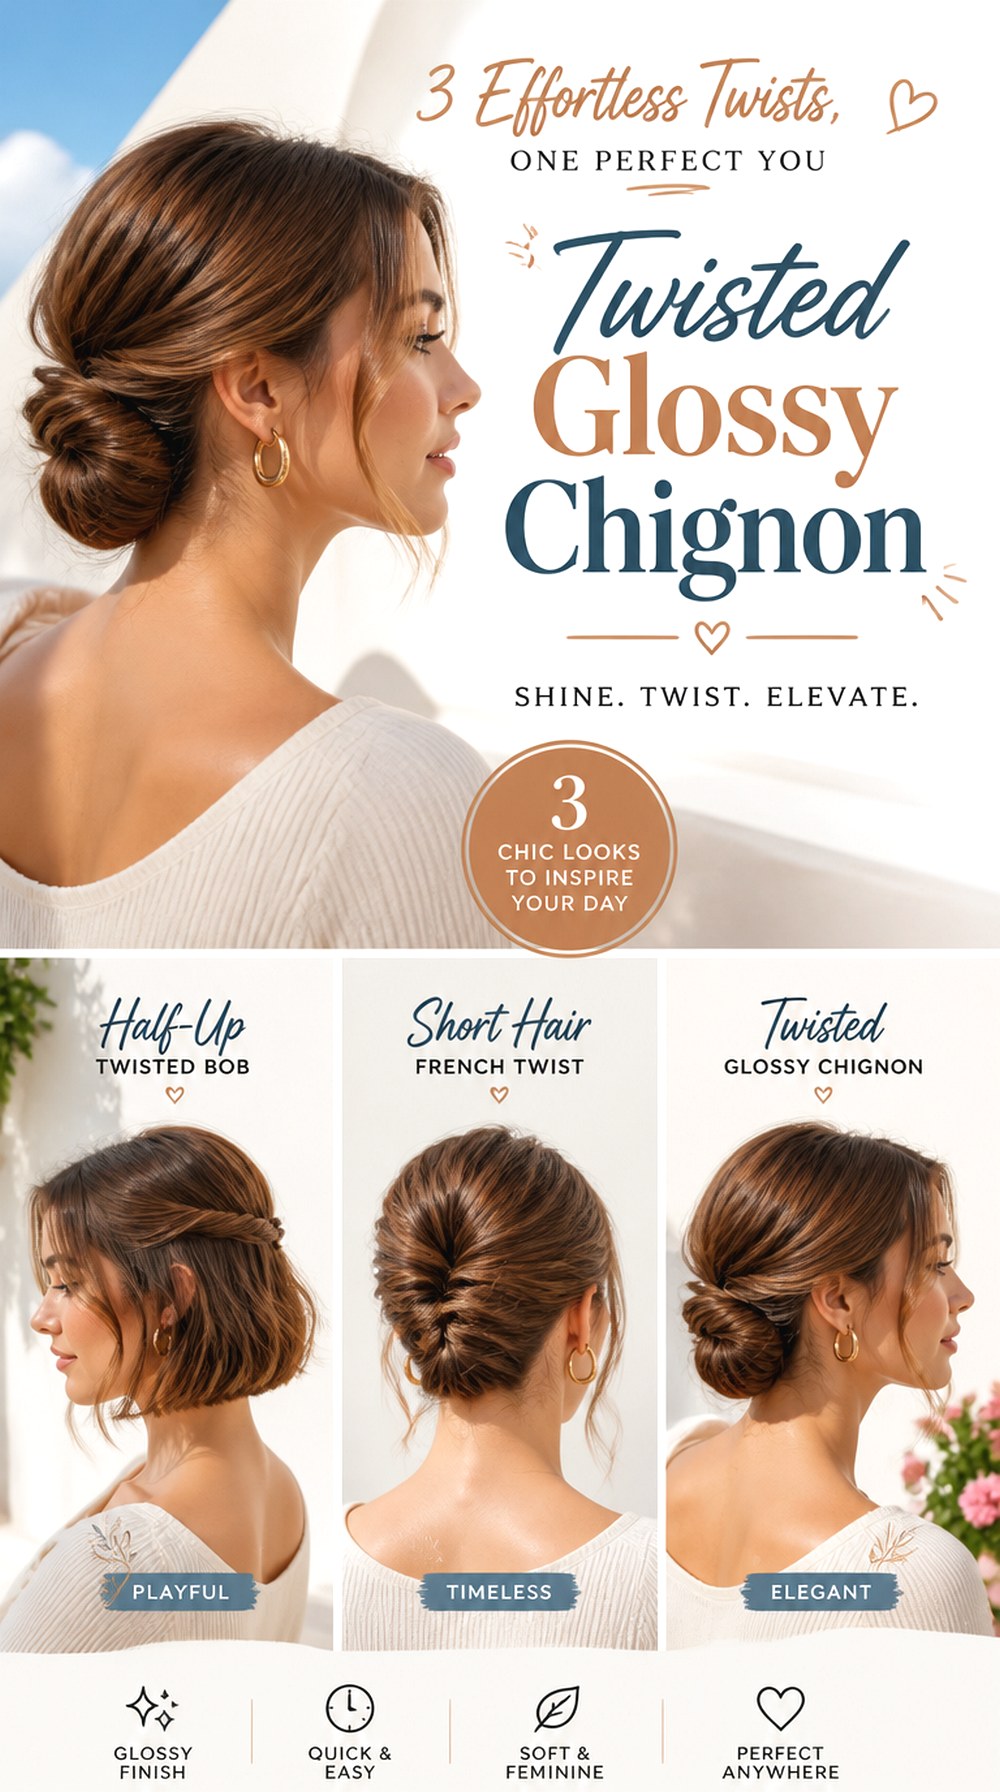
Twisting the hair before pinning creates soft directional lines through an otherwise smooth chignon. The twists can begin near the temples or only within the bun, depending on how much detail you want to see. This shape is useful for medium and thick hair because twisting helps control density without making the finish look bulky. Wavy hair can also work well because its natural movement supports the curved sections. Prepare with leave-in conditioner, a small amount of smoothing serum, and flexible-hold hairspray. Styling takes a little longer than a basic bun. When speaking with your stylist, specify whether you prefer broad loose twists or narrower, more defined sections.
Pro tip: Twist sections firmly enough to hold their shape but stop before they begin to rope tightly and lose their smooth, wide surface
Braided Glossy Chignon
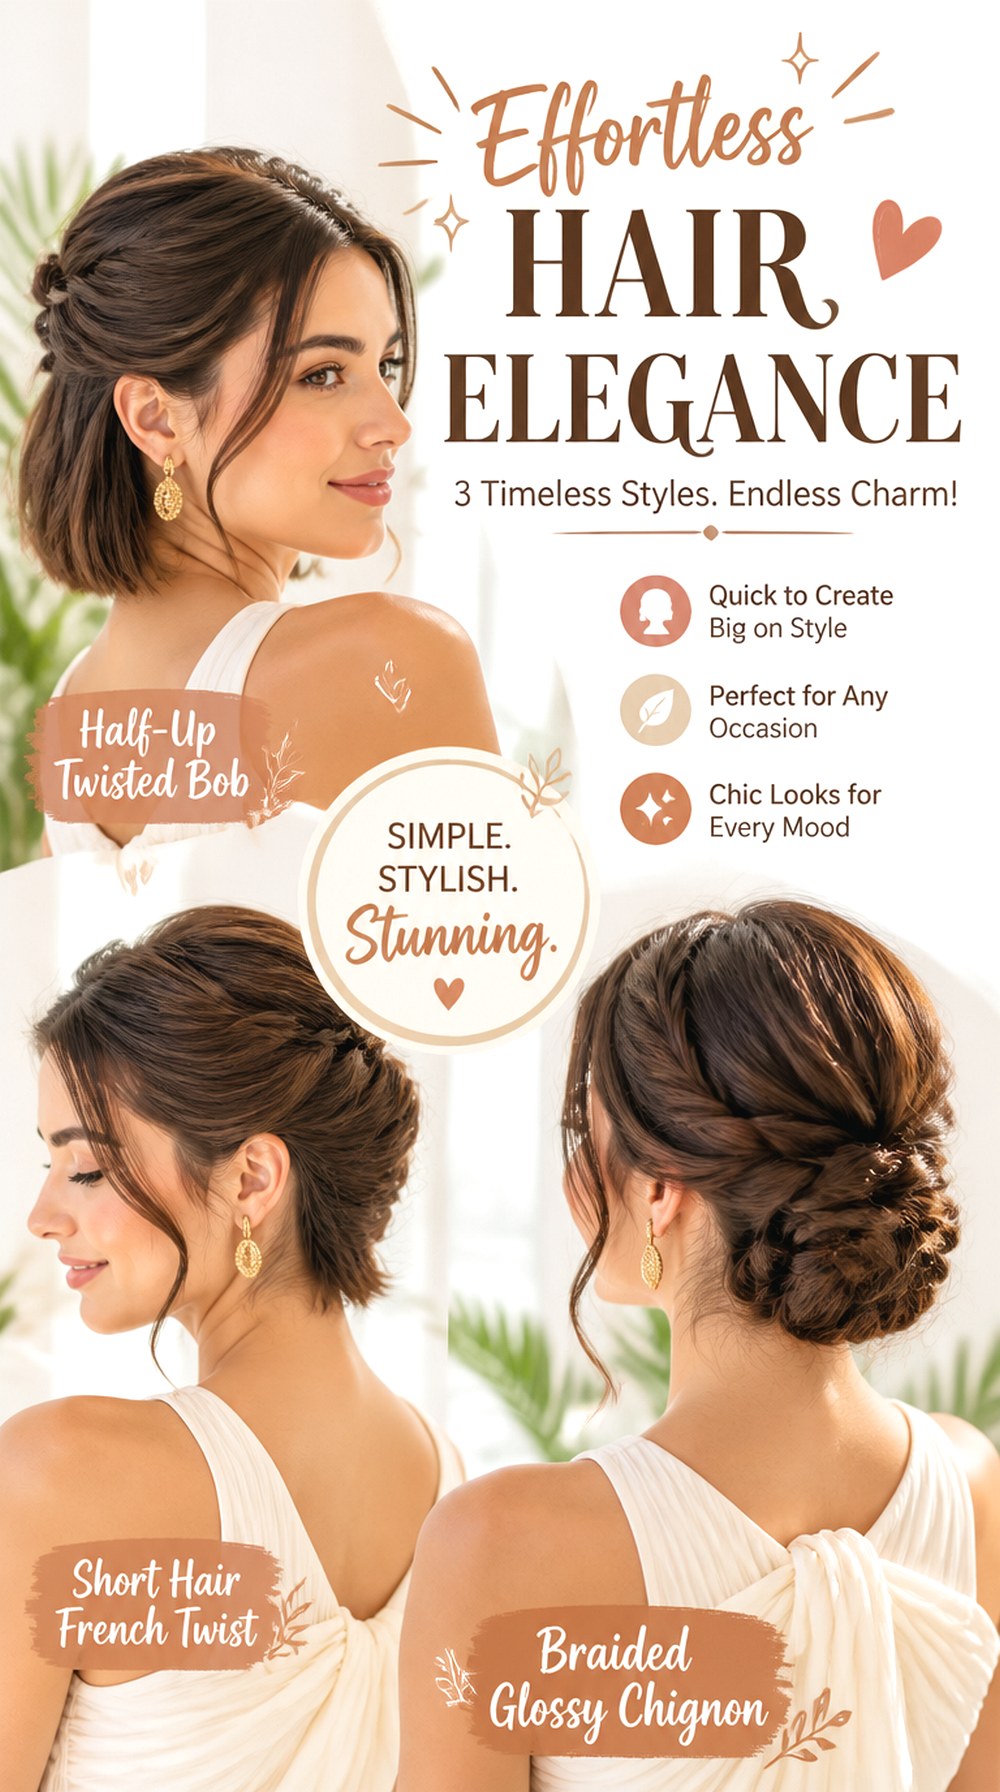
A glossy braided chignon adds visible texture while keeping the overall silhouette polished. Hair can be braided from the ponytail and wrapped at the nape, or several smaller braids can be layered into the bun. Medium-to-long hair works best because extra length makes the braided pattern easier to see. Fine hair benefits from gently widening the braid before pinning, while thick hair may look cleaner with one controlled braid rather than several bulky sections. Use lightweight mousse, smoothing serum, and small clear elastics for preparation. Styling takes moderate time. Ask your stylist to keep the outer surface polished while preserving enough braid definition to show the pattern.
Pro tip: Loosen only the outer edges of the braid before wrapping it; pulling every section apart can make a glossy finish look unnecessarily messy.
French Twist Glossy Chignon

This hybrid combines the vertical sweep of a French twist with the lower folded shape of a chignon. The hair travels upward or diagonally before tucking into a smooth roll near the back of the head, creating more height than a traditional low bun. It is particularly useful for medium or thick straight and wavy hair because the density helps build the roll. A texturizing spray underneath provides grip, while a smoothing brush and light-hold hairspray keep the visible surface clean. Styling requires more time and pin placement than a basic chignon. Show your stylist whether you want the French roll clearly visible from the side.
Pro tip: Add grip to the hidden interior only; keeping texturizing product away from the outer layer preserves the glossy surface.
Pearl-Accented Glossy Chignon

Pearls add a decorative finish without changing the clean structure of a glossy chignon. They can be clustered on one side, placed around the bun, or inserted sparingly through a twist. This option works well for bridal styling and other formal occasions where the hair accessory should remain visible throughout the event. Almost any density can support small pearl pins, although very fine hair may need crossed bobby pins underneath for extra grip. Prepare the hair with shine spray, a fine-tooth comb, and firm-hold hairspray. Styling is moderate because accessories require deliberate placement. Bring the exact pearls to your appointment so your stylist can plan the chignon around their size and weight.
Pro tip: Place pearl pins after the bun is fully secured so decorative pieces do not become structural pins and shift during wear.
Glossy Chignon With Soft Tendrils
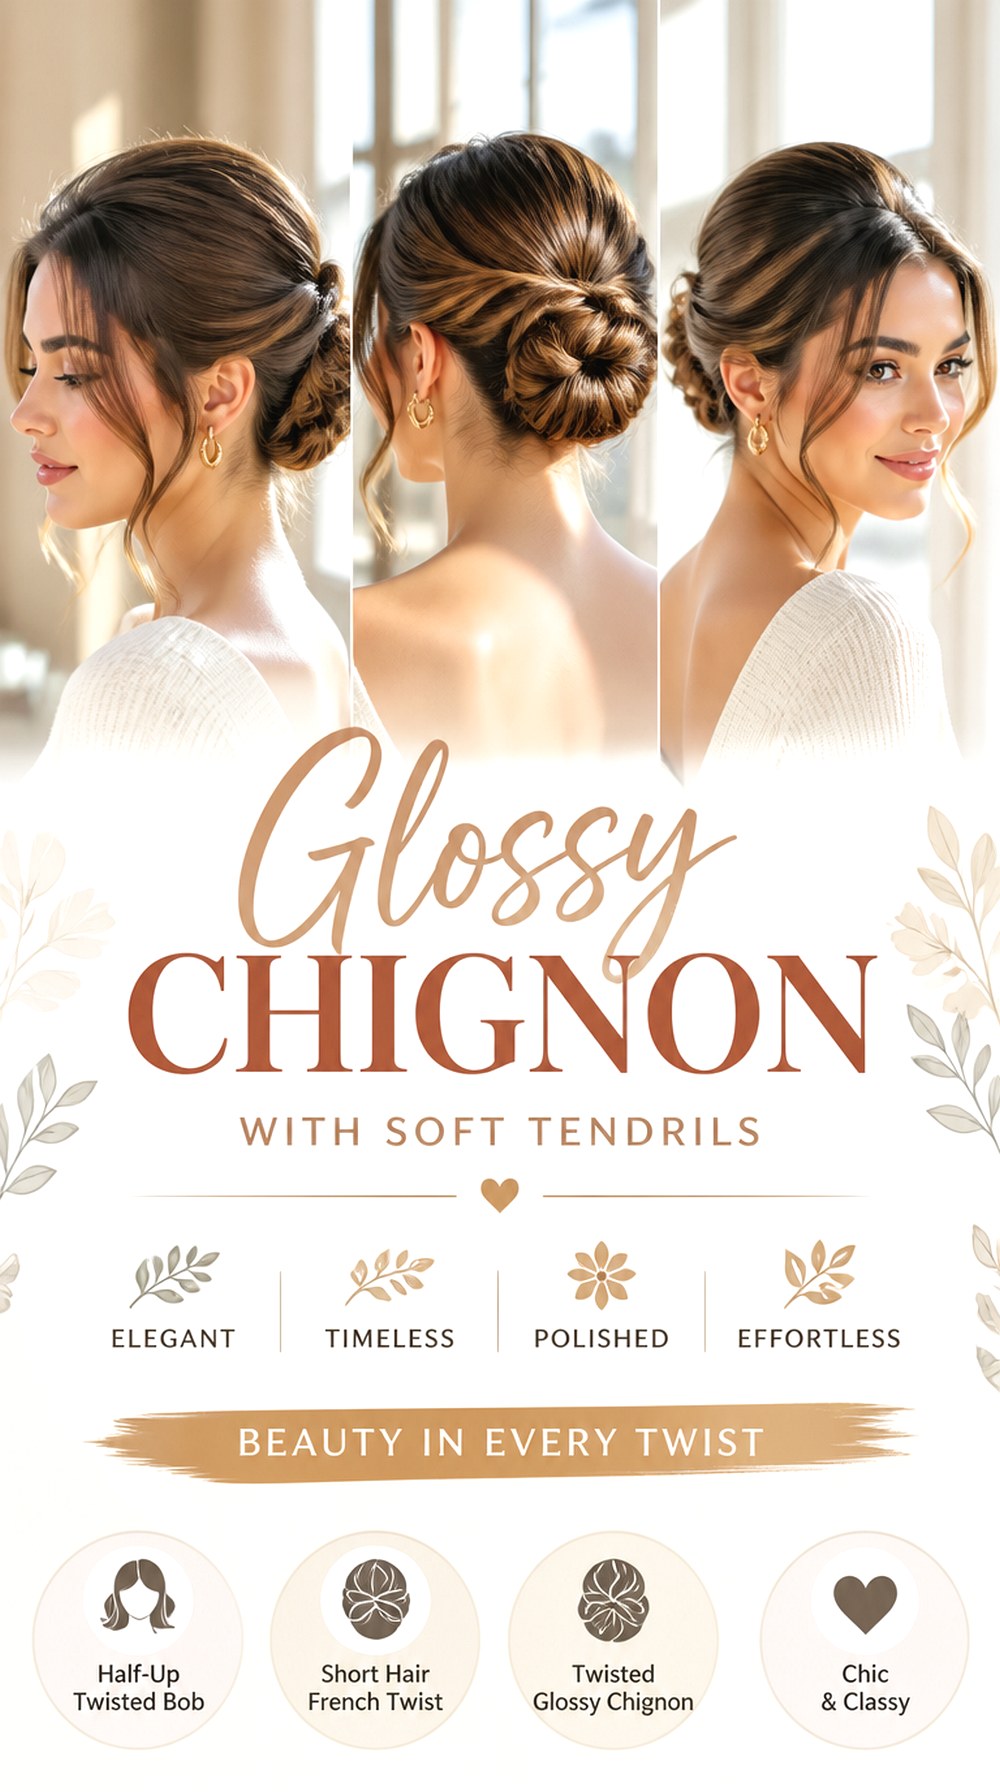
Leaving a few controlled tendrils around the face gives the polished chignon a softer outline. The contrast works especially well for wavy hair or anyone who finds a completely slicked-back front too sharp. Face-framing strands can sit near the cheekbones, jaw, or just in front of the ears depending on your haircut and face shape. Use a small curling iron, heat protectant, and flexible-hold hairspray so the tendrils retain movement rather than becoming stiff. Styling takes moderate time because the loose sections need separate finishing. Ask your stylist to separate the face-framing pieces before the rest of the hair is secured into the bun.
Pro tip: Start with fewer tendrils than you think you need; additional pieces can be released later, but putting them back cleanly is harder.
Wet-Look Glossy Chignon
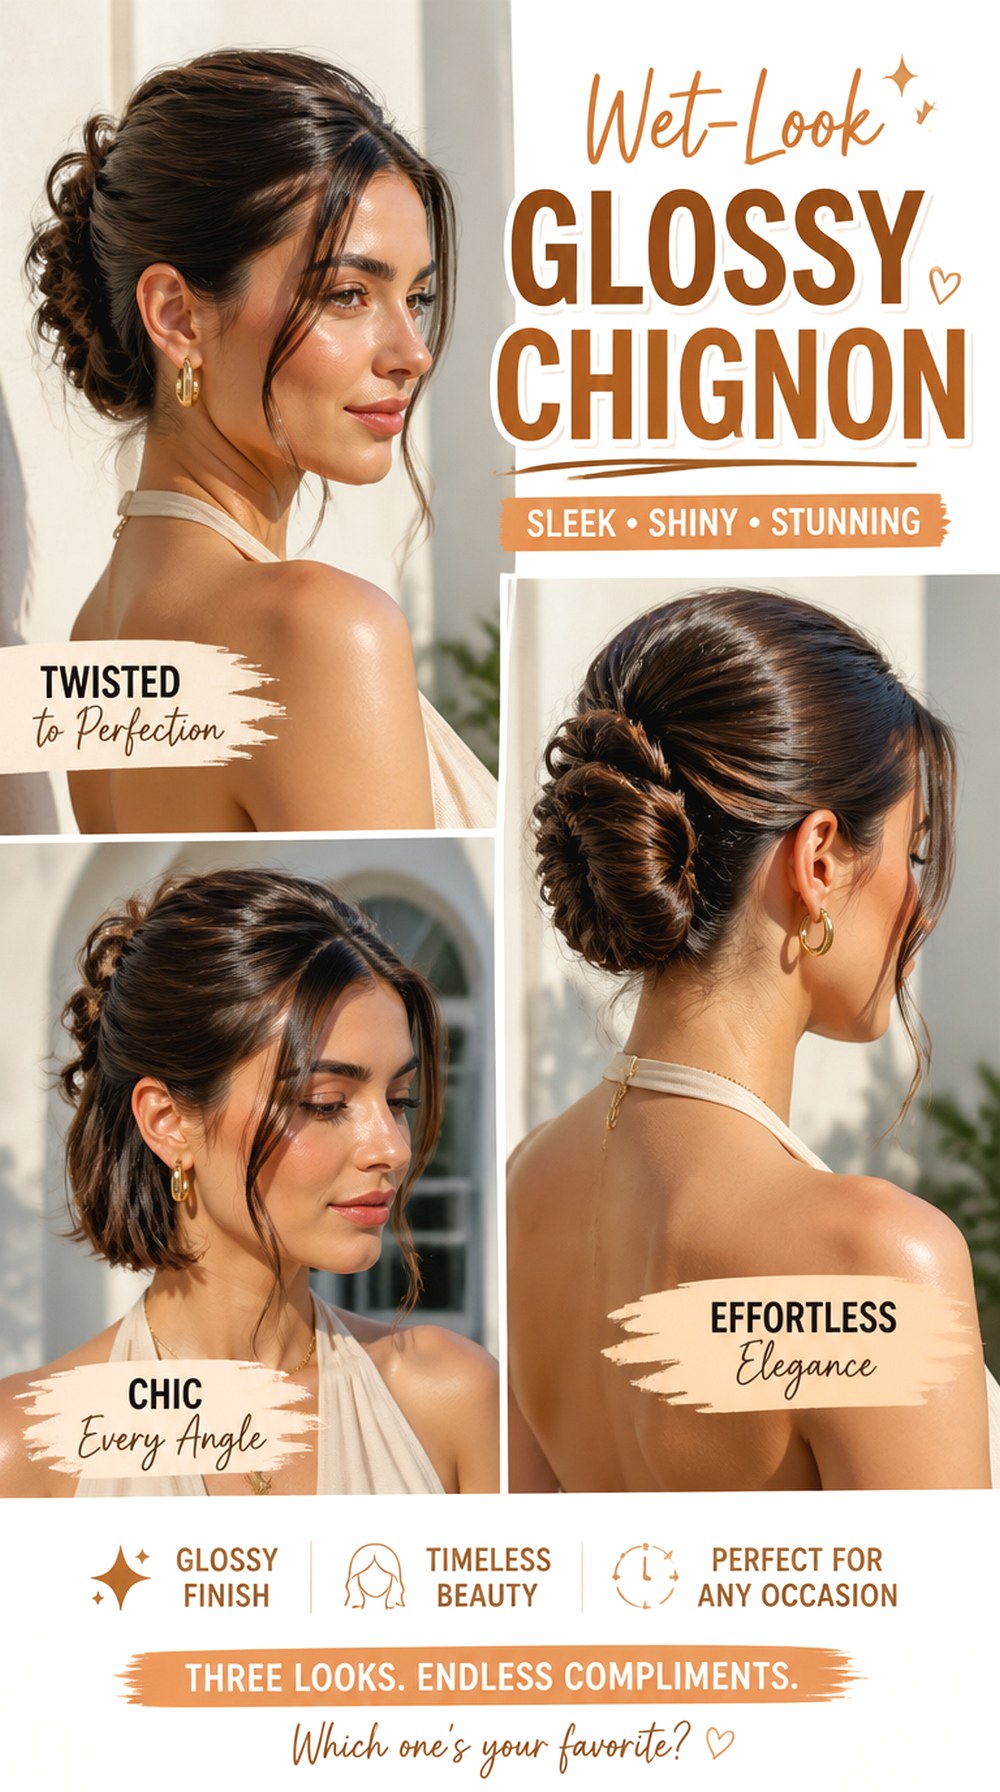
A wet-look chignon creates the strongest shine in this group, with the front and sides deliberately combed into a glassy, close-to-the-head finish. Unlike damp hair, the finished style should be dry and stable while products create the appearance of controlled moisture. It works particularly well on short-to-medium layers that can reach a small bun and on medium or thick densities that tolerate stronger styling products. Use strong-hold gel, a fine-tooth comb, and high-shine finishing spray. Styling is relatively quick, although even product distribution matters. Tell your stylist whether you want visible comb lines or a completely smooth surface.
Pro tip: Apply gel in thin layers instead of one heavy coating; this gives better control and reduces the risk of a sticky, uneven finish.
High Glossy Chignon
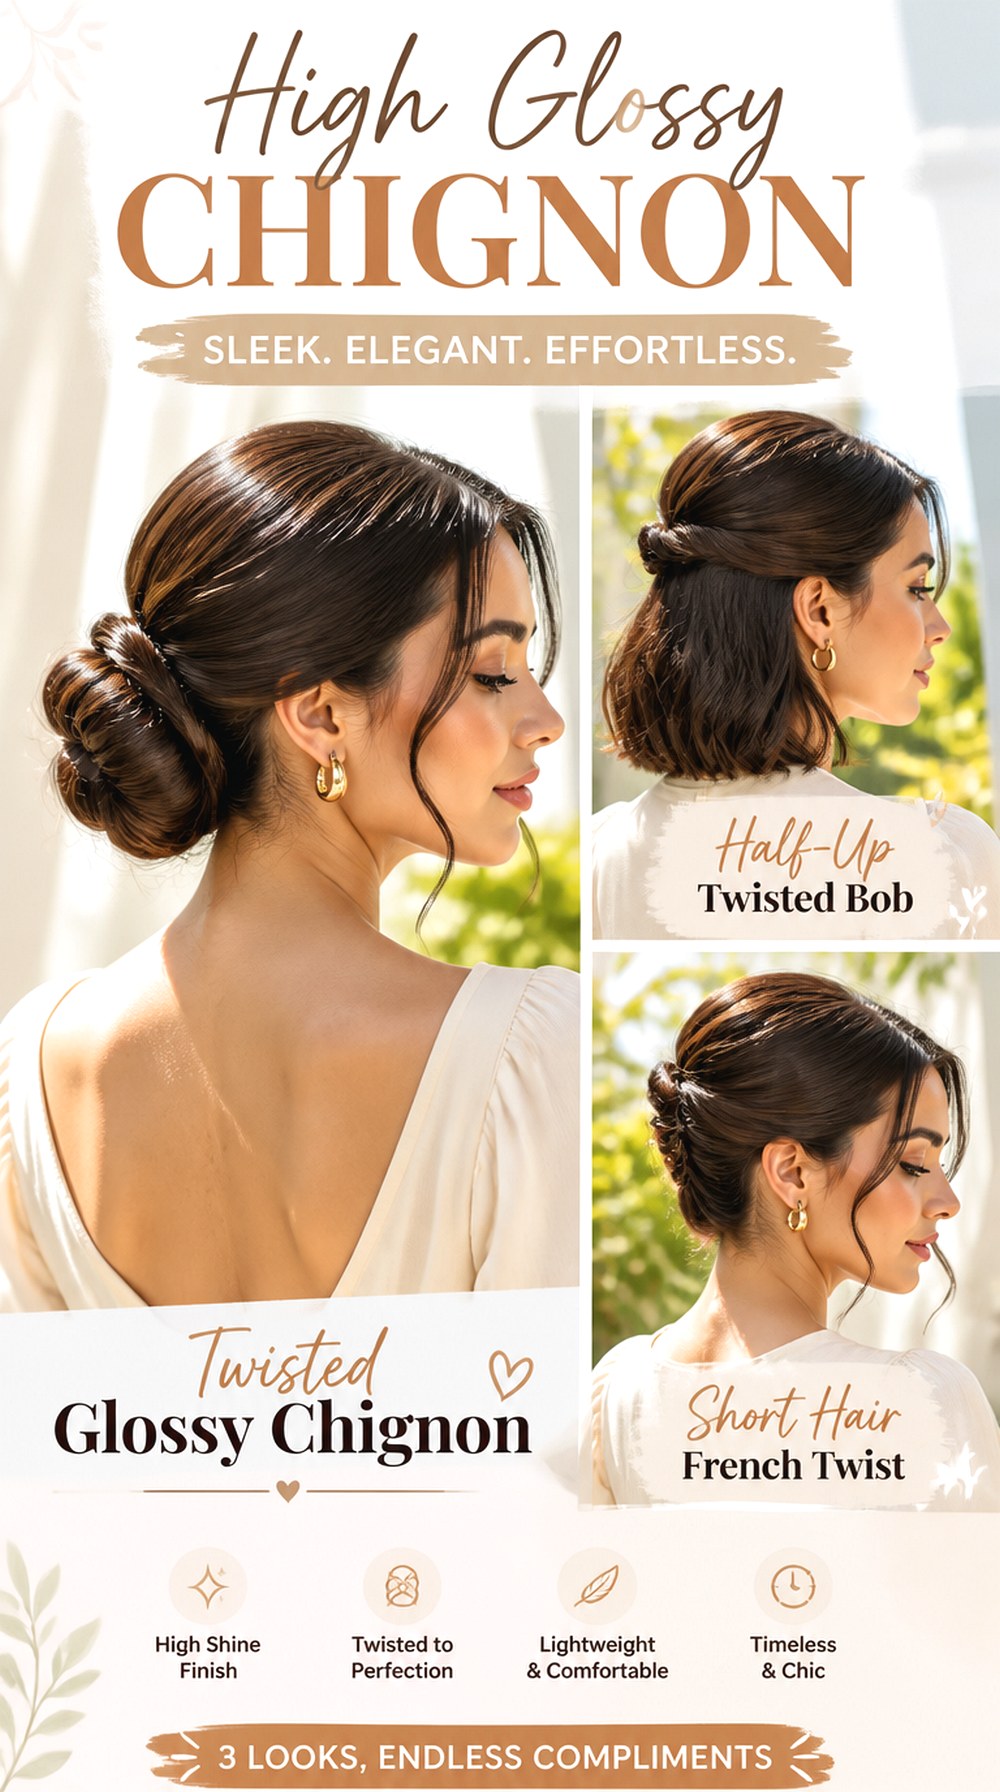
Moving the chignon higher on the back of the head creates a lifted silhouette and makes the bun more visible from the front and side. The position works well for medium-to-long hair, although very heavy or thick hair needs strong anchoring so the bun does not pull downward. A high placement can also add vertical emphasis, making it useful when you prefer less width around the sides. Prepare with volumizing mousse, a strong ponytail elastic, and smoothing hairspray. Styling takes moderate time, especially when achieving an even surface. Show your stylist the exact height you want rather than simply requesting a “high bun,” since a chignon generally has a flatter, more folded shape.
Pro tip: Anchor the ponytail first and check the profile before building the chignon; moving a finished bun is much harder.
Side Glossy Chignon
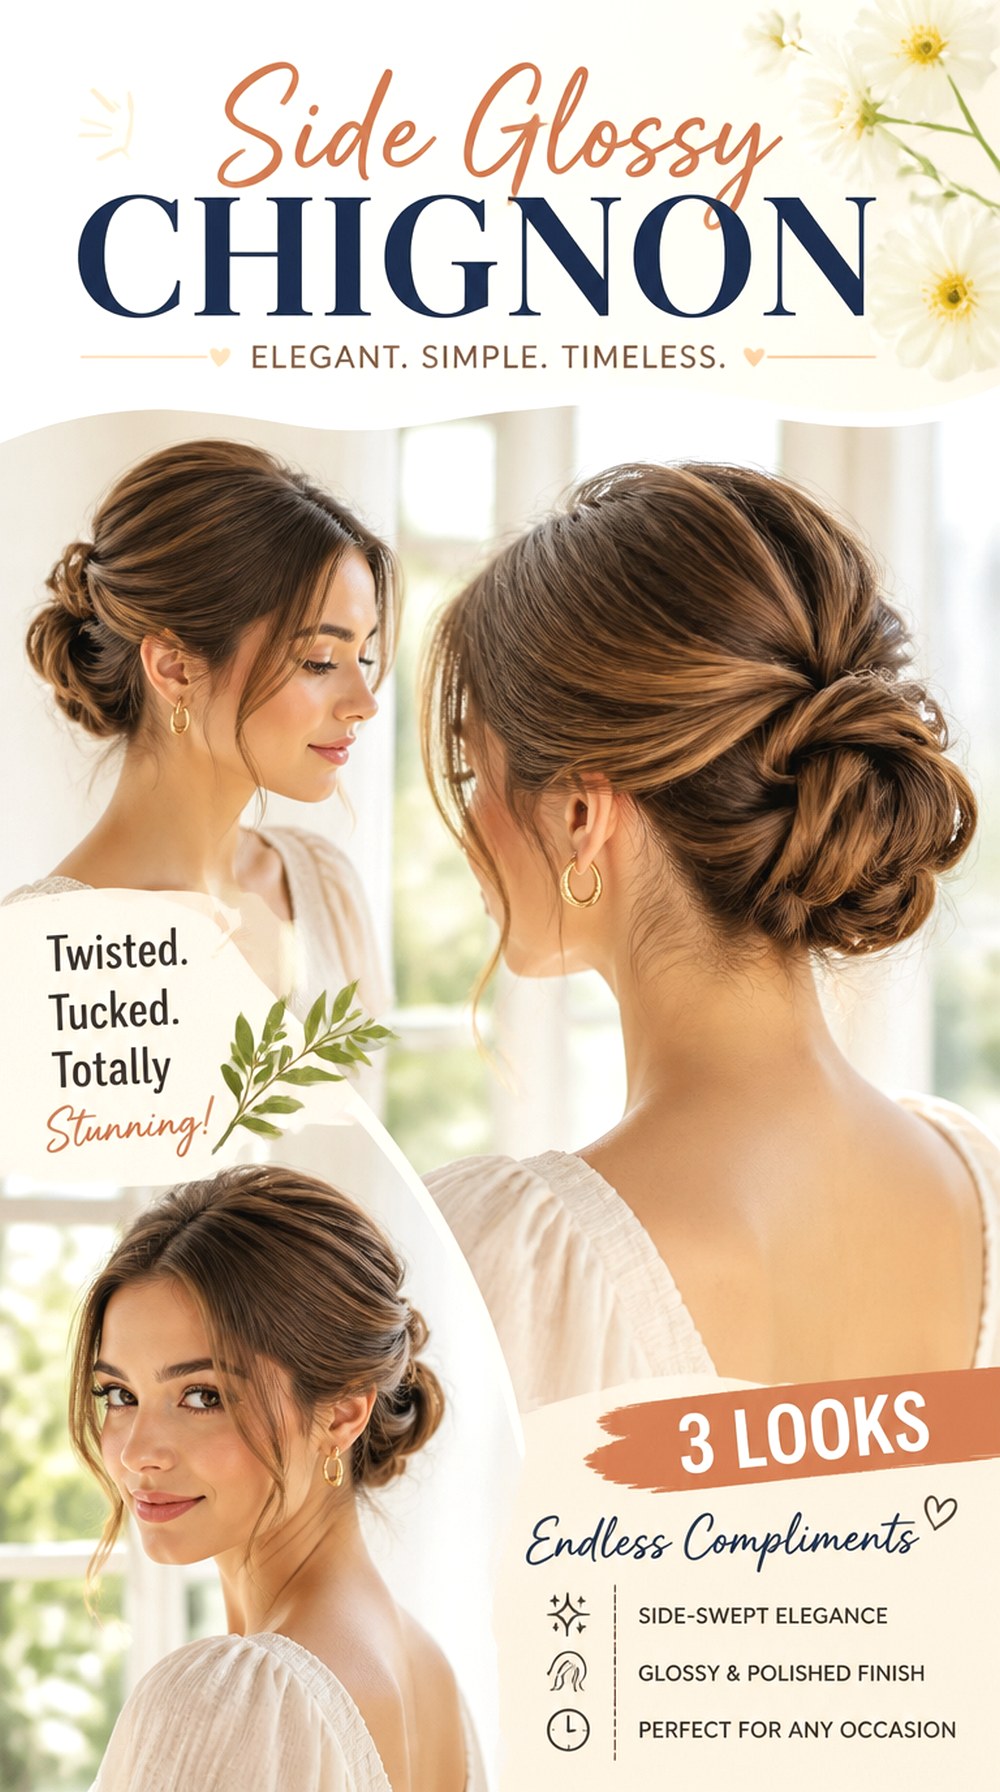
A side chignon sits close to one side of the nape instead of directly in the center. The asymmetry gives the hairstyle a softer visual direction and can display decorative earrings or an open neckline particularly well. Medium and long hair are easiest to sweep across the back, while very thick hair should be sectioned so one side does not become overly heavy. Use smoothing cream, a wide-tooth comb during preparation, and strong hairpins for secure placement. This style needs moderate styling time because the hair must travel cleanly toward one side. Ask your stylist to check the shape from both the back and front before finishing it.
Pro tip: Position the bun just behind the ear rather than directly beneath it to keep the hairstyle balanced and comfortable.
Double-Twist Glossy Chignon

Two smooth twists meeting at the back create dimension without sacrificing the polished character of the chignon. Each side can be rolled inward toward the center before the remaining lengths are tucked into a low bun. This construction is particularly helpful for medium and thick hair because it divides the density into manageable sections. Wavy textures can provide natural grip, while very straight hair may need a small amount of styling product. Use lightweight styling cream, sectioning clips, and flexible hairspray. Expect moderate styling time because both twists need to look balanced. Tell your stylist how much of each twist you want visible from the side.
Pro tip: Begin each twist near the temple or just behind the ear at matching heights so the back does not appear uneven.
Voluminous Crown Glossy Chignon
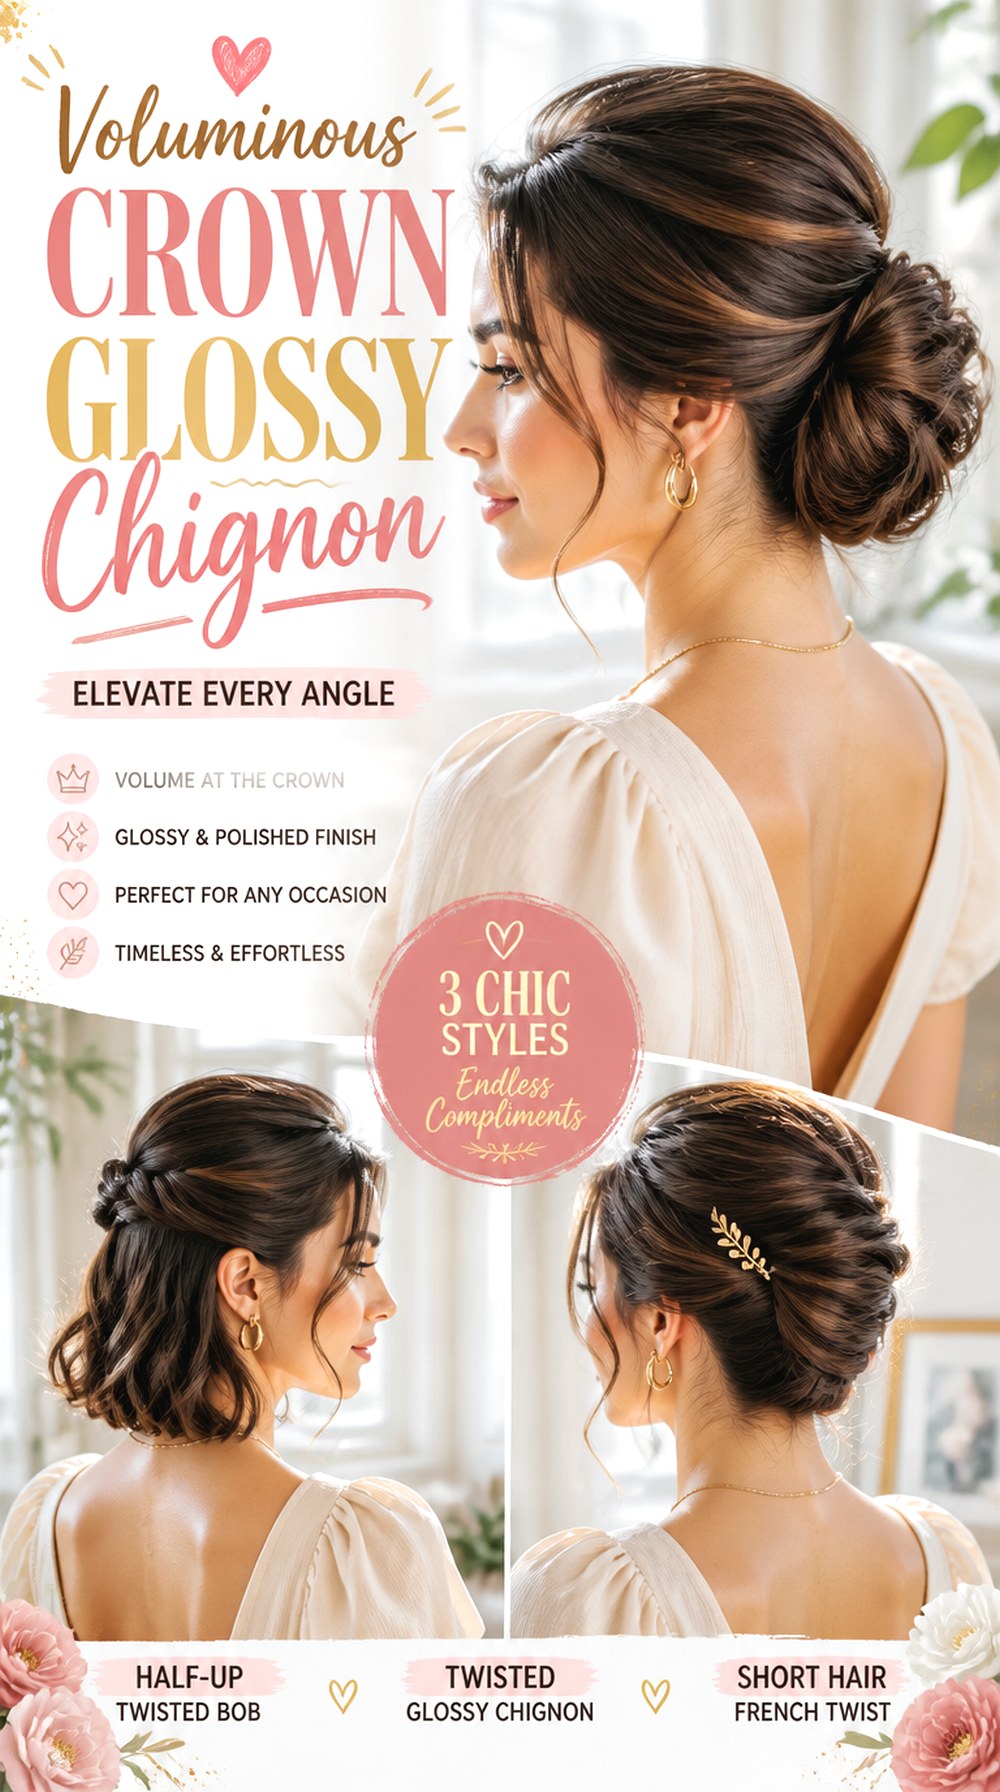
This chignon keeps the sides smooth while allowing controlled height through the crown. The extra volume can balance a low bun and is useful for anyone who dislikes having every section pressed flat against the scalp. Fine-to-medium hair usually responds well to gentle root support, while dense hair may already have enough natural volume and only need shaping. Use root-lifting spray, a round brush, and light-hold hairspray to create lift without making the outer layer rough. Styling takes slightly longer because the crown must be shaped before the chignon is pinned. Ask your stylist for soft elevation rather than visible teasing or an exaggerated bump.
Pro tip: Backcomb only underneath the crown section, then smooth an untouched top layer over it to maintain shine.
Face-Framing Glossy Chignon

A face-framing chignon keeps the bun sleek while allowing longer front layers to remain visible. Unlike fine curled tendrils, these pieces can be wider and follow the existing haircut, sitting around the cheekbones, jaw, or collarbone. The option is especially useful for layered medium and long hair, and it can be adjusted to different face shapes by changing where the pieces end. A heat protectant, small flat iron, and smoothing serum help control the framing sections without removing all movement. Styling effort is moderate. Show your stylist which front layers you regularly wear loose so they are separated before the chignon is created.
Pro tip: For a softer outline, let the shortest face-framing section begin near the cheekbone rather than releasing thick pieces from the entire temple area.
Tucked Glossy Chignon

The tucked chignon has a smooth rolled-under finish with few visible ends, giving it a compact and carefully constructed shape. Hair is often gathered low, folded inward, and pinned beneath itself rather than wrapped around a central point. Medium-length hair can work particularly well because excessive length is not required, while thick hair may need several smaller sections to keep the fold flat. Use smoothing lotion, a tail comb, and sturdy U-pins. Styling is moderate but may take practice because the pins should remain hidden. Ask your stylist to keep the lower edge rounded and neat rather than allowing the fold to become wide.
Pro tip: Tuck shorter ends into the center before securing the outer fold so small pieces do not begin escaping around the edges.
Ribbon-Wrapped Glossy Chignon
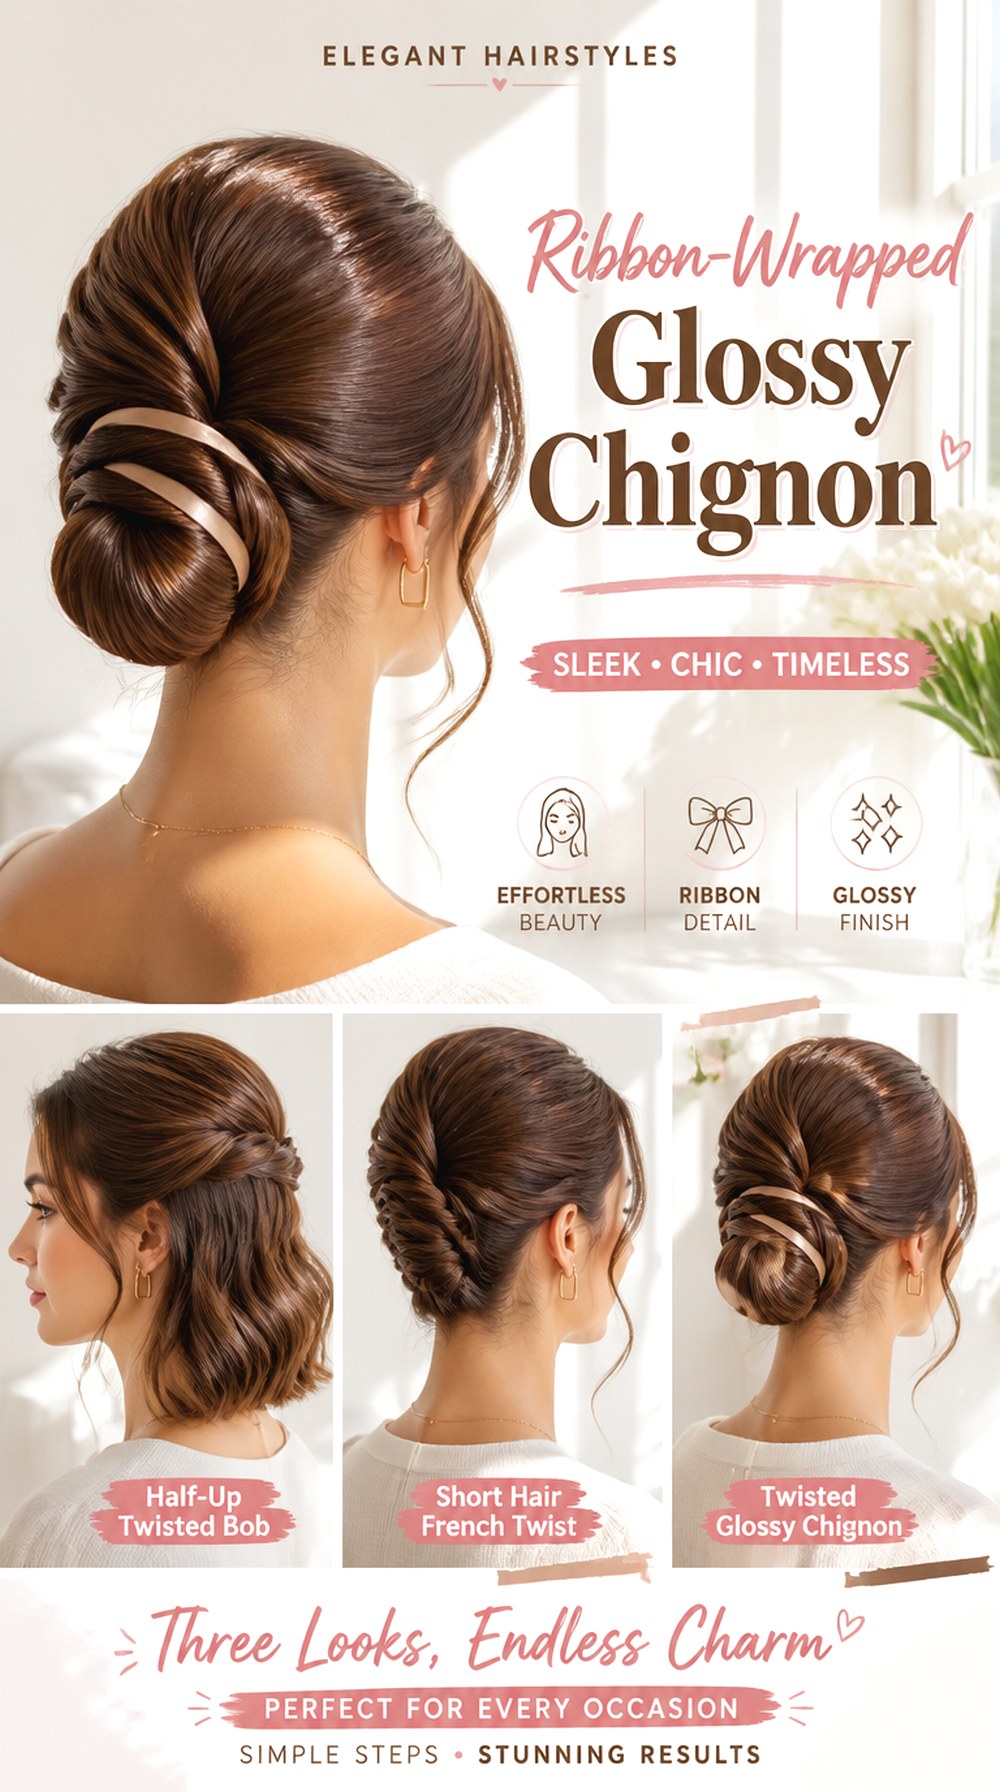
Wrapping a ribbon around a glossy chignon introduces contrast without covering the smooth shape. A narrow satin ribbon gives a subtle finish, while a wider ribbon becomes more noticeable and can coordinate with an outfit. The style works on most medium and long hair densities as long as the chignon itself is securely anchored first. Use smoothing spray, bobby pins, and a light finishing serum to control the hair before adding the accessory. Styling time is moderate because the ribbon needs to lie neatly without compressing the bun. Take the ribbon to your stylist so its width, texture, and length can be tested against the finished shape.
Pro tip: Pin the ribbon discreetly underneath the chignon rather than relying on a tight knot, which can distort the smooth outer curve.
Sculpted Loop Glossy Chignon
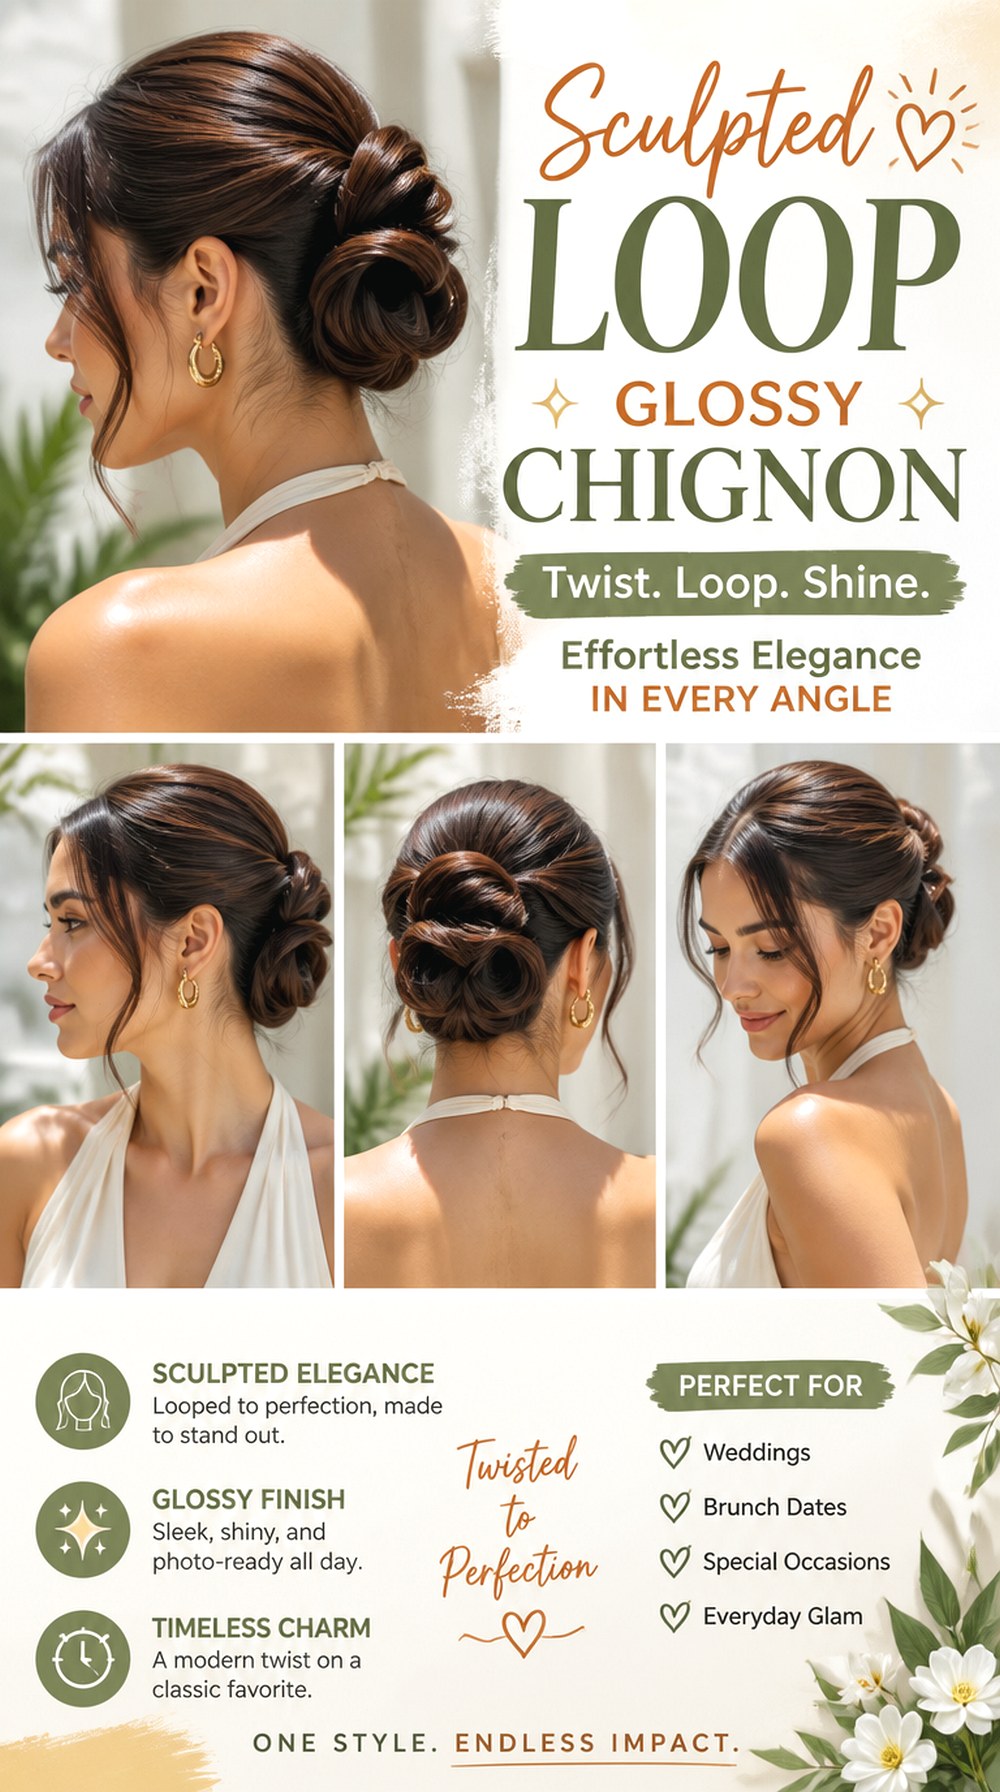
A sculpted loop chignon uses the hair to form visible curves or folded loops, making the bun more architectural than a standard rounded chignon. Long, smooth hair offers the most flexibility, although medium lengths can create a simpler single-loop design. Fine hair may need light internal padding, while very dense hair should be divided carefully to prevent oversized loops. Prepare with heat protectant, smoothing serum, and firm-hold finishing spray. This is one of the more time-consuming options because each loop must be shaped and pinned separately. Show your stylist a reference from several angles so the intended structure is clear, particularly if you want an asymmetrical design.
Pro tip: Keep enough width in each section before folding it; narrow twisted strands will not create the broad, glossy ribbon-like loops that define this shape.
Conclusion
Glossy chignon hairstyles can look very different depending on how the hair is parted, shaped, twisted, folded, and positioned. A low compact chignon offers a cleaner silhouette, while crown volume, soft framing pieces, braids, accessories, or sculpted loops can add more detail. Length and density can also be adjusted through tighter folds, smaller buns, internal padding, or careful removal of excess bulk.
The best choice depends on your face shape, natural texture, hair density, preferred parting, and how much styling effort you want to manage. You can also change the bangs or fringe, volume, texture, and degree of shine. For longer wear, focus as much on secure construction and comfortable tension as you do on the glossy finish.
CTA
Choose one or two favorite chignon ideas and save clear photo references showing the front, side, and back whenever possible. When you meet your stylist, discuss your face shape, natural hair texture, density, preferred length, maintenance expectations, and usual styling routine. Point out the exact parting, face-framing pieces, crown volume, bun position, twists, loops, or glossy finish you want rather than relying only on the hairstyle name.
FAQs
What hair length works best for glossy chignon hairstyles?
Medium to long hair generally gives the most styling options because there is enough length to twist, fold, braid, or loop into a secure bun. Some low tucked chignons can also work on shorter lengths if the hair reaches the nape.
Can fine hair hold a glossy chignon?
Yes. Fine hair can hold a chignon, but lightweight mousse, root spray, hidden padding, or strategically placed pins may help create fullness. Avoid using too much oil or serum because heavy products can collapse volume and reduce grip.
How can thick hair be kept from making a chignon too bulky?
Divide thick hair into sections and build the bun gradually instead of twisting the entire ponytail into one large coil. Removing unnecessary internal bulk while keeping the visible surface smooth can also create a flatter, more balanced shape.
How long does a glossy chignon usually take to style?
A basic sleek chignon may take around 10–20 minutes once you are familiar with the technique. Braided, twisted, accessorized, or sculpted versions can take 25–40 minutes or longer because they require more sectioning, pinning, and finishing.