18 Pixie Shag Haircut Ideas

A pixie shag haircut combines the compact length of a pixie with the broken layers, movement, and softer edges associated with a shag. Instead of sitting close to the head in one neat shape, it usually has extra texture through the crown, sides, fringe, or nape. Some versions look feathery and light, while others have chunky pieces, curls, wispy bangs, or a slightly longer back.
The haircut can work with straight, wavy, and curly hair, but the cutting technique needs to match the natural texture. Fine hair often benefits from lighter layering that preserves density around the perimeter, while thick hair may need internal weight removed to stop the shape becoming bulky. Face-framing sections, fringe length, crown height, and side volume can also be changed for round, oval, square, heart, or longer face shapes.
Daily styling ranges from a quick finger-style with texture spray to more deliberate blow-drying or curl definition. Most pixie shags benefit from salon reshaping every five to eight weeks, although softer grown-out versions can go longer. Before choosing one, consider how short you want the sides and nape, how much fringe maintenance you accept, and whether you prefer polished texture or a more undone finish.
Quick List
- Soft Textured Pixie Shag
- Choppy Pixie Shag With Wispy Bangs
- Curly Pixie Shag
- Wavy Pixie Shag With Curtain Fringe
- Feathered Pixie Shag
- Long Pixie Shag With Face-Framing Layers
- Short Pixie Shag With Micro Bangs
- Razor-Cut Pixie Shag
- Tousled Pixie Shag With Side-Swept Bangs
- Voluminous Pixie Shag For Thick Hair
- Airy Pixie Shag For Fine Hair
- Mullet-Inspired Pixie Shag
- Tapered Pixie Shag
- Pixie Shag With Crown Volume
- Piecey Pixie Shag With Textured Ends
- Undercut Pixie Shag
- Grown-Out Pixie Shag
- Pixie Shag With Soft Curly Fringe
Soft Textured Pixie Shag
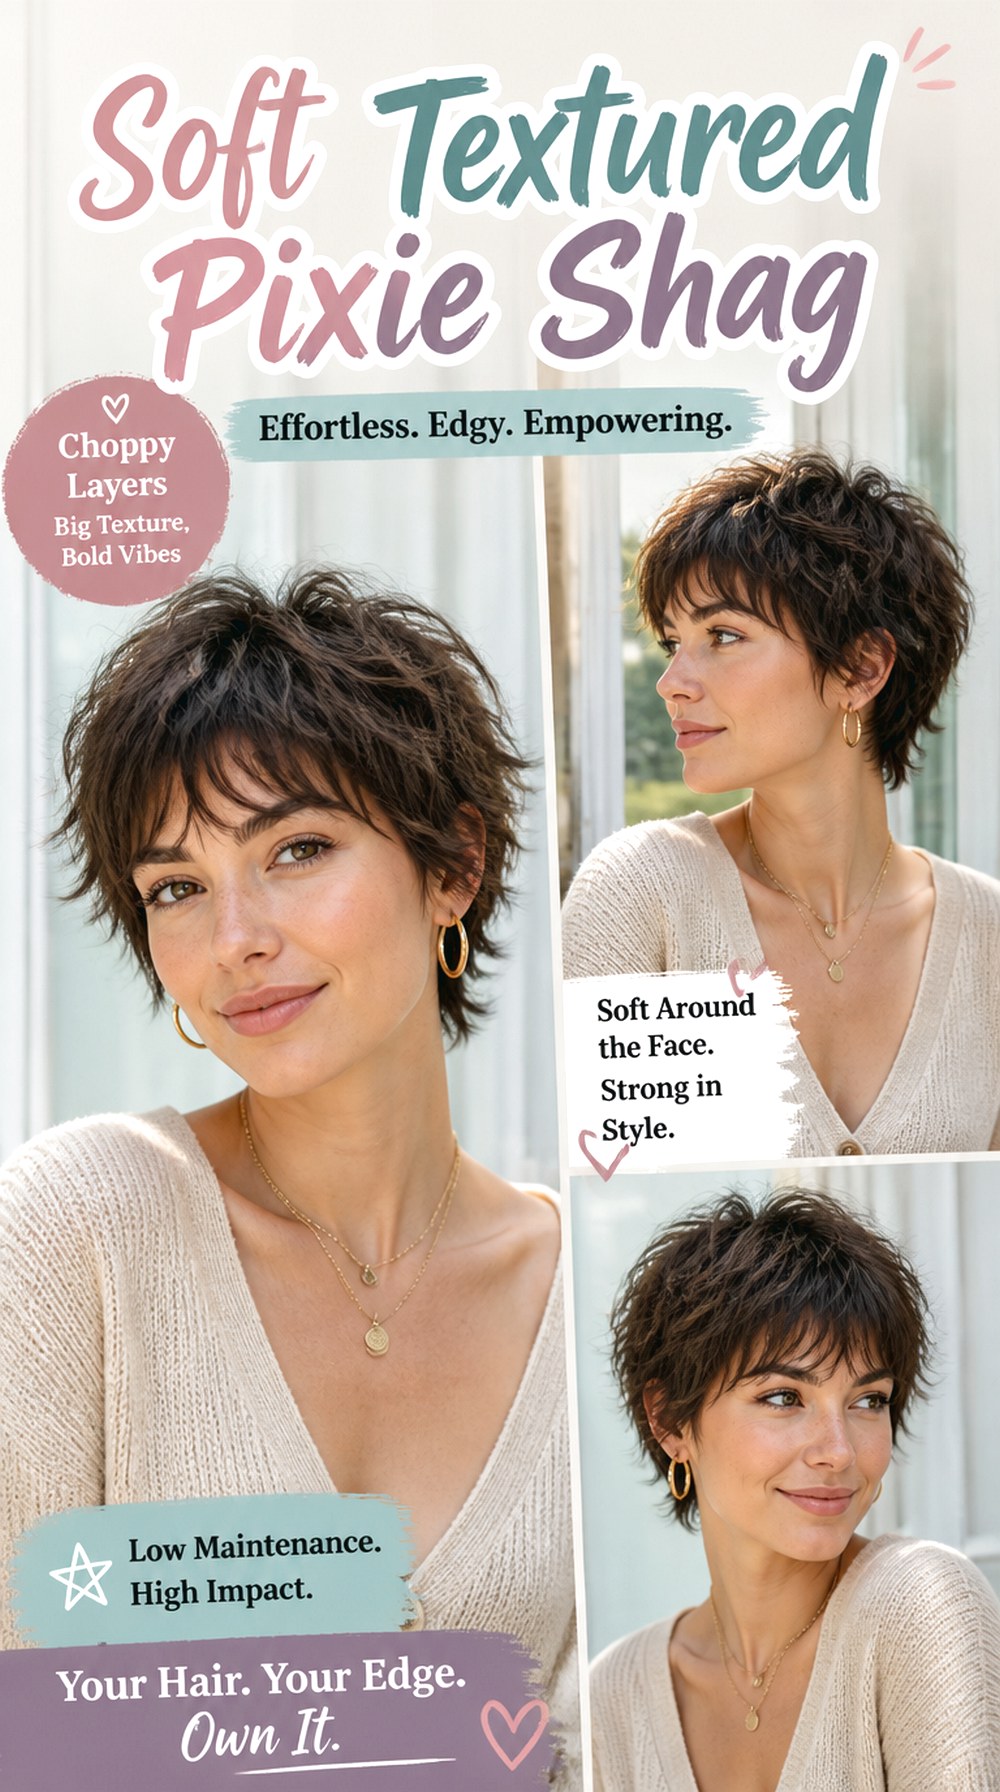
Soft layering gives this pixie shag movement without creating a heavily chopped finish. The crown stays lightly lifted, while longer pieces around the ears and forehead keep the outline relaxed. It suits straight to gently wavy hair, especially medium density, and the softer perimeter can be adjusted around oval, heart, or square faces. Styling is fairly quick: work in lightweight mousse, blow-dry with your fingers, then add a little texturizing spray through the ends. A trim about every six to eight weeks helps the shape stay balanced. At the salon, ask for blended shag layers rather than short, disconnected pieces so the haircut moves without looking overly thinned.
Pro tip: Keep the shortest crown layers long enough to lie softly when you do not want extra volume.
Choppy Pixie Shag With Wispy Bangs
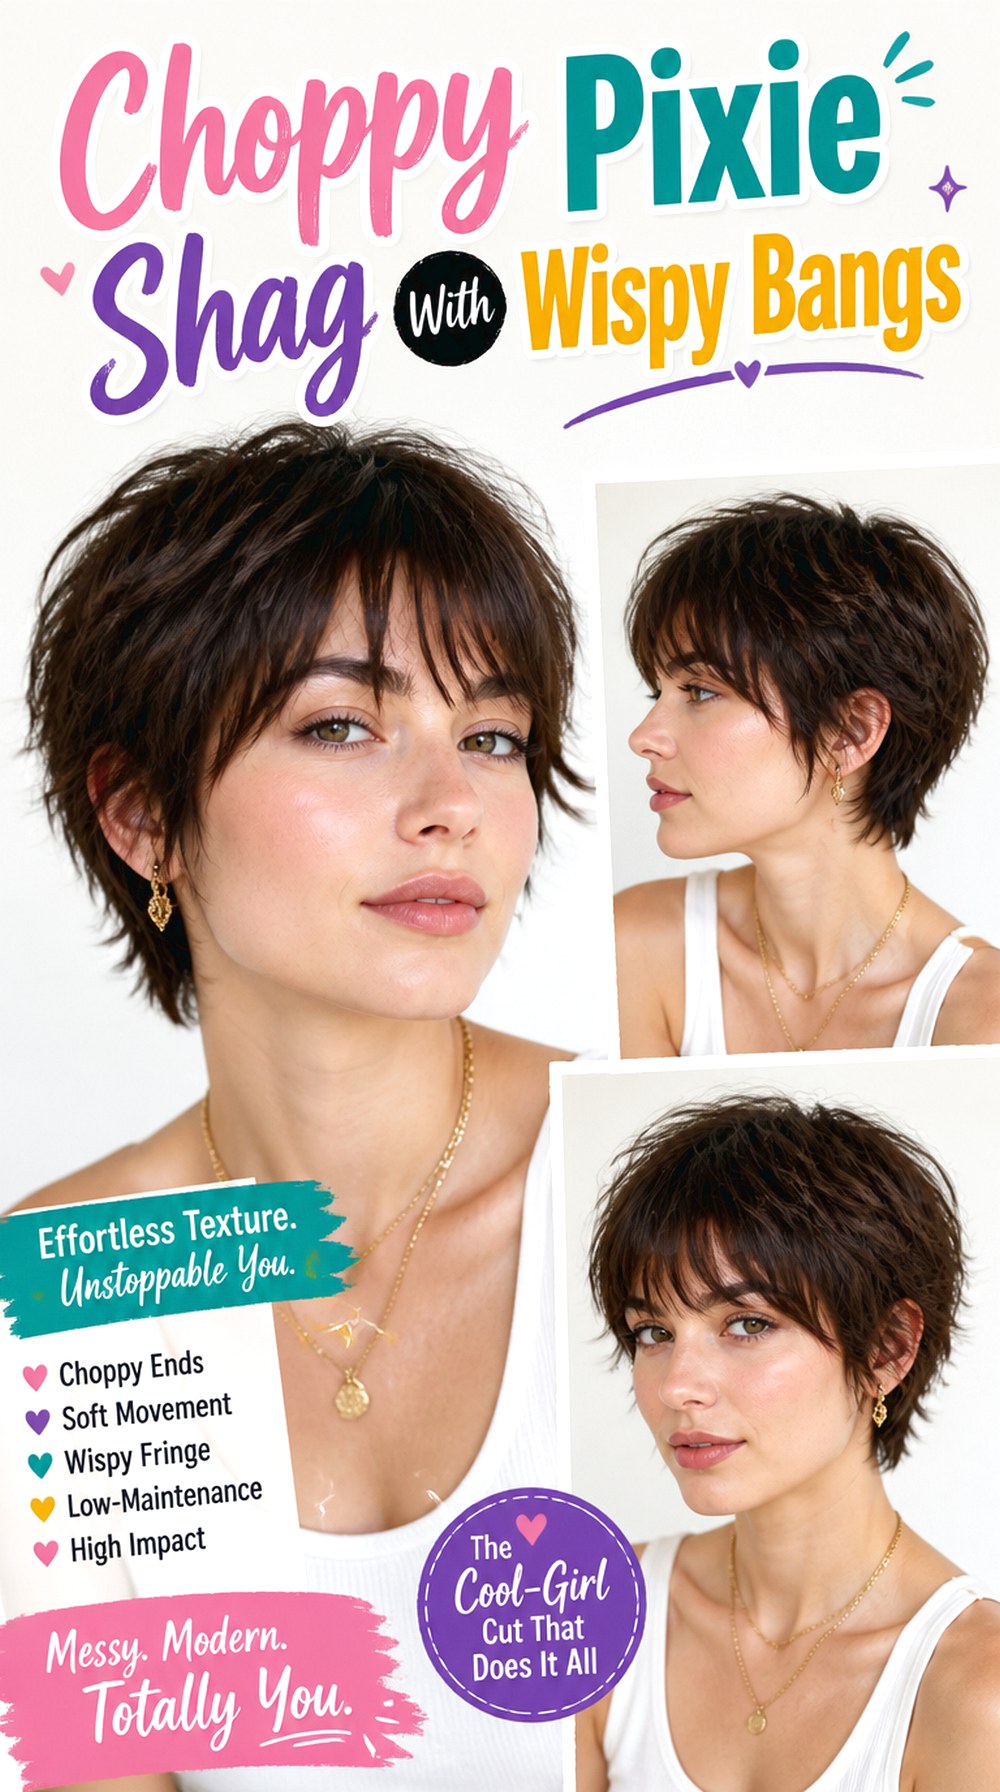
Choppy layers add separation through the top and sides, while wispy bangs keep the front light instead of creating a heavy horizontal line. This cut works particularly well on straight or slightly wavy medium-density hair and can soften the forehead area on longer or oval faces. A small amount of texturizing spray and lightweight styling paste helps define individual pieces without making them stiff. A small flat iron can refine a few stubborn sections when needed. Styling usually takes five to ten minutes, although the fringe may need attention each morning. Ask your stylist for visible texture with enough weight left in the ends so the haircut does not become thin or stringy.
Pro tip: Have the wispy fringe cut with slightly uneven points rather than one uniform length for a softer finish.
Curly Pixie Shag
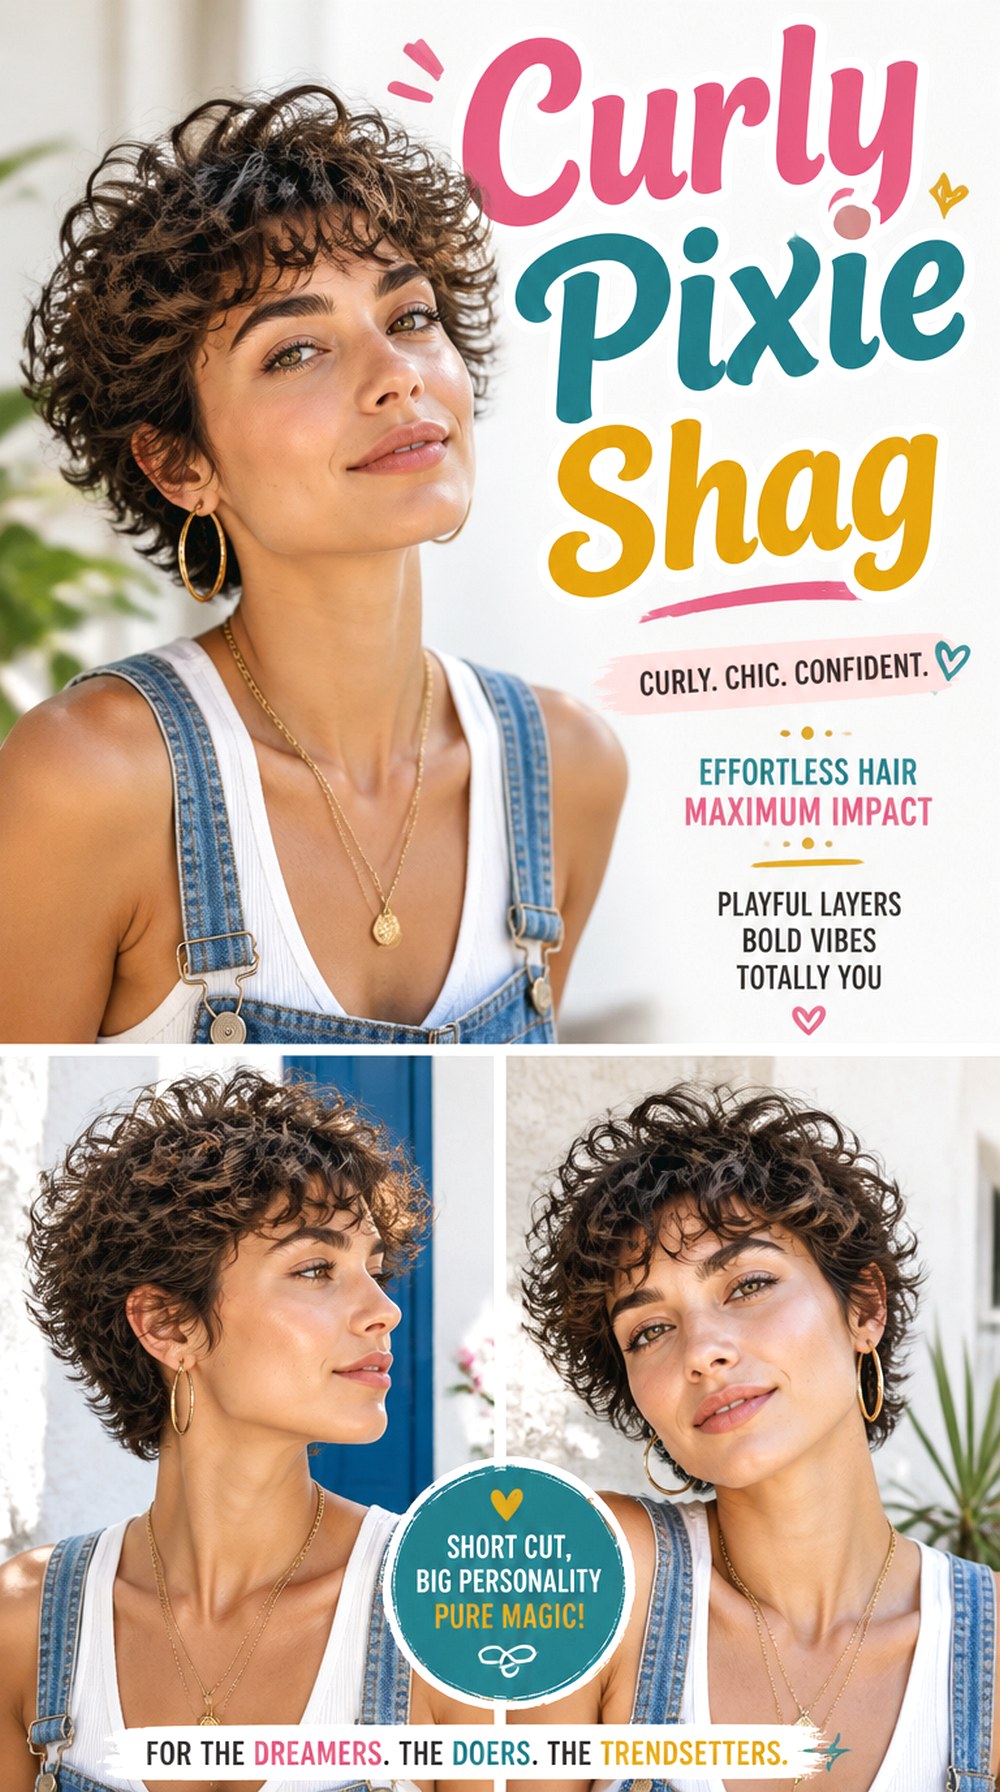
Natural curls give a pixie shag plenty of built-in shape, so the layers should support curl formation rather than break it apart. A rounded crown with slightly longer curls at the fringe and nape creates movement while maintaining a recognizable silhouette. It can work well for medium to thick curly hair, especially when bulk is removed selectively instead of aggressively. Curl cream, leave-in conditioner, and a diffuser are useful for definition and frizz control. Styling is moderate and usually depends more on refreshing curls than heat shaping them. Salon visits every six to eight weeks can keep the layers from becoming triangular. Ask for curl-by-curl consideration around the face and crown.
Pro tip: Keep more length in areas where your curls shrink strongly, particularly around the fringe and temples.
Wavy Pixie Shag With Curtain Fringe

A divided curtain fringe brings softness to the front of a wavy pixie shag while allowing the natural bend of the hair to show. The center or slightly off-center part opens the face, and layered sides blend into a textured crown. It is especially useful for naturally wavy medium-density hair because the texture creates movement with limited effort. Apply a light curl cream or volumizing spray, then scrunch and diffuse or air-dry. A wide-tooth comb is useful before styling but should not be used after waves have formed. Expect moderate maintenance, with fringe adjustments between full cuts if needed. Show your stylist where you want the shortest curtain pieces to fall.
Pro tip: For cheekbone emphasis, have the shortest fringe pieces finish around the upper cheek rather than directly at eyebrow level.
Feathered Pixie Shag

Fine, feathered ends create a lighter pixie shag with visible movement around the crown, sides, and fringe. Unlike a heavily choppy cut, the layers flow into each other and can be brushed away from the face for a softer outline. Straight and slightly wavy hair respond particularly well, while medium density gives enough hair for the feathering to show clearly. Use heat protectant, a small round brush, and light-hold hairspray when you want a polished swept finish. Styling takes a little longer because the direction of the layers matters. A six-week reshaping schedule usually keeps the feathered edges fresh. Ask for soft point-cutting rather than severe thinning throughout the ends.
Pro tip: Start the strongest feathering around the cheekbones and temples so the front stays light without losing fullness at the crown.
Long Pixie Shag With Face-Framing Layers
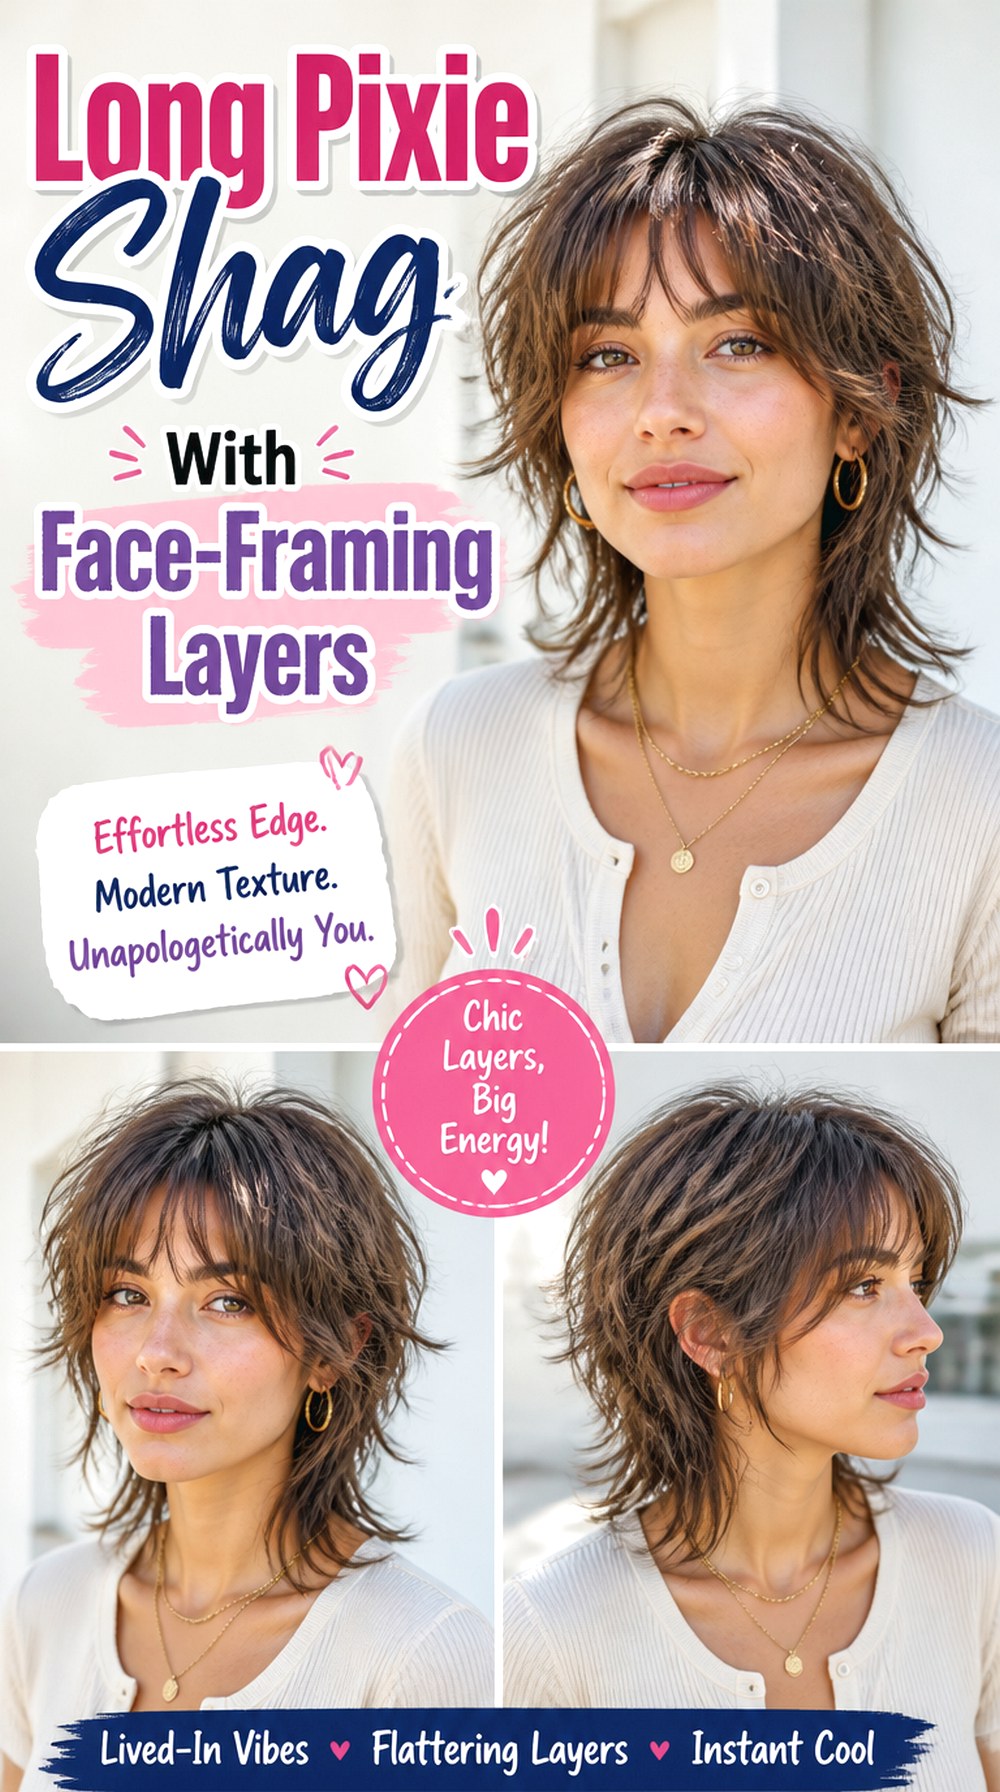
Keeping extra length around the ears, nape, and front creates a pixie shag that feels less severe than a traditional cropped pixie. Face-framing layers can begin near the cheekbones or jaw, depending on the shape you want to highlight. This option works with straight, wavy, and loosely curly hair and is especially practical for someone who wants a short haircut that can still be tucked behind the ears. Use leave-in conditioner, texturizing spray, and a round brush for controlled movement. Styling is usually moderate rather than demanding. Salon shaping every seven to nine weeks works for its softer outline. Ask your stylist to preserve length around the perimeter while building movement internally.
Pro tip: Keep the front pieces long enough to tuck behind the ears if styling flexibility is important to you.
Short Pixie Shag With Micro Bangs

Micro bangs give a short pixie shag a sharper front edge while broken layers keep the rest of the haircut textured. The fringe sits well above the brows, drawing attention to the upper face, while the crown and sides can stay slightly tousled. Straight to gently wavy hair is easiest to control at this short fringe length. A small flat iron, heat protectant, and light styling paste are useful for smoothing the bangs and defining the ends. Daily styling is quick, but the fringe itself requires frequent trims, often every three to four weeks. At the salon, agree on the dry fringe length before cutting because hair can spring upward once released.
Pro tip: If you have a strong cowlick, leave the micro fringe slightly longer so it has enough weight to sit predictably.
Razor-Cut Pixie Shag
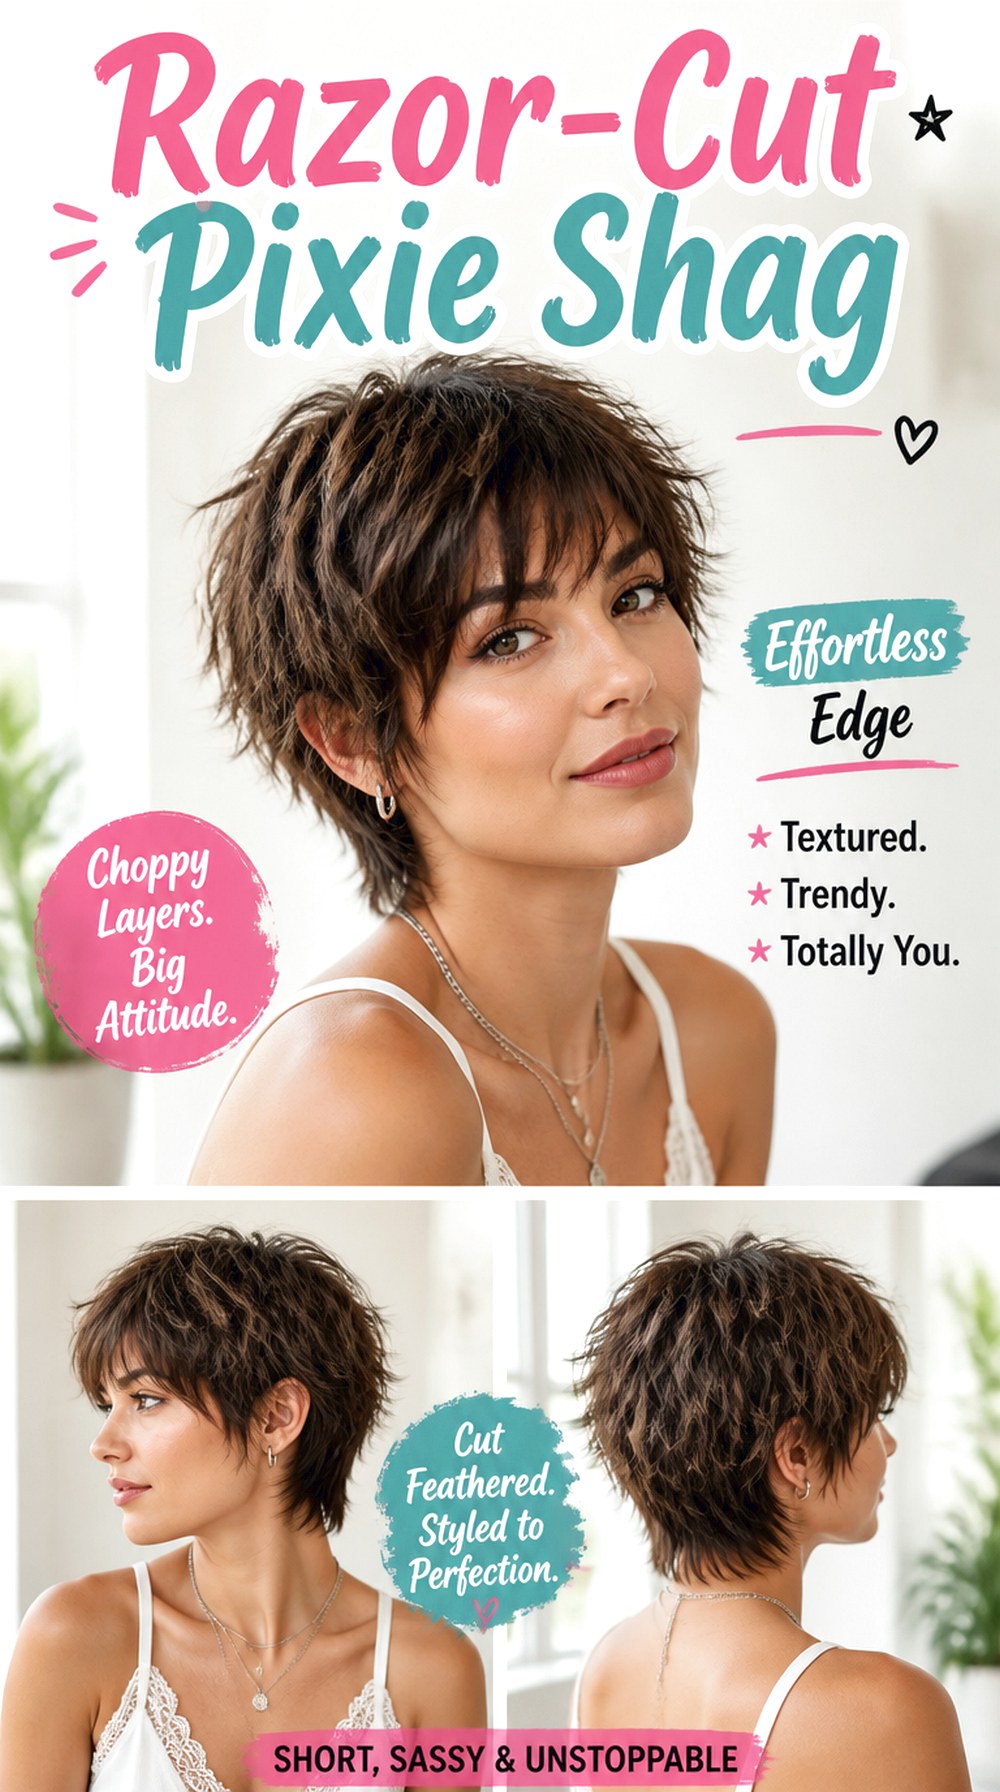
A razor-cut pixie shag has tapered, airy ends rather than the more solid finish created by blunt scissor cutting. The technique can produce soft separation through the fringe, crown, and nape, especially on straight or gently wavy hair. Medium-density hair is often a good match because there is enough fullness to support the textured ends. Very fragile or highly frizz-prone hair may need a different cutting approach. Use smoothing serum, texturizing spray, and heat protectant if you occasionally straighten individual sections. Styling is quick to moderate depending on the desired finish. Ask your stylist whether your hair responds well to razor cutting before committing to the technique.
Pro tip: Request razor work mainly through the ends rather than repeatedly through the same mid-lengths if you want to preserve density.
Tousled Pixie Shag With Side-Swept Bangs
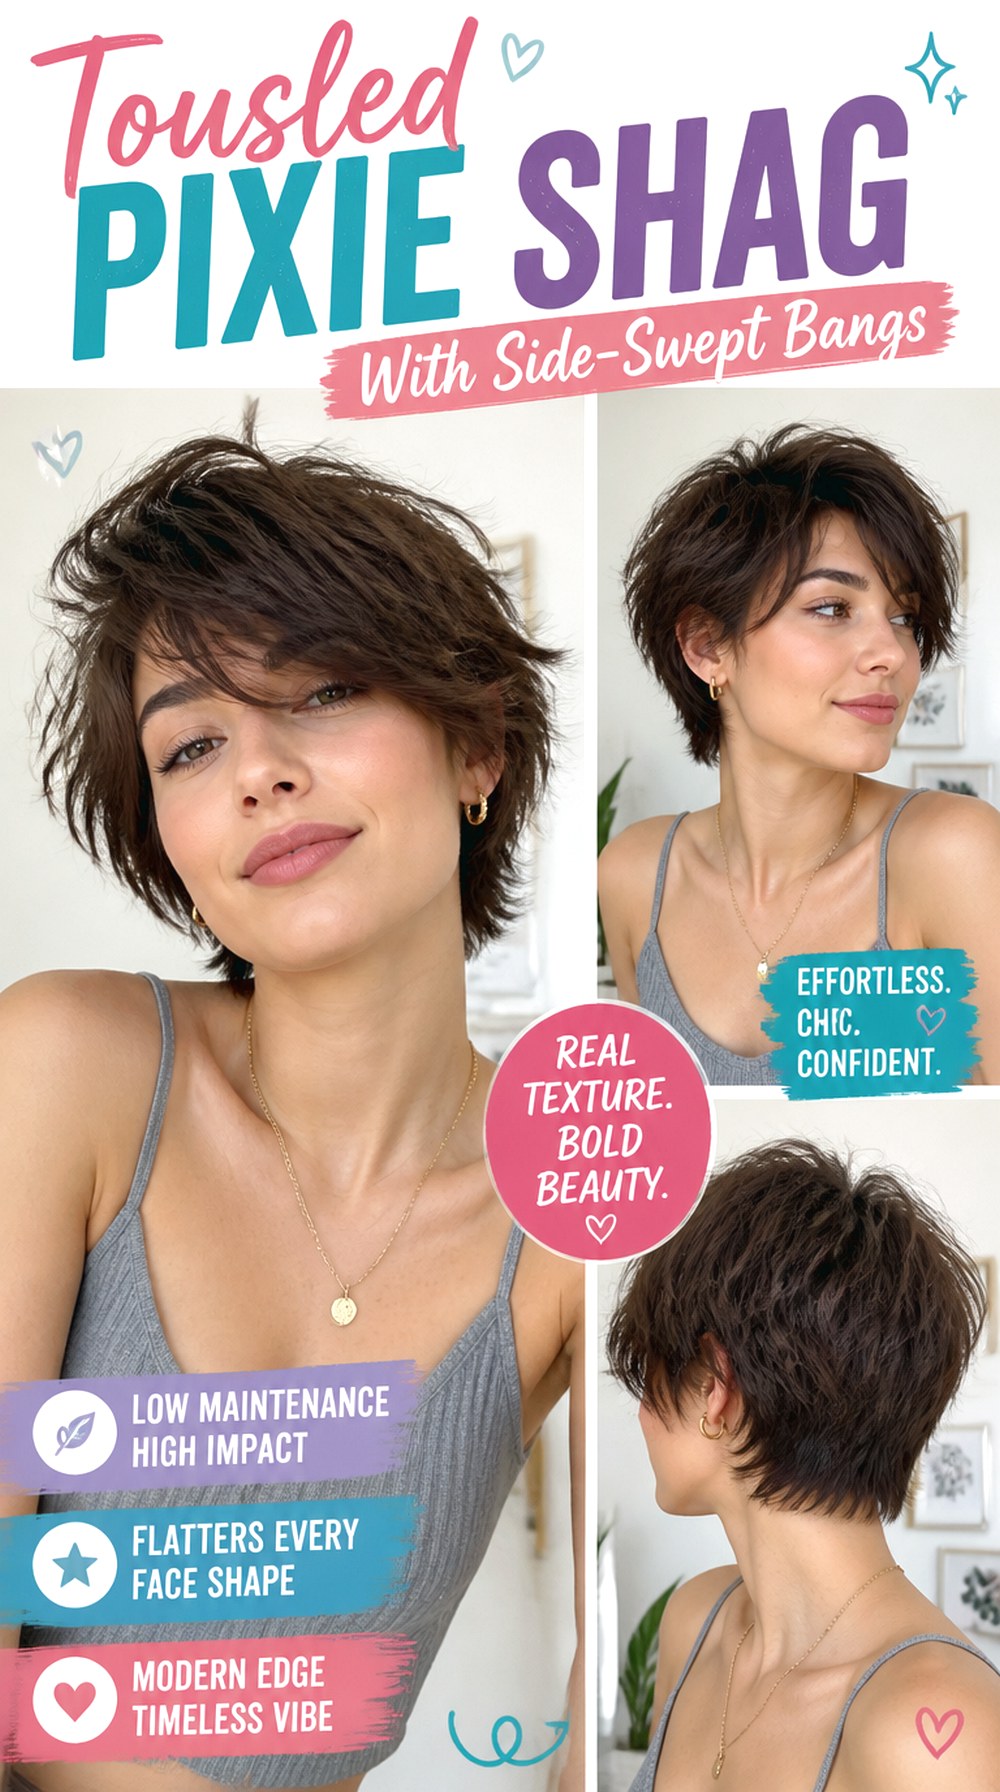
A longer side-swept fringe gives the pixie shag an asymmetrical front while tousled layers keep the crown relaxed. The bangs can cross the forehead and blend into one side, making the haircut useful for people who prefer coverage without a full straight fringe. Straight and wavy textures both work, and medium to thick density supports the longer front. Apply volumizing spray at the roots, blow-dry with a small round brush, and finish selected pieces with texturizing paste. Styling is moderate because the fringe needs some direction. Trimming every six to eight weeks keeps it out of the eyes. Tell your stylist which side you naturally part your hair on.
Pro tip: Keep the side-swept fringe slightly heavier at its starting point so it does not split into thin pieces across the forehead.
Voluminous Pixie Shag For Thick Hair

Thick hair can create a full, sculptural pixie shag when the bulk is managed in the right places. Shorter internal layers lift the crown, while controlled weight removal through the sides prevents the cut from becoming too wide. This shape suits naturally straight, wavy, or loose curly thick hair, but the exact layering should reflect how much the hair expands after drying. A smoothing serum, wide-tooth comb, and lightweight mousse provide control without flattening the texture. Styling is moderate, and occasional blow-drying may help direct crown volume. Reshaping every six to eight weeks is useful. Ask your stylist to remove bulk internally while protecting enough perimeter weight for a strong outline.
Pro tip: Avoid excessive thinning near the surface; it can create short flyaways and make thick hair look even fuller as it grows.
Airy Pixie Shag For Fine Hair

Fine hair benefits from a pixie shag that creates movement without sacrificing too much density. Slightly shorter crown layers can provide lift, but the lower perimeter should remain reasonably solid so the ends do not appear sparse. Straight and soft wavy textures are well suited to this approach. Use volumizing spray at the roots, lightweight mousse through the mid-lengths, and a small round brush for gentle lift. Styling usually takes only a few minutes once the cut is balanced. A trim every six to eight weeks prevents the ends from losing their shape. Ask for strategic layers rather than aggressive thinning, especially around the temples and lower sides.
Pro tip: Keep the longest perimeter pieces slightly blunt underneath the texture to make fine hair appear more substantial.
Mullet-Inspired Pixie Shag
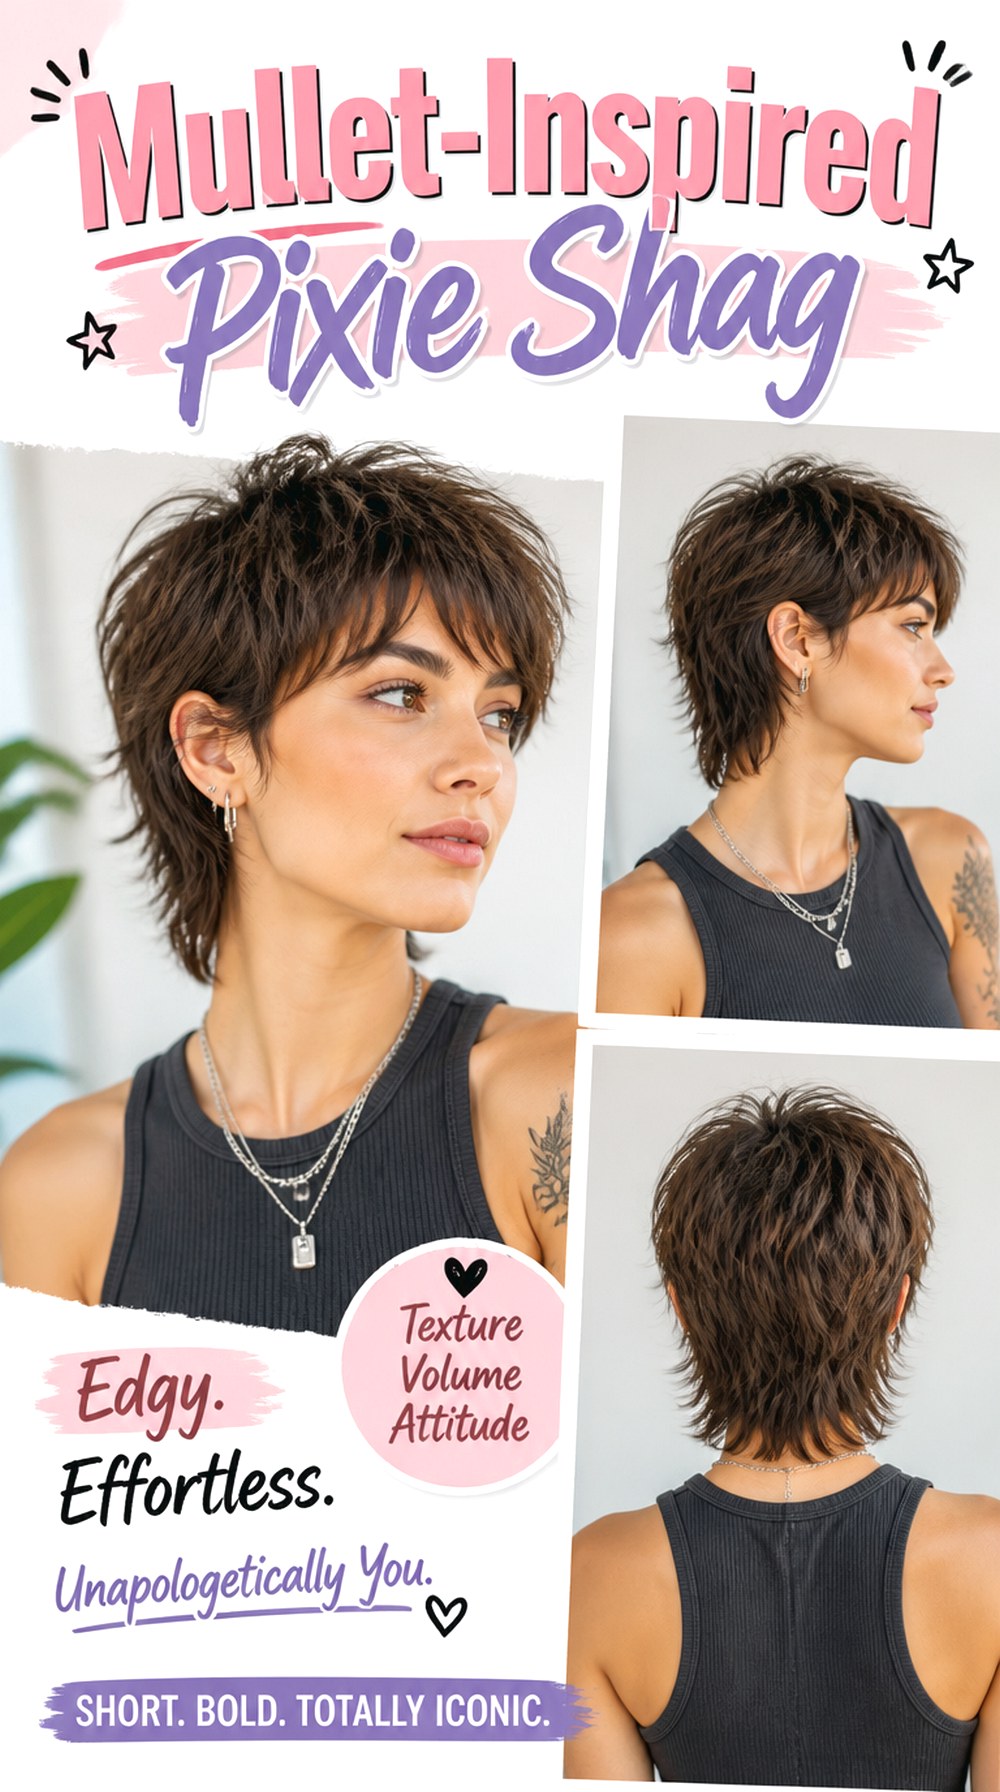
A mullet-inspired pixie shag combines shorter, textured sides and crown layers with noticeable extra length at the nape. The contrast can be subtle or pronounced, depending on how bold you want the silhouette. Straight, wavy, and curly textures can all suit it, though thicker hair may need weight removed around the back. Styling paste, texture spray, and a diffuser or blow-dryer help separate the crown while keeping the nape defined. Daily styling is usually moderate because the shape looks best when the layers remain distinct. Salon visits every six to eight weeks keep the short-to-long transition intentional. Bring a reference showing exactly how much nape length you want to retain.
Pro tip: Decide whether you want a soft transition or a clearly disconnected back before the cut; that detail changes the entire character of the haircut.
Tapered Pixie Shag

A tapered pixie shag keeps the neckline and lower sides neater while maintaining shaggy movement through the upper layers. The closer perimeter gives the haircut a more controlled outline without removing its texture. It works particularly well on straight, wavy, and loose curly hair and can be useful for dense hair that tends to puff around the ears. Apply lightweight mousse for root lift, smoothing serum around the taper, and texturizing spray through the crown. Styling is quick once the sides are shaped correctly. Because the taper grows out visibly, expect salon cleanups every four to six weeks. Ask for a soft taper rather than a hard clipper line if you prefer natural grow-out.
Pro tip: Leave a little softness directly above the ears so the textured top blends naturally into the shorter lower section.
Pixie Shag With Crown Volume
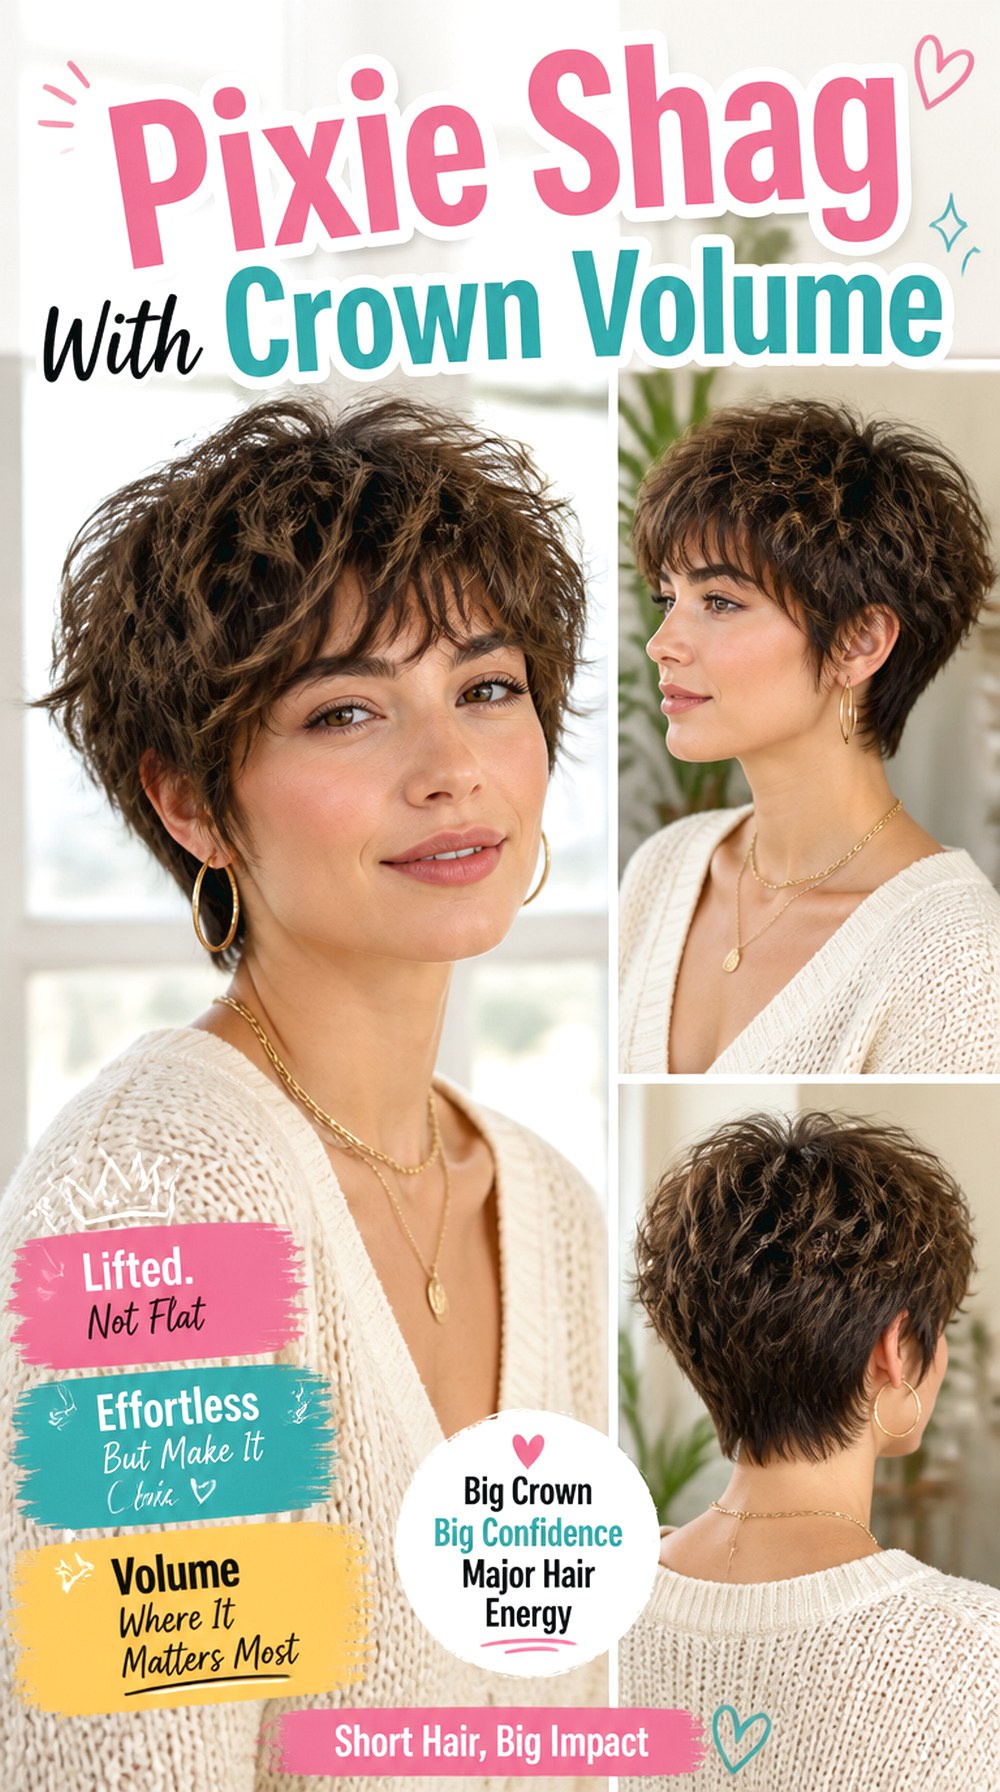
Concentrating volume at the crown gives a pixie shag height without requiring equal fullness at the sides. Short-to-medium layers around the upper head lift more easily, while longer front and lower pieces keep the shape balanced. This approach can work especially well for fine to medium hair that tends to lie flat. Volumizing spray, a small round brush, and light-hold hairspray help maintain lift without creating a stiff finish. Styling is moderate and usually involves a few minutes of focused blow-drying at the roots. Have the shape refreshed every six to eight weeks. Ask your stylist to graduate the crown lengths instead of cutting every top layer equally short.
Pro tip: Direct the crown roots upward and slightly backward while drying; lifting them straight sideways can make the silhouette look too wide.
Piecey Pixie Shag With Textured Ends

Piecey ends give the pixie shag a defined, separated finish that shows the individual layers clearly. The perimeter can remain soft while selected sections around the fringe, temples, and crown are encouraged to separate. Straight and slightly wavy medium-density hair tends to display this texture well. Start with heat protectant if blow-drying, then use texturizing spray and a tiny amount of matte styling paste on dry ends. Too much product can make the pieces collapse together. Styling is quick, often under ten minutes. A six-to-eight-week trim maintains the definition. Ask for point-cut or softly notched ends rather than an overly thin, shredded perimeter.
Pro tip: Warm a pea-sized amount of paste between your fingertips and touch only the final inch of selected pieces for cleaner separation.
Undercut Pixie Shag
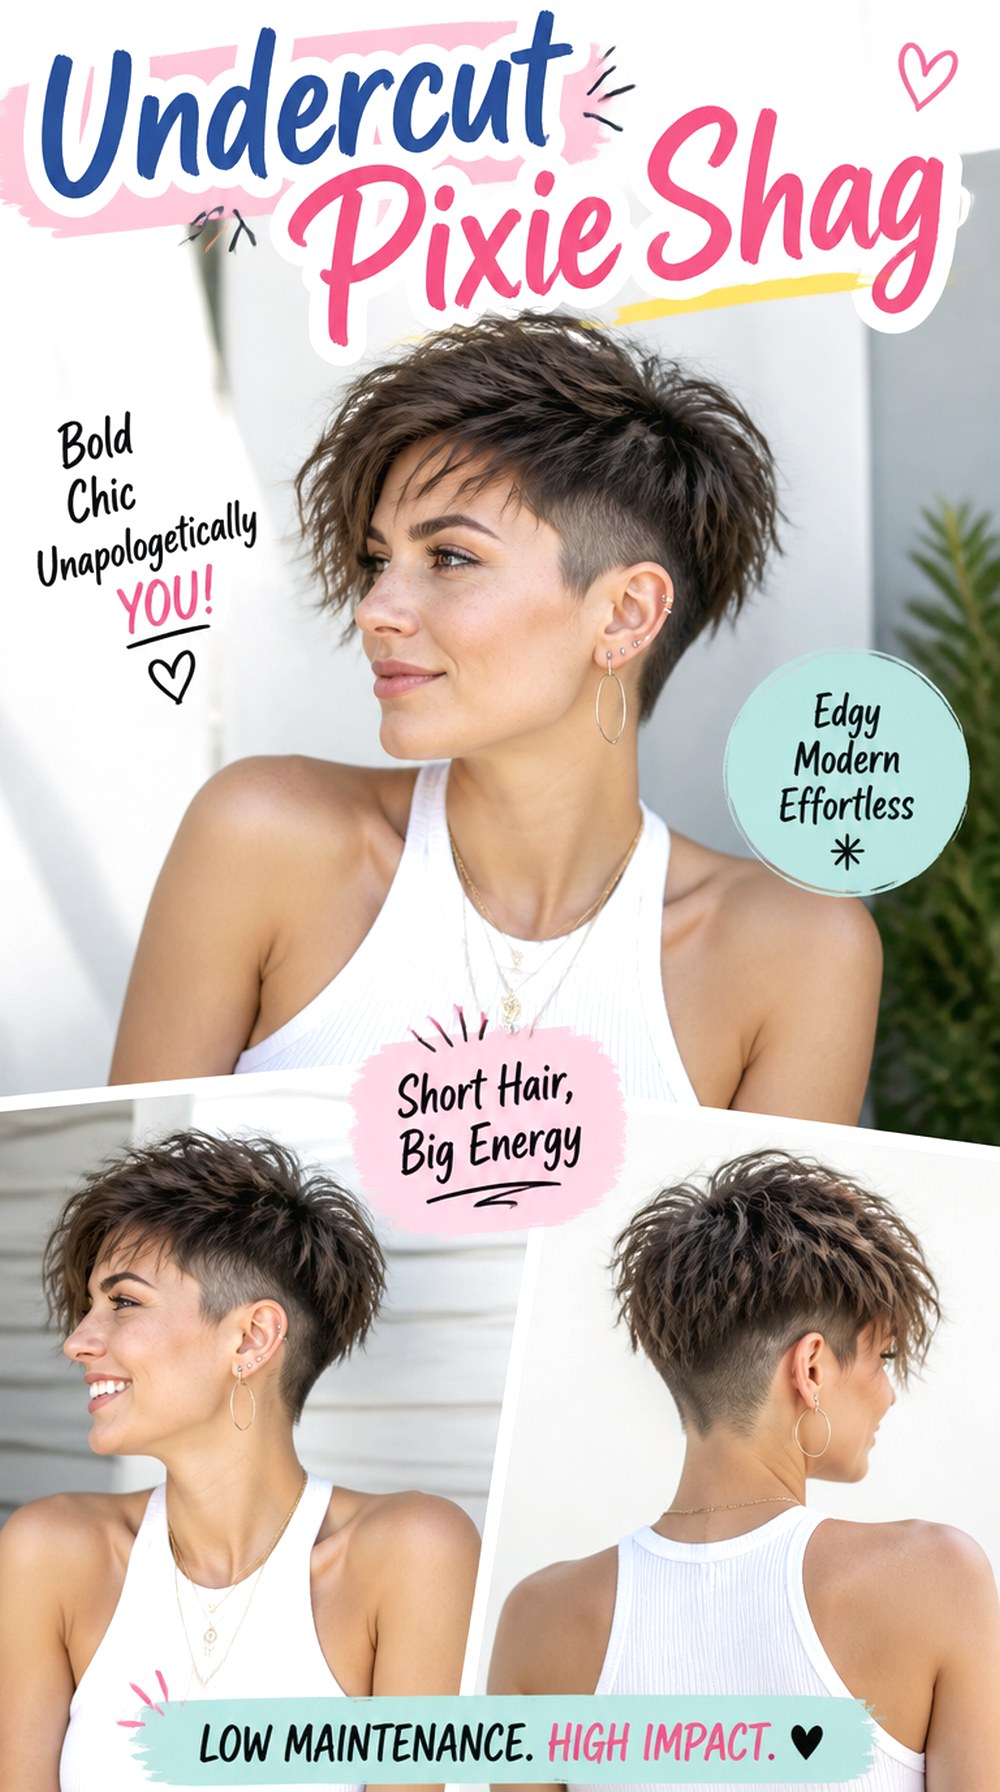
An undercut removes significant length beneath part of the pixie shag, allowing the longer top layers to create a strong contrast. The undercut may sit at the sides, nape, or both, while the upper hair remains shaggy and movable. It is especially useful for thick hair when reducing hidden bulk is a priority. Styling can be surprisingly quick: use texturizing powder or volumizing spray at the roots and a light styling paste through the ends. However, the shaved or closely cropped area needs regular upkeep, often every three to five weeks. At the salon, clearly agree on how high the undercut should extend and whether you want it visible or concealed.
Pro tip: Keep the undercut lower if you want the option of hiding it when the top hair is worn down.
Grown-Out Pixie Shag
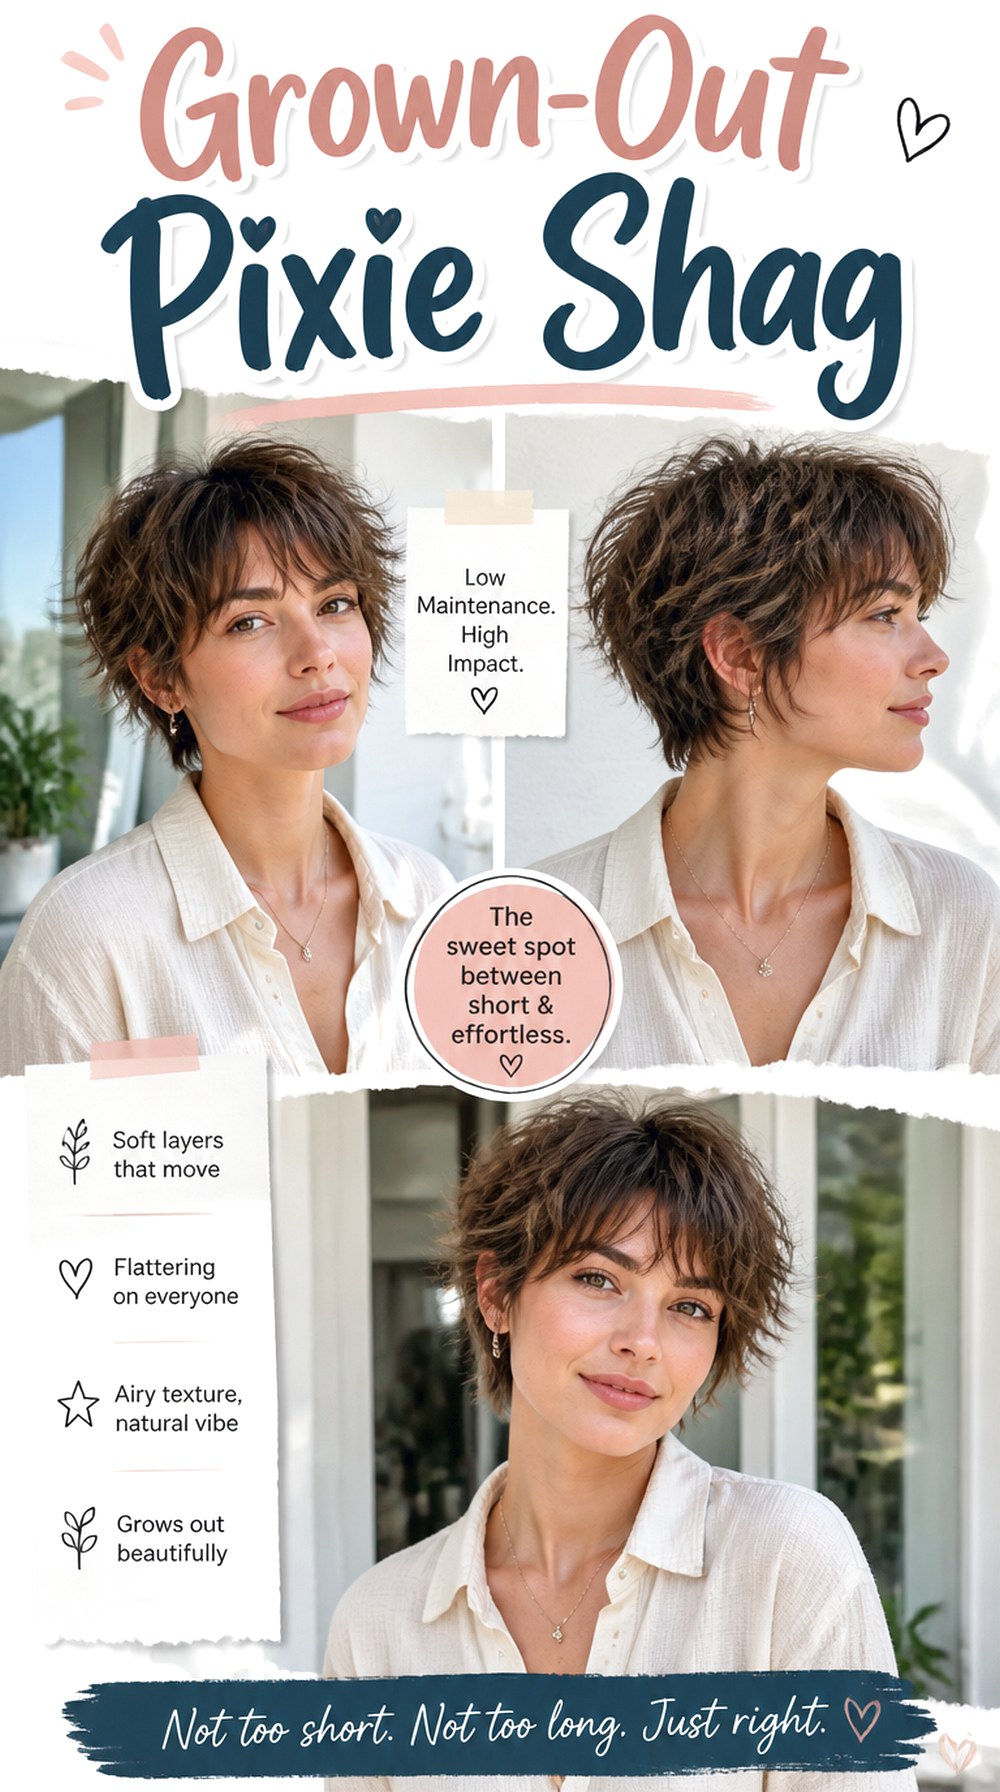
A grown-out pixie shag sits between a cropped pixie and a short shag, with extra length around the ears, fringe, and nape. The uneven growth that can feel awkward in a classic pixie becomes part of the layered shape here. It works with most textures and is particularly practical for anyone transitioning toward a bob or longer shag. Leave-in conditioner, texture spray, and a wide-tooth comb help keep the longer pieces controlled without over-styling them. Daily effort is low to moderate, and salon visits may stretch to eight or ten weeks if the shape remains balanced. Ask your stylist to reshape rather than automatically shortening every section.
Pro tip: During grow-out appointments, trim bulky areas selectively while protecting the front and nape lengths that are helping you reach your next haircut.
Pixie Shag With Soft Curly Fringe

A soft curly fringe brings natural texture forward while the remaining pixie shag stays layered around the crown, sides, and nape. The bangs can sit at eyebrow level when dry or fall slightly longer for a looser shape. Naturally wavy and curly hair works best, and medium density usually gives enough fullness without overwhelming the forehead. Apply leave-in conditioner and curl cream, then use a diffuser on low airflow if you do not air-dry. Styling is moderate mainly because curls may need refreshing between wash days. Have the fringe checked every four to six weeks. Ask your stylist to cut according to your natural curl shrinkage rather than stretching the hair straight.
Pro tip: Have the fringe cut dry or checked after drying so you can judge where each curl actually rests on the forehead.
Conclusion
These 18 pixie shag haircut ideas show how much the basic shape can change with small adjustments. A pixie shag may be cropped and tapered, longer and softer, curly, feathered, piecey, or built around a statement fringe. The length, layer density, bangs, crown volume, natural texture, parting, and final finish can all be changed without losing the shaggy character of the cut.
The best choice depends on your face shape, natural hair texture, density, daily routine, and willingness to style or visit the salon regularly. Fine hair often needs protected density, while thick hair may need thoughtful bulk removal. Choose the version whose natural behavior is closest to your own hair rather than relying only on the finished styling in a reference photo.
CTA
Choose one or two favorite pixie shag ideas and save clear photos from several angles before your appointment. Discuss your face shape, natural hair texture, density, preferred length, maintenance level, and normal styling routine with your stylist. Point out the exact fringe length, crown layers, face-framing pieces, nape length, volume, or finish you like in each photo. Those details are much more useful than simply asking for a general pixie shag and can help your stylist adapt the haircut to your own hair.
FAQs
Is a pixie shag haircut good for fine hair?
Yes, it can work well on fine hair when the layering is controlled. Keeping some weight through the perimeter and adding strategic crown layers can create movement without making the ends look sparse.
How often does a pixie shag need trimming?
Most versions benefit from reshaping about every five to eight weeks. Short tapers, micro bangs, and undercuts may need maintenance sooner, while longer grown-out versions can often go longer.
Can a pixie shag work with curly hair?
Yes. Curly pixie shags can have excellent natural volume and texture, but the layers should account for curl pattern and shrinkage. Avoid removing more bulk than the curls actually need.
Does a pixie shag require heat styling every day?
Not necessarily. Wavy, curly, and naturally textured hair can often be air-dried or diffused with styling products. Straighter hair may need brief blow-drying or occasional heat styling when more volume or definition is desired.