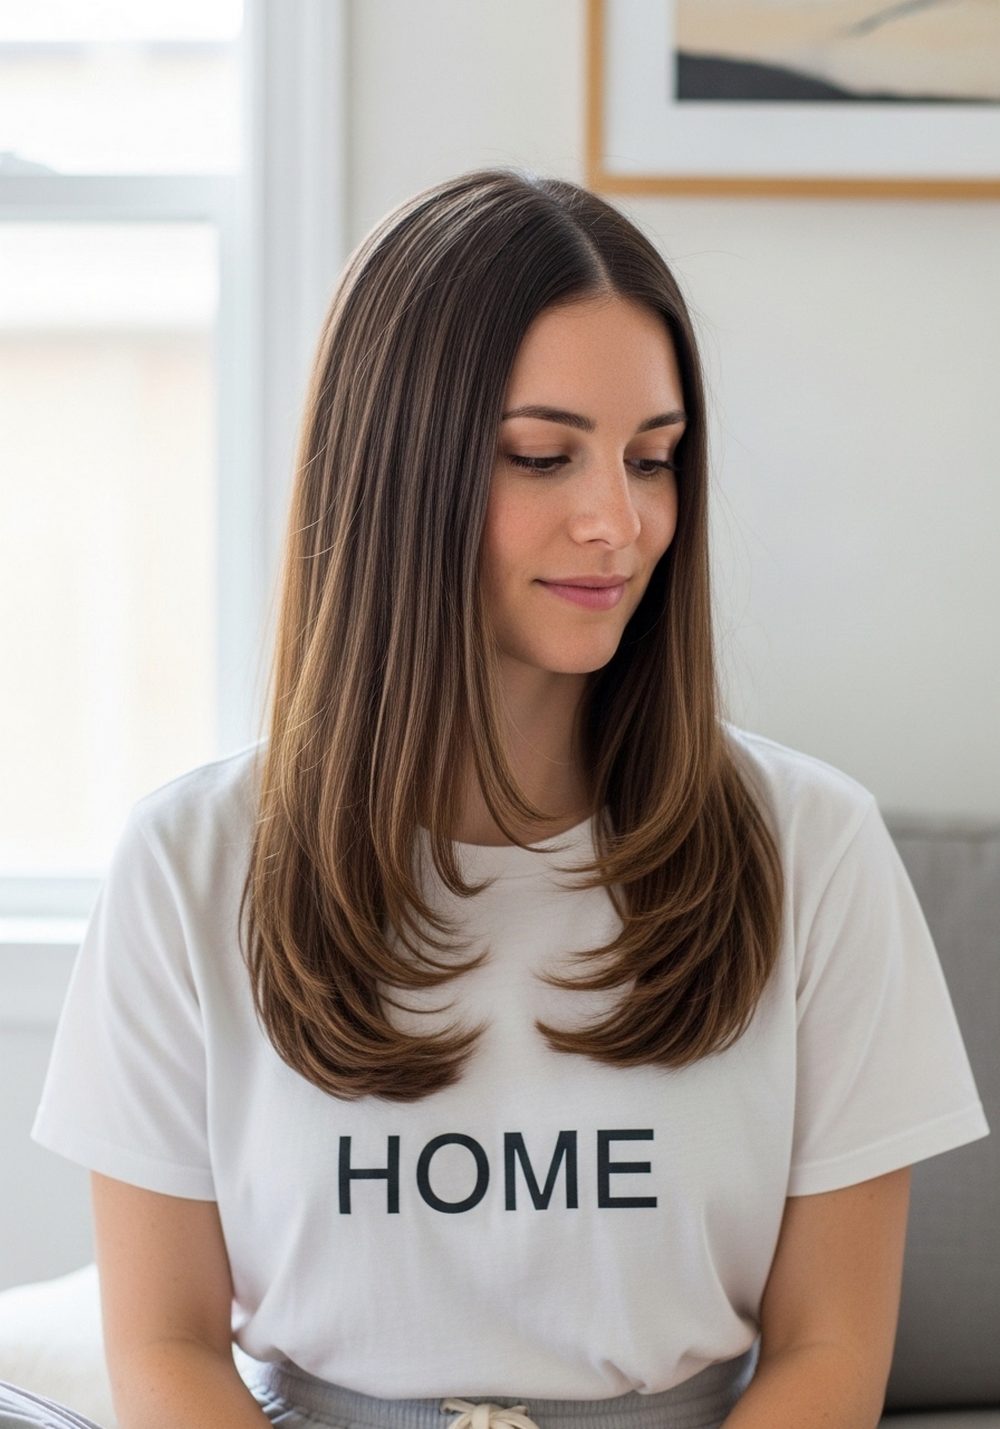
10 U-Cut Hairstyles for Long Hair That Keep Length But Add Shape
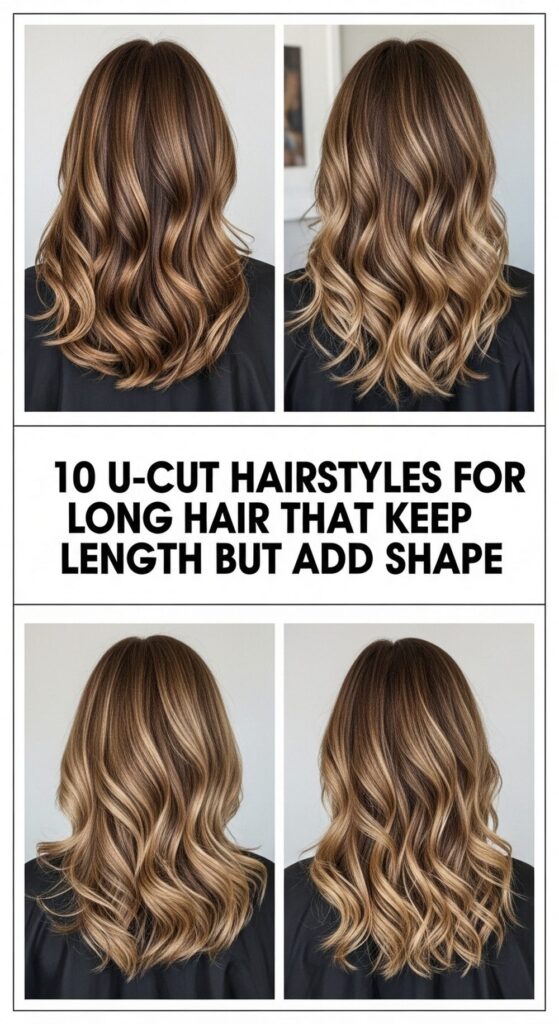
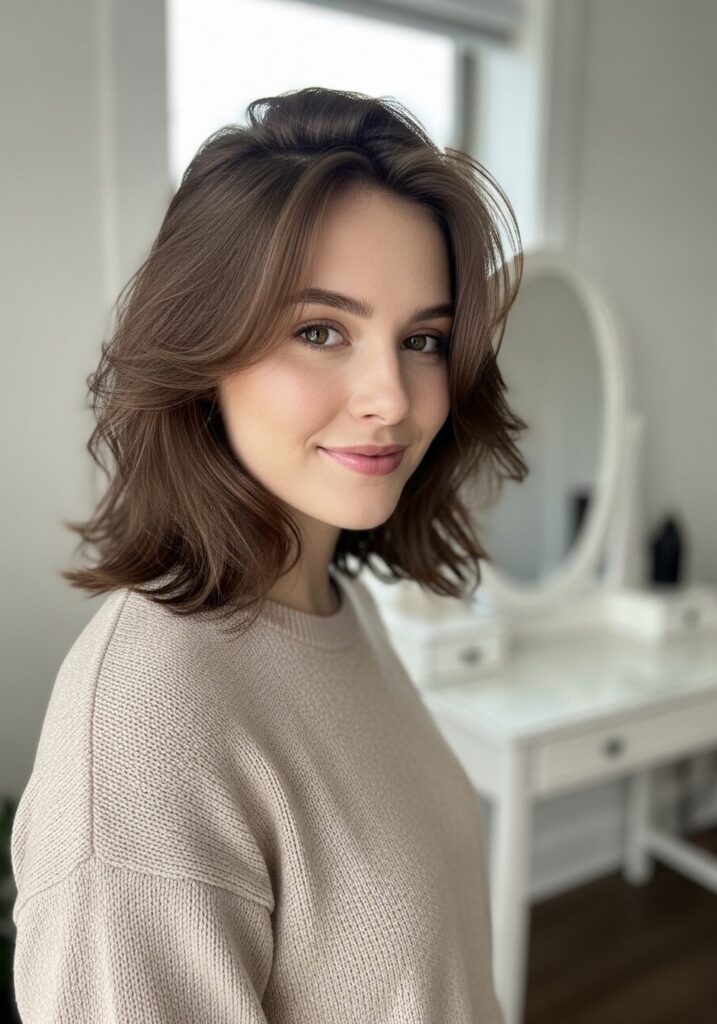
U-cut hairstyles are perfect when you love your long hair but hate how flat or heavy it can look. Instead of a blunt line, the ends curve into a soft “U” shape that keeps most of your length while carving out shape, swing, and movement. This list focuses on long hair that sits past the shoulders, with ideas for straight, wavy, and curly textures. You’ll see options that soften a strong jaw, slim a round face, or balance a long one. Before styling, gently detangle with a wide-tooth comb, use a light leave-in conditioner, and always add heat protectant if you’re blow-drying or curling. A few basic tools and a good trim are all you need to make these cuts shine.
Quick List
- Classic Soft U-Cut Length Saver
- Face-Framing Layered U-Cut
- Long U-Cut with Curtain Bangs
- Textured Straight U-Cut with Light Layers
- Airy Wavy U-Cut with Lifted Ends
- Defined Curly U-Cut for Shape and Bounce
- Sleek Glass-Hair U-Cut
- Volumized U-Cut with Hidden Layers
- Low-Maintenance Air-Dry U-Cut
- Glam Blowout U-Cut for Special Occasions
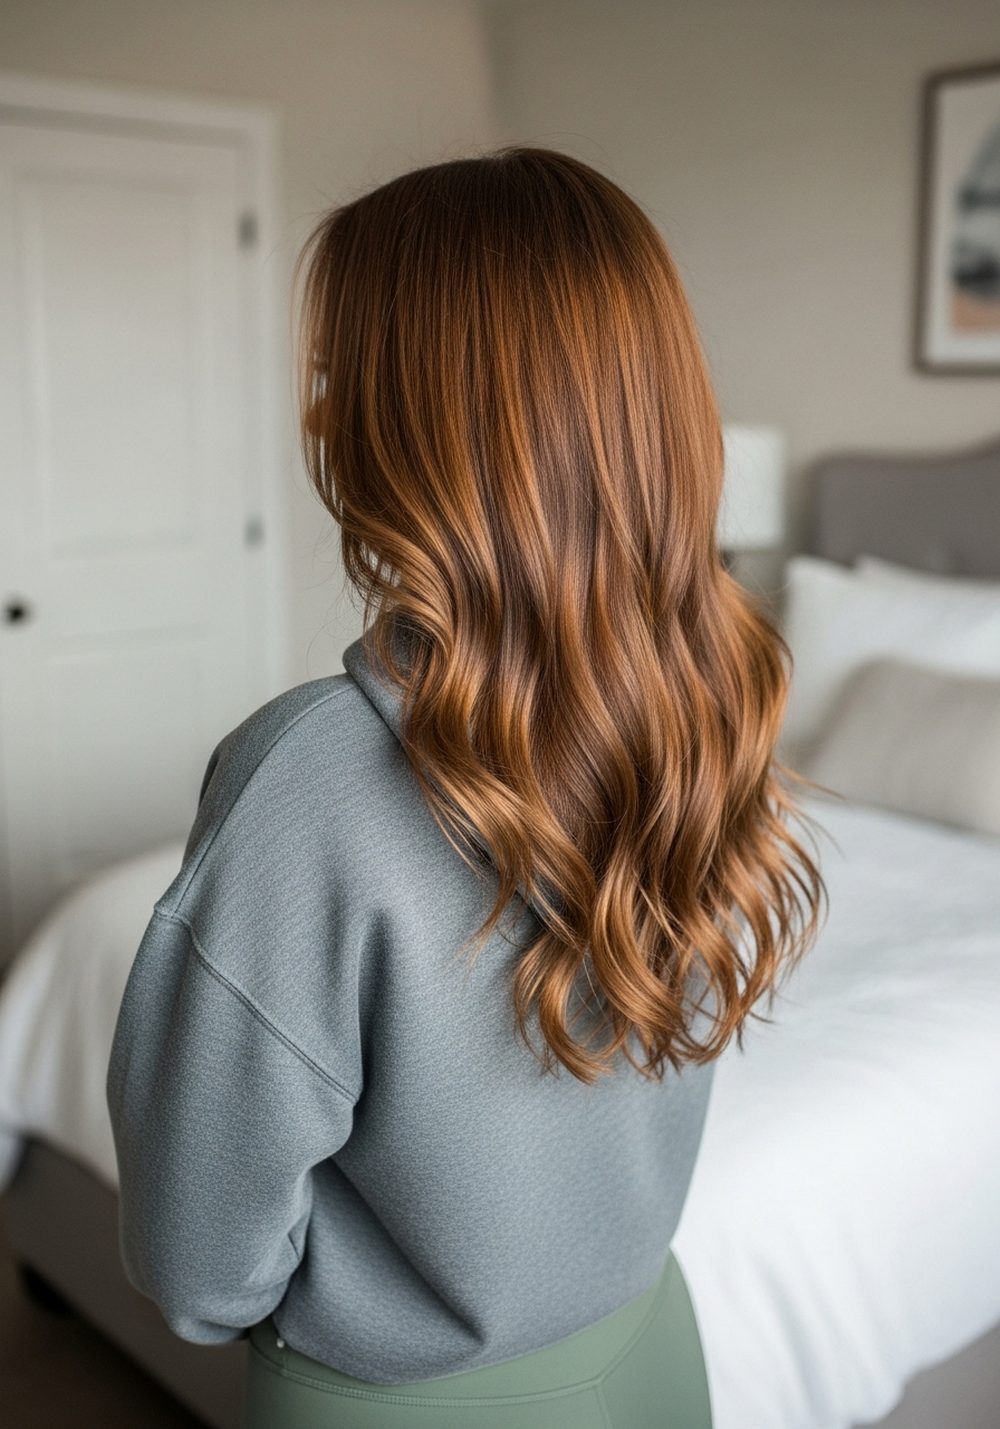
1. Classic Soft U-Cut Length Saver
This is the purest version of the U-cut: long hair that curves gently at the ends into a soft U, with almost all of your length kept intact. It removes that heavy, blocky feeling you get from a blunt line while still looking full and healthy. The movement is subtle but noticeable in a ponytail, braid, or when your hair is loose and straight. Ask your stylist to keep the shortest point of the U only slightly shorter than the sides so you don’t lose inches. This is ideal if you’re growing your hair out but want it to look intentional, not scraggly. Pro tip: dust the ends every 8–10 weeks to keep the shape sharp without sacrificing length.
How To Style
- Apply a light smoothing cream to damp hair.
- Blow-dry using a paddle brush, following the curve of the ends inward.
- Glide a flat iron through mid-lengths if needed, bending slightly at the tips.
- Finish with a small amount of serum just on the ends.
Best For
- Face shapes: oval, round, heart
- Hair types: straight or softly wavy
Tools & Products
- Wide-tooth comb
- Paddle brush
- Blow-dryer
- Heat protectant spray
- Light hair serum or cream
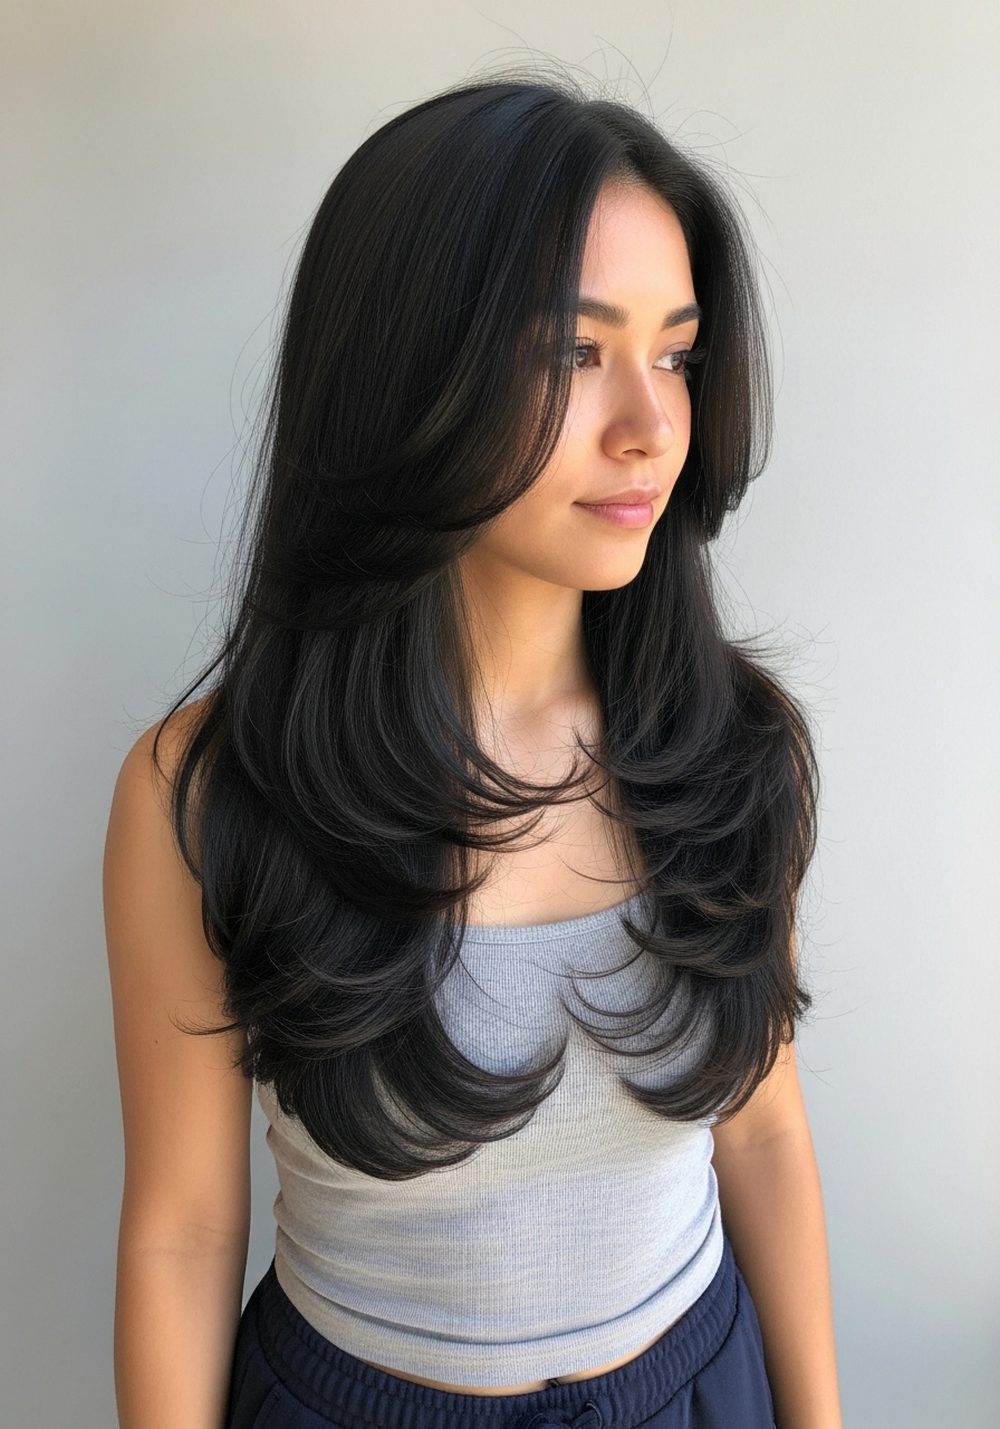
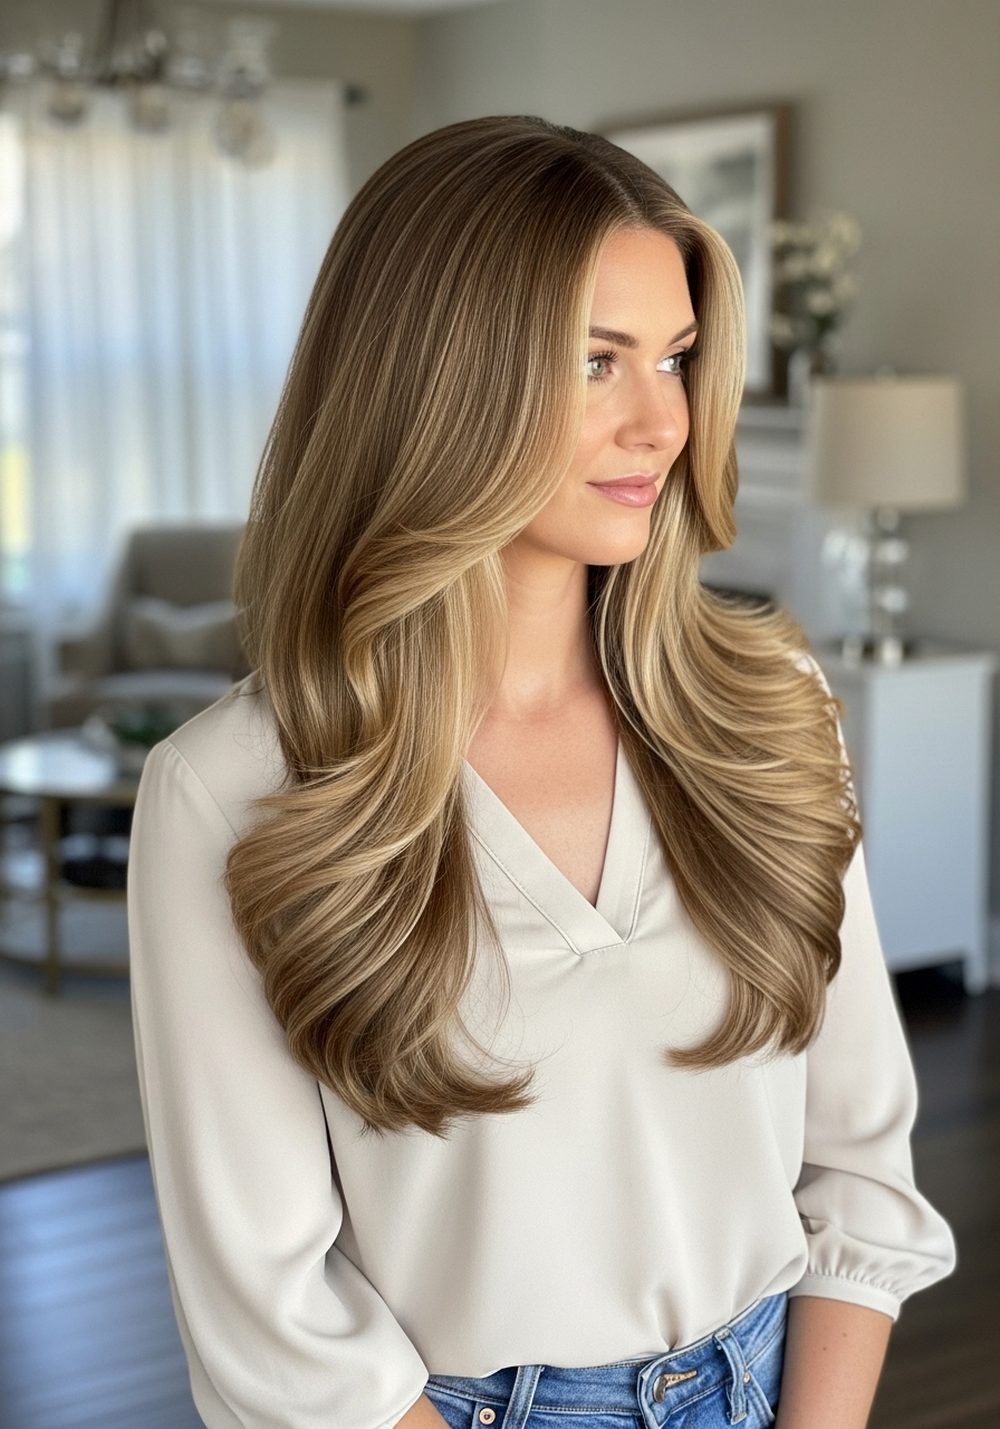
2. Face-Framing Layered U-Cut
If you want shape around your face without losing your long length, this U-cut with face-framing layers is a strong choice. Soft, graduated pieces around the cheeks and collarbone blend into a gentle U at the back, which stops the ends from looking thin. These layers draw attention to your eyes and cheekbones and can slim a round face or soften a square jaw. You can style the front pieces straight, flipped out, or lightly waved depending on your mood. The back stays long and flowing, so you still have dramatic length in braids and ponytails. Pro tip: ask your stylist where you usually part your hair so the face-framing pieces fall exactly where you like.
How To Style
- Apply volumizing spray at the roots and a light cream on mid-lengths.
- Blow-dry with a round brush, rolling the face-framing pieces away from the face.
- Add a few loose waves around the front with a curling iron.
- Shake out with fingers for a soft, lived-in finish.
Best For
- Face shapes: round, square, heart
- Hair types: straight, wavy
Tools & Products
- Sectioning clips
- Round brush
- Blow-dryer
- Volumizing spray
- Light styling cream
3. Long U-Cut with Curtain Bangs
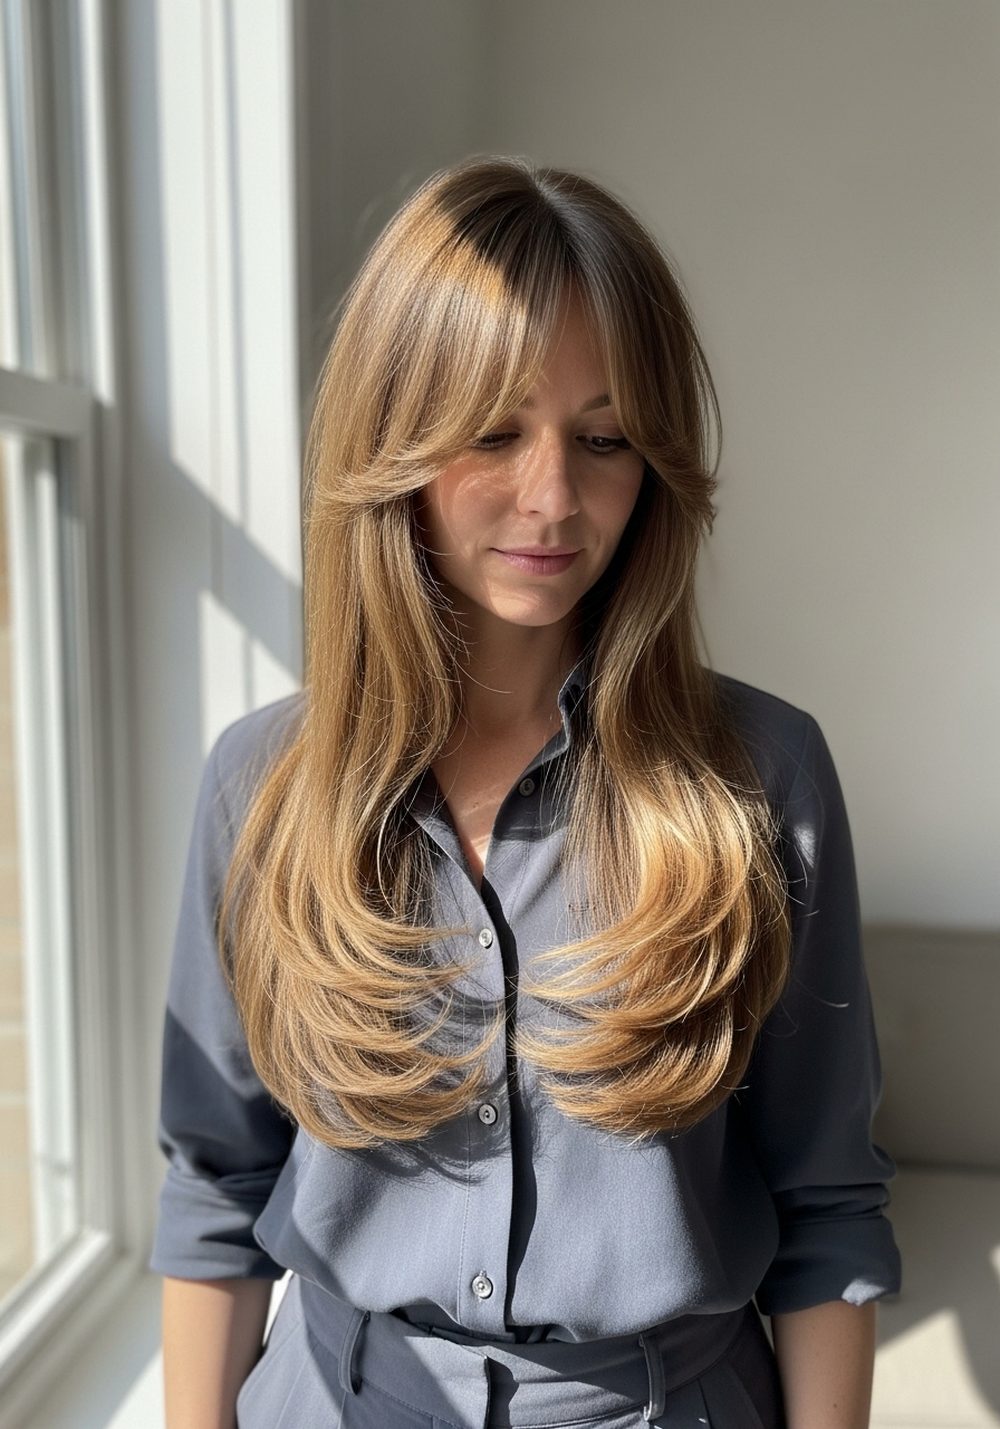
A long U-cut paired with curtain bangs gives you tons of movement without sacrificing your length. The bangs split softly down the center or slightly off-center and flow into the U shape at the sides, which creates a smooth transition from fringe to ends. This look is especially nice if you like to wear your hair half-up or clipped back, because the bangs add interest even when the rest is pulled away. It can help balance a long face or soften a sharper forehead. You still get the drama of long hair in the back with that gentle U curve to keep the shape soft. Pro tip: keep your curtain bangs trimmed just below the eyes so they grow out gracefully.
How To Style
- Apply a lightweight mousse to damp roots and mid-lengths.
- Blow-dry bangs first with a small round brush, rolling them under and then sweeping back.
- Blow-dry the rest, bending the ends into a soft U shape.
- Finish with a flexible-hold hairspray to keep everything airy.
Best For
- Face shapes: long, oval, heart
- Hair types: straight, wavy
Tools & Products
- Small round brush
- Blow-dryer
- Lightweight mousse
- Flexible-hold hairspray
- Fine-tooth comb
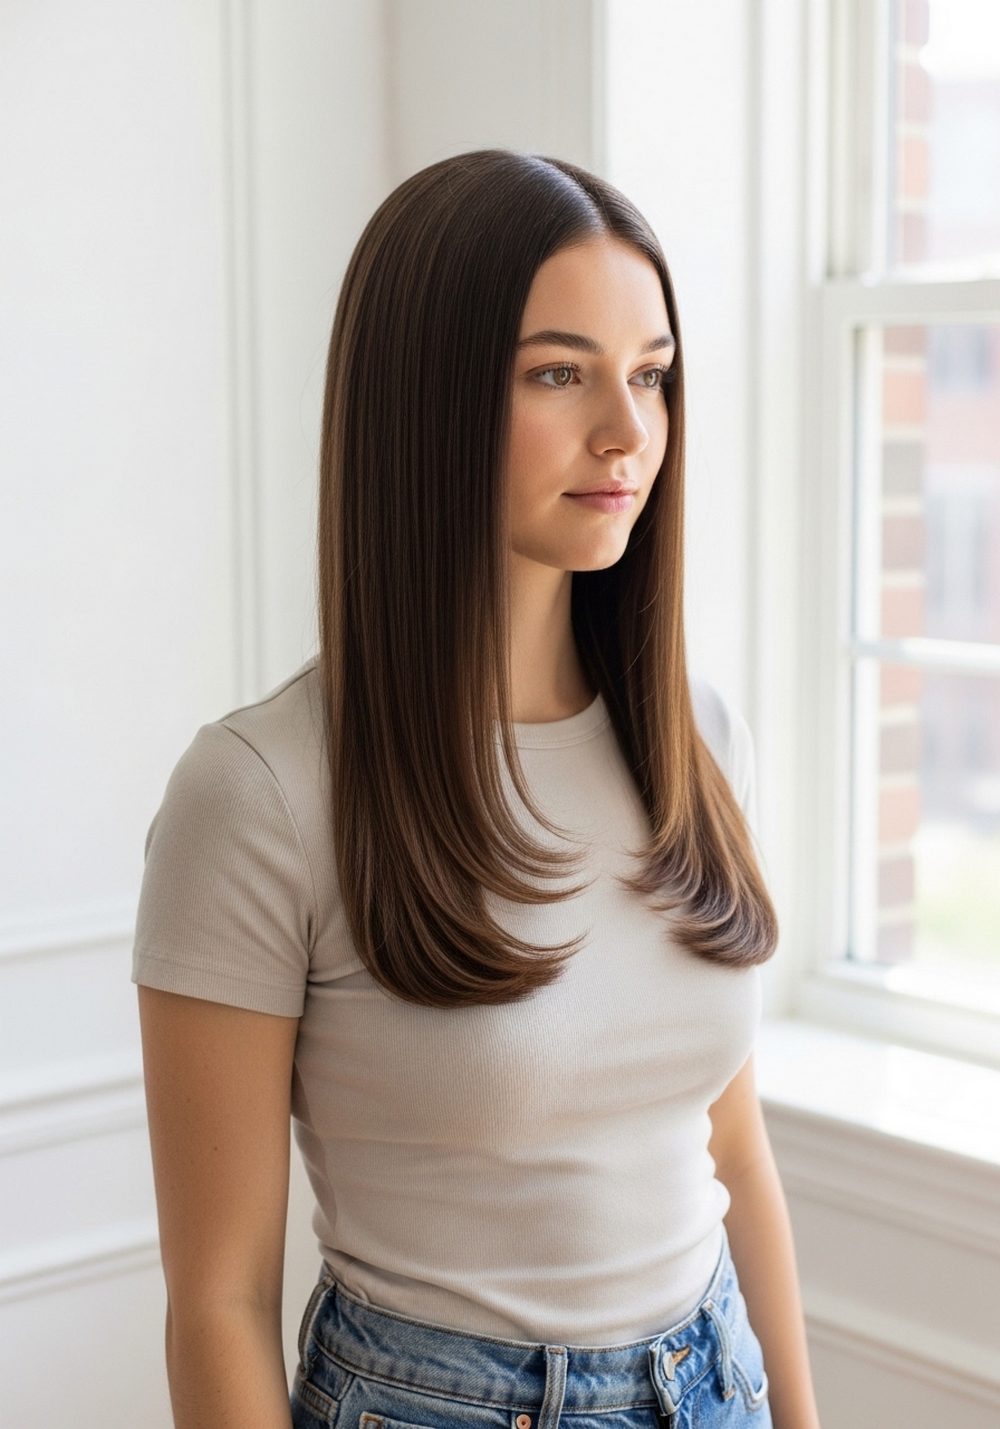
4. Textured Straight U-Cut with Light Layers
If your hair is naturally straight and tends to look flat, a U-cut with subtle, long layers adds texture without taking off too much length. The U shape keeps the perimeter neat, while a few interior layers create movement that you can see when you shake your hair out. This style looks polished when straightened and still interesting when air-dried. It’s great for those who like sleek hair but want it to look intentional, not heavy. The longest pieces stay full, so ponytails still look thick. Pro tip: ask for “barely there” layers that start below the shoulders to avoid choppy ends.
How To Style
- Apply a lightweight heat protectant to damp hair.
- Blow-dry with a paddle brush, focusing on smoothness.
- Run a flat iron through in large sections, twisting slightly at the ends.
- Finish with a texturizing spray through the mid-lengths for soft movement.
Best For
- Face shapes: oval, round
- Hair types: straight, fine to medium
Tools & Products
- Paddle brush
- Blow-dryer
- Flat iron
- Heat protectant spray
- Light texturizing spray
5. Airy Wavy U-Cut with Lifted Ends
For naturally wavy hair, a U-cut that’s slightly shorter in the center at the back helps your waves stack softly instead of forming a heavy triangle. The ends curve up into that gentle U, creating space for the waves to bounce and separate. From the front, your hair still looks long and romantic, but the back has more lift and movement. This cut is easy to wear both polished and beachy. It suits you if you want to keep your length but reduce bulk at the bottom. Pro tip: ask for minimal thinning so your waves stay defined, not frizzy.
How To Style
- Apply a curl or wave cream to damp hair.
- Scrunch gently from ends upward and let hair air-dry or diffuse.
- Once dry, shake out the roots to enhance lift at the back.
- Finish with a light oil on the ends to define the U shape.
Best For
- Face shapes: oval, heart, round
- Hair types: wavy, slightly curly
Tools & Products
- Wide-tooth comb
- Microfiber towel
- Diffuser attachment (optional)
- Wave or curl cream
- Light hair oil
6. Defined Curly U-Cut for Shape and Bounce
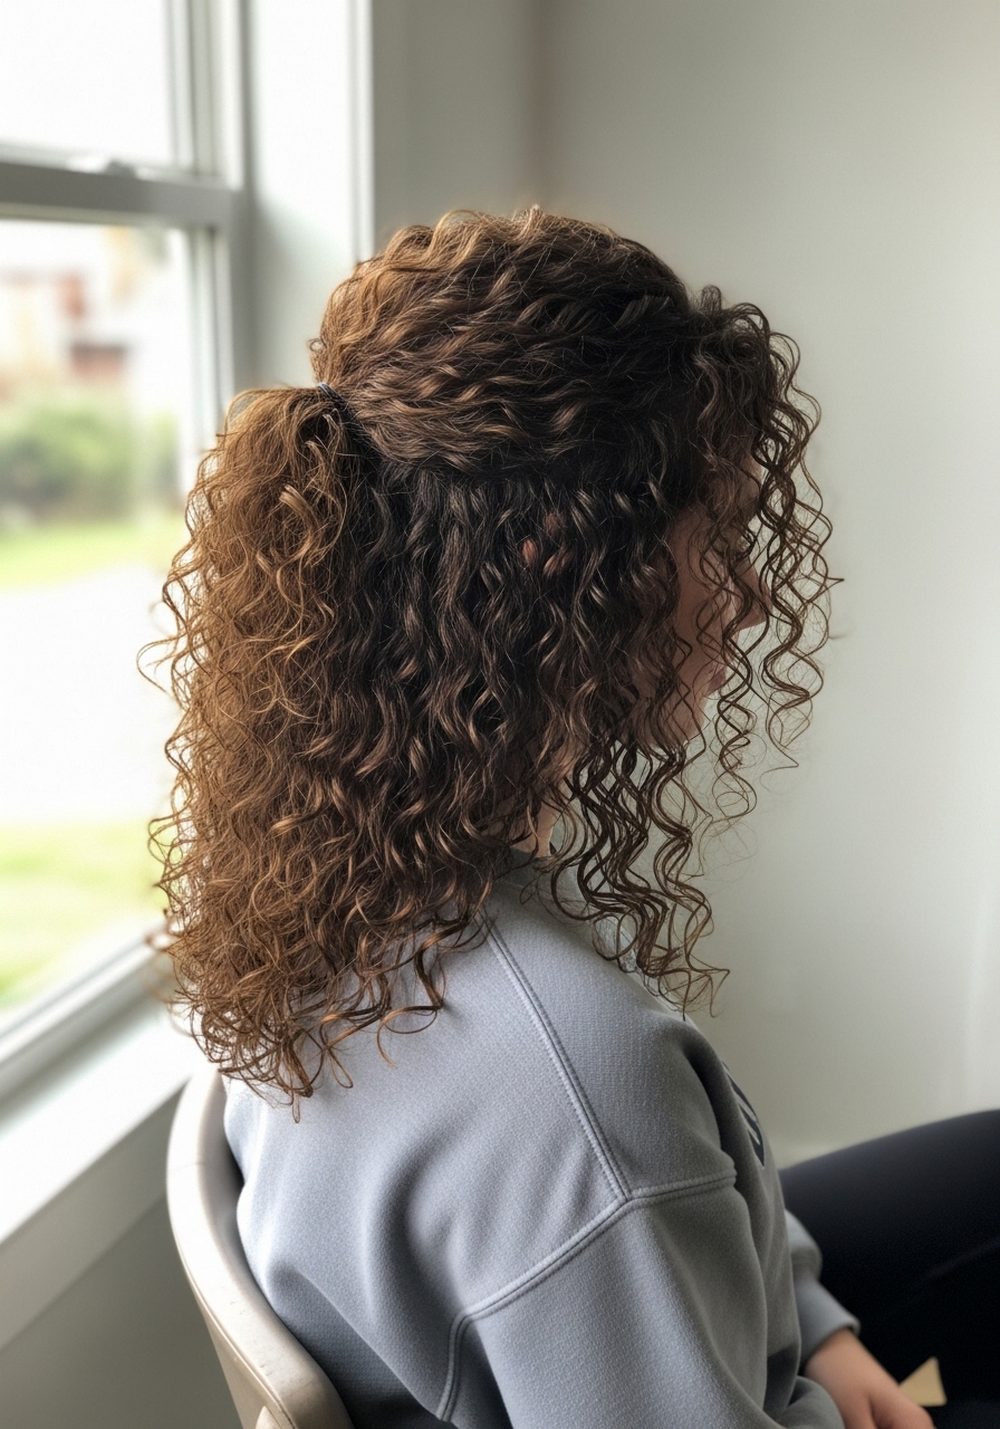
On long curly hair, a U-cut can stop the ends from looking flat and help your curls stack in a flattering way. The center back is slightly higher than the sides, creating a curved outline that mirrors the natural spring of your curls. This keeps volume around the mid-lengths while still leaving plenty of length to play with. From the front, the shape looks soft and rounded, not blunt. It’s ideal if you want more definition but fear losing inches. Pro tip: get this cut done on dry curls so your stylist can see how the U shape will sit in real life.
How To Style
- Apply leave-in conditioner to soaking-wet curls.
- Layer on a curl cream or gel from mid-lengths to ends.
- Scrunch gently and either air-dry or diffuse on low.
- Once dry, gently separate clumps to show off the curved bottom.
Best For
- Face shapes: round, oval, heart
- Hair types: curly, coily
Tools & Products
- Wide-tooth comb or fingers
- Leave-in conditioner
- Curl cream or gel
- Diffuser attachment
- Lightweight oil or serum
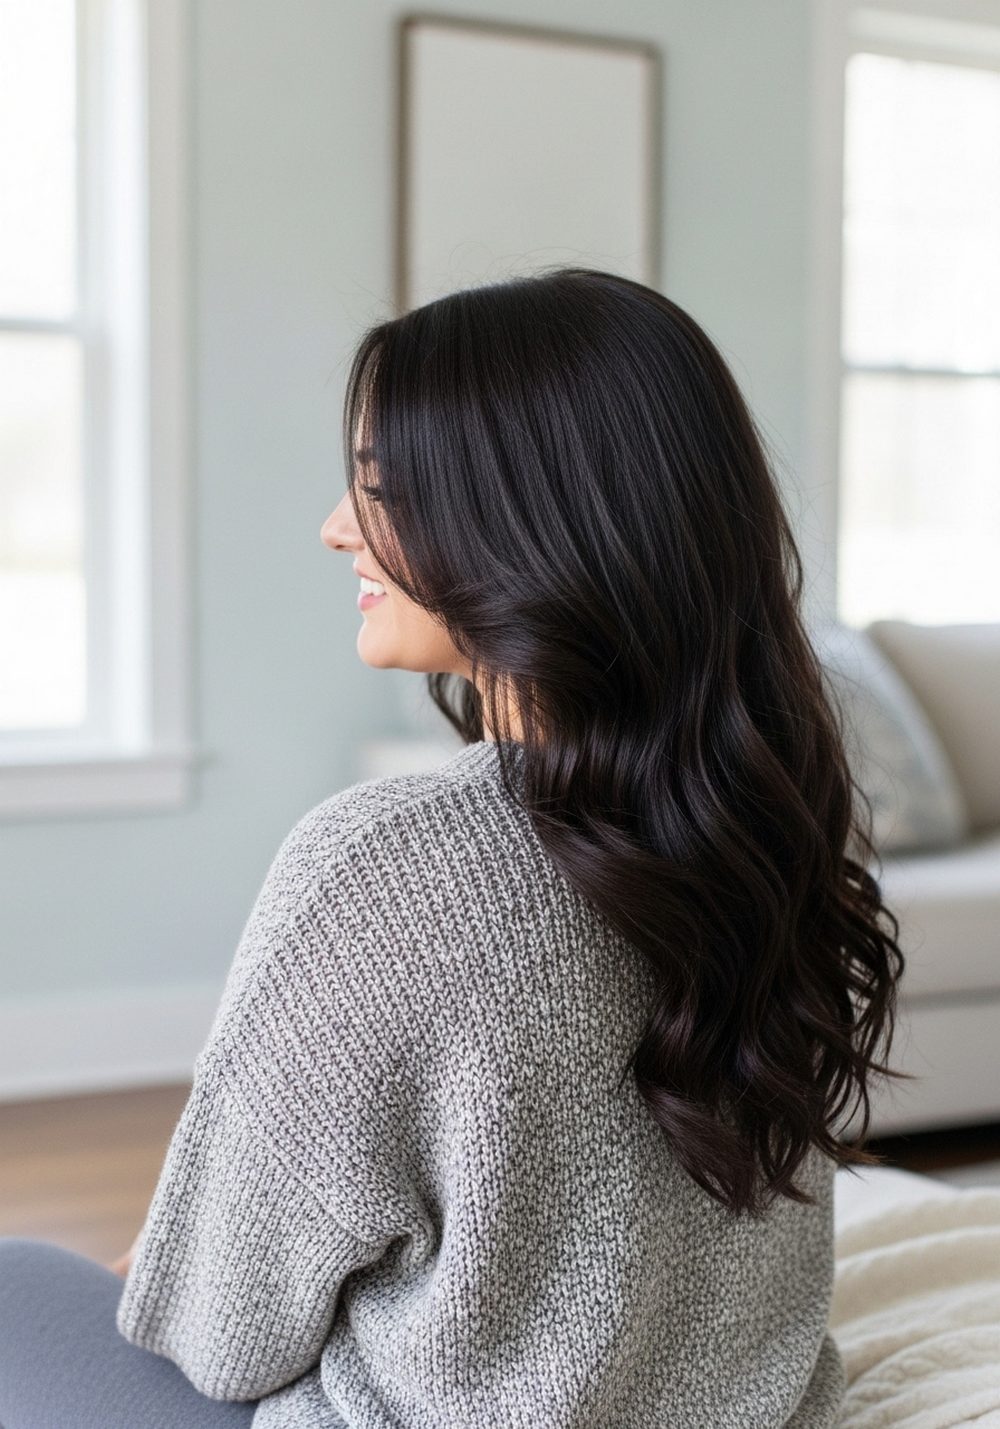
7. Sleek Glass-Hair U-Cut
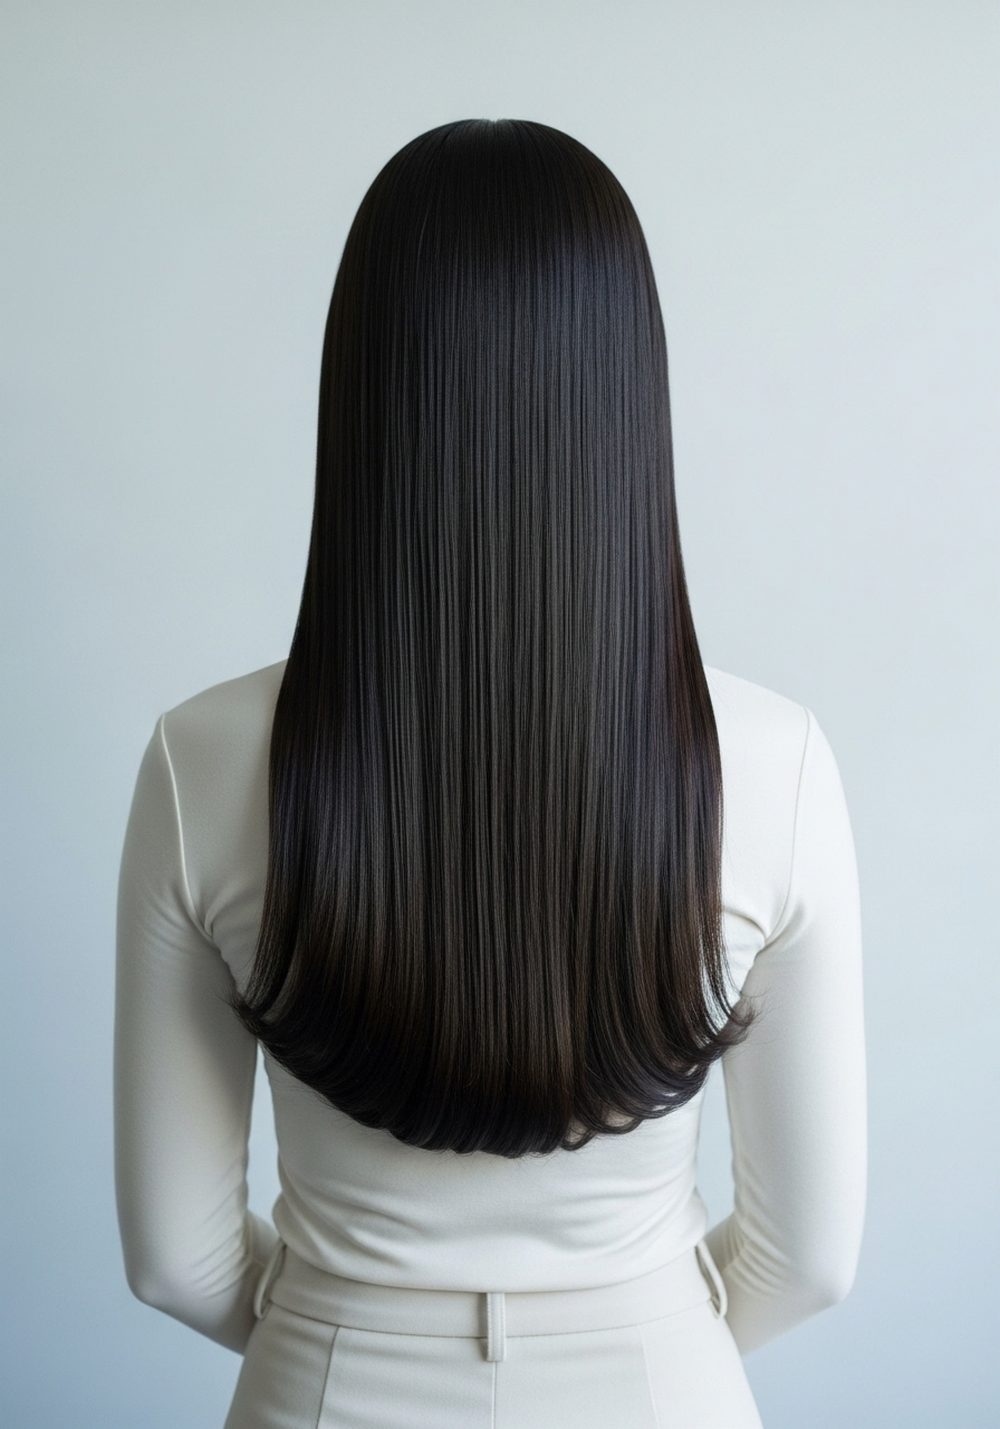
If you love that super smooth, reflective “glass hair” look, a long U-cut keeps things sleek while giving the ends a softer outline. Instead of a harsh straight line, the U shape curves gently, which looks especially pretty when light hits the hair from behind. This style works best on healthy, thicker hair that holds a smooth finish well. It’s a great choice for office, events, and nights out because it looks polished with minimal effort once styled. You still keep your dramatic length, but the softer curve makes it feel less severe. Pro tip: regular deep conditioning will help your U-cut look shiny instead of dull.
How To Style
- Apply smoothing cream and heat protectant to damp hair.
- Blow-dry in sections using a paddle or flat brush, pointing the nozzle downward.
- Flat iron in small sections for a glassy finish, curving the ends into the U.
- Finish with a tiny bit of shine serum, avoiding the roots.
Best For
- Face shapes: oval, square
- Hair types: straight, thick, smooth-wavy
Tools & Products
- Paddle or flat brush
- Blow-dryer with nozzle
- Flat iron
- Smoothing cream
- Shine serum
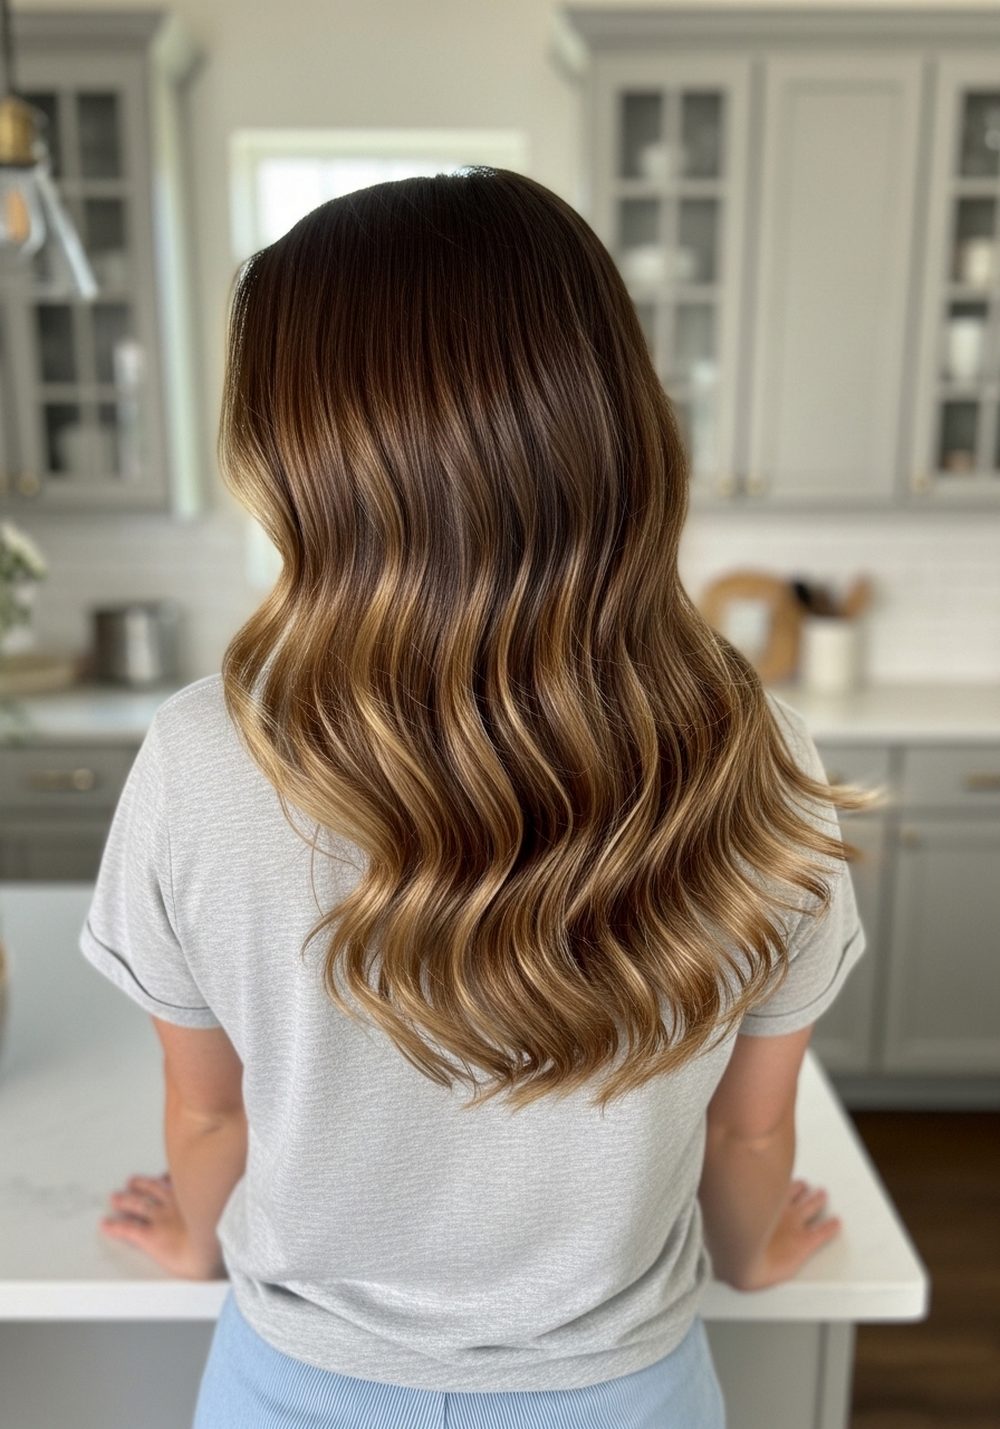
8. Volumized U-Cut with Hidden Layers
This U-cut hides soft, long layers inside the shape so you get volume and movement without obvious choppiness. The perimeter still curves in a clean U, but the interior layers help lift the crown and reduce weight through the middle. It’s ideal if your hair looks flat at the top and heavy at the bottom. The overall effect is full and bouncy, especially when styled with a round brush or large curling iron. From the back, the U is visible but subtle. Pro tip: ask for layers that start around the collarbone so you keep fullness at the ends.
How To Style
- Spray volumizer at the roots of damp hair.
- Blow-dry upside down for extra lift, then finish with a round brush at the ends.
- Add a few loose curls through the mid-lengths if you want extra bounce.
- Flip your head back and gently shake to reveal the shape.
Best For
- Face shapes: round, heart, oval
- Hair types: straight, wavy, medium to thick
Tools & Products
- Round brush
- Blow-dryer
- Root-lifting spray or mousse
- Large curling iron (optional)
- Light hairspray
9. Low-Maintenance Air-Dry U-Cut
If you prefer to skip hot tools most days, a low-maintenance U-cut is a smart option. The shape is soft and forgiving, with a gentle curve at the back and minimal layering so it looks good even with simple air-drying. The ends naturally fall into that U outline, which keeps your length looking neat rather than stringy. It’s the kind of cut that works for workdays, weekends, and quick throw-it-up buns. The key is a healthy trim and a simple product routine. Pro tip: have your stylist cut with your typical part so the shape sits correctly when you air-dry.
How To Style
- Apply a lightweight leave-in conditioner to damp hair.
- Add a small amount of cream or gel through the mid-lengths.
- Comb once, then leave it alone to air-dry to reduce frizz.
- Once dry, smooth any flyaways with a tiny bit of oil.
Best For
- Face shapes: oval, heart, long
- Hair types: straight, wavy, loose curls
Tools & Products
- Wide-tooth comb
- Leave-in conditioner
- Light cream or gel
- Microfiber towel
- Lightweight oil
10. Glam Blowout U-Cut for Special Occasions
This U-cut is all about a big, glamorous blowout while still keeping your long length. The U shape creates a soft, rounded backdrop for bouncy, curled-under ends and lifted roots. When styled, the hair flows around the shoulders and down the back in a smooth curve that looks great in photos. It’s perfect for weddings, parties, or any time you want that “salon blowout” vibe at home. The cut itself is simple; the magic is in the styling. Pro tip: use larger sections and a big round brush to create soft, modern body instead of tight curls.
How To Style
- Apply volumizing mousse and heat protectant to damp hair.
- Rough-dry until about 70% dry.
- Blow-dry in sections with a large round brush, rolling ends under to echo the U.
- Let sections cool, then brush through for soft, bouncy movement.
Best For
- Face shapes: round, heart, oval
- Hair types: straight, wavy, medium to thick
Tools & Products
- Large round brush
- Blow-dryer
- Sectioning clips
- Volumizing mousse
- Flexible-hold hairspray
Conclusion
A long U-cut is one of the easiest ways to keep your length while getting real shape and movement. Whether your hair is straight, wavy, or curly, there’s a version that can soften your outline, slim your face, or add volume where you need it. Save a couple of these ideas, note your hair type and face shape, and bring them to your next trim. A small tweak in the hemline can make your everyday hair feel completely fresh.
Call to Action
Pick your top two U-cut favorites from this list, screenshot them, and show them to your stylist at your next appointment so you can walk out with long hair that finally has shape, swing, and purpose.
FAQs
1. What is a U-cut hairstyle for long hair?
A U-cut is a haircut where the ends form a soft U shape instead of a straight line. The center back is slightly shorter and the sides are a bit longer, which keeps the length while adding movement and shape. It works especially well on long hair that feels heavy or flat at the bottom.
2. Does a U-cut take away a lot of length?
Not usually. A classic U-cut is designed to keep most of your length while cleaning up the ends. You can ask your stylist for a very shallow U if you are nervous about losing inches, so the change feels more like a refresh than a big chop.
3. Is a U-cut better for straight, wavy, or curly hair?
A U-cut can work on all three hair types; it just looks different on each. On straight hair it softens a blunt edge, on wavy hair it helps waves fall more evenly, and on curly hair it can prevent a heavy triangle shape. Your stylist can adjust the depth of the U to suit your texture.
4. How often should I trim a U-cut to keep the shape?
Most people can maintain a U-cut with trims every 8–12 weeks, depending on how fast their hair grows and how damaged the ends get. If you use a lot of heat or color, you may want trims a bit more often to keep the curved outline looking healthy and full.
5. Can I create a U-cut at home by myself?
Cutting a precise U shape alone is difficult because you can’t clearly see the back and small mistakes are easy to make. It’s safer to have a professional set up the basic shape, then you can maintain the ends with tiny dusting trims at home if you feel confident. For major changes, a salon visit is usually worth it.