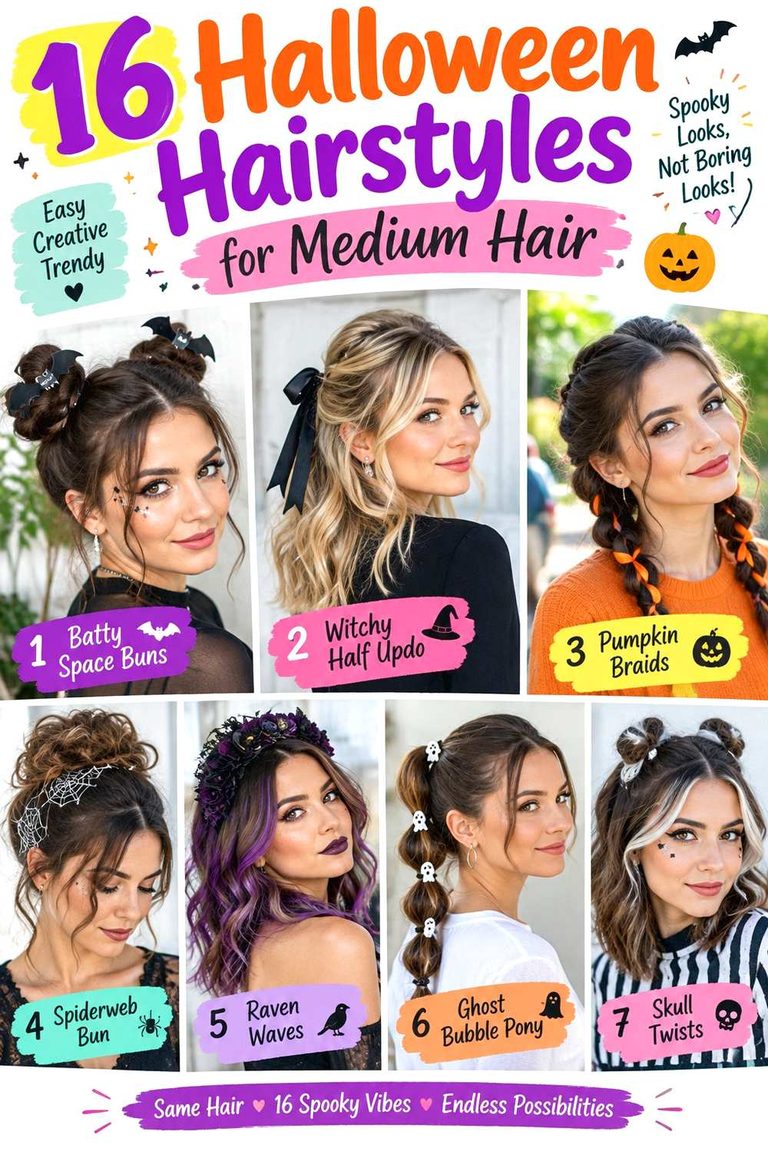
13 High Gloss Updo Hairstyles for an Elegant Finish
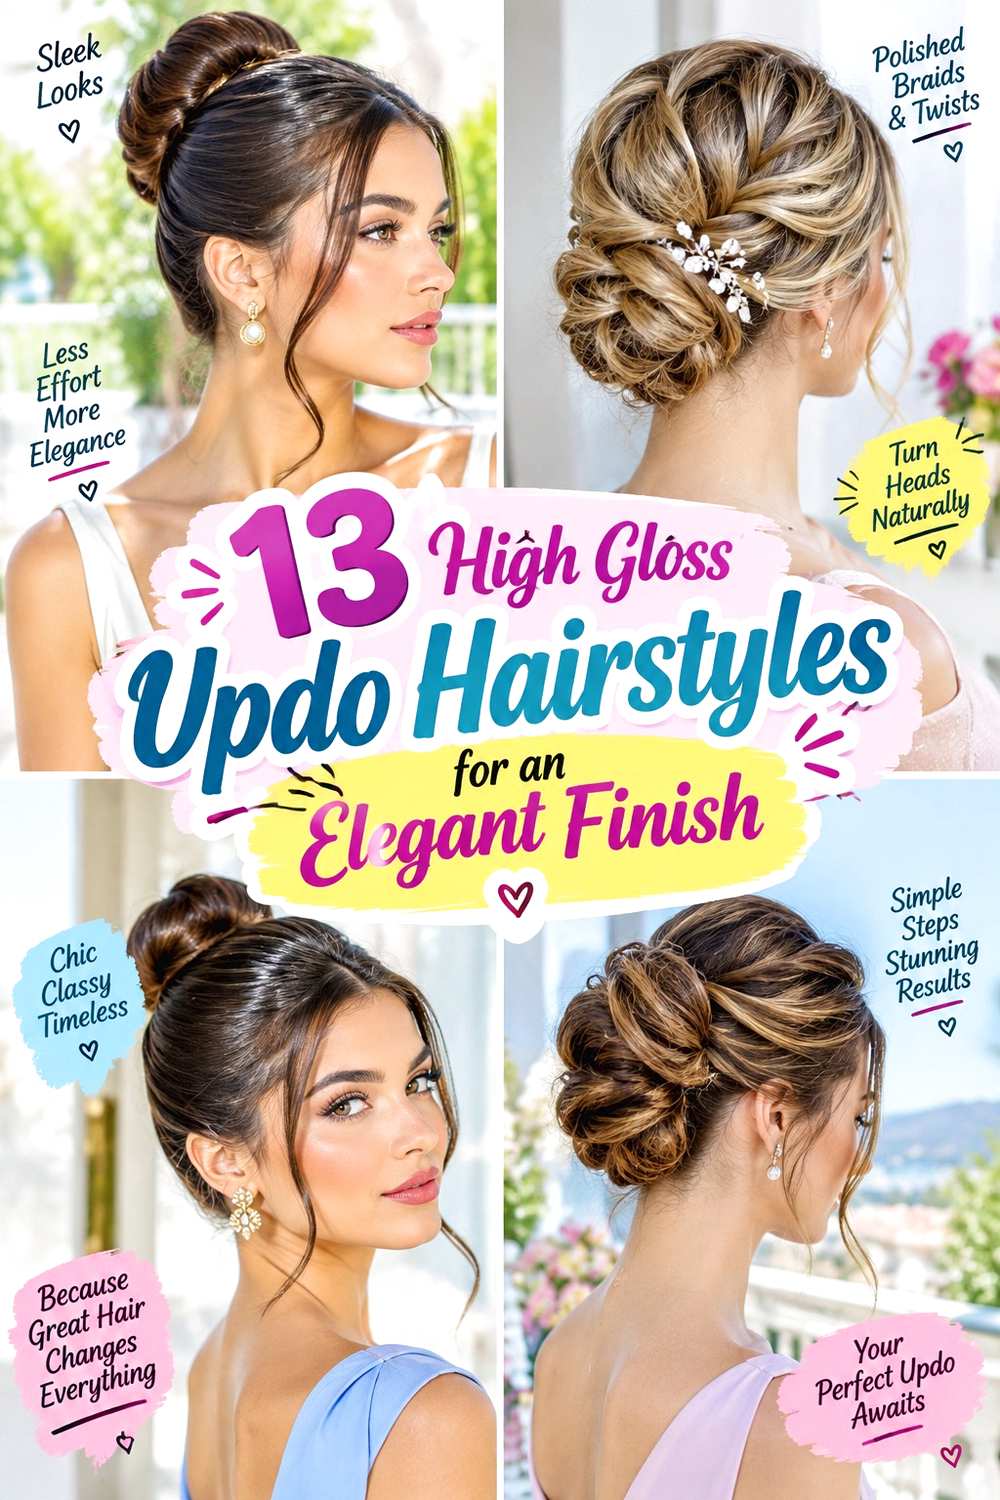
High gloss updo hairstyles are defined less by one bun shape than by a controlled, light-reflective surface. The hair may sit in a low chignon, high knot, French twist, braid, or wrapped bun, but the roots and visible sections stay smooth rather than fluffy. Some versions use a sharp center or side part, while others sweep everything back. Length usually needs to reach at least the shoulders for secure wrapping, although shorter pieces can often be incorporated with careful anchoring. The polished finish puts extra focus on placement, symmetry, and the condition of the ends.
Straight, wavy, curly, and coily textures can all support a glossy updo without needing to be made identical first. Natural texture can remain visible within a polished arrangement, while dense hair may need weight distributed across several anchor points. Finer or lower-density hair can benefit from a slightly broader knot instead of an extremely tight one. Face-framing pieces, crown height, and parting can also be adjusted without changing the basic updo.
A quick refresh may involve smoothing the hairline and securing one loose area, while a full wash-day version can take considerably longer depending on length, density, texture, and experience. Because these are temporary styles, maintenance is mainly about comfortable tension, stable anchors, frizz control, and keeping the glossy surface from becoming overloaded with product.
Quick List
- Sculpted Low Chignon Hairstyle
- Glass-Sleek High Bun Hairstyle
- Deep Side-Part Twist Updo Hairstyle
- Center-Part Wrapped Knot Hairstyle
- Polished French Twist Hairstyle
- Braided Gloss Bun Hairstyle
- Wet-Look Low Knot Hairstyle
- Sleek Ponytail Bun Hairstyle
- Twisted Crown Chignon Hairstyle
- High Shine Ballerina Bun Hairstyle
- Side-Swept Gloss Roll Hairstyle
- Accessory-Pinned Low Bun Hairstyle
- Soft Gloss Face-Frame Updo Hairstyle
Sculpted Low Chignon Hairstyle
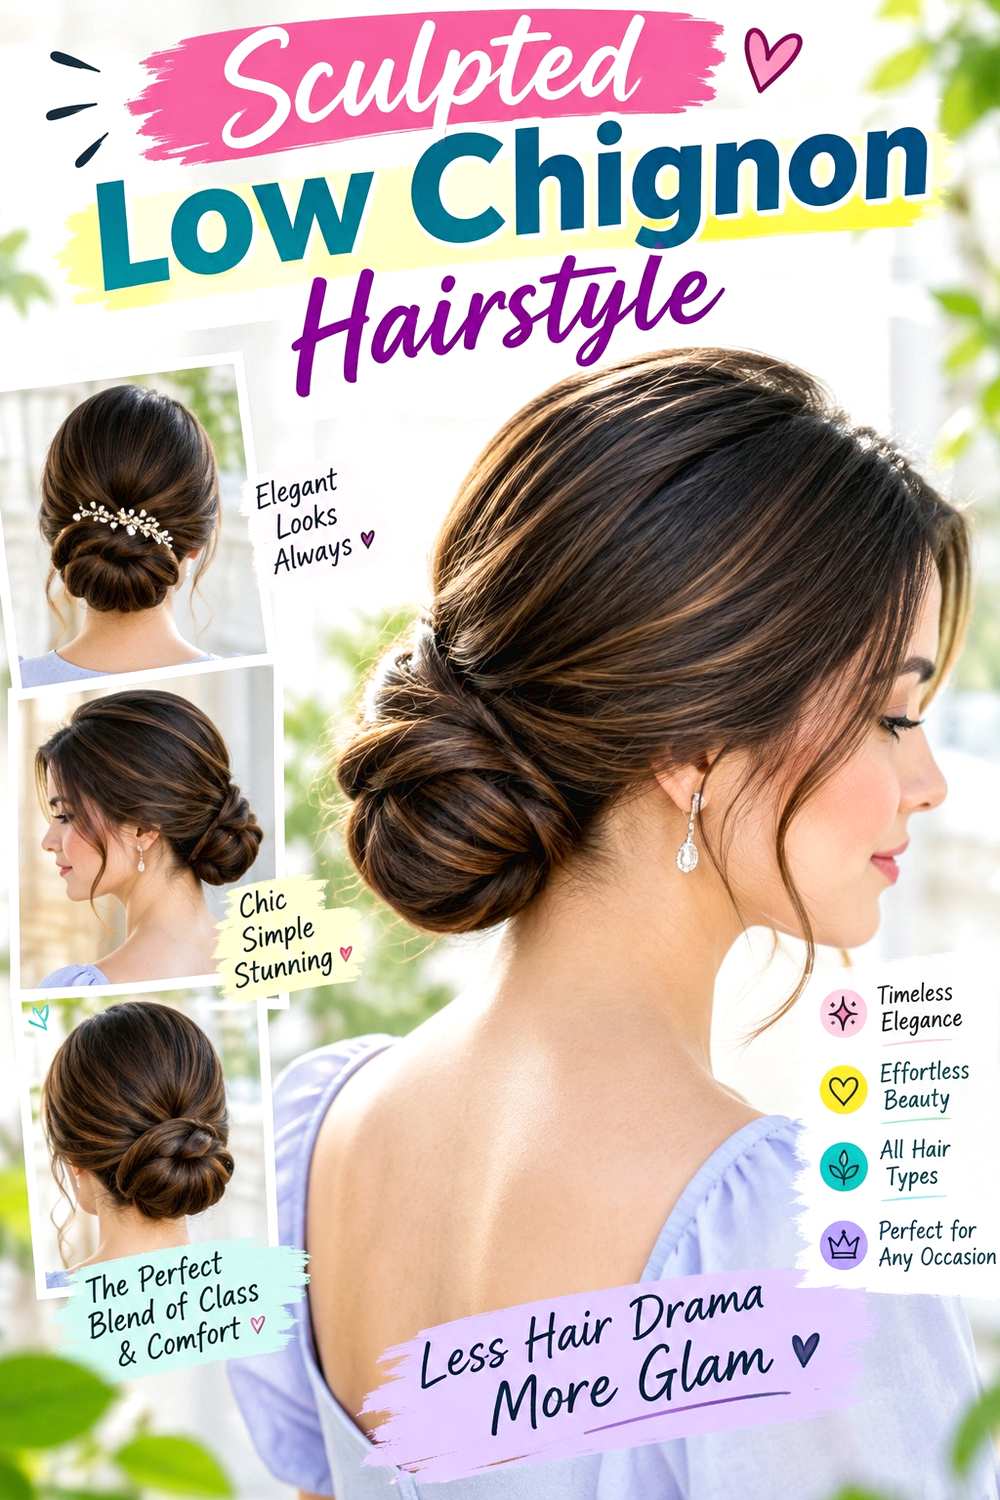
A low chignon keeps the visual weight close to the nape, making the glossy surface and clean outline easy to notice. Hair is drawn back with a center or softly offset part, then folded into a compact horizontal or rounded shape. Keeping the crown relatively flat creates a formal finish, while lightly curved sections near the ears can soften the transition without becoming loose face-framing strands. Medium to long hair is easiest to fold securely, and dense hair may need the chignon spread slightly wider so the center does not become bulky.
A strong-hold gel helps smooth the hairline, a fine-tooth comb directs the surface neatly, and bobby pins secure the folded shape. A full version generally takes longer than a simple ponytail because each side needs balanced tension; between wears, a brief refresh can focus only on flyaways and any pin that has shifted. Avoid pulling harder when the base loosens. Instead, rebuild the anchor comfortably. For an event, explain exactly how low you want the chignon placed and whether you prefer a narrow sculpted roll or a wider rounded form, because that placement changes the profile considerably.
Pro tip:
Smooth the side sections toward the nape before forming the chignon rather than trying to flatten them afterward. Creating that direction first reduces ridges and makes the final surface look more continuous.
Make It Work for You:
If your hair is very dense, ask for the chignon to be arranged across a slightly wider base. Spreading the weight can preserve the sleek shape without concentrating uncomfortable tension in one small spot.
Watch Out For:
Do not keep adding gel every time one hair lifts. Repeated layers can make the surface look coated. Smooth the existing product first, then add only a small amount where control is actually needed.
Glass-Sleek High Bun Hairstyle

Placed near the crown, a high bun creates a taller profile and puts the smooth root area on full display. The hair is swept upward without a visible part, while the bun itself stays compact and rounded rather than loosely fanned. A polished version works especially well when the ends can wrap fully around the base. Shoulder-length hair may produce a smaller knot, while longer hair offers more material for a substantial circular shape. Curly and coily hair can keep some natural texture within the bun while the outer surface remains controlled.
Use a fabric-covered elastic to establish a secure high base, styling gel to guide shorter hairs upward, and bobby pins to anchor the wrapped ends. The complete style may require 15 to 30 minutes depending on length, density, starting texture, and practice. A morning refresh is shorter: smooth the perimeter and check that the bun has not shifted. If headaches or tenderness develop, the base is too tight and should be reset rather than endured. When having the style done professionally, specify the exact bun height and whether you want the knot centered on the crown or slightly behind it; those two positions create noticeably different silhouettes.
Pro tip:
Tilt your chin slightly downward while the high base is secured. This leaves a little working room at the nape, helping prevent the shortest underside hairs from feeling stretched when you move your head.
Make It Work for You:
For shorter shoulder-length hair, keep the bun smaller and more compact instead of forcing a large shape. The glossy crown can remain the defining feature even when the wrapped knot has less volume.
Watch Out For:
A high bun can lean backward if the base sits too far behind the crown. Check the profile before pinning the ends, and reposition the anchor rather than correcting a tilted bun with extra tension.
Deep Side-Part Twist Updo Hairstyle

The defining feature here is a deep side part that creates one broad, glossy front panel before the hair turns into a low twisted updo. The heavier side can sweep across the forehead without becoming a fringe, while the lighter side stays tucked close to the head. At the back, the lengths coil inward near the nape so the finish looks structured rather than loosely knotted. This arrangement can be useful when you prefer asymmetry or want volume concentrated on one side instead of directly at the crown.
A smoothing cream keeps the front panel controlled, a tail comb creates a precise part, and bobby pins hold the twist against the head. Full styling takes more care than a centered bun because both sides travel in different directions, but the next refresh usually means redefining the part and securing any loosened section. If your natural growth pattern resists a very deep part, choose a slightly shallower line instead of repeatedly forcing the roots flat. For salon or event styling, show where you want the part to begin and where the back twist should finish. A twist anchored directly at the nape feels different from one placed several centimeters higher.
Pro tip:
Set the side part before gathering the back. Comb each front section in its final direction first; otherwise, changing the part after the updo is secured can create visible bumps near the crown.
Make It Work for You:
If you have lower-density hair around the front, use a moderately deep part rather than an extreme one. Keeping a little more hair on the lighter side can maintain coverage while preserving the asymmetry.
Watch Out For:
Do not pull the heavy side completely flat across the temple if it starts to separate. Redirect it in smaller sections toward the twist so the surface stays smooth without excessive tension.
Center-Part Wrapped Knot Hairstyle
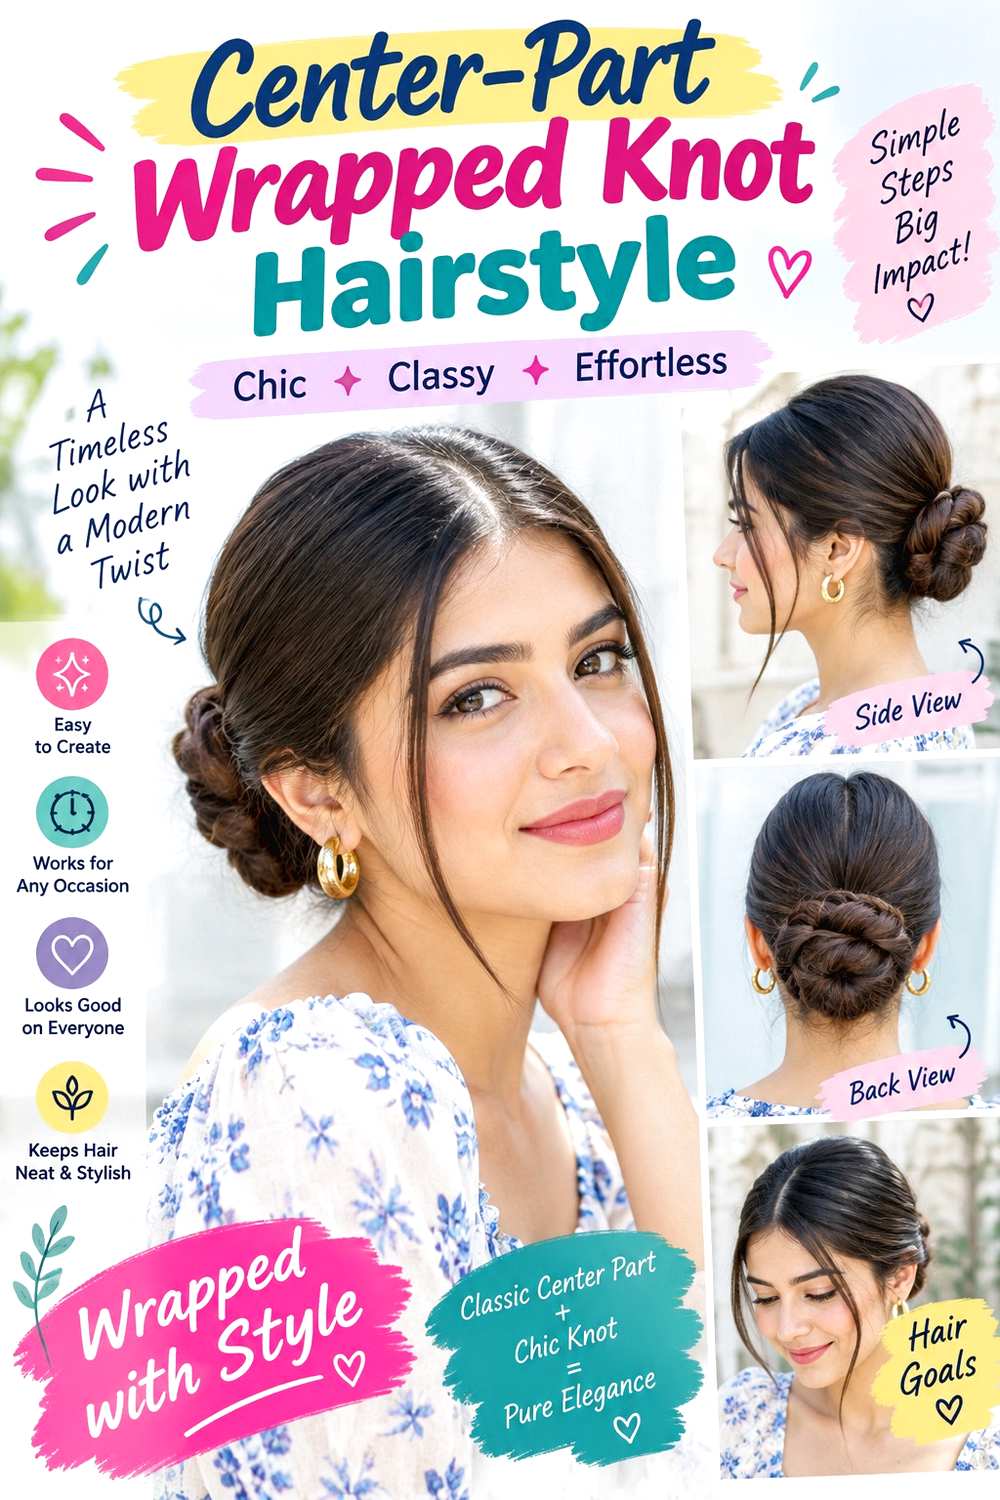
A crisp center part gives this wrapped knot its balanced, architectural appearance. Both front sections travel evenly toward the back, keeping the crown close to the head before meeting in a low or mid-level knot. The lengths then wrap around the base in a clean spiral, with the ends hidden underneath. Because the design depends on symmetry, it works particularly well when you like a controlled finish rather than loose crown volume or wispy pieces around the face.
Styling wax can keep small hairs close to the surface, a tail comb helps divide the part accurately, and hairpins secure the wrapped lengths without making the knot unnecessarily bulky. The first full set can take around 15 to 25 minutes depending on length and density; a later refresh is mostly about correcting the hairline and re-tucking an exposed end. Straight, wavy, curly, and coily textures can all use the shape, though the degree of surface smoothness can be adjusted to suit your routine. If the part naturally shifts to one side, perfect symmetry may require more daily control. When discussing the design with a stylist, specify whether you want the knot positioned directly on the nape or slightly above it, since this alters both comfort and visual balance.
Pro tip:
Before wrapping the knot, divide longer hair into two sections and cross them around the base. This can distribute thickness more evenly than forcing the entire length to travel in one heavy coil.
Make It Work for You:
For very curly or coily hair, keep the center part crisp while allowing some texture to remain visible in the wrapped knot. A polished updo does not require every curl to disappear.
Watch Out For:
An uneven center part becomes especially noticeable in a symmetrical style. Establish the line before applying strong hold, then check it from the front instead of repeatedly re-combing product-coated roots.
Polished French Twist Hairstyle

The French twist creates vertical movement rather than the circular outline of a bun. Hair is directed toward the back, swept across one side, then rolled inward so a smooth ridge rises from the nape toward the crown. The visible ends can disappear inside the roll for a formal finish. A slight side part, center part, or fully swept-back front can work, but keeping the twist itself elongated is what separates this shape from a low knot. Medium to long hair provides enough length for a secure interior roll.
A light smoothing serum reduces surface frizz, bobby pins build the hidden anchor, and flexible hairspray helps the finished roll hold without making every strand rigid. A complete French twist often takes more practice than a basic bun, particularly when creating it on your own, while a short refresh usually involves replacing one loose pin or smoothing the outer ridge. Dense hair may need a broader roll rather than an extremely narrow one. If the shape collapses, rebuilding the internal anchor is more effective than adding more spray. For professional styling, describe where you want the upper tip of the twist to finish and how much crown lift you prefer, because those details determine whether the profile feels sleek or more elongated.
Pro tip:
Build the hidden pin line before rolling the hair over it. A stable interior anchor gives the twist something to rest against and reduces the need to pierce the visible outer surface repeatedly.
Make It Work for You:
If your hair is shorter near the shoulders, choose a compact French twist that finishes below the crown. The vertical ridge can still read clearly without requiring every short end to reach a tall roll.
Watch Out For:
Too many visible pins can break up the glossy surface. If sections keep escaping, rebuild the hidden anchor underneath rather than adding pin after pin through the outside of the finished twist.
Braided Gloss Bun Hairstyle

A braid adds visible structure to an otherwise smooth bun. The roots stay sleek from the hairline to the base, then the gathered length is braided and wrapped into a circular knot. Keeping each braid section even creates a clean pattern around the bun, while slightly broader sections can make the braid look substantial without aggressively pulling it apart. The style works best when the hair is long enough for at least one full wrap, though a shorter braid can form a compact knot instead.
A fabric-covered elastic secures the base, braiding gel keeps the woven sections neat, and hairpins anchor the braid as it circles inward. The full style may take 20 to 30 minutes depending on length, density, and braiding speed, but refreshing it can be quick if the braid remains intact; focus on the hairline and any loosened outer turn. Curly and coily hair can produce a beautifully textured braid while maintaining a smooth root area. For dense hair, comfortable tension matters more than making every section extremely tight. If you are having it styled, discuss braid width and the position of the first wrap so the finished bun has the scale and profile you want.
Pro tip:
Pin the wrapped braid at several points around its circumference instead of relying on one central anchor. Spreading the support helps the bun stay level and reduces strain on a single section.
Make It Work for You:
For finer or lower-density hair, braid with moderate tension and make a slightly wider loop around the base. The larger footprint can create presence without excessive teasing or forced expansion.
Watch Out For:
Do not pull the braid apart so aggressively that short ends start escaping. If you want more width, loosen only the outer edges slightly while keeping the center of the braid structurally secure.
Wet-Look Low Knot Hairstyle

The wet-look finish makes shine the main feature, with hair appearing deliberately saturated and directional rather than simply slicked down. A center or side part can define the front, while the lengths are gathered into a simple low knot at the nape. The roots stay flat and glossy, and visible comb lines may be left in place for a more graphic effect. Because the knot is understated, this version depends on consistent product distribution and a clean silhouette around the head.
A high-shine styling gel creates the reflective surface, a wide-tooth comb spreads it through the outer layers, and bobby pins secure the low knot. Application can take longer on thick or highly textured hair because the product needs to be distributed evenly rather than piled onto the top layer. A later refresh should be brief: dampen and reshape only the areas that have lifted instead of coating the whole head again. This finish can suit many textures, but the amount of definition can be adjusted so natural pattern remains visible if preferred. For professional styling, explain whether you want obvious comb tracks or a completely smooth surface, and specify exactly how low the knot should sit behind the ears.
Pro tip:
Apply shine product in small sections from the hairline backward rather than spreading one large amount over the finished style. Controlled distribution helps prevent dry patches beside areas that look overly coated.
Make It Work for You:
If you dislike a fully saturated appearance, keep the wet effect concentrated from the hairline through the crown and let the knot retain more natural texture. The glossy direction will still define the design.
Watch Out For:
Using too much gel at once can make the roots look heavy instead of intentionally glossy. Start with a smaller amount, spread it thoroughly, and build only where the surface lacks definition.
Sleek Ponytail Bun Hairstyle

This design begins with a clean ponytail, making the base especially clear and secure before the lengths become a bun. The front can be center-parted, side-parted, or swept straight back, but the gathered section should sit at a deliberate mid or low height. From there, the ponytail coils into a rounded bun with the ends tucked underneath. The two-stage construction is useful when you want a predictable anchor and a smooth transition from scalp to knot.
A strong elastic establishes the ponytail, smoothing cream controls the crown, and hairpins secure the coiled length. Because the anchor is built first, full styling can be relatively straightforward, often around 15 to 25 minutes depending on hair length and density. A quick refresh usually means correcting the perimeter rather than dismantling the whole bun. Very dense hair may feel more comfortable with the base placed slightly lower, while finer hair can keep the coil broad instead of wrapping it too tightly. If you notice pulling around the temples, reset the ponytail rather than tightening it further. For event styling, be specific about the base height and bun diameter; a compact mid-height knot gives a different profile from a wide bun sitting directly at the nape.
Pro tip:
Before wrapping the ponytail, rotate your head gently from side to side. If the base already feels restrictive, loosen and reset it then; wrapping the bun will add weight to that anchor.
Make It Work for You:
For long, dense hair, form a wider coil rather than stacking the length directly on top of itself. Spreading the bun can distribute weight while keeping the outer crown sleek.
Watch Out For:
A ponytail base that is too loose may let the entire bun sag. Correct the anchor before wrapping the lengths instead of trying to lift a slipping bun with more hairpins afterward.
Twisted Crown Chignon Hairstyle
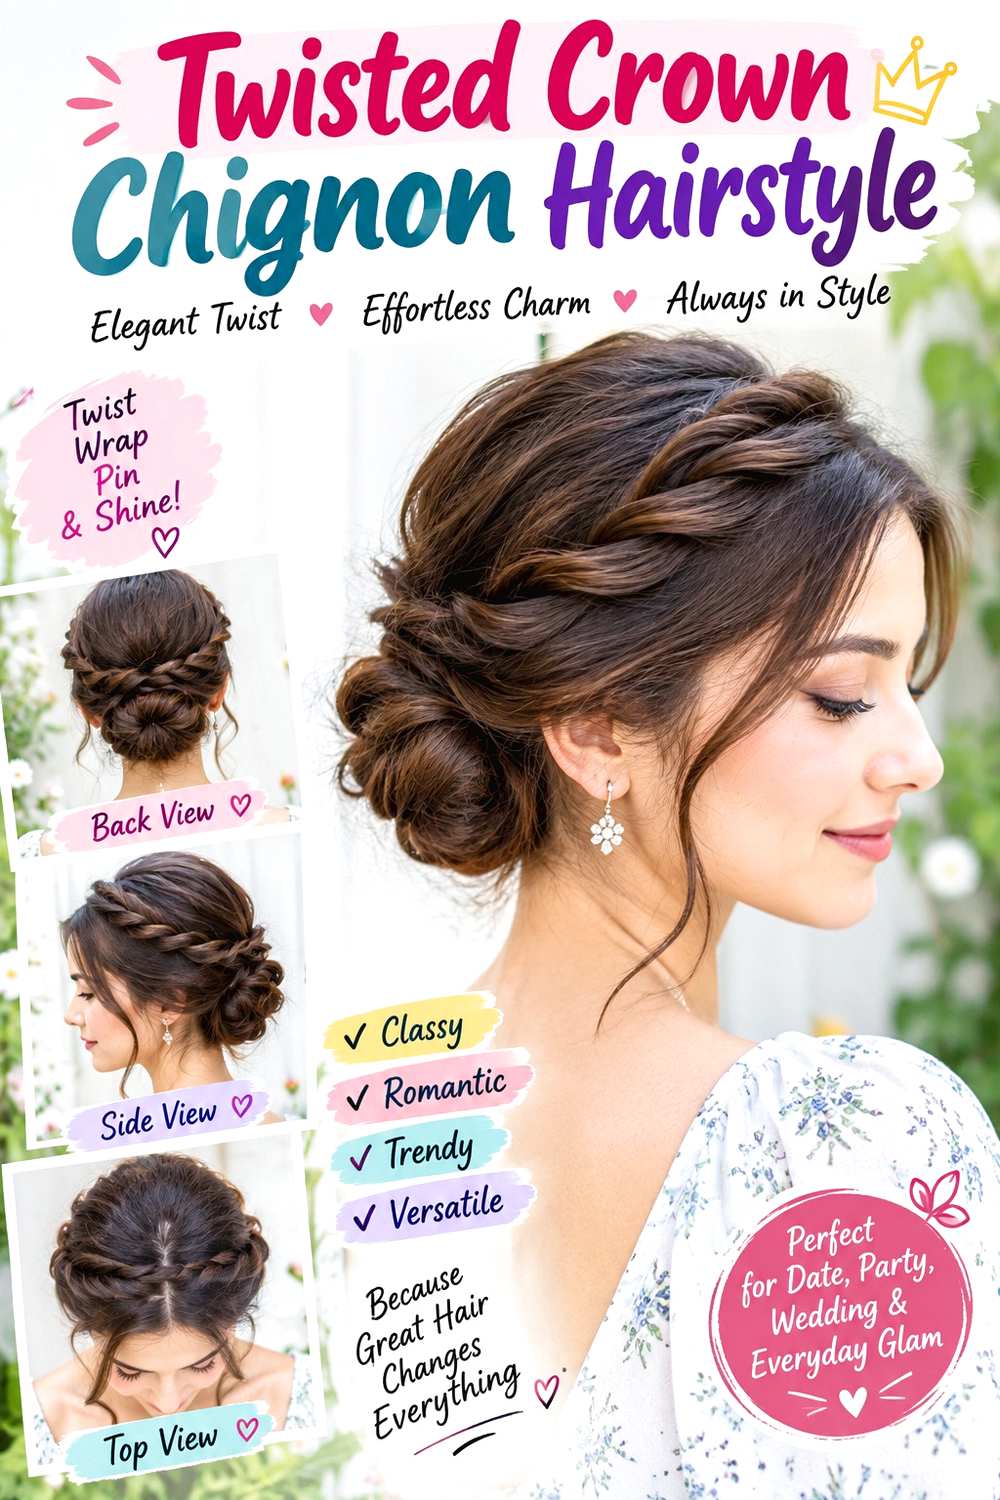
Instead of pulling every section straight toward the nape, this chignon uses two smooth twists that travel from the sides toward the back. The twists add gentle dimension around the crown while the lower lengths collect into a compact chignon. A center part creates symmetry, while a soft side part can make one twist more prominent. The finish still reads polished because the sections are controlled and glossy rather than deliberately tousled.
A lightweight styling cream gives the twists slip and frizz control, a tail comb separates clean side sections, and bobby pins secure both the traveling twists and the finished chignon. Full styling generally takes longer than a basic low bun because the side sections need even direction and tension. Between wears, a short refresh can focus on one loosened twist without rebuilding the whole shape. Wavy, curly, and coily textures can retain some pattern inside the twists if a completely smooth surface is not desired. Avoid over-tightening near the temples simply to sharpen the lines. When working with a stylist, point out where you want each twist to begin and where it should meet the chignon; a twist starting above the ear gives a different contour from one beginning near the temple.
Pro tip:
Twist the side sections in the direction they naturally travel toward the chignon. Forcing them to reverse direction can create bumps near the ear and make the section harder to anchor smoothly.
Make It Work for You:
If your hair is very thick, divide each side into a slightly broader twist instead of one narrow rope. The larger section can carry the density comfortably while preserving the polished crown detail.
Watch Out For:
Do not let the side twists become so tight that they resemble hard cords. If they look narrow and strained, loosen them slightly before anchoring so the transition into the chignon stays balanced.
High Shine Ballerina Bun Hairstyle

A ballerina bun places the knot high enough to create a neat, upright profile but usually keeps the shape flatter and more disciplined than an oversized topknot. Hair is swept back without loose pieces, and the lengths form a compact circle centered near the crown. The clean perimeter makes every ridge visible, so even direction and controlled tension matter more than creating extra volume. Medium to long hair works well, while very long hair may need the coil spread across a larger base.
Strong-hold gel keeps the hairline smooth, a boar-bristle brush directs the outer surface, and hairpins fix the coil securely. A full set can take 15 to 25 minutes depending on density and how smooth the starting hair is, while a quick refresh may take only a few minutes if the bun itself remains stable. Natural texture does not have to be completely straightened; the crown can be polished while the bun retains subtle texture. If the scalp feels sore, loosen and rebuild the base rather than accepting discomfort. For a stylist, specify how flat you want the bun to sit against the head and exactly how high it should be positioned, because a projected knot creates a very different silhouette.
Pro tip:
Brush upward in sections instead of repeatedly circling the whole head. Working from nape, sides, and front toward one fixed anchor can reduce ridges and help the surface meet more evenly.
Make It Work for You:
For very long hair, spread the wrapped coil into a slightly wider circle rather than stacking multiple turns vertically. This can keep the bun flatter while distributing the weight across more anchor points.
Watch Out For:
Do not mistake tighter tension for a cleaner result. If ridges appear, release the base and smooth the section direction again; pulling harder can increase discomfort without correcting uneven placement.
Side-Swept Gloss Roll Hairstyle

A broad side sweep gives this updo its movement before the hair folds into a glossy back roll. The front travels diagonally across the forehead or temple, creating a soft asymmetry without leaving loose fringe. At the back, the hair can be rolled horizontally near the nape or slightly upward for more height. The ends remain hidden, keeping the finish uninterrupted. This shape is useful when you want polished hair with more directional movement than a straight-back bun.
A smoothing balm controls the sweeping front section, a tail comb defines its starting point, and bobby pins secure the hidden roll. Building the full arrangement may take 20 to 30 minutes depending on length, density, and how naturally the front follows the chosen direction. Refreshing is quicker if the roll remains intact; focus on the side sweep and any lifted perimeter hairs. For curls or strong growth patterns, a less extreme sweep may require less manipulation while preserving the idea. Do not force the front so low that it falls into the eyes. When explaining the design to a stylist, identify where the sweep should cross the forehead and where the back roll should sit. Those landmarks are more useful than simply requesting “side-swept.”
Pro tip:
Anchor the front sweep behind the ear before constructing the back roll. This separates the two jobs, so the visible front section does not shift every time you adjust the lower portion.
Make It Work for You:
If your hair naturally parts near the center, use a moderate diagonal sweep rather than forcing a very deep one. You can keep the asymmetric gloss while reducing the amount of root direction change.
Watch Out For:
A front sweep that is overloaded with balm may separate into heavy sections. Use enough for control, then smooth with the comb instead of adding more product every time a small gap appears.
Accessory-Pinned Low Bun Hairstyle
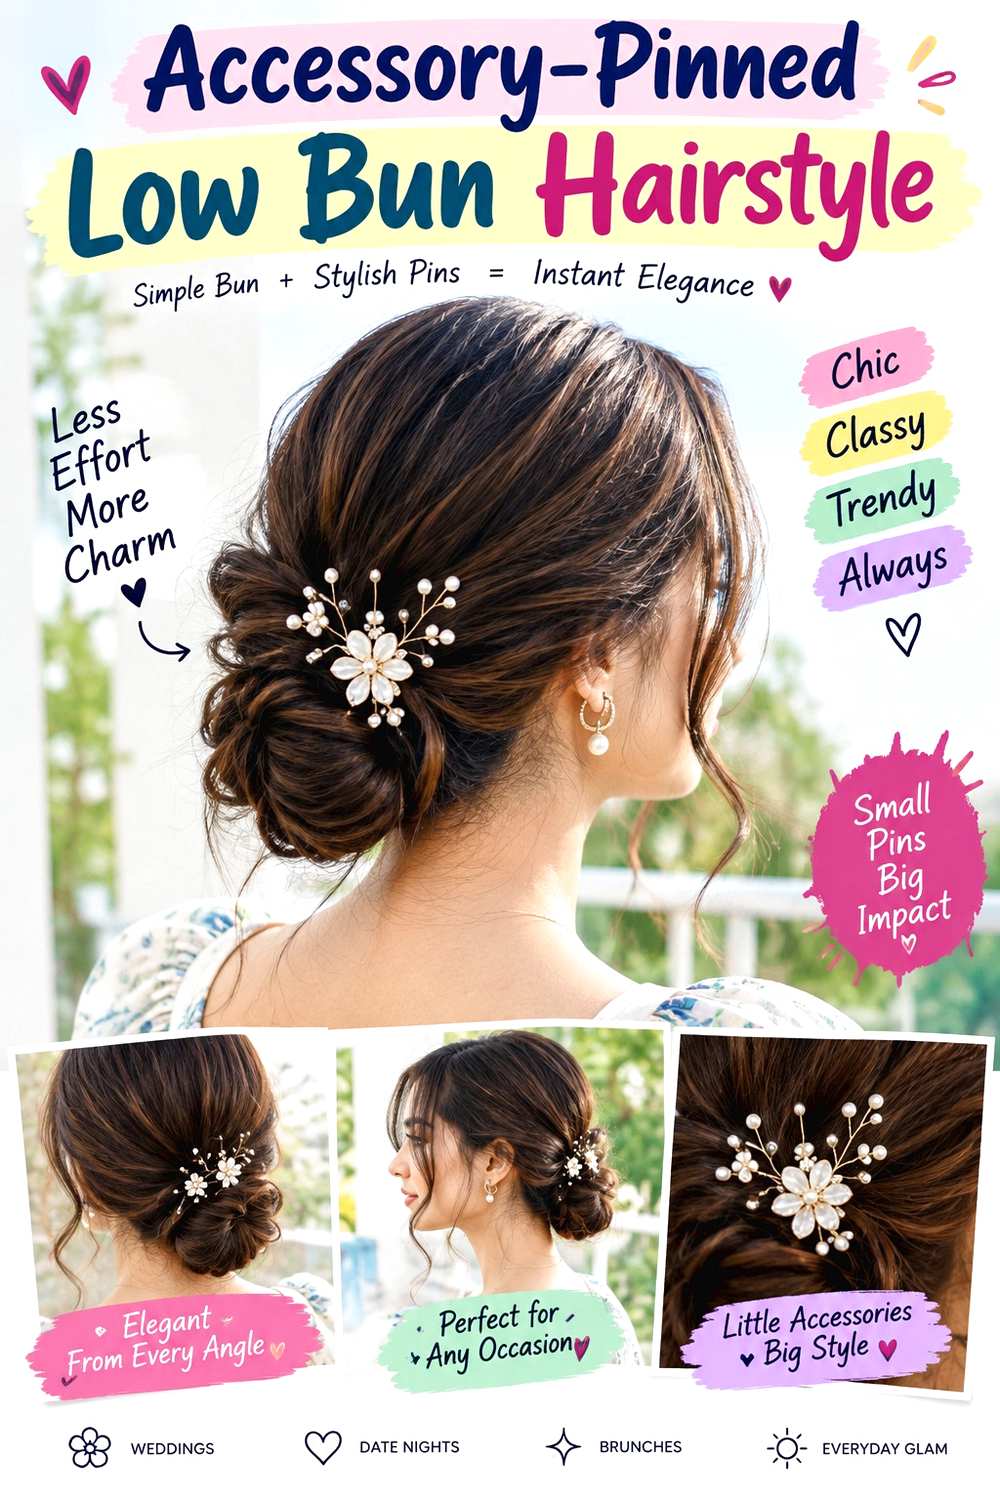
A polished low bun becomes more decorative when one side is finished with a barrette, jeweled pin, or similar accessory. The bun itself stays close to the nape, with a center or side part and a smooth crown, so the accessory remains a focal point rather than competing with loose texture. Placement matters: a piece fixed just above the bun creates a different line from one positioned behind the ear. The base hairstyle should remain secure even if the accessory is removed.
A styling cream smooths the crown, bobby pins build the bun, and a secure barrette provides the decorative finish. The complete style may take 15 to 25 minutes depending on the complexity of the bun, while a refresh is usually limited to checking the anchor and smoothing the hairline. Fine or slippery hair may need the accessory attached over a pinned section rather than directly onto loose surface hair. With dense hair, choose placement that does not force the clasp through an overly thick section. For professional styling, bring or show the actual accessory and decide its exact angle before the bun is finished. The stylist can then leave a stable anchoring area rather than trying to add the piece as an afterthought.
Pro tip:
Test the accessory position before final pinning. Open and close it once at the intended spot to make sure the clasp sits flat and does not press uncomfortably against the head.
Make It Work for You:
If your hair is very slippery, attach the decorative piece over a section already stabilized by hidden pins. The accessory should decorate the updo rather than carrying the weight of the bun.
Watch Out For:
Avoid anchoring a heavy accessory directly into the outer edge of the bun. Its weight can distort the shape. Place it beside a stable base where support is already built underneath.
Soft Gloss Face-Frame Updo Hairstyle

Not every glossy updo needs a completely closed hairline. This variation keeps the crown polished while leaving two controlled face-framing pieces at the front. The loose sections may finish near the cheekbones, jaw, or below the chin, depending on the available length and the effect you prefer. The rest of the hair gathers into a low twisted bun, while the crown remains smooth with gentle rather than severe tension. That contrast gives the style softness without turning it into a loose, textured updo.
A light smoothing serum controls surface frizz, heat protectant shields the front pieces during thermal styling, and a curling iron creates a deliberate bend away from the face. Full styling takes longer when the front sections are heat-shaped, while a next-day refresh may involve only redefining those pieces and securing the bun again. Curly hair can leave the face frame in its natural pattern instead of recreating a uniform curl. Keep the sections narrow enough that the updo still feels intentional. For salon styling, specify the finished length of the loose pieces and whether you want them softly curved or distinctly curled; that detail changes how much hair should be separated before the rest is gathered.
Pro tip:
Separate the face-framing pieces before smoothing the rest of the hair. Trying to pull them out after the bun is secured can disturb the polished hairline and release more hair than intended.
Make It Work for You:
If you prefer minimal heat, leave naturally wavy, curly, or coily front pieces in their existing pattern and refine only their placement. The glossy crown can provide enough contrast to define the updo.
Watch Out For:
Do not make the loose sections so wide that the sides of the updo lose their structure. Start narrow, check the balance from the front, and release more hair only if needed.
Conclusion
High gloss updo hairstyles can range from compact low chignons and braided buns to tall knots, vertical twists, and softer designs with face-framing pieces. The best choice depends less on one ideal hair type than on where you want volume, how much length you have to secure, and whether you prefer a center part, side part, or fully swept-back front. Dense hair may benefit from distributed anchors, while finer hair can often keep a broader shape instead of an extremely tight knot. Natural texture can remain visible within a polished finish. Also consider effort: a simple low knot may suit regular styling, while detailed twists, braids, or sculpted rolls can require more time and careful refreshing.
Before Your Salon Visit
Choose one or two favorite updos and save clear references showing the front, side, and back when possible. Explain your natural texture, density, approximate length, usual styling routine, and how long you want the style to stay comfortable. Point specifically to the parting, crown volume, bun or twist placement, face-framing pieces, accessory position, and degree of gloss you like. Because these are temporary styles, focus on secure styling and comfortable tension rather than assuming you need a new haircut.
FAQs
How Long Does Hair Need to Be for a Glossy Updo?
Shoulder-length hair is enough for many compact buns, twists, and pinned styles, although shorter layers may need careful anchoring. Longer hair gives more wrapping options but can also add weight. The most useful reference is whether your lengths comfortably reach the intended anchor point without excessive tension.
Can Curly or Coily Hair Wear a High Gloss Updo Without Straightening?
Yes. A polished updo does not require naturally curly or coily hair to become completely straight. You can smooth the outer surface, define a part, and keep natural texture in the bun, braid, or twist. The amount of smoothing should match your preferred finish and routine.
How Do I Keep a Glossy Updo From Looking Greasy?
Use styling product in small amounts and concentrate it where control or shine is actually needed. Distribute each layer thoroughly before adding more. A reflective finish should still show shape and separation; if the roots appear coated or heavy, excessive product may be hiding the intended structure.
How Can I Keep an Updo Secure Without Making It Too Tight?
Build a stable anchor and distribute the weight instead of relying on extreme tension. Larger buns may need support at several points, while dense hair can benefit from a wider base. If you feel persistent pulling, tenderness, or a headache, loosen and reset the style rather than tightening it further.