13 Rounded Layer Haircuts
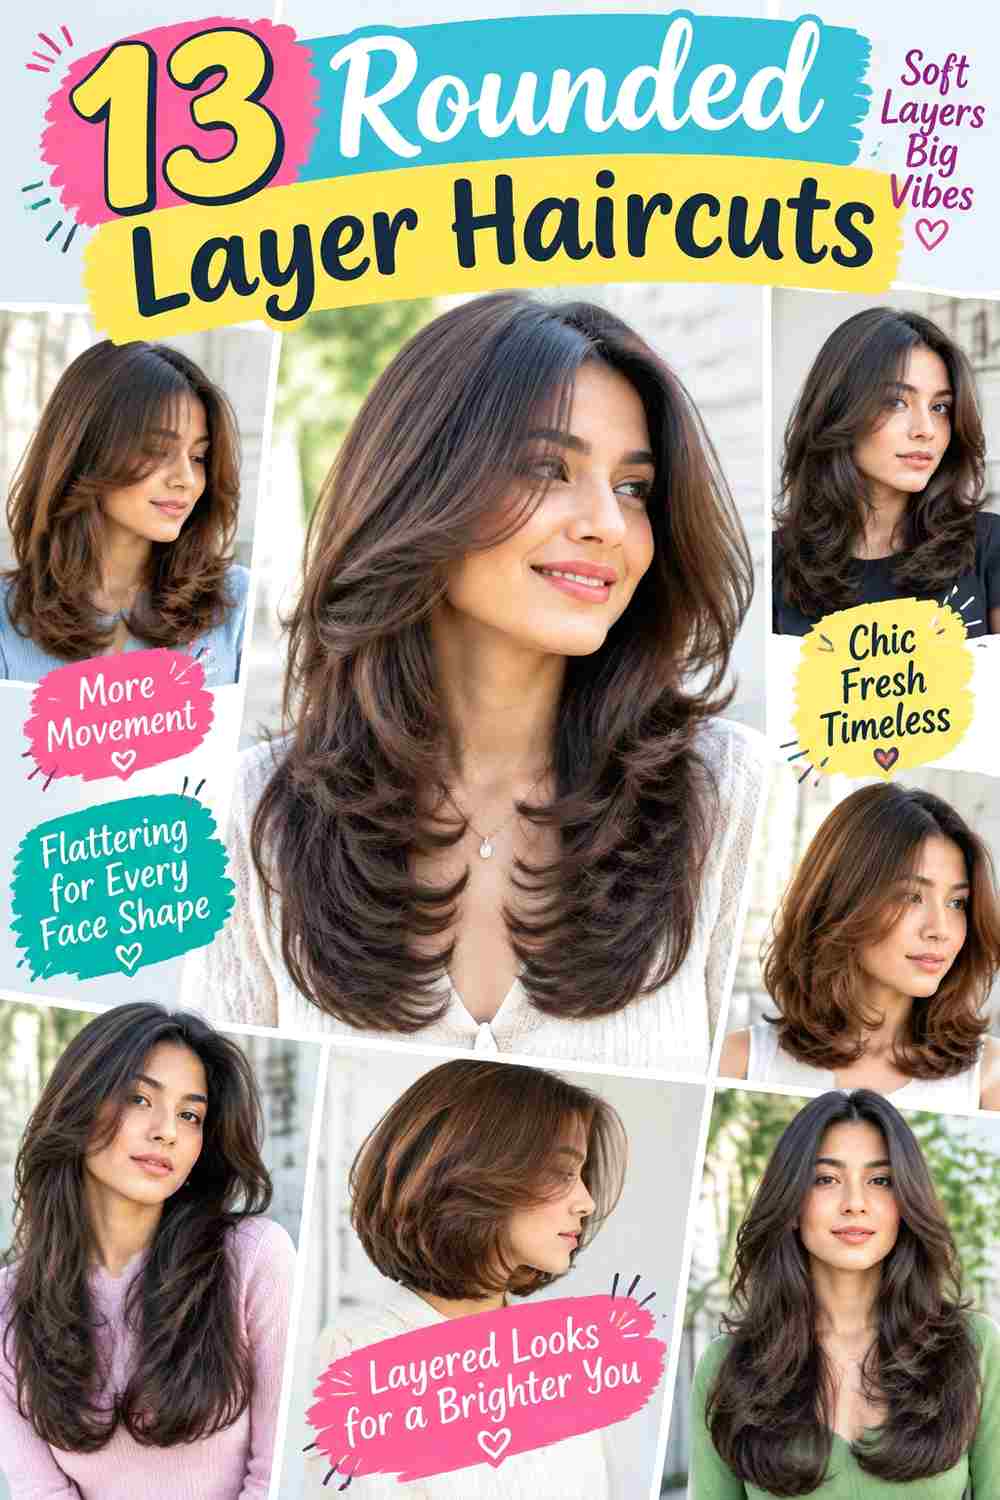
Rounded layer haircuts use graduated lengths to create a curved silhouette rather than a flat, one-length fall or sharply disconnected layers. The shortest sections can begin around the cheekbones, jaw, shoulders, or crown depending on the design, then blend into longer lengths. Styling often encourages the layers to sweep inward or outward in broad bends, giving the sides movement while maintaining a rounded overall outline. Fringe is optional, with curtain bangs offering one way to connect the front into the layered shape.
Texture and density influence where those layers work best. Straight and wavy hair can show the individual levels clearly, while curls create roundness through their natural grouping and shrinkage. Fine strands may benefit from fewer, longer layers and a stronger bottom edge. Dense hair may need carefully positioned internal weight reduction so the silhouette does not become unnecessarily wide.
Styling effort ranges from a quick natural refresh to a complete rounded blow-dry. Layer placement also affects grow-out: when shorter sections become too long to support the intended curve, the haircut may begin to hang more heavily. The ideas below compare different ways to control length, movement, volume, fringe, and finish. hairstyle_caption_depth_knowled…
Quick List
- Shoulder-Length Rounded Layer Hairstyle
- Long Flowing Rounded Layer Hairstyle
- Face-Framing Rounded Layer Hairstyle
- Curtain Bangs Rounded Layer Hairstyle
- Soft Side-Part Rounded Layer Hairstyle
- Voluminous Crown Rounded Layer Hairstyle
- Feathered Rounded Layer Hairstyle
- Wavy Rounded Layer Hairstyle
- Curly Rounded Layer Hairstyle
- Fine-Hair Rounded Layer Hairstyle
- Dense-Hair Rounded Layer Hairstyle
- Collarbone Rounded Layer Hairstyle
- Air-Dried Rounded Layer Hairstyle
Shoulder-Length Rounded Layer Hairstyle
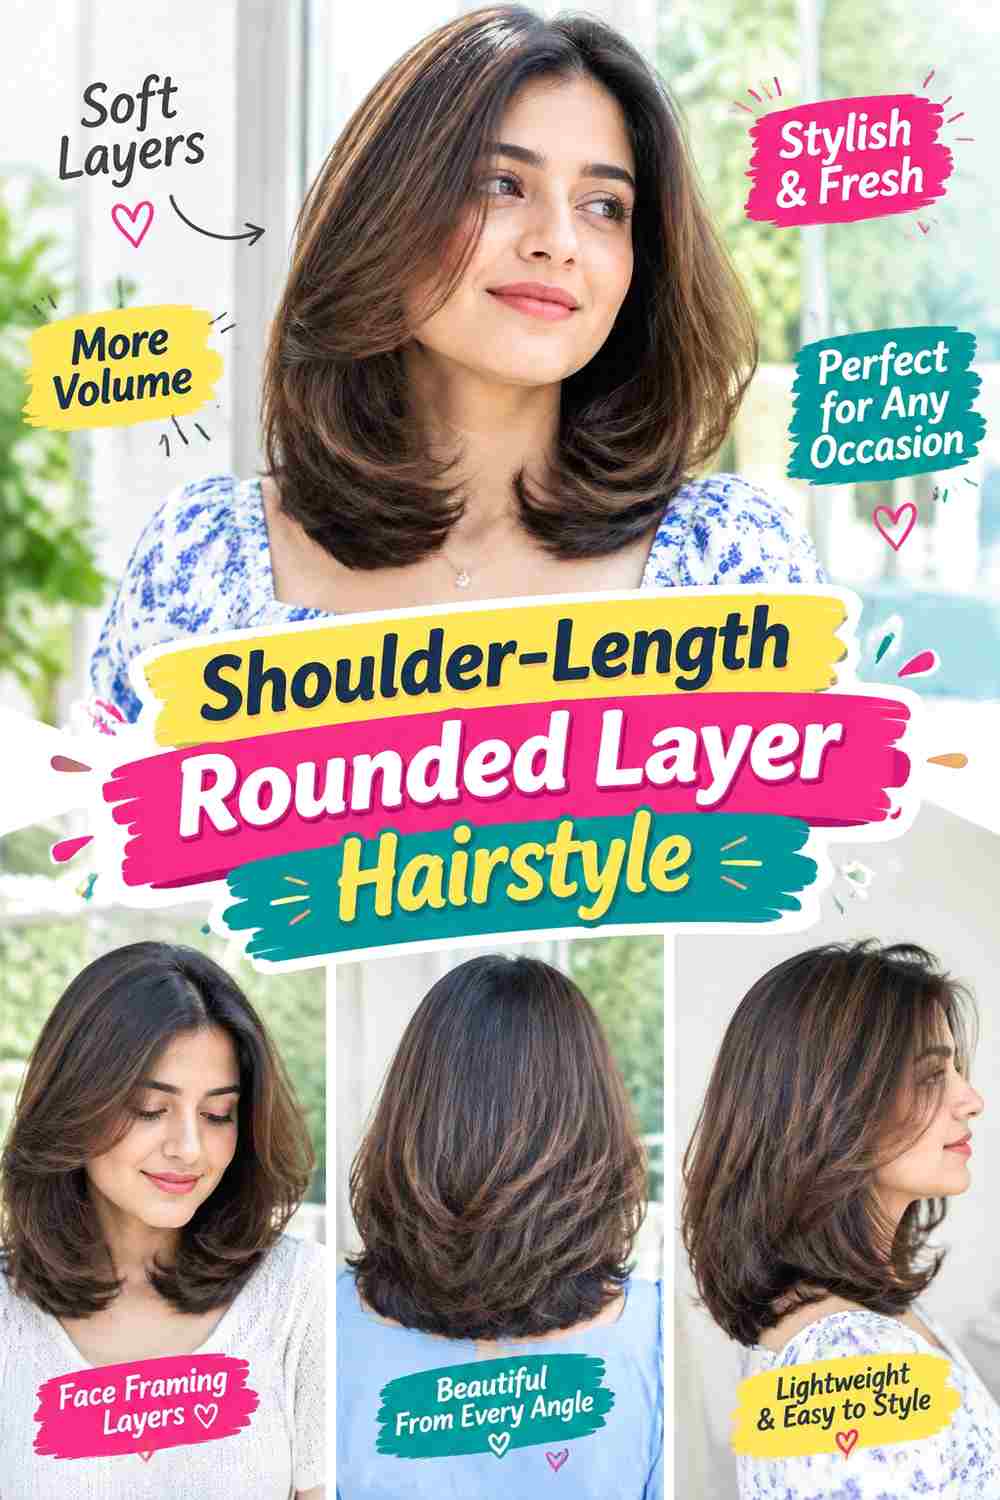
Shoulder length gives rounded layers enough space to curve without allowing the silhouette to become excessively long or heavy. The bottom sits around the shoulders, while graduated sections can begin around the jaw and continue through the lower lengths. A center or gentle off-center part works with the balanced outline, and broad inward bends through the ends reinforce the rounded shape. The perimeter should retain enough weight to keep the haircut cohesive.
A round brush and lightweight mousse can encourage the layers to separate while maintaining fullness. Include heat protectant when blow-drying with significant heat. Straight and softly wavy textures can show the individual layers clearly, while denser hair may need thoughtful bulk placement. A quick refresh can focus on the front and upper layers; recreating the complete rounded blow-dry after washing requires more time.
At the salon, identify where you want the shortest visible layer to begin rather than requesting vague “short layers.” Starting near the jaw creates noticeably more movement than beginning near the shoulders. As the haircut grows, those layers gradually drop and the silhouette becomes less rounded. A reshape is useful when the upper sections stop supporting the curve, even if you want to preserve most of the overall length.
Pro tip:
Dry the lower layers first, then work upward so the shorter sections can settle over the established shape. This makes it easier to see where the haircut needs additional bend or lift.
Make It Work for You:
If your ends are lower in density, keep the shortest layers closer to the jaw or below and preserve more weight around the bottom. The shape remains rounded without sacrificing unnecessary perimeter fullness.
Watch Out For:
Too many short layers can make shoulder-length hair widen around the sides. Keep the layer placement connected and assess where you actually need volume rather than removing weight evenly throughout.
Long Flowing Rounded Layer Hairstyle
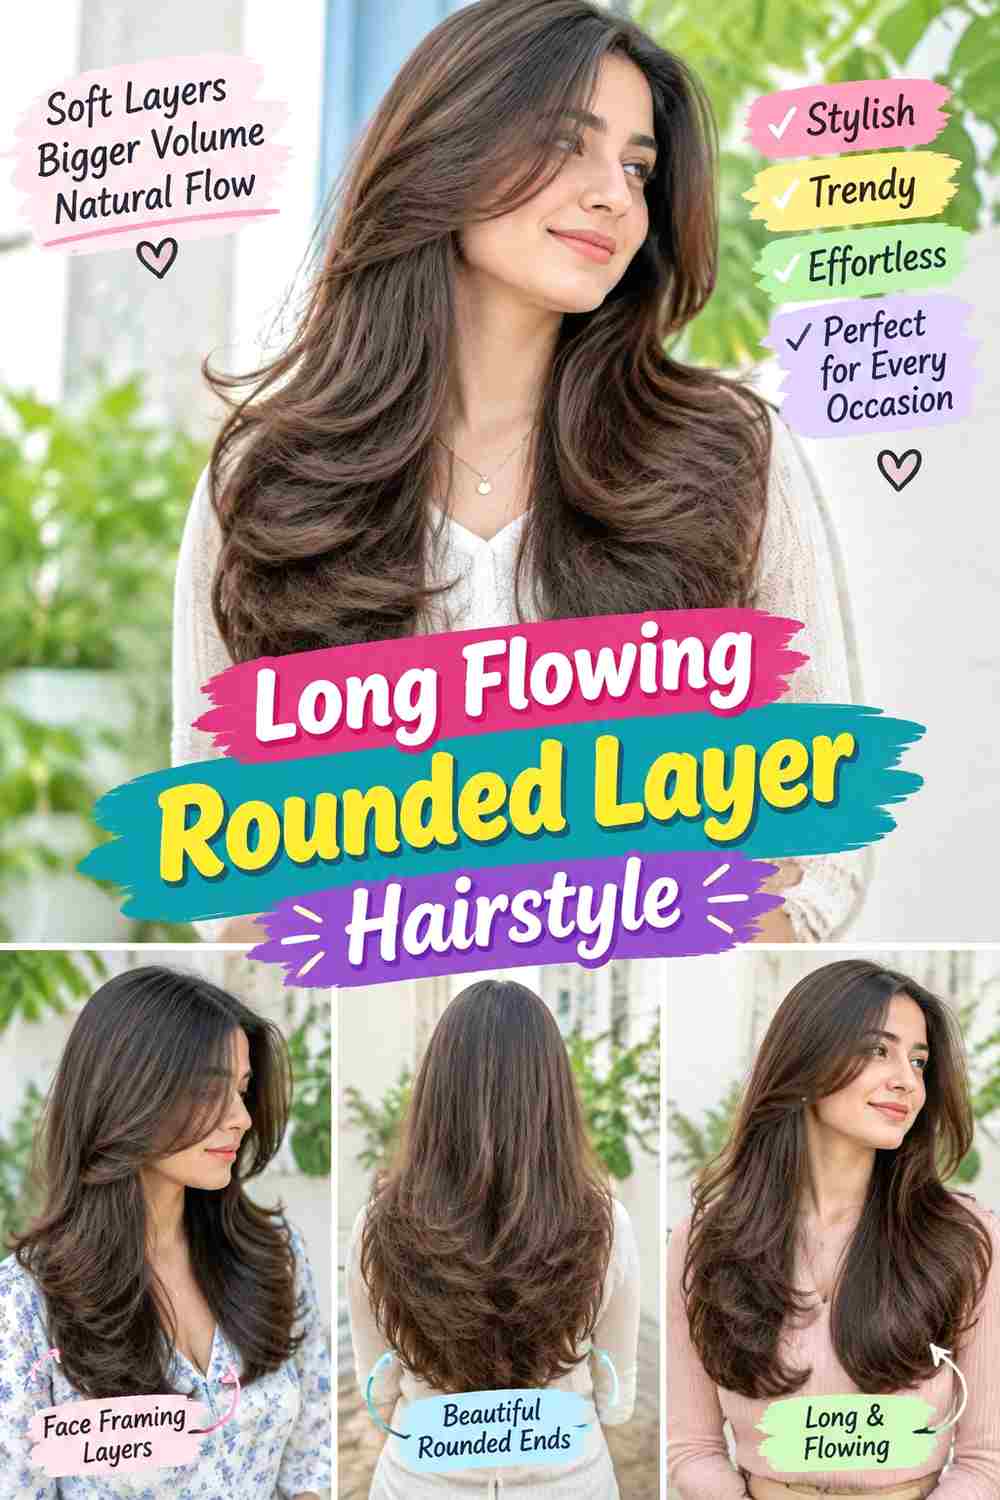
Long hair can carry a rounded silhouette when the layers gradually descend instead of forming short, disconnected steps. The front may begin around the chin or below, with subsequent layers flowing through the chest-length or longer perimeter. Broad bends help each level become visible, while straighter roots prevent excessive height at the crown. A center part emphasizes symmetry, though a softer off-center part can shift the movement.
Use heat protectant before heated styling, then a large round brush to create sweeping bends rather than tight curls. Lightweight finishing serum can control flyaways through the longer ends. A non-wash-day refresh may require reshaping only the front and upper sections. A full wash-day blow-dry is a bigger commitment because long or dense hair naturally takes more time to dry and direct.
Long layers need enough separation to move but should still connect visually with the bottom. Tell your stylist where the shortest front and upper layers should finish, and explain how much overall length you want to protect. As the layers grow, they may begin to merge into the perimeter and reduce visible movement. Reshaping can restore the graduated curve without requiring a dramatic reduction in total length.
Pro tip:
Work with broad sections when creating the rounded bend. Very small sections can produce a curlier finish, while larger sections encourage the long, sweeping movement that suits this layered silhouette.
Make It Work for You:
For very long fine hair, keep fewer layers and concentrate them around the front and upper surface. This introduces movement without removing too much weight from the already distant perimeter.
Watch Out For:
Avoid making the shortest layer dramatically shorter than the next level. A large gap can interrupt the flowing curve and make the haircut look tiered rather than smoothly rounded.
Face-Framing Rounded Layer Hairstyle

The curve begins around the face in this version, where shorter pieces lead into increasingly longer layers. The first section might finish around the cheekbones, jaw, or chin, depending on how much movement you want near the front. The back can remain considerably longer and fuller, while the front layers sweep away from the face to create a rounded transition instead of a sharp step.
Heat protectant and a round brush can direct those front layers backward, while lightweight mousse provides enough support to keep the bend visible. On ordinary mornings, refreshing only the face frame can be relatively quick. Styling every layer from wet hair takes longer, especially when the back is dense or long. Straight and wavy textures can show the transition clearly, while curly hair needs layer placement that accounts for shrinkage.
At your appointment, point to the exact landmark where the shortest front section should finish. “Face-framing” alone does not establish whether you want cheekbone-level movement or a much longer chin-level piece. Also discuss how quickly those pieces should connect to the back. As they grow below their intended position, the front becomes heavier and loses some of its rounded sweep even though the overall haircut remains wearable.
Pro tip:
Direct the front layers away from your face and let them cool before separating them. This helps preserve a broad backward sweep instead of turning the pieces into tighter curls around the cheeks.
Make It Work for You:
If you prefer less movement beside your face, begin the frame around the chin or below. The graduated connection remains visible while keeping more length and weight through the front sections.
Watch Out For:
Do not make every face-framing piece equally short. Without a gradual transition into the longer hair, the front can resemble a disconnected shelf instead of supporting the intended rounded flow.
Curtain Bangs Rounded Layer Hairstyle
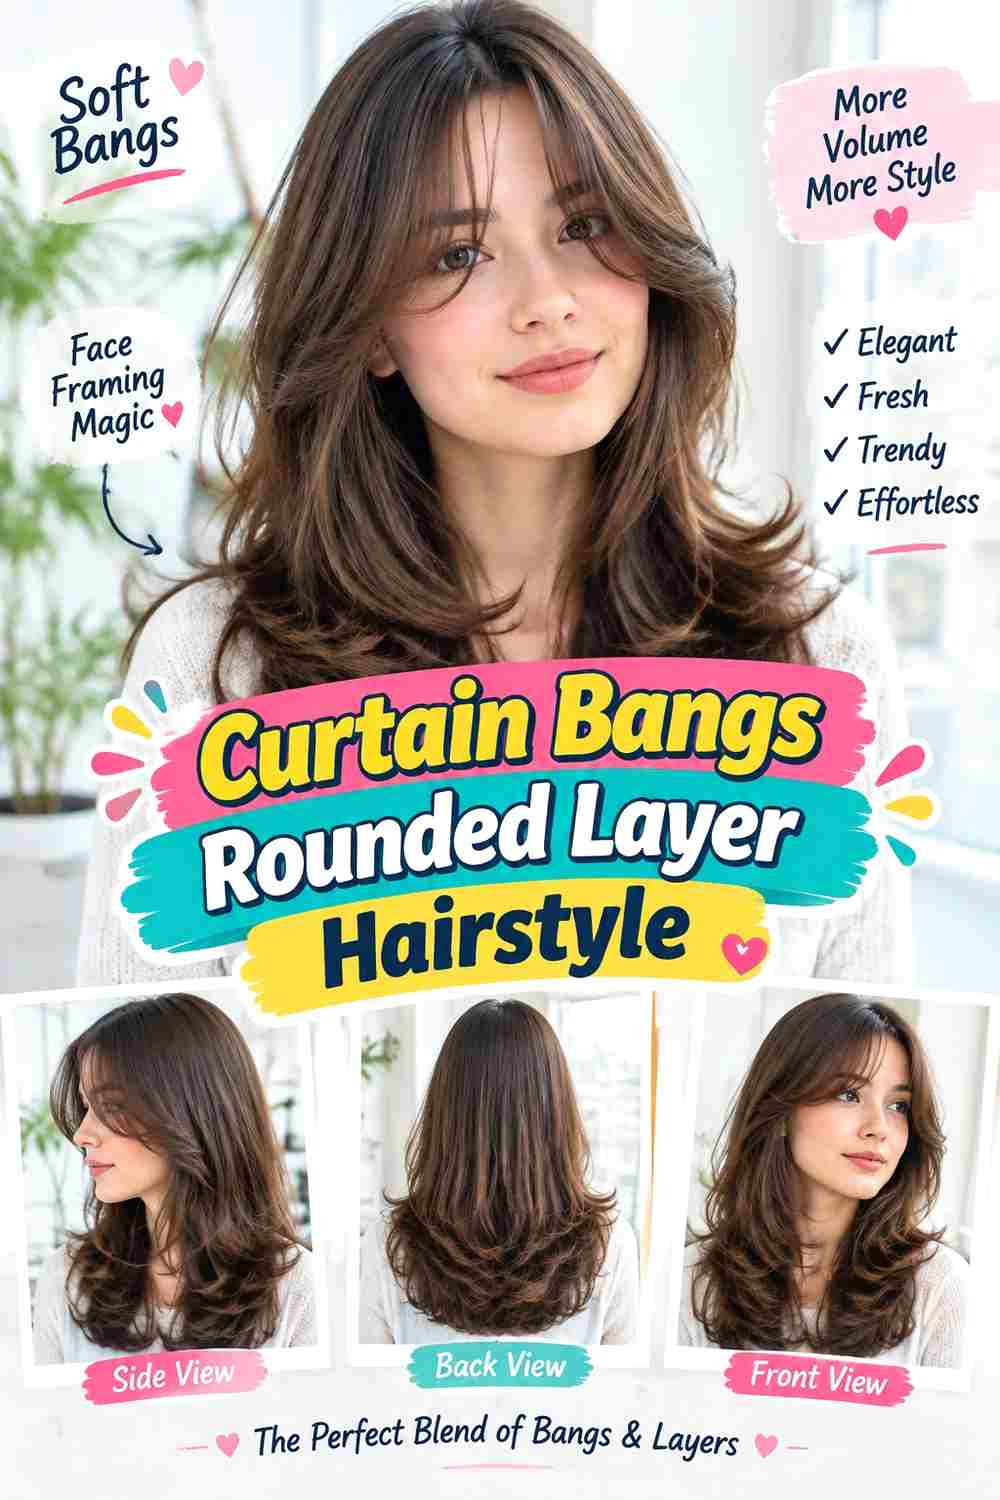
Curtain bangs create the shortest point of this layered shape, with a divided center that gradually lengthens toward the outer corners. Those longer fringe sections connect into cheekbone-, jaw-, or chin-level layers before flowing through the rest of the haircut. A center or near-center part makes the transition easiest to see, while broad bends keep the fringe and layers moving in the same direction.
Use heat protectant when heat styling, a round brush to guide each side away from the center, and flexible hairspray for light hold. Refreshing only the fringe can be a short task between washes, while setting the complete layered shape takes considerably longer. Hairline growth patterns can affect how readily the fringe opens, so a perfectly symmetrical split may require more work for some readers.
Fringe maintenance is separate from upkeep of the longer layers because the center pieces reach the eyes sooner. Ask your stylist where the bangs should finish when dry and how long the outer corners should remain so they blend into the first major layer. Curly or strongly wavy hair should be assessed with its shrinkage in mind rather than using a universal wet fringe measurement.
Pro tip:
Style the fringe soon after washing, before it dries into an unintended direction. Establish the center opening first, then sweep the outer sections into the longer layers for a more continuous curve.
Make It Work for You:
For easier fringe grow-out, choose a longer center and cheekbone-level outer corners. You retain the curtain shape while reducing how quickly the shortest pieces interfere with your eyes.
Watch Out For:
Avoid rolling the bangs too tightly around the brush. A strong curl can make them appear much shorter and disconnected; aim for a broad bend that flows into the surrounding layers.
Soft Side-Part Rounded Layer Hairstyle
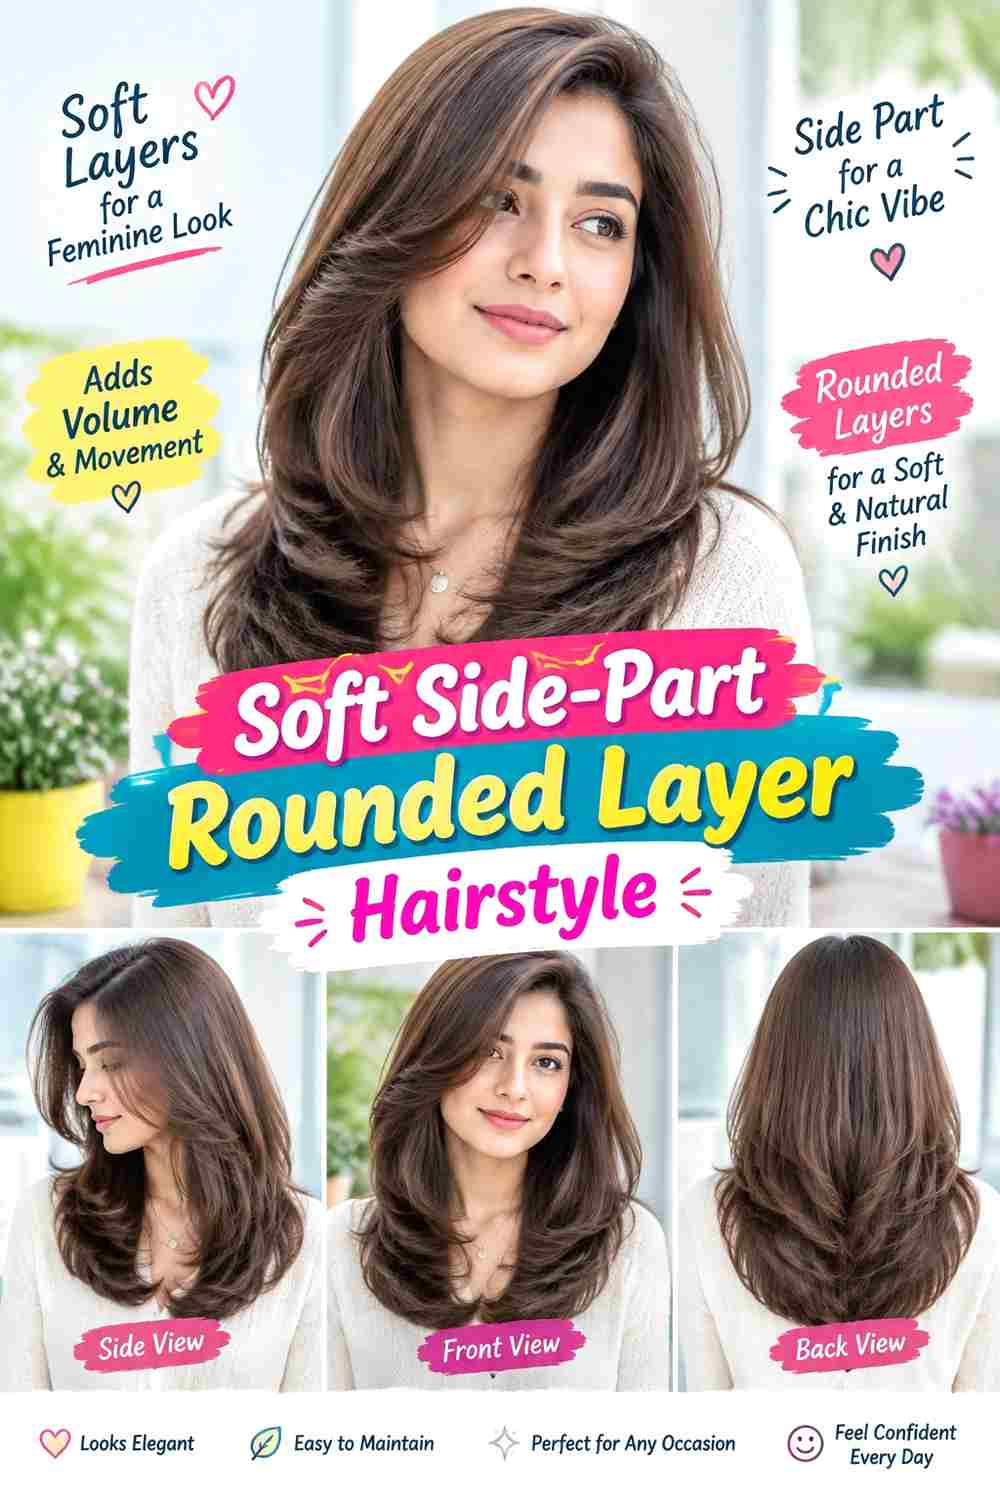
A side part shifts the rounded movement toward one side, creating a fuller front sweep without requiring extremely short crown layers. The heavier side falls across the forehead and blends into graduated lengths around the cheek and jaw. Layers continue through the shoulders or longer perimeter, with broad curves keeping the overall silhouette soft rather than sharply feathered.
Root-lift spray can support the heavier side, while heat protectant and a round brush help establish the sweeping direction. A between-wash refresh may involve only the roots around the part and the first few layers. Rebuilding the complete blow-dry takes longer, especially if your natural texture differs substantially from the intended smooth finish. Straight and wavy textures may require less reshaping than curls when worn in this particular finish.
At the salon, show where you normally place your side part because layer balance can appear different when the hair is shifted. Explain whether you want the heavier side to remain long or sweep from a shorter cheek- or jaw-level section. As the layers grow, the front can become heavy and stop holding its rounded movement. A targeted reshape may restore that section without changing the entire haircut.
Pro tip:
Dry the roots briefly against the final direction of the part, then place them back into position. This can provide controlled lift beneath the front sweep without requiring aggressive teasing.
Make It Work for You:
If you dislike strong asymmetry, move the part only slightly away from center and keep the same rounded layers. You gain directional movement without concentrating most of the volume on one side.
Watch Out For:
Too much root product can weigh down the section you are trying to lift. Apply support mainly near the part and keep heavier finishing products away from the crown area.
Voluminous Crown Rounded Layer Hairstyle
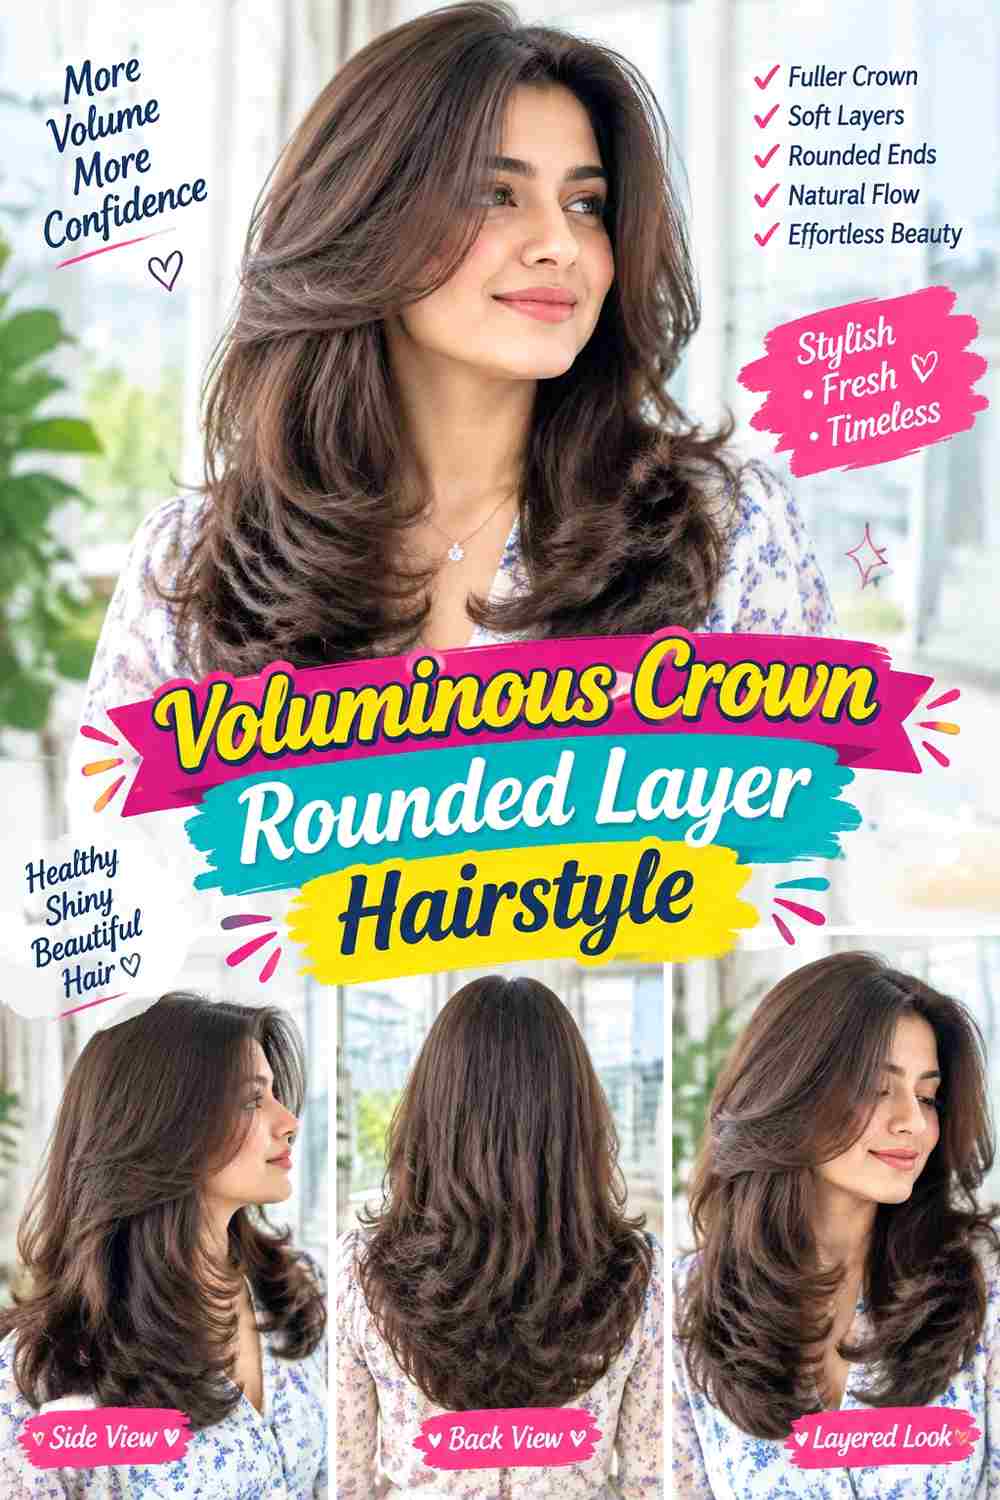
Shorter upper layers make crown lift a deliberate part of the silhouette. Instead of concentrating all movement around the face and ends, this cut creates height near the top that gradually blends into fuller middle and lower lengths. The perimeter can sit anywhere from the shoulders downward, while a center or off-center part controls where the upper volume separates.
Root-lift spray provides targeted support, and a round brush can raise the upper layers during drying. Heat protectant belongs in the routine when substantial heat is used. A quick refresh may involve lifting only the crown sections, whereas a full wash-day blow-dry takes longer because each upper layer needs direction. Medium to dense hair can support the rounded structure, although excessive bulk may require individualized internal adjustment.
The shortest crown layer strongly affects the result. Ask your stylist where that section will fall and how it will connect with the side layers before committing to significant shortening. Very short crown pieces create more obvious lift but can require more daily styling. As they grow, volume gradually shifts downward and the silhouette becomes longer and flatter, providing a useful signal that reshaping may be worthwhile.
Pro tip:
Lift crown sections upward while drying rather than pulling them straight backward. The upward direction creates support at the root while allowing the ends to fall naturally into the surrounding rounded layers.
Make It Work for You:
If your hair is fine, keep the crown layers moderately long and use styling direction for extra lift. This protects density while still creating visible height through the upper silhouette.
Watch Out For:
Do not assume shorter crown layers automatically create more volume. If too much weight is removed, the ends may separate instead; coordinate layer length with your density and normal styling routine.
Feathered Rounded Layer Hairstyle

Feathered movement gives the rounded cut more separation through the front and sides. Layers sweep backward in visible sections, often beginning near the cheekbones or jaw and continuing through shoulder-length or longer hair. The ends turn away rather than sitting entirely underneath, but the gradual layer progression still creates an overall curved silhouette instead of a sharply disconnected shape.
Apply heat protectant before styling and use a round brush to direct individual layers away from the face. Flexible hairspray can keep the feathered sections separated without making them rigid. Straight and softly wavy textures can show this finish clearly, while naturally curly hair will produce a different interpretation unless it is heat styled. A short refresh can focus on the front layers; a complete feathered blow-dry requires considerably more work.
At the salon, explain where you want the feathering to begin and how much perimeter weight should remain. Layers starting around the cheekbones create a more pronounced result than those beginning below the chin. Grow-out tends to soften the separation as the shortest sections become longer. If you enjoy obvious feathering, reshaping when those sections stop sweeping distinctly can be more useful than following a fixed trimming calendar.
Pro tip:
Rotate the front layers backward rather than directly underneath while drying. This directional change produces the characteristic feathered opening while allowing the lower layers to retain their broader rounded movement.
Make It Work for You:
For lower-density hair, keep the feathering concentrated around the face and upper surface. Leaving the deeper lower sections longer helps maintain a fuller perimeter while still providing visible movement.
Watch Out For:
Too many heavily feathered layers can make the ends appear scattered. Preserve enough connected length through the lower sections so the haircut retains its rounded outline beneath the separated movement.
Wavy Rounded Layer Hairstyle
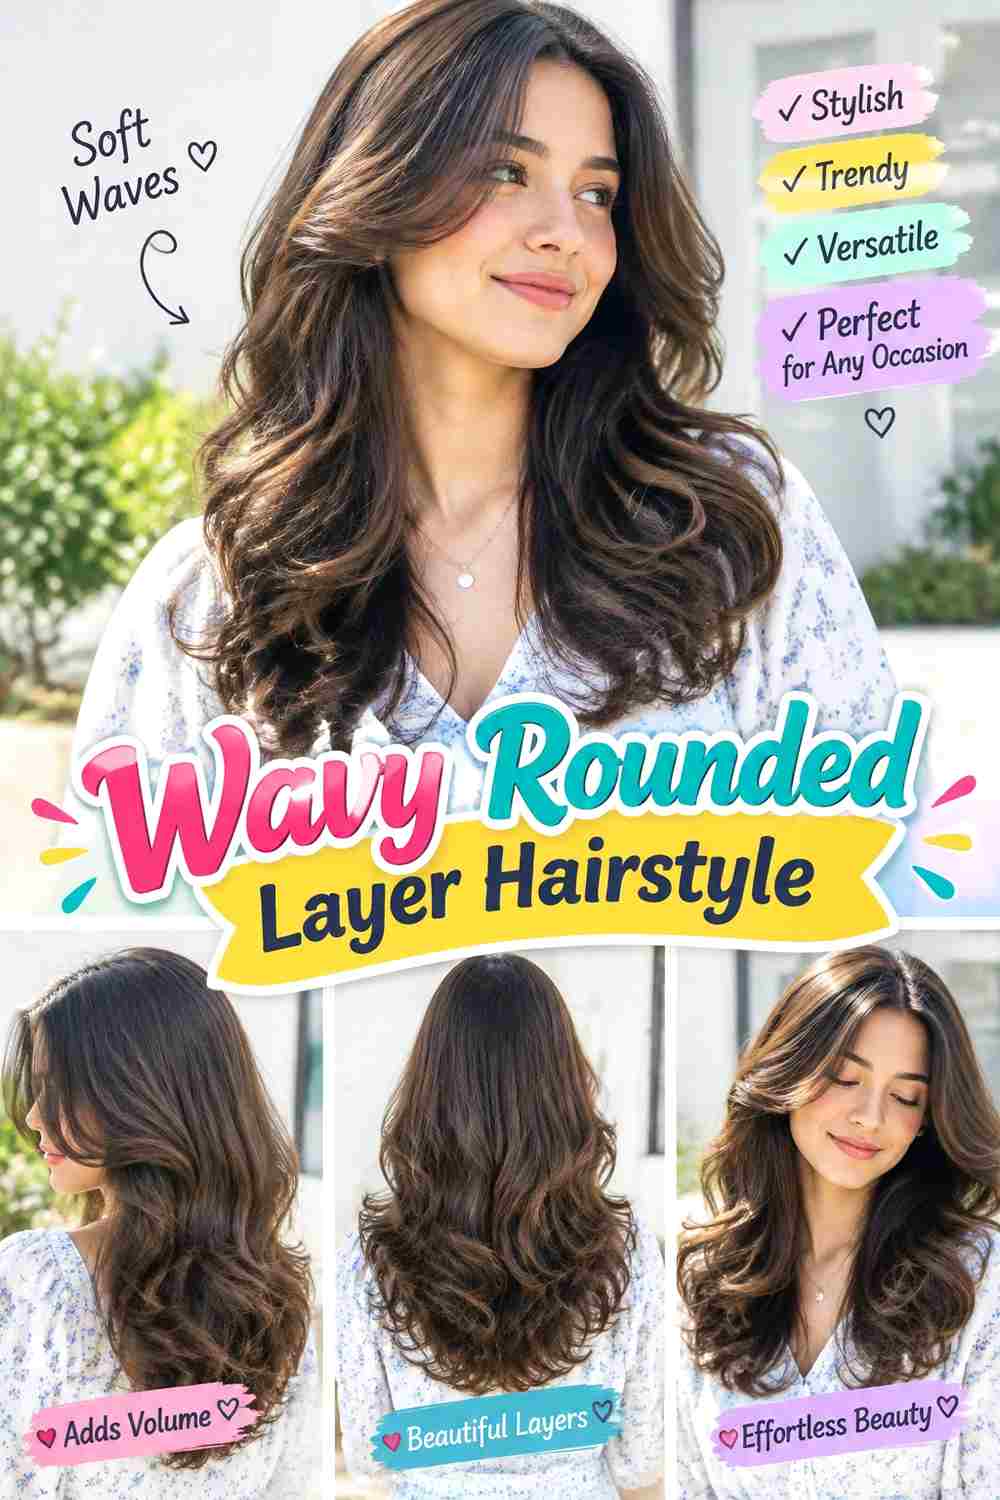
Waves make the different layer lengths visible through changing bends rather than a polished blow-dry. The shortest sections can begin around the jaw, with longer layers falling through the shoulders and below. Broad waves through the middle lengths create width, while relatively relaxed roots and softer tips keep the silhouette rounded without making it uniformly curled.
Naturally wavy hair can use lightweight mousse to support its existing pattern, while heat-styled waves need heat protectant and a curling iron. A quick refresh should concentrate on flattened sections instead of rebuilding every bend. Full wash-day styling takes longer, particularly when the wave pattern is being created on naturally straight hair. Density also matters because too much product can pull finer waves downward.
At the salon, discuss where your natural wave pattern becomes widest and where you want the shortest layer to sit. Layering that works beautifully in a smooth blow-dry may behave differently when air-dried or waved, so make your usual finish clear. As the layers grow, the bends can collect lower in the silhouette and make the top appear flatter. A reshape restores separation when that shift no longer suits your preferred balance.
Pro tip:
Allow waves to begin at slightly different heights across the layers. This prevents the haircut from forming one horizontal band of volume and makes the rounded shape appear more naturally connected.
Make It Work for You:
If your waves are fine and easily weighed down, keep richer products away from the roots and preserve a stronger bottom edge. Movement can come from selected upper layers rather than extensive thinning.
Watch Out For:
Avoid curling every layer into an identical spiral. Uniform curls can hide the graduated shape; loosen the bends and let different layer lengths create the visual movement instead.
Curly Rounded Layer Hairstyle
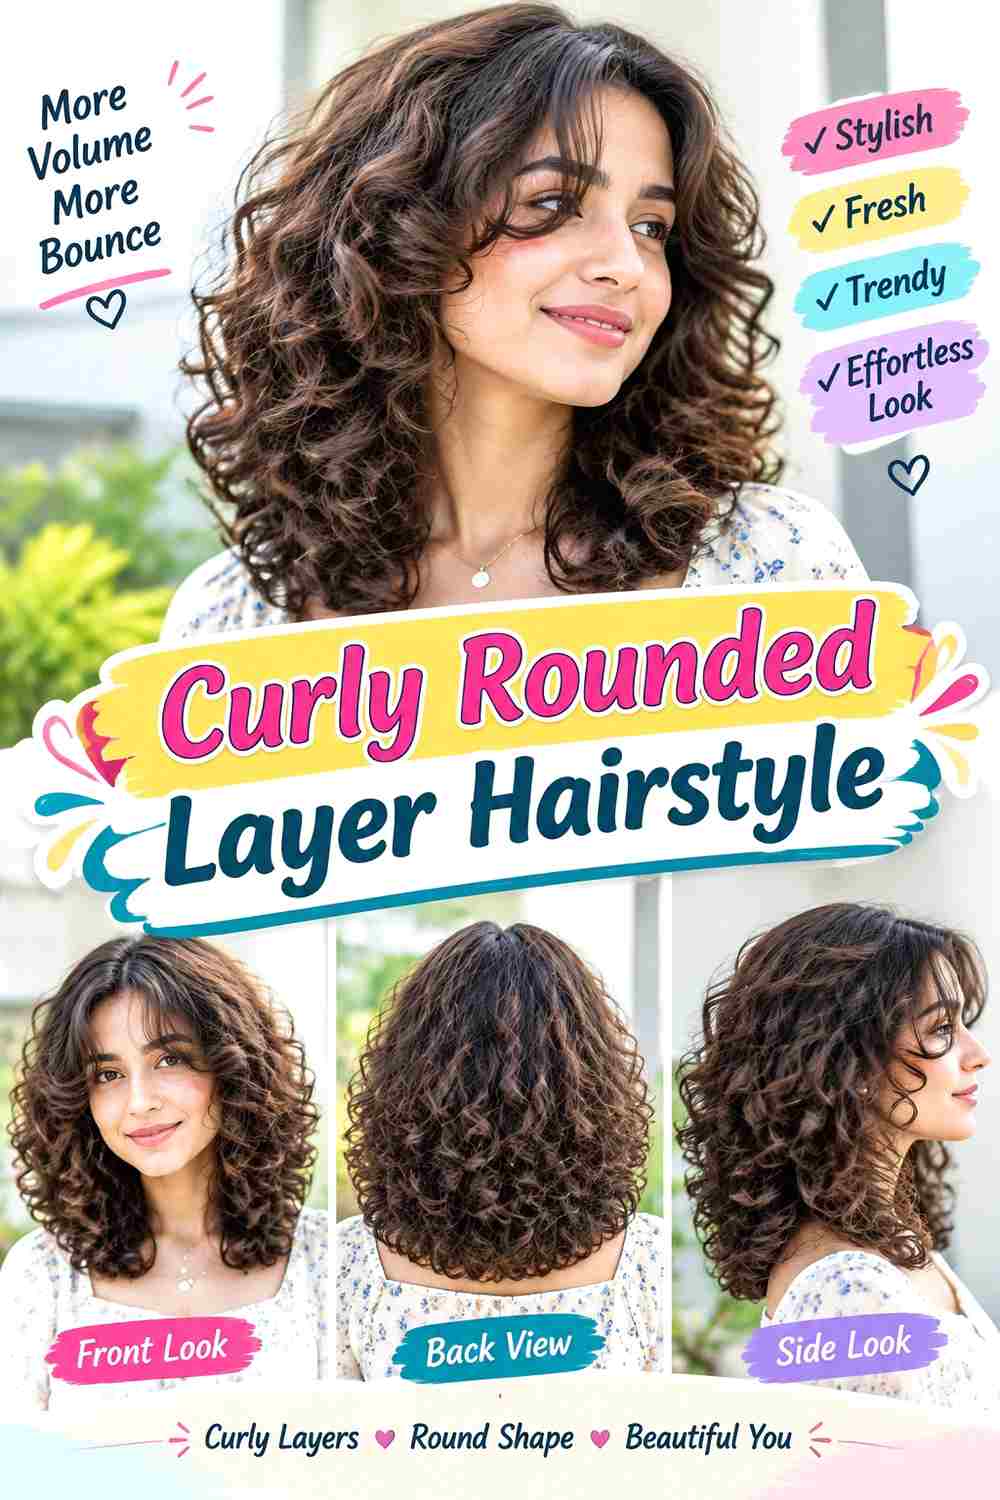
Natural curls can create a rounded silhouette through both layer placement and curl grouping. Shorter curls around the upper sides introduce lift, while progressively longer sections build width and length toward the shoulders or beyond. The front may include cheekbone- or jaw-level curls, and the part can remain flexible depending on growth pattern and preferred volume distribution.
A lightweight leave-in conditioner provides slip, curl gel supports grouping, and a diffuser can dry the shape with less disruption. A small between-wash refresh may involve only flattened curls around the crown and front. A complete wash, product application, and drying routine requires more time, especially with dense hair. The cut itself should work with the curl pattern rather than depend on straightening to reveal its layers.
Shrinkage is central to salon planning. Discuss the desired dry silhouette and where you want the widest part of the rounded shape to sit. The shortest layer should be assessed in its natural curl rather than measured only while stretched or wet. As layers grow, volume may settle lower and the top can become heavier. Reshaping can restore the intended distribution without requiring every curl to be shortened equally.
Pro tip:
Check the fully dry outline before deciding that one area needs additional volume. Curl groups can settle considerably during drying, so the final silhouette provides more useful information than the wet shape.
Make It Work for You:
If your curls shrink strongly, keep extra length in the shortest planned layers and judge their placement dry. You can maintain rounded volume without accidentally moving the upper sections much higher than intended.
Watch Out For:
Do not stretch curls straight to compare layer lengths and assume they will fall evenly when released. Different shrinkage patterns can change the finished balance, especially around the front and crown.
Fine-Hair Rounded Layer Hairstyle
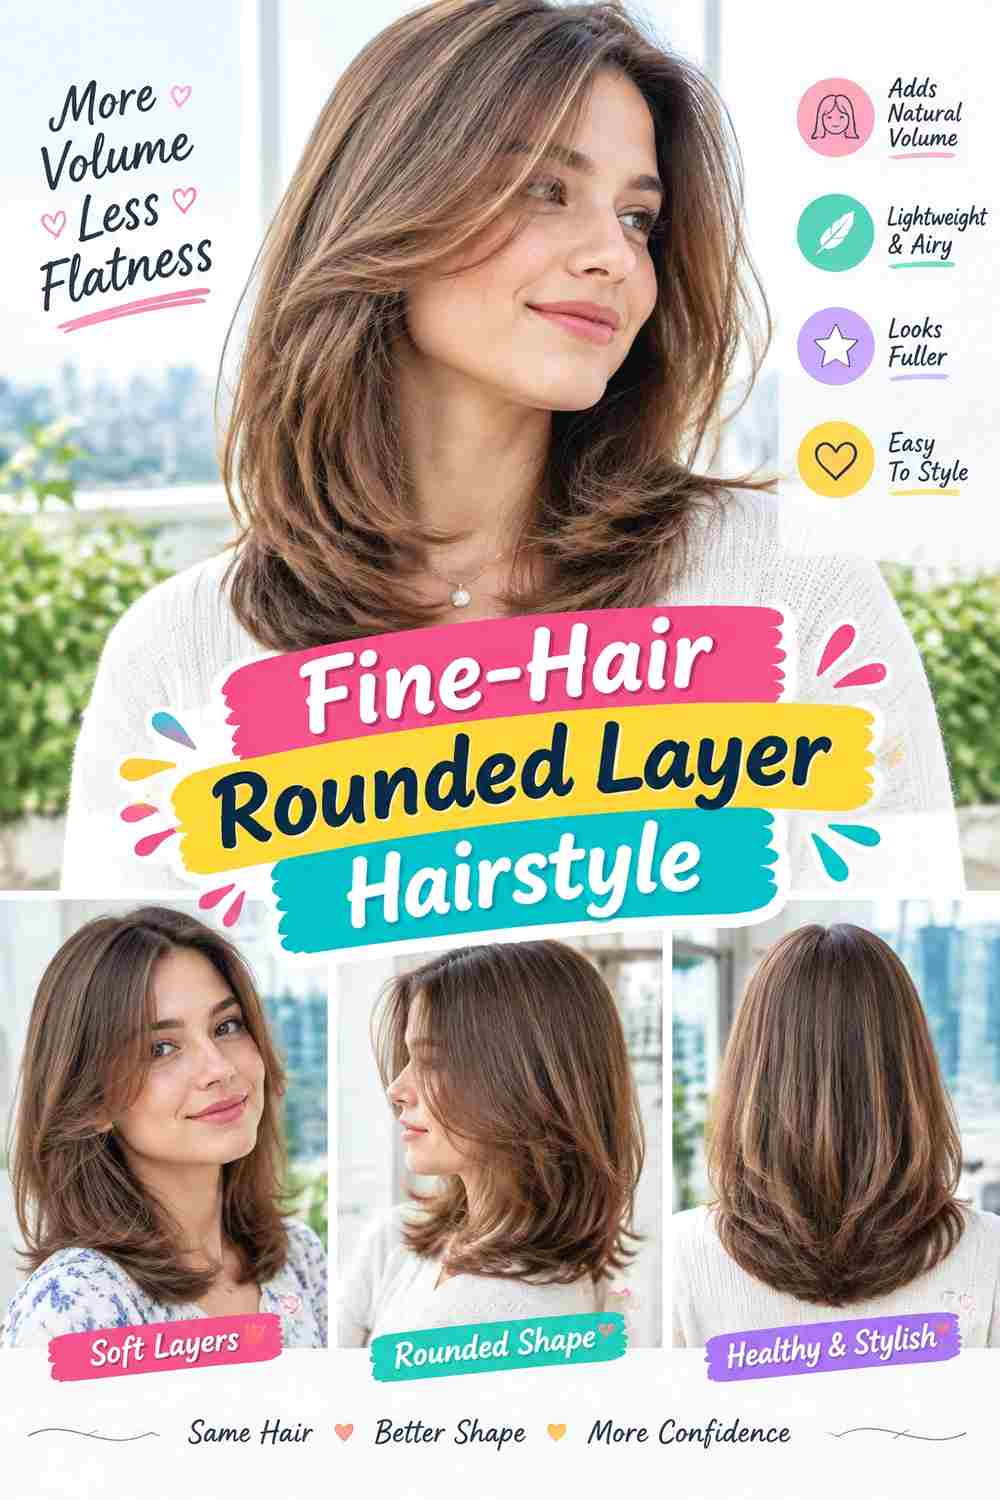
A rounded shape for fine strands depends on strategic layering rather than simply adding more layers. Keeping a substantial bottom edge helps the ends appear cohesive, while a limited number of longer layers introduce movement through the front and upper surface. The shortest sections might begin around the jaw or below, with broad bends making those levels visible without creating excessive separation.
Lightweight mousse can provide support without coating the lengths heavily, while a round brush shapes the curve during drying. Include heat protectant when using significant heat. A quick refresh may involve only lifting the front and crown, while a complete wash-day blow-dry naturally requires more time. Fine describes individual strand thickness rather than overall density, so someone with fine but dense hair may need different weight placement from someone with sparse ends.
At the salon, make perimeter fullness part of the discussion and identify exactly where the shortest layer should land. Ask how much layering can be introduced while retaining the bottom weight you prefer. As the cut grows, layers may blend together and movement can decrease, but that does not necessarily mean more layers are needed; reshaping the existing structure may be enough. hairstyle_human_writing_reader_…
Pro tip:
Apply mousse mainly where support is needed rather than saturating the entire length. Keeping the ends lightly coated helps them remain mobile and prevents product weight from weakening the rounded bend.
Make It Work for You:
If your fine hair is also dense, you may have room for more layering than expected. Preserve the visible perimeter while allowing your stylist to assess where internal weight actually limits movement.
Watch Out For:
Avoid treating fine hair and low-density hair as identical. Removing large amounts of weight unnecessarily can leave the ends sparse; layer placement should reflect both individual strand thickness and overall density.
Dense-Hair Rounded Layer Hairstyle
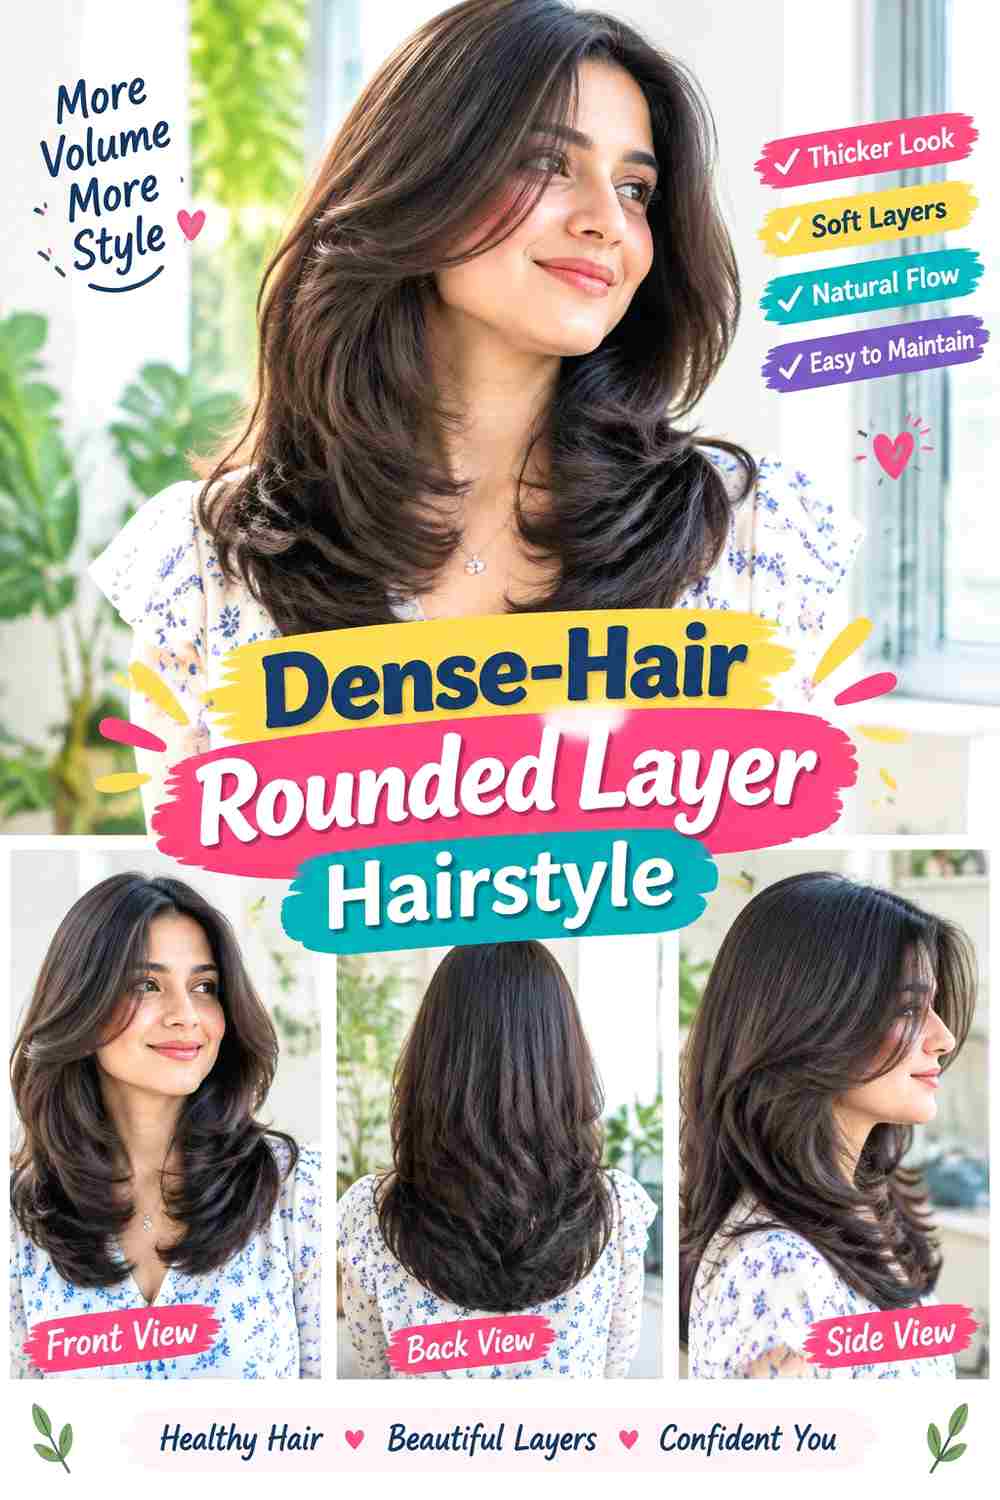
Dense hair can support a substantial rounded silhouette, but thoughtful weight placement prevents the shape from becoming excessively wide through the lower sides. Visible layers may begin around the jaw or shoulders, while controlled internal shaping helps the outer layers move without destroying the perimeter. Broad bends or natural texture can then reveal the graduated outline rather than leaving the hair in one heavy mass.
A lightweight leave-in conditioner helps manage the lengths, while a round brush can direct broad sections during a smooth blow-dry. Heat protectant should be included if significant heat is used. A small refresh can target the upper layers, but washing and fully drying dense hair is usually a longer process. Air-drying may reduce active styling time even though total drying time can remain substantial.
At your appointment, identify where the haircut tends to feel or appear bulky rather than simply asking for aggressive thinning everywhere. The stylist can assess whether controlled internal weight removal suits those areas while preserving the visible outer shape. As the hair grows, bulk can gradually return around the sides and lower lengths. That change, along with reduced movement, is a practical reason to consider reshaping.
Pro tip:
When blow-drying, work through manageable sections rather than one very large mass of hair. This allows the rounded direction to reach the internal lengths without repeatedly applying heat to the outer surface.
Make It Work for You:
If you enjoy your natural density, keep more perimeter weight and concentrate adjustment only where the silhouette spreads too widely. The goal can be movement without making the haircut feel substantially lighter.
Watch Out For:
Aggressive thinning is not a universal solution for dense hair. Removing too much internal weight can produce short pieces or uneven expansion, so address specific bulk areas rather than thinning indiscriminately.
Collarbone Rounded Layer Hairstyle
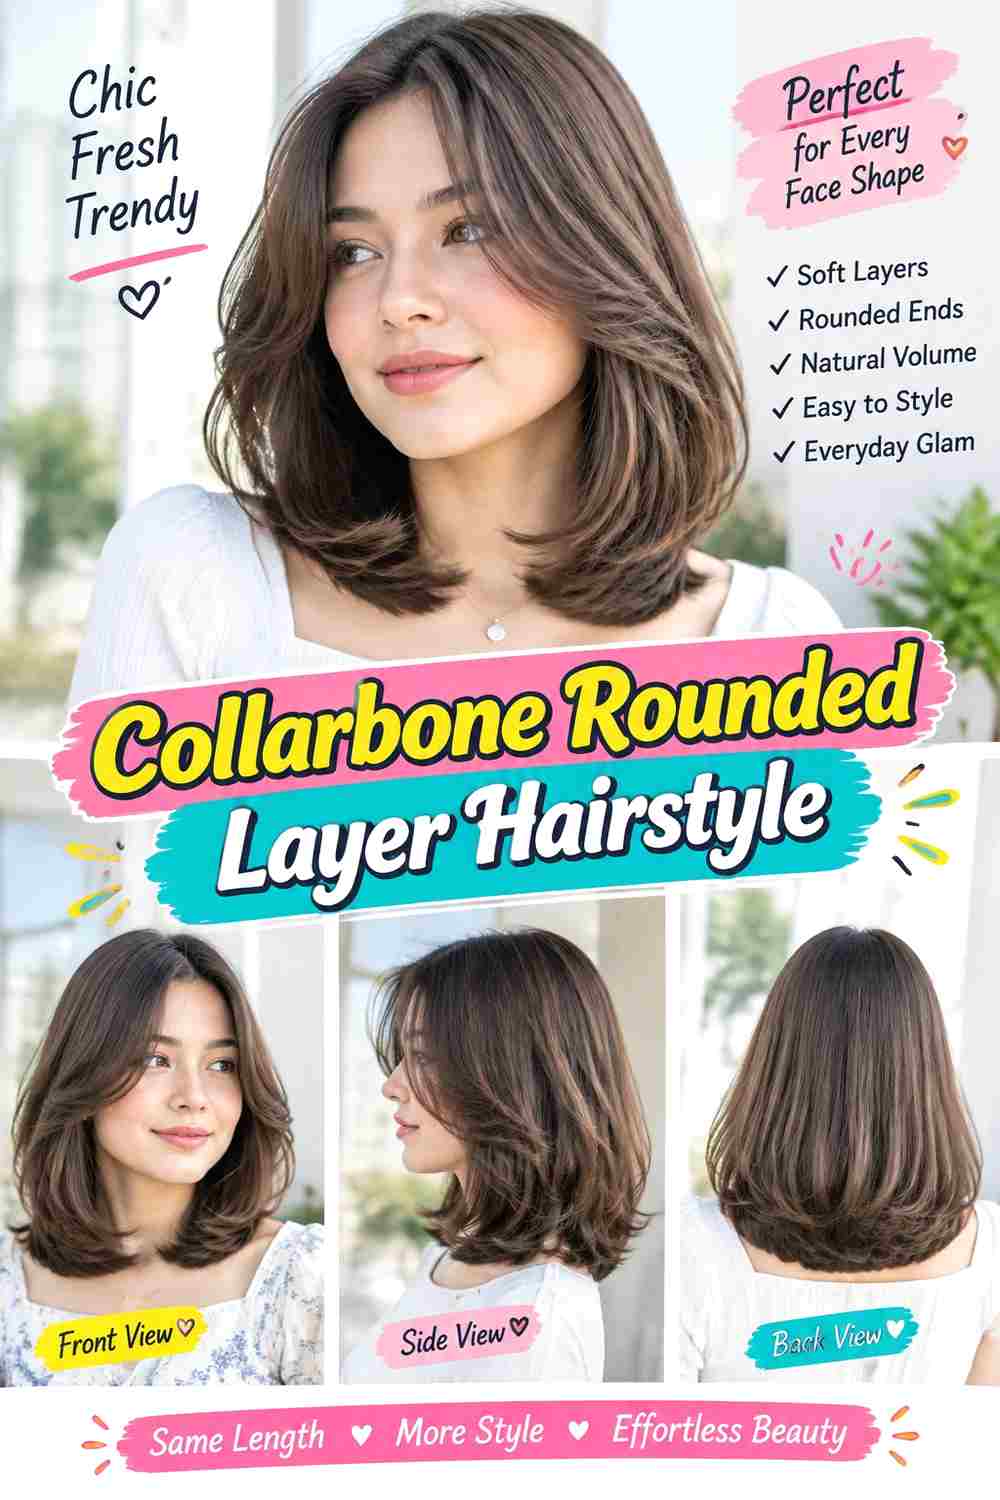
Collarbone length creates a compact rounded haircut with more movement than a blunt lob. The main perimeter rests around the collarbones, while shorter layers can begin near the jaw or chin and gradually connect downward. Broad inward or outward bends show the layering clearly, and either a center or off-center part can shift how the front curve sits.
Use heat protectant before a heated blow-dry, then a round brush to direct the layers into broad arcs. Lightweight mousse can support the shape without making the collarbone ends stiff. Straight and wavy textures can reveal the individual levels easily, while curly versions require shrinkage-aware placement. A quick refresh can focus on the front and ends; recreating the entire blowout after washing takes longer.
Because the perimeter interacts with the shoulders, the ends may naturally kick outward as the haircut moves. Tell your stylist whether you want that movement incorporated or prefer a smoother inward curve. Also identify the shortest layer precisely, since chin-level layers produce a stronger rounded effect than those beginning near the collarbones. Reshape when the upper layers lose separation or the perimeter grows far enough below the collarbones to change the intended proportions.
Pro tip:
Use the collarbone as a visual reference when checking the dry perimeter. Clothing and shoulder contact can move the ends, so assess the shape with the hair settled naturally rather than pulled forward.
Make It Work for You:
For a subtler shape, keep the shortest layers below the jaw and retain a fuller collarbone edge. You still get rounded movement without creating a strongly graduated or heavily layered silhouette.
Watch Out For:
Do not judge the perimeter while the ends are temporarily pushed outward by a collar or jacket. Let the hair settle first so you can distinguish the actual cut from clothing-induced movement.
Air-Dried Rounded Layer Hairstyle

An air-dried rounded cut depends on layer placement that works with the hair’s natural movement rather than a shape created only with a round-brush blowout. The perimeter may sit at the shoulders or below, with graduated sections arranged to support natural bends, waves, curls, or coils. The part can follow its usual position, and the finished outline can remain softly irregular while still reading as rounded.
Lightweight leave-in conditioner helps manage the lengths, while an air-dry cream can encourage cohesion and control surface frizz. A wide-tooth comb can distribute product when appropriate for your texture. Active styling time may be relatively short, although actual drying can take much longer with dense hair. Between washes, refresh only flattened or frizzy areas instead of automatically wetting the entire haircut again.
At the salon, explain that air-drying is your normal routine and show how your hair behaves without heat styling. Ask for layer placement based on that natural finish, including where volume builds and where the ends become heavy. Curly and coily textures also need shrinkage considered when establishing the dry silhouette. Reshaping becomes useful when the layers stop supporting natural movement or the overall outline begins collecting too much weight toward the bottom.
Pro tip:
Arrange your part and major curl or wave groups while the hair is damp, then limit unnecessary handling. Repeated touching during drying can disrupt grouping and make the finished rounded outline less defined.
Make It Work for You:
If your natural pattern varies across your head, allow different sections to behave differently while keeping the layer structure connected. A rounded silhouette does not require every wave or curl to match.
Watch Out For:
Avoid choosing layers solely because they look good in a heat-styled reference if you normally air-dry. The same lengths may sit differently without tension, so make your everyday finish part of planning.
Conclusion
Rounded layer haircuts can range from compact collarbone shapes to long flowing cuts, but successful versions share a connected progression of lengths. Fine hair may benefit from fewer layers and a fuller perimeter, while dense hair can sometimes use carefully placed internal weight adjustment. Curtain bangs and face framing bring the curve forward; crown layers shift volume upward. Waves, curls, and air-dried texture create softer movement, while a blow-dried finish makes individual layers more obvious. Parting also changes where fullness appears. Consider your natural texture, density, preferred length, face-framing position, styling effort, and grow-out tolerance before choosing how pronounced you want the rounded effect to be.
Before Your Salon Visit
Save one or two references that show the rounded shape you prefer, then discuss your natural texture, density, face shape, desired length, usual part, styling routine, and realistic upkeep. Point specifically to where you want the shortest layer to begin, how much perimeter weight you want to retain, and whether you prefer crown volume, face framing, fringe, or a softer natural finish. If you usually air-dry, make that clear so the haircut is planned around your everyday texture.
FAQs
What makes rounded layers different from regular layers?
Rounded layers are arranged to create a connected curved silhouette, with shorter sections flowing progressively into longer ones. “Regular layers” can describe many different structures. The important salon conversation is where the shortest sections begin, where volume should sit, and how much weight remains at the perimeter.
Can fine hair have rounded layers without looking thin?
Yes, depending on density and the amount of layering. Fine strands can often benefit from fewer, longer layers while retaining a stronger bottom edge. Rather than avoiding layers completely, discuss where movement is needed and how much perimeter weight should remain visible.
How should rounded layers be adjusted for curly hair?
Layer placement should account for the curls’ dry shape, grouping, shrinkage, and volume distribution. A section that appears long when wet or stretched may sit considerably higher once dry. Discuss the desired finished silhouette and where you want the widest part of the shape to fall.
Do rounded layers require a blow-dry every day?
No. A polished rounded blowout highlights the layers, but a well-planned cut can also work with natural waves, curls, coils, or air-dried movement. Styling effort depends on how different your preferred finish is from your natural texture, so discuss your normal routine before the cut.