13 Brooch Hair Accessory Hairstyles for an Elegant Vintage Look
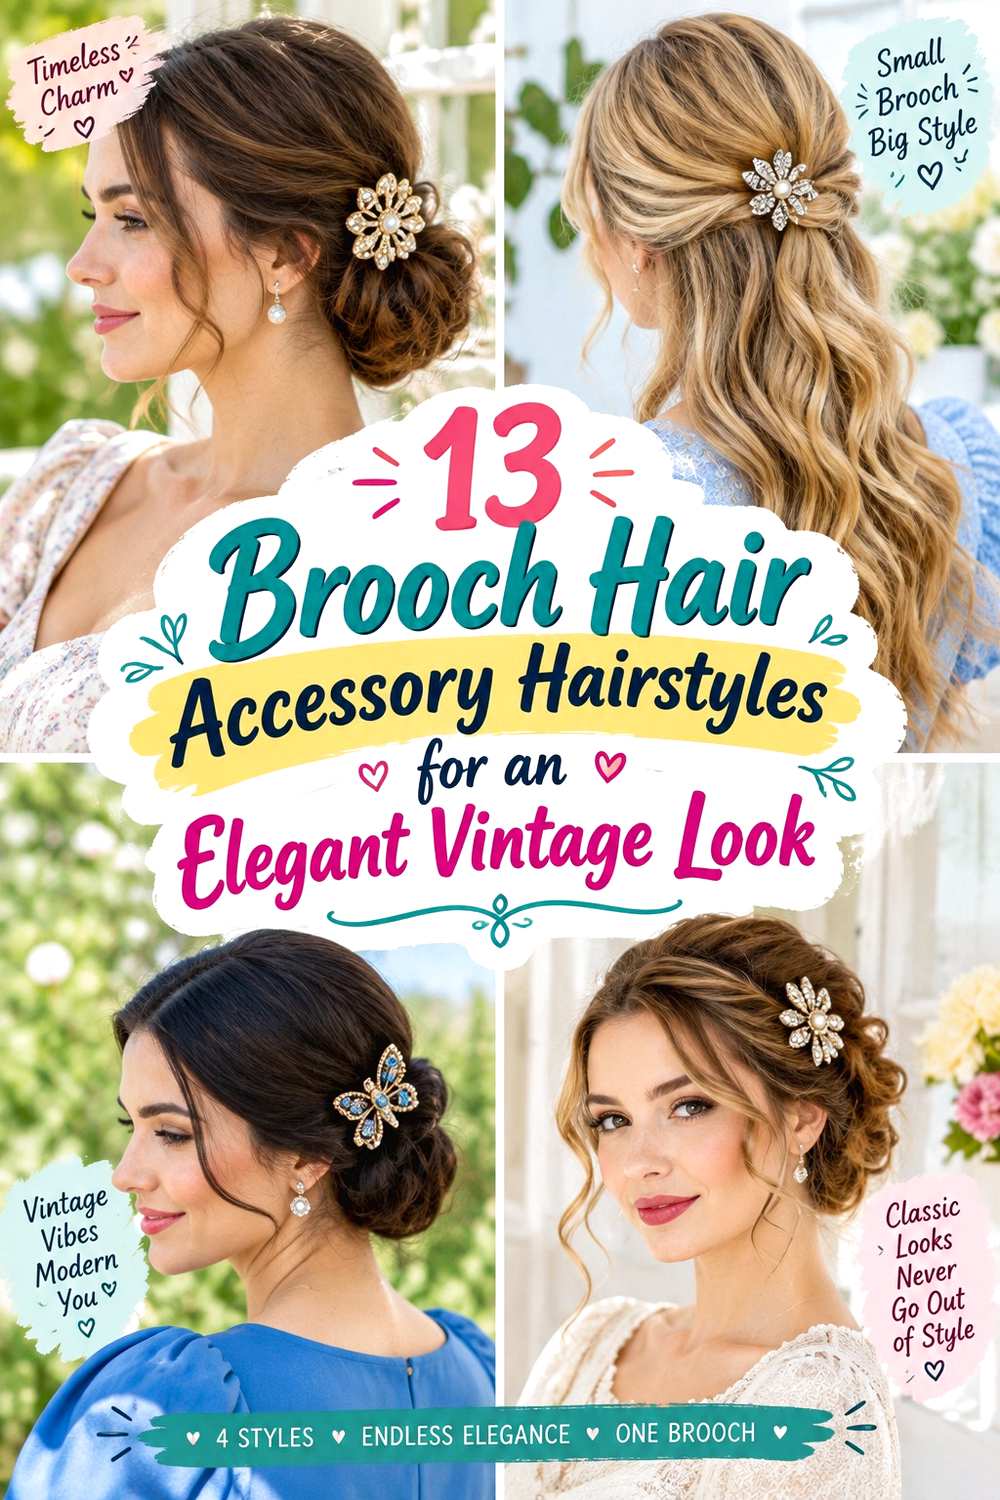
Brooch hair accessory hairstyles work best when the decorative piece is treated as a finishing detail rather than the main source of hold. Vintage-inspired brooches can sit beside waves, above a low chignon, near a French twist, or over a half-up anchor. The strongest looks balance the brooch with a clear haircut or styling shape, using parting, face-framing pieces, curl placement, perimeter weight, and controlled volume so the accessory feels integrated instead of oversized.
Hair texture and density affect both placement and scale. Fine strands often suit lighter brooches, compact anchors, and fuller-looking ends, while dense hair can support broader buns or larger decorative pieces more easily. Curly and coily hair can keep natural definition, with shrinkage considered before choosing side tucks, tendrils, or puff placement. Short bobs and pixies usually need smaller accessories, while medium and long hair gives more room for chignons, braids, and ponytails.
Styling effort ranges from a quick side clip to a longer wave set or pinned updo. A brief refresh may involve resetting the brooch, smoothing a visible section, or tightening an elastic, while full wash-day styling takes longer. If you are adapting a jewelry brooch for hair, use a covered or hair-safe clip backing so the pin point cannot scratch the scalp or snag strands. Comfort, balance, and secure anchoring matter as much as the vintage finish.
Quick List
- Side-Swept Waves With Pearl Brooch Hairstyle
- Low Chignon With Antique Brooch Hairstyle
- Curly Bob With Side Brooch Hairstyle
- French Twist With Crystal Brooch Hairstyle
- Half-Up Waves With Floral Brooch Hairstyle
- Coily Low Puff With Vintage Brooch Hairstyle
- Braided Low Bun With Cameo Brooch Hairstyle
- Sleek Low Ponytail With Jeweled Brooch Hairstyle
- Short Pixie With Mini Brooch Hairstyle
- Side Braid With Oval Brooch Hairstyle
- Soft Updo With Art Deco Brooch Hairstyle
- Hollywood Lob With Rhinestone Brooch Hairstyle
- Velvet Ribbon Bun With Brooch Hairstyle
Side-Swept Waves With Pearl Brooch Hairstyle
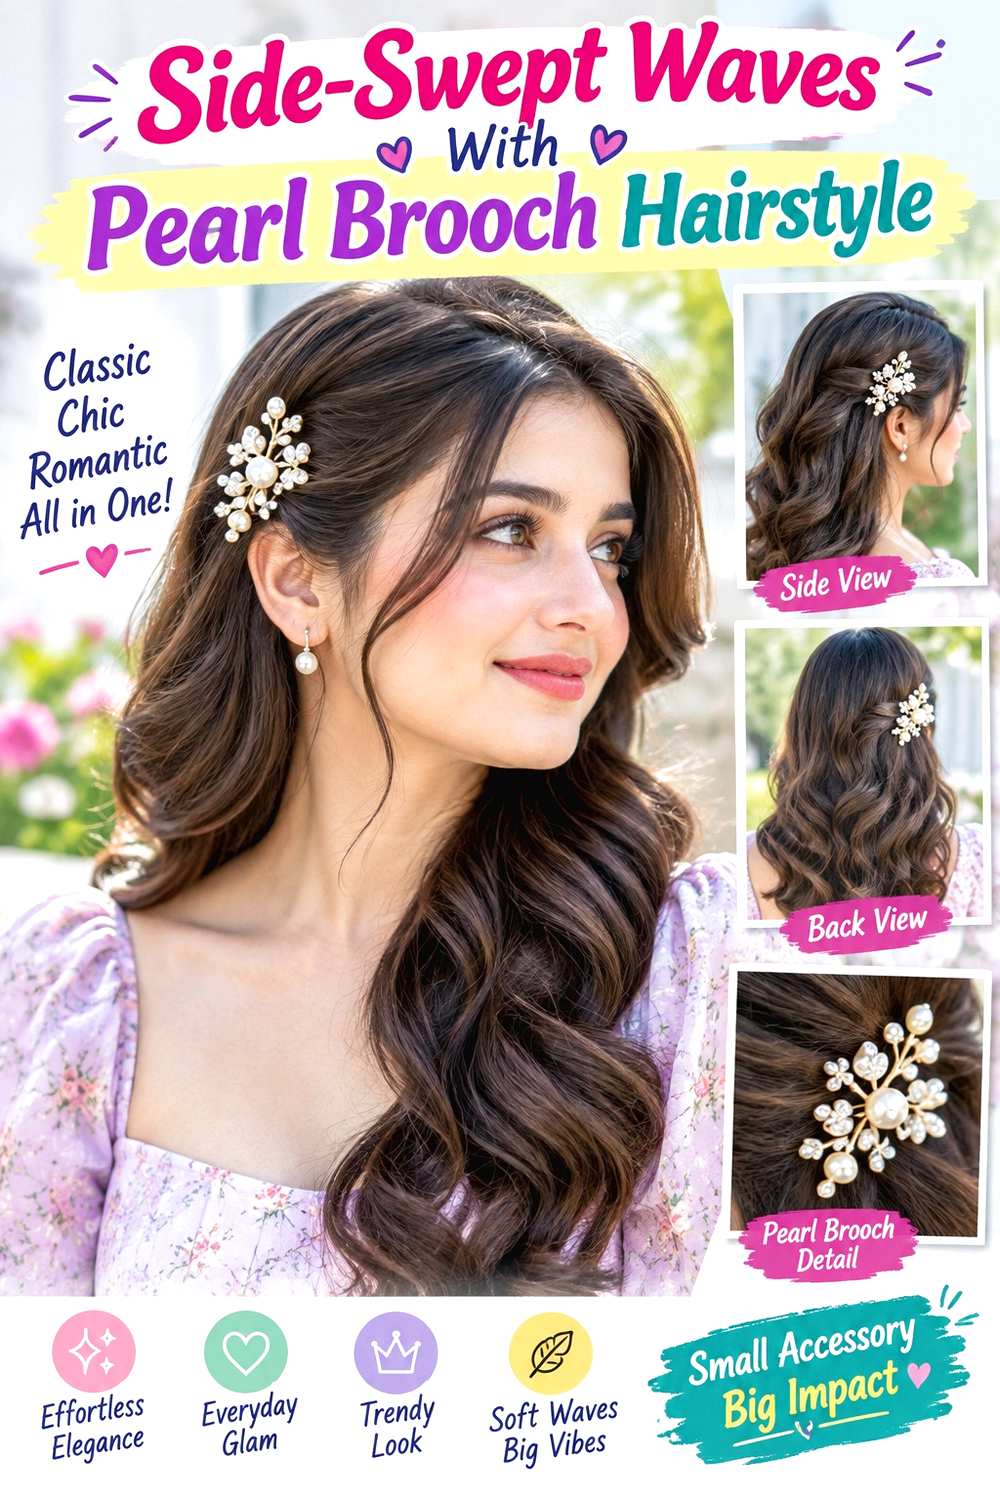
A pearl brooch placed above one ear can give side-swept waves a refined vintage detail without interrupting the movement of the hair. Use a deep or moderate side part, tuck the smaller side neatly behind the ear, and direct the fuller side over one shoulder. Broad waves should begin around the cheekbone or jaw, with smoother ends so the shape stays fluid. Shoulder-length and longer hair shows the contrast especially well, while moderate crown volume keeps the brooch visible rather than buried in lift.
Straight and wavy textures usually need the least preparation. Apply heat protectant before using a large-barrel curling iron, then add the pearl brooch only after the waves have cooled and the tucked side feels stable. A quick refresh may take a few minutes to reshape the front bend and reset the accessory; a full wash-day set takes longer depending on density and length. If the brooch is an adapted jewelry piece, make sure its sharp pin is covered or converted to a hair-safe clip before use.
For salon styling, specify which shoulder should carry the hair, where the strongest front bend should begin, and exactly how high the brooch should sit above the ear.
Pro tip:
Anchor the tucked side first, then attach the brooch just above the ear. A stable base keeps the accessory from sliding when you move or turn your head.
Make It Work for You:
For fine hair, choose a smaller pearl piece and keep the tucked section shallow. This preserves fullness on the loose side while still showing the brooch clearly.
Watch Out For:
A heavy brooch clipped only to surface strands can pull the tuck downward. Move it closer to a secure section instead of tightening the whole side.
Low Chignon With Antique Brooch Hairstyle

A low chignon gives an antique-style brooch a strong, structured base while keeping the overall silhouette soft. Choose a center or gentle side part, gather the hair at the nape, and fold the length into a broad horizontal chignon instead of a tall bun. Keep the surface controlled but not rigid, with one or two narrow pieces around the jaw if you prefer softer framing. Place the brooch slightly above or to one side of the chignon so it decorates the shape without covering the whole bun.
Medium to long hair works best, and dense hair often feels more comfortable when the bun spreads across the nape. Use a fabric-covered elastic for the anchor, bobby pins to secure the folded sections, and a hair-safe antique brooch for decoration. A quick refresh usually means replacing one loose pin and checking the brooch angle; a full wash-day updo takes longer if drying or smoothing comes first. The brooch should never be the main structural support.
For professional styling, specify the chignon width, exact nape height, and accessory position. If the piece is converted from jewelry, ask for a secure clip backing that keeps any sharp point away from the scalp.
Pro tip:
Finish the chignon completely before adding the brooch. Once the bun is stable, you can adjust the accessory angle without disturbing the pins that hold the shape.
Make It Work for You:
For shorter medium hair, make the chignon smaller and place the brooch slightly above it. The accessory adds presence without requiring a larger bun overall.
Watch Out For:
Do not insert a sharp jewelry pin directly through the hairstyle. Use a covered clip conversion so the piece stays secure without risking scalp scratches.
Curly Bob With Side Brooch Hairstyle

A side brooch can make a curly bob feel dressed up without flattening the natural texture. Keep the bob around the jaw, neck, or upper shoulders, let the curls follow their preferred part, and lightly gather a shallow section above one ear. Place the brooch over that stable side section while the opposite side stays fuller around the cheek. Defined curl groups through the ends should remain visible, and the accessory should sit close enough to the head that it does not pull the curls downward.
Short and medium curly hair suits this design especially well. Use lightweight leave-in conditioner for softness, curl gel to support definition, and a hair-safe brooch clip as the decorative accent. A quick refresh may involve dampening two or three front curls and resetting the brooch; a full wash-day routine takes longer according to density, shrinkage, and drying method. Avoid stretching the tucked side farther back than it naturally reaches.
For salon shaping, specify the dry bob perimeter and how much volume you want around the cheek and jaw. If you often wear one side clipped, mention that habit so the haircut can be assessed both loose and accessorized, with shrinkage guiding the finished position.
Pro tip:
Let the curls dry before choosing the brooch position. A finished curl pattern makes it easier to find a stable section without flattening nearby groups.
Make It Work for You:
For dense curls, secure only a shallow side section. This keeps most of the bob’s volume visible while giving the brooch a clear place to sit.
Watch Out For:
Dragging the accessory through dry curls can cause frizz and snagging. Open the clip fully, place it once, and avoid repeated sliding during wear safely.
French Twist With Crystal Brooch Hairstyle
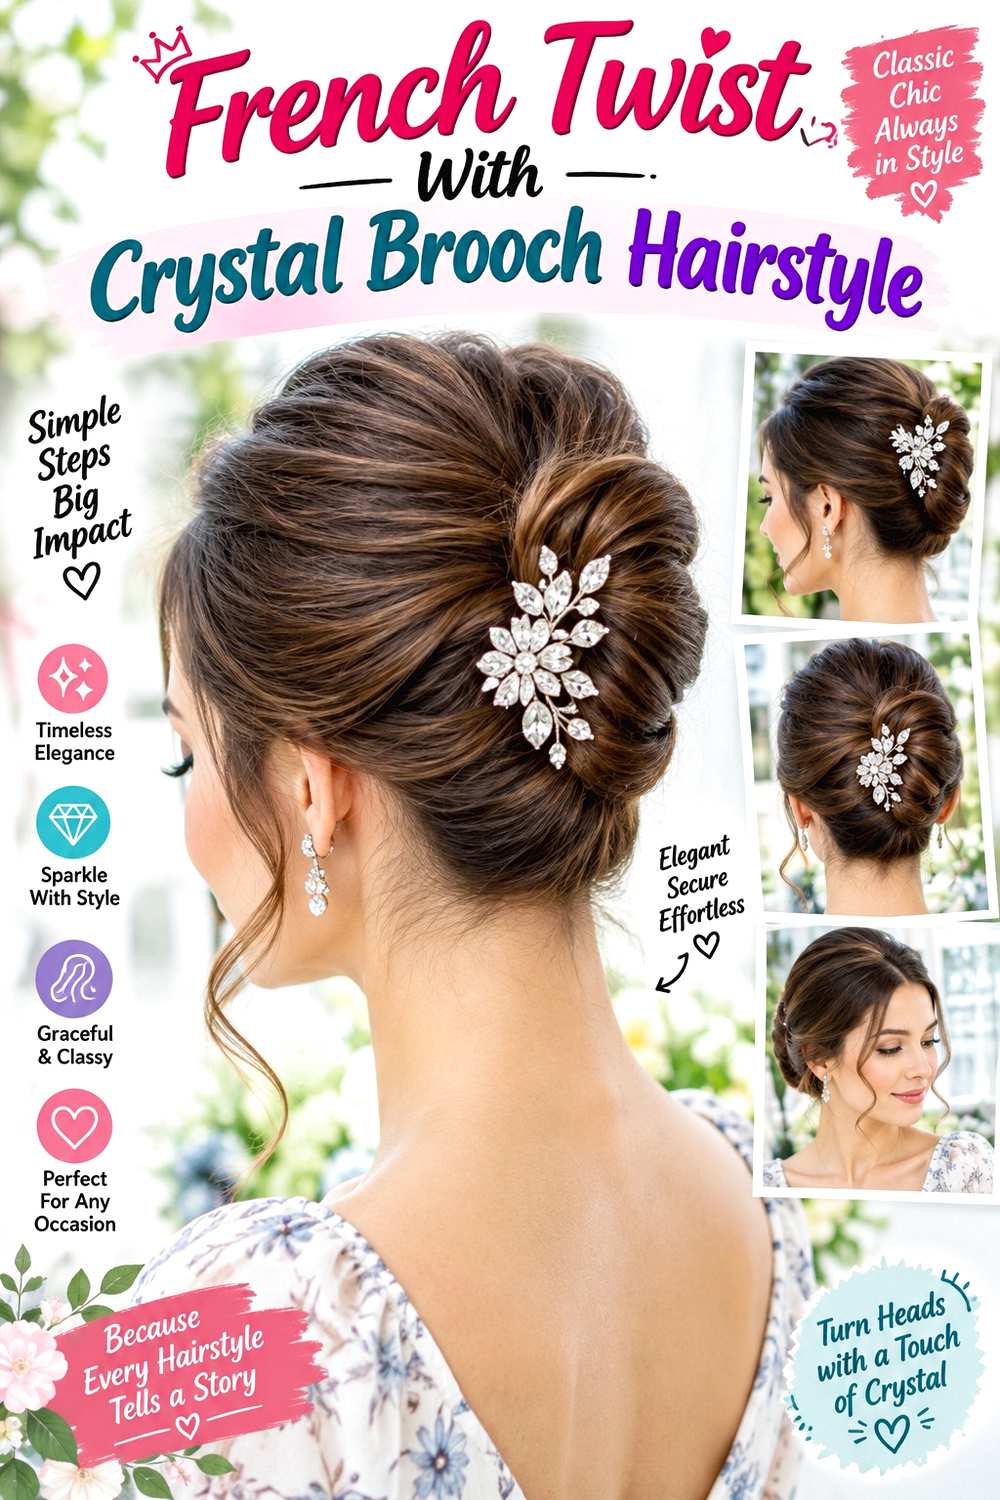
A crystal brooch works naturally with a French twist because the vertical roll gives the accessory a clear place to sit. Sweep the hair toward one side at the back, roll the length inward, and tuck the ends inside the fold. Keep the crown softly controlled rather than highly lifted, and use a side or off-center part to soften the front. Place the brooch along the upper edge of the roll or near the lower fold, depending on where you want the sparkle to appear.
Medium to long straight or wavy hair usually folds most easily. Use texturizing spray for grip, bobby pins to secure the hidden roll, and a hair-safe crystal brooch for decoration. A quick refresh means checking the central pin line and resetting the accessory; full styling takes longer if blow-drying or smoothing comes first. If the twist opens, rebuild the hidden structure instead of relying on the brooch to close the gap.
For salon styling, specify how high the roll should finish, how much crown volume you want, and the exact brooch position. A converted jewelry brooch should have a covered or clip-style backing so the decorative face stays visible without exposing a sharp pin.
Pro tip:
Build the twist first and test its hold before adding the crystal piece. A finished roll gives the brooch a safer, more stable attachment point.
Make It Work for You:
For fine hair, keep the roll slimmer and choose a lighter crystal brooch. A compact shape usually supports decorative weight better than an oversized twist.
Watch Out For:
Do not use the brooch to close a loose seam in the twist. Repair the hidden pin structure first, then add the accessory only for decoration.
Half-Up Waves With Floral Brooch Hairstyle
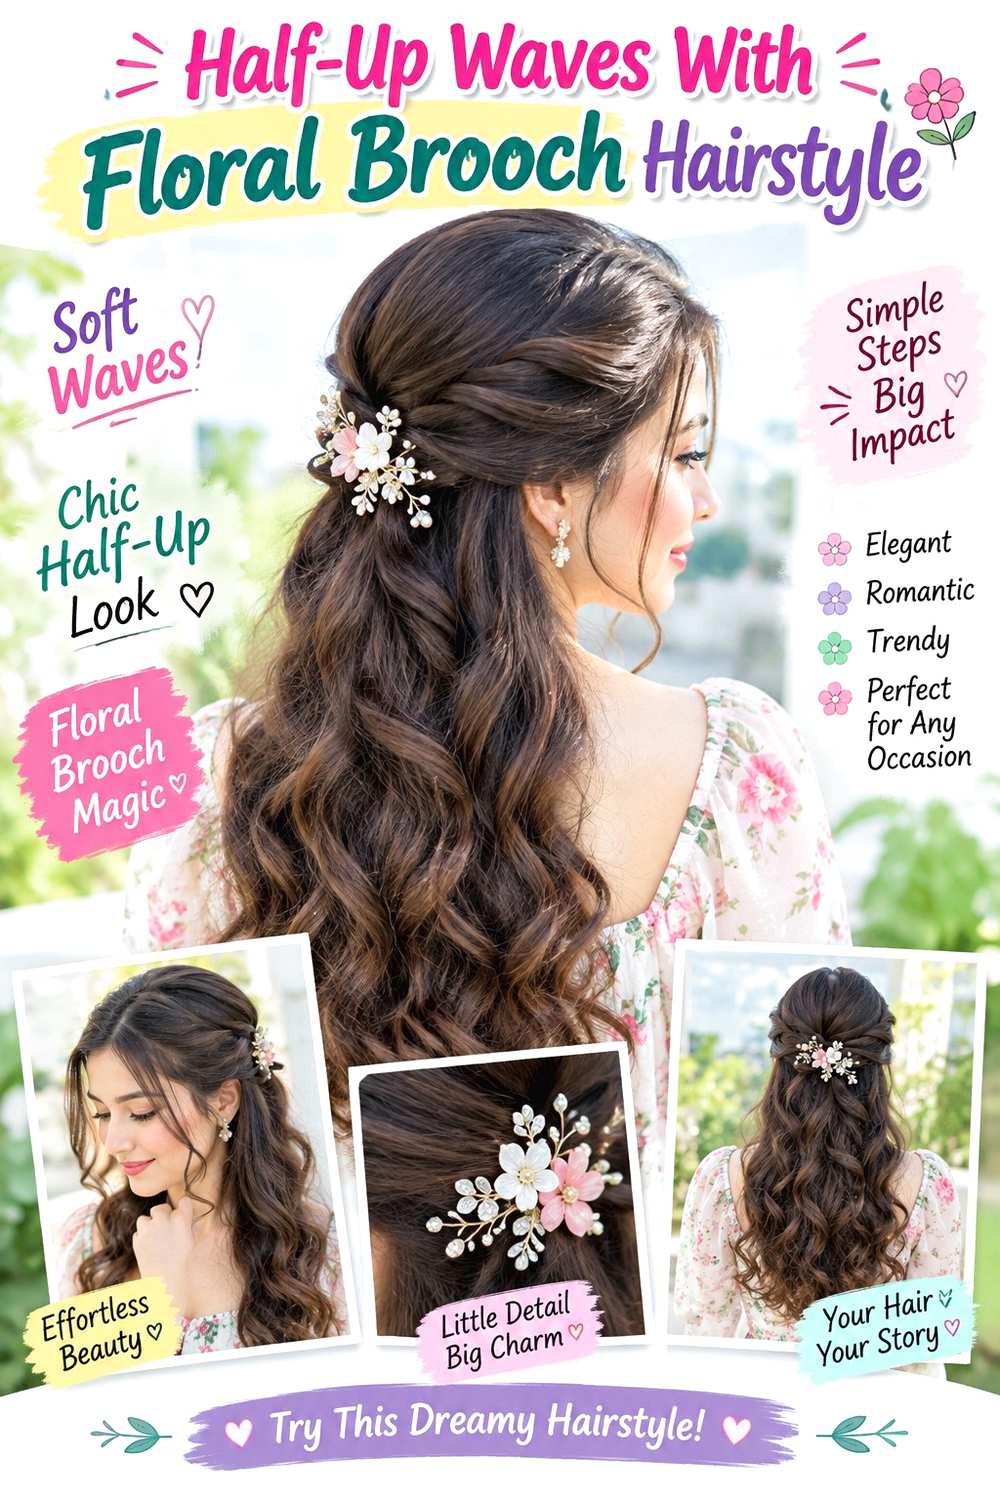
A floral brooch can sit at the center of a half-up wave style, giving the back a vintage focal point while leaving most of the hair loose. Take narrow sections from above both ears, guide them toward the center below the crown, and secure them together. Keep the crown softly controlled, then let broad waves fall through the shoulders and back. Shorter face-framing layers can stay loose, and the brooch should sit flat over the center connection rather than on a bulky bump.
Medium and long hair works especially well because the lower lengths remain the larger part of the silhouette. Apply heat protectant before using a large-barrel curling iron, then add the floral brooch after the waves have cooled and the half-up anchor is secure. A quick refresh usually means tightening the center connection and reshaping the front bends; a full wash-day set takes longer according to length and density.
If the lower hair looks thin, gather less into the half-up section instead of teasing heavily. For salon or occasion styling, specify the center-back height, how much hair should remain loose, and how large the floral brooch should appear against the waves. A hair-safe backing keeps the accessory decorative rather than structural.
Pro tip:
Secure the half-up connection before placing the floral brooch. The hidden anchor should carry the hair so the accessory remains easy to reposition throughout the event.
Make It Work for You:
For fine strands, gather less hair from the sides and use a smaller floral piece. More loose length below keeps the overall silhouette fuller.
Watch Out For:
A large brooch can flatten the center waves and drag the anchor downward. Reduce accessory weight instead of tightening the side sections at the temples.
Coily Low Puff With Vintage Brooch Hairstyle
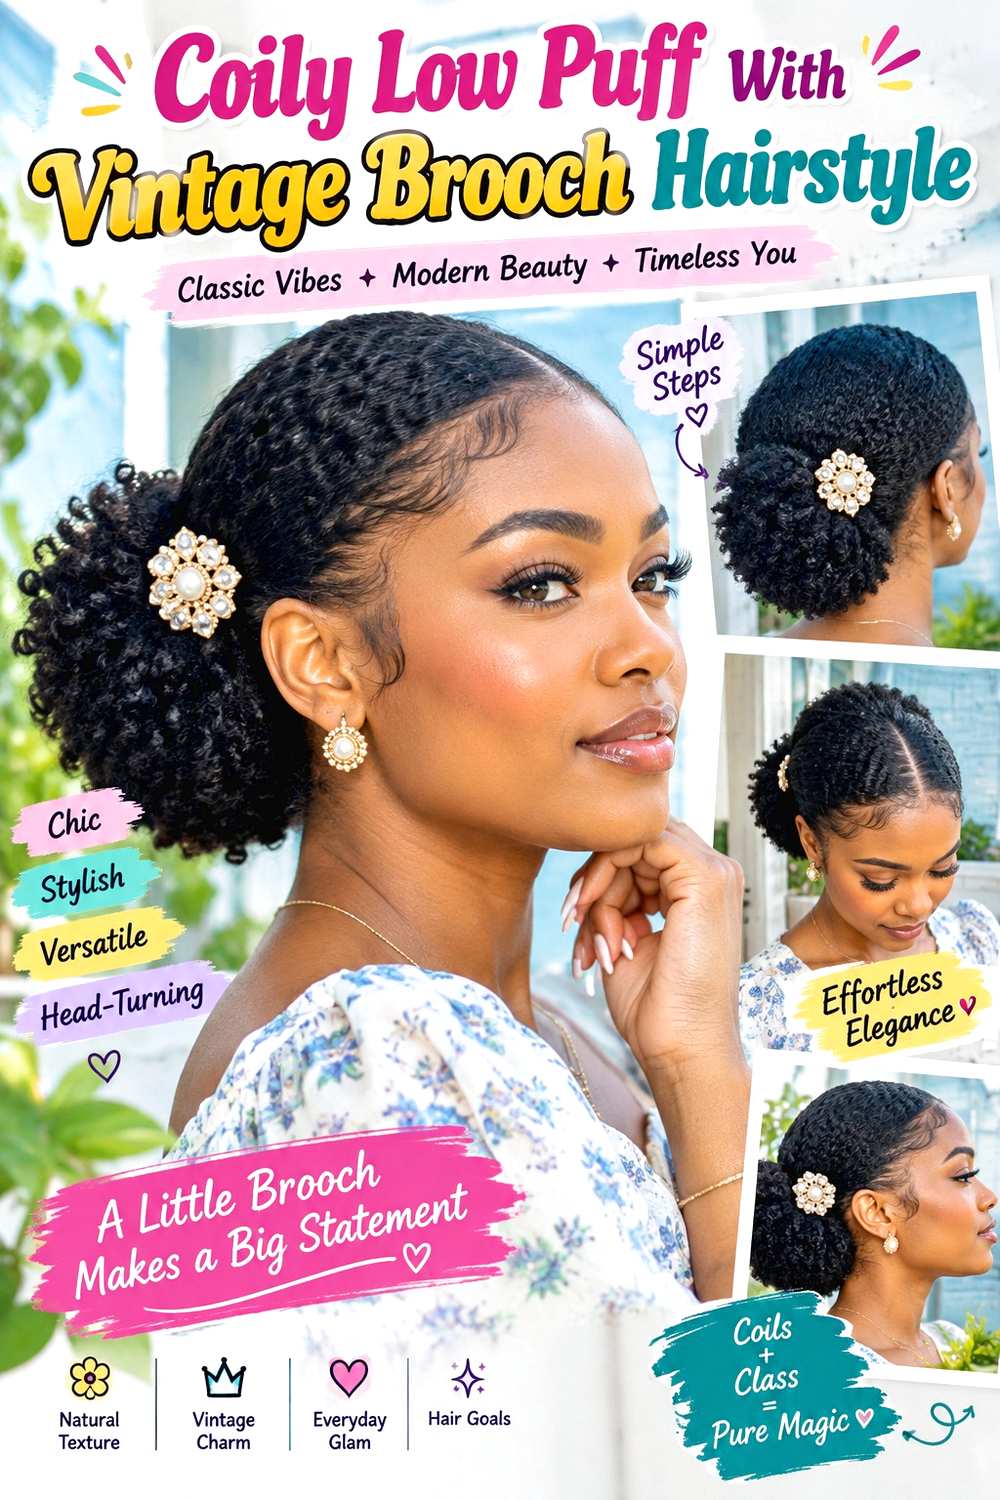
A vintage brooch can add detail beside a low coily puff while leaving the natural texture fully visible. Use a center, side, or natural part, guide the hair toward a low anchor with comfortable tension, and let the puff expand into a rounded shape behind the nape. Small coils around the temples can remain free, while the brooch sits near one side of the secured base rather than clipped into loose outer coils. This keeps the accessory visible without distorting the puff.
Coily hair with enough length to gather can use this style without straightening. Apply moisturizing leave-in conditioner for softness, use a fabric-covered elastic for the puff base, and add a hair-safe vintage brooch after the anchor feels stable. A quick refresh may involve reshaping the puff and resetting a few front coils; a full wash-day routine takes longer depending on density, shrinkage, detangling, and drying.
If the puff settles smaller as it dries, work with normal shrinkage instead of tightening the base. For salon or event styling, specify the puff width, exact nape height, and brooch position. The accessory should attach close to the secure anchor, with no exposed pin point touching the scalp or catching individual coils.
Pro tip:
Shape the puff before attaching the brooch. Once the rounded outline is settled, place the accessory close to the base where it will not disturb coils.
Make It Work for You:
For strong shrinkage, keep the brooch compact and slightly to one side of the base. The puff can stay full without extra stretching comfortably.
Watch Out For:
Do not clip the brooch into loose outer coils. Attach it near the secured anchor so the accessory does not pull, snag, or distort the texture.
Braided Low Bun With Cameo Brooch Hairstyle
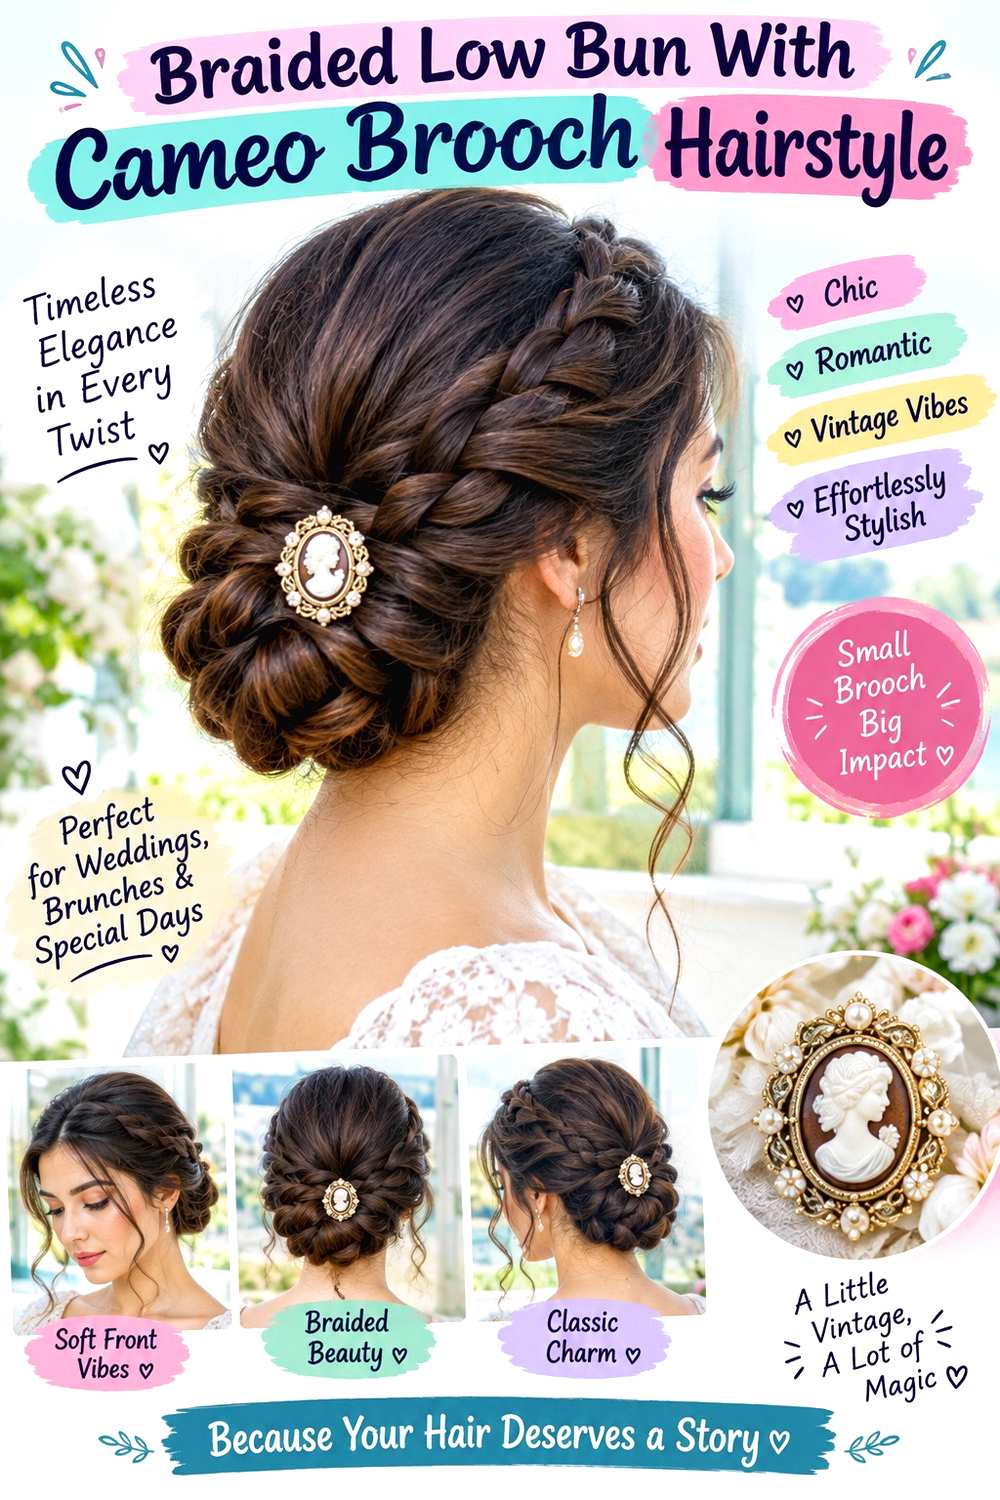
A cameo brooch pairs well with a braided low bun because both details have clear structure without needing excessive volume. Gather the hair at the nape, secure a low ponytail, braid the length, and coil the braid around the base into a compact rounded bun. Keep the front softly parted, with narrow face-framing pieces if you prefer. Place the cameo slightly above the bun or at one side so its oval shape remains visible instead of disappearing into the braid texture.
Medium to long hair works best, especially when the braid has enough length to wrap without pulling. Use a fabric-covered elastic for the base, bobby pins to secure the braided coil, and a hair-safe cameo brooch for decoration. A quick refresh usually means retucking one braid edge and checking the cameo angle; a full wash-day updo takes longer if drying or smoothing comes first.
If the bun begins rotating, rebuild the ponytail anchor rather than tightening the accessory. For salon styling, specify the bun diameter, exact nape placement, and whether the cameo should sit centered or offset. A converted brooch needs a protected backing so it does not snag the braid or press a sharp point toward the scalp.
Pro tip:
Pin the braided bun completely before adding the cameo. A finished coil lets you place the accessory where it is visible without relying on it for hold.
Make It Work for You:
For dense hair, spread the braided bun wider and keep the cameo slightly off-center. This distributes weight while preserving the oval detail comfortably balanced.
Watch Out For:
A brooch attached to a loose braid loop can rotate the bun. Secure it close to the stable center rather than the softened outer edge.
Sleek Low Ponytail With Jeweled Brooch Hairstyle
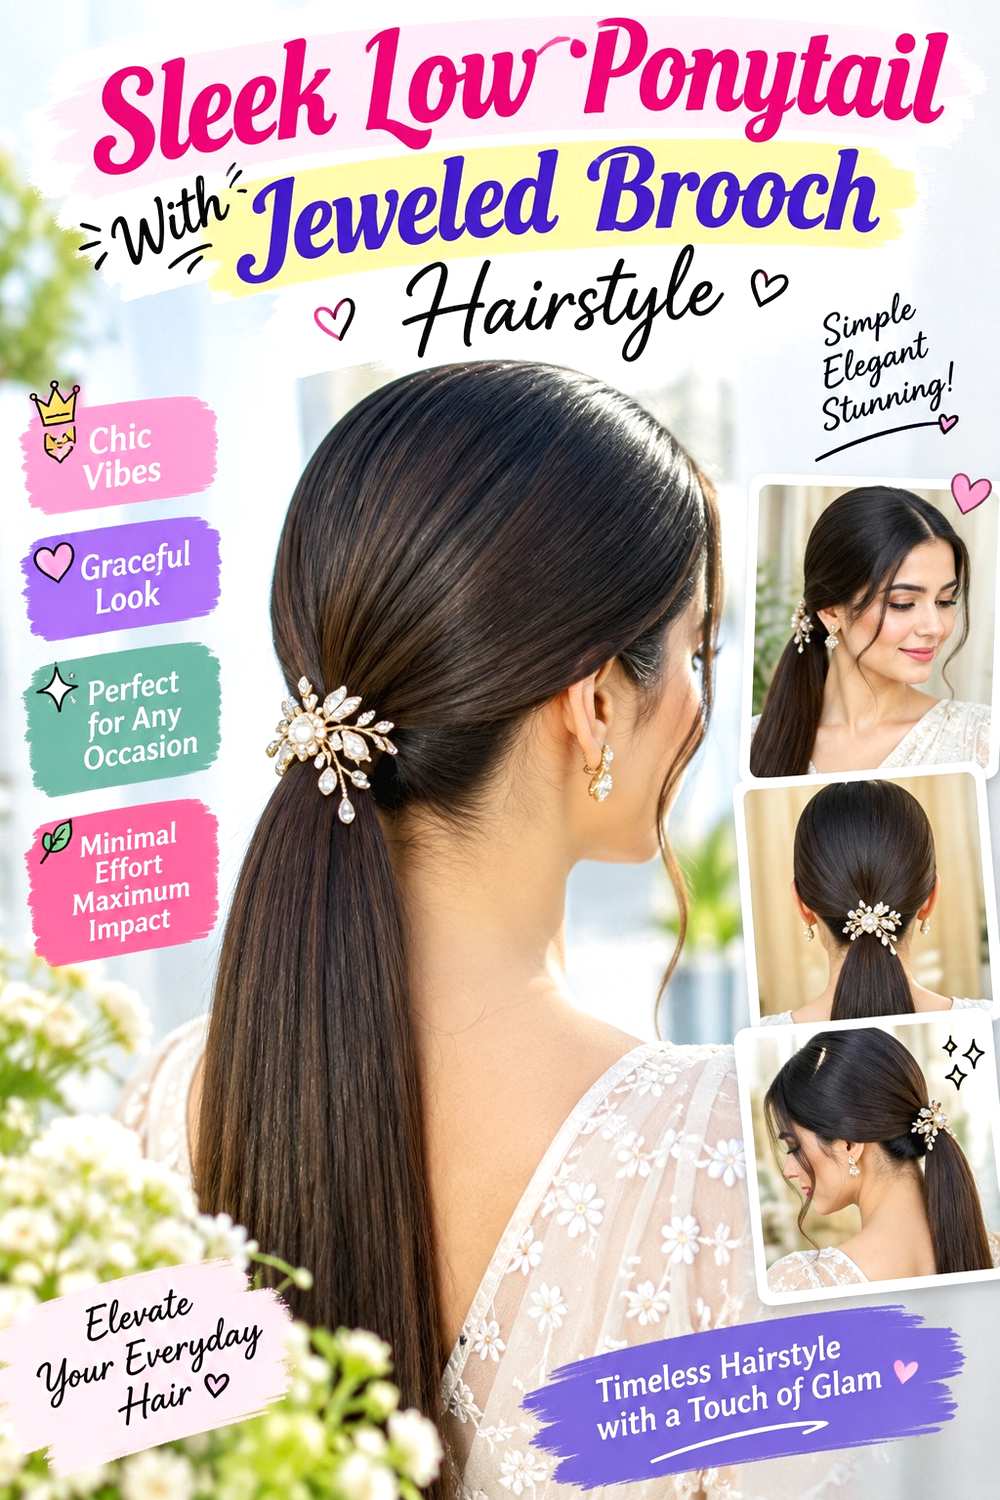
A jeweled brooch can turn a low ponytail into a polished vintage-inspired style when it sits directly above the base. Use a center or precise side part, guide the hair smoothly toward the nape, and secure the ponytail below the occipital area. Keep the crown controlled without making it painfully tight, while the tail stays straight, softly bent, curly, or coily. Position the brooch just over the elastic so it reads as a decorative clasp rather than floating on loose hair.
Medium and long hair works best because enough tail remains visible below the accessory. Use a soft-bristle brush to direct the crown, a fabric-covered elastic for the actual anchor, and a hair-safe jeweled brooch for decoration. A quick refresh means smoothing the part and checking the accessory; a full wash-day style takes longer if you also change the natural texture.
If the ponytail base drops, reset the elastic instead of clipping the brooch more tightly. For salon or event styling, specify the exact nape height, how sleek you want the surface, and whether the brooch should sit centered or slightly to one side. The accessory should have a secure covered backing that cannot scratch the scalp.
Pro tip:
Create and test the ponytail before adding the brooch. A secure elastic should hold the style on its own so the accessory stays purely decorative.
Make It Work for You:
For textured hair, keep the tail natural and polish only the crown as much as you prefer. The jeweled clasp effect still reads clearly at the base.
Watch Out For:
Do not tighten the ponytail just to support a heavy brooch. Choose a lighter accessory or stronger clip backing instead of increasing scalp tension during wear.
Short Pixie With Mini Brooch Hairstyle

A mini brooch can add a small vintage detail to a pixie without covering the cut’s defining shape. Keep the shorter sides close to their natural direction, leave enough length through the top for a soft sweep or textured fringe, and place the brooch above one temple or just behind the ear. The accessory should remain compact so the fringe, crown texture, and neckline still define the silhouette rather than being visually overwhelmed.
Straight, wavy, and softly curly pixies can all use this idea. Use lightweight styling cream to direct the top and a small hair-safe brooch clip for the decorative accent. A quick refresh may take only a few minutes to reshape the fringe and reset the brooch; a full wash-day style stays relatively short because there is no long section to curl or pin. Avoid fixing a heavy jewelry brooch directly into fine temple hair.
As the pixie grows, the best accessory position may shift because the fringe and side length change quickly. At the salon, specify the dry fringe length, how much top weight you want, and which side you prefer to accessorize. A clip-style converter is useful if the original brooch has a sharp pin or more weight than short hair can safely support.
Pro tip:
Place the mini brooch after shaping the fringe. Seeing the finished direction first helps you choose a spot that frames the pixie instead of disrupting it.
Make It Work for You:
For fine or soft pixie hair, use a very lightweight brooch and place it behind the temple rather than on the shortest strands near the hairline.
Watch Out For:
A full-size jewelry brooch can overwhelm a pixie and pull delicate side hair. Keep the accessory small, light, and fitted with a hair-safe backing overall.
Side Braid With Oval Brooch Hairstyle

An oval brooch can mark the base of a side braid, creating a vintage focal point without hiding the woven length. Use a side or off-center part, gather the hair behind one ear, and begin a three-strand braid near the lower ear or nape. Keep the first crossings secure and loosen only selected sections through the middle. Place the brooch above the braid base, while the tail remains visible over one shoulder and a few short face-framing pieces stay loose.
Medium to long hair gives the braid enough length for the accessory to feel proportionate. Use light styling cream to control flyaways, a small fabric-covered elastic to secure the braid, and a hair-safe oval brooch for decoration. A quick refresh usually means tightening the upper crossing and checking the brooch position; a full wash-day style takes longer only if detangling or drying is needed first.
If the braid sags, rebuild its base instead of using the brooch to pin it tighter. For salon or event styling, specify which shoulder the braid should fall over, how wide you want the loosened sections, and exactly where the brooch should sit. The accessory should attach to a stable section beside the braid, not the softest outer loops.
Pro tip:
Secure the braid first, then position the brooch beside its base. This keeps the accessory from carrying tension that should come from the woven structure.
Make It Work for You:
For fine hair, keep the braid narrow and choose a smaller oval brooch. More loose density through the tail helps the overall shape stay balanced.
Watch Out For:
Clipping the brooch into loosened braid loops can stretch them unevenly. Attach it beside the firm upper section instead of the softest woven edge during wear.
Soft Updo With Art Deco Brooch Hairstyle

An Art Deco brooch can give a soft updo a geometric focal point while the hair around it remains rounded and relaxed. Choose a center or gentle side part, separate narrow face-framing pieces, then gather the remaining length at the lower back of the head. Fold overlapping sections into a compact cluster rather than one perfect coil. Keep the crown softly controlled and place the brooch on one side of the updo where its shape can be seen clearly against the pinned texture.
Medium to long hair provides enough length for layered pinning. Use a fabric-covered elastic to establish a hidden base, bobby pins to secure the folds, and a hair-safe Art Deco brooch for decoration. A quick refresh usually means checking one outer pin and resetting the accessory; a full wash-day style takes longer if waves or smoothing are prepared first.
If the updo expands unevenly, repair the hidden anchor rather than adding the brooch as support. For salon styling, specify the updo width, anchor height, and exact face-framing length. The brooch should be attached near the secure center with a covered backing so its decorative edges do not snag loose pieces.
Pro tip:
Choose the brooch position only after the updo is pinned. A finished silhouette makes it easier to place the geometric detail where it looks intentional.
Make It Work for You:
For fine hair, keep the updo compact and use a lighter Art Deco piece. Smaller scale prevents the accessory from overpowering the pinned shape overall.
Watch Out For:
Do not use the brooch to hold a collapsing outer section. Repair the hidden anchor first so decorative weight does not destabilize the updo during wear.
Hollywood Lob With Rhinestone Brooch Hairstyle
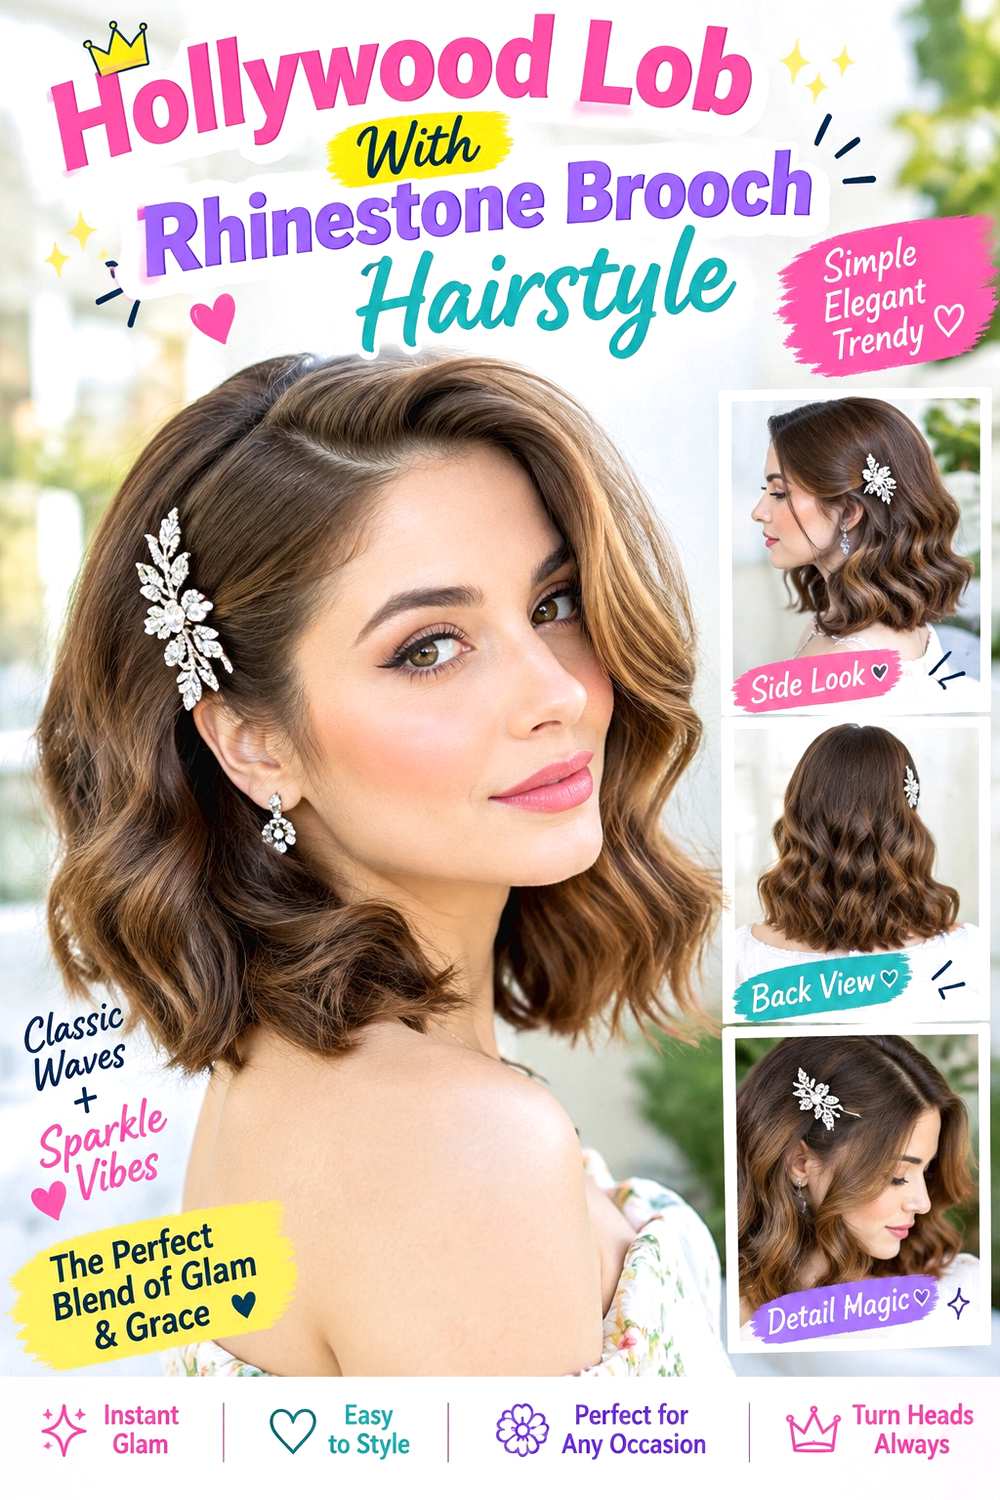
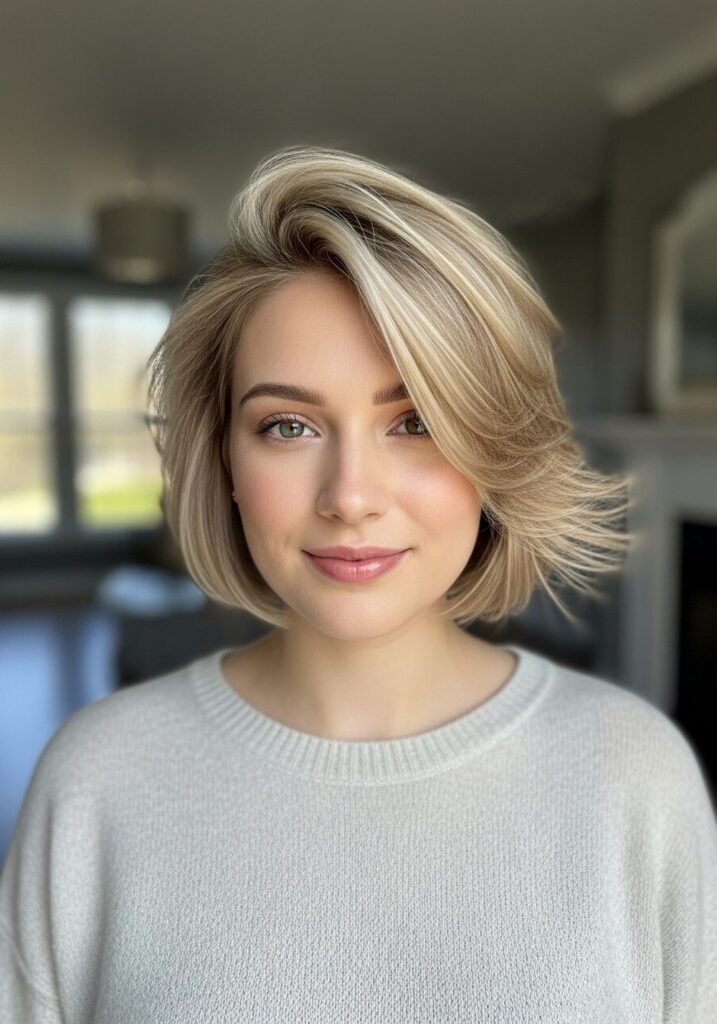
A rhinestone brooch can sit above a tucked ear in a Hollywood-wave lob, adding sparkle without interrupting the smooth wave pattern. Use a deep side part and create broad bends that travel in the same direction through the shoulder- or collarbone-length hair. Tuck the smaller side behind the ear, keep the fuller side curved around the cheek, and leave the ends softly turned instead of tightly curled. Place the brooch on the tucked side so the continuous wave remains the main feature.
Straight and wavy hair usually holds this finish most predictably. Apply heat protectant before using a medium curling iron, then attach the rhinestone brooch only after the wave has cooled and the side tuck is stable. A quick refresh may involve reshaping the front curve and resetting the accessory; a full wash-day set takes longer depending on density and drying.
If the wave breaks into separate curls, arrange the cooled sections together rather than adding more heat immediately. For salon shaping, specify the exact lob perimeter, side-part depth, and brooch height. Keeping enough weight through the bottom edge helps the polished wave remain smooth beside the decorative detail.
Pro tip:
Set the ear tuck and wave pattern before adding the rhinestone piece. The accessory should sit on a stable side without changing the continuous curve.
Make It Work for You:
For fine hair, keep the brooch small and preserve a strong lob perimeter. Broad waves and a lighter accessory help maintain fullness around the ends.
Watch Out For:
An oversized brooch can interrupt the polished wave line. Place a compact piece on the tucked side and let the fuller wave remain unobstructed overall.
Velvet Ribbon Bun With Brooch Hairstyle

A velvet ribbon and brooch can work together around a low bun when each detail has a clear role. Gather the hair at the nape, fold or twist the length into a compact bun, and secure the shape before adding decoration. Wrap a narrow velvet ribbon around the bun base, then attach the brooch at the ribbon knot or slightly to one side. Keep the crown simple and let a few narrow face-framing sections remain loose if they complement the vintage mood.
Medium to long hair works best, and a broad low bun can help distribute weight on dense hair. Use bobby pins to secure the bun, narrow velvet ribbon to create the base accent, and a hair-safe brooch for the focal point. A quick refresh means checking the pins and straightening the ribbon; a full wash-day style takes longer if drying or smoothing comes first.
The ribbon and brooch should never replace the hidden bun structure. For salon or event styling, specify the bun width, ribbon placement, and accessory size. If the brooch began as jewelry, use a protected clip conversion so its pin cannot pierce the ribbon, snag hair, or touch the scalp.
Pro tip:
Secure the bun and tie the velvet before adding the brooch. Layering decoration last keeps the accessory from interfering with the bun’s hidden structure completely.
Make It Work for You:
For fine hair, use a narrow ribbon and small brooch with a compact bun. The layered detail still reads clearly without overwhelming the hair overall.
Watch Out For:
Do not pierce the velvet and hair with an exposed brooch pin. Use a protected clip conversion so the fabric and hairstyle stay undamaged during wear.
Conclusion
Brooch hair accessory hairstyles can range from side-clipped bobs and pixies to waves, braids, low ponytails, chignons, and softly pinned updos. Fine hair usually benefits from lighter brooches, compact anchors, and fuller ends, while dense hair can support broader shapes and slightly larger pieces. Curly and coily textures can keep natural definition, with shrinkage guiding placement and face framing. Center and side parts change how visible the accessory feels, while bun height, braid width, and surface finish affect balance. Choose a brooch that suits your natural texture, face shape, routine, and comfort level, then attach it to a secure hairstyle rather than asking the accessory to hold the structure on its own.
Before Your Salon Visit
Choose one or two favorite references and save views that clearly show both the hairstyle and brooch placement. Discuss your natural texture, density, face shape, preferred length, usual upkeep, and styling routine. Point out the exact fringe or face-framing length, bun or ponytail height, braid width, volume, finish, and accessory position you like. Bring the brooch when possible so its size, weight, backing, and safest anchoring point can be tested before the final style is built.
FAQs
How do I keep a brooch secure in my hair?
Use a hairstyle with its own secure anchor first, then attach the brooch to a stable section such as a tuck, bun base, braid connection, or ponytail anchor. If the brooch is converted from jewelry, use a hair-safe clip backing and make sure no sharp pin point can contact the scalp.
Can brooch hair accessories work with curly or coily hair?
Yes. Curly and coily hair can wear brooches beside puffs, buns, side tucks, braids, or half-up styles without being straightened. Work with normal shrinkage, keep tension comfortable, and attach the accessory near a stable anchor instead of clipping it into loose outer curls or coils.
What brooch size works best for short or fine hair?
Small to medium brooches are usually easier to balance on fine or short hair. Choose a lightweight piece, preserve fullness through the ends, and avoid gathering too much hair simply to support the accessory. A compact brooch can still create a strong vintage detail without pulling the hairstyle down.
Is it safe to use a regular jewelry brooch in hair?
Not necessarily. A traditional pin-backed brooch can snag strands or scratch the scalp if used directly. A safer option is a brooch fitted to a hair clip or another covered backing designed for hair. The decorative piece should stay secure without exposing a sharp point or carrying the hairstyle’s main structural load.