13 Christmas Family Photo Hairstyles for a Festive Look
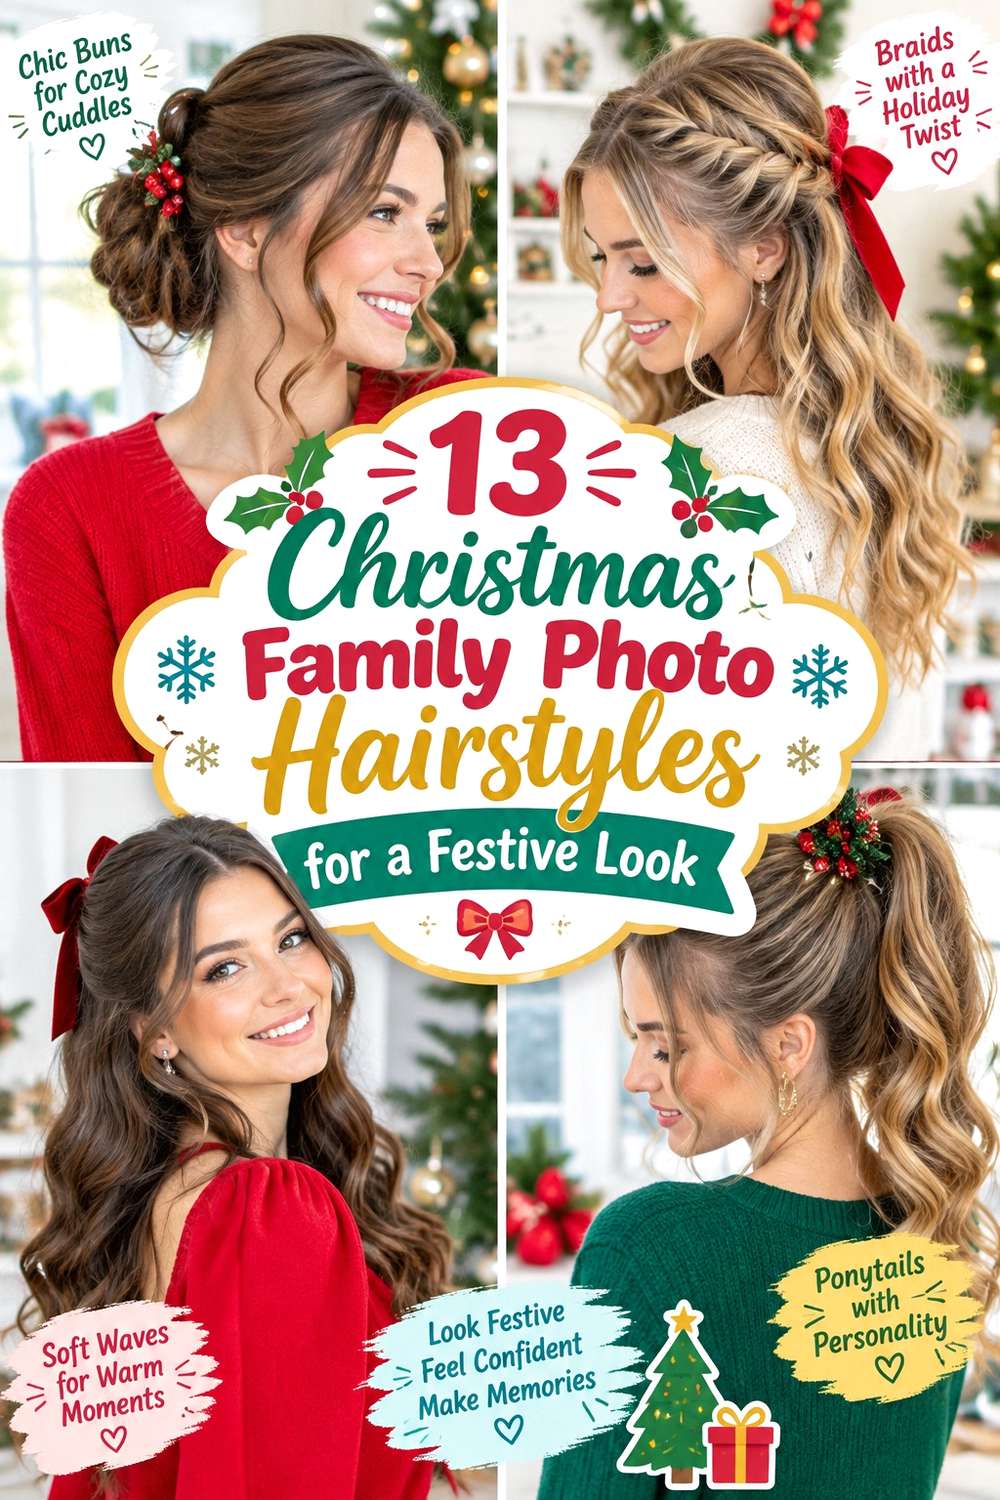
Christmas family photo hairstyles need to look balanced in individual portraits and wider group pictures while remaining comfortable through posing, coats, and indoor gatherings. Soft waves, curls, polished ponytails, braided details, and low updos all work because they keep the face visible while adding shape around the shoulders or crown. Medium and long lengths offer more room for gathering, while shoulder-length hair can rely on a strong outline and controlled movement.
Straight, wavy, curly, and coily textures can all suit these ideas when the finish works with natural density and movement. Fine or lower-density hair may benefit from lighter accessories and smaller gathered sections, while dense hair often needs weight distributed through wider buns or softer anchors. Face-framing sections can finish at the cheekbones, jaw, or longer, and curly hair should be judged at its dry length so shrinkage is considered.
Styling effort varies considerably. A clip twist or low ponytail can be refreshed quickly, while a blowout, wave set, or braided crown requires more preparation from a full wash. Flexible hold, secure accessories, manageable frizz, and comfortable tension matter more than making every strand perfectly still for the camera.
Quick List
- Velvet Bow Half-Up Waves Hairstyle
- Pearl Headband Soft Curls Hairstyle
- Low Chignon With Face-Framing Pieces Hairstyle
- Side-Part Polished Waves Hairstyle
- Braided Crown With Satin Ribbon Hairstyle
- Natural Curls With Jeweled Clip Hairstyle
- Center-Part Sleek Low Ponytail Hairstyle
- Shoulder-Length Blowout Hairstyle
- Twisted Half-Up Pearl Barrette Hairstyle
- Soft Braided Low Bun Hairstyle
- Long Straight Hair With Curved Ends Hairstyle
- Curly Half-Up Puff Hairstyle
- Claw Clip Twist With Festive Accent Hairstyle
Velvet Bow Half-Up Waves Hairstyle
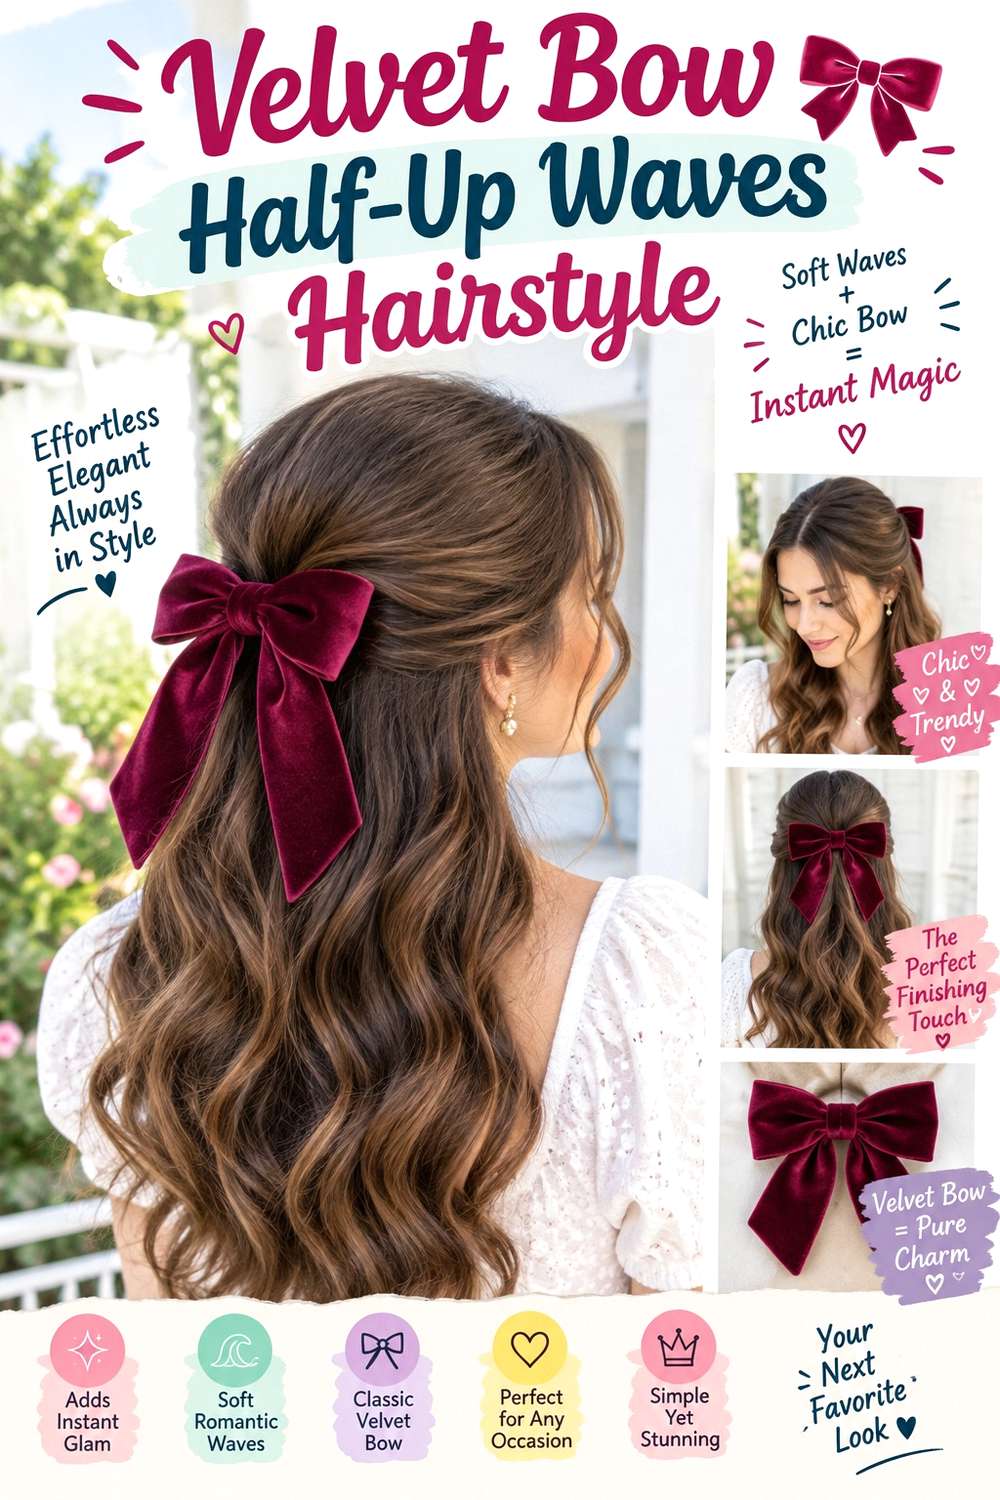
A velvet bow gives loose waves a festive focal point while keeping the face open for family photos. Gather narrow sections from each temple and secure them around the upper back of the head, leaving soft lift at the crown. The loose lengths can carry broad waves beginning around the cheekbones or jaw, with relaxed ends rather than tight curls. A center part keeps the front balanced, while a slight side part adds a little asymmetry.
Apply heat protectant before using a large-barrel curling iron, then attach the velvet bow over a stable half-up anchor. Straight and wavy hair usually reach the finish with moderate effort, while naturally curly hair can keep more of its existing texture instead of being fully reshaped. A complete wash-day set takes longer; a morning photo refresh can focus on the front bends and any sections flattened overnight.
For professional styling, specify how high the half-up section should sit and how much crown volume you want above the bow. Lower-density hair often looks fuller when less hair is gathered. If the bow rotates, adjust the accessory rather than tightening the temple sections. The style should remain soft enough to move naturally when turning between poses.
Pro tip:
Finish the waves and adjust crown volume before placing the bow. Adding the accessory last keeps you from repeatedly moving it while shaping the most visible sections around the face.
Make It Work for You:
For shoulder-length or layered hair, gather smaller temple sections and choose a compact bow. Shorter pieces can stay secure without removing too much volume from the loose portion.
Watch Out For:
Do not rely on the bow itself to hold the half-up section. Build a stable anchor first so slippery fabric does not slide and pull the sides tighter.
Pearl Headband Soft Curls Hairstyle

A pearl headband can frame soft curls beautifully in holiday portraits because it adds detail near the face without hiding the texture below. Position the band slightly behind the hairline and leave a center or soft side part visible in front. Let broad curls begin around the cheekbones or jaw and continue through the ends, keeping the crown gently lifted so the accessory does not flatten the upper shape.
Use heat protectant before forming curls with a curling wand, then place the pearl headband after the hair has cooled. A light flexible hairspray can support the curls without making them rigid. Straight or wavy hair may need a full curl set, while naturally curly hair can use its existing pattern and skip unnecessary heat. Full styling takes longer on dense or long hair, but a photo-day refresh usually means reshaping only the front and resetting the band.
If a stylist is preparing the look, specify how far behind the hairline you want the headband and how much volume should remain at the crown. For lower-density hair, a lighter band can feel more proportional. If the headband starts slipping, reposition it instead of forcing it tighter, and keep heavy finishing products away from its resting area.
Pro tip:
Place the headband after the curls are fully arranged, then lift a little hair immediately behind it. Restoring that volume helps the accessory look integrated rather than pressed down.
Make It Work for You:
For natural curls, let the hair dry completely before choosing the band placement. Finished shrinkage gives a more accurate view of crown height and curl volume.
Watch Out For:
Avoid a rigid headband that creates pressure behind the ears. A family photo session may involve extended wear, so comfort matters as much as secure placement.
Low Chignon With Face-Framing Pieces Hairstyle
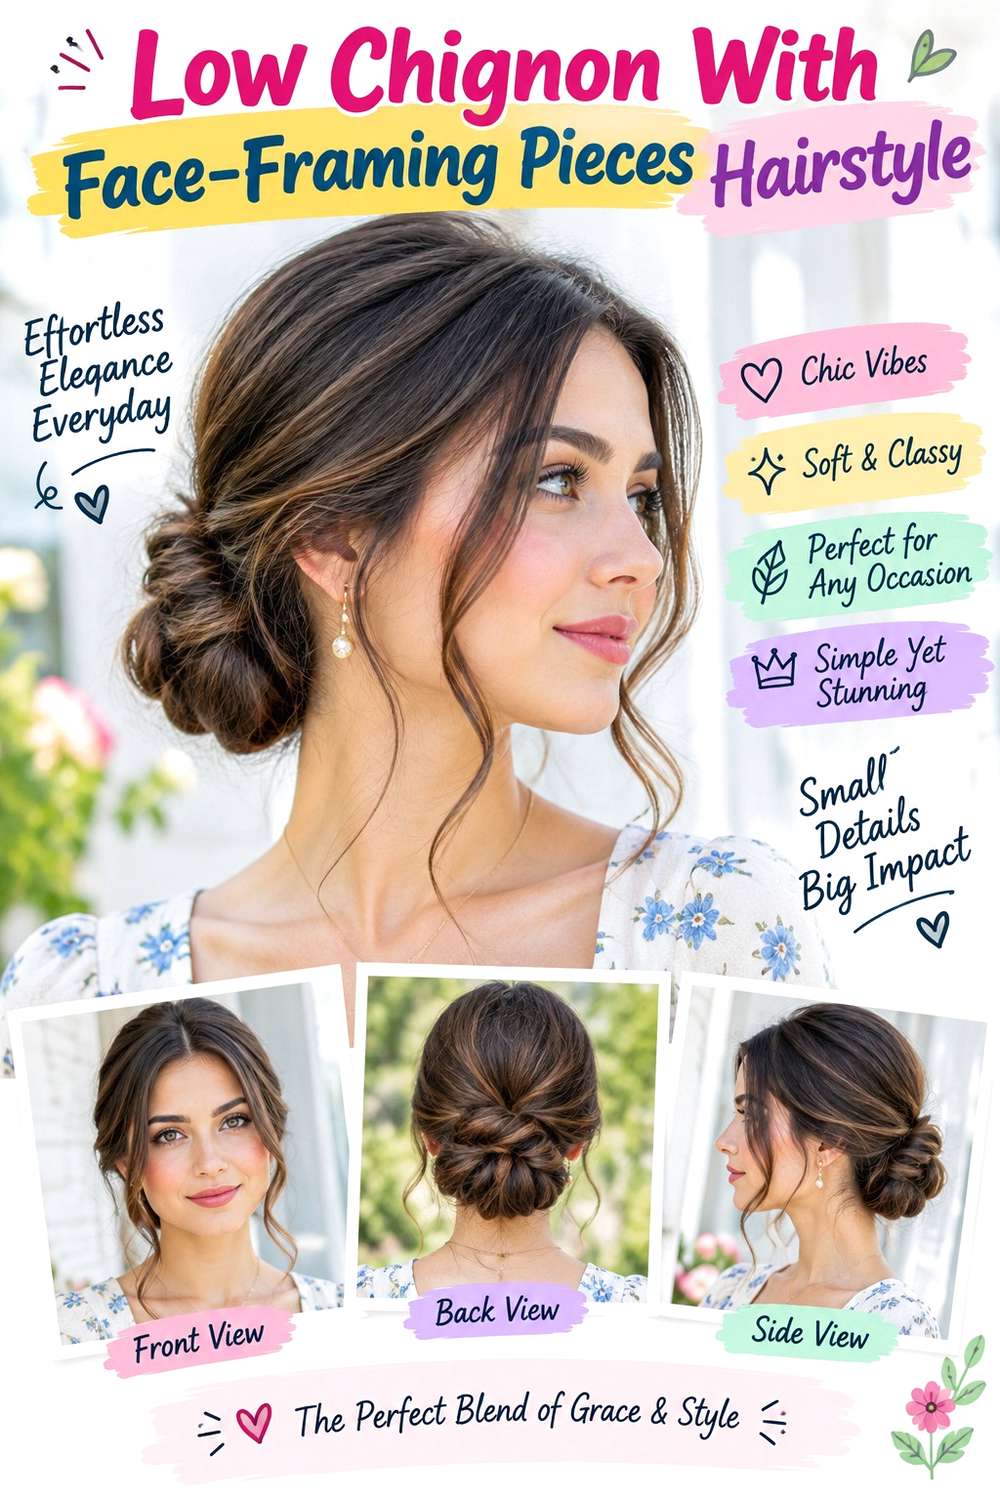
A low chignon keeps the neckline tidy and photographs clearly from several angles, while face-framing pieces soften the front. Gather medium or long hair at the nape and shape it into a compact or gently widened bun rather than a tight knot. A center part creates balance, while a side part shifts more movement to one side. Leave two deliberate front pieces around the cheekbones, jaw, or below instead of pulling out random strands afterward.
Use a fabric-covered elastic for the base, bobby pins to shape the chignon, and flexible hairspray for light control. Straight, wavy, curly, and coily textures can all support the style, with natural texture left visible when preferred. Building the full updo takes moderate time, while a quick refresh before pictures may only require replacing one pin and smoothing the front.
For a salon appointment, explain the exact bun height and whether you want it compact or spread across the nape. Dense hair often feels more comfortable when the weight is distributed. If the chignon begins to sag, reinforce its lower edge rather than tightening the front. Check the placement with your planned collar so clothing does not repeatedly disturb the bun during group photos.
Pro tip:
Separate the face-framing sections before creating the bun. Choosing them early keeps their width intentional and prevents you from weakening the finished chignon by pulling pieces out afterward.
Make It Work for You:
For curly or coily hair, let visible texture remain through the chignon. The low silhouette stays polished without requiring every section to be smoothed flat.
Watch Out For:
Do not place the bun directly against a thick sweater or coat collar. Repeated contact can push it upward; adjust the height before final pinning.
Side-Part Polished Waves Hairstyle

A deep side part gives polished waves a clear direction and keeps one side of the face especially open in photos. Medium and long hair show the shape most clearly. Keep the roots smooth, direct the heavier front section away from the face, and create broad connected bends through the mid-lengths. The opposite side can tuck behind the ear, while the ends remain soft instead of separating into tight individual curls.
Apply heat protectant before using a large-barrel curling iron, then finish with flexible hairspray after the sections cool. A complete wave set is a longer styling session, especially for dense hair, but later touch-ups can focus on the front sweep and any visible bend that has relaxed. Naturally wavy hair may need less reshaping, while curly hair can choose a softer interpretation instead of full smoothing.
If a stylist is creating the look, show the exact depth of the part and where you want the first wave to curve. This affects how much of the face stays visible from three-quarter angles. Maintain the style by smoothing individual sections rather than brushing everything repeatedly. If family members are moving between indoor and outdoor settings, allow some softness instead of chasing a perfectly fixed surface.
Pro tip:
Let the front wave cool in its final direction before touching it. That section establishes the whole side-swept shape and is especially noticeable in close family portraits.
Make It Work for You:
For fine hair, use fewer large waves and keep modest lift near the part. Broader movement can preserve visual fullness better than many small separated curls.
Watch Out For:
Avoid heavy hairspray before the wave pattern is arranged. Stiff sections are difficult to connect smoothly; shape first, then add flexible hold once the curves align.
Braided Crown With Satin Ribbon Hairstyle
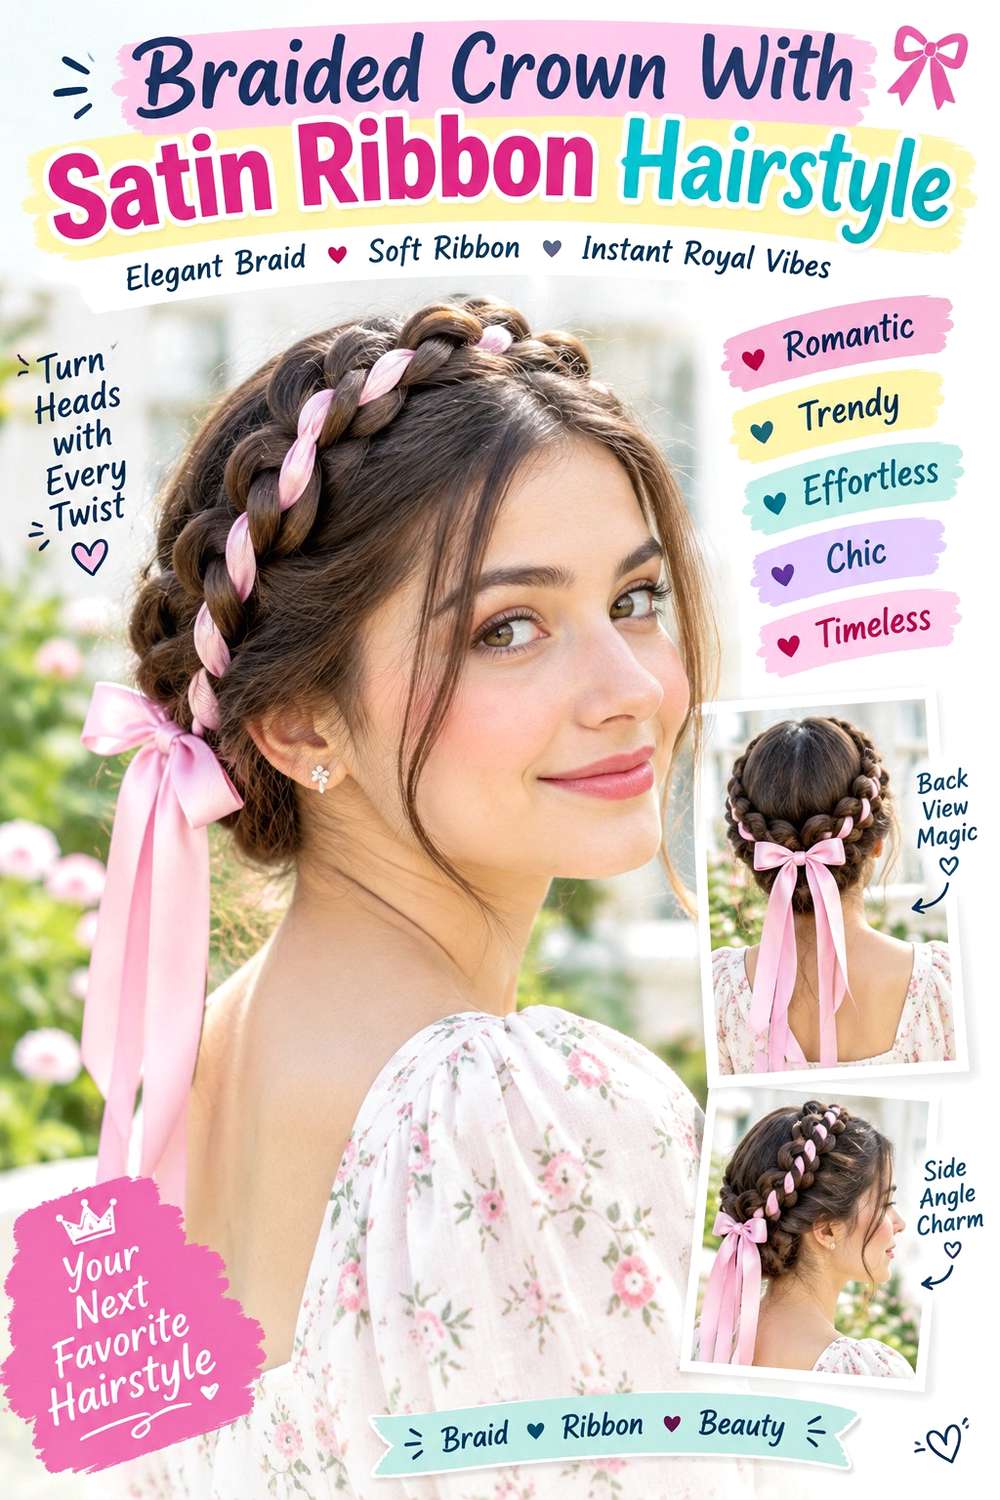
A braided crown keeps hair controlled while a satin ribbon adds a festive detail that reads clearly in family pictures. Create one braid from each side and guide them across the upper back or around the head, joining them securely so the woven shape remains visible. The front can stay softly parted, with a few longer face-framing pieces if desired. Medium and long hair work most easily, while shorter hair can use two smaller braids that meet rather than a complete wrap.
Use light texturizing spray for braid grip, bobby pins for the structural anchors, and a satin ribbon as the decorative finish. The full style takes longer than a ponytail because the braids need balanced placement, but a photo-day refresh generally means replacing one shifted pin or retieing the ribbon. Straight, wavy, curly, and coily textures can all work without requiring a completely smooth surface.
For professional styling, specify braid width, crown height, and comfortable tension around the temples. Secure the entire braid before adding ribbon so the fabric does not carry structural tension. If the ribbon loosens, adjust it separately. Keep the crown positioned away from bulky collars or headwear that could press against the braid and change its shape.
Pro tip:
Complete and pin the braid before threading or tying the satin ribbon. A stable foundation lets you adjust the decoration without loosening the sections that support the crown.
Make It Work for You:
For lower-density hair, keep the braids moderately narrow and use a slim ribbon. This leaves enough hair in each woven section to maintain visible fullness.
Watch Out For:
Do not tighten the crown simply because the ribbon moves. Fix the decoration separately; increasing scalp tension will not correct an accessory that was poorly anchored.
Natural Curls With Jeweled Clip Hairstyle

A jeweled clip can make natural curls feel festive without changing their pattern. Create a soft side part, sweep a narrow section behind one ear, and secure the accessory over that controlled area. Leave the opposite side full, allowing curls to frame the cheek, shoulder, or collarbone depending on length. The asymmetry keeps the face visible while preserving natural volume through most of the hairstyle.
Use lightweight leave-in conditioner for softness, curl gel to support definition, and the jeweled clip as the decorative finish. A full wash-day routine may take longer because the curls should be completely dry before final placement. The morning refresh can be much shorter: revive flattened curls, reset the side sweep, and place the clip. Lower-density hair may prefer a lighter accessory, while dense curls can support a larger piece if its anchor remains comfortable.
For salon styling, specify whether the clip should sit at the temple, above the ear, or slightly behind it, and how much volume should remain on the fuller side. Shrinkage affects that balance, so judge placement on dry hair. Check the jewelry settings for rough edges before wearing, and remove the accessory fully before loosening the tucked section.
Pro tip:
Secure the side sweep before arranging the fuller curls. Establishing the anchor first prevents repeated handling of the texture that will be most visible in the photos.
Make It Work for You:
For shorter curls, place the jeweled clip slightly higher near the temple. The accessory stays visible even when the side section cannot comfortably reach behind the ear.
Watch Out For:
Do not drag the clip through finished curls when repositioning it. Open it fully, lift it clear, and place it again to reduce snagging and frizz.
Center-Part Sleek Low Ponytail Hairstyle

A center-part low ponytail creates a clean family-photo silhouette and works especially well with statement earrings, high necklines, or coordinated holiday outfits. Define the center part, smooth the sides toward the nape, and keep a little natural height at the crown rather than pulling everything completely flat. The ponytail can stay straight, softly waved, or naturally textured, while longer face-framing sections may be omitted for a cleaner front.
Use a fabric-covered elastic for secure hold, lightweight smoothing cream to control the front, and flexible hairspray for visible flyaways. On second-day hair, the style can be assembled quickly. A full wash-day version takes longer only if the ponytail itself needs a different finish. Medium and long hair gather most easily, while dense hair needs an elastic that can support the weight without excessive tightening.
For professional styling, specify whether you want the ponytail directly at the nape or slightly higher to clear a sweater collar. Also explain how sleek you want the crown. If the base loosens, reset the elastic rather than repeatedly pulling the front sections tighter. A clean part and stable anchor matter more in photographs than eliminating every small movement around the surface.
Pro tip:
Test the ponytail height while wearing your planned neckline. Moving the base slightly above a thick collar can keep it from being pushed upward throughout the photo session.
Make It Work for You:
For curly or coily hair, keep the ponytail naturally textured and smooth only the front as much as desired. The contrast can look polished without full straightening.
Watch Out For:
Avoid using too much smoothing cream near the center part. Excess product can make the roots separate visibly and reduce the clean, balanced appearance in close photos.
Shoulder-Length Blowout Hairstyle
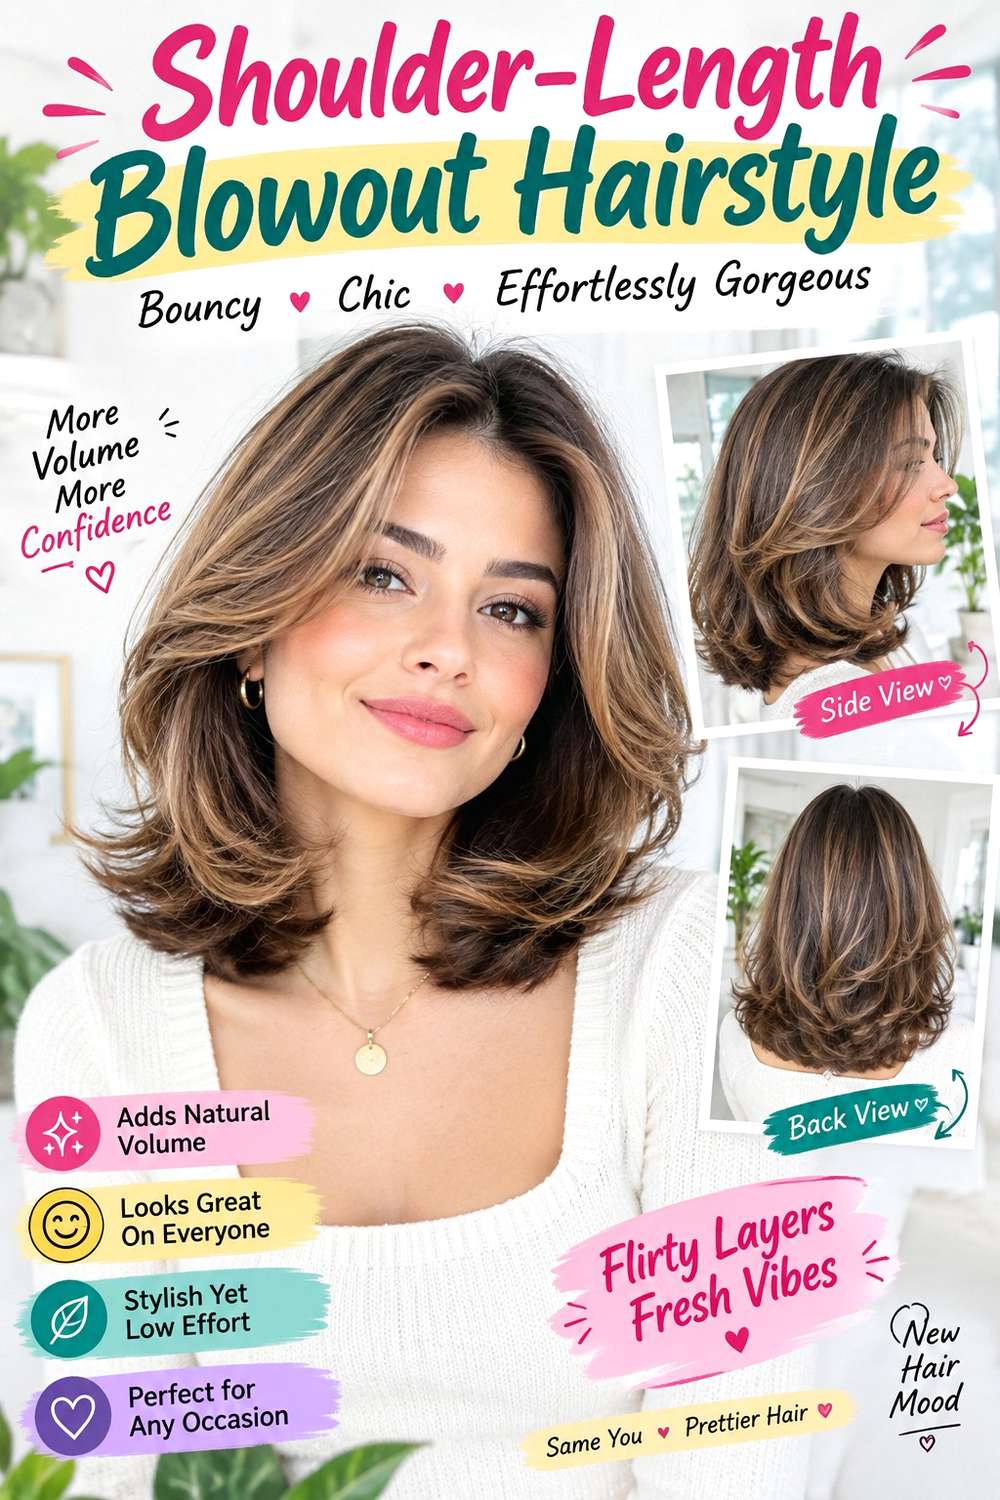
A shoulder-length blowout gives shorter hair enough movement for family pictures while keeping the silhouette neat around sweaters and coats. Keep the perimeter near the shoulders or collarbones, add moderate lift at the crown, and shape broad curves through the ends rather than tight curls. A center part feels balanced, while a subtle side part creates more lift over one temple. Jaw-length face framing can add movement without removing too much fullness from the bottom.
Apply heat protectant before blow-drying, use a round brush to shape the front and ends, and add root-lift spray sparingly near the crown. Straight and wavy hair generally need a moderate full styling session, while curly hair may require more time when a smoother blowout is desired. The photo-day refresh can focus on the front layers and ends rather than repeating the whole process.
At the salon, point to the exact finished shoulder or collarbone length and explain how much weight you want preserved along the bottom. Fine or lower-density ends often benefit from a stronger perimeter. If the ends begin turning unpredictably against clothing, reshape only those sections. Styling effort and haircut maintenance are separate; a flat crown does not automatically mean the cut needs more layers.
Pro tip:
Shape the ends after the crown is lifted and settled. Finishing the lower curve last helps you see how the blowout will actually sit against your neckline.
Make It Work for You:
For dense hair, ask the stylist to assess where internal bulk makes the blowout widen. Controlled adjustment can preserve movement without sacrificing the stronger outer perimeter.
Watch Out For:
Do not pile root-lift product onto a crown that has flattened. Product buildup can add weight; reset the drying direction first and use only a light amount.
Twisted Half-Up Pearl Barrette Hairstyle

A pearl barrette fits naturally over a twisted half-up style because the hidden join gives the accessory a stable place to sit. Take one section from each temple, twist both toward the back, and secure them around the upper rear of the head. Leave the lower length loose in waves, curls, or a smoother finish. Keep modest crown volume above the twists so the barrette does not appear to flatten the entire top.
Use light texturizing spray for grip, a small clear elastic for the hidden anchor, and the pearl barrette as the decorative third item. This is a quick option on second-day hair when the loose texture is already prepared. A full wash-day version takes longer only if the lengths also need curling, smoothing, or defining. Fine hair may prefer a lightweight barrette, while dense hair can support a larger piece when the base is secure.
For salon styling, specify where you want the twists to meet and whether the barrette should sit horizontally or follow a slight curve. If the accessory slides, strengthen the hidden anchor rather than pulling the temple sections tighter. Remove the barrette before undoing the twists so raised decorative edges do not catch separated strands.
Pro tip:
Adjust the crown volume after securing the elastic but before adding the barrette. This lets you perfect the shape without repeatedly moving a decorative accessory through finished hair.
Make It Work for You:
For shorter or layered hair, use narrower twists and place the meeting point slightly higher. Short pieces then have less distance to travel before reaching the anchor.
Watch Out For:
Do not let the pearl barrette provide the only hold. A decorative closure can shift during posing; secure the twists underneath first so the accessory remains ornamental.
Soft Braided Low Bun Hairstyle
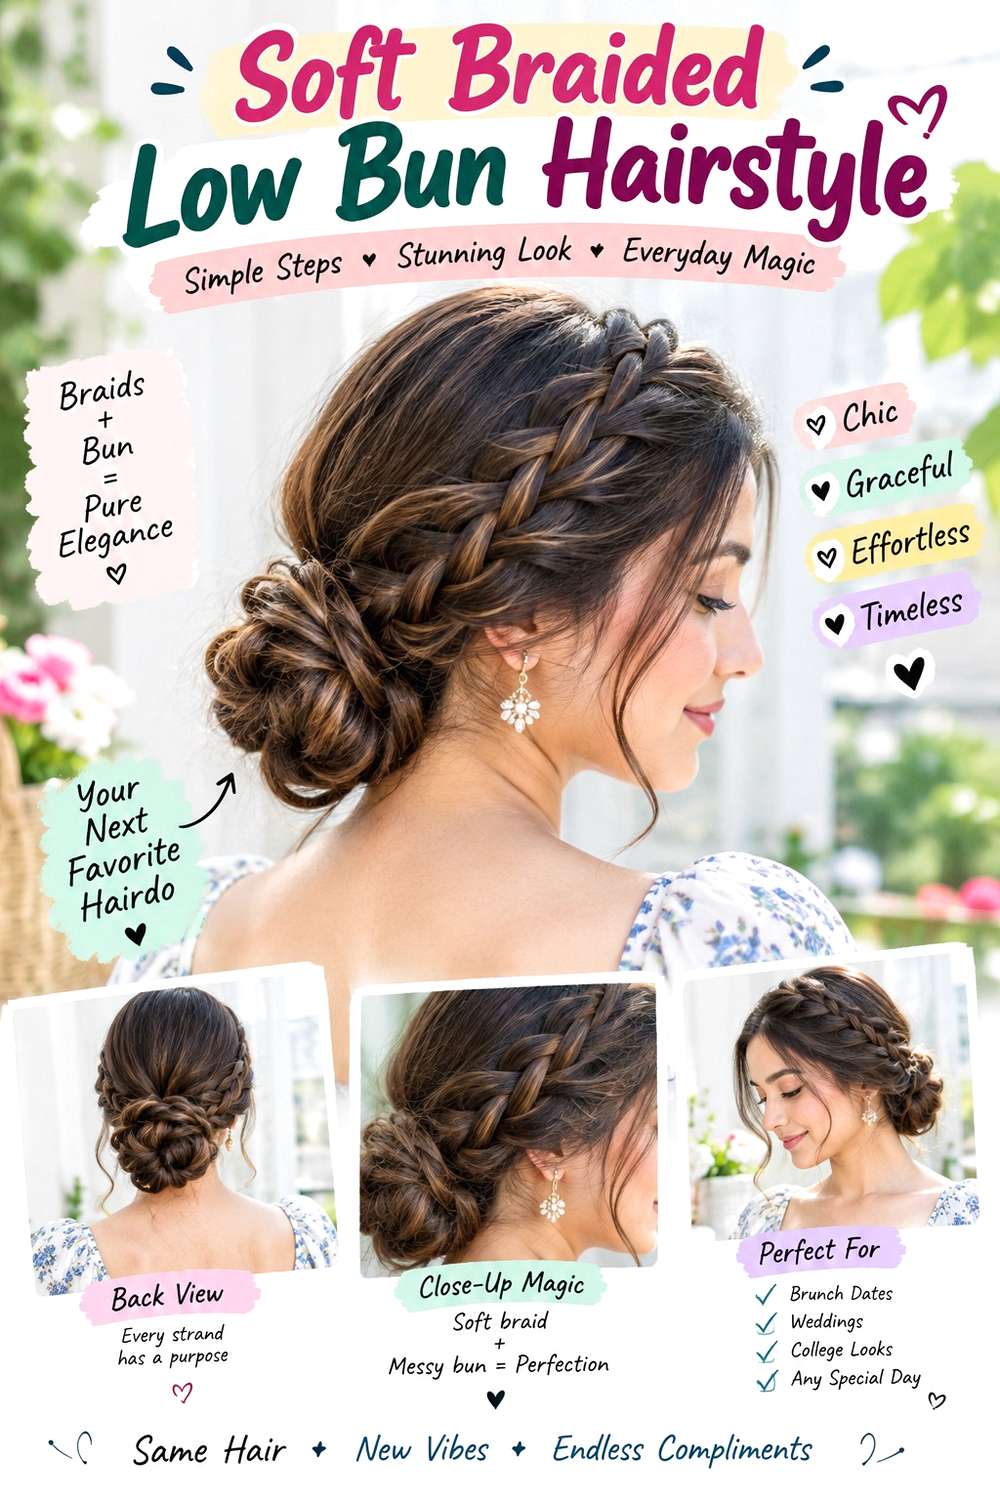
A braided low bun creates visible texture at the nape while keeping the face and neckline tidy for Christmas family photos. Gather medium or long hair low, braid the ponytail, then coil it into a bun that spreads slightly rather than forming a tight knot. A center or side part can frame the front, while a few longer pieces may remain loose if you want softness. Keep the braid relaxed enough to show its pattern without pulling it apart excessively.
Use a fabric-covered elastic for the base, bobby pins to anchor the braided coil, and flexible hairspray for light surface control. The style takes longer than a simple low bun because the braid adds another step, but it usually holds well once secured. A quick refresh may involve replacing one lower support pin and smoothing the front. Straight, wavy, curly, and coily hair can all use the same structure.
For professional styling, specify braid width and whether you want the bun compact or spread across the nape. Dense hair may benefit from two smaller braids rather than one heavy coil. If the bun drops during the photo session, reinforce its lower edge instead of tightening the entire base.
Pro tip:
Anchor the bottom of the coiled braid first, then secure the sides. Supporting the weight underneath helps the bun stay level while you move between standing and seated poses.
Make It Work for You:
For very thick hair, split the ponytail into two braids before wrapping. This distributes bulk and can produce a flatter, more comfortable bun at the nape.
Watch Out For:
Do not loosen the braid dramatically after it is already pinned. Large gaps can weaken the bun; soften the braid before wrapping and make only small final adjustments.
Long Straight Hair With Curved Ends Hairstyle
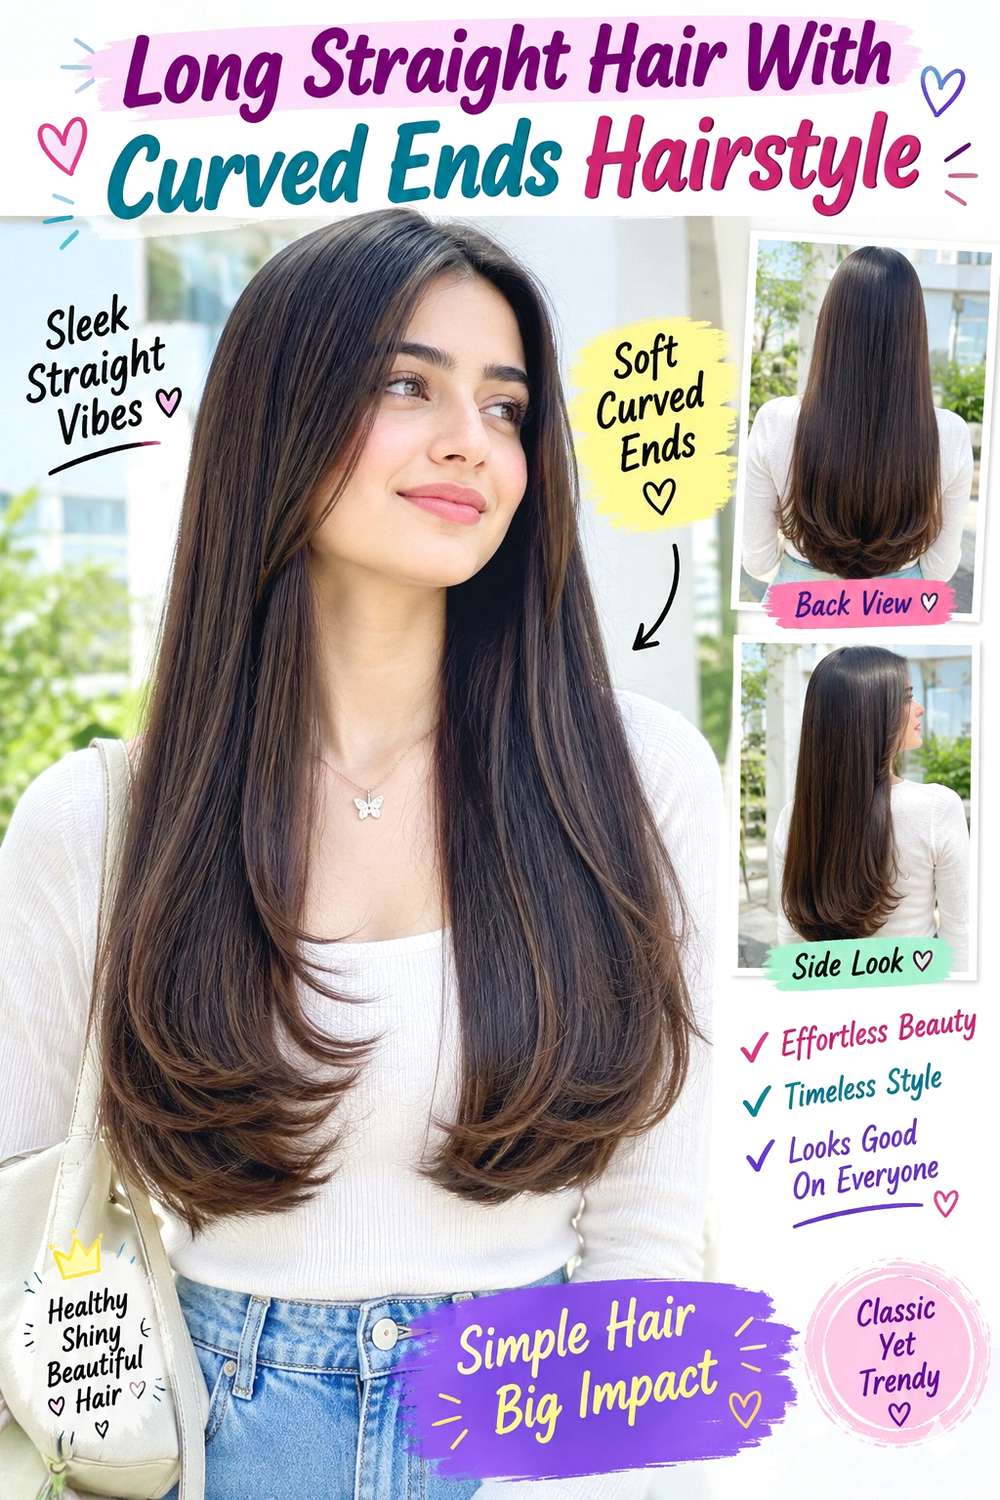
Long straight hair can photograph beautifully when the roots stay smooth and the ends have just enough curve to create movement. Use a center or gentle side part, let the lengths fall in a clean line, and bend only the lower few inches inward or softly away from the shoulders. Long face-framing pieces can begin below the chin so they blend into the vertical shape without creating a heavily layered front.
Apply heat protectant before smoothing with a flat iron, then use lightweight serum through the mid-lengths and ends for frizz control and shine. Naturally straight hair may need only a short styling session, while wavy or curly hair requires more time if you choose this finish. A quick photo-day refresh should target only visible bends or the front rather than reheating the whole length.
At the salon, explain how full you want the bottom perimeter and where any face-framing pieces should begin. This matters especially if your ends are fine or lower-density. Keep heavier finishing products away from the roots so the part stays clean. If clothing creates a bend near the bottom, smooth that area selectively instead of repeatedly straightening every section.
Pro tip:
Curve only the lowest few inches rather than creating a full curl. That subtle movement keeps long straight hair from looking rigid while preserving its clean overall line.
Make It Work for You:
If your ends are sparse, keep face framing limited and preserve more weight at the bottom. You can still create front movement without layering heavily throughout the length.
Watch Out For:
Avoid repeated flat-iron passes for minor bends caused by coats or sitting. Smooth the section by hand first and use additional heat only when genuinely necessary.
Curly Half-Up Puff Hairstyle

A half-up puff keeps curls visible through the lower hair while adding controlled height at the crown. Gather the upper section from around the temples and top, secure it toward the upper back, and allow the curls to expand instead of compressing them into a small ponytail. Leave the lower curls loose through the shoulders or back, with selected face-framing spirals around the cheekbones or jaw. Finished placement should be judged once shrinkage is complete.
Use lightweight leave-in conditioner for softness, curl gel for definition, and a soft elastic for the half-up anchor. Full wash-day styling may take much longer than the actual puff because drying time depends on length and density. Once the curls are ready, a refresh can be brief: revive flattened sections, reset the elastic, and arrange the crown. Dense curls often require less hair gathered than expected.
For salon styling, specify how high you want the puff and how much volume should remain at the sides. If the base feels tight, loosen it instead of accepting discomfort for extra height. Arrange the curls themselves to increase lift rather than repeatedly pulling the elastic tighter.
Pro tip:
Form the puff only after the curls are fully dry. Seeing the finished shrinkage makes it easier to balance the gathered crown against the loose lower volume.
Make It Work for You:
For lower-density curls, gather a smaller upper section and leave more texture loose around the sides. This preserves fullness while keeping the half-up shape recognizable.
Watch Out For:
Do not keep tightening the elastic to create a taller puff. Extra tension can flatten front curls and become uncomfortable without improving the visible crown shape.
Claw Clip Twist With Festive Accent Hairstyle

A claw clip twist is useful for family photos when you need a style that can be rebuilt quickly if clothing or movement disturbs it. Gather medium or long hair at the back, twist it upward, and secure the center with a decorative festive clip. Let the ends tuck inside for a cleaner silhouette or fan lightly above the accessory. Keep the crown softly lifted, and allow two controlled face-framing pieces to remain loose if preferred.
Use light texturizing spray for grip, a sturdy claw clip as the main anchor, and a small amount of smoothing cream for the visible front pieces. On second-day hair, this is one of the fastest options. A full wash-day version takes longer only if you plan to reshape waves or curls first. Straight, wavy, curly, and coily textures can all work when the clip size matches the density.
For professional styling, specify the clip height and whether you want the ends visible. Test placement with your planned sweater, coat, or collar because a low accessory can be knocked repeatedly. If the twist loosens, reopen the clip and rebuild the base instead of squeezing the accessory harder around slipping hair.
Pro tip:
Put on your photo outfit before finalizing the clip height. Raising the twist slightly can prevent a thick collar from pushing against the accessory every time you move.
Make It Work for You:
For very dense hair, gather a smaller central section or choose a larger clip. The style should close securely without forcing excessive tension through the twist.
Watch Out For:
Do not use a clip that barely closes around your hair. A strained accessory can pop open unexpectedly; match the clip capacity to your actual density.
Conclusion
Christmas family photo hairstyles can be polished without becoming overly formal. Loose waves and blowouts add movement around the shoulders, while ponytails, chignons, braided buns, and clip twists offer more control. Natural curls can keep their volume, and straight hair can rely on clean parting and softly curved ends. Density affects how much hair should be gathered and how heavy an accessory feels, while face framing, fringe, crown volume, and parting change the balance around the face. Consider your outfit as well: collars and sweaters can interfere with low buns or accessories. Choose a finish that works with your natural texture, stays comfortable during the session, and can be refreshed without rebuilding the entire hairstyle.
Before Your Salon Visit
Choose one or two favorite references and save views that clearly show the features you want to recreate. Discuss your natural texture, density, face shape, preferred length, upkeep, and normal styling routine. Point out the exact face-framing pieces, braid width, bun or ponytail placement, crown volume, parting, accessory position, or finish you like. For temporary Christmas family photo styles, focus on secure, comfortable styling and how the hairstyle works with your neckline rather than requesting an unnecessary haircut.
FAQs
Which Christmas family photo hairstyles keep the face most visible?
Low ponytails, chignons, half-up styles, side tucks, and braided crowns can keep hair controlled around the eyes while still leaving softness near the face. Choose a part and face-framing length that stay comfortable when you turn your head, lean toward family members, or pose from different angles.
Should I wear my natural curls for Christmas family pictures?
You can. Natural curls can look defined and balanced in half-up puffs, side sweeps, accessory styles, or simply worn loose. Let the hair reach its finished dry shape before deciding final placement, especially when shrinkage changes the length or volume around the face and shoulders.
How do I stop a holiday hair accessory from slipping during photos?
Give the accessory a stable base whenever possible. A hidden elastic, secured twist, braid, or tucked section can provide more grip than loose hair alone. Match the accessory weight to your density, and fix the anchor rather than tightening a headband or clip painfully against the scalp.
How early should I test my hairstyle before family photos?
Try the style once before the photo day if it includes an unfamiliar accessory, updo, or fringe arrangement. Wear it with your planned sweater, coat, or neckline and check the shape from the front, side, and back so collar interference, slipping, or uncomfortable tension can be corrected.