15 Crown Braid Hairstyles for Fall 2026

Crown braids wrap braided hair around the head to create a raised, woven shape that can range from smooth and structured to loose and textured. Some versions use nearly all the hair in a complete halo, while others braid only the sides and leave waves, bangs, or a bun visible. The placement can sit high near the crown, closer to the hairline, or lower toward the nape, and those small changes affect how much volume and face-framing you see.
These crown braid hairstyles for Fall 2026 can be adapted for straight, wavy, curly, and coily textures. Fine hair often looks fuller when the braid is gently widened after securing it, while thick hair may need larger sections or internal bulk control so the crown does not become too heavy. Fringe, curtain bangs, and loose temple pieces can also be adjusted around different face shapes.
Styling effort varies. A half-up crown can be relatively quick, while a complete Dutch or double crown braid takes more precision. Before choosing one, consider your length, density, layers, natural texture, braid tension, and how securely you need the style to last through the day.
Quick List
- Classic Halo Crown Braid hairstyle
- Dutch Crown Braid with Face-Framing Pieces hairstyle
- French Crown Braid with Soft Texture hairstyle
- Double Crown Braid Updo hairstyle
- Crown Braid with Curtain Bangs hairstyle
- Messy Crown Braid with Wispy Pieces hairstyle
- Crown Braid for Natural Curls hairstyle
- Crown Braid for Thick Hair hairstyle
- Crown Braid for Fine Hair hairstyle
- Ribbon-Woven Crown Braid hairstyle
- Side-Swept Crown Braid hairstyle
- Low Crown Braid with Tucked Ends hairstyle
- Half-Up Crown Braid with Loose Waves hairstyle
- Crown Braid with Bun Finish hairstyle
- Textured Autumn Crown Braid hairstyle
Classic Halo Crown Braid hairstyle

A classic halo crown braid circles the head in one continuous-looking band, keeping the neckline clear while making the braid itself the main feature. Medium to long hair gives enough length to wrap comfortably, and straight or softly wavy textures are usually easiest to section. Fine hair can gain width by gently loosening the outer loops after the braid is pinned, while thick hair may need broader sections to avoid an overly bulky crown. Use texturizing spray for grip, a tail comb for clean sectioning, and strong bobby pins to secure the tucked ends. Styling takes moderate to longer effort because the braid needs even tension all the way around. Short layers may require extra pins or flexible hairspray. Maintenance is mostly about keeping the perimeter healthy enough to braid smoothly. At the salon, ask for connected layers that remain long enough around the sides and nape to feed into a full halo without constant flyaways.
Pro tip:
Start the braid slightly behind one ear rather than directly at the center back; the join is easier to hide once the ends are tucked underneath.
Dutch Crown Braid with Face-Framing Pieces hairstyle

The raised structure of a Dutch crown braid creates more visible height than a flatter French braid, while loose face-framing pieces soften the front. Hair is crossed underneath as the braid travels around the head, producing a defined ridge that works especially well on medium or thick density. Fine hair can still wear it by gently widening the loops after finishing rather than pulling too much hair into each section. Wavy texture naturally adds grip; very straight hair may need a little prep first. Use dry texture spray, a tail comb, and flexible hairspray to control short pieces without making the braid stiff. Styling takes moderate time and requires careful tension around the temples. Refreshing is usually limited to the front pieces if they lose shape. At the salon, specify where you want the shortest face-framing layer to fall—cheekbone, jaw, or collarbone—so the loose pieces look deliberate instead of accidentally escaping from the braid.
Pro tip:
Separate the face-framing pieces before you begin braiding; pulling them out afterward can loosen the Dutch ridge around the temples.
French Crown Braid with Soft Texture hairstyle

A French crown braid lies closer to the scalp than a Dutch version, giving the style a softer, flatter outline. Instead of crossing hair underneath, sections pass over the center as more hair is added around the head. The result suits straight, wavy, and lightly curly textures, especially when you want a crown that feels secure without a pronounced ridge. Medium-density hair is straightforward to manage, while fine hair benefits from a little texturizing product and thick hair may need larger sections for faster braiding. Prep with lightweight mousse, use a rat-tail comb for neat parting, and finish with a mist of light-hold hairspray. Styling takes moderate time but can be comfortable for a full day when the tension stays even. Very short layers may work loose as the hours pass. At the salon, ask for blended side layers that can reach the braid while still giving movement when your hair is worn down.
Pro tip:
Keep the French braid slightly looser over the crown than near the nape; that subtle change prevents the top from looking pressed flat.
Double Crown Braid Updo hairstyle

Two separate braids wrapped around the head create a fuller crown with more visible structure than a single halo. This works best on medium to long hair because the length needs to divide into two substantial sections without leaving either braid too thin. Thick hair naturally creates strong twin bands, while fine hair may need slightly looser braiding to preserve width. Straight or wavy texture is easiest to organize, although curly hair can create a softer result with gentle tension. Use styling cream for control, strong pins, and a fine mist of hairspray to hold the overlap points. The double construction takes more time than a single braid and is better for days when you want a secure updo rather than a two-minute style. Check the balance from both sides before pinning permanently. At the salon, ask to keep enough density through the ends and avoid excessive thinning, since two braids need consistent thickness from base to finish.
Pro tip:
Place the second braid slightly behind the first instead of directly on top of it; the offset makes both woven bands visible and reduces bulk.
Crown Braid with Curtain Bangs hairstyle
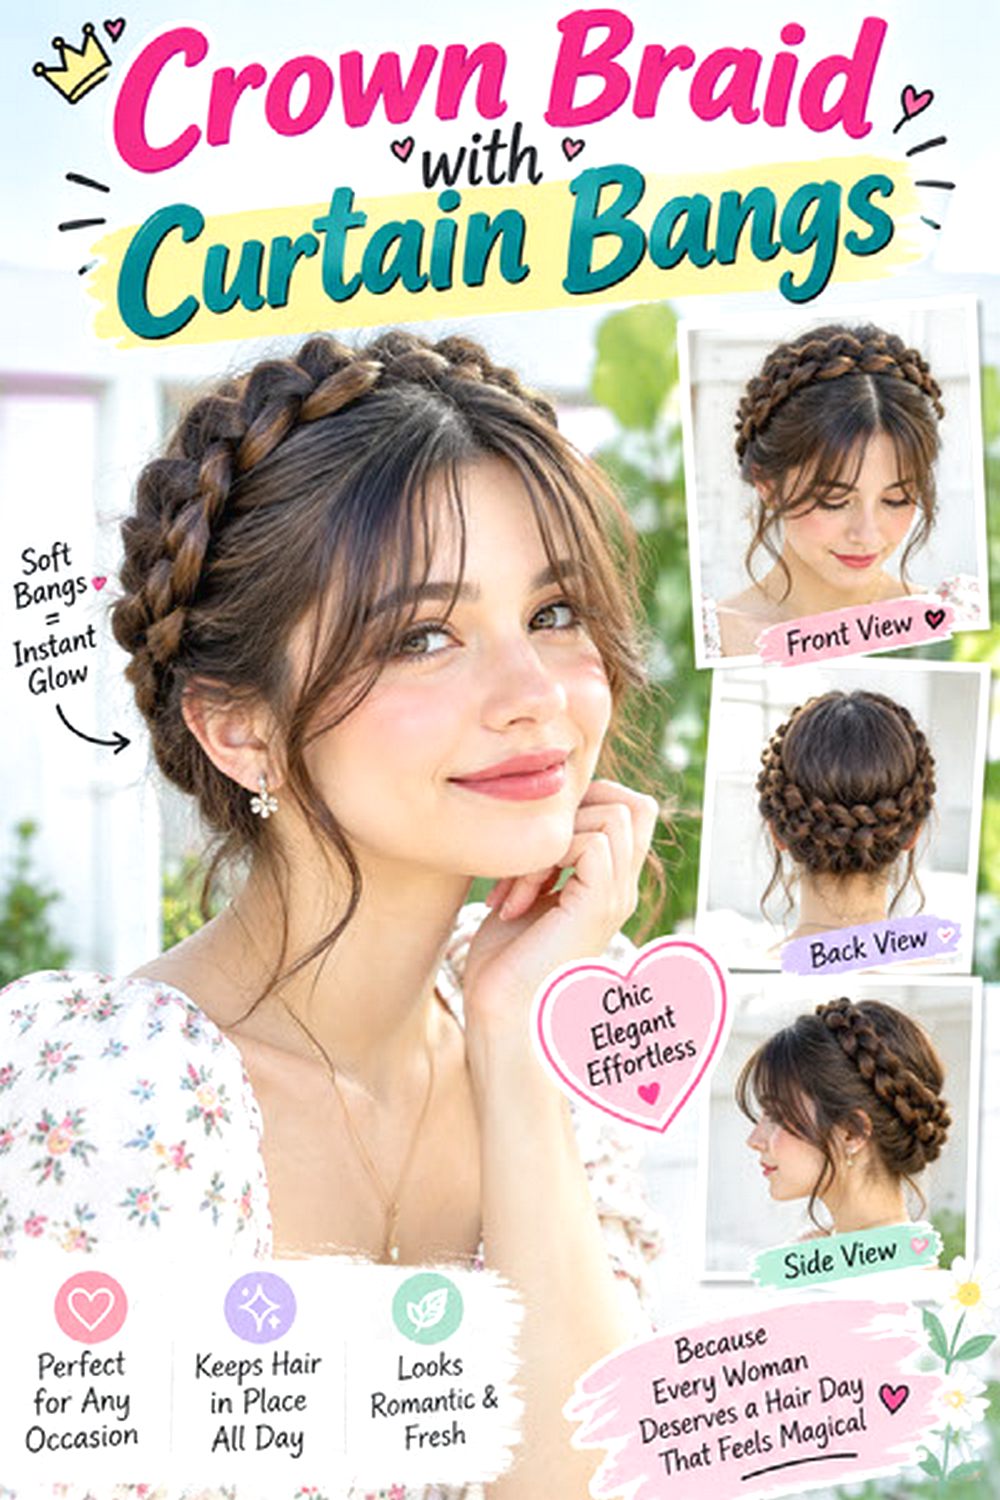
Curtain bangs leave movement around the face while the rest of the hair stays controlled in a crown braid. The fringe can split near the center and curve toward the cheekbones, with longer pieces blending into the temples before the braid begins. Straight and wavy hair are easiest to shape with a round brush, while curly textures need enough extra bang length to account for shrinkage. Fine hair often works better with a lighter fringe so the crown braid does not lose too much density at the front. Use heat protectant, a medium round brush, and flexible hairspray for the bangs; the braid itself may only need a few secure pins. Styling takes moderate time because the fringe should be shaped separately before braiding. Bang trims will usually be needed sooner than full haircut reshaping. At the salon, show the exact shortest bang point you want and keep the temple pieces long enough to blend cleanly into the braided section.
Pro tip:
Style the curtain bangs before starting the braid so the braid tension does not pull the fringe opening wider than you intended.
Messy Crown Braid with Wispy Pieces hairstyle

A messy crown braid looks most convincing when the looseness is controlled rather than random. Keep the braid secure around the head, then gently widen selected loops and release only a few pieces around the temples, ears, or nape. Naturally wavy hair suits the texture well because it already has grip and movement. Fine hair can appear fuller when the braid is loosened carefully, while thick hair may need some internal weight removed so the crown does not become oversized. Use dry texture spray, a few bobby pins, and lightweight hairspray that still allows movement. Styling takes moderate time, though it is more forgiving than a polished halo because every section does not need to look identical. Humidity can increase frizz, so a tiny amount of anti-frizz cream on exposed pieces may help. At the salon, request soft face-framing layers that are long enough to curl naturally rather than short fragments that stick straight out.
Pro tip:
Loosen the braid only after all pins are secure; pulling sections too early can reduce tension at the base and make the crown slide.
Crown Braid for Natural Curls hairstyle

Natural curls bring extra texture to a crown braid, so the braid does not need to be perfectly smooth to look intentional. Work with moisturized curls and use gentle tension as you braid around the head, leaving a few defined curls near the face if you want a softer outline. Medium and thick curly hair creates a substantial crown, while finer curls can use larger sections to preserve fullness. Coily textures may benefit from light stretching first if that makes the braiding process more comfortable, but daily heat is not necessary. Use leave-in conditioner, curl cream, and a wide-tooth comb or fingers for detangling before styling. Wash-day preparation takes more time, while the finished braid can last longer with careful overnight protection. Avoid pulling tightly along the hairline. At the salon, discuss shrinkage and ask for layer placement that still gives enough length around the crown and sides to reach securely into braided updos.
Pro tip:
Leave the front curls out before braiding and refresh them afterward with a little water and curl cream instead of repeatedly pulling them from the finished crown.
Crown Braid for Thick Hair hairstyle
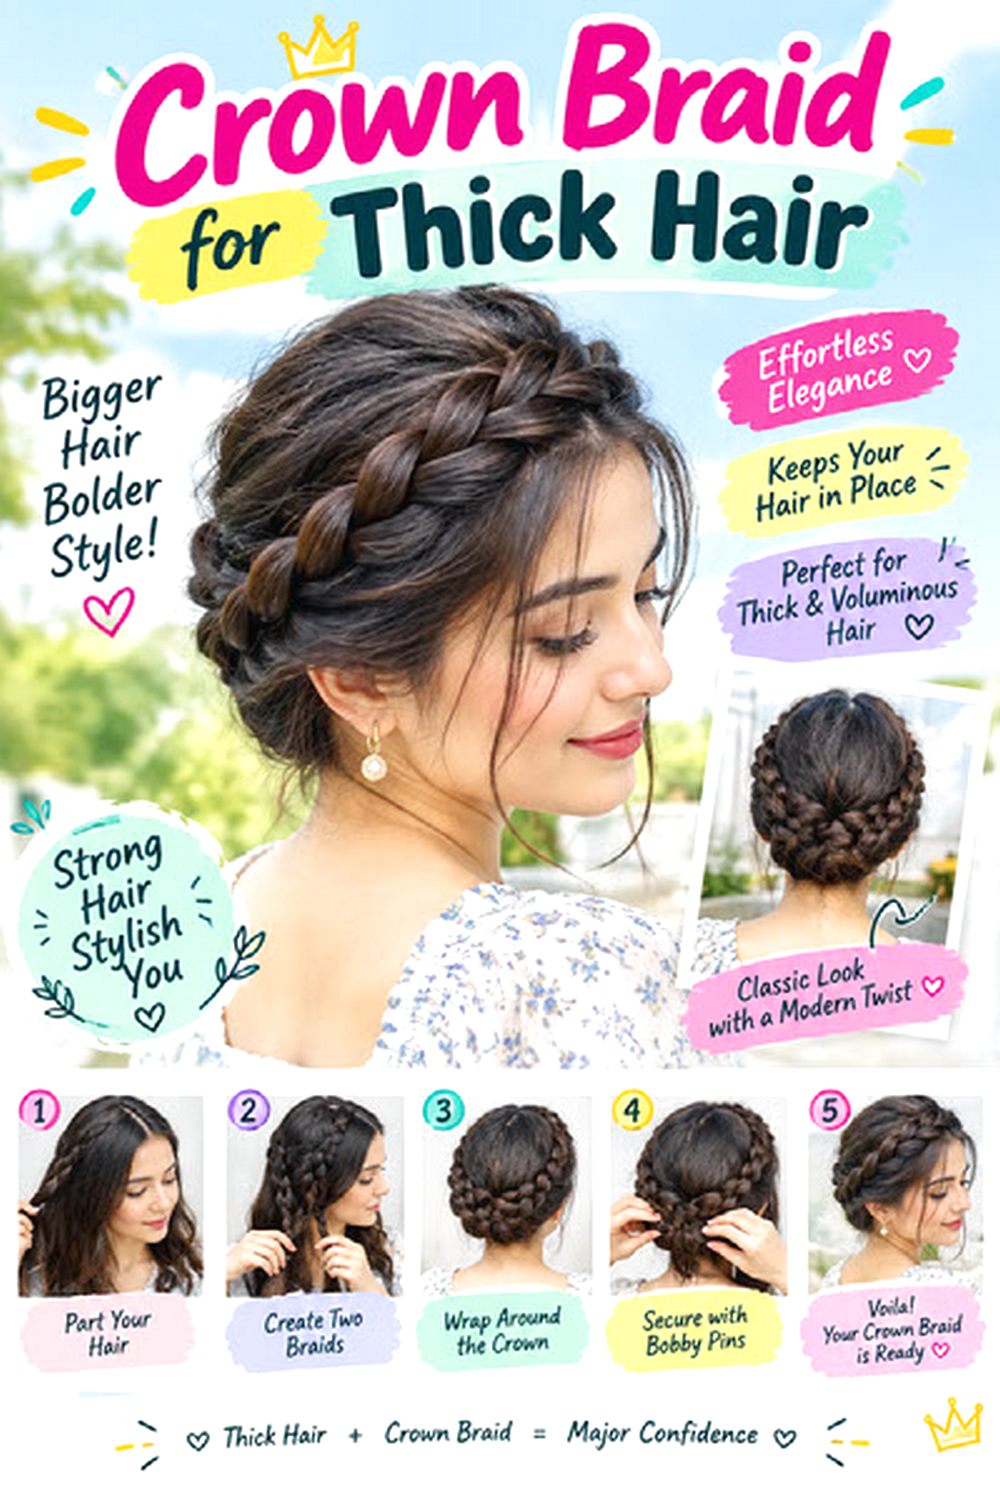
Thick hair can create an impressive crown braid, but controlling weight is more important than making the braid as large as possible. Use broader sections and moderate tension so the braid sits close enough to the head without becoming uncomfortable. Long, dense hair may be easier to manage as two braids that wrap and overlap rather than one continuous braid around the entire head. Wavy and coarse textures usually hold well with minimal product. Straight thick hair may need extra grip at the roots. Use a sectioning comb, styling cream, and heavy-duty pins that can support the finished crown. Styling takes more time because each section contains more hair, and scalp comfort should be checked before the final pins are hidden. Salon shaping can make a big difference. Ask for internal bulk removal where needed while preserving a strong perimeter; aggressive thinning through the ends can create short pieces that escape from the braid.
Pro tip:
Divide very dense hair into two balanced braids and cross them at the back; spreading the weight reduces pulling at one single starting point.
Crown Braid for Fine Hair hairstyle
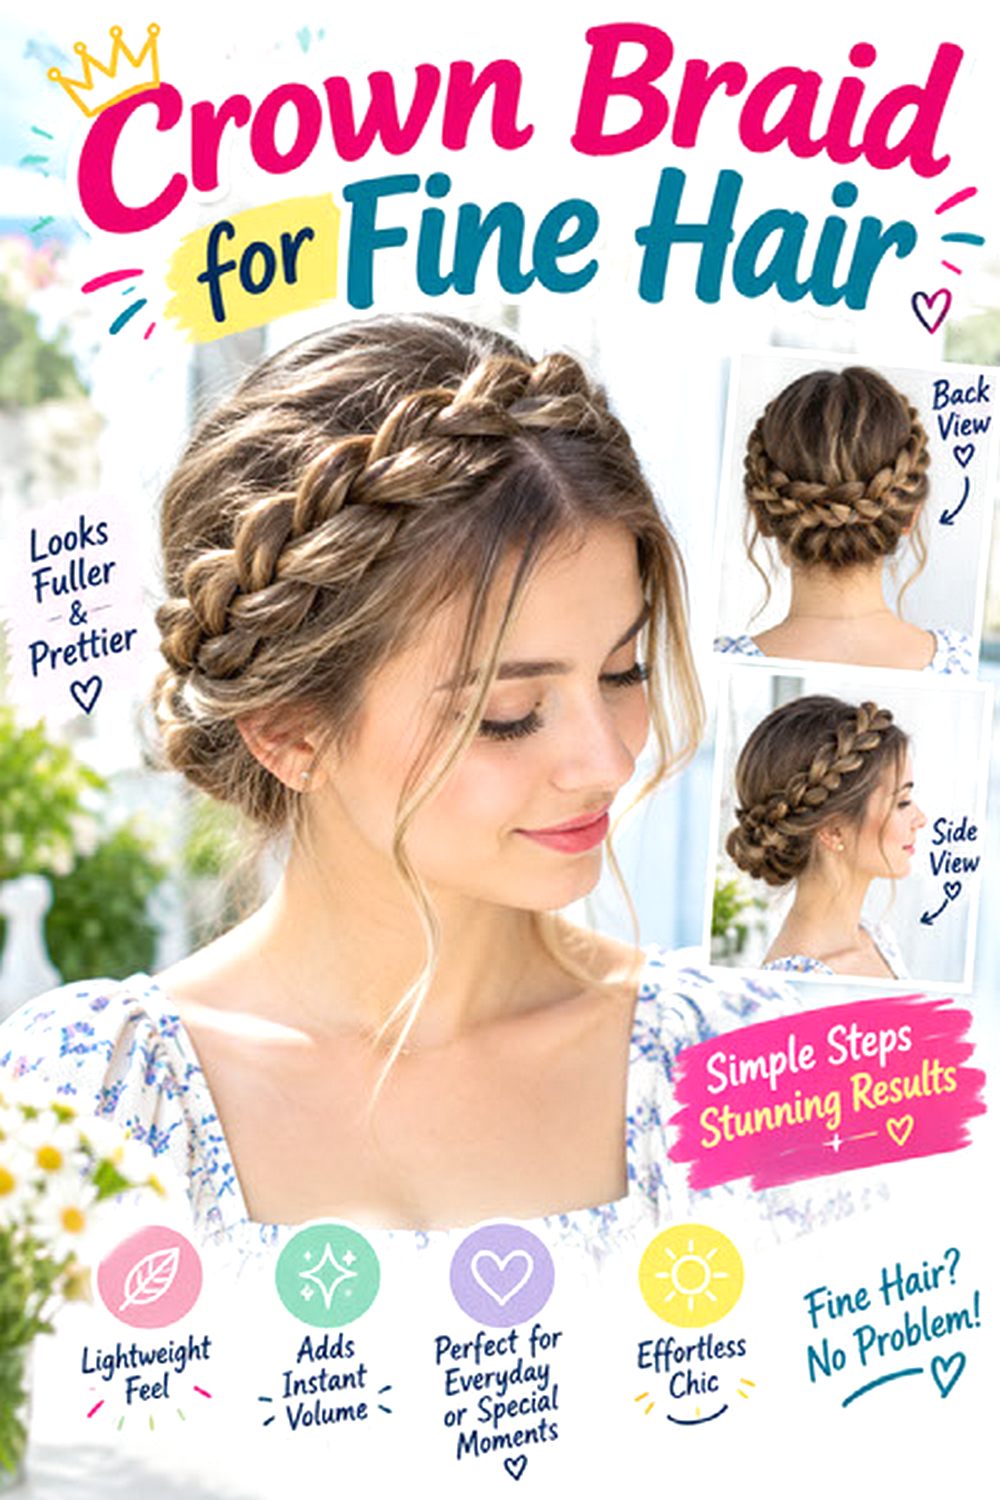
Fine hair usually looks fuller in a crown braid when the sections are kept light and the finished braid is widened gradually. Pulling too tightly can make the braid appear narrow and expose more scalp, so gentle tension works better. Shoulder-length to long hair can create the shape, although shorter lengths may need a half-crown construction rather than a full wrap. Straight fine hair benefits from texture at the roots, while naturally wavy hair often has enough grip on its own. Use volumizing powder or dry texture spray, small bobby pins, and a fine elastic that can hide beneath the braid. Styling is moderate but usually easier when the hair is not freshly washed. Avoid heavy serums that make strands slippery. Haircut maintenance matters because too many layers can thin out the braid. At the salon, ask to preserve perimeter density and keep layering subtle, especially through the lower half of the hair.
Pro tip:
Widen only the outer edge of each braid loop; pulling both sides equally can flatten the center and make the crown look less structured.
Ribbon-Woven Crown Braid hairstyle

Ribbon turns a crown braid into a more decorative fall style by adding a visible line of color through the weave. Narrow satin, grosgrain, or soft velvet works best because wide ribbon can create too much bulk around the head. Medium and long hair provide enough braid length for the ribbon to show consistently, while fine hair should use a slimmer ribbon so the accessory does not overpower the braid. Straight, wavy, and lightly curly textures can all carry the look. Use texturizing spray for grip, a small elastic to anchor the ribbon, and bobby pins to secure the finished crown. Styling takes moderate to longer time because ribbon tension needs to stay even while you braid. Check that the fabric does not twist or bunch near the temples. At the salon, keep side layers connected enough to stay inside the braid. Very short pieces can interrupt the clean ribbon pattern.
Pro tip:
Anchor the ribbon to a hidden elastic before weaving it in; relying on braid tension alone makes smooth ribbon more likely to slide as you work.
Side-Swept Crown Braid hairstyle
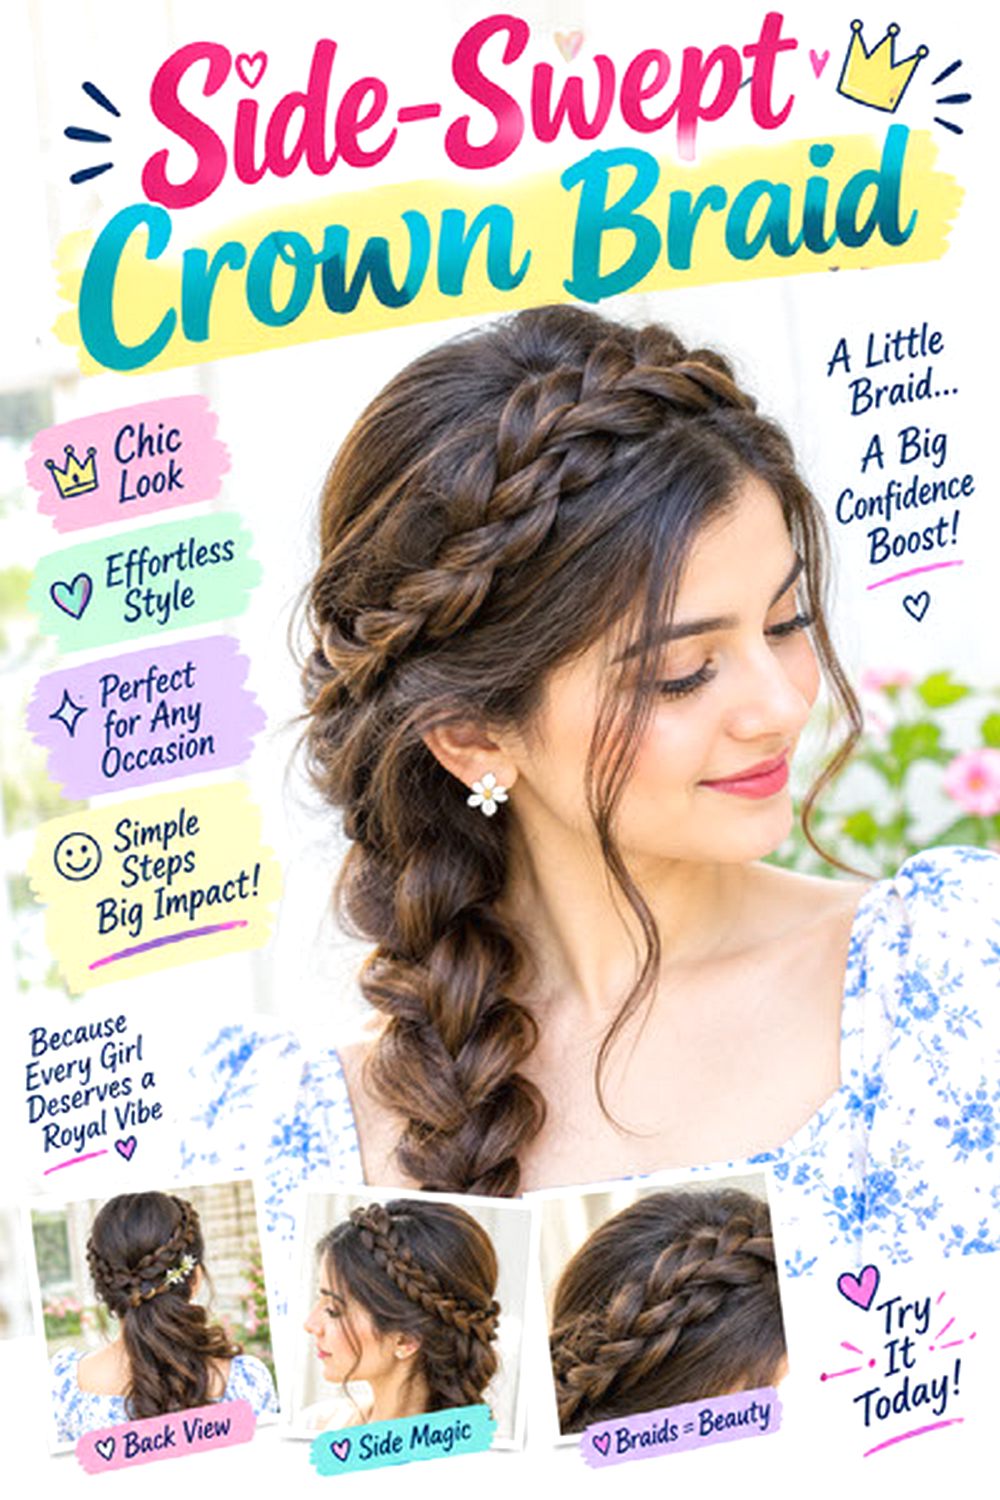
An asymmetric crown braid puts more braid volume on one side rather than creating a perfectly even halo. A deeper side part can feed into the braid, with the fuller section sweeping across the forehead or temple before joining the woven shape. This works well on medium to long hair and can be adjusted for different face shapes by changing the part depth and braid height. Fine hair benefits from keeping the heavier side softly widened, while thick hair may need slightly flatter sections for balance. Use volumizing mousse, a tail comb, and flexible hairspray to control the sweep without making it rigid. Styling takes moderate time because the two sides are intentionally different and need to look balanced rather than identical. Front sections may need a quick refresh the next day. At the salon, show where you normally part your hair and ask for face-framing layers that can blend smoothly into that side-swept direction.
Pro tip:
Begin the braid slightly higher on the fuller side and lower it gradually around the back; the diagonal line makes the asymmetry look purposeful.
Low Crown Braid with Tucked Ends hairstyle

A low crown braid sits closer to the nape and lower sides of the head, creating a compact shape that works well with coats and higher necklines. Instead of building height at the top, the braid follows the lower perimeter and hides the ends underneath. Medium to long hair is easiest to wrap securely, while straight and softly wavy textures create a neat finish with minimal preparation. Fine hair can use a slightly loosened braid for more width; thick hair should keep the weave controlled so it does not become bulky at the nape. Use smoothing cream, strong hairpins, and a tail comb for clean sections. Styling requires moderate time but tends to feel secure once the tucked ends are anchored. Short nape layers may need extra pins. At the salon, ask to keep the lower back layers long enough to feed into updos rather than cutting many short pieces that fall loose underneath.
Pro tip:
Cross the tucked ends underneath the fullest part of the braid rather than pinning them directly at center back; the overlap hides the join more naturally.
Half-Up Crown Braid with Loose Waves hairstyle
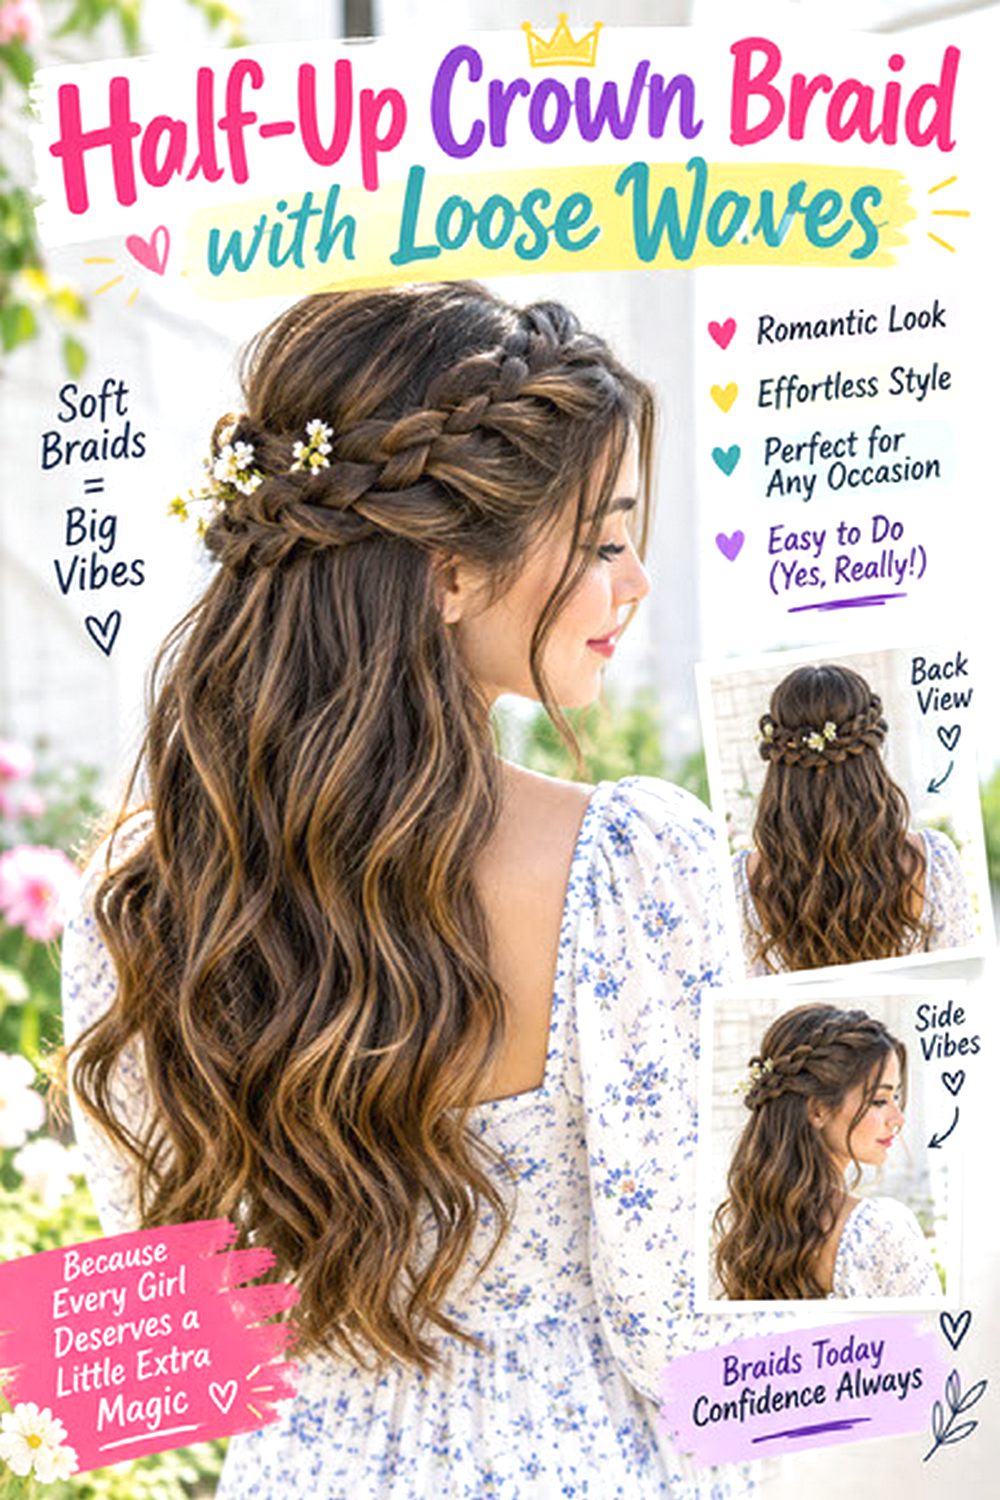
A half-up crown braid creates the appearance of a halo while leaving most of the length loose. Braid one section from each temple and wrap or join them across the back, then let the remaining hair fall in soft waves. Medium and long hair show the contrast most clearly, and this option is useful for fine hair because much of the density stays down instead of being used in the braid. Thick hair may need smaller side sections so the half-crown does not become too heavy. Use heat protectant, a large-barrel curling iron, and small clear elastics or pins to secure the braids. Styling takes moderate time if waves are created from scratch, but naturally wavy hair can make it much quicker. Re-curling only the front pieces is usually enough for a refresh. At the salon, ask for long face-framing layers that begin around the cheekbone or jaw and blend naturally into the loose lengths.
Pro tip:
Secure the two braids slightly below the crown rather than directly on top of it; this leaves room for natural root lift above the woven band.
Crown Braid with Bun Finish hairstyle

Combining a crown braid with a bun gives the hairstyle two distinct shapes: a woven band around the head and a compact finish at the back. The braid can travel from the sides toward the nape, where the remaining length is twisted into a low bun. Medium to long hair works best, and thick hair creates a substantial bun without extra padding. Fine hair can loosen the braid slightly and keep the bun softly coiled rather than tightly wrapped. Use styling mousse for grip, strong hairpins, and flexible hairspray to secure both sections. This style needs more time than a simple halo because the transition from braid to bun has to look intentional. It is useful for events or longer days when you want the hair fully secured. At the salon, ask for layers that remain long enough to reach the nape and preserve some perimeter weight so the bun does not become too small.
Pro tip:
Finish the braid before forming the bun, then use the braid’s tail as part of the bun base; this hides the transition and reduces extra pinning.
Textured Autumn Crown Braid hairstyle
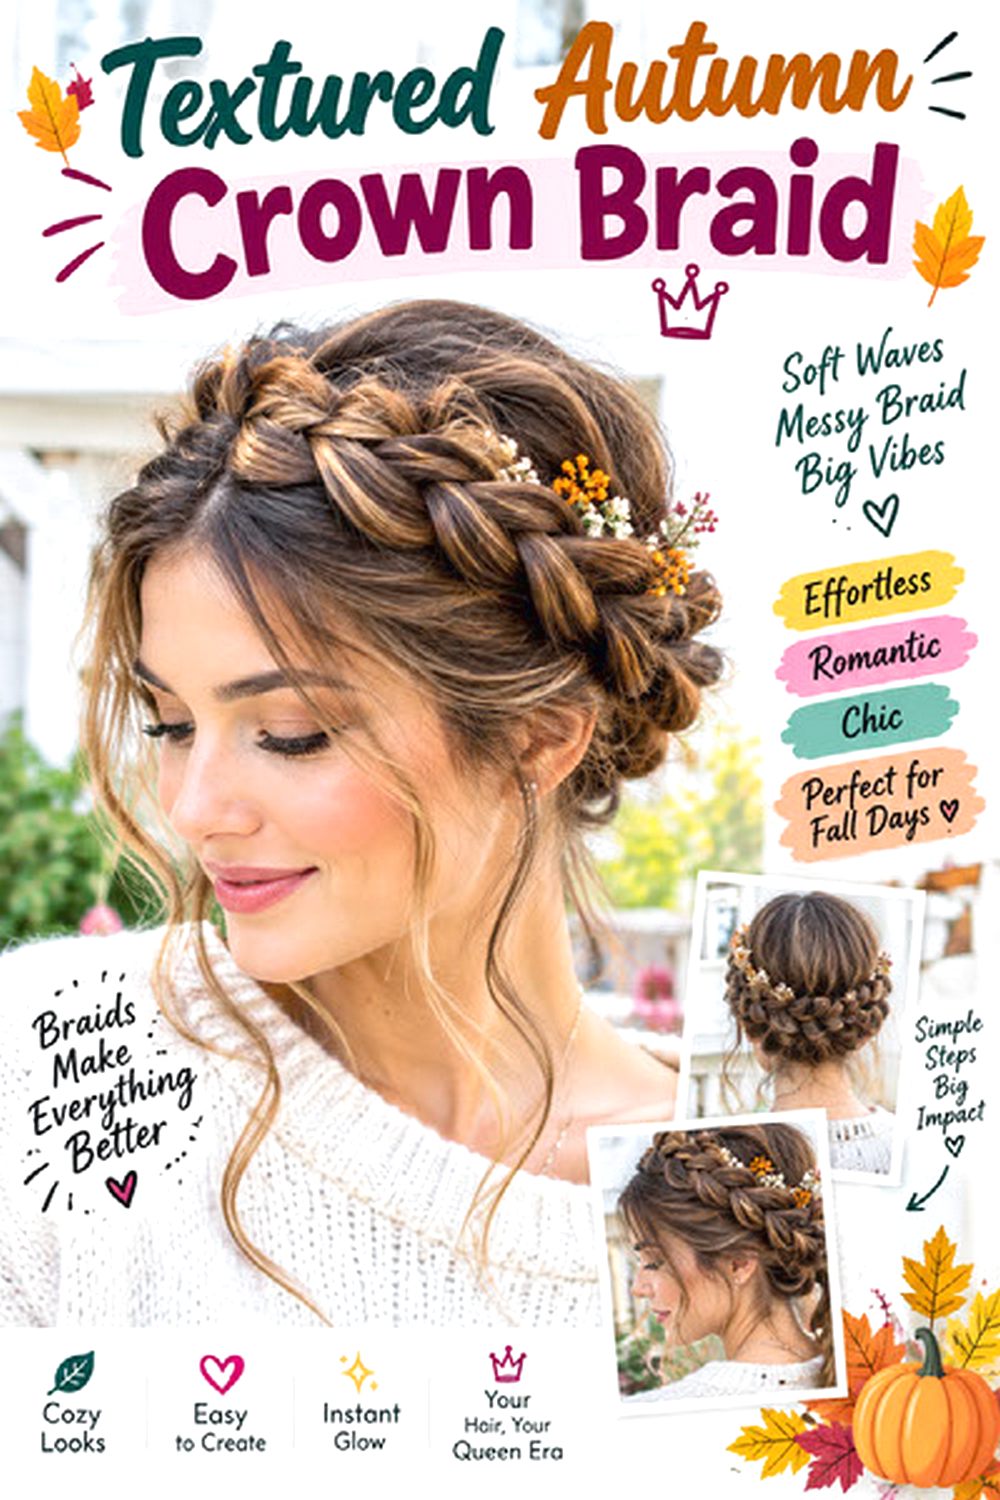
A textured autumn crown braid focuses on softness, visible movement, and a slightly relaxed surface rather than a sleek finish. Begin with natural waves or add gentle bends, then braid around the head without compressing every section. Medium-density wavy hair suits the effect naturally, while straight hair can gain grip from texture spray and thick hair may need some internal weight control. Fine hair should avoid over-pulling the braid apart, since too much loosening can make the sections unstable. Use dry texture spray, a few strong pins, and anti-frizz cream only on the most exposed pieces. Styling takes moderate time, but the finish is forgiving because small irregularities become part of the texture. Humid fall weather can increase frizz, so keep product light rather than coating the entire braid. At the salon, ask for soft, connected layers that encourage movement while preserving enough length around the sides for secure braiding.
Pro tip:
Loosen the crown in small sections after pinning, concentrating on the upper edge; this creates airy volume without weakening the braid underneath.
How to Choose Crown Braid Hairstyles for Fall 2026
The best crown braid hairstyles for Fall 2026 depend on how much structure, texture, and daily effort you want. A full halo keeps all the hair secured, while a half-up crown leaves more length visible. Dutch braids create stronger definition, French braids sit flatter, and messy or curly versions allow more natural movement. Fine hair often benefits from gentle widening and fewer layers, while thick hair may need larger braid sections or internal bulk removal. Fringe, curtain bangs, and face-framing pieces can change the front without altering the braid itself. Placement matters too: a high crown adds height, while a lower braid gives a compact shape near the nape. Choose according to your face shape, natural texture, density, preferred length, maintenance habits, and how much time you realistically want to spend braiding.
Choose one or two favorite ideas and save clear photo references that show the front, sides, and back. Bring those images to your stylist and discuss your face shape, natural texture, density, preferred length, maintenance level, and usual styling routine. Point out the exact braid height, fringe length, face-framing placement, layer starting point, crown volume, or tucked finish you like. Those details help your stylist shape the haircut so your favorite crown braid is easier to recreate instead of fighting short layers, thin ends, or misplaced bulk.
FAQs
How long does hair need to be for a full crown braid?
Medium to long hair is usually easiest because there is enough length to wrap around the head. Shorter hair can still create a half-crown or use two smaller braids pinned together.
Can fine hair look full in a crown braid?
Yes. Use light texture at the roots, braid with gentle tension, and widen only the outer loops after securing the style. Preserving density through the haircut also helps.
Are crown braids suitable for curly and coily hair?
Yes. Work with moisturized hair, use comfortable tension, and account for shrinkage. Leaving a few defined curls around the face can also soften the finished shape.
How can I make a crown braid last longer?
Start with hair that has some grip, secure the braid at several hidden points, and avoid making it painfully tight. Wrapping the style gently at night can also reduce friction and loosened sections.