17 Easy Hairstyles for Second Day Hair That Still Look Fresh
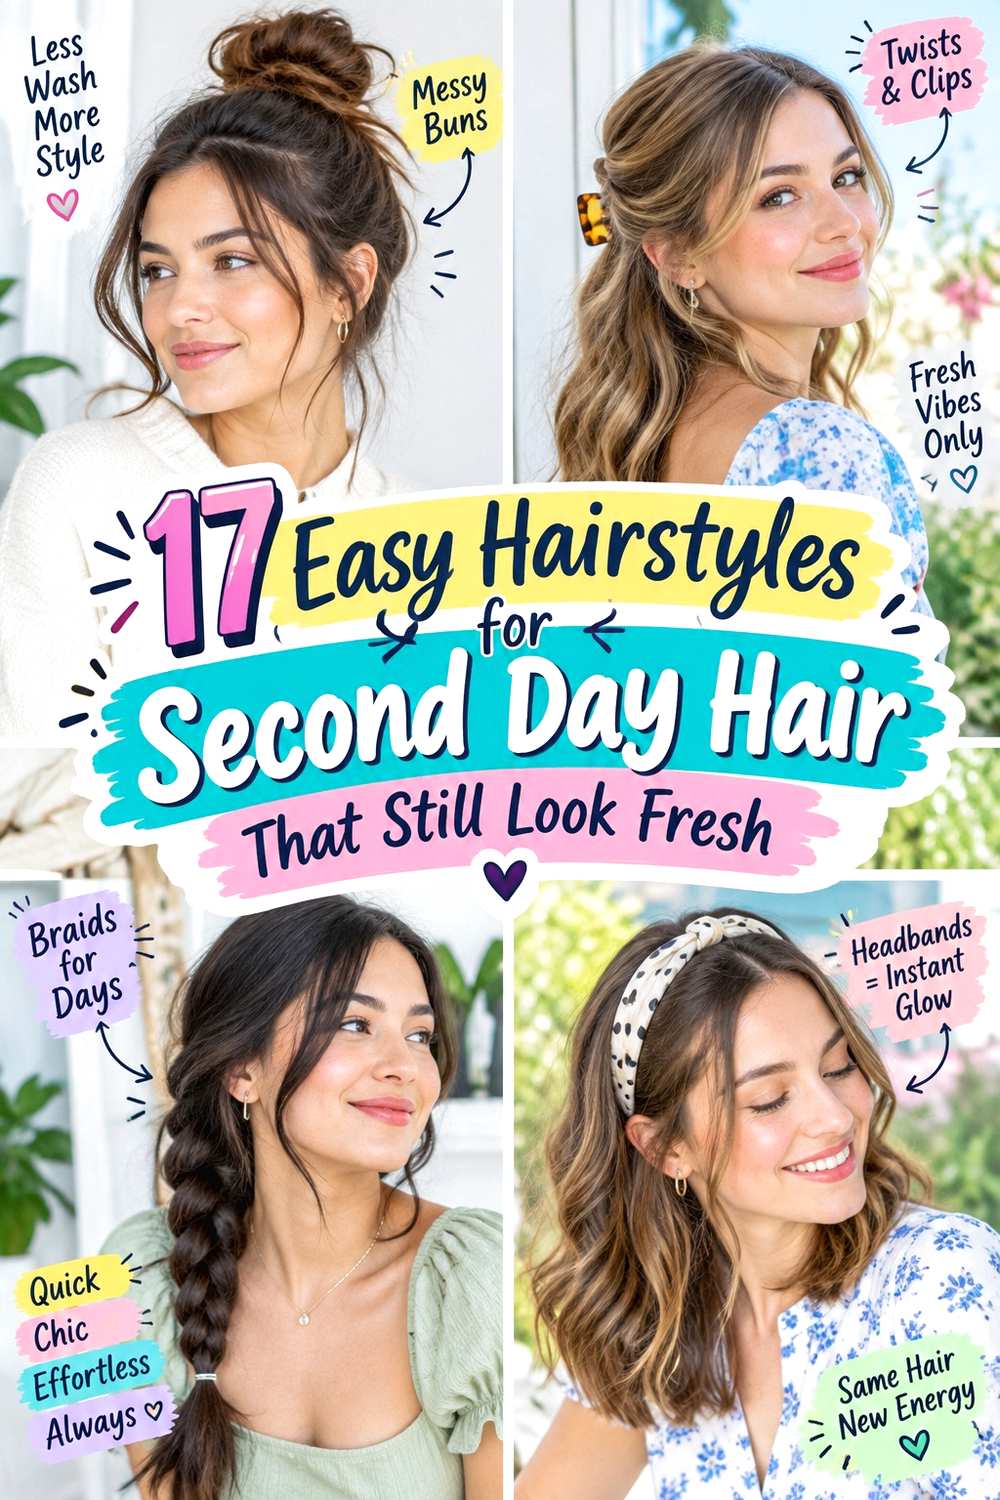
Easy hairstyles for second day hair work best when they use the texture that is already present instead of trying to recreate a full wash-day finish. Slightly settled roots can make braids, buns, twists, ponytails, and claw-clip styles easier to anchor, while the front, fringe, or face-framing pieces can be refreshed separately. The defining goal is balance: control areas that look flat or uneven while keeping useful wave, curl, coil, or natural movement through the lengths.
Straight and wavy hair may need a little root lift or reshaping around the face, while curly and coily textures usually benefit from targeted moisture and minimal disturbance. Fine hair can look fresher when the crown stays light and the lower shape remains full. Dense hair often handles larger buns, puffs, and braids well, but comfortable placement still matters. Parting can also change the impression quickly without requiring a complete restyle.
A quick second-day refresh may take only five to ten minutes, while a full wash-day routine can involve drying, defining, or heat styling from scratch. The practical approach is to fix only what has changed overnight or during wear and leave the rest alone.
Quick List
- Loose Low Ponytail With Face-Framing Pieces Hairstyle
- Textured Claw Clip Twist Hairstyle
- Half-Up Mini Bun Hairstyle
- Soft Side Braid Hairstyle
- Curly Pineapple Refresh Hairstyle
- Coily Puff With Defined Front Hairstyle
- Messy Low Bun With Center Part Hairstyle
- Bubble Ponytail Refresh Hairstyle
- Half-Up Twist With Barrette Hairstyle
- Braided Headband Hairstyle
- Sleek Low Bun Hairstyle
- Loose Waves With Refreshed Front Hairstyle
- Double Mini Braids Hairstyle
- Scarf-Wrapped Ponytail Hairstyle
- Short Bob Side-Tuck Hairstyle
- High Ponytail With Wrapped Base Hairstyle
- Loose Fishtail Braid Hairstyle
Loose Low Ponytail With Face-Framing Pieces Hairstyle
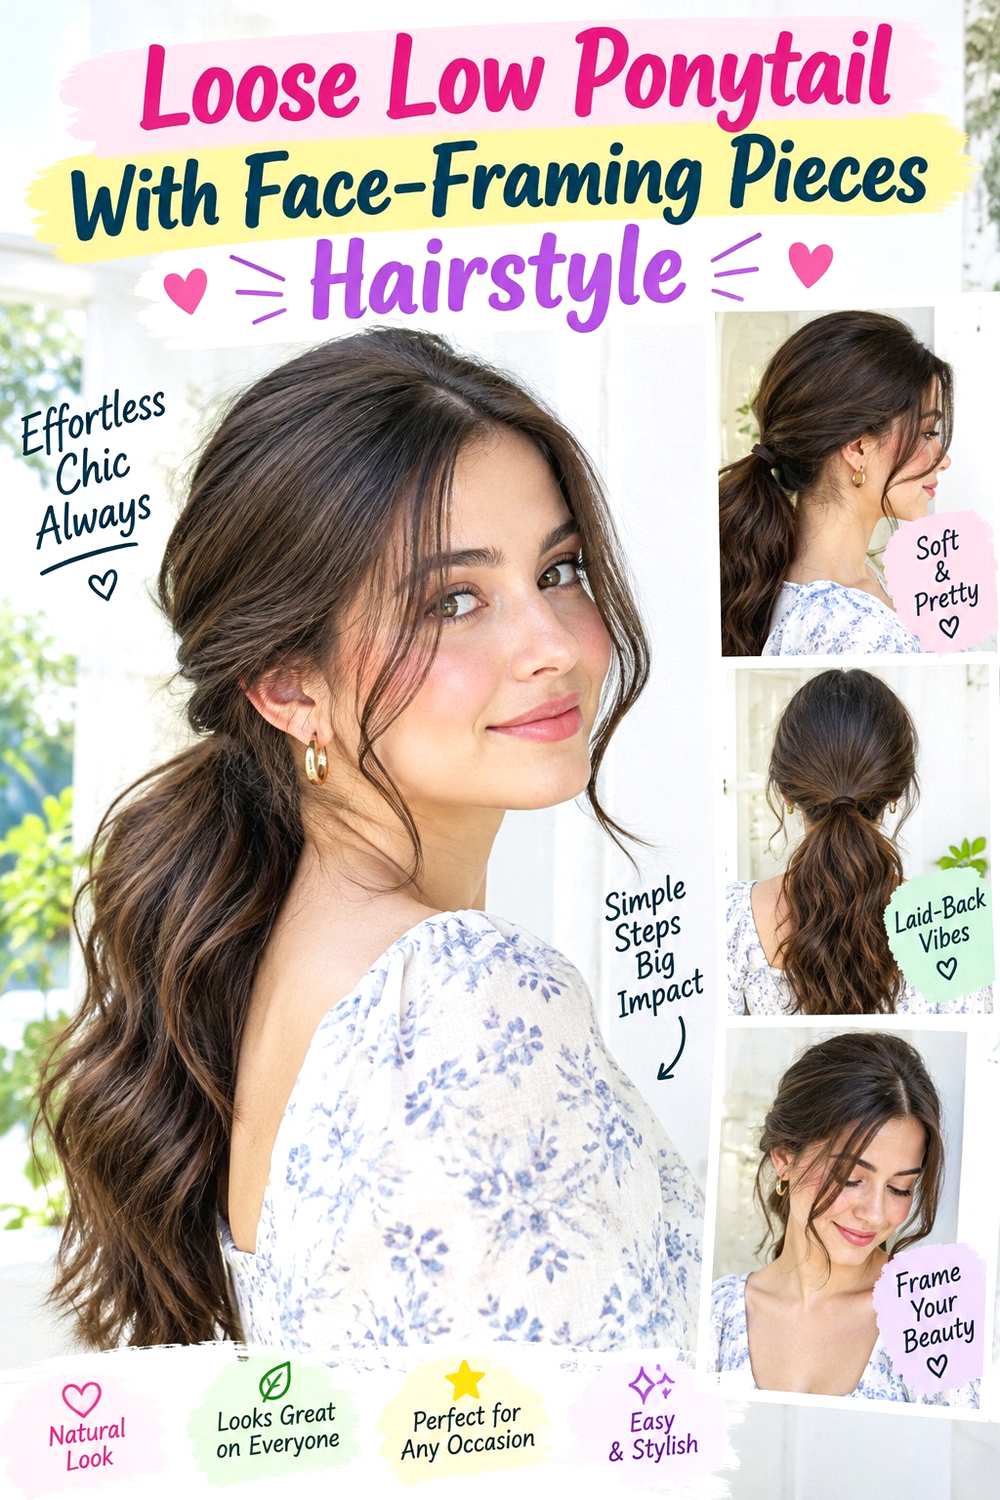
A loose low ponytail is useful when the roots have settled but the lengths still look smooth, wavy, or softly textured. Choose a center or relaxed side part, separate a few pieces around the cheeks or jaw, and gather the rest at the nape. Keep a little natural lift above the elastic instead of pulling the crown perfectly flat. The tail can remain straight, waved, curly, or lightly tousled, and slightly bent ends often make second-day texture feel intentional rather than unfinished.
Straight, wavy, and loosely curly hair can all adapt this style, especially at medium or long lengths. Use dry shampoo only where the roots need oil control, a soft-bristle brush to neaten visible sections, and a fabric-covered elastic for the anchor. A quick refresh may take about five minutes because only the roots and front need attention; full wash-day styling takes longer if you normally dry, curl, or define the entire length.
At the salon, specify where your shortest face-framing layer should land when the ponytail is tied. Pieces around the cheekbone or jaw can soften the front, but layers that are much shorter may fall out unpredictably rather than looking deliberate.
Pro tip:
Apply root refresh only where you actually need it, then let it settle before brushing. Treating the entire head can remove useful second-day texture from areas that already look balanced.
Make It Work for You:
For fine hair, keep the ponytail low and loose rather than overly smoothed. Preserving slight crown lift and a fuller tail usually creates a fresher overall silhouette.
Watch Out For:
Pulling too much hair around the face can make the ponytail look thin. Choose a few deliberate pieces rather than removing large sections from both sides.
Textured Claw Clip Twist Hairstyle
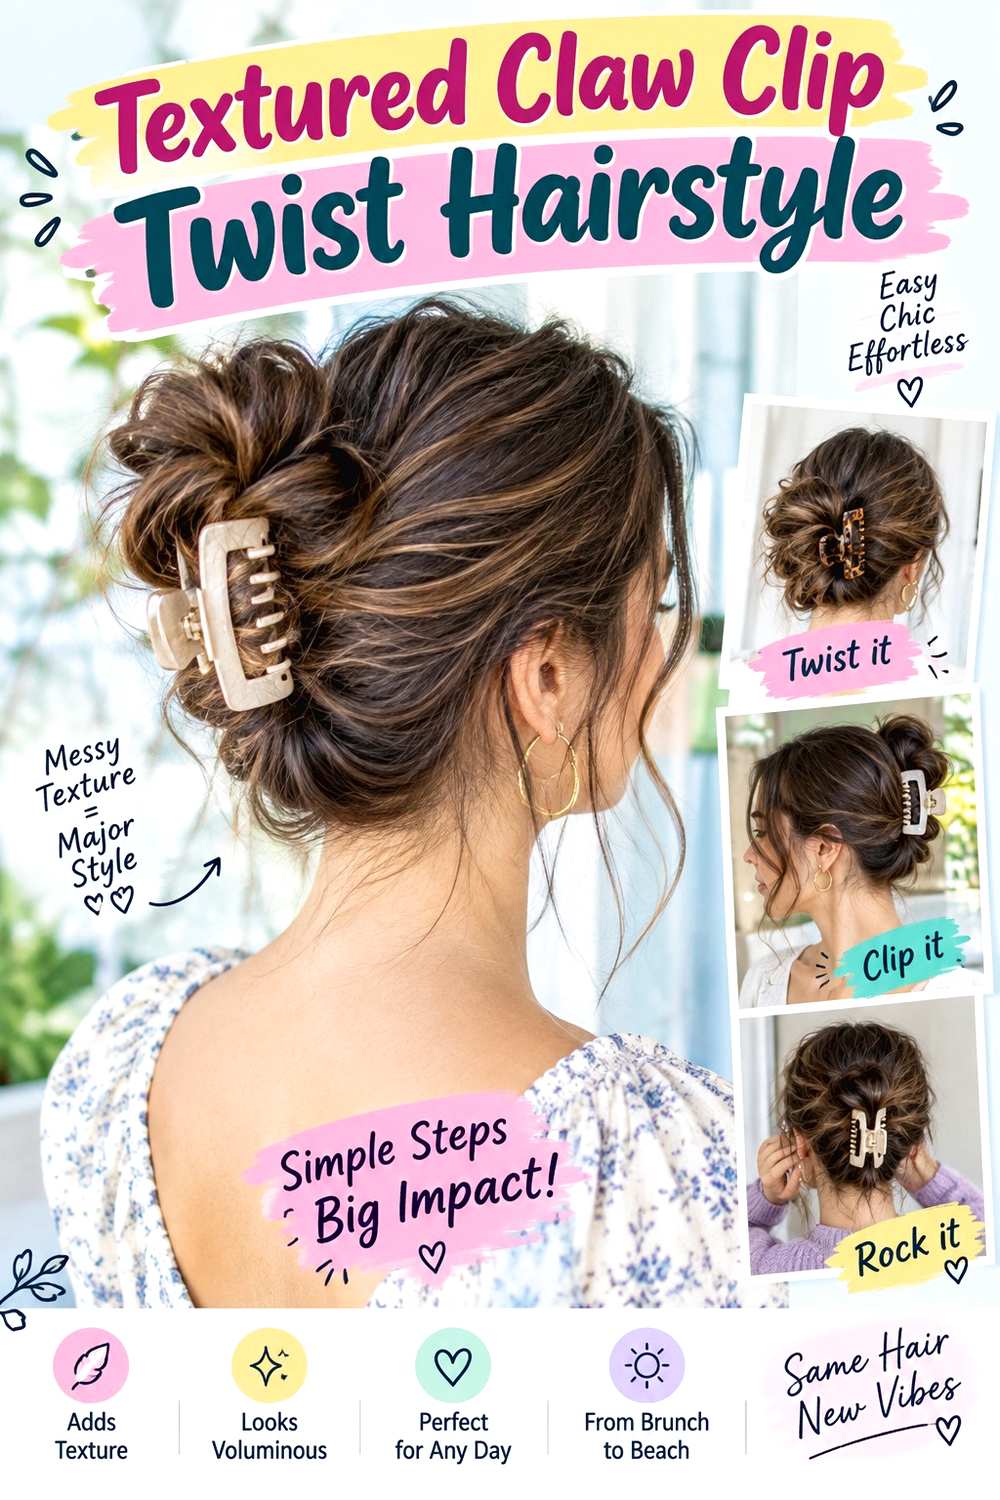
A claw clip twist makes good use of second-day grip because the hair often folds more easily than it does immediately after washing. Gather the length at the center back, twist it upward, and fold the remaining ends down or inward before closing the clip over the thickest part. Leave a few ends visible if the length is medium, or tuck them more fully if the hair is long. A center or casual side part works, while soft pieces near the jaw can keep the front relaxed.
Medium to long straight, wavy, curly, or lightly coily hair can use this shape if the claw is sized correctly. Use texturizing spray for extra grip and a deep-tooth claw clip as the main anchor. A quick refresh may take only two to four minutes because there is no need to restyle the entire length; a full wash-day finish takes longer if you prefer smoother or more defined texture first.
If the twist falls out, choose a deeper clip rather than twisting harder. For salon planning, mention how often you wear claw clips so the back layers can remain long enough to reach the fold comfortably. Very short crown or nape layers may escape more easily.
Pro tip:
Fold the hair to match the length of your claw before closing it. A better fit allows more teeth to engage, which improves hold without extra scalp tension.
Make It Work for You:
For dense hair, use a wider fold and deeper claw instead of compressing everything into a narrow twist. Spreading the section makes the anchor more comfortable.
Watch Out For:
A claw that barely closes is too small. Forcing the teeth together can pull strands, create pressure, and make the twist spring open unexpectedly.
Half-Up Mini Bun Hairstyle
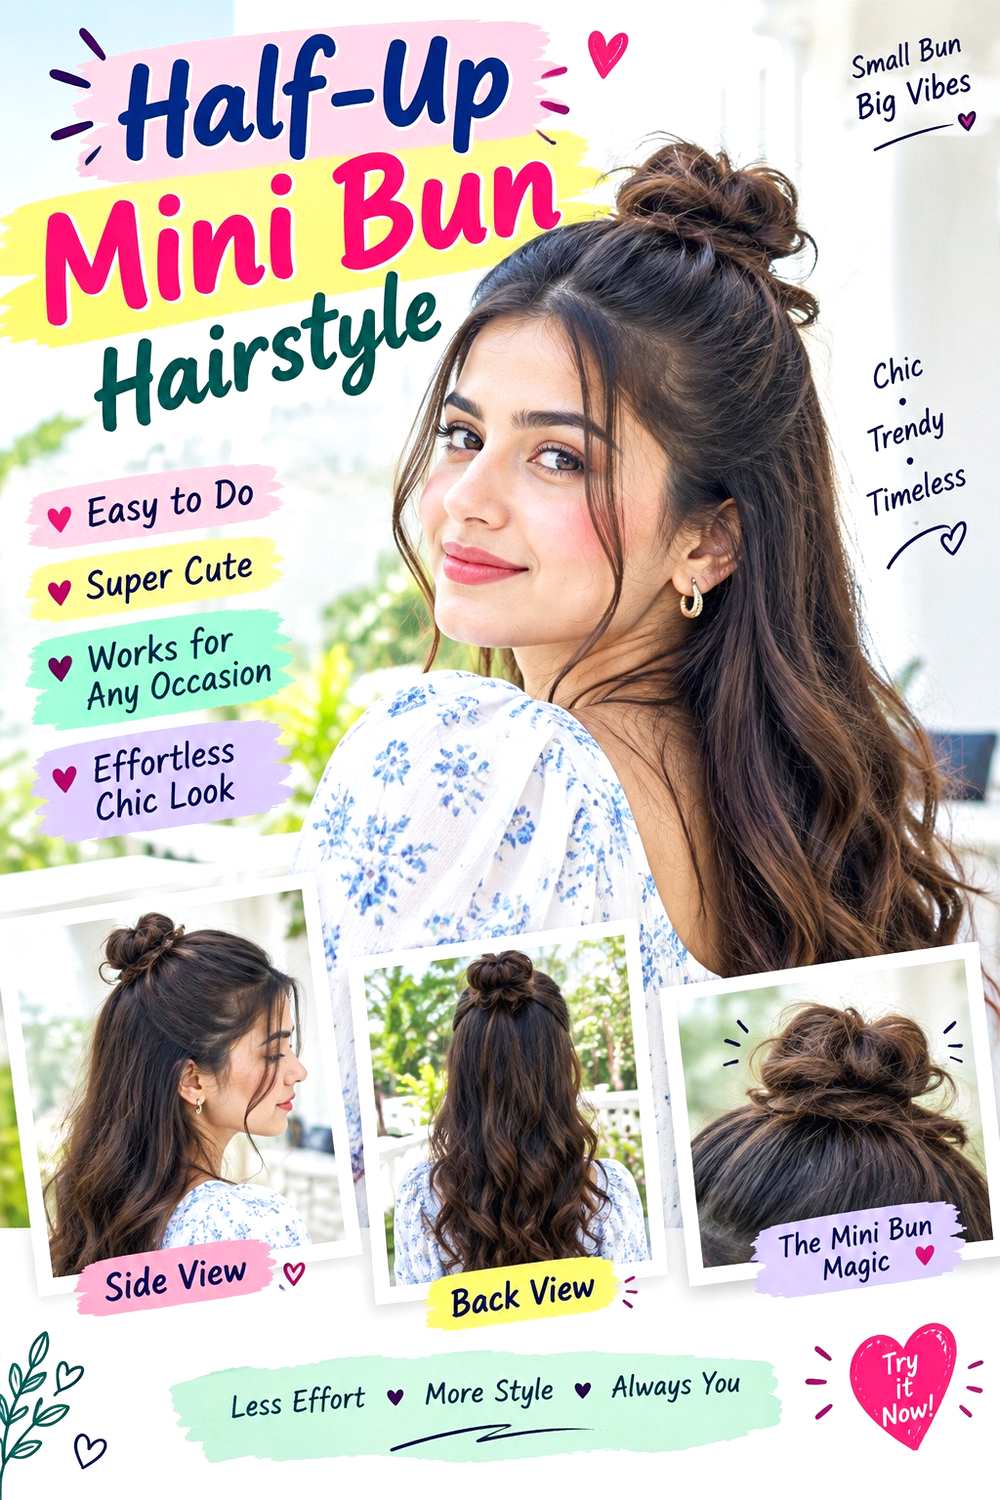
A half-up mini bun hides flatter crown sections while leaving useful second-day texture through the lower hair. Gather a shallow section from the temples and upper crown, secure it slightly below the highest point of the head, then wrap that small tail into a compact bun. Keep the lower lengths loose, whether they are straight, softly waved, curly, or tousled. Face-framing pieces can remain free, and the bun should stay proportionate instead of taking half the hair away from the lower silhouette.
Medium and long hair works best, particularly when the crown section is long enough to wrap once. Use a small fabric-covered elastic for the anchor and two bobby pins to secure the bun. A quick refresh may take five minutes because only the top section is rebuilt; full wash-day styling takes longer if the loose lengths normally require heat styling or curl definition.
If the lower hair suddenly looks sparse, use less hair in the bun rather than teasing underneath. At the salon, specify how short you want crown layers, especially if you regularly wear half-up styles. Longer upper layers make the mini bun easier to secure and create fewer loose ends during grow-out.
Pro tip:
Build the bun from a smaller section than you think you need. A compact top knot usually holds better and leaves more movement and fullness through the lower hair.
Make It Work for You:
For fine hair, gather only the upper temple area and keep the bun small. This preserves density below while still refreshing a flatter crown quickly.
Watch Out For:
Do not keep adding hair to make the bun larger. An oversized upper section can leave the loose lengths thin and make the whole style feel top-heavy.
Soft Side Braid Hairstyle
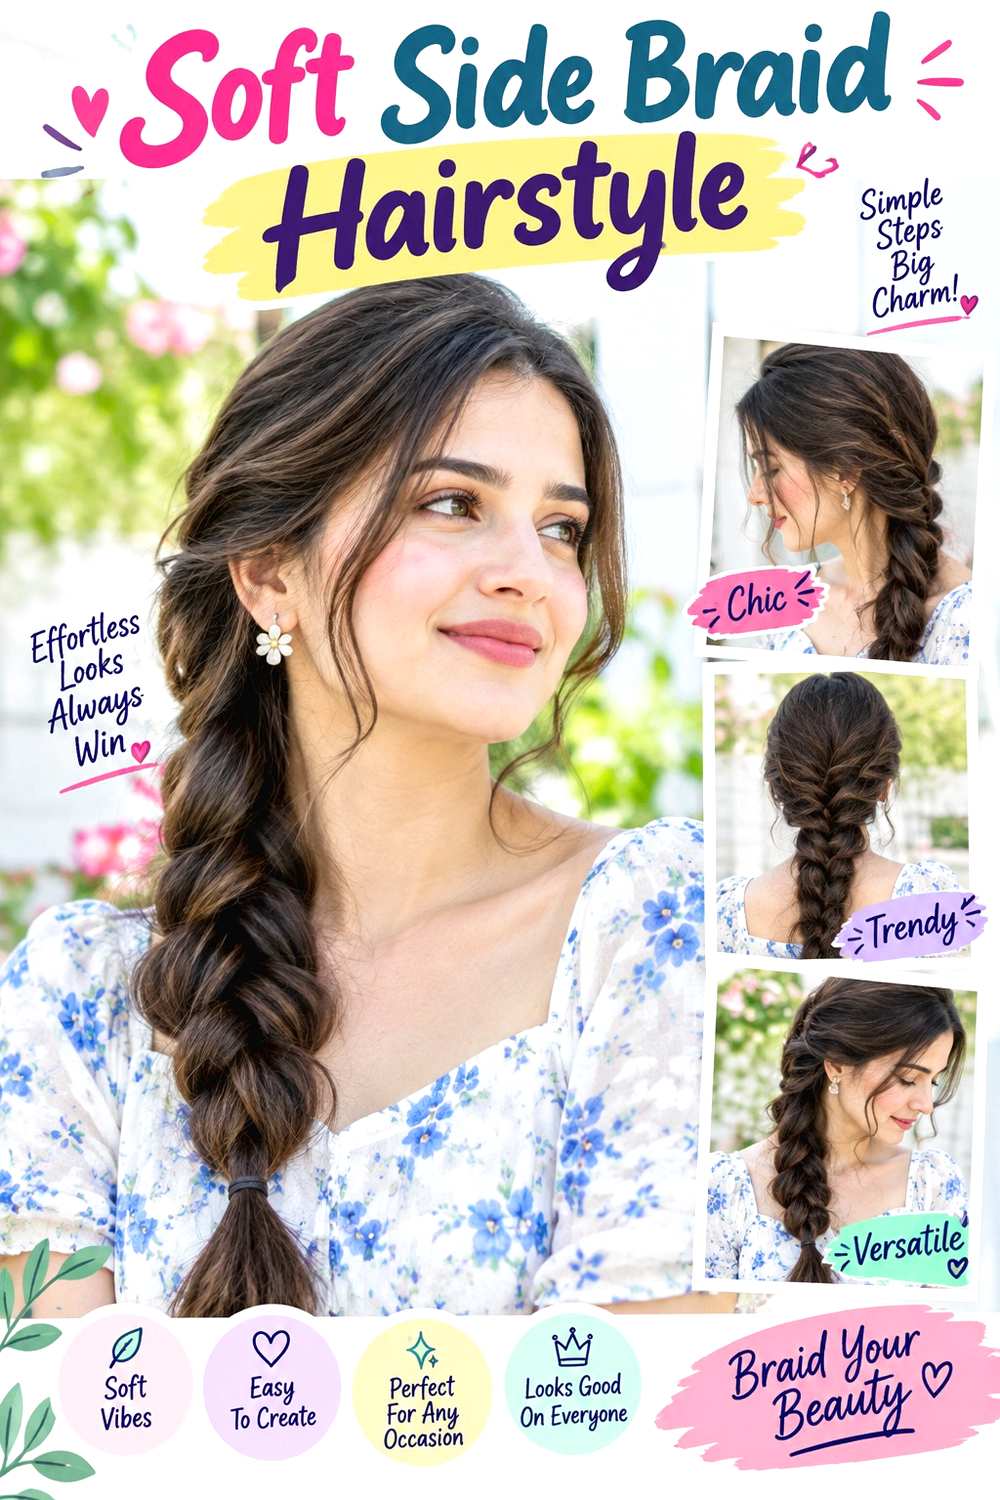
A soft side braid is useful when second-day lengths have extra grip but the roots no longer feel freshly styled. Use a side or off-center part, bring the hair behind one ear, and begin a three-strand braid around the lower ear or nape. Keep the first crossings secure, then loosen selected middle sections for softness. Let short pieces around the face remain free instead of trying to trap every layer, and keep the tail end compact enough that the braid does not unravel quickly.
Medium to long hair works particularly well, including straight, wavy, curly, and loosely textured hair. Use light styling cream to control surface flyaways, a fabric-covered elastic for the braid end, and a wide-tooth comb only if the loose sections need gentle detangling first. A quick refresh may take five to eight minutes; a full wash-day style takes longer if detangling and drying are required beforehand.
For salon planning, specify which front layers you want to stay loose when braiding. Layers ending around the jaw can create intentional framing, while very short pieces may need more frequent resetting. If the braid slips, tighten its upper crossings rather than pulling the entire style harder.
Pro tip:
Secure the braid before loosening its outer edges. A finished tail gives you a stable base, so you can soften selected sections without creating slack near the scalp.
Make It Work for You:
For fine hair, loosen only alternating outer sections rather than every crossing. Selective softness adds width while keeping the braid visually dense through the tail.
Watch Out For:
Over-loosening near the ear can make the whole braid sag. Keep the first few crossings firm and create most of the softness farther down.
Curly Pineapple Refresh Hairstyle
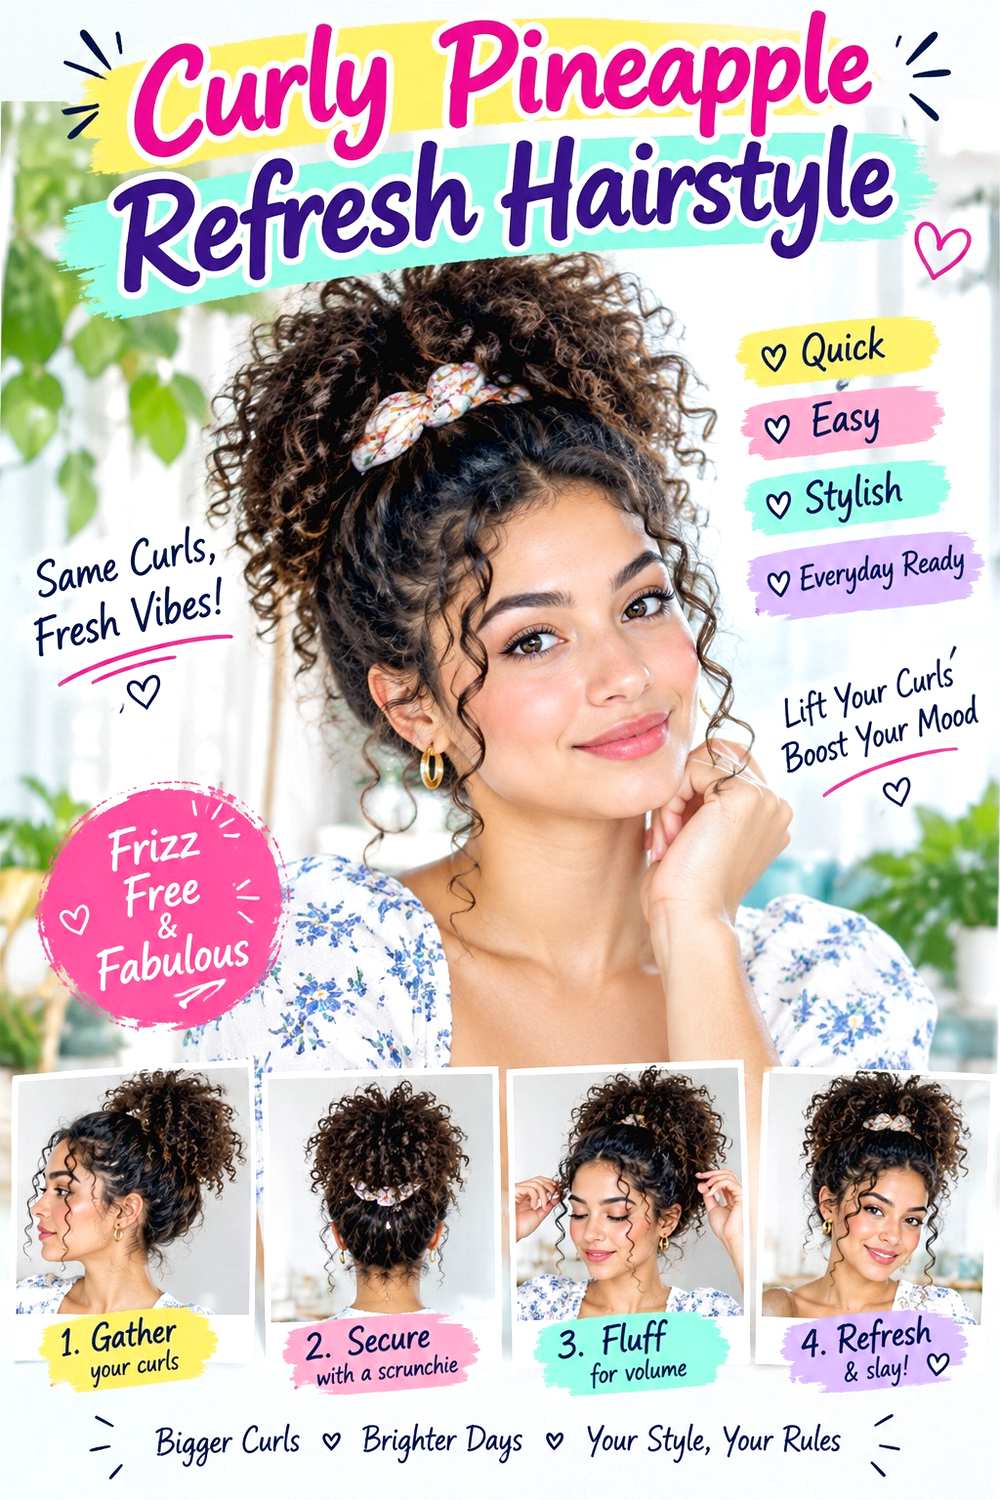
A loose pineapple can refresh second-day curls by lifting them away from flattened areas while keeping the curl pattern visible. Gather the curls high and slightly forward, using only enough tension to hold the base without stretching the sides. Let the ends spill naturally over the top or toward one side, and separate a few curls around the temples if you prefer softer framing. The finished shape should look rounded and springy rather than tightly pulled into a conventional high ponytail.
Medium and long curly hair usually works best because the curls need enough length to gather comfortably. Use a fine-mist spray bottle to lightly reactivate only flattened sections, curl gel to redefine a few visible pieces, and a soft scrunchie for the loose anchor. A quick refresh may take five to ten minutes; full wash-day styling takes substantially longer because the entire curl pattern needs washing, defining, and drying.
If the pineapple becomes smaller as the curls dry, accept the normal shrinkage instead of tightening the base. For salon shaping, specify where you want shorter front curls to land when dry. Those pieces can remain loose rather than being forced into the top anchor.
Pro tip:
Refresh only the curls that lost their shape overnight. Leaving intact curl groups alone reduces frizz and keeps the second-day routine much faster than rewetting everything.
Make It Work for You:
For shorter curls, position the pineapple slightly lower and let the front pieces stay loose. You can keep the lifted effect without overstretching sections that cannot reach.
Watch Out For:
Too much water can make the entire style shrink and reset unevenly. Mist selectively instead of soaking curls that already have good definition and shape.
Coily Puff With Defined Front Hairstyle
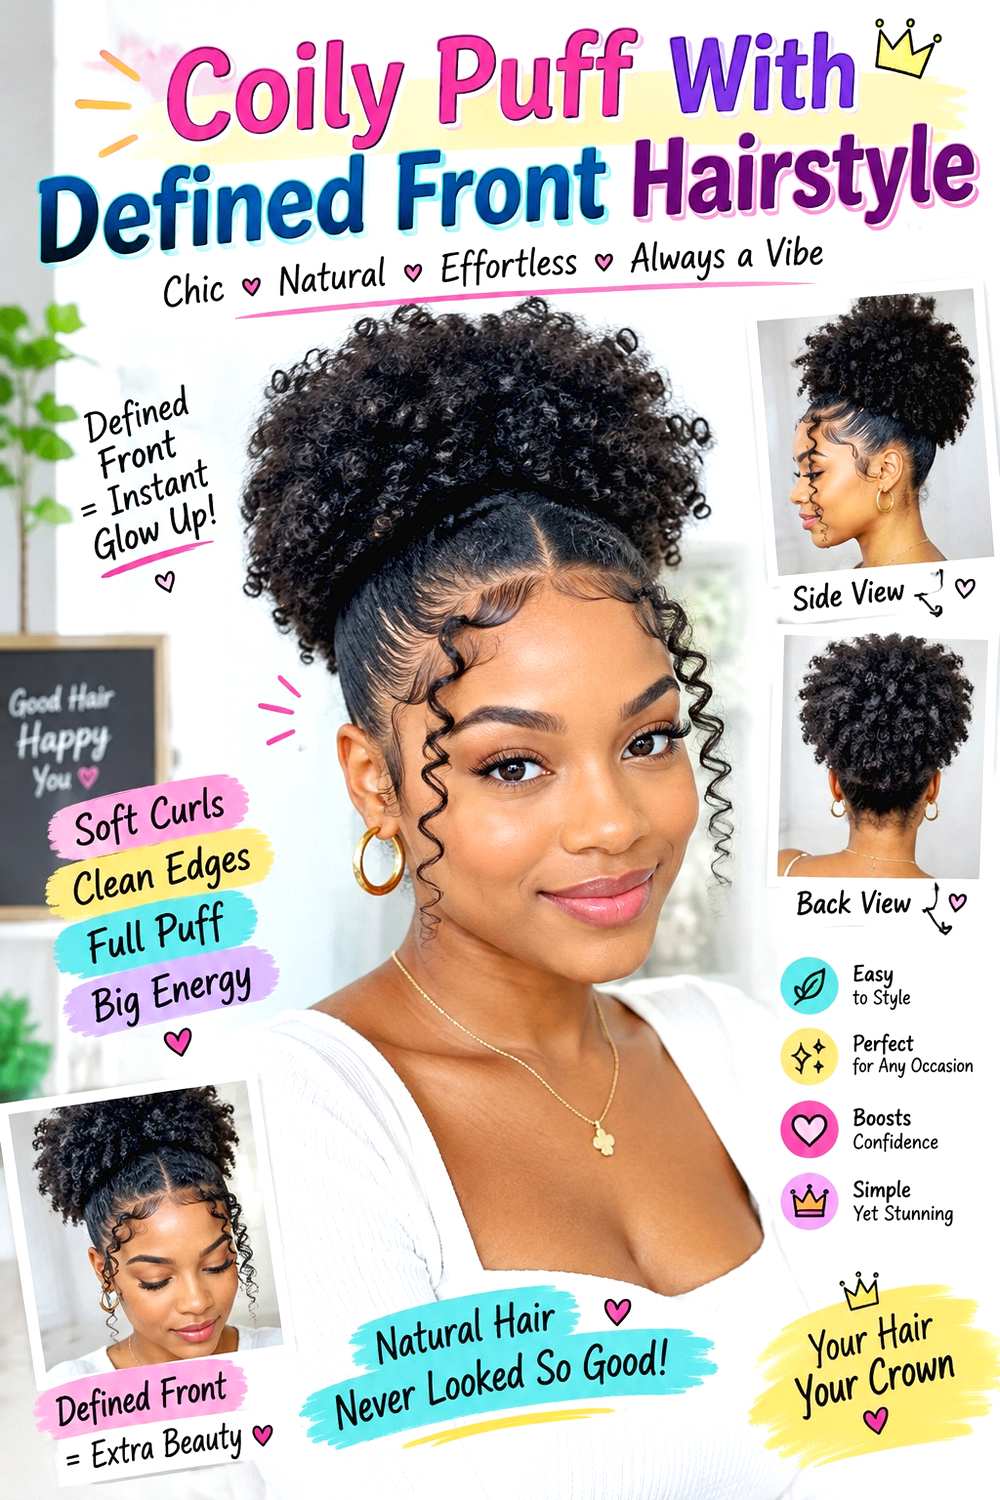
A coily puff can make second-day hair look intentional by refreshing the front while letting the established texture remain full at the back. Gather the hair into a low, mid-height, or high puff with comfortable tension, then shape the outer coils rather than stretching them flat. Leave selected coils near the temples or forehead if they already frame the face well. A center, side, or natural part can all work, depending on how the front texture settled overnight.
Coily hair with enough length to gather can use this style without heat. Apply moisturizing leave-in conditioner only where the front feels dry, use a small amount of curl gel to redefine visible coils, and secure the puff with a fabric-covered elastic. A quick refresh may take five to ten minutes; full wash-day styling takes longer because detangling, conditioning, defining, and drying cover the entire head.
If the puff has compacted overnight, reshape its perimeter with your hands instead of pulling the base tighter. At the salon, specify where you prefer bulk to sit and how long the front coils should appear when dry. Shrinkage should guide those decisions so the puff stays balanced in its natural state.
Pro tip:
Shape the outer puff after securing the base. Working around the perimeter last lets you restore width and height without repeatedly disturbing the anchor.
Make It Work for You:
For very dense coils, use a broader puff base and moderate height. Spreading the gathered section can feel more comfortable than concentrating all the weight at one point.
Watch Out For:
Do not brush the entire front repeatedly for extra smoothness. Refine only the areas that need control so natural coil texture remains visible and comfortable.
Messy Low Bun With Center Part Hairstyle
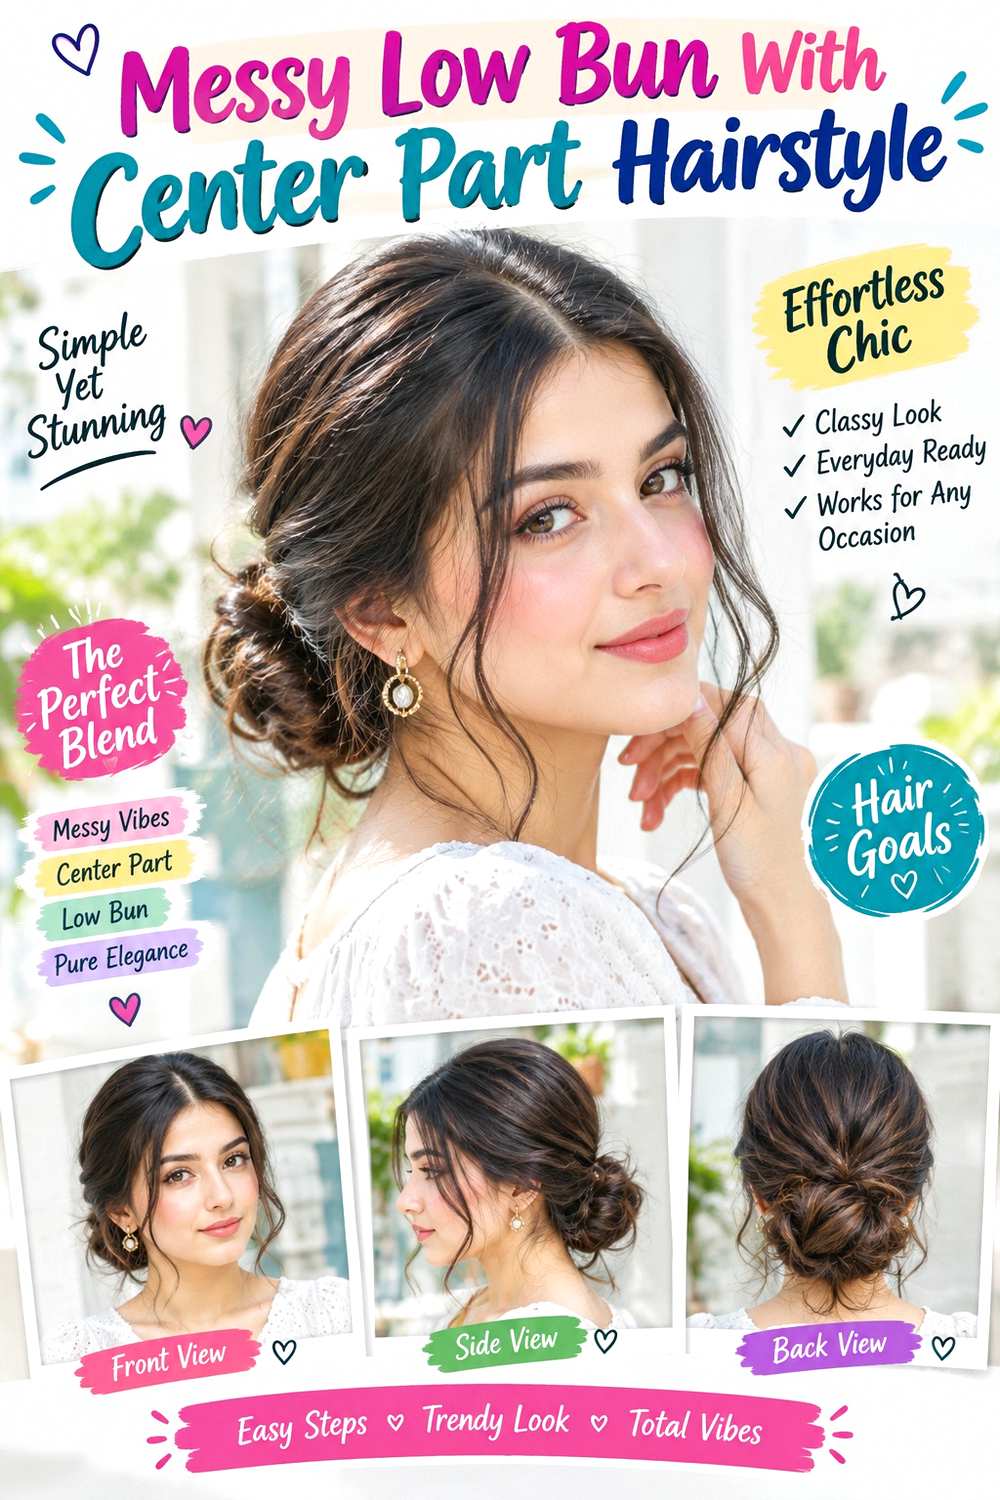
A messy low bun can make slightly settled roots work in your favor because the style looks best with a controlled front and softer texture at the nape. Create a center part, gather the hair low, fold the ponytail into a loose loop, and wrap or tuck the remaining ends around the base. Keep the bun compact but irregular, allowing a few short ends to remain visible. Narrow pieces around the jaw can soften the symmetry without making the front look unplanned.
Medium to long straight, wavy, or softly curly hair suits this shape well. Use dry shampoo only at oily root areas, a fabric-covered elastic for the bun base, and bobby pins to secure loose ends. A quick refresh may take five to seven minutes; a full wash-day bun requires more time only if you normally dry or smooth the hair first.
If the bun starts dropping, rebuild the central loop instead of tightening the front. For salon planning, specify whether you like jaw-length face framing and how much perimeter weight you want to keep. Longer layers around the back usually stay inside the bun more easily, while shorter pieces create a deliberately undone finish.
Pro tip:
Build the bun securely before pulling out any soft pieces. A firm center lets you loosen the perimeter without accidentally weakening the entire nape structure.
Make It Work for You:
For fine hair, keep the bun small and loosen only a few outer sections. A compact shape usually looks fuller than an oversized bun stretched into gaps.
Watch Out For:
Do not pull repeatedly at the center part when the bun shifts. Fix the nape anchor instead so the front stays smooth without unnecessary tension.
Bubble Ponytail Refresh Hairstyle
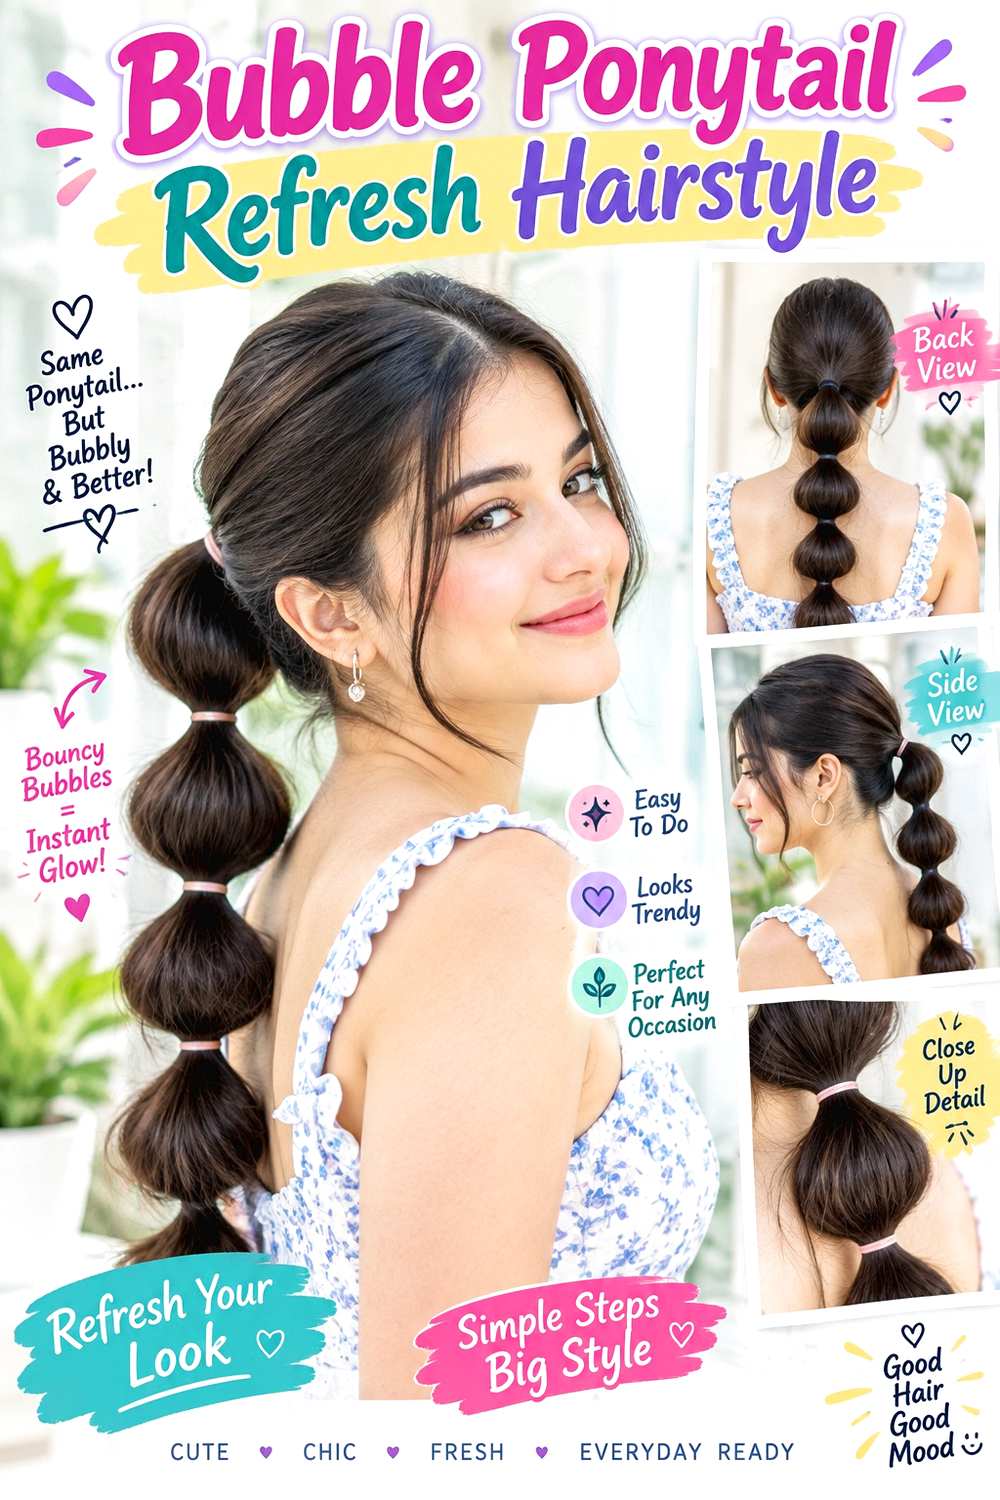
A bubble ponytail can disguise uneven second-day bends by turning the tail into a repeated rounded pattern. Gather the hair into a low or mid-height ponytail, then place small elastics at regular intervals down the length. Gently expand each section into a bubble, keeping the first one slightly smaller and the later sections fuller. A center or side part works well, and short face-framing pieces can remain loose instead of being forced into the main anchor.
Medium-long and long hair gives enough length for multiple bubbles. Use dry shampoo at the roots if they need oil control and snag-free elastics for the main ponytail and repeated sections. A quick refresh may take six to ten minutes because the existing length does not need to be restyled; full wash-day styling takes longer if you normally dry or smooth the hair first.
If the tail is fine, keep the elastics closer together and expand the bubbles only slightly. For salon planning, mention whether you frequently wear ponytails so shorter layers can be placed intentionally. A strong lower perimeter gives the final bubble more substance, while excessive short layering can make sections escape unevenly.
Pro tip:
Place every elastic before expanding the bubbles. Seeing the whole length first makes spacing easier to adjust and prevents the lower sections from becoming disproportionately large.
Make It Work for You:
For dense hair, use slightly wider spacing and modest expansion. Natural fullness already creates clear bubbles, so you do not need to pull each section dramatically.
Watch Out For:
Over-expanding the first bubble can loosen the main ponytail. Keep the upper section controlled and create more volume through the middle and lower tail.
Half-Up Twist With Barrette Hairstyle
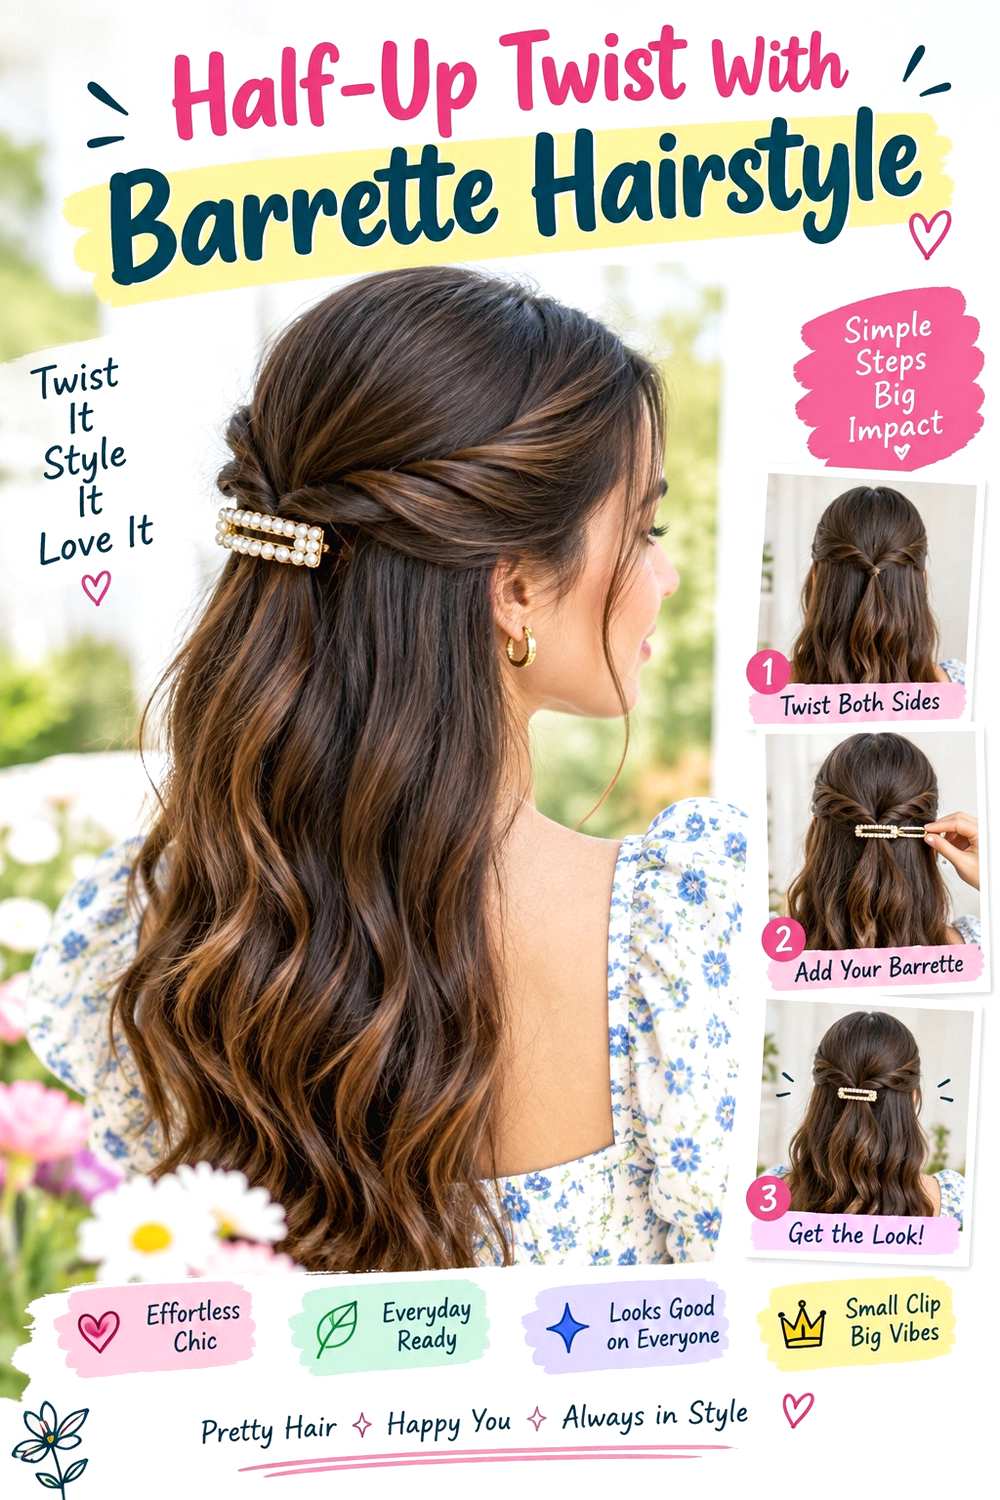
A half-up twist with a barrette is useful when the crown needs control but the lower lengths still look good on day two. Take a shallow section from each temple, twist both pieces backward, and cross or join them below the crown. Leave the remaining hair straight, wavy, curly, or naturally textured, with a few face-framing pieces free if desired. The barrette should sit over a stable center connection rather than trying to hold a large amount of hair by itself.
Medium and long hair works best when the side sections reach the center comfortably. Use texturizing spray for grip, bobby pins to stabilize the joined twists, and a lightweight barrette for the visible finish. A quick refresh may take three to five minutes; full wash-day styling takes longer if the lower hair normally needs heat or definition.
If one twist repeatedly slips, lower the meeting point rather than tightening the temple area. For salon planning, specify where your shortest front layers finish and whether you often wear half-up styles. Side layers that reach at least toward the back of the ear give you more options, while shorter pieces can remain as deliberate framing.
Pro tip:
Pin the twists together before adding the barrette. A hidden stable center keeps the accessory level and lets you reposition it without rebuilding the whole style.
Make It Work for You:
For fine hair, gather very shallow side sections and use a lightweight clip. More hair left loose below helps the lower silhouette stay full.
Watch Out For:
A heavy barrette can drag the entire half-up section downward. Choose a lighter accessory rather than compensating with tighter twists around the temples.
Braided Headband Hairstyle
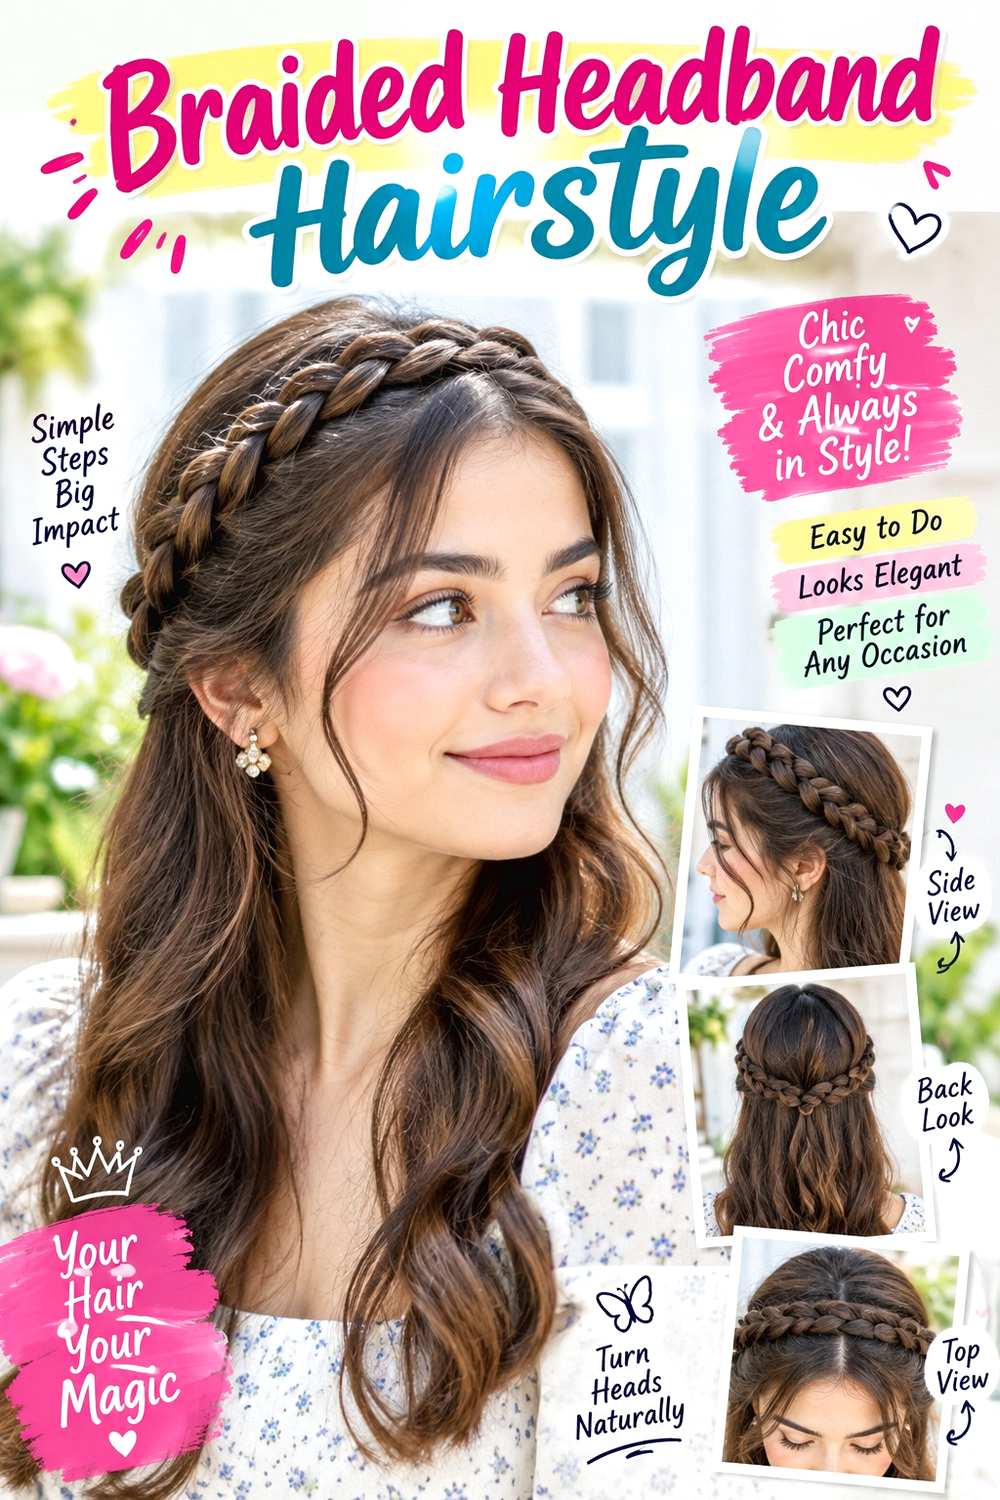
A braided headband redirects attention from second-day roots while leaving most of the hair loose. Take a narrow section from behind one ear, braid it, then bring the braid across the top of the head like a slim band and secure it behind the opposite ear. Keep the remaining lengths straight, wavy, curly, or softly tousled, and allow shorter pieces around the face to stay free. The braid should sit slightly behind the hairline so it looks integrated rather than perched directly on the forehead.
Medium and long hair works best because the braid needs enough reach to cross comfortably. Use texturizing spray for grip, a small clear elastic for the braid end, and bobby pins to secure the hidden endpoint. A quick refresh may take five to eight minutes; full wash-day styling depends on the loose texture below.
If the braid cannot reach without pulling, start farther back or use two shorter braids that meet near the top. For salon planning, specify whether you like shorter front layers or fringe because those pieces can remain loose while the braid sits behind them. This style does not require a special haircut, only enough length in the chosen braid section.
Pro tip:
Secure the braid behind the opposite ear before softening it. Once the endpoint is stable, you can gently widen selected sections without making the headband sag.
Make It Work for You:
For fine hair, keep the braid narrow and leave the rest loose. A slim woven band adds detail without removing too much density from the main shape.
Watch Out For:
Do not stretch the braid tightly across the crown just to make it reach. Shorten the route or use two sections if the scalp feels pulled.
Sleek Low Bun Hairstyle
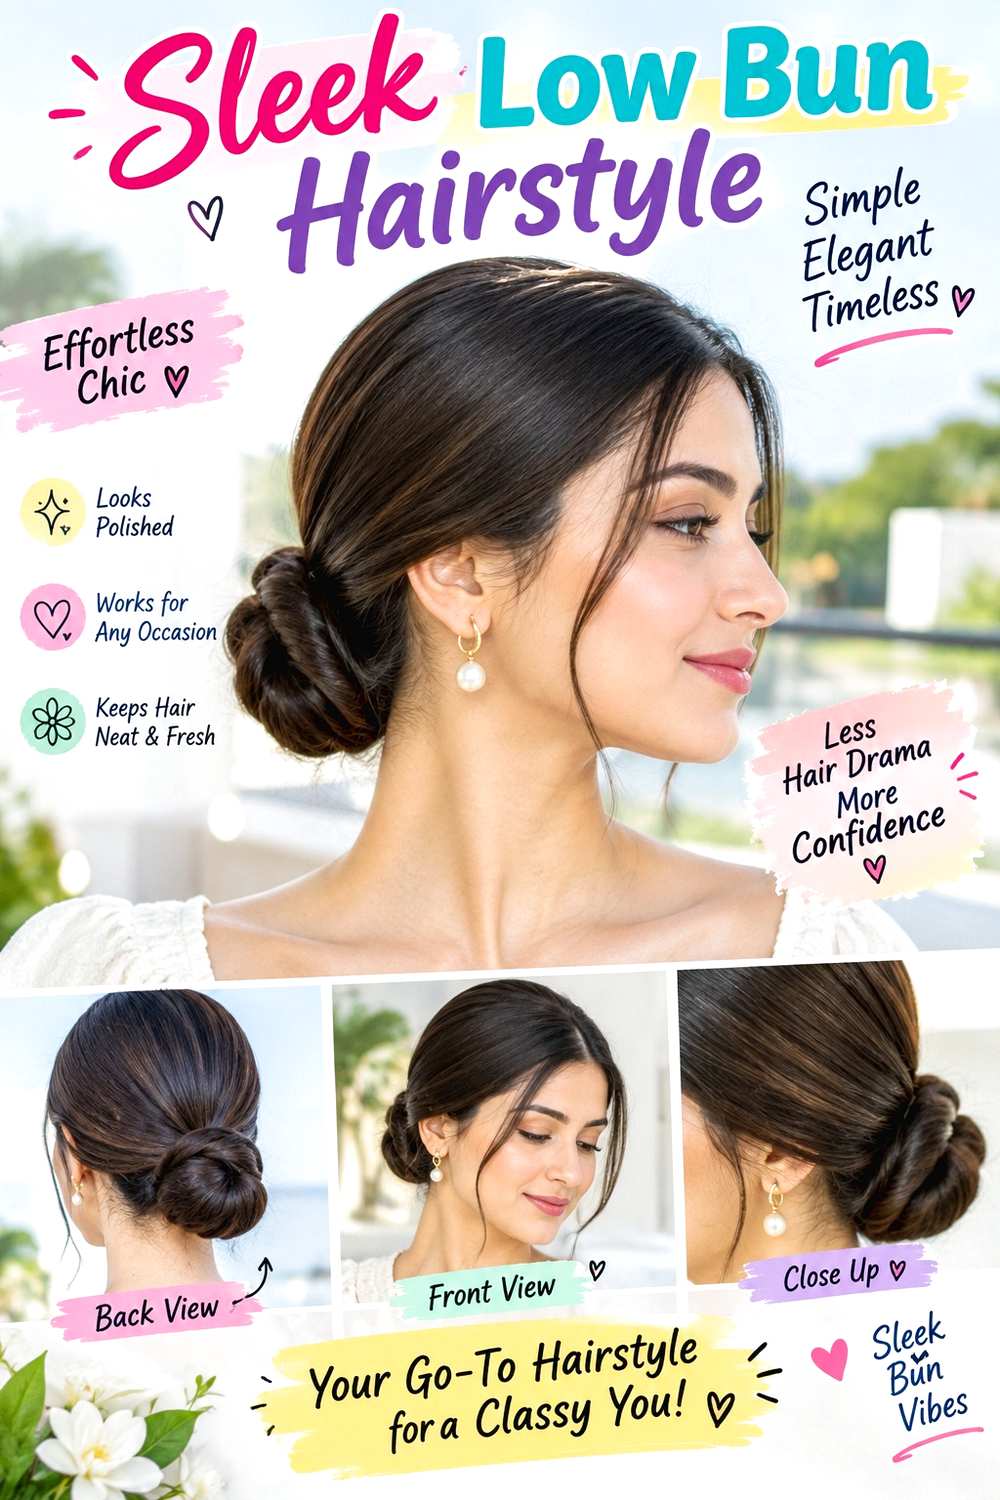
A sleek low bun is useful when second-day roots are already flatter and you want to turn that settled texture into a deliberate finish. Choose a center or side part, guide the hair smoothly toward the nape, secure a low ponytail, and twist or fold the length into a compact bun. Keep the crown controlled rather than heavily coated, and tuck short flyaways only where they interrupt the intended clean line.
Medium to long straight, wavy, curly, or stretched textured hair can use this shape. Apply light styling cream to smooth the visible surface, use a soft-bristle brush to direct the crown, and secure the bun with a fabric-covered elastic. A quick refresh may take five to eight minutes because the roots do not need fresh volume; a full wash-day sleek style takes longer if drying or stretching comes first.
If the bun loosens, rebuild the nape anchor instead of brushing the front repeatedly. For salon planning, specify whether you prefer a clean one-length outline or face-framing pieces left loose when the hair is tied back. Very short layers around the nape can escape from a polished bun more quickly as the cut grows.
Pro tip:
Use the natural second-day direction of the roots instead of fighting it. A part that already sits neatly can reduce brushing and help the front look smoother faster.
Make It Work for You:
For dense hair, create a wider, flatter bun rather than a tight round knot. Spreading the length distributes weight and can feel more comfortable.
Watch Out For:
Too much smoothing product can make the roots look greasy rather than polished. Start with a small amount and add only where flyaways remain visible.
Loose Waves With Refreshed Front Hairstyle
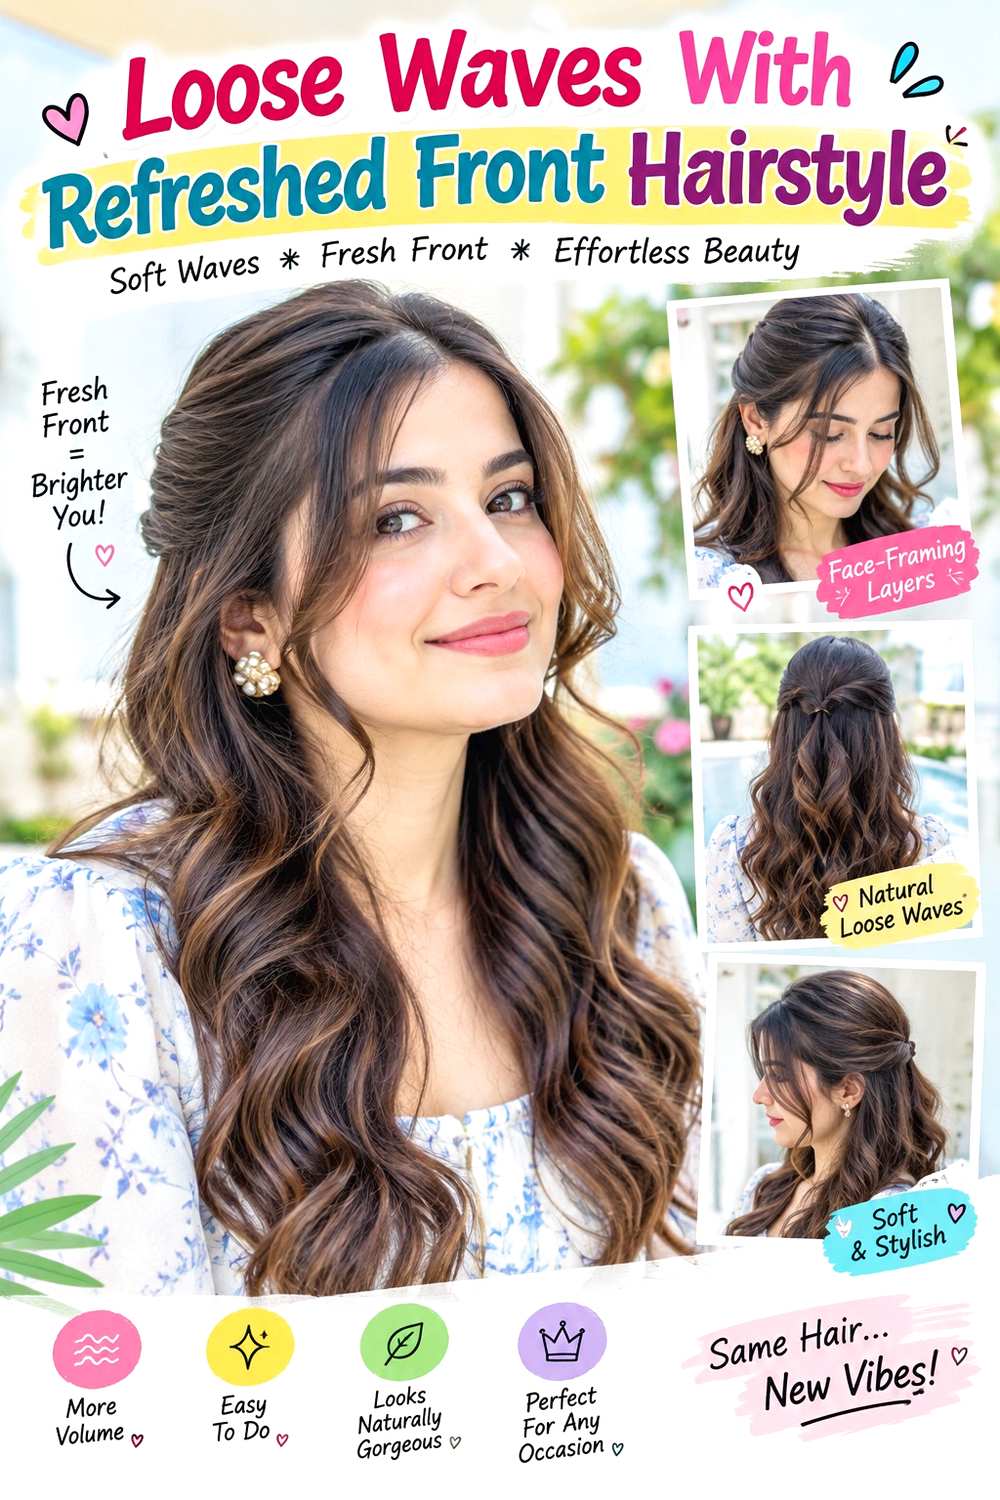
If most of your second-day waves still look good, refreshing only the front can make the whole hairstyle feel more finished. Keep the existing bends through the back and lower lengths, then identify one or two flattened sections around the part or face. Recreate only those curves so they blend with the older texture. A center or side part works, and slightly uneven movement through the ends can look natural as long as the face-framing sections appear deliberate.
Shoulder-length and longer straight or wavy hair suits this approach especially well. Apply heat protectant to the sections you plan to restyle, use a large-barrel curling iron only on those pieces, and finish with flexible hairspray for light hold. A quick refresh may take five to ten minutes; full wash-day styling can take much longer because every section would need drying and waving.
For salon planning, specify where the shortest face-framing layer should start so it can hold a visible bend around the cheek or jaw. If the front layers are extremely short, they may need daily attention even when the rest of the waves last well. Keeping the back layers longer usually helps second-day movement remain cohesive.
Pro tip:
Match the direction and size of the existing waves instead of creating perfect new curls. The goal is blending refreshed pieces into yesterday’s texture, not replacing it.
Make It Work for You:
For fine hair, refresh only the front and avoid reheating the whole length. Leaving intact waves alone helps preserve body and reduces unnecessary handling.
Watch Out For:
Repeated heat on the same face-framing pieces can add up quickly. Use protection and restyle only sections that genuinely lost their shape.
Double Mini Braids Hairstyle
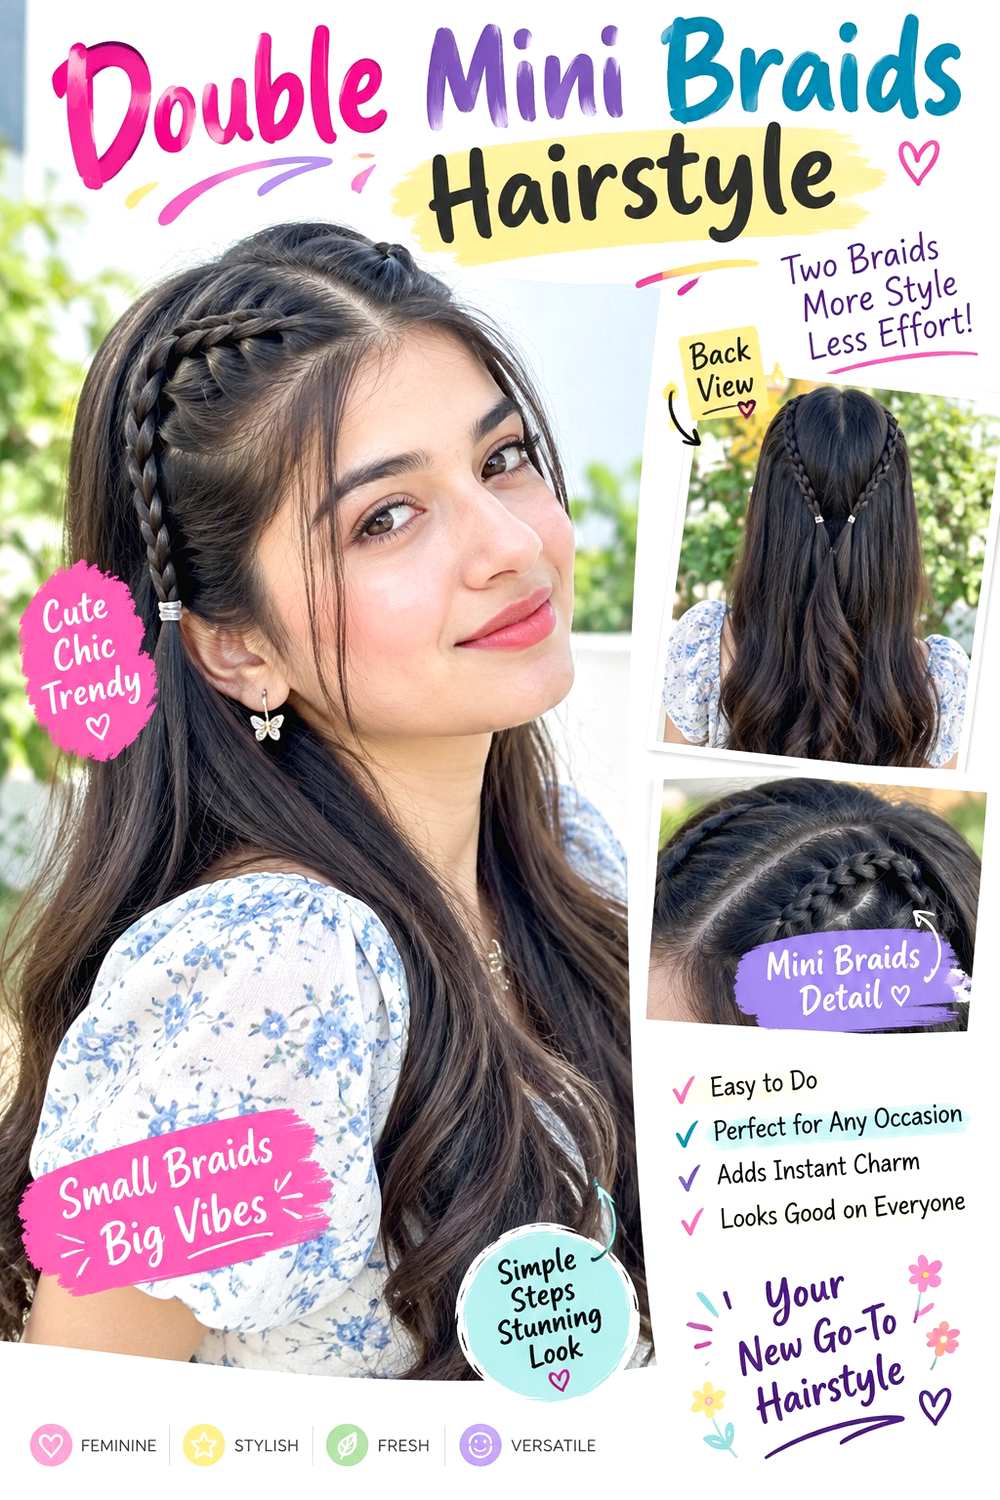
Two mini braids can refresh second-day hair by adding detail near the face while leaving the rest of the texture untouched. Use a center or side part, take one narrow section near each temple, and braid each piece downward or slightly backward. Secure the short tails and let the remaining bob, lob, waves, curls, or long hair stay loose. The braids should be slim accents rather than large sections, which keeps fullness through the main silhouette.
Short through long hair can use this idea as long as the temple sections have enough length for several crossings. Use texturizing spray for braid grip and two small clear elastics for the ends. A quick refresh may take five minutes because there is no need to restyle the lower hair; full wash-day styling depends on your natural texture and routine.
If the braids feel too exposed, position them slightly behind the front hairline instead of making them wider. For salon planning, specify where your shortest front layers should finish, especially if you enjoy mini braids often. Pieces around the cheekbone may work as framing, while slightly longer temple layers make the braid easier to secure during grow-out.
Pro tip:
Braid the second side only after checking the first section’s width. Matching the amount of hair matters more than making every crossing perfectly identical.
Make It Work for You:
For fine hair, make the braids extremely narrow and leave the rest loose. Small details can refresh the front without reducing overall fullness.
Watch Out For:
Do not widen the mini braids by taking large temple sections. That can leave the loose hair around the face noticeably thinner than the back.
Scarf-Wrapped Ponytail Hairstyle
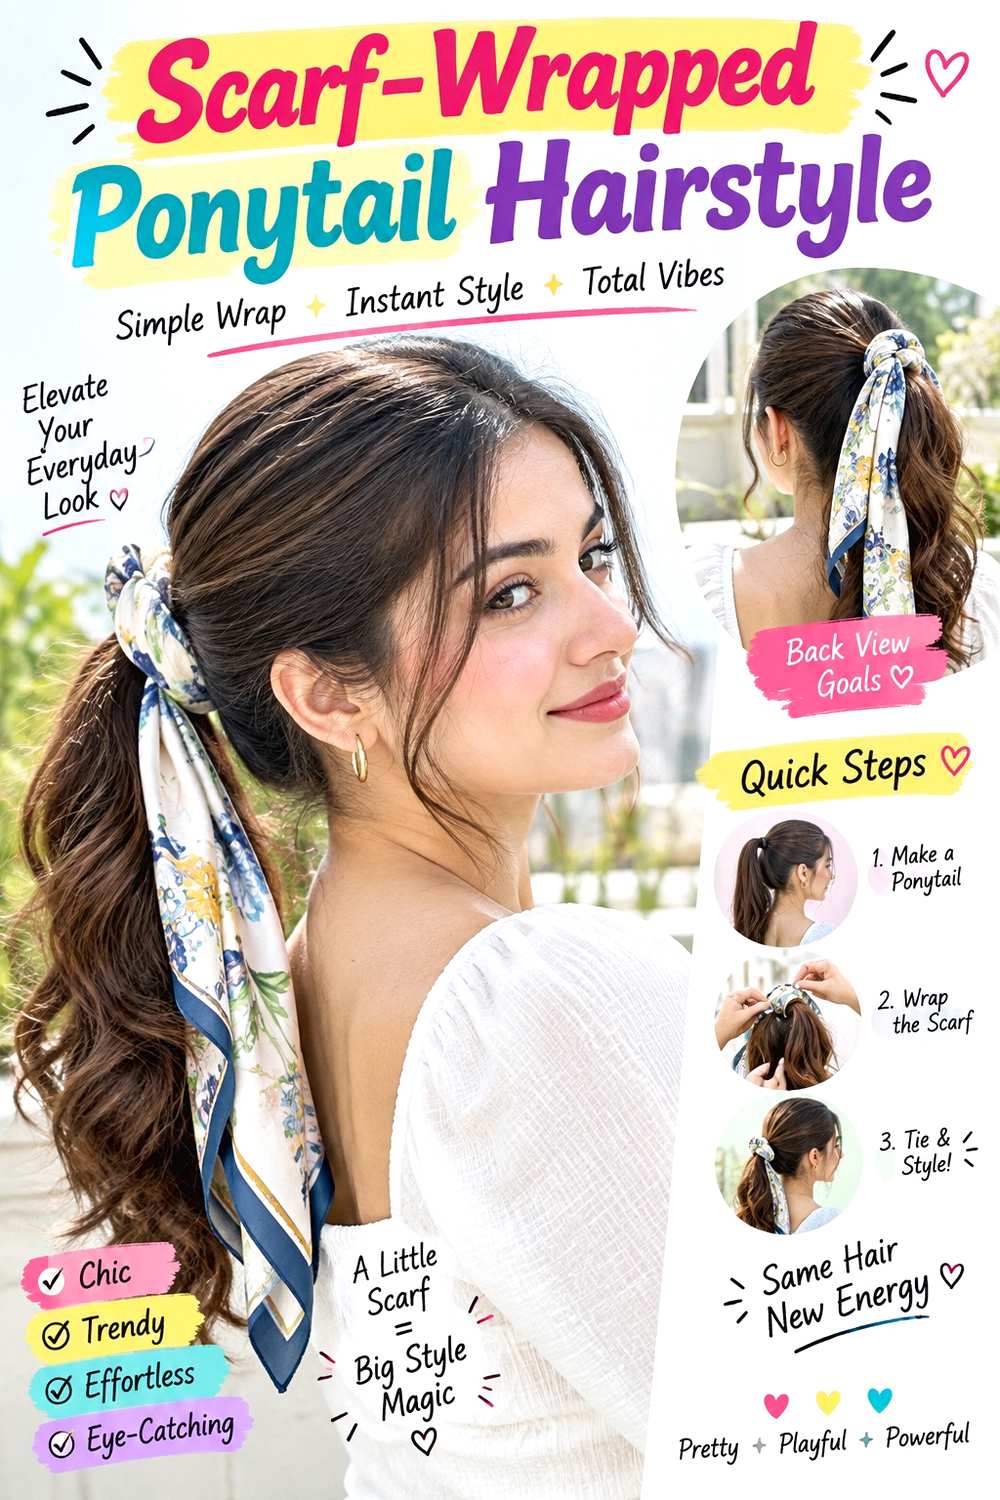
A scarf-wrapped ponytail can disguise a plain second-day anchor while adding color or pattern without requiring a complete restyle. Gather the hair into a low or mid-height ponytail, secure it first, then wrap a narrow scarf around the elastic once or twice. Tie the ends in a small knot or short bow, keeping enough tail visible below the fabric. A center, side, or natural part can all work, and the ponytail can stay straight, wavy, curly, or coily.
Medium and long hair balances the scarf most easily. Use a fabric-covered elastic for the real anchor and a narrow lightweight scarf for decoration. A quick refresh may take three to five minutes because the lengths can remain untouched; full wash-day styling takes longer if the tail normally needs drying or definition.
If the scarf slips, secure the ponytail itself before adjusting the fabric rather than tying the scarf tighter around the hair. For salon planning, specify whether you like face-framing pieces loose with ponytails. Layers around the jaw can soften the front, while longer pieces give you the option to tuck everything back. The scarf should decorate a stable anchor rather than provide the structural hold.
Pro tip:
Choose lightweight fabric and wrap it directly over the elastic. The existing anchor gives the scarf grip while keeping the knot from compressing loose hair unnecessarily.
Make It Work for You:
For fine hair, use a narrow scarf with short ends. A smaller accessory keeps the ponytail visually balanced instead of making the tail appear thinner.
Watch Out For:
A long scarf can tangle into the ponytail or catch on clothing. Shorten the loose ends if they repeatedly wrap around the hair during movement.
Short Bob Side-Tuck Hairstyle
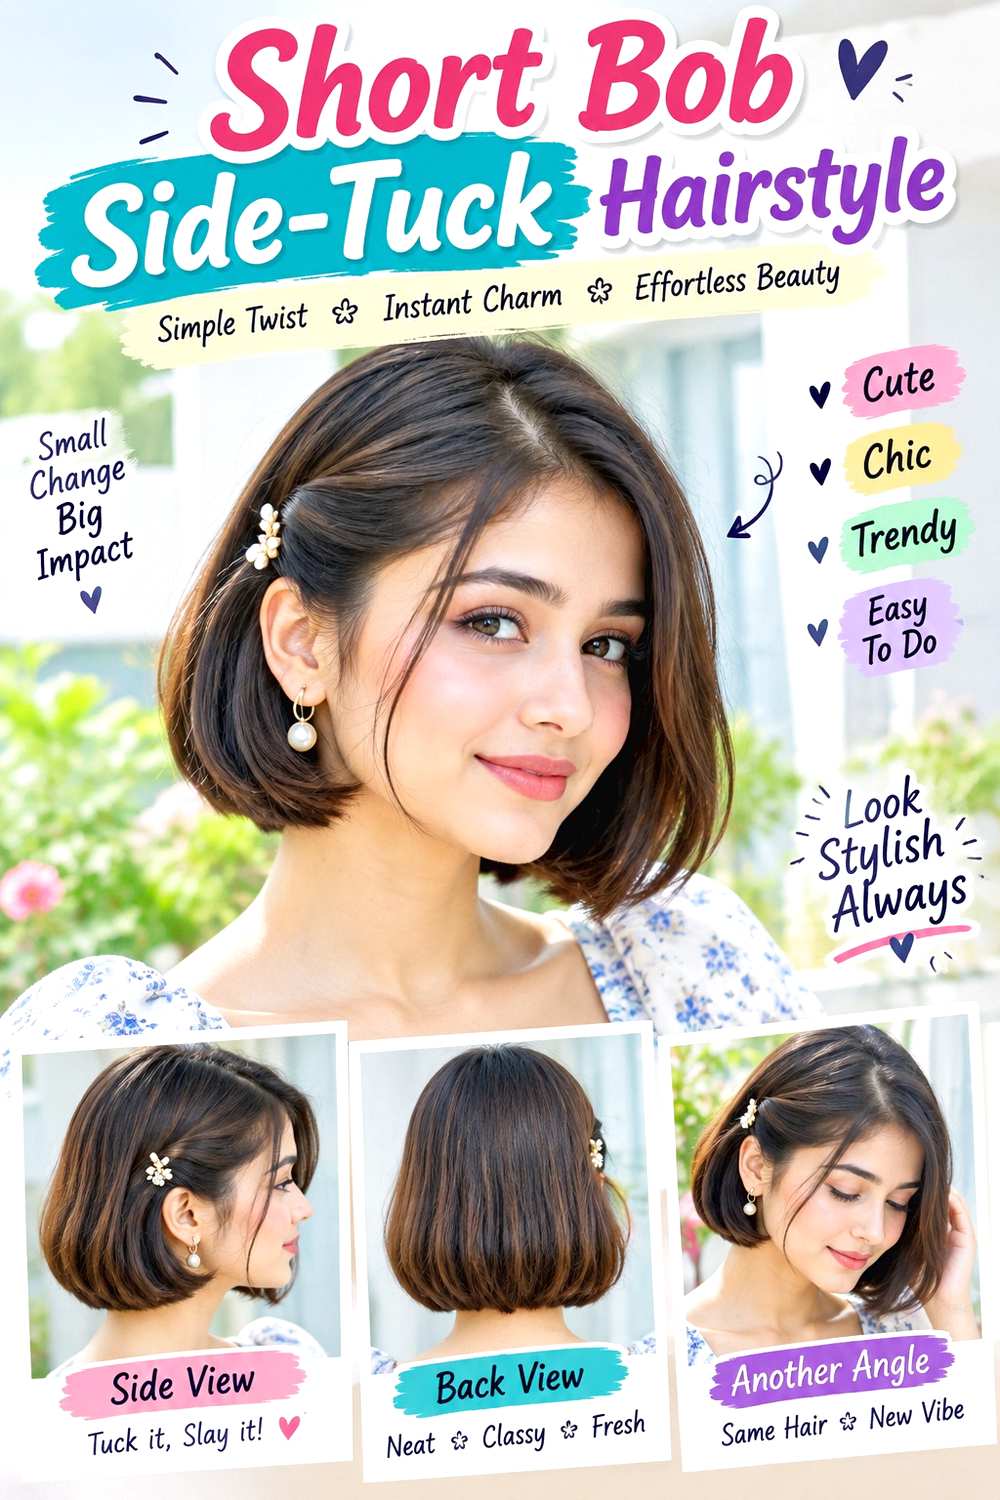
A side tuck can make a second-day bob look deliberate when the roots have settled but the perimeter still holds its shape. Choose a side or off-center part, guide the smaller section behind the ear, and leave the opposite side fuller around the cheek. Keep the ends straight, softly bent, wavy, or naturally textured rather than reworking the entire cut. The asymmetry itself creates polish, so only the visible front section may need reshaping.
Jaw- to shoulder-length bobs work particularly well. Use light dry shampoo at the root area if needed and a small barrette to hold the tucked side. A quick refresh may take two to five minutes; full wash-day styling takes longer if the bob normally requires blow-drying, smoothing, or curl definition.
If short layers spring out of the tuck, let them remain loose rather than forcing them behind the ear. At the salon, specify the dry perimeter and which side you usually tuck. Keeping enough length in the front section makes this style easier, while excessive short layering can make the tuck unstable. A strong lower edge also helps the bob retain its shape when the roots lose some first-day lift.
Pro tip:
Build the ear tuck before adding the barrette. A section that already lies naturally needs less clip pressure and is less likely to spring forward.
Make It Work for You:
For fine bobs, keep the opposite side full and use a small lightweight clip. Preserving that asymmetry helps the overall cut look denser.
Watch Out For:
Do not keep adding dry shampoo when the issue is a bent front section. Refresh the specific problem instead of coating roots that already look clean.
High Ponytail With Wrapped Base Hairstyle
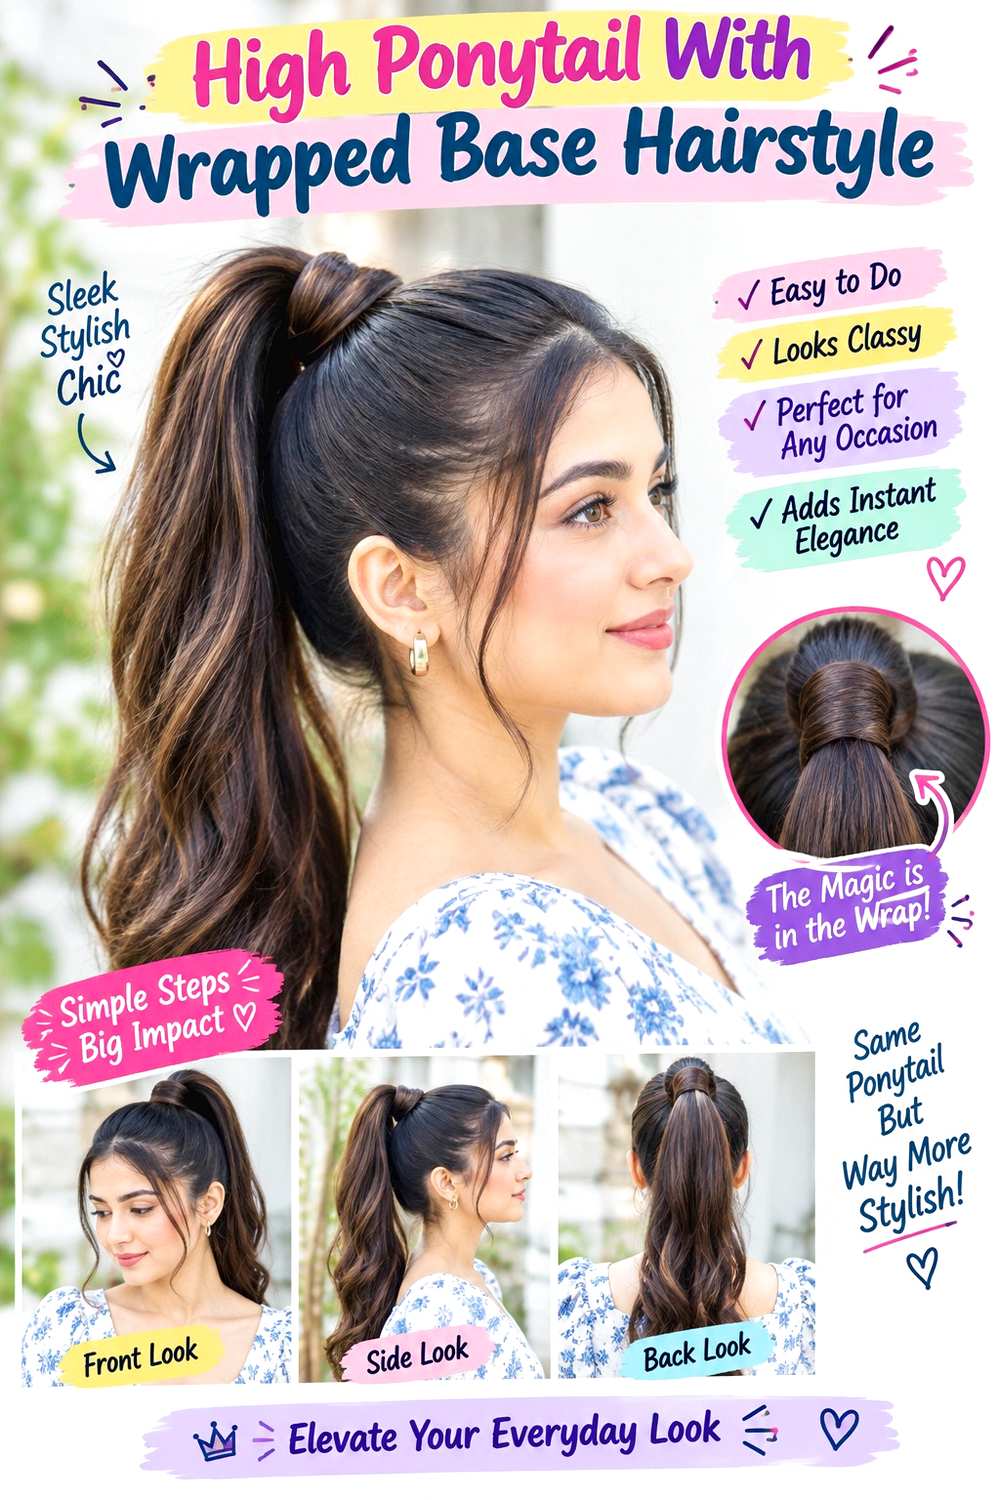
A high ponytail can revive second-day hair when the roots have flattened but the lengths still have useful movement. Gather the hair just behind the crown rather than directly on top, secure it firmly but comfortably, then take a small section from the tail and wrap it around the elastic. Pin the end underneath so the base looks finished. Keep the tail straight, waved, curled, or naturally textured, and leave face-framing pieces out only if they already sit well.
Medium to long hair works best because the elevated anchor shortens the visible tail. Use a soft-bristle brush to guide the crown, a strong fabric-covered elastic for support, and a bobby pin to secure the wrapped section. A quick refresh may take five minutes; full wash-day styling takes longer if the tail normally needs smoothing or definition.
If the ponytail feels heavy, lower it slightly instead of tightening it harder. For salon planning, specify whether you regularly wear high ponytails because very short crown layers may not reach the anchor comfortably. Keeping some upper layers longer can improve hold while still allowing movement when the hair is worn loose.
Pro tip:
Test the ponytail’s comfort before wrapping the base. If the anchor already pulls, adjust its position first rather than hiding an uncomfortable setup beneath the hair section.
Make It Work for You:
For dense hair, place the ponytail slightly behind the crown and keep the wrapped section narrow. This reduces extra bulk around an already substantial base.
Watch Out For:
A very tight high ponytail can create unnecessary tension. Rebuild the anchor if it slips instead of repeatedly pulling the sides tighter during the day.
Loose Fishtail Braid Hairstyle
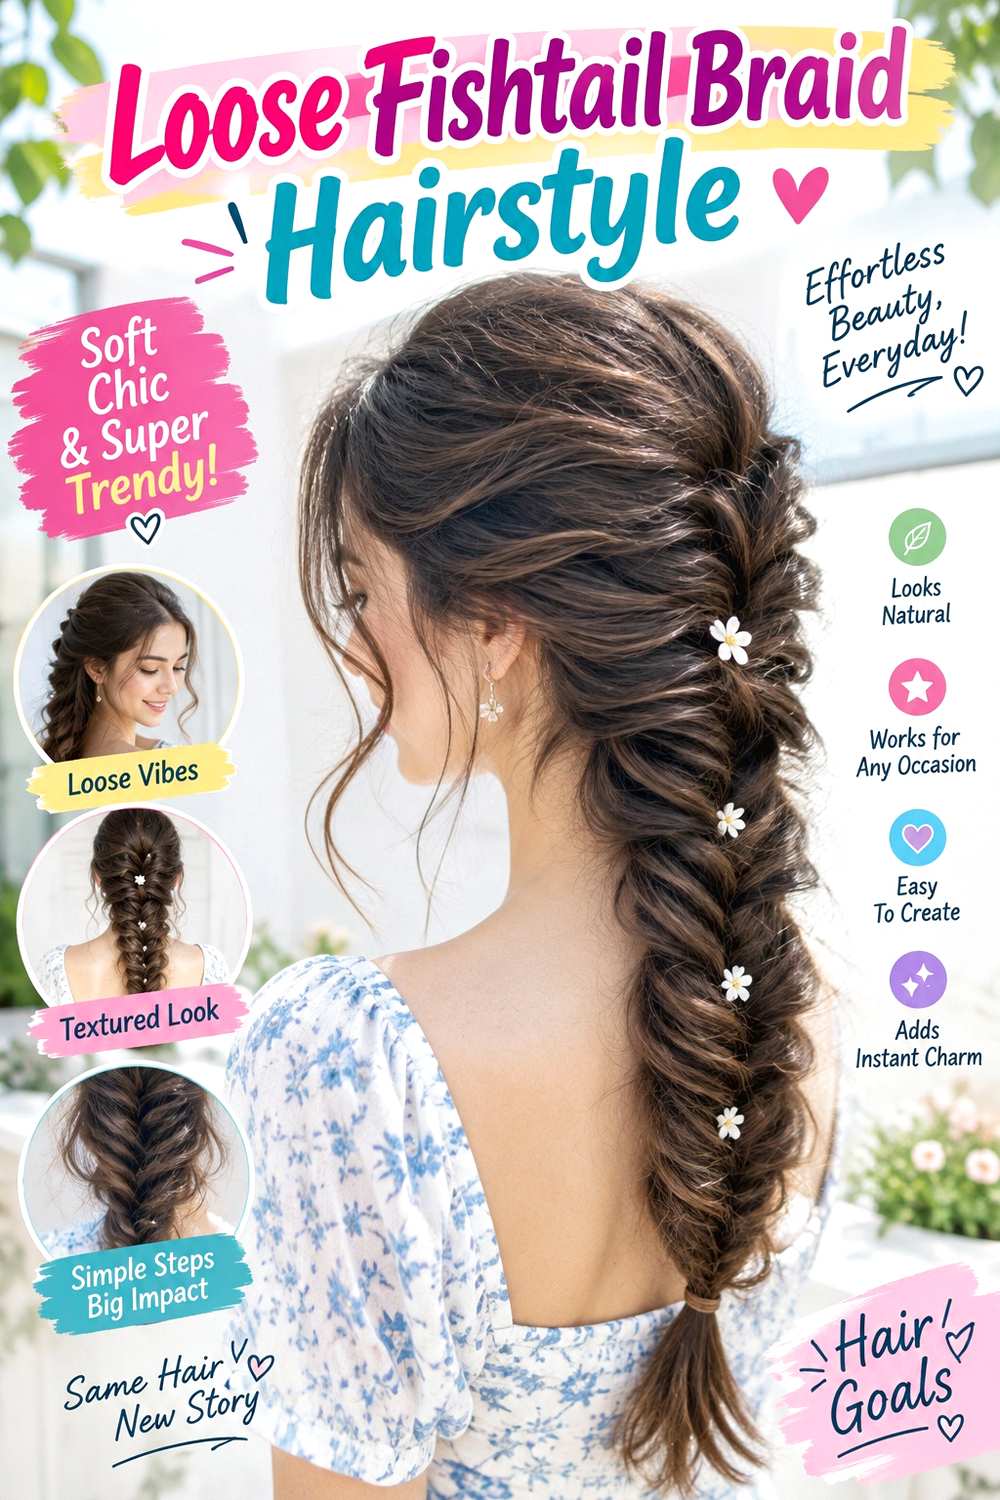
A loose fishtail braid uses second-day grip well because the narrow woven sections are less likely to slide apart than on freshly washed, very silky hair. Gather the hair low or slightly to one side, divide it into two sections, and cross small pieces from each outer edge toward the opposite side. Secure the tail, then soften selected outer crossings rather than pulling the entire braid wide. Leave a few face-framing pieces loose if they already fall naturally.
Medium-long and long hair works best because the fishtail pattern needs enough length to become visible. Use texturizing spray for grip and a small fabric-covered elastic for the tail. A quick refresh may take eight to ten minutes depending on length; full wash-day styling takes longer if detangling and drying are needed first.
If the braid looks uneven, correct a few crossings rather than restarting for perfect symmetry. For salon planning, specify where your shortest face-framing layers should sit and how much weight you want through the ends. Long layers stay inside the fishtail more easily, while shorter ones may escape and become part of the softer finish as the style wears.
Pro tip:
Secure the braid before loosening it, then work upward from the tail. This keeps the starting section stable while you add controlled softness through the visible pattern.
Make It Work for You:
For fine hair, use slightly larger crossing sections and loosen only a few edges. The braid will stay clearer and denser than an aggressively widened fishtail.
Watch Out For:
Pulling every crossing apart can erase the fishtail pattern. Keep the center compact and soften only selected outer sections for a relaxed finish.
Conclusion
Easy hairstyles for second day hair work best when they refresh the parts that changed while preserving texture that still looks good. Fine hair may benefit from light root control, compact braids, and smaller gathered sections, while dense hair can handle broader buns, twists, and ponytails with comfortable anchors. Straight and wavy lengths can keep yesterday’s bends, while curls and coils often need only selective moisture and reshaping. Parts, fringe, face framing, volume, and finish can all be adjusted without rebuilding the whole hairstyle. Choose a style that suits your natural texture, face shape, upkeep, and available time. A targeted five-minute refresh is often more useful than trying to reproduce a full wash-day result.
Before Your Salon Visit
Choose one or two second-day styles you expect to wear regularly and save references that show the front, sides, and back. Discuss your texture, density, face shape, preferred length, upkeep, and normal styling routine. Point out the exact fringe or face-framing length, layer placement, ponytail or bun height, crown volume, and finish you like. Ask whether your current layers can reach the anchors comfortably, especially if you often wear braids, claw clips, ponytails, or half-up styles.
FAQs
Should I use dry shampoo every time I style second-day hair?
No. Use it only when the roots actually need oil control or extra grip. If your hair already looks balanced, adding more product can make it dull or powdery. Curly and coily textures may benefit more from selective moisture or reshaping than from treating the entire scalp.
How can I refresh curls or coils without fully washing them?
Focus on flattened or frizzy sections instead of soaking the whole head. Lightly dampen only the areas that need reshaping, add a small amount of your usual defining product, and leave intact curl or coil groups alone. This keeps the refresh faster and limits unnecessary handling.
What is the quickest second-day hairstyle for medium or long hair?
A claw clip twist, low ponytail, or half-up twist can usually be built quickly because the existing texture does most of the work. The exact time depends on density and layering, but these styles generally require fewer steps than heat-styled waves, detailed braids, or a full curl refresh.
How do I stop second-day hair from looking flat at the crown?
Change the part slightly, gather only the crown into a half-up style, or use targeted root refresh rather than restyling every length. Avoid adding heavy product to already-flat roots. For long-term flexibility, keep enough crown length that it can be lifted, twisted, or clipped comfortably.