17 Friendsgiving Half Up Hairstyles

Friendsgiving half up hairstyles give you the comfort of keeping hair away from the face while leaving enough length down for movement and texture. The defining shape is simple: the upper side or crown sections are gathered, braided, twisted, clipped, or knotted while the lower hair stays loose. That lower section can be straight, softly waved, curly, or coily, and face-framing pieces can remain free when you want a softer front. Medium and long lengths offer the most options, although some versions adapt well to shorter cuts.
Texture and density affect how much hair should be gathered. Fine or lower-density hair may look fuller when the half-up section stays narrow, while dense hair can support broader braids, twists, or a fuller crown. Curly and coily hair should be positioned after the dry shape and shrinkage are visible. A center part creates balance, while side parts add more direction around the face.
Styling effort ranges from a fast claw clip or barrette to a full wave set or braided crown. Wash-day styling can take longer, but most versions need only small Friendsgiving touch-ups around the face or anchor. A comfortable, independent base also matters during a long meal, so clips and decorative pieces should support rather than painfully tighten the style.
Quick List
- Soft Wave Twist-Back Friendsgiving Hairstyle
- Braided Crown Half-Up Friendsgiving Hairstyle
- Mini Knot Half-Up Friendsgiving Hairstyle
- Claw Clip Half-Up Friendsgiving Hairstyle
- Curly Half-Up Puff Friendsgiving Hairstyle
- Coily Half-Up Crown Friendsgiving Hairstyle
- Bubble Half-Up Ponytail Friendsgiving Hairstyle
- Rope Twist Half-Up Friendsgiving Hairstyle
- Side-Part Barrette Half-Up Friendsgiving Hairstyle
- Center-Part Sleek Half-Up Friendsgiving Hairstyle
- Fishtail Accent Half-Up Friendsgiving Hairstyle
- Bow Clip Half-Up Friendsgiving Hairstyle
- Double Braid Half-Up Friendsgiving Hairstyle
- Voluminous Crown Half-Up Friendsgiving Hairstyle
- Face-Framing Half-Up Ponytail Friendsgiving Hairstyle
- Low Twisted Half-Up Friendsgiving Hairstyle
- Headband Half-Up Waves Friendsgiving Hairstyle
Soft Wave Twist-Back Friendsgiving Hairstyle

Two soft twists meeting above loose waves create a relaxed half-up shape that still keeps the temples clear during dinner. Use a center or shallow side part, take a moderate section from each side, and twist backward without pressing the crown flat. Let broad waves begin around the cheekbones or jaw and keep the ends softly bent rather than tightly curled. Shoulder-length to long hair works well, while fine or lower-density hair often benefits from keeping the twisted sections narrow so the loose bottom retains fullness.
Apply heat protectant before shaping, use a curling iron for broad bends, and secure the crossed twists with bobby pins hidden beneath them. A full wash-day style takes longer because the lower lengths need drying and setting, while a quick refresh can focus on the front wave and one flattened section. If you are discussing layers with a stylist, point to where you want the shortest front piece to finish when pulled into a twist; that landmark affects how smoothly it reaches the back. Keep the anchor independent from the waves so you can tighten or loosen the upper section without disturbing the movement below.
Pro tip:
Cross the two twists slightly before pinning them. The overlap creates a flatter anchor, hides the structural pins, and keeps the upper sections from separating as you move around.
Make It Work for You:
For naturally wavy hair, leave the lower texture mostly untouched and refine only uneven front pieces. The twisted crown still provides structure without requiring a complete heat-styled wave set.
Watch Out For:
Avoid twisting large side sections too tightly. That can remove fullness from the lower hair and flatten the crown; use smaller sections and keep the root area softly lifted.
Braided Crown Half-Up Friendsgiving Hairstyle

A partial braided crown adds woven detail while keeping most of the hair loose. Start one braid above each temple, direct both toward the back, and overlap the ends around the upper rear of the head. Keep the braids broad enough to see but not so large that they take most of the side density. The lower hair can remain straight, naturally wavy, or softly curled, and a few short face-framing pieces may stay loose. Medium to long hair is easiest, although layered cuts can work when the braids remain slightly firmer.
Use light texturizing spray to improve grip, small clear elastics to secure the braid ends, and bobby pins to anchor the overlap. Creating the crown takes more time than a basic clip, while a quick Friendsgiving refresh may only involve tucking one escaped piece or tightening a hidden pin. If you are talking with a stylist about face framing, explain how much front length you like available for braiding; cheekbone-short sections behave differently from pieces that reach the jaw. The braid should stay comfortable around the temples. Loosen the outer edges only after the hidden anchors are secure so the crown gains width without losing its support.
Pro tip:
Pin the first braid across the back, then place the second over its end. This creates a continuous crown line and hides both elastics beneath the woven sections.
Make It Work for You:
For finer density, keep each braid narrow and widen only the middle section slightly. More hair remains loose below, so the crown detail does not reduce overall fullness.
Watch Out For:
Do not pull heavily on the braid near the temples to make it wider. That area has less support; expand the middle and back portions instead for safer fullness.
Mini Knot Half-Up Friendsgiving Hairstyle
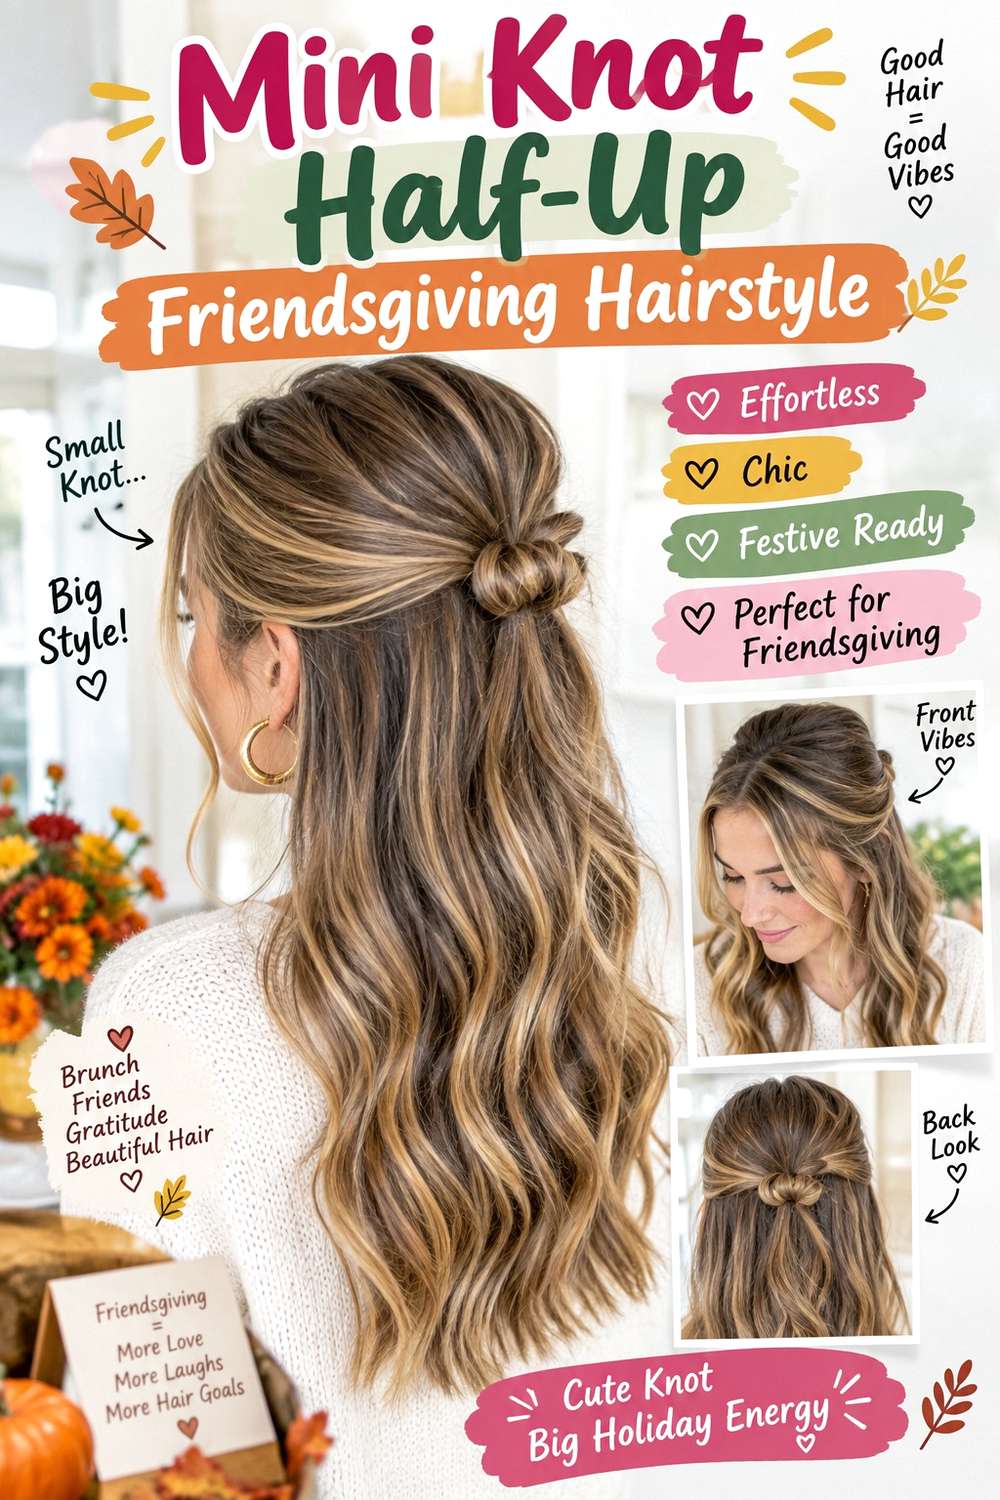
A small knot at the crown gives a half-up style more structure than a plain ponytail without taking much hair away from the loose lengths. Gather the upper side sections just behind the crown, keep a little root lift, and twist the joined section into a compact knot. Leave the lower hair straight, wavy, or softly textured, with face-framing pieces outside the knot if you like an open front. Medium and long hair both work, and finer density usually benefits from a smaller gathered section.
Use light texturizing spray for grip, a mini elastic to create the hidden half-up base, and bobby pins to shape the knot around it. The full style is relatively quick, while a refresh may involve retucking one end or lifting a flattened crown. If a stylist is shaping your layers, show where the front sections need to reach when you wear a half-up knot; this helps you discuss usable length rather than requesting vague “long layers.” Keep the knot compact enough that its small base can support it comfortably. If it starts sagging, repair the elastic or hidden pin rather than pulling more hair into the section and reducing the loose fullness below.
Pro tip:
Build the mini ponytail first, then wrap the knot around that stable base. Separating the structural anchor from the visible knot makes it much easier to reshape later.
Make It Work for You:
For thick hair, gather a smaller top section and keep the knot compact. You still get a clear crown detail without creating a heavy anchor that pulls backward.
Watch Out For:
Avoid over-expanding the knot after pinning. Pulling too much from its center can weaken the small base; loosen only the outer edge where extra softness is needed.
Claw Clip Half-Up Friendsgiving Hairstyle

A claw clip makes a half-up style quick to assemble and easy to adjust during a long Friendsgiving meal. Take the upper side and crown sections, bring them together at the back, twist once, and secure the twist with a small or medium clip. Let the lower hair fall freely, whether it is straight, wavy, curly, or coily. A center part creates a balanced front, while a side part gives the gathered section more direction. This works from medium lengths onward as long as the clip is sized for the section being held.
Use light texturizing spray when you need extra grip and choose a claw clip whose teeth close fully around the gathered hair. Those two supplies are enough; the clip should not need painful pressure to stay secure. Full styling is usually quick unless you also set the loose lengths, and a refresh can take only a moment if the twist loosens. If you regularly wear this shape, show your stylist how much front hair you prefer to gather so face-framing length can be discussed realistically. Keep the clip high enough that it does not press into a chair back, especially if Friendsgiving involves a long seated dinner.
Pro tip:
Twist the gathered section only once or twice before clipping it. Excessive twisting can create a hard ridge that makes the clip sit unevenly or feel bulky.
Make It Work for You:
For dense hair, use a wider clip and take a slightly shallower upper section. This keeps the lower hair full while allowing the accessory to close comfortably around the twist.
Watch Out For:
Do not use a clip whose teeth barely meet around the section. An undersized accessory can pop open; reduce the gathered amount or choose a larger clip.
Curly Half-Up Puff Friendsgiving Hairstyle

A curly half-up puff keeps the front controlled while leaving defined curls free through the lower half. Gather the upper crown and side curls into a small puff near the back or top of the head, but keep complete curl groups intact rather than brushing them into a smooth ponytail. The lower curls should retain their natural movement, and a few front groups can remain loose if they frame the face comfortably. Medium to long curly hair works well, with the final height determined by shrinkage and density rather than stretched length.
Use lightweight leave-in conditioner for softness, curl gel to maintain definition, and a soft hair tie to secure the half-up puff. A full wash-day set takes longer because curls need time to dry, while a refresh may involve redefining only the flattened crown pieces and resetting the tie. If a stylist is shaping your curly layers, discuss where the front and crown sections sit when dry and how much length you need to gather them comfortably. Avoid judging the half-up position while the hair is wet. During Friendsgiving, reshape individual curls from underneath instead of tightening the puff whenever one area becomes compressed.
Pro tip:
Choose the puff height after your curls are fully dry. This lets you see the true shrinkage and prevents you from gathering sections that would rather sit naturally lower.
Make It Work for You:
For shorter curls, position the puff farther back and gather less from the sides. You preserve the half-up outline while allowing more texture to remain visible around the temples.
Watch Out For:
Avoid brushing through defined curls before gathering them unless that is your intended finish. Separating curl groups can create more frizz than the half-up shape actually requires.
Coily Half-Up Crown Friendsgiving Hairstyle

A coily half-up crown gathers the upper section while allowing the lower coils to remain full through the back and shoulders. Bring the top and side sections toward the crown with comfortable tension, then secure them into a compact puff or rounded mini ponytail. Leave the lower half loose and defined, and allow selected coils near the hairline to remain free if desired. The contrast between the lifted crown and loose lower texture defines the style. Medium coily lengths work particularly well because the crown gains height without needing a large section.
Use moisturizing leave-in conditioner for softness, styling gel for targeted control around the gathered perimeter, and a soft hair tie for the anchor. Full wash-day styling can take considerably longer than the Friendsgiving refresh, which may only involve reshaping the crown and neatening a few outer coils. If a stylist is shaping the cut, discuss the dry length of the crown and front pieces so you know how comfortably they reach the half-up base. Shrinkage should guide placement rather than wet measurements. Keep the gathered section secure but not painful, and correct individual loose areas instead of repeatedly tightening the entire crown.
Pro tip:
Shape the crown puff from the outside after securing it. Lifting small areas with your fingertips can balance the silhouette without adding tension to the roots.
Make It Work for You:
For very dense coils, gather a slightly smaller crown section and preserve more volume below. This reduces anchor weight while keeping the lifted half-up shape clearly visible.
Watch Out For:
Do not use tightness to create a smoother perimeter. If the base feels uncomfortable, loosen it and use targeted styling product only where you actually want more control.
Bubble Half-Up Ponytail Friendsgiving Hairstyle

A bubble detail turns a basic half-up ponytail into something more structured without requiring a full braid. Gather the upper side and crown sections into a ponytail at the back, then add one or two small elastics down that gathered length. Gently expand each section from both sides so the bubbles stay rounded. Leave the lower hair completely loose, with straight, wavy, or naturally textured ends. Medium to long hair gives enough gathered length for at least one visible bubble, while fine hair usually looks fuller with fewer divisions.
Use lightweight mousse for manageable body, snag-free elastics for the bubble sections, and flexible hairspray to settle flyaways after shaping. Building the style is fairly quick, and a Friendsgiving refresh may only involve re-expanding one flattened bubble. If a stylist is shaping your layers, mention that you like half-up ponytails and show how much crown hair you usually gather; very short upper layers may release more easily. Keep the bubbles proportional to the short half-up tail rather than squeezing in extra divisions. If a section loses fullness, repair that bubble instead of tightening the crown anchor and pulling more hair from the loose lower layer.
Pro tip:
Place every elastic first, then expand the bubbles. Seeing the spacing before shaping makes it easier to keep each rounded section proportional to the available half-up length.
Make It Work for You:
For fine hair, create one larger bubble instead of two tiny ones. The gathered section keeps more visible fullness and still looks intentionally segmented from the loose hair.
Watch Out For:
Avoid pulling only one side of a bubble. Uneven expansion can twist the half-up ponytail; alternate sides in small adjustments until the shape looks balanced.
Rope Twist Half-Up Friendsgiving Hairstyle

A rope twist creates a cleaner, more defined line than a loose twist-back while still leaving most of the hair down. Take one section from each side, divide each into two smaller pieces, twist them together, and bring both ropes to meet at the back. Keep the crown lightly lifted and let the lower lengths stay straight, wavy, or softly curled. Medium to long hair gives enough side length for the twisted pattern to remain visible, and the design works especially well when you want detail without a full braid.
Use light texturizing spray to create grip, small clear elastics to secure the rope ends, and bobby pins to anchor them together. The initial style takes a little longer than a simple twist, while a refresh may only require tightening one rope or replacing a hidden pin. If a stylist is cutting face-framing layers, show where the side sections need to finish to join comfortably at the back. Keep the ropes firm through their center before softening their outer edges. If one begins unraveling, repair its elastic or twist direction rather than tightening the whole crown.
Pro tip:
Twist both rope sections in the same direction before bringing them together. Matching their pattern makes the back view look balanced and helps the joined sections sit neatly.
Make It Work for You:
For thicker hair, take smaller rope sections and leave more density loose underneath. The twisted detail stays visible without turning the half-up portion into a heavy upper layer.
Watch Out For:
Do not loosen the rope aggressively before its end is secured. The two strands can unravel quickly; anchor first, then soften only the outer edge if desired.
Side-Part Barrette Half-Up Friendsgiving Hairstyle

A side part and decorative barrette create an asymmetrical half-up style that looks polished without much construction. Sweep the heavier front section softly across the forehead or temple, take hair from both sides toward the back, and secure the gathered section slightly off-center. The lower hair can stay straight or carry relaxed bends beginning around the jaw. Medium and long lengths work well, while the barrette should be sized to close comfortably around the gathered section rather than forcing too much hair into a narrow clasp.
Use heat protectant before creating bends, a curling iron for soft movement, and a barrette as the half-up anchor. A full wash-day style takes longer when all the lengths are being shaped, while a quick Friendsgiving refresh can focus on the front sweep and accessory placement. If a stylist is working on your layers, point out where you want the heavier front section to fall when worn to the side. Keep the barrette attached to a stable section rather than slippery surface strands. If it begins to slide, reduce the amount of hair inside or rebuild the tuck instead of repeatedly closing the clasp more tightly.
Pro tip:
Set the side part and front direction before fastening the barrette. Establishing the shape first prevents the accessory from pulling the part farther back than you intended.
Make It Work for You:
For finer hair, choose a lighter barrette and gather a narrower upper section. The loose bottom keeps more fullness while the off-center accessory still provides a clear focal point.
Watch Out For:
Avoid coating the anchor with heavy serum before clipping it. Excess slip can make the barrette migrate; keep smoothing products mainly through the loose lengths and ends.
Center-Part Sleek Half-Up Friendsgiving Hairstyle
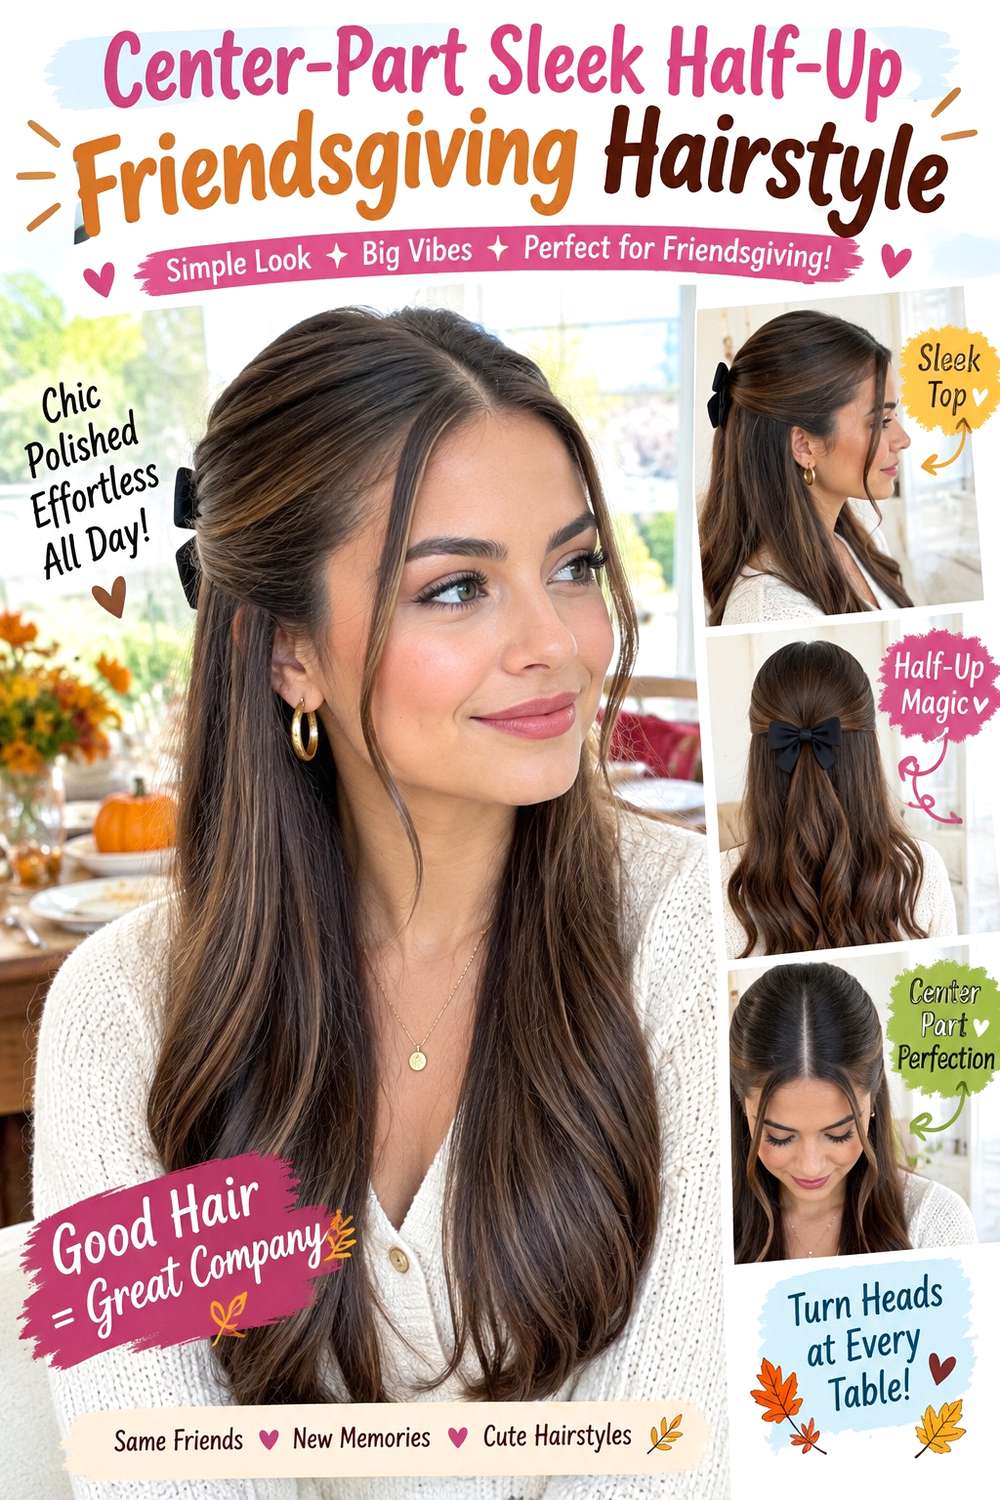
A sleek center part gives the half-up shape a clean, balanced front while the lower hair remains loose. Create a precise part, smooth the side sections back toward a mid-crown anchor, and keep a small amount of natural lift behind the part so the top does not appear pasted down. The lower lengths can fall straight with softly curved ends or maintain a gentle natural wave. Medium to long hair works best, and a fuller perimeter helps the loose bottom retain visual weight after the upper section is gathered.
Apply heat protectant before refining the lengths, use a flat iron only where smoothing is needed, and secure the half-up section with a fabric-covered elastic. Full wash-day styling takes longer because drying direction affects the sleek finish, while a quick refresh may involve only the front and top layer. If you are discussing the cut with a stylist, identify how much face-framing hair you prefer to keep outside the gathered section and where those pieces should finish. Avoid removing excessive perimeter weight solely for this style. If the crown loosens later, reset the elastic rather than continually smoothing and tightening the sides.
Pro tip:
Create the center part before gathering any hair and keep it undisturbed while securing the back. This maintains symmetry and reduces repeated brushing around the front hairline.
Make It Work for You:
For naturally wavy hair, smooth only the crown and leave subtle movement through the lower lengths. The precise upper shape stays intact without requiring every strand to be straightened.
Watch Out For:
Do not flatten the crown completely while chasing a sleek finish. A little lift behind the part keeps the profile balanced and prevents the loose lower hair from looking disconnected.
Fishtail Accent Half-Up Friendsgiving Hairstyle

A small fishtail braid across the back adds fine woven texture while leaving most of the hair loose. Gather narrow side sections, join them at the back, and create a short fishtail through the resulting half-up tail. Keep the braid compact or gently widen its outer edges after securing the end. The lower hair can remain wavy, straight, or naturally textured. Medium to long lengths work best because the gathered tail needs enough length for the fishtail pattern to show, while finer density benefits from taking only a small upper section.
Use light texturizing spray for grip, a small clear elastic to secure the fishtail, and bobby pins if the upper meeting point needs extra support. Full styling takes longer only if you also set the loose lengths; otherwise, the braid itself is a moderate-effort detail. A refresh may mean retightening the end or smoothing one escaped section. If a stylist is shaping your front layers, explain that you like braided half-up styles and show how far the side pieces need to reach. Keep the fishtail secure before widening it. If it begins to unravel, correct the end rather than pulling more hair from the crown.
Pro tip:
Widen the fishtail from its lower edge upward after the end is secured. Small pulls keep the weave visible without making the short half-up braid lose its structure.
Make It Work for You:
For thick hair, use relatively narrow side sections and let the lower hair carry most of the density. The fishtail remains clear without creating a bulky upper layer.
Watch Out For:
Do not loosen the braid before the final elastic is secure. A short fishtail can unravel quickly, making the back look uneven and forcing you to rebuild the section.
Bow Clip Half-Up Friendsgiving Hairstyle

A bow clip gives a simple half-up style a clear accessory focal point while keeping the construction uncomplicated. Gather the upper side sections toward the back, maintain a little crown softness, and secure them with a hidden elastic or pins before attaching the bow over the anchor. The loose lengths can stay straight, wavy, curled, or naturally textured. Medium to long hair works easily, while shorter shoulder-length cuts can use a smaller bow so the accessory does not overwhelm the loose bottom.
Use light texturizing spray when extra grip is needed, a mini elastic for the hidden anchor, and a bow clip as the decorative finish. Full styling takes longer only when you reshape the lower hair, while a quick Friendsgiving refresh can involve simply retightening the base and replacing the bow. If a stylist is shaping your layers, show how much crown hair you normally gather so the shortest front sections can be discussed realistically. The bow should clip into the secured base rather than hold the entire style by itself. If it starts drooping, repair the hidden elastic or choose a lighter accessory instead of pulling the crown tighter.
Pro tip:
Attach the bow after the half-up base feels stable. A hidden structural anchor lets you reposition the accessory for the best angle without loosening the hairstyle underneath.
Make It Work for You:
For fine or lower-density hair, choose a smaller fabric bow and gather a narrow upper section. The accessory remains proportional while the loose lower hair keeps more visible fullness.
Watch Out For:
Avoid using a heavy bow as the only fastener. If the clasp slips, the entire style can collapse; secure the hair independently before adding the decorative piece.
Double Braid Half-Up Friendsgiving Hairstyle

Two narrow braids running from the temples to the back create parallel texture without forming a full crown. Start one braid on each side, keep the sections relatively small, and join them at the upper back with a hidden elastic or pins. Let the remaining hair fall loose underneath in waves, curls, or a straighter finish. Medium and long hair both work, and the two separate braids make this useful for layered cuts because each side can be controlled independently rather than stretched across the entire head.
Use light texturizing spray for grip, two small clear elastics to secure the braid ends, and bobby pins to hide and connect them at the back. The complete style takes a moderate amount of time, while a quick refresh may involve securing one escaped layer. If you are working with a stylist, explain how much front length you want available for side braids and whether you like temple pieces left loose. Keep the braid tension comfortable and consistent from front to back. Once the anchors are secure, widen only selected outer edges if you want more texture. The lower hair should remain the main source of fullness.
Pro tip:
Compare the braid heights before joining them at the back. Matching their starting and meeting points creates a cleaner horizontal line than trying to correct completed braids afterward.
Make It Work for You:
For dense hair, use narrower braid sections and leave most of the side density loose. The doubled texture remains visible without making the upper half unnecessarily bulky.
Watch Out For:
Do not pull one braid tighter to make it appear level with the other. Reposition the meeting point instead so both sides keep similar tension and remain comfortable.
Voluminous Crown Half-Up Friendsgiving Hairstyle

A lifted crown gives a half-up style more height while leaving the lower lengths relaxed. Gather the upper section toward the back, but preserve gentle volume between the part and the anchor instead of smoothing everything flat. The lower hair can carry broad waves from the mid-lengths downward, with softer ends and a few face-framing pieces left free. Medium to long hair works particularly well, while fine strands may need only modest lift so the crown does not separate from the looser bottom.
Apply heat protectant before shaping, use a round brush during drying to encourage root lift, and secure the half-up section with bobby pins. Full wash-day styling takes longer because the crown and lengths need preparation, while a quick refresh can focus on lifting the root area and reshaping front bends. If a stylist is cutting your hair, discuss where the upper layers start and how they behave when gathered; excessive removal around the crown may change the fullness you prefer. Keep the back anchor stable before loosening the surface. If the crown flattens during Friendsgiving, gently lift from underneath instead of tightening the side sections.
Pro tip:
Secure the half-up anchor before adjusting crown height. Once the base is stable, lift tiny sections from underneath so you add volume without creating large bumps or weakening hold.
Make It Work for You:
For dense hair, keep the crown lift moderate and concentrate movement through the loose lengths. This prevents the upper profile from becoming wider than the rest of the hairstyle.
Watch Out For:
Avoid aggressive teasing when you only need soft height. Excessive backcombing can make the crown difficult to reshape later; rely on drying direction and small adjustments first.
Face-Framing Half-Up Ponytail Friendsgiving Hairstyle
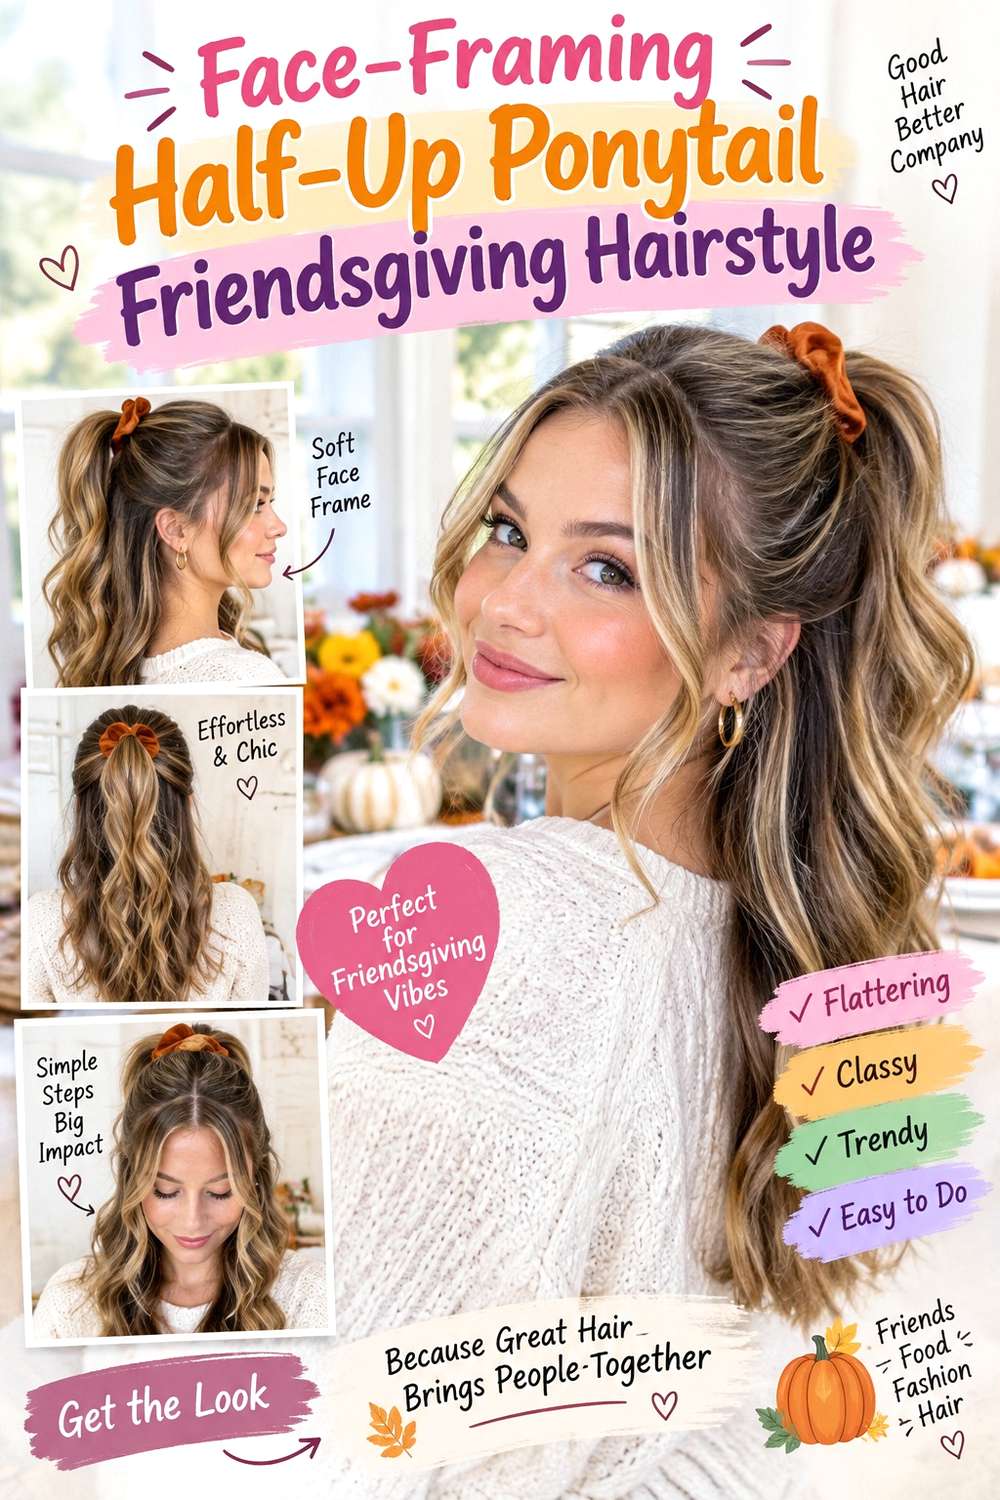
A half-up ponytail with intentional face-framing pieces gives you a secure crown while keeping the front soft. Choose a center or slightly off-center part, separate narrow sections near the temples, and gather the remaining upper hair into a ponytail at the back. Let the lower lengths and half-up tail move together in soft waves or natural texture. Medium to long hair works well, and the face-framing pieces can finish near the cheekbone, jaw, or below depending on the cut.
Apply heat protectant before shaping the loose front pieces, use a curling iron for a broad bend, and secure the half-up ponytail with a fabric-covered elastic. A complete wave set takes longer, but the Friendsgiving refresh usually focuses on the exposed front sections. If a stylist is cutting your face frame, show the finished landmark you want when the hair is gathered rather than simply asking for short layers. The upper ponytail should sit comfortably and avoid taking too much density from the loose bottom. If the face frame loses shape, restyle those pieces individually instead of loosening the whole crown.
Pro tip:
Separate the front sections before gathering the ponytail and keep them completely outside the elastic. This prevents stretched roots and makes their finished bend fall more naturally around the face.
Make It Work for You:
For curly hair, choose two naturally formed curl groups for the face frame. Select them after shrinkage so their dry length lands where you actually want the framing.
Watch Out For:
Avoid leaving overly wide pieces loose around both temples. Too much front hair can reduce the visible half-up shape; begin narrow and release more only if needed.
Low Twisted Half-Up Friendsgiving Hairstyle
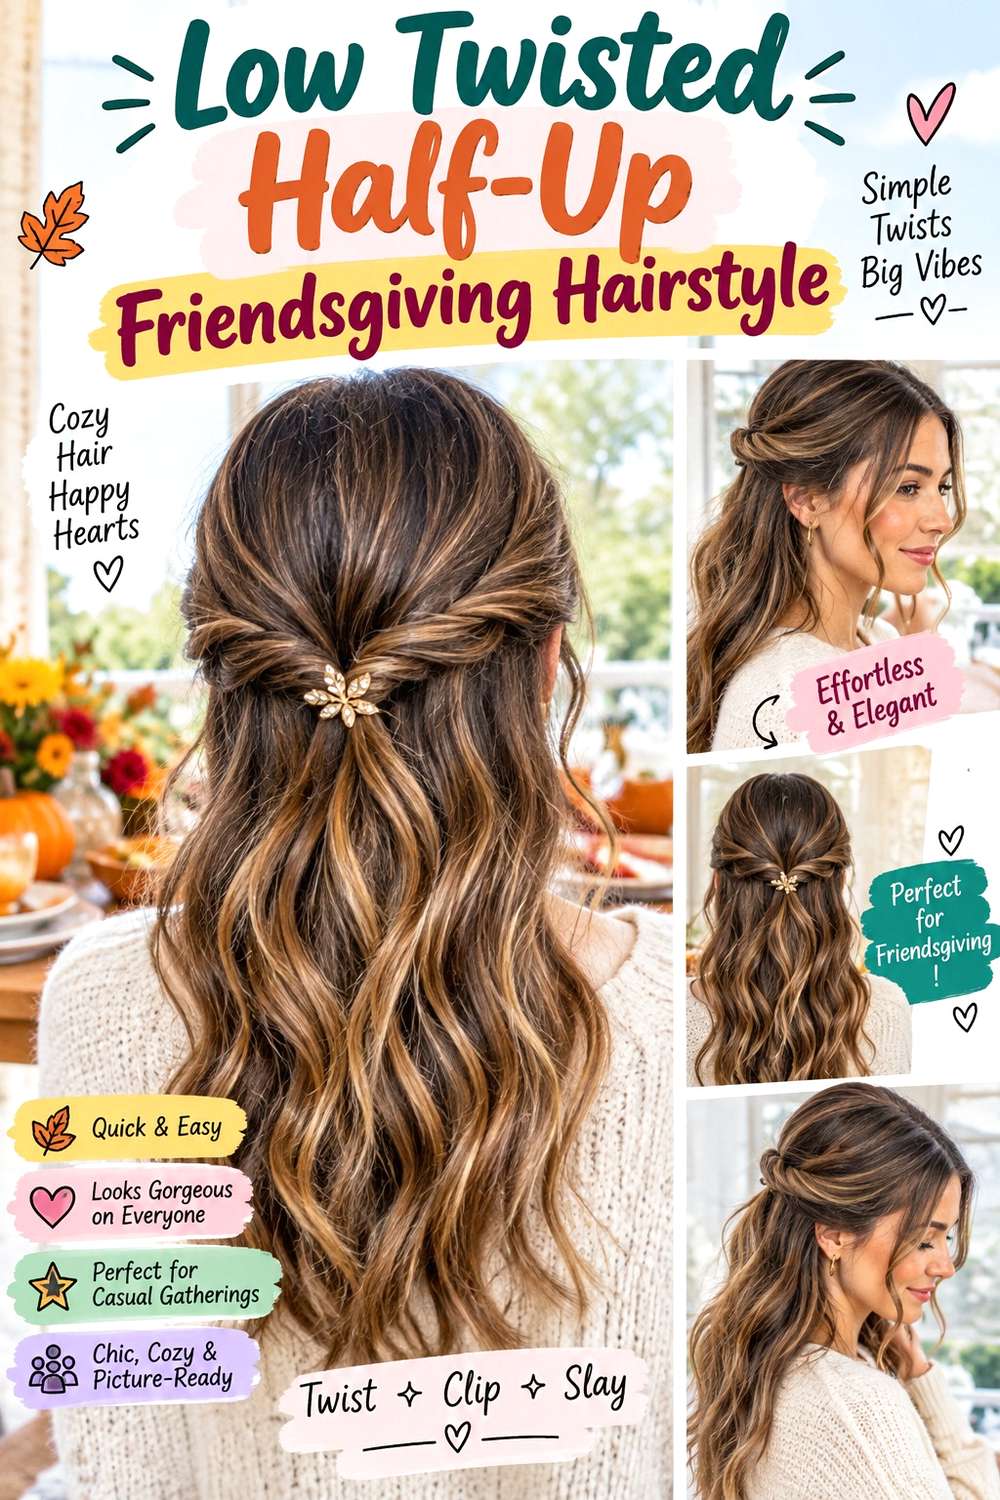
A low half-up twist sits closer to the nape than a crown style, creating a softer shape that blends almost seamlessly into the loose lengths. Take side sections from above the ears, direct them backward and slightly downward, twist them once, and secure them near the upper nape. Keep the crown relatively natural rather than lifted. Straight, wavy, and loosely curly hair can all work, and medium-to-long lengths give the low placement enough side hair to reach comfortably.
Use light texturizing spray for grip, bobby pins to secure the overlapping twists, and flexible hairspray for small flyaways. Full styling is quick unless you also reshape the loose lengths, while a refresh may involve only retwisting one side. If a stylist is shaping your front layers, show where you need them to reach when the twists sit low; shorter pieces may fall free around the face, which can be intentional. Because the anchor is lower, check that it does not press uncomfortably against a chair or high collar during Friendsgiving. Repair slipping sides individually instead of tightening both sections and flattening the crown.
Pro tip:
Angle the side sections slightly downward before twisting them. This helps the low anchor blend into the loose hair instead of creating a horizontal ridge across the back.
Make It Work for You:
For thicker hair, use shallower side sections and keep more density loose. The low twist remains secure while the bottom maintains movement and does not become overly reduced.
Watch Out For:
Do not place the anchor directly where a high sweater collar rubs it repeatedly. Move the twist slightly upward if needed so pins remain comfortable throughout the meal.
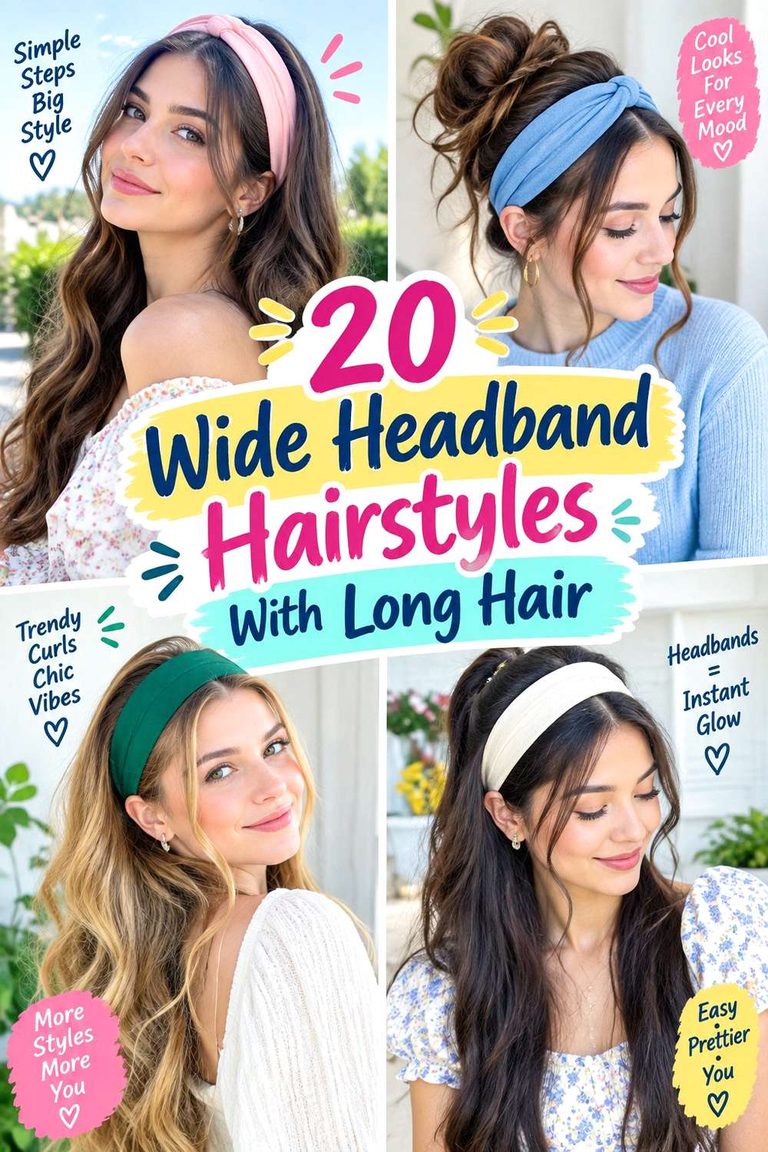
Headband Half-Up Waves Friendsgiving Hairstyle
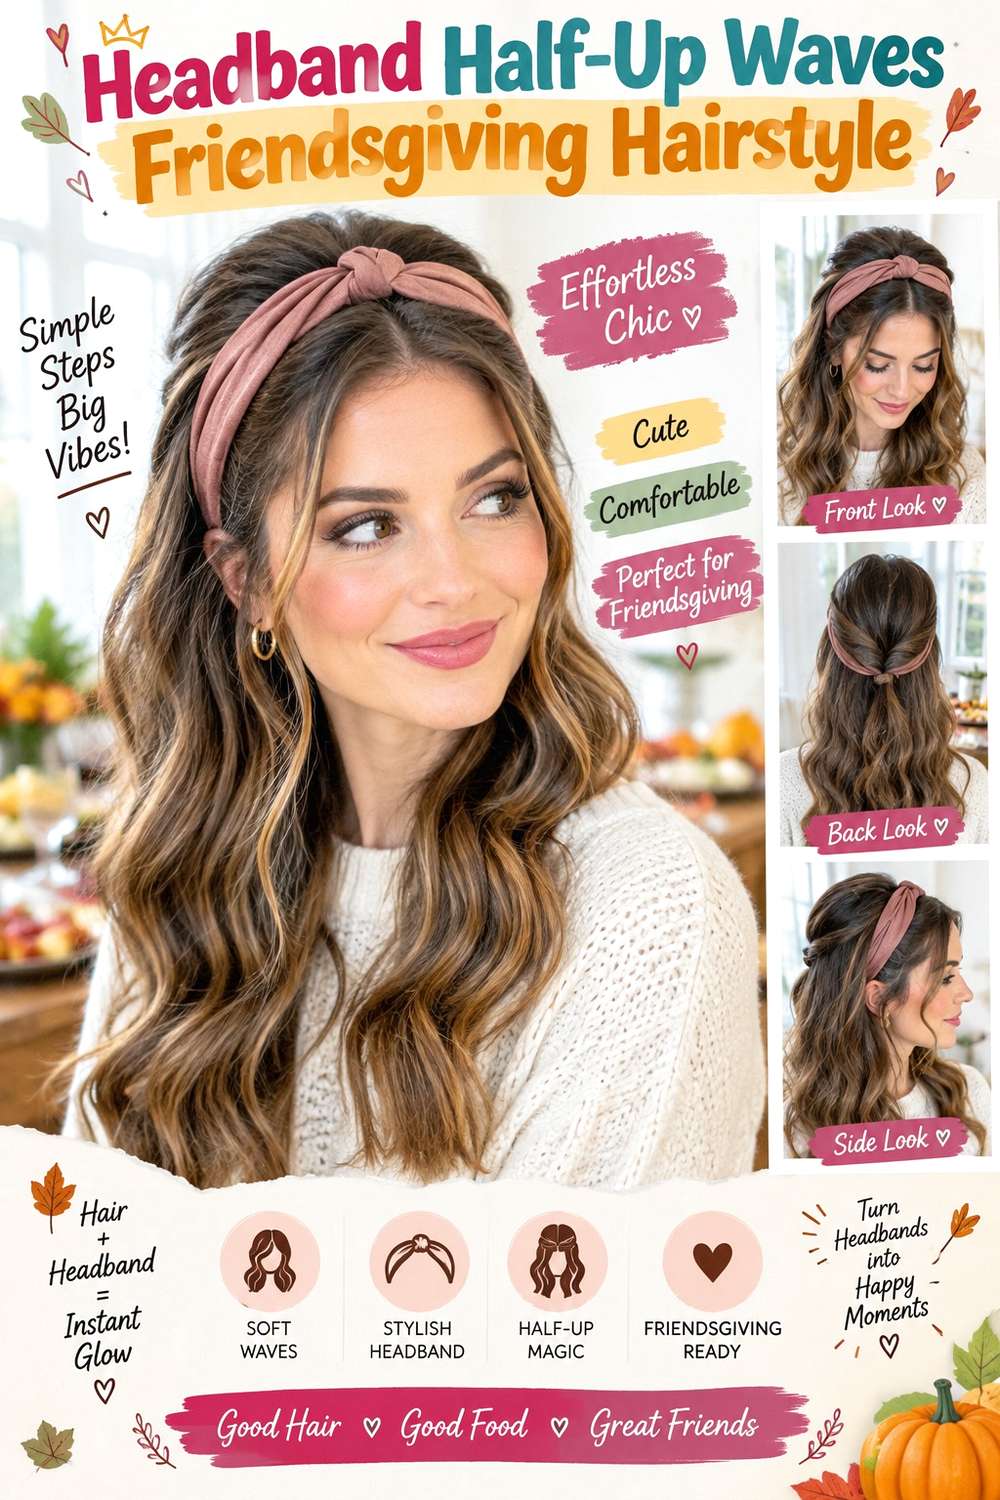
A headband combined with a half-up wave style keeps the front controlled while preserving movement through the back. Create a center or soft side part, set broad waves through the mid-lengths, then gather the upper side sections into a small anchor at the back. Place the headband just behind the hairline, leaving a little front shape visible rather than pushing every section behind it. Medium and long hair work naturally, while a narrower headband usually suits finer or less dense hair without dominating the crown.
Apply heat protectant before shaping, use a curling iron for open bends, and choose a comfortable fabric-covered headband that sits securely without sharp pressure behind the ears. Full wash-day styling takes longer because the waves need to be set, while a refresh may focus only on flattened front and top pieces. If a stylist is cutting your face frame, explain how much hair you typically leave in front of a headband and half-up anchor. Build the half-up section independently so the headband does not have to hold it. If the accessory slips, reset its position rather than tightening the gathered back.
Pro tip:
Finish and cool the waves before placing the headband. Adding the accessory last reduces dents and makes it easier to position it behind the strongest front movement.
Make It Work for You:
For naturally curly or wavy hair, keep the existing texture and refine only uneven front sections if needed. The headband and half-up anchor provide structure without requiring a full heat set.
Watch Out For:
Avoid a rigid headband that presses strongly behind the ears during a long dinner. Choose a flexible fit so comfort does not depend on constantly repositioning the accessory.
Conclusion
Friendsgiving half up hairstyles offer an easy middle ground between wearing everything loose and committing to a full updo. Braids and rope twists add visible texture, while sleek ponytails and low twists give a cleaner finish. Fine or lower-density hair may benefit from smaller gathered sections, whereas dense hair can support broader crowns and fuller knots. Curls and coils can keep their natural pattern, with placement chosen after shrinkage is visible. Center parts feel balanced, side parts create direction, and face-framing pieces can soften the front. When choosing among these ideas, consider how much length you want left down, how much crown volume feels comfortable, and whether you prefer a quick accessory refresh or a more involved styled finish.
Before Your Salon Visit
Choose one or two favorite half-up references and save clear views of the front, sides, and back. Discuss your natural texture, density, face shape, preferred length, upkeep, and everyday styling routine. Point out the exact fringe or face-framing length, crown volume, braid width, twist placement, parting, and loose-hair finish you like. Because half-up Friendsgiving styles are temporary, focus on having enough comfortable usable length and secure anchor points rather than requesting a haircut solely for one event.
FAQs
Can Half-Up Friendsgiving Hairstyles Work on Fine Hair?
Yes. Use a smaller upper section so most of the density remains loose, and choose lightweight elastics, pins, or clips. Gentle crown lift can add shape without aggressive teasing. The goal is to preserve the fullness of the lower hair rather than gathering too much into the half-up anchor.
How Do I Keep a Half-Up Hairstyle Secure Through Dinner?
Build a stable anchor with an elastic, pins, braid, or properly sized clip before loosening the visible surface. If one section slips, repair that area instead of tightening everything. Also consider where the anchor sits against a chair back, sweater collar, or headband during a long meal.
Can Curly or Coily Hair Wear Half-Up Styles Without Heat?
Yes. Curly and coily textures work naturally with puffs, twists, braids, clips, and half-up ponytails. Choose the placement after the hair is fully dry so shrinkage and volume are visible. Keep complete curl or coil groups intact when possible instead of brushing them apart simply to create the style.
What Length Is Easiest for Friendsgiving Half-Up Hairstyles?
Medium to long hair provides the widest range because side and crown sections reach the back easily, but shorter cuts can still use clips or small twists. The key is usable length around the temples and crown. Loose shorter pieces can remain intentional rather than being forced into a tight anchor.