13 Halloween Hairstyles For Long Hair

Halloween hairstyles for long hair can create plenty of drama without requiring a new haircut. Length gives you room for crown braids, low buns, flowing waves, sculpted ponytails, and half-up shapes that can support ribbons, decorative clips, flowers, or themed pins. The strongest designs usually have one clear focal point rather than several competing details: a web-like braid, a dark bow, a sweeping wave, or a carefully positioned accessory.
Straight and wavy hair can make sleek sections and defined braids easy to see, while curly and coily textures can bring natural volume to buns, ponytails, and cascading half-up styles. Density affects how large each element should be. Fine or lower-density hair often works better with narrower braids and lighter accessories, while dense hair can support fuller knots and broader sections without losing the overall shape.
Styling effort ranges from a quick ribbon ponytail to a longer wave set or braided crown. Temporary Halloween looks should rely on comfortable anchors rather than painful tension, and accessories should attach to a secure base instead of carrying the hairstyle themselves. A short refresh before heading out may involve tightening one anchor, redefining a tendril, or smoothing flyaways, while full wash-day preparation takes longer depending on length and natural texture.
Quick List
- Velvet Bat Bow Half-Up Hairstyle
- Gothic Braided Crown Hairstyle
- Spiderweb Side Braid Hairstyle
- Vampire Wave Side Part Hairstyle
- Witchy Ribbon Low Ponytail Hairstyle
- Ghostly Bubble Braid Hairstyle
- Dark Rose Low Bun Hairstyle
- Twisted Horn Half-Up Hairstyle
- Moon Clip Cascade Hairstyle
- Lace Veil Half-Up Hairstyle
- Skull Pin Braided Ponytail Hairstyle
- Curly Tendril Witch Bun Hairstyle
- Cobweb Accent Braid Hairstyle
Velvet Bat Bow Half-Up Hairstyle
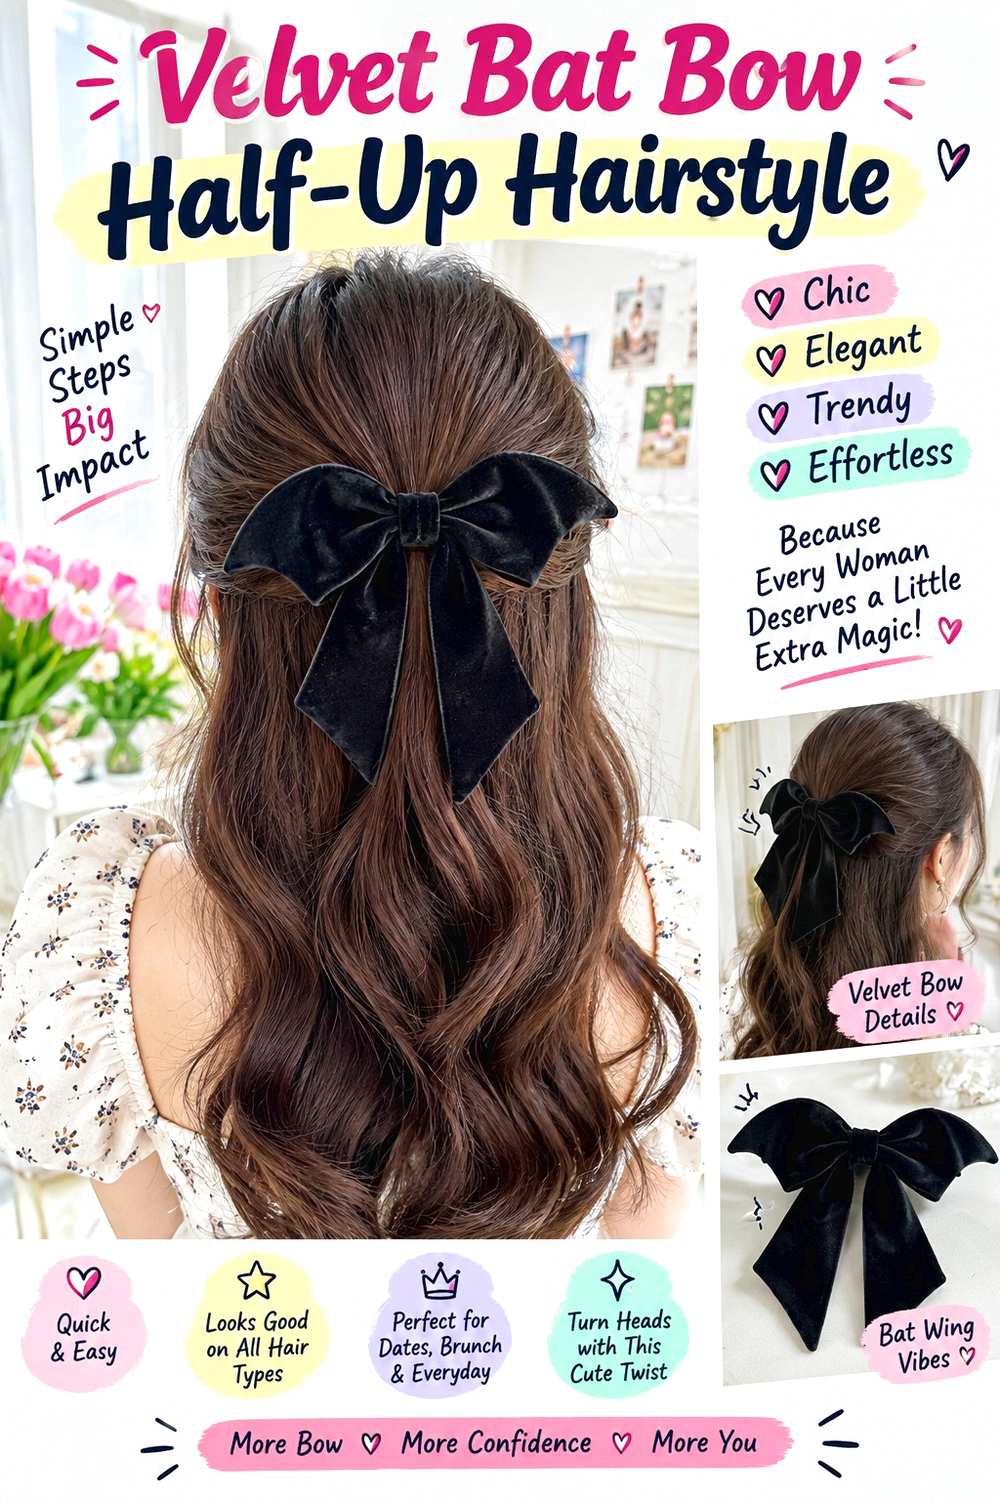
A half-up shape gives a bat-inspired velvet bow enough structure to feel intentional without hiding the length. Gather the crown and temple sections toward the back of the head, keeping the top softly lifted rather than pulled flat. Let the remaining hair fall in loose waves, curls, or its natural texture, with a few narrow face-framing pieces left free around the temples. The bow should sit just below the crown so it remains visible from the side without becoming the highest point of the hairstyle.
Use light texturizing spray to give the gathered section grip, bobby pins to build a stable anchor, and a velvet bat-shaped bow or dark ribbon clip as the decorative finish. A quick refresh can involve checking the pins and smoothing the front; a full wash-day version takes longer if you also create waves through the lengths. This works especially well on medium to dense long hair, while finer hair usually benefits from a smaller accessory.
For professional or event styling, specify how much hair you want left loose and exactly where the bow should sit. Ask for comfortable anchor placement rather than extra-tight pulling. The accessory should attach to the secured half-up base, not hold the style by itself.
Pro tip:
Build and test the half-up anchor before attaching the bow. Turn your head gently from side to side to make sure the base stays stable without pulling.
Make It Work for You:
If your hair is fine or lower in density, gather a narrower crown section and choose a lighter bow so the accessory does not flatten or overpower the loose lengths.
Watch Out For:
Do not clamp a heavy bow onto loose hair alone. Attach it to a secure pinned base so movement does not make the accessory slide downward.
Gothic Braided Crown Hairstyle
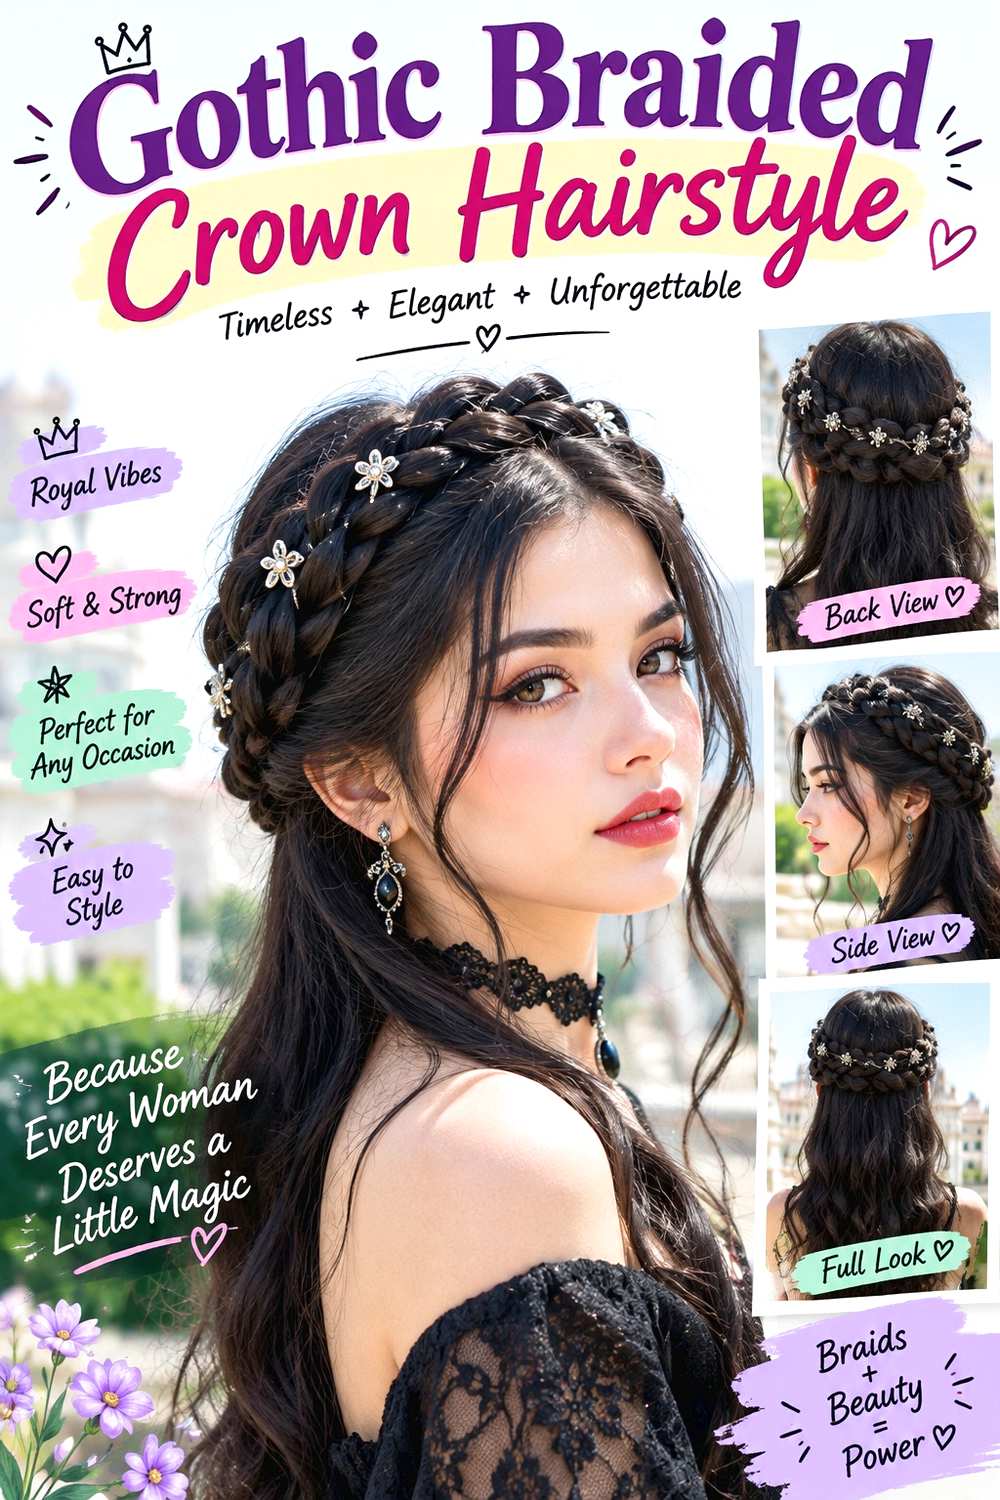
A braided crown creates a dramatic Halloween silhouette while keeping long hair controlled and comfortable. Start a braid above one ear, carry it across the back or top of the head, and anchor it near the opposite side. The braid can stay broad and softly expanded instead of tightly woven, while the remaining length is tucked beneath, gathered low, or left flowing depending on how formal you want the finish. Loose temple pieces soften the front and keep the crown from looking severe.
Use texturizing spray for grip, a clear elastic to secure the braid end, and bobby pins to anchor the braid along the head. A short refresh involves checking the overlap and replacing any loose pins; the full style takes longer on dense or very long hair because the braid needs even sectioning. Straight, wavy, curly, and coily textures can all work, though braid width should reflect density and length.
If someone else is styling it, explain whether you want the crown to sit high across the top or lower around the back. Ask for even, comfortable tension and several anchor points rather than one tight section. The braid should feel secure when you move your head, but it should not create scalp pain or tug at the hairline.
Pro tip:
Secure the braid at several points before gently widening its outer edges. Expanding after anchoring keeps the crown soft without loosening the entire structure.
Make It Work for You:
For shorter front layers, leave a few pieces loose near the temples instead of forcing them into the braid. The softer frame still preserves the crown shape.
Watch Out For:
A braid secured only at the end may sag during wear. Add discreet anchors along the curve while keeping each pin comfortable against the scalp.
Spiderweb Side Braid Hairstyle
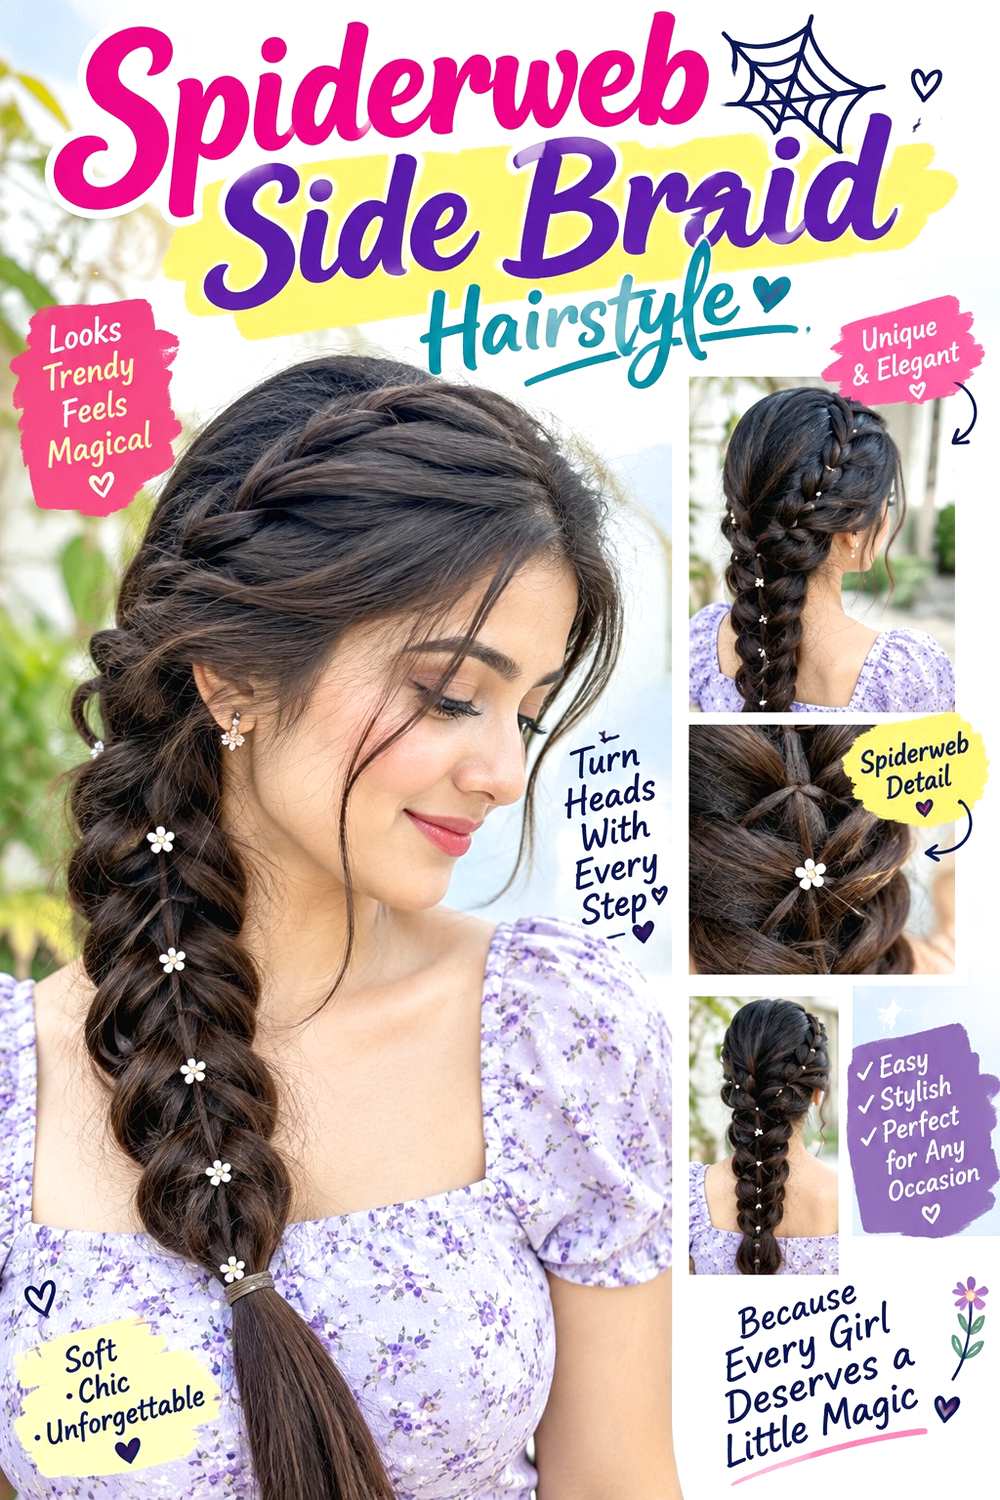
A spiderweb-inspired side braid uses small connected sections to create the illusion of webbing without covering the whole head in accessories. Sweep most of the hair to one side, then build a loose main braid from around the ear downward. On the exposed side, create two or three narrow connecting sections that feed toward the braid at different points, leaving visible spaces between them. The web effect should stay flat enough to read clearly while the long braid provides movement below.
Use light styling gel to keep the smaller web sections neat, clear elastics to secure their connection points, and bobby pins where extra support is needed. A quick refresh can tighten one connecting section or smooth flyaways, while the full style is more detailed and takes longer than a standard side braid. Medium and dense long hair gives the pattern more material, but fine hair can use fewer, wider connections.
For salon or event styling, show how much of the side of your head you want covered by the web detail. Ask for comfortable tension around the temple and ear, and specify whether the main braid should be narrow or full. The small sections should connect securely without being pulled so tightly that the side of the head feels sore.
Pro tip:
Map the web sections before securing them permanently. Keeping the spaces uneven but balanced makes the pattern easier to see and prevents a crowded, tangled appearance.
Make It Work for You:
If your hair is fine, use two or three larger web sections instead of many tiny ones. The design stays readable without dividing too much hair into small pieces.
Watch Out For:
Do not tighten each connecting section repeatedly. If the web shifts, reinforce the anchor point rather than increasing tension around the temple or hairline.
Vampire Wave Side Part Hairstyle
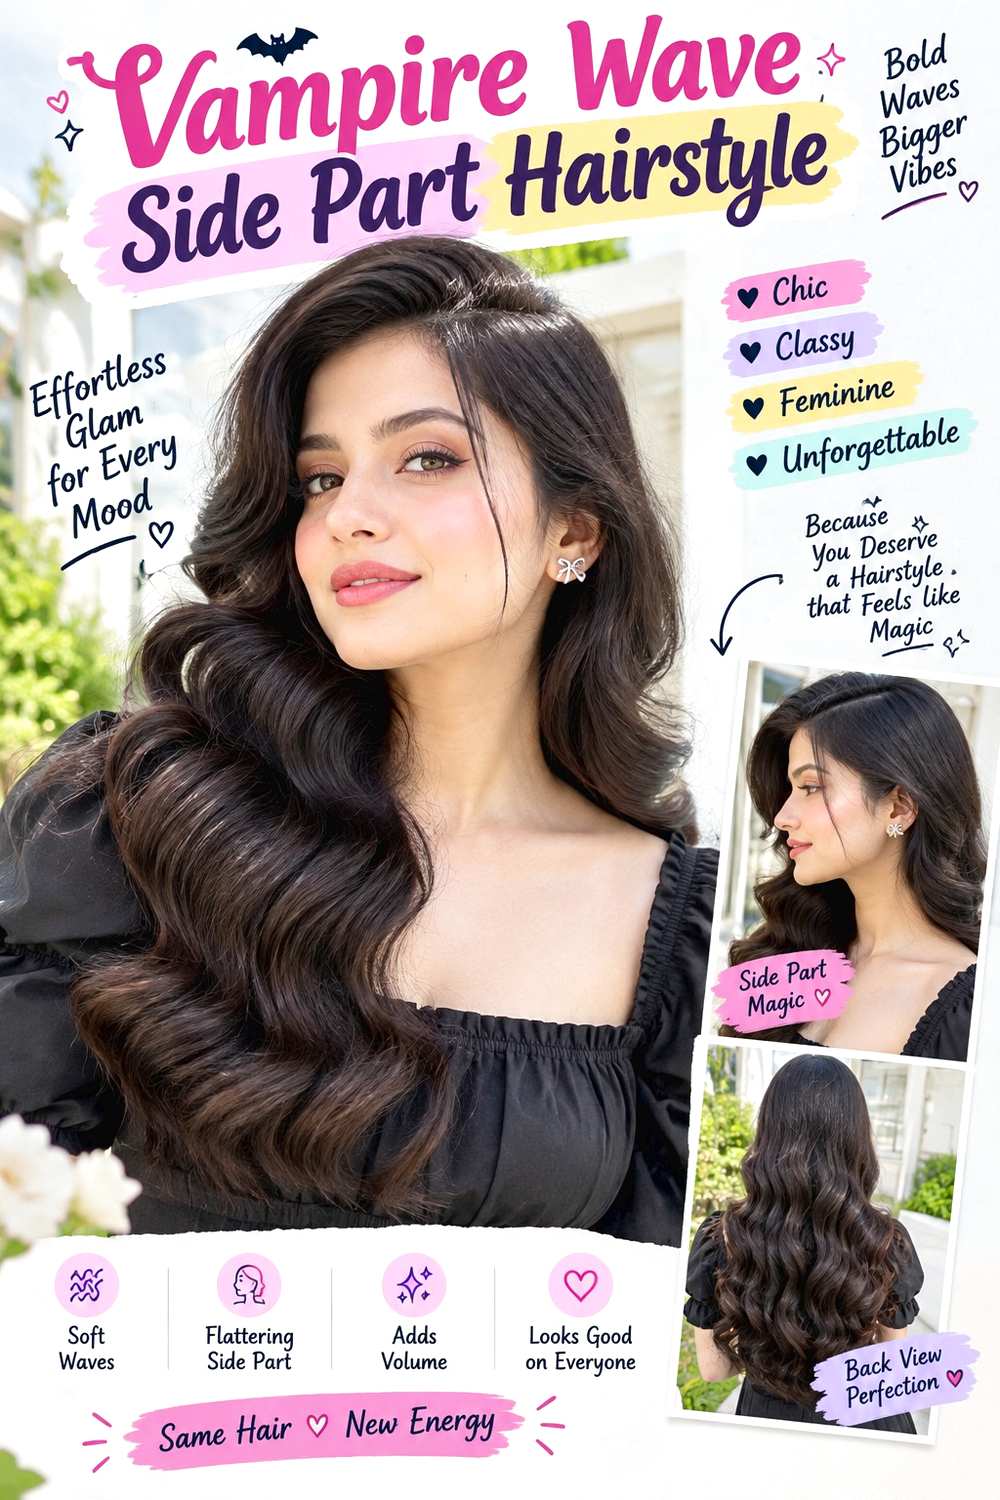
A deep side part and polished waves create a vampire-inspired look without relying on obvious costume accessories. Keep the roots smoother on the lighter side, then build broad bends from around the cheekbones or jaw through the long lengths. Let the heavier side fall forward while the opposite side tucks behind the ear or stays close to the head. The ends should remain soft and movable rather than tightly spiraled, which keeps the finish dramatic but wearable.
Apply heat protectant before using a large curling iron, then finish with flexible hairspray after the curls have cooled. A quick refresh can target the front bend and any flattened sections near the shoulders; a full wash-day set takes longer, particularly on very long or dense hair. Straight and wavy textures can reach the finish most directly, while curly hair can preserve more natural texture if a fully polished wave is not the goal.
For professional styling, show how deep you want the side part and where the first visible wave should begin. Ask for the tucked side to remain smooth with comfortable pinning. The defining balance is one fuller side against one controlled side, so extra volume is not needed everywhere.
Pro tip:
Clip the front wave into its curve while it cools, then release it last. The bend will hold more cleanly without requiring an overly stiff amount of spray.
Make It Work for You:
If your hair is naturally curly, smooth only the front sections and let the lower lengths keep more of their pattern for a softer, lower-heat interpretation.
Watch Out For:
Brushing the wave set before it has cooled can flatten the pattern. Wait until the sections are fully cool, then soften them together gently.
Witchy Ribbon Low Ponytail Hairstyle
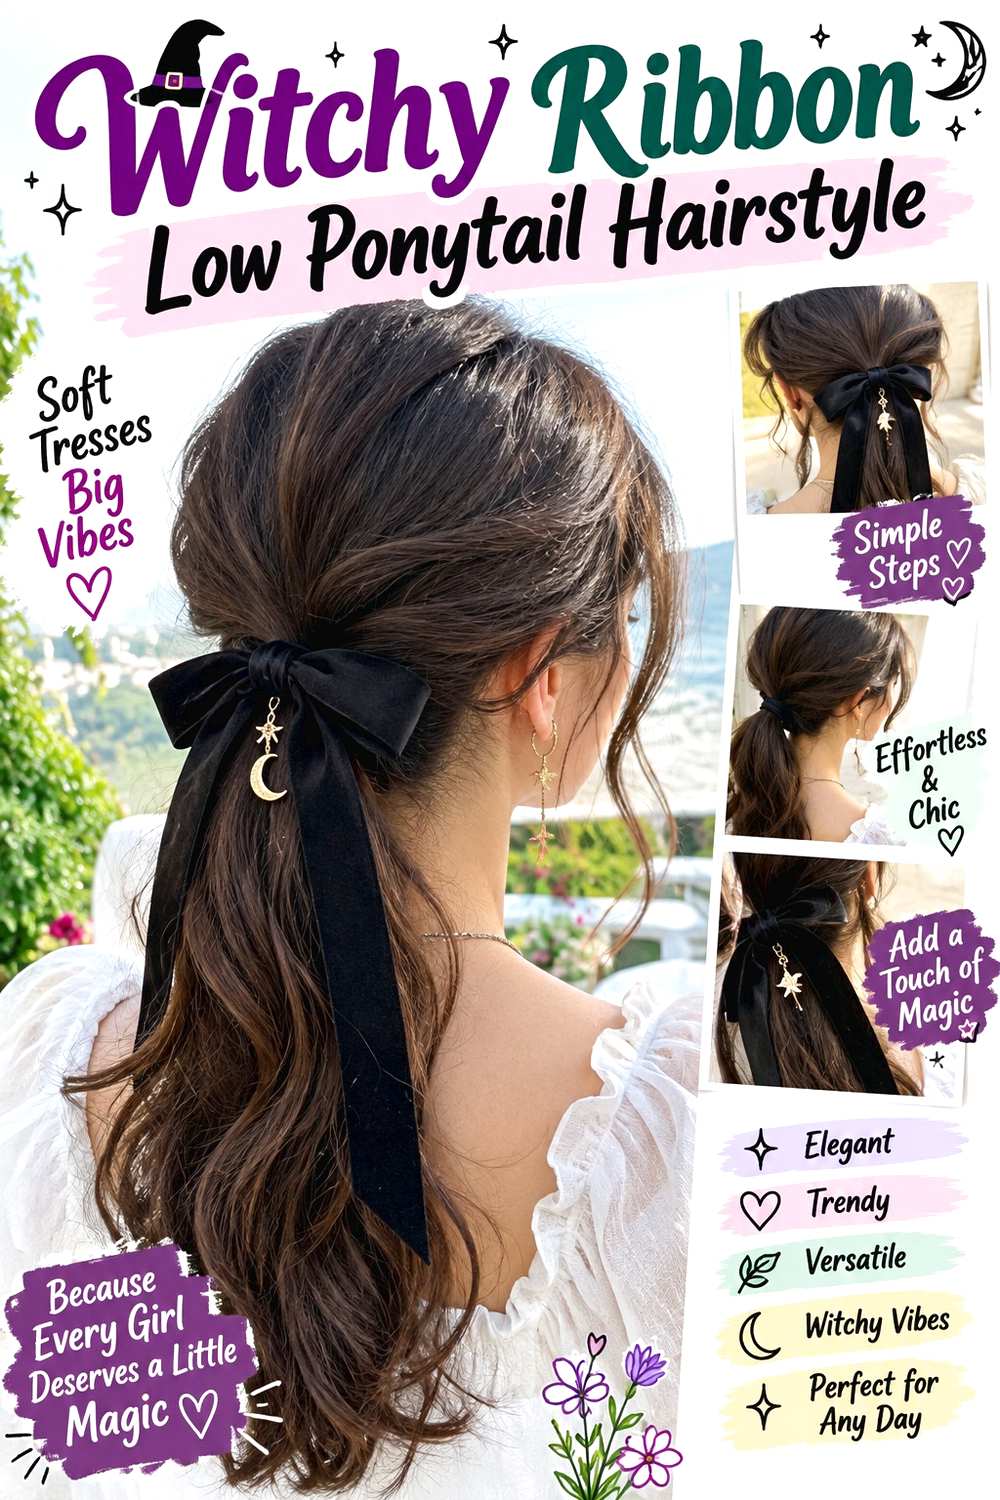
A low ponytail with a long dark ribbon creates a witchy Halloween effect while staying practical for long hair. Part the hair in the center or softly to one side, leave two narrow face-framing pieces free, and gather the rest close to the nape. The ponytail can stay straight, wavy, curly, or coily; the defining feature is the low placement and ribbon trailing alongside the length. Keep the crown smooth but not stretched tightly against the scalp.
Use a fabric-covered elastic to form the secure base, light styling cream to control surface flyaways, and a long velvet or satin ribbon tied around the elastic. A quick refresh can involve retightening the bow and smoothing the front; full styling takes longer only if you also reshape the ponytail texture. This works across densities, though the ribbon width should stay proportional to the ponytail.
If you have the style done for an event, specify how low the base should sit and how long you want the ribbon tails to fall. Ask for comfortable tension around the temples and nape. The elastic should hold the ponytail, while the ribbon functions as decoration rather than the primary anchor.
Pro tip:
Secure the ponytail completely before tying the ribbon. This lets you loosen the bow later if needed without changing the tension or stability of the hairstyle.
Make It Work for You:
For very dense hair, use a wider ribbon that remains visible against the ponytail, but keep its knot compact so it does not add uncomfortable bulk at the nape.
Watch Out For:
Do not tighten the ribbon to compensate for a slipping ponytail. Reinforce the hidden elastic base instead so the decorative tie remains comfortable.
Ghostly Bubble Braid Hairstyle
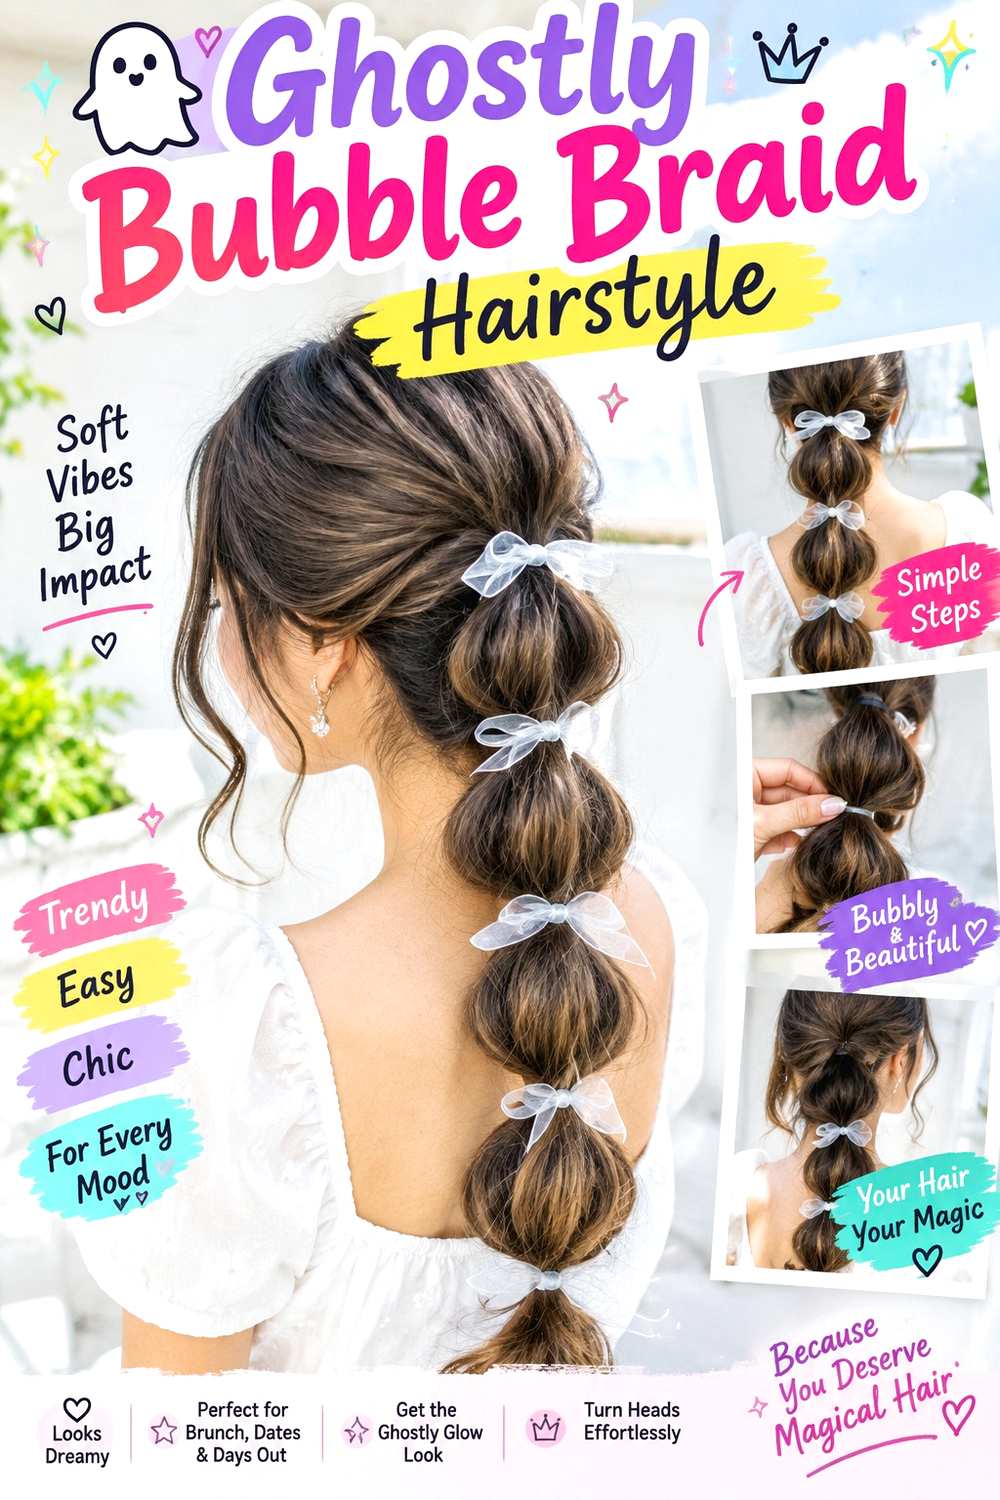
A long bubble braid can create a ghostly, sculptural effect when the sections are softly expanded rather than pulled into a tight conventional braid. Gather the hair into a mid or low ponytail, then place evenly spaced elastics down the length. Gently widen each section between the elastics so the bubbles look rounded and airy. Keeping the crown smoother provides contrast, while a few loose tendrils around the face prevent the style from feeling overly severe.
Use fabric-covered mini elastics to form the sections, light texturizing spray to add grip, and flexible hairspray to control flyaways after shaping. A quick refresh is simple: adjust any collapsed bubble and check the elastics. The full style takes longer on very long or dense hair because each section needs to be balanced. Straight and wavy hair show the rounded shapes clearly, while curls can create a softer, more textured bubble effect.
For event styling, specify how large you want the bubbles and whether the ponytail should sit low, mid-height, or slightly to one side. Ask for enough slack between elastics to create volume without pulling at the scalp. The first elastic should be stable and comfortable because it supports the weight of the entire length.
Pro tip:
Expand each bubble from the bottom upward after all elastics are in place. This makes it easier to compare their size and keep the overall shape balanced.
Make It Work for You:
If your hair is fine, make fewer, longer bubbles and expand them gently. Larger sections create visual volume without requiring lots of hair at each point.
Watch Out For:
Over-expanding one bubble can make the braid uneven and weaken the section. Adjust both sides gradually rather than pulling hard from one point.
Dark Rose Low Bun Hairstyle

A low bun with a dark rose accessory combines romantic Halloween styling with a secure shape that keeps long hair off the neck. Part the hair in the center or slightly to one side, gather it at the nape, and twist the length into a soft bun. Leave one or two face-framing pieces free, then place the rose just above or beside the bun rather than directly in the middle. This keeps the accessory visible without making it look oversized.
Use a fabric-covered elastic to create the base, bobby pins to distribute the bun’s weight, and a floral clip or comb for the dark rose. A quick refresh can involve replacing a loose pin and checking the flower anchor; a full style takes longer if you first add texture or smooth the lengths. Long, dense hair may need a wider bun so the twist does not become too tall.
For salon or event styling, explain the exact bun height and which side you want the rose placed on. Ask for the flower to anchor into already-secured hair rather than carry the bun itself. Comfortable tension at the temples and nape matters, especially if you plan to wear the style for several hours.
Pro tip:
Finish pinning the bun before adding the rose, then angle the accessory into a firm section underneath. This keeps the flower stable without dragging the surface loose.
Make It Work for You:
For fine hair, use a smaller rose and a flatter bun close to the nape. The accessory remains noticeable without overpowering the scale of the hairstyle.
Watch Out For:
Do not clip a heavy flower onto a loose twist. Anchor it through secured hair so its weight does not pull the bun apart during movement.
Twisted Horn Half-Up Hairstyle
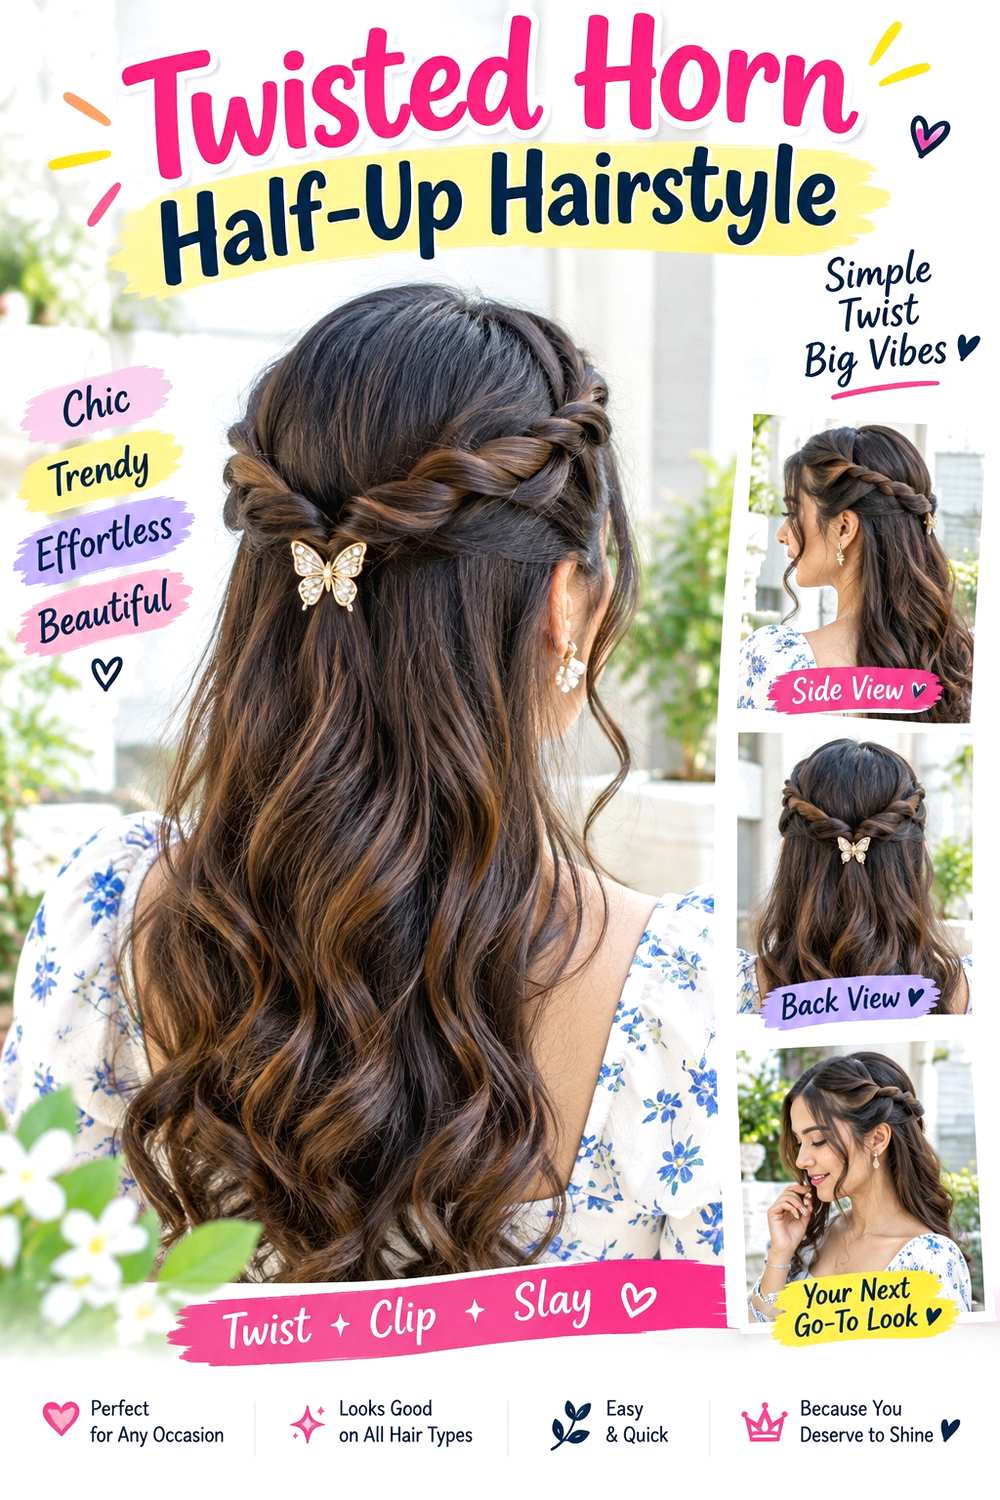
Two small twisted sections at the crown can suggest horn shapes while the rest of the long hair stays loose. Divide the upper hair into two balanced sections, twist each one away from the face, and coil it upward into a compact point or curved knot. Keep the horns relatively small so they remain wearable, and let the lower length fall in waves, curls, or natural texture. A center part gives the design symmetry, while a slightly softer front keeps it from looking too rigid.
Use texturizing spray for grip, bobby pins to secure each twist, and flexible hairspray to hold the finished shape. A quick refresh can focus on one loose pin or reshaping a softened horn; creating both sides evenly takes more time than a standard half-up style. Medium and dense hair can support fuller twists, while fine hair should use smaller sections so the lower lengths remain substantial.
If someone else styles it, specify the height, width, and direction of each horn before pinning begins. Ask for the two sides to feel balanced but not painfully tight. The pins should support the shape at several points so the twists do not rely on scalp tension to stay upright.
Pro tip:
Shape both twists loosely before pinning either one permanently. Comparing their height first makes symmetry easier than trying to rebuild one side after it is fixed.
Make It Work for You:
For fine or lower-density hair, use narrow upper sections and keep the horns compact, leaving most of the length loose so the overall hairstyle still feels full.
Watch Out For:
Do not keep tightening the twists when they lean. Add support underneath with pins so the shape stays upright without unnecessary pulling at the roots.
Moon Clip Cascade Hairstyle
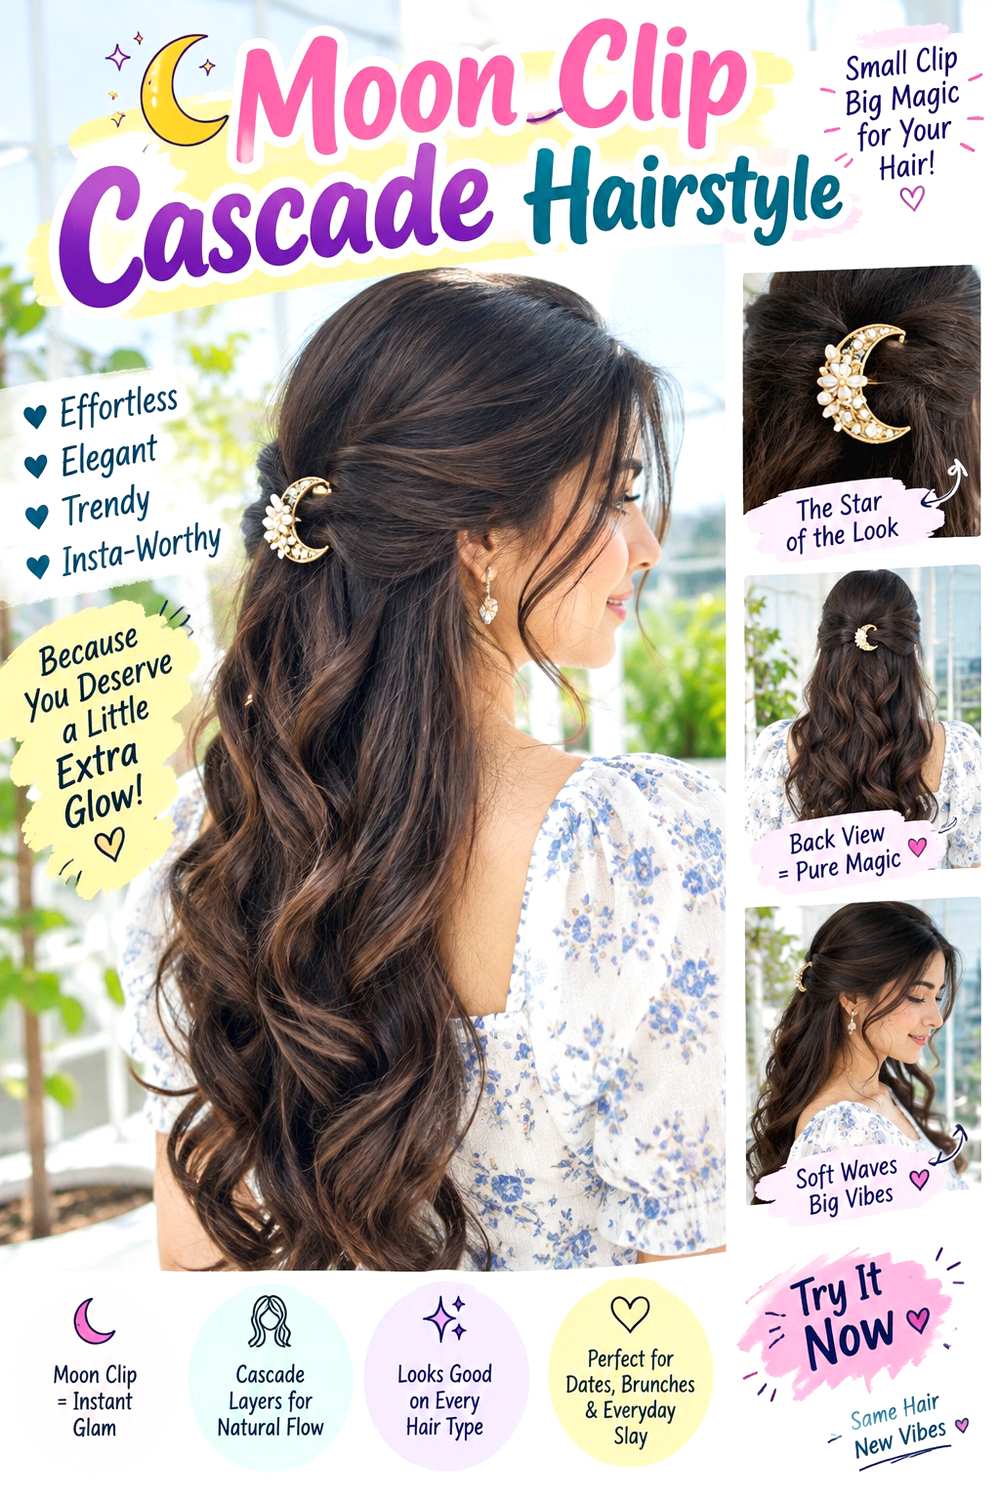
A crescent moon clip works well with a cascading half-up style because the accessory can mark the anchor without taking over the entire design. Sweep the temple sections toward the back and overlap them lightly, keeping soft lift through the crown. Secure the join below the widest part of the head, then let the long lengths cascade underneath in waves, curls, or natural texture. The clip should sit horizontally or on a slight diagonal depending on its shape, while a few front pieces stay loose for softness.
Use light texturizing spray for grip, bobby pins to secure the underlying half-up section, and a crescent-shaped clip as the decorative finish. A quick refresh can involve checking the hidden pins and repositioning the clip; full styling takes longer if you also create a wave set. The look works across textures, but a heavy metal clip needs a stronger base than a lightweight barrette.
For salon or event styling, show whether you want the moon visible from the back only or from a three-quarter angle. Ask for the accessory to attach to a pinned section rather than loose hair. The cascade should move freely below the anchor while the clip remains stationary.
Pro tip:
Test the moon clip on the finished anchor before loosening the crown. Once its position is secure, soften the surrounding sections without disturbing the support underneath.
Make It Work for You:
If your hair is slippery or fine, choose a lighter moon clip and build a smaller pinned base so the accessory stays secure without flattening the crown.
Watch Out For:
A decorative clip should not carry the full half-up section. If it slips, strengthen the hidden anchor instead of clamping the accessory more tightly.
Lace Veil Half-Up Hairstyle
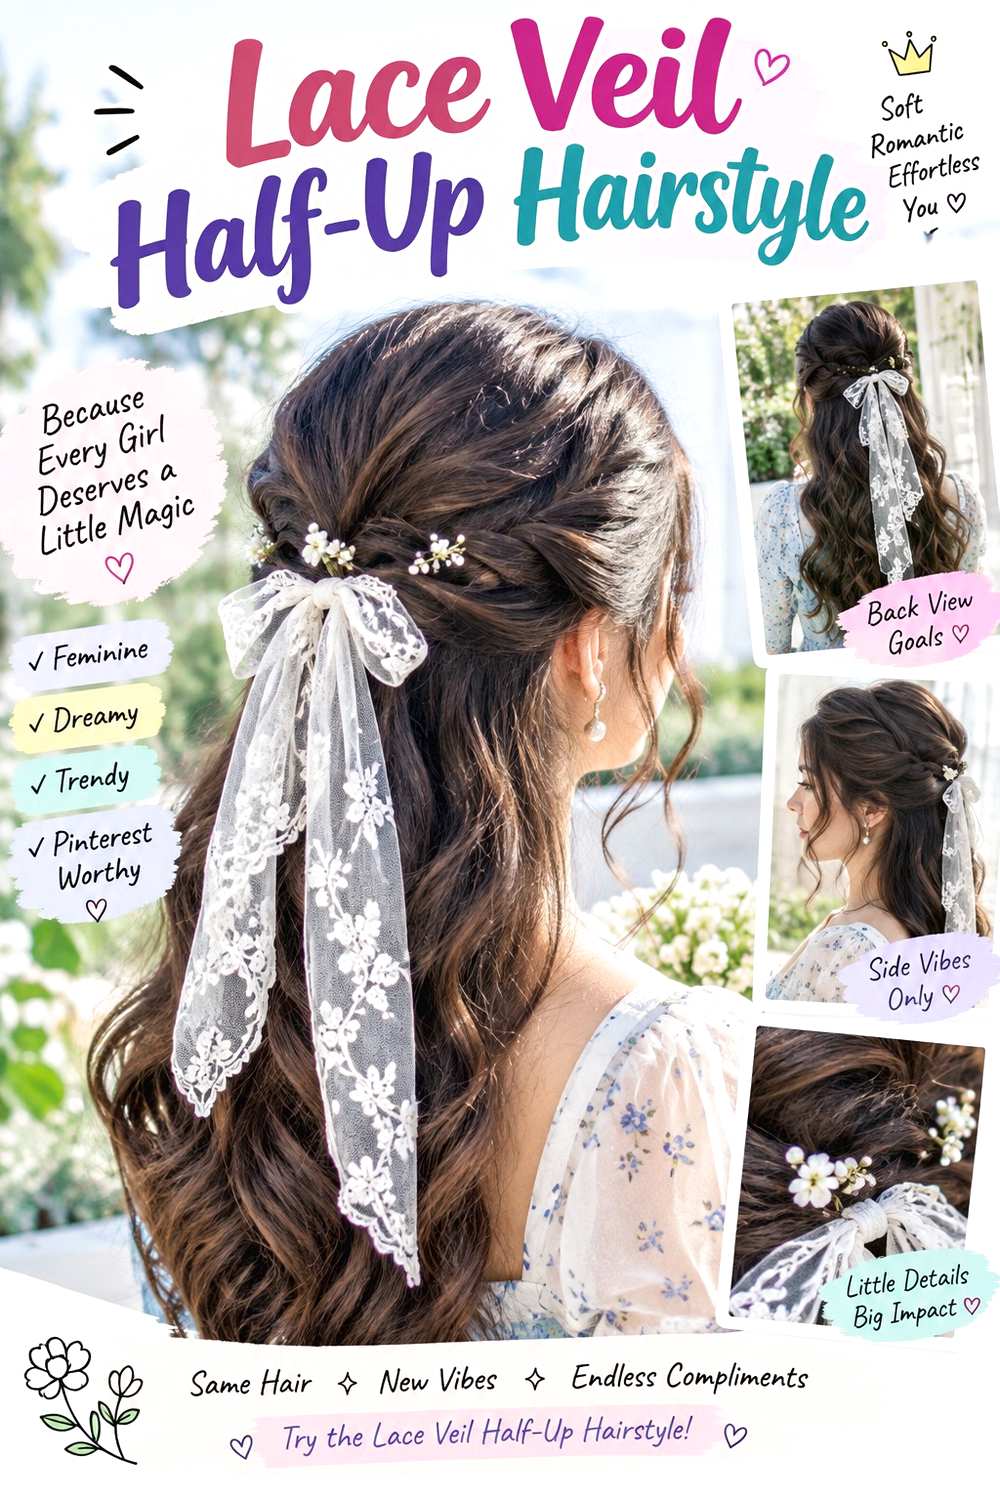
A short lace veil adds a gothic Halloween detail to a half-up style while leaving long hair visible underneath. Keep the crown softly lifted, gather narrow sections from the temples, and anchor them at the back before attaching the veil. The lace can fall to the upper back rather than covering the full hair length, allowing waves, curls, or straight lengths to remain part of the look. A center part creates symmetry, while a side part makes the veil feel slightly more dramatic.
Use light texturizing spray for grip, bobby pins to build the hidden half-up base, and a comb-attached lace veil for the decorative layer. A quick refresh involves checking the comb and smoothing the front; a complete style takes longer if the loose lengths are heat-shaped. Medium to dense hair can support a slightly wider veil, while fine hair usually works better with lightweight lace.
For professional styling, bring the actual veil if possible so the anchor can be built around its comb size and weight. Specify where you want the veil to begin and how much crown volume should remain visible. The veil should slide into secured hair, not be pushed repeatedly into the scalp for extra grip.
Pro tip:
Build the hairstyle around the veil’s comb rather than attaching it as an afterthought. A correctly sized anchor keeps the lace stable without excessive pinning.
Make It Work for You:
For curly or coily hair, keep the loose texture natural beneath the veil and use the half-up anchor only to control placement at the crown.
Watch Out For:
Heavy lace attached to a weak base can pull backward. Use a lighter veil or strengthen the hidden anchor instead of increasing scalp tension.
Skull Pin Braided Ponytail Hairstyle
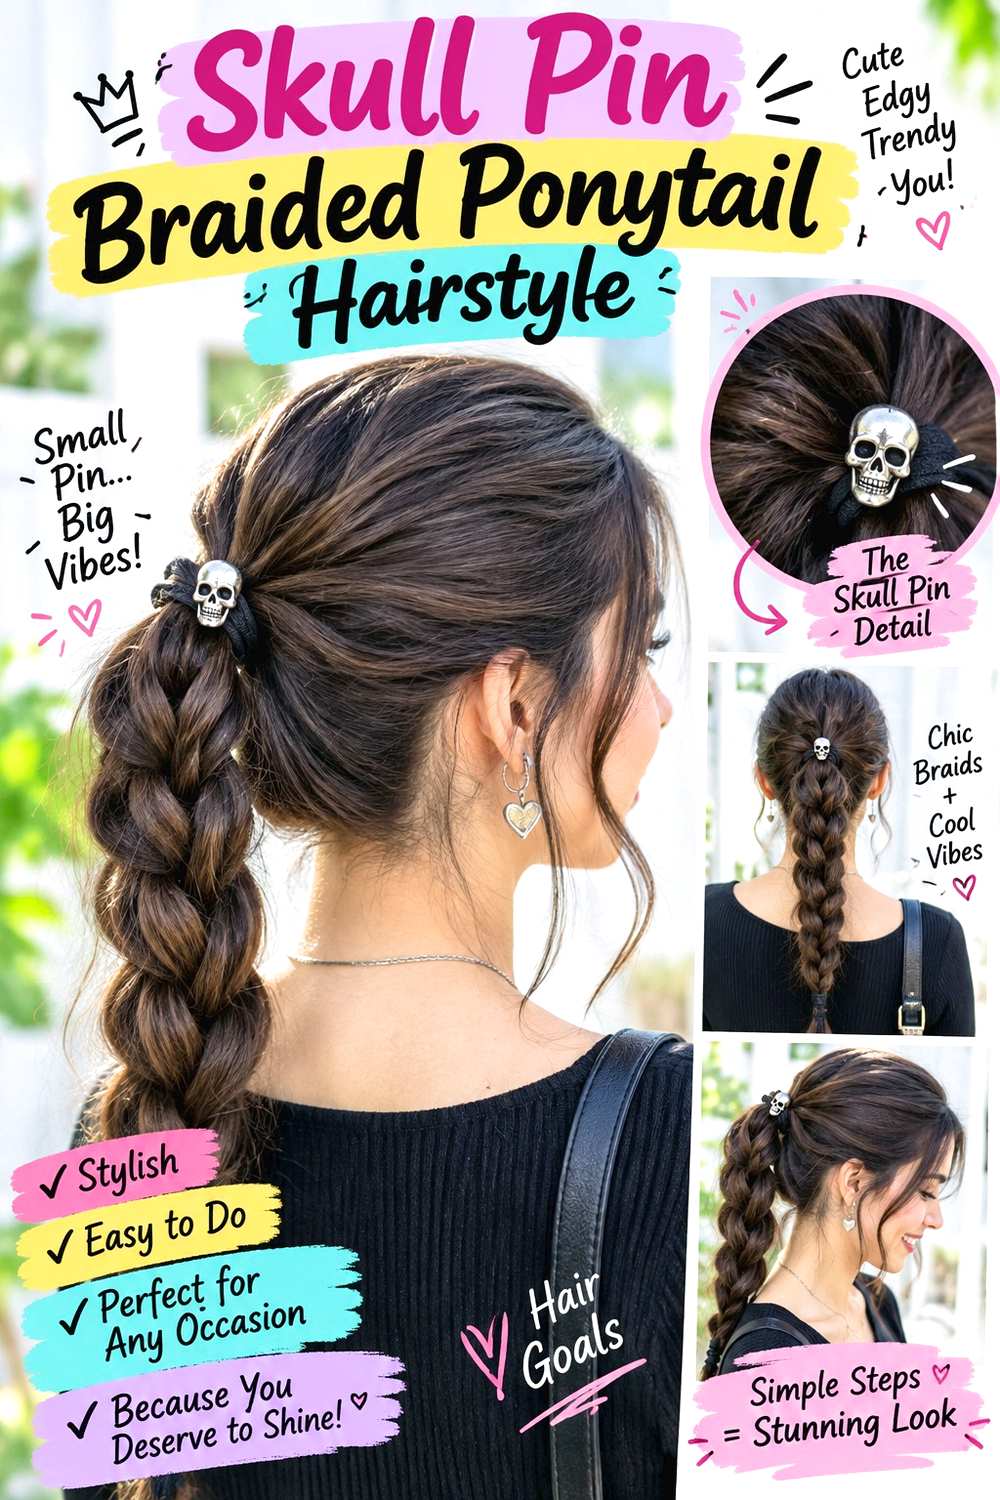
A braided ponytail with skull pins adds a clear Halloween detail without making the hairstyle difficult to wear. Gather the hair into a mid or low ponytail, then create one substantial braid down the length. Keep the braid slightly expanded so the skull pins or charms have visible spaces to sit against, but leave the crown controlled and comfortable. The decorative pins can be clustered near the upper braid or spaced irregularly through the length rather than attached at every crossing.
Use a fabric-covered elastic for the ponytail base, light texturizing spray for braid grip, and small skull pins or charms as accents. A quick refresh can involve checking the base and repositioning one accessory; the full style takes longer if your hair is very long or dense. Straight, wavy, curly, and coily textures can all work, with braid scale adjusted to density.
For salon or event styling, specify the braid width and how many accessories you plan to use. Ask for the ponytail base to feel stable without excessive tension. Decorative pins should slide into the braid itself or a secure section, not press against the scalp. Keeping the accessories lightweight reduces the chance of the braid sagging over several hours.
Pro tip:
Place the largest skull accent near the upper third of the braid, then use smaller pieces lower down. This keeps visual weight closer to the strongest anchor.
Make It Work for You:
If your hair is fine, keep the braid moderately narrow and use fewer lightweight pins so the accessories do not make the braided length collapse or twist.
Watch Out For:
Too many heavy charms can drag the braid downward and stress the base. Reduce accessory weight rather than tightening the ponytail more aggressively.
Curly Tendril Witch Bun Hairstyle

A high or mid-height bun with defined curly tendrils creates a witchy silhouette while preserving the natural movement of long textured hair. Gather most of the hair upward without flattening the crown completely, then shape the bun so curls remain visible rather than being compressed into one smooth knot. Leave a few deliberate tendrils around the temples, ears, or jaw. Their placement should look controlled rather than random, with enough length to show the curl pattern clearly.
Use curl gel to reinforce the loose tendrils, a fabric-covered elastic for the bun base, and bobby pins to shape and secure the gathered curls. A quick refresh can involve re-wetting the front tendrils and replacing one pin; a full wash-day version takes longer because the curls need to dry before their final placement is obvious. Curly and coily textures are especially suited to this shape, but wavy hair can create a softer version.
For professional styling, specify the bun height and how many curls you want left loose. Ask for comfortable tension around the hairline and nape, with weight distributed through several pins. The bun should feel stable without requiring the roots to be stretched painfully tight.
Pro tip:
Separate the tendrils before building the bun and keep them clipped aside. This prevents the face-framing curls from being accidentally trapped inside the main anchor.
Make It Work for You:
If your curls shrink strongly, leave slightly longer front sections free and judge their position after drying so the tendrils do not finish much shorter than intended.
Watch Out For:
Do not pull the bun tighter to smooth natural texture. Secure the shape with distributed anchors while allowing comfortable volume around the crown and hairline.
Cobweb Accent Braid Hairstyle
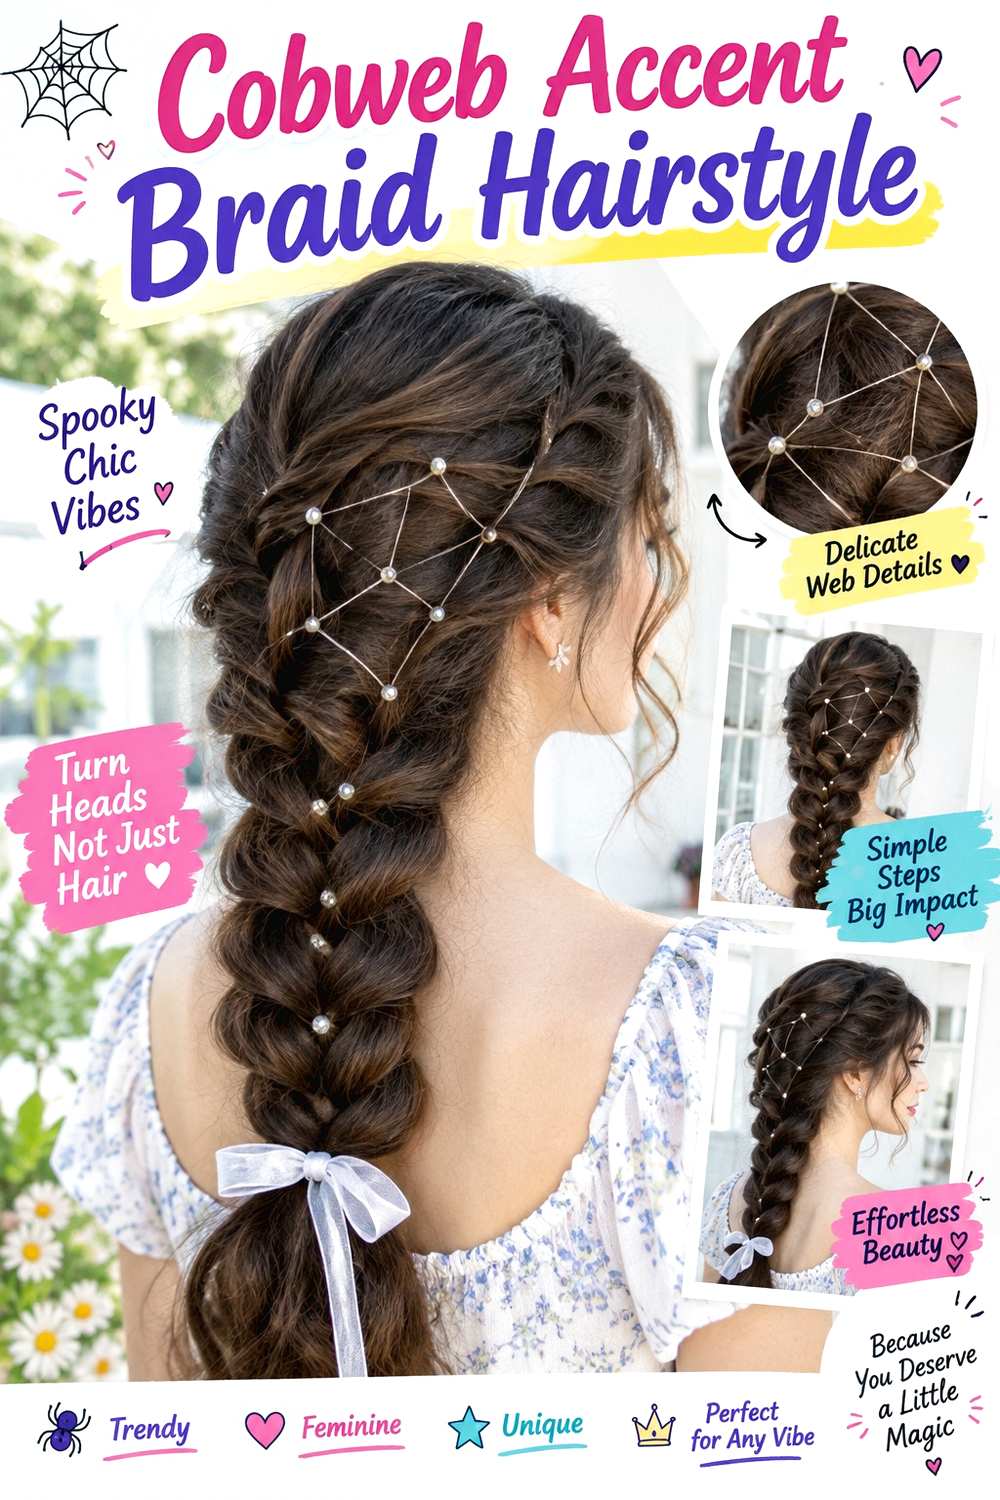
A cobweb accent braid keeps most of the long hair loose while adding one detailed Halloween section near the temple or behind the ear. Create a narrow braid as the main anchor, then connect several tiny sections into it at staggered points so open spaces form between the strands. Keep the web area compact, with the remaining hair falling naturally in waves, curls, or a straight finish. This works well when you want a themed detail without committing to a full braided headpiece.
Use light styling gel to keep the small sections controlled, clear elastics for the connection points, and bobby pins to secure the finished accent against the side of the head. A quick refresh can involve smoothing one section or replacing an elastic; the full web takes more patience than a standard accent braid. Fine hair should use fewer connections, while dense hair can support a larger pattern without making the loose lengths feel depleted.
If a stylist is creating it, show where you want the cobweb visible from the front and side. Ask for comfortable tension around the temple and enough support at the anchor braid. The web should sit securely without pulling multiple tiny sections tightly against the scalp.
Pro tip:
Build the anchor braid first, then add the web connections one at a time. This keeps the pattern organized and gives every small section a stable point to join.
Make It Work for You:
For lower-density hair, keep the cobweb behind one temple and use only a few larger connections, leaving most of the long hair untouched and visually full.
Watch Out For:
Too many tiny sections can tangle and create uncomfortable tension. Use fewer connections and reinforce the anchor braid instead of tightening every strand.
Conclusion
Halloween hairstyles for long hair can be dramatic without requiring a complicated costume or permanent haircut. Waves and low ponytails give a softer finish, while crown braids, bubble braids, and web details create stronger structure. Bows, roses, moon clips, veils, and skull pins work best when attached to secure anchors rather than loose hair. Fine or lower-density hair generally benefits from lighter accessories and smaller sections; dense hair can support fuller buns and wider braids. Curly and coily textures can keep their natural movement in tendril buns, cascades, and half-up shapes instead of being straightened. Choose the parting, volume, placement, and styling effort that fit both your Halloween plans and the amount of time you actually want to spend getting ready.
Before Your Salon Visit
Choose one or two favorites and save references showing the exact braid width, ponytail height, bun placement, loose-piece length, accessory position, and overall finish you like. Since these are temporary Halloween styles, focus on styling rather than requesting a haircut you do not otherwise want. Discuss your natural texture, density, long-hair length, comfort with tension, and how many hours the style needs to last. If you are bringing a bow, veil, clip, flower, or pins, show the accessory so the anchor can be planned around its size and weight.
FAQs
Which Halloween hairstyle is easiest for very long hair?
A low ribbon ponytail, bubble braid, or simple half-up accessory style is usually easier to manage than an elaborate crown braid. Very long hair adds weight, so keep the main anchor secure and comfortable. Choose a design that controls the length without requiring many tiny sections.
How can I keep Halloween hair accessories from slipping?
Secure the hairstyle first, then attach the accessory to that stable base. Bobby-pin anchors, braids, or elastics can provide support depending on the design. A heavy bow, veil, flower, or decorative clip should not be responsible for holding the entire hairstyle by itself.
Can curly or coily long hair work for these Halloween styles?
Yes. Buns, braided crowns, ponytails, half-up styles, and accessory looks can all preserve natural curls or coils. Plan loose pieces in their dry state, keep comfortable tension at the hairline, and place decorations where they remain visible after shrinkage and natural volume return.
Do Halloween hairstyles for long hair need heat styling?
No. Heat is useful for polished waves or deliberately shaped bends, but many braids, ponytails, buns, and half-up styles work with natural texture. If you use hot tools, include heat protectant and focus touch-ups only where needed rather than repeatedly reheating the entire length.