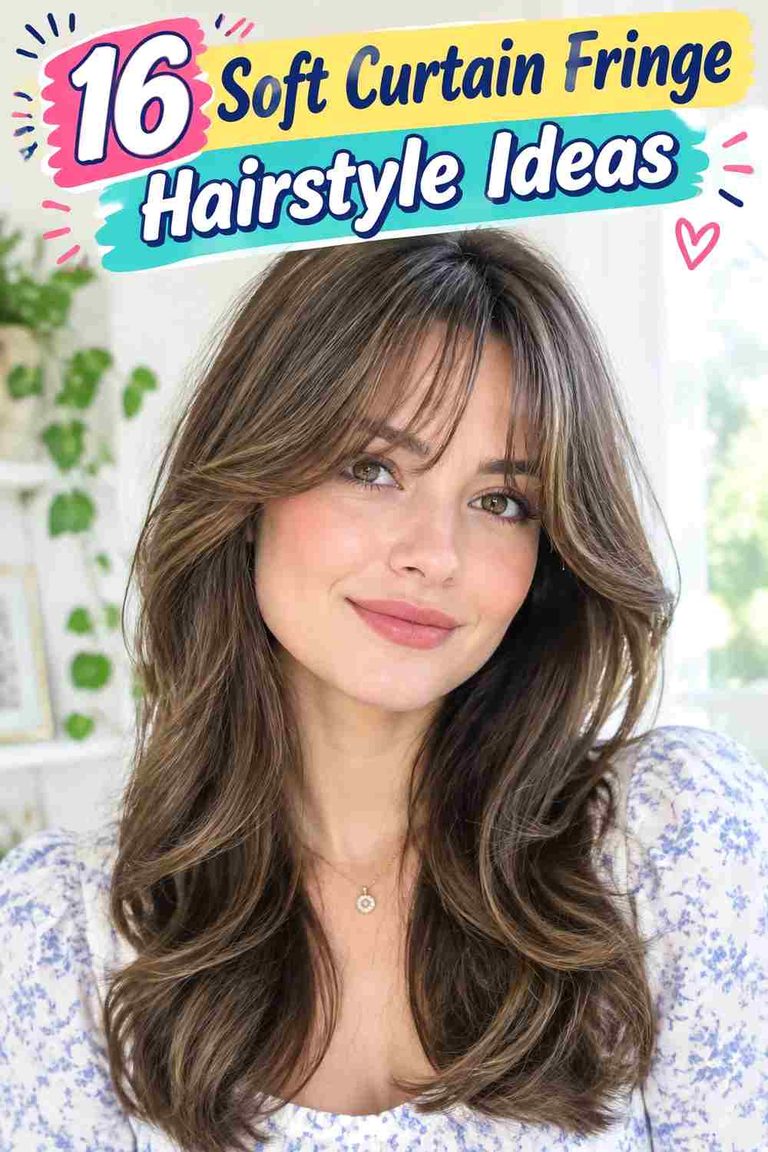
17 Long Wispy Fringe Hairstyle Ideas

A long wispy fringe uses light, separated pieces that fall lower than a short bang, usually reaching from the eyes or upper cheeks toward the cheekbones. The center can remain slightly shorter while longer outer sections merge into face-framing layers, or the entire fringe can sweep sideways. Unlike a dense full fringe, the shape allows some forehead to remain visible. Soft ends, modest volume, and flexible movement keep the front airy rather than forming a heavy curtain across the face.
Straight and wavy textures show fine separation clearly, while curls can create a wispy effect through selected narrow curl groups. Fine strands often benefit from a shallow fringe section so useful density remains at the sides. Dense hair may support a fuller section but still needs controlled weight. Curl shrinkage and hairline growth direction should always influence the finished length.
Daily styling can be simple when the fringe follows its natural direction. A quick refresh usually targets only the roots and front pieces, while a full wash-day routine takes longer. Maintenance becomes useful when the center enters the eyes, the fringe loses separation, or the outer sections merge completely into longer layers.
Quick List
- Cheekbone Long Wispy Fringe Hairstyle
- Center-Parted Long Wispy Fringe Hairstyle
- Side-Swept Long Wispy Fringe Hairstyle
- Wavy Long Wispy Fringe Hairstyle
- Curly Long Wispy Fringe Hairstyle
- Feathered Long Wispy Fringe Hairstyle
- Narrow Long Wispy Fringe Hairstyle
- Long Layered Wispy Fringe Hairstyle
- Shoulder-Length Long Wispy Fringe Hairstyle
- Bob-Length Long Wispy Fringe Hairstyle
- Shaggy Long Wispy Fringe Hairstyle
- Fine Hair Long Wispy Fringe Hairstyle
- Dense Hair Long Wispy Fringe Hairstyle
- Piecey Long Wispy Fringe Hairstyle
- Off-Center Long Wispy Fringe Hairstyle
- Jawline Long Wispy Fringe Hairstyle
- Tousled Long Wispy Fringe Hairstyle
Cheekbone Long Wispy Fringe Hairstyle

Cheekbone-length pieces make a wispy fringe feel more like delicate face framing than conventional bangs. The center can begin near the lower eye area, while the outer sections skim the cheekbones and blend gradually toward the temples. A center or slightly off-center opening keeps the forehead visible. Below the fringe, medium or long layers can continue through the jaw and shoulders, creating a smooth progression without requiring many short pieces.
Straight and softly wavy textures show the airy separation particularly clearly. Apply heat protectant before heated styling, use a small round brush to give the front a broad outward curve, and finish with lightweight styling cream on selected ends. A quick refresh may take only several minutes because the fringe can be dampened separately. Full wash-day styling takes longer when the surrounding layers also need shaping.
At the salon, identify the shortest dry point and where the outer fringe should meet the cheekbones. Ask to preserve enough density for the pieces to move predictably. As the fringe grows, it becomes easier to tuck but gradually disappears into ordinary face framing. A targeted reshape restores the lighter front without shortening the rest of the haircut.
Pro tip:
Direct the fringe slightly forward before sweeping it away from the cheeks. This creates flexible root movement and prevents long pieces from immediately collapsing into the sides of the haircut.
Make It Work for You:
If you prefer minimal styling, keep the shortest pieces close to the cheekbones rather than the eyes. The added length makes the fringe easier to tuck or blend on low-effort days.
Watch Out For:
Avoid thinning the outer sections excessively. They need enough substance to connect the fringe with the longer face frame; overly sparse corners can make the front look disconnected.
Center-Parted Long Wispy Fringe Hairstyle

A center opening divides the fringe into two light sections that fall around the eyes and upper cheeks. The shortest pieces can sit near the inner cheek area, with longer ends moving toward the cheekbones and temples. Small spaces between strands preserve the wispy finish, while jaw-level layers below the fringe provide a gradual transition into shoulder-length or longer hair.
Straight and gently wavy textures can hold this balanced shape with modest styling. Heat protectant prepares the fringe for hot airflow, a small round brush directs each side away from the center, and lightweight hairspray provides flexible support. A quick refresh focuses on the part and roots. Full wash-day styling takes longer if the hairline naturally prefers a strong side direction.
At the salon, establish your normal center part before deciding the finished lengths. Ask for visual balance rather than mechanically identical pieces because growth direction can make one side settle differently. As the fringe grows, the center opening becomes wider and the shortest pieces move below the cheekbones. Refining those central sections can restore the wispy curtain effect while preserving the longer outer corners.
Pro tip:
Set the center opening while the roots are damp, then dry each side with only moderate lift. Too much elevation can make a light fringe separate farther than intended.
Make It Work for You:
If your natural part sits slightly off center, follow it and balance the visible sections around that position. The fringe can retain a two-sided effect without forced symmetry.
Watch Out For:
Do not repeatedly shorten one side because it appears longer. Check the fringe after normal styling first; root direction and natural bends can change its visible resting length.
Side-Swept Long Wispy Fringe Hairstyle
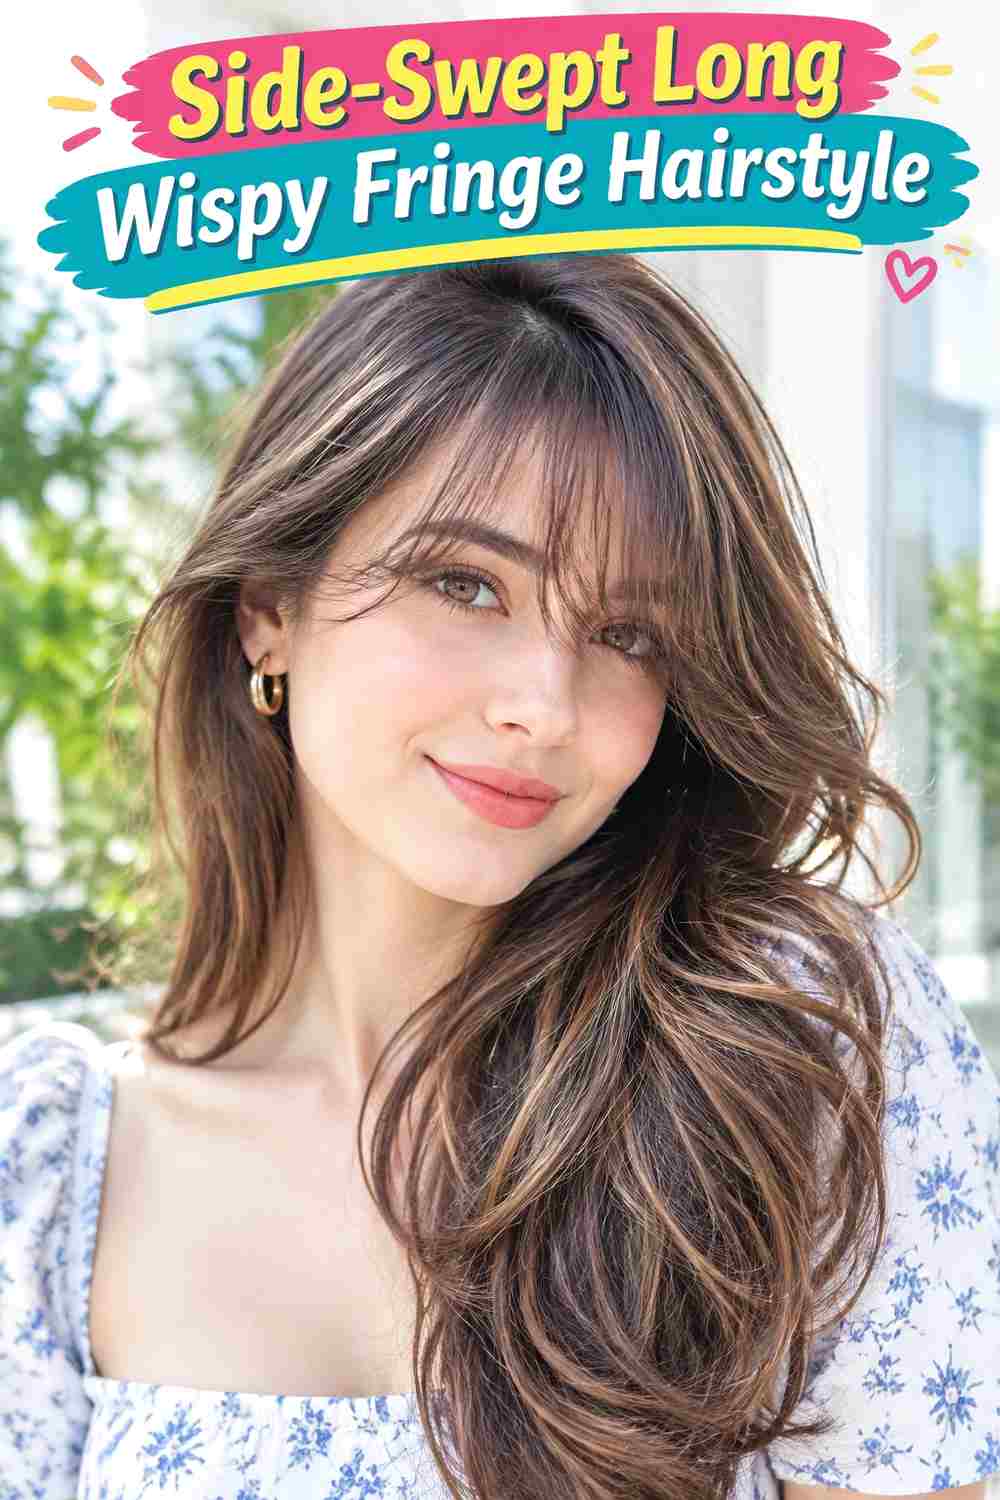
A diagonal sweep gives long wispy fringe more coverage on one side while keeping the edge light. The shorter area can begin near one eye, then lengthen across the cheek toward the opposite temple. Fine spaces between pieces stop the sweep from becoming a dense side bang. Longer jaw-level framing can continue the diagonal movement into medium or long hair.
Straight and wavy textures can show the sweep clearly. Apply heat protectant before heated styling, use a small round brush to create lift at the roots, and finish with flexible hairspray when the direction needs extra support. A quick refresh usually focuses on dampening and resetting the fringe. Full wash-day styling takes longer when the natural growth pattern strongly opposes the chosen sweep.
At the salon, wear your preferred part and identify where the shortest and longest fringe pieces should settle when dry. The transition should follow the intended diagonal rather than simply thinning a full bang. As the fringe grows, it becomes heavier and moves farther toward the cheek. A targeted trim can restore the sweep while retaining enough outer length for easy blending or tucking.
Pro tip:
Dry the roots briefly opposite the final direction before sweeping them across. This loosens a stubborn part and gives the fringe flexible movement without requiring a large amount of hairspray.
Make It Work for You:
If you regularly switch your part, keep the diagonal length difference subtle. The fringe can still sweep sideways while remaining adaptable when you want to reposition it.
Watch Out For:
Avoid creating the entire diagonal by cutting one side dramatically shorter. Gentle length progression and root direction should work together, or the fringe may look uneven when worn forward.
Wavy Long Wispy Fringe Hairstyle
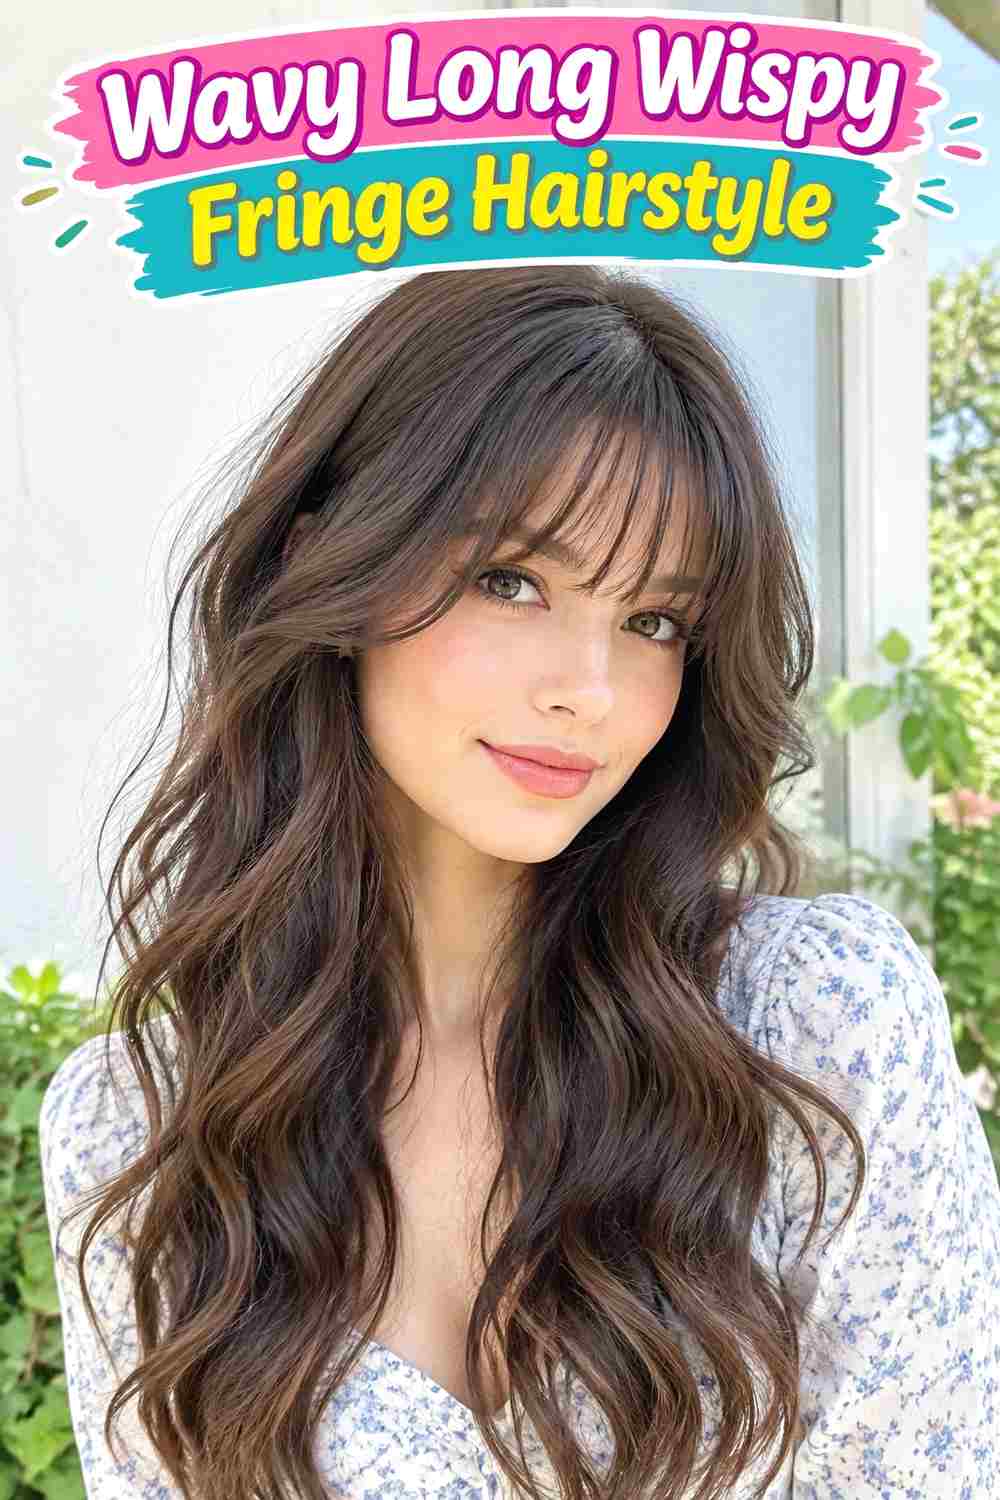
Natural waves make long wispy fringe move in soft bends instead of forming a smooth curtain. The center pieces can fall around the eyes or upper cheeks, while longer waves reach the cheekbones and temples. A center or relaxed off-center opening allows the natural pattern to create small gaps through the fringe. Layered lengths below the jaw continue the movement without requiring every section to match.
Wavy hair often needs encouragement rather than full reshaping. Lightweight mousse supports the bends, curl cream controls frizz, and a diffuser dries the fringe without brushing it straight. A quick refresh can involve dampening a few flattened pieces and diffusing briefly. Full wash-day styling takes longer because the fringe’s true length and separation become clear only after the wave pattern has dried.
At the salon, identify the desired dry fringe landmarks rather than stretching the waves to measure them. Keep the outer pieces long enough to blend naturally with cheekbone or jaw layers. As the fringe grows, the bends become heavier and may settle lower. Selective reshaping restores lightness while preserving the irregular movement that makes the fringe wispy.
Pro tip:
Arrange the fringe opening while it is damp, then minimize handling as it dries. Letting the waves set before separating them helps preserve definition and prevents unnecessary frizz around the face.
Make It Work for You:
For loose waves that stretch easily, keep the shortest fringe pieces slightly longer. Natural bends can create the visual lift and separation without requiring an aggressively short front section.
Watch Out For:
Do not measure wavy fringe under strong tension. Once released and dry, the bends can raise the finished length and leave the pieces shorter around the eyes than you planned.
Curly Long Wispy Fringe Hairstyle

Curly wispy fringe uses selected curl groups to create light coverage rather than thinning curls into fine straight pieces. The shortest groups can settle around the brows or eyes, while longer curls move toward the upper cheeks and temples. Small openings between curl groups reveal the forehead naturally. Jaw and shoulder layers can continue the progression while preserving a recognizable curl pattern.
Shrinkage needs to guide the finished length. Lightweight leave-in conditioner provides slip, curl gel supports grouping, and a diffuser helps set the fringe without stretching it downward. Refreshing a few compressed curls can take only several minutes. A complete wash, product application, and diffuse takes longer, particularly when the surrounding hair is dense or long.
At the salon, assess the fringe in its normal dry pattern and specify the shortest acceptable curl position. Individual groups can contract differently, so identical stretched measurements are not the goal. The outer curls need enough length to blend into the sides. As the fringe grows, its curls become heavier and settle lower, gradually transitioning into face framing.
Pro tip:
Let fringe curls dry fully before deciding which groups need separation. Dividing only selected dry curls can create airy spaces while preserving definition through the rest of the front.
Make It Work for You:
For strong shrinkage, begin with a longer dry target near the upper cheeks. The curls can still frame the forehead lightly while giving you more margin for natural contraction.
Watch Out For:
Avoid judging the fringe from wet length alone. Water stretches curls, and sections that appear safely long while damp can rise significantly once the natural pattern returns.
Feathered Long Wispy Fringe Hairstyle

Feathering gives long wispy fringe directional movement through fine overlapping ends. The center can fall near the eyes or upper cheeks, while longer pieces sweep across the cheekbones and toward the temples. Instead of forming two solid sections, the fringe breaks into light strands that move independently. Feathered jaw-level layers can extend that texture into medium or long hair.
Straight and softly wavy textures make the changing edge easy to see. Apply heat protectant before heated styling, use a small round brush to shape a broad outward curve, and add lightweight styling cream to selected ends. A quick refresh can focus on the roots and a few front pieces. Full wash-day styling takes longer when feathered movement continues throughout the haircut.
At the salon, discuss how much density should remain inside the fringe before asking for feathered ends. The effect should come from edge treatment and direction, not excessive thinning. As the fringe grows, the individual pieces begin merging with longer face framing. A modest perimeter refinement can restore separation while preserving the useful length through the outer corners.
Pro tip:
After drying, direct only a few ends slightly away from the face with your fingertips. Selective movement shows the feathering while preventing the whole fringe from becoming one large backward flip.
Make It Work for You:
For thicker strands, keep each feathered section more substantial. Softness can come from changing lengths and direction rather than making every piece extremely fine or transparent.
Watch Out For:
Avoid heavy thinning through the outer fringe. Those longer pieces create the bridge into the face frame, and weakening them can make the transition look sparse instead of feathered.
Narrow Long Wispy Fringe Hairstyle
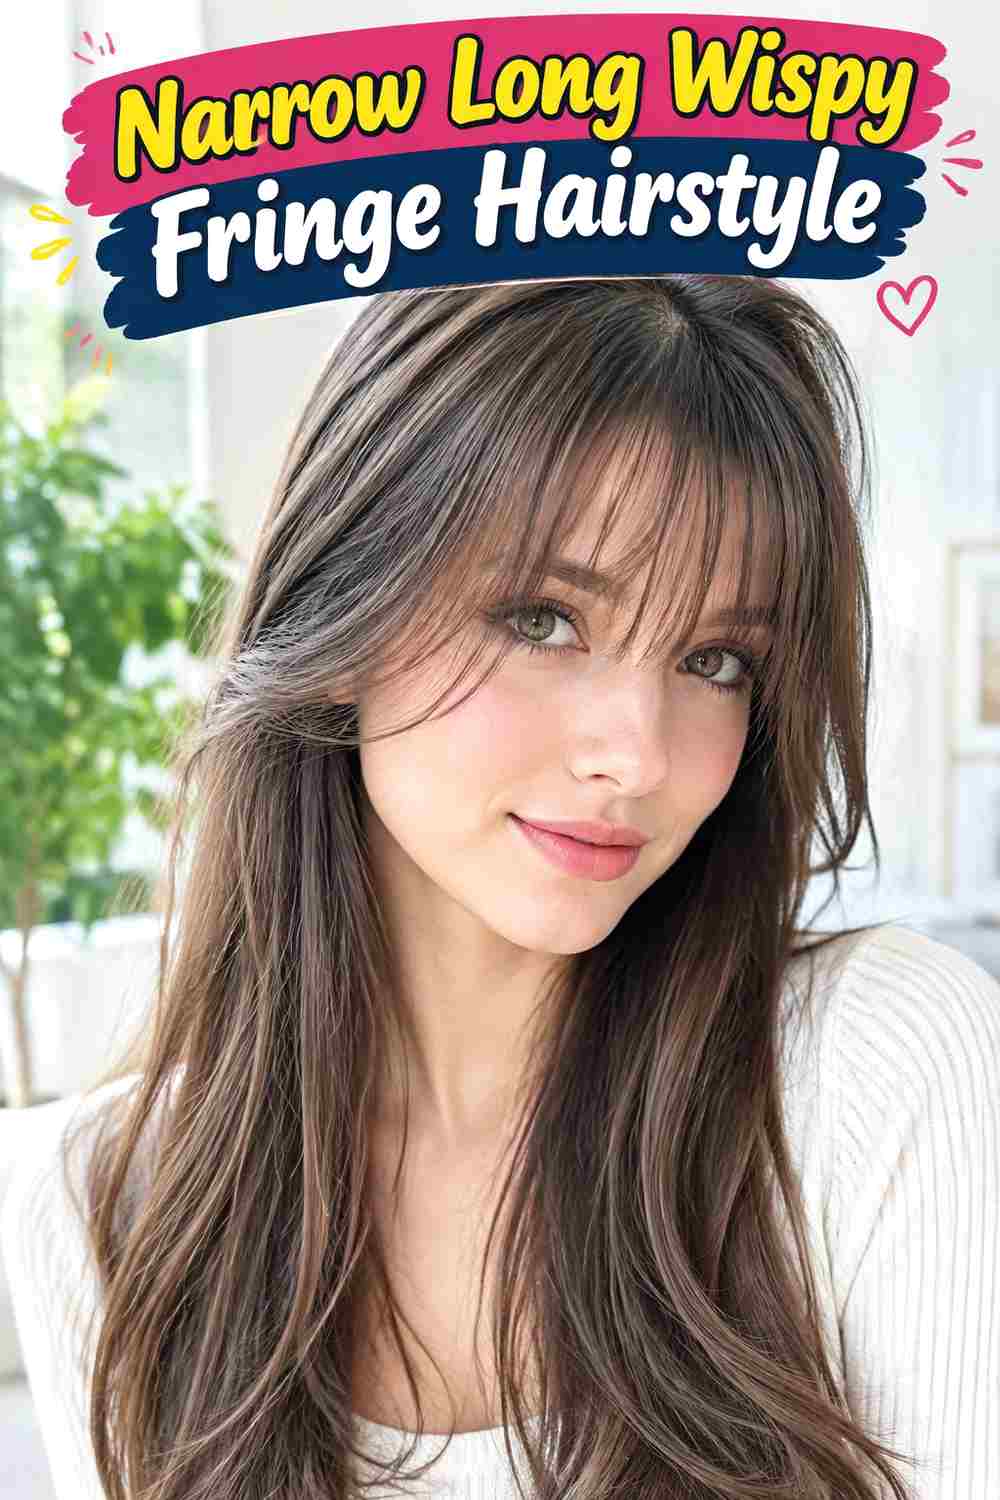
A narrow fringe concentrates light pieces through the center of the forehead while leaving more hair intact around the temples. The shortest strands can fall around the eyes, then lengthen gently toward the upper cheeks. Because the section is compact, the sides remain substantial and can form longer cheekbone or jaw framing. The result works with bobs, lobs, and longer hair.
Straight and softly wavy textures can make the narrow shape particularly clear. Lightweight mousse gives the roots flexible support, a small round brush resets the front, and heat protectant is useful whenever hot airflow is involved. A quick refresh is usually brief because only a small section needs attention. Full wash-day effort depends mainly on the surrounding haircut.
At the salon, establish the fringe width and depth before choosing the final length. A narrow fringe can gradually become wider during repeated trims if extra temple hair is accidentally included. Hairline growth direction should also be considered. As the fringe grows, the central pieces become easy to divide or sweep sideways, making the transition into longer face framing relatively forgiving.
Pro tip:
Separate the original fringe section carefully before every refresh trim. Keeping the same boundaries prevents small additions from the temples from gradually turning a narrow fringe into a much fuller bang.
Make It Work for You:
For lower-density hair, keep the section shallow as well as narrow. A small amount of long fringe can soften the forehead while preserving more useful fullness through the sides.
Watch Out For:
Do not keep adding hair because the fringe appears too separated after styling. Check for oil or product buildup first, since those factors can change how a narrow section groups.
Long Layered Wispy Fringe Hairstyle
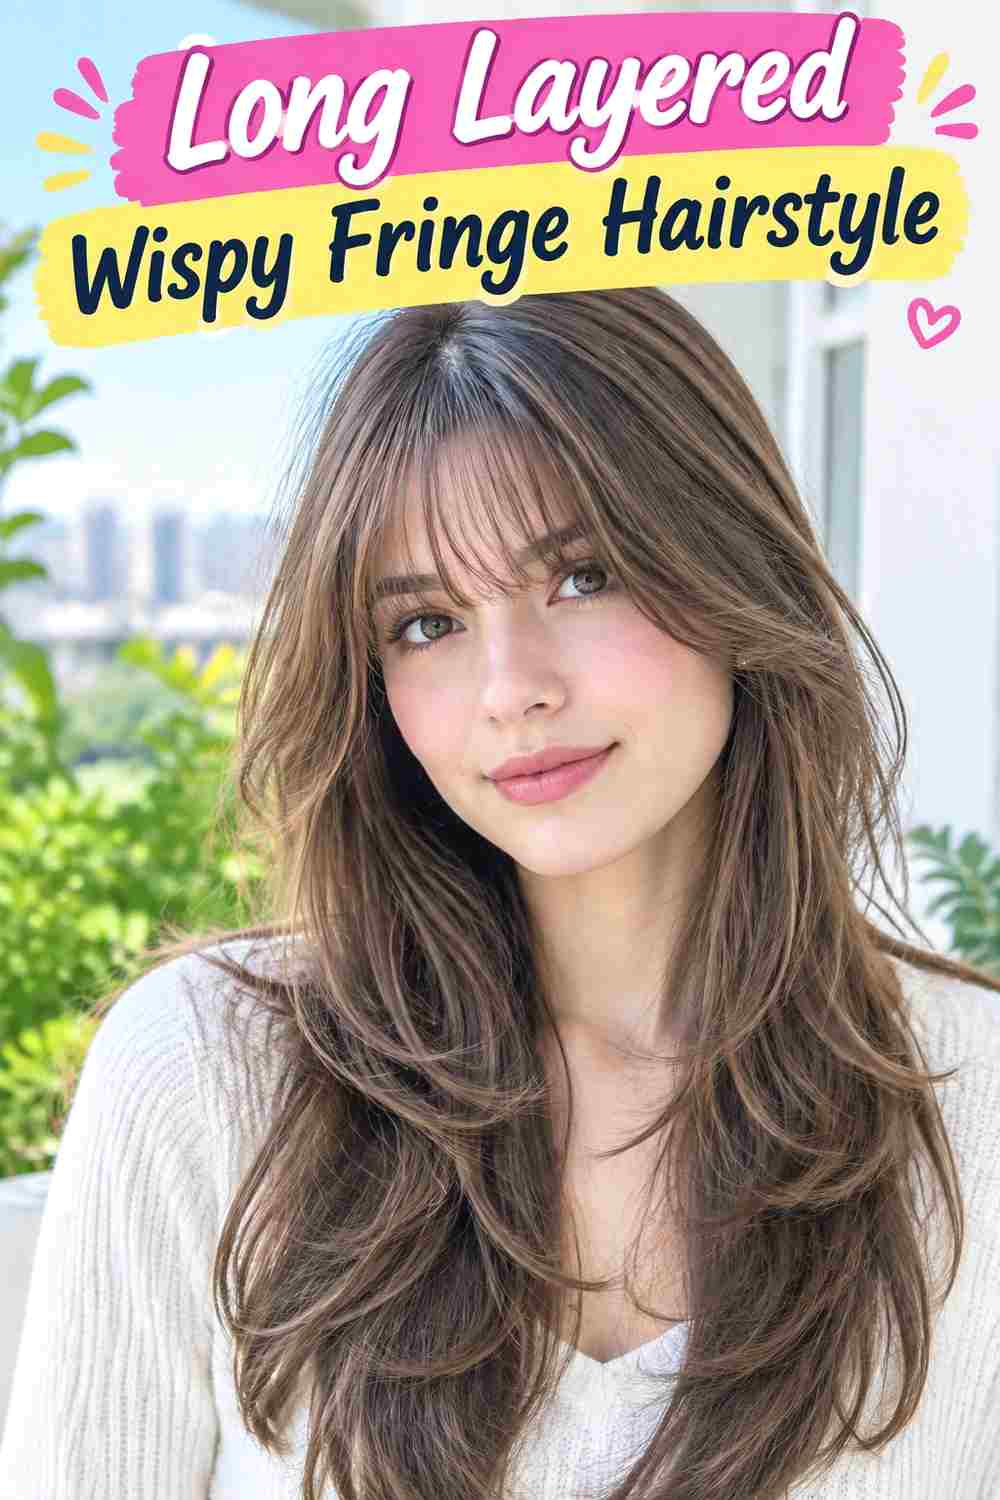
Long layers create an easy transition from wispy fringe into hair that extends well below the shoulders. The shortest fringe pieces can fall around the eyes or upper cheeks, outer strands reach the cheekbones, and additional framing continues toward the jaw and collarbone. The back layers remain longer, so the airy front does not require the entire haircut to become heavily graduated.
Straight and wavy textures can show this progression clearly. Apply heat protectant before heat styling, use a medium round brush through the face frame, and finish with lightweight serum on the longest ends. A quick refresh may involve only the fringe and cheekbone pieces. Full wash-day styling takes considerably longer because the overall length requires more drying and sectioning.
At the salon, identify the shortest fringe point and the next two face-framing landmarks instead of simply asking for layers everywhere. This keeps the transition deliberate. As the fringe grows, it merges first with the cheekbone sections, while the long perimeter changes slowly. Targeted front reshaping can restore the wispy detail without sacrificing meaningful length through the back.
Pro tip:
Use a smaller curve through the fringe and gradually increase the brush size through longer layers. Changing the scale of movement makes the front blend naturally into the extended lengths.
Make It Work for You:
If you prefer minimal overall layering, keep the back nearly intact and concentrate the progression around the face. The fringe can still connect smoothly without reducing density throughout long hair.
Watch Out For:
Avoid adding numerous short layers solely to connect the fringe. A few deliberate cheekbone, jaw, and collarbone sections can provide continuity without changing the entire haircut.
Shoulder-Length Long Wispy Fringe Hairstyle
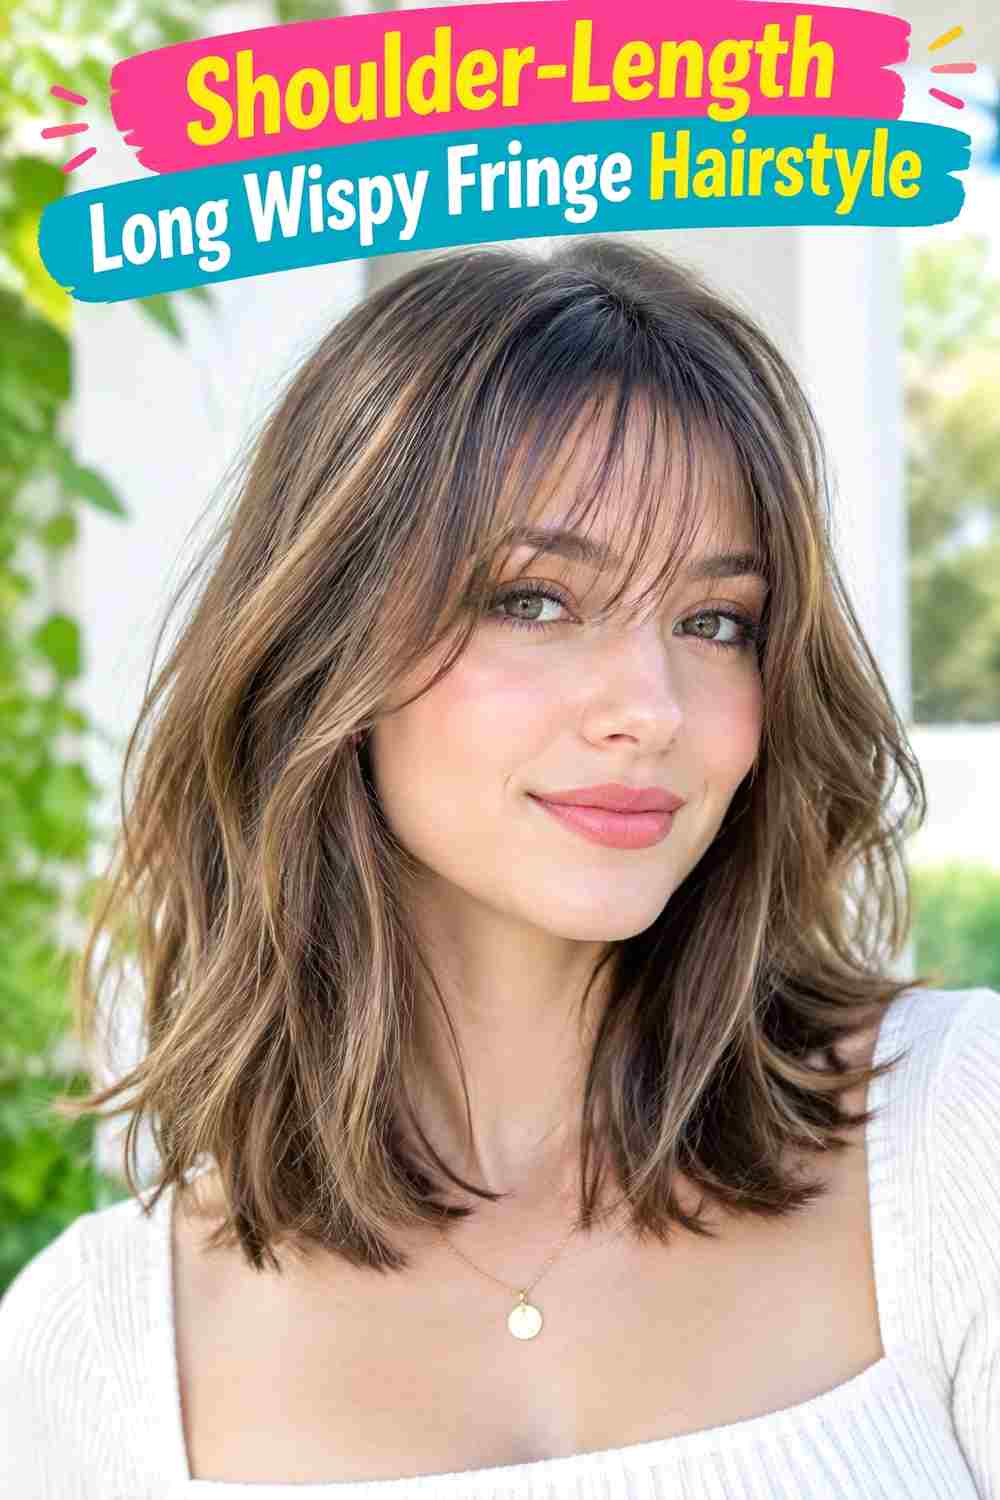
Shoulder-length hair gives a long wispy fringe enough surrounding length for blending while keeping the overall haircut manageable. The fringe can begin near the eyes or upper cheeks and lengthen toward the cheekbones. Jaw-level layers connect the front to a shoulder-skimming perimeter, while a center or off-center opening keeps the fringe airy rather than dense across the forehead.
Straight and softly wavy textures work particularly well with this balanced length. Heat protectant prepares the hair for heated styling, a small round brush controls the fringe, and lightweight serum smooths the shoulder-length ends. A quick refresh can focus entirely on the front. Full wash-day styling takes longer because the perimeter and face frame need separate drying directions.
At the salon, identify the dry fringe landmarks and the exact shoulder endpoint. Ask how much weight will remain through the perimeter after the face frame is added. As the fringe grows, it blends toward the jaw layers, while the main haircut begins moving below the shoulders. Reshaping either area can be done independently, which makes the style adaptable when you want to preserve overall length.
Pro tip:
Shape the fringe before working on the shoulder-length ends. Establishing the light front movement first prevents larger brush motions through the perimeter from accidentally flattening or redirecting the bangs.
Make It Work for You:
For lower-density hair, preserve a fuller shoulder perimeter and keep the fringe section shallow. Front movement remains visible without taking excessive weight from the rest of the haircut.
Watch Out For:
Avoid making every shoulder layer as light as the fringe. Keeping more substance through the lower haircut provides useful contrast and prevents the entire shape from appearing overly wispy.
Bob-Length Long Wispy Fringe Hairstyle

A bob creates strong contrast with long wispy fringe because the light front pieces sit close to the eyes and cheeks while the main perimeter finishes near the jaw or chin. The fringe can split softly at the center or drift off center, with longer temple pieces blending into the bob’s sides. Minimal internal layering keeps the lower outline substantial.
Straight and softly wavy hair can show the contrast between airy fringe and stronger perimeter clearly. Apply heat protectant before heat styling, use a small round brush for the fringe, and a paddle brush to control the bob. A quick refresh may involve only resetting the front. Full wash-day styling takes longer because the bob perimeter and fringe require different drying directions.
At the salon, establish the dry fringe length and bob perimeter as separate landmarks. Ask to preserve enough side weight that the fringe does not turn the entire front into short layers. The fringe usually shows growth sooner than the bob. A small bang reshape can maintain eye-to-cheek framing while the perimeter continues growing toward a longer bob.
Pro tip:
Keep the bob comparatively smooth and give the fringe the lighter movement. The contrast between a stable perimeter and separated front pieces makes the wispy detail easier to see.
Make It Work for You:
For fine hair, use a shallow fringe section and preserve a strong bob edge. The front gains softness while the jaw or chin perimeter retains more visible density.
Watch Out For:
Do not over-layer the sides just to connect them with the fringe. Longer temple pieces can provide enough transition while allowing the bob’s defining perimeter to remain clear.
Shaggy Long Wispy Fringe Hairstyle
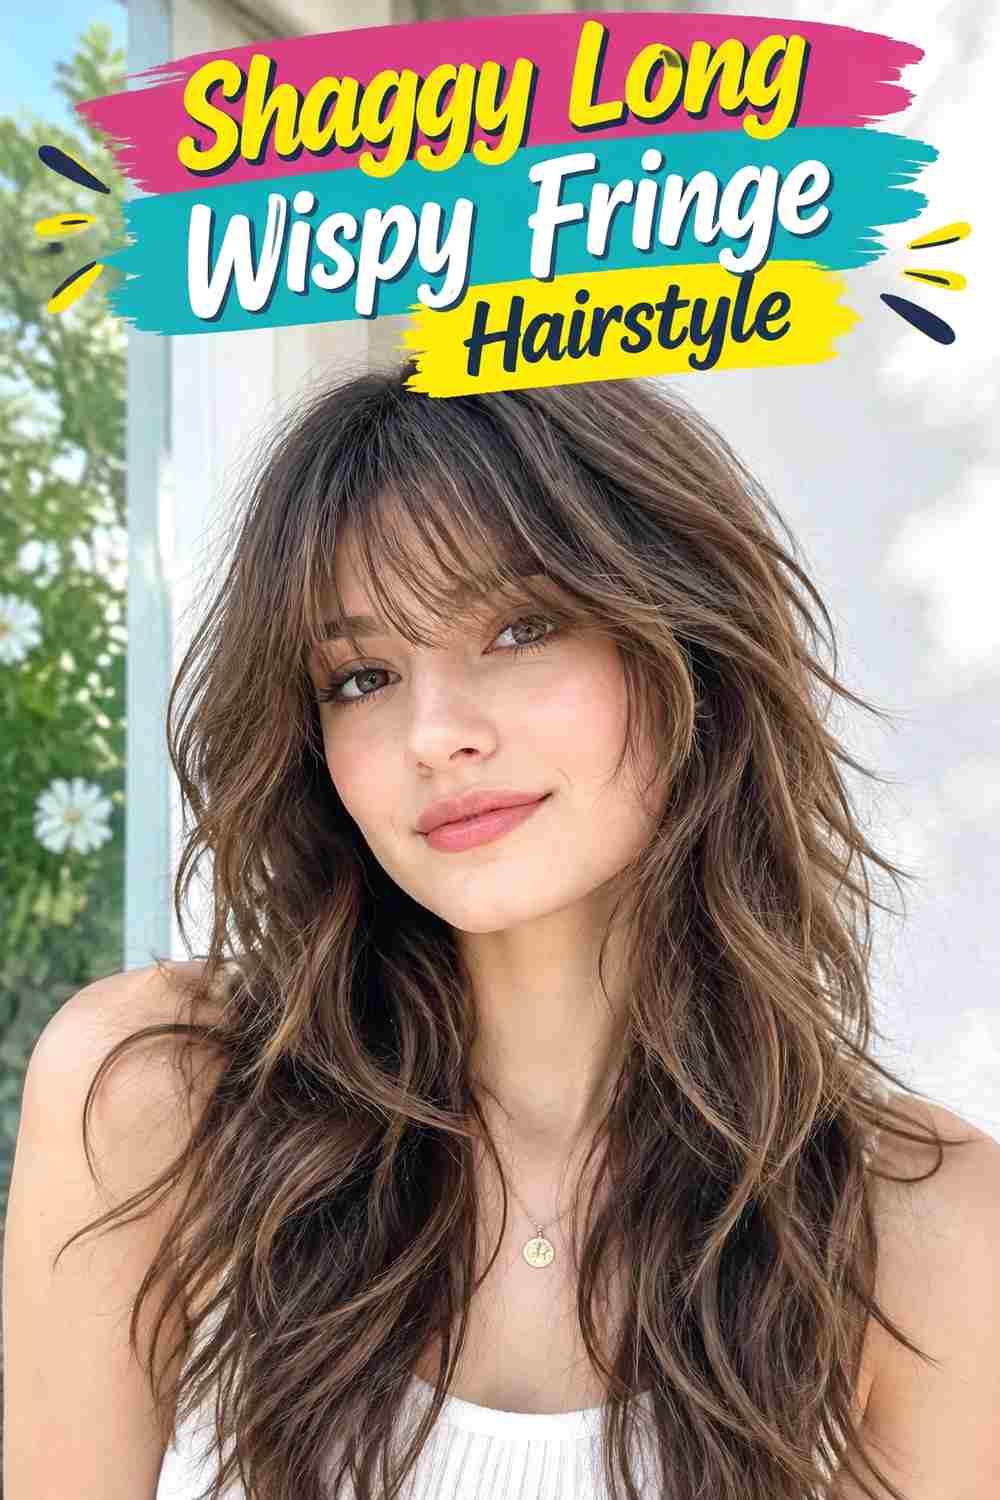
A shag naturally supports long wispy fringe because multiple layer lengths already surround the face. The fringe can fall around the eyes, split loosely through the center, and lengthen toward the cheekbones. Crown layers add lift behind it, while jaw, shoulder, and longer pieces create an irregular progression. The ends stay mobile instead of forming a heavy one-length perimeter.
Wavy hair can make this combination especially low effort. Lightweight mousse supports the crown, curl cream controls frizz, and a diffuser dries the layers without smoothing away their movement. A quick refresh may target the fringe and crown only. Full wash-day styling takes longer because several layer levels need to dry before their final balance becomes clear.
At the salon, identify the dry fringe endpoint and the shortest substantial crown layer separately. Keeping those landmarks distinct prevents the entire upper haircut from becoming too short. As the shag grows, the fringe drops toward the cheeks and crown volume moves lower. Targeted reshaping restores those proportions while the longest layers can remain largely unchanged.
Pro tip:
Give the fringe slightly more controlled direction than the crown behind it. An organized front with looser upper movement helps the wispy bangs remain visible within a heavily layered haircut.
Make It Work for You:
For lower-density hair, lengthen the crown layers and use a narrower fringe section. The haircut can retain shaggy movement without sacrificing too much weight through the upper sides.
Watch Out For:
Avoid combining an extremely sparse fringe with aggressively thinned crown layers. Removing too much weight from both areas can weaken the front silhouette instead of creating controlled softness.
Fine Hair Long Wispy Fringe Hairstyle
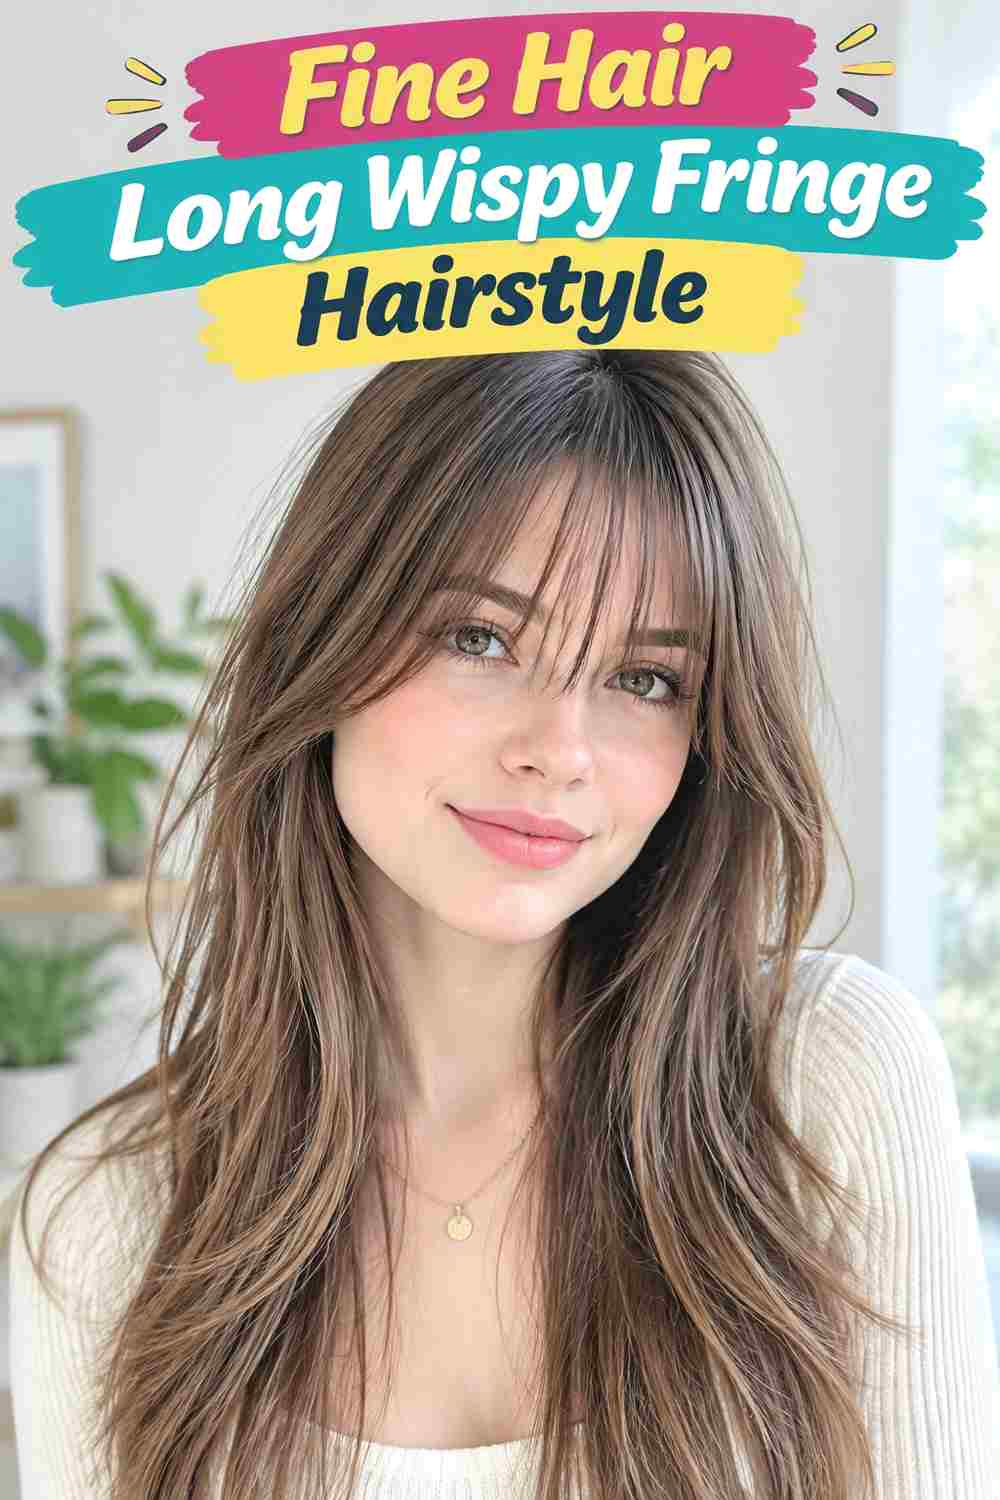
Fine strands can naturally create a delicate fringe, but enough weight should remain for the longer pieces to sit predictably. The center can fall near the eyes or upper cheeks, while longer strands extend toward the cheekbones. A shallow section preserves density in the sides, and the surrounding haircut can stay relatively full through a bob, lob, or longer perimeter.
Fine strand diameter is different from low density, so both should influence the plan. Lightweight mousse gives the fringe gentle root support, heat protectant prepares it for hot airflow, and a small round brush creates a broad curve. A quick refresh can be very brief because fine fringe dries quickly. Full wash-day effort depends more on the surrounding length.
At the salon, discuss strand thickness, overall density, fringe width, and depth separately. Softness should not automatically mean extensive thinning. As the fringe grows, fine pieces can become flatter and merge with the sides. A simple length adjustment may restore separation without repeatedly texturizing ends that already have a delicate appearance.
Pro tip:
Use only modest root lift when drying fine fringe. Too much elevation can spread the pieces apart excessively, while gentle support keeps the section airy but still visibly connected.
Make It Work for You:
If your fine hair is densely distributed, you may be able to use a wider fringe section. Choose its depth according to actual density rather than strand diameter alone.
Watch Out For:
Avoid repeated thinning simply to maintain a wispy appearance. Fine strands may already provide enough transparency, and excessive removal can make the fringe difficult to control during grow-out.
Dense Hair Long Wispy Fringe Hairstyle

Dense hair can create a fuller interpretation of wispy fringe by preserving substantial pieces while introducing controlled spaces between them. The center can reach the eyes or upper cheeks, with outer sections extending toward the cheekbones. A center or off-center opening reduces heaviness across the forehead, while longer face framing carries the front into the rest of the haircut.
Straight and wavy dense hair may require more drying time through the fringe. Apply heat protectant before heated styling, use a medium round brush to control the roots, and finish with lightweight styling cream on selected ends. A quick refresh can focus on the surface and part. Full wash-day styling takes longer because the interior of a dense fringe must dry as well.
At the salon, identify where the fringe feels bulky and where you want density preserved. Targeted weight adjustment is more useful than thinning the entire section evenly. As the bangs grow, extra length can pull the front flatter and make the outer pieces feel heavy. Refining those specific areas restores movement without creating short flyaways throughout the fringe.
Pro tip:
Dry dense fringe in smaller sections so the interior roots follow the intended direction. Shaping only the visible surface can leave hidden weight underneath that pushes the fringe forward.
Make It Work for You:
If you enjoy a fuller fringe, keep the section substantial and create wispiness mainly through the edge and parting. You do not need an extremely thin bang to achieve softness.
Watch Out For:
Avoid indiscriminate thinning through dense fringe. Removing weight everywhere can create short flyaways while leaving the specific bulky areas near the roots or outer corners unresolved.
Piecey Long Wispy Fringe Hairstyle
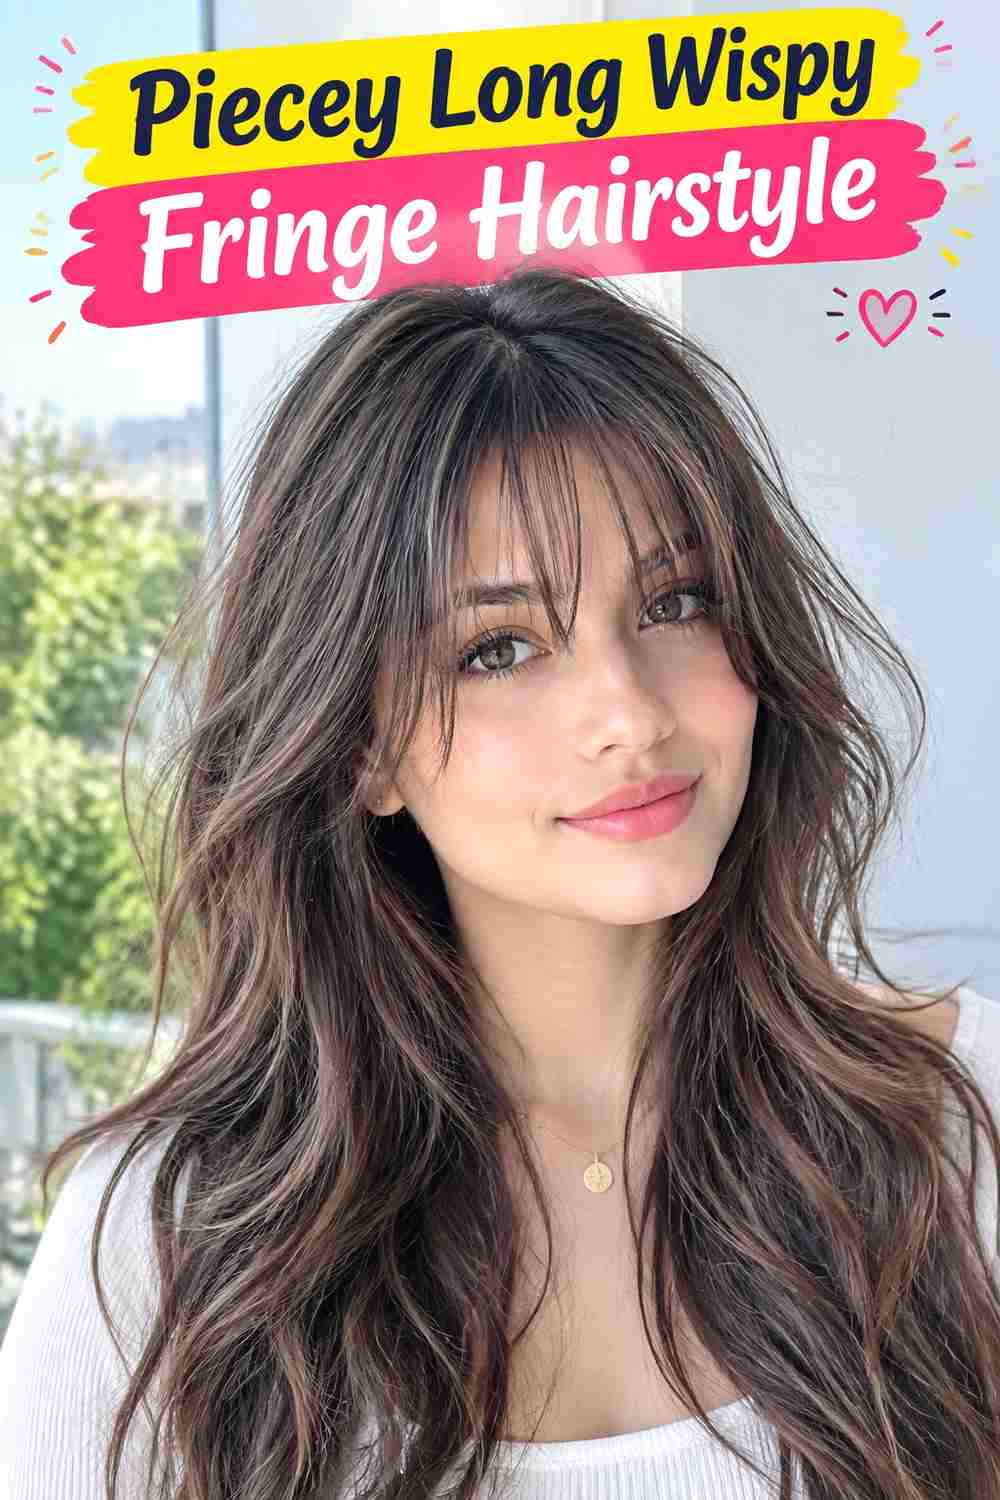
Piecey separation turns the fringe into small visible groups rather than an evenly dispersed veil. The sections can fall from eye level toward the upper cheeks, with longer groups reaching the cheekbones and temples. Slight variation in the ends creates a relaxed edge, while a soft center or off-center opening prevents the fringe from becoming a dense band.
Straight and softly wavy hair can show the individual groups clearly. Apply heat protectant before using a mini flat iron to redirect stubborn pieces, then use lightweight styling cream to define selected dry ends. A quick refresh may involve only two or three sections. Full wash-day styling takes longer according to the surrounding haircut rather than the fringe itself.
At the salon, discuss how much separation you want and how much density should remain between the visible pieces. A piecey result does not require random thinning. As the fringe grows, neighboring sections begin merging and the ends lose their defined spacing. A modest length refinement can restore the effect while preserving enough weight for the groups to move naturally.
Pro tip:
Warm a tiny amount of styling cream between your fingertips and touch only selected ends. Targeted definition creates piecey separation without coating the roots or collapsing the fringe.
Make It Work for You:
For thicker strands, use slightly broader groups rather than trying to create extremely fine pieces. The fringe can remain visibly separated while retaining enough substance for controlled movement.
Watch Out For:
Do not make every piece identical in width and spacing. Slight variation creates a softer result; excessive uniformity can make the fringe look deliberately segmented rather than naturally wispy.
Off-Center Long Wispy Fringe Hairstyle
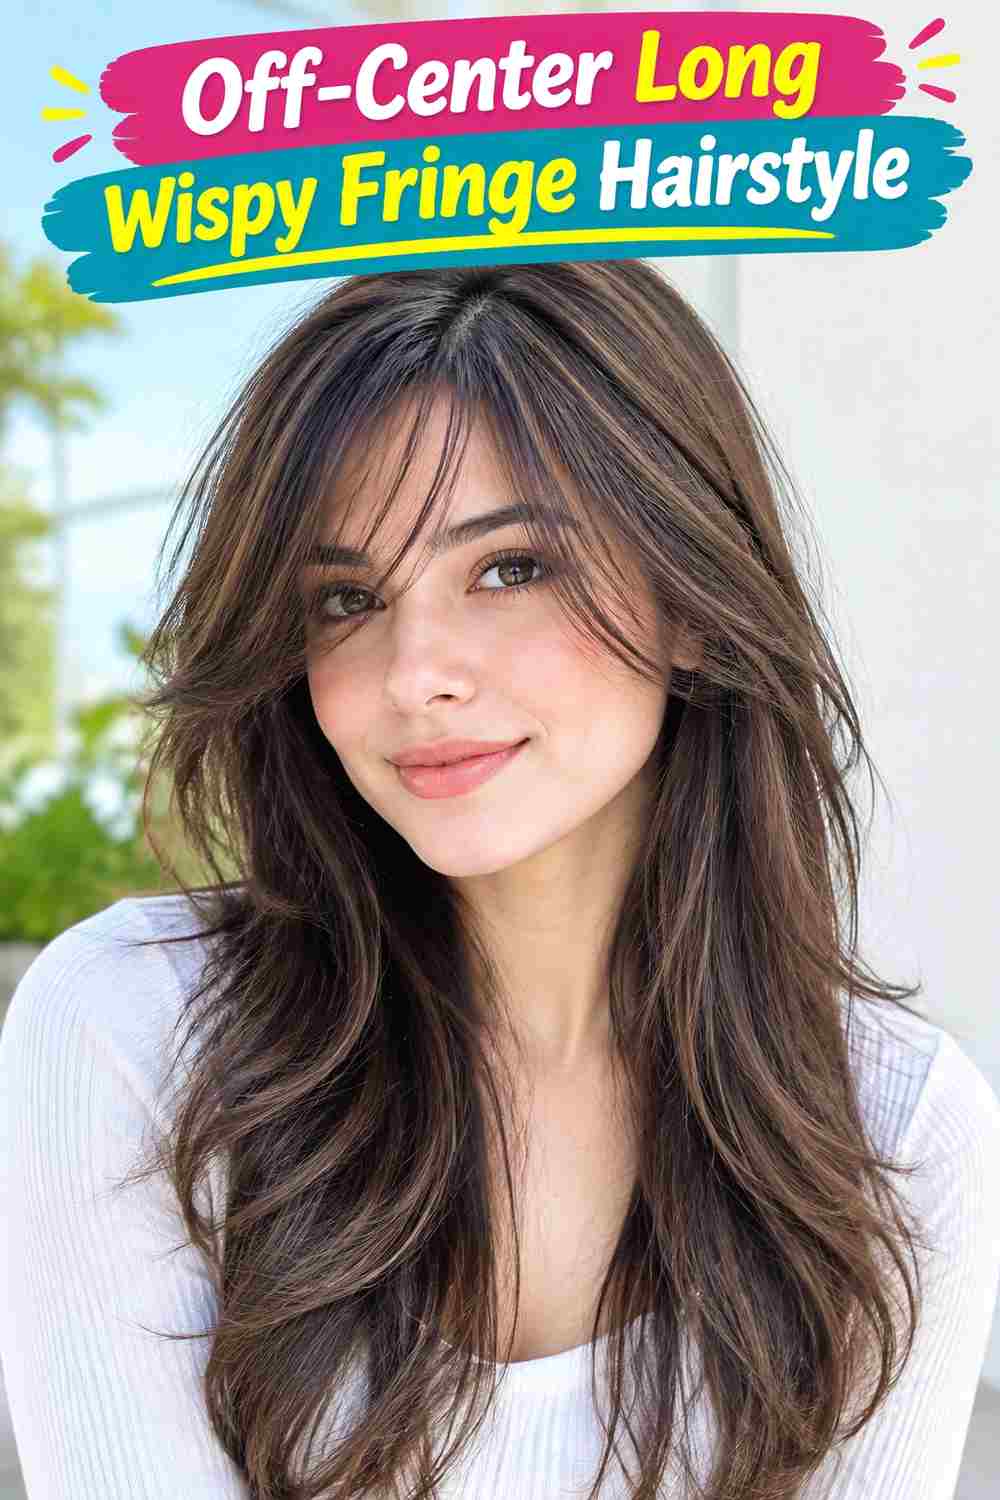
An off-center opening gives long wispy fringe a subtle imbalance, with one side carrying slightly more hair and a broader sweep. The center pieces can fall around the eyes, while outer sections lengthen toward the cheekbones. The fuller side curves across more of the forehead, and the lighter side sits closer to the temple. Jaw-level layers can connect both sections with longer hair.
Straight and wavy textures can adapt easily to this arrangement. Apply heat protectant before heated styling, use a small round brush to direct each side separately, and add flexible hairspray if the opening shifts. A quick refresh focuses on the roots. Full wash-day styling takes longer when the hair’s natural part sits somewhere different.
At the salon, establish the preferred opening before cutting the fringe. Each side should be assessed in its normal resting position rather than mirrored mechanically. As the fringe grows, the fuller section may feel heavier first and the opening can drift farther sideways. Targeted reshaping restores balance without turning the fringe into a strict center-parted curtain.
Pro tip:
Use slightly less brush tension on the lighter side and more root lift on the fuller section. Adjusting the styling to actual density creates visual balance without forcing exact symmetry.
Make It Work for You:
If your part moves naturally from day to day, keep the length difference between both sides subtle. The fringe remains flexible enough to shift without exposing an obvious cutting imbalance.
Watch Out For:
Avoid trimming both sides identically without checking how the part redistributes hair. An off-center opening naturally changes visible density, so assess the dry overall frame before adjusting length.
Jawline Long Wispy Fringe Hairstyle

Jawline fringe is an extra-long version that behaves almost like a narrow face-framing layer while retaining the light separation of bangs. The shortest pieces can start around the lower cheekbones, then taper toward the jaw and temples. A center or off-center opening exposes most of the forehead, and longer layers below the jaw help distinguish the fringe from the rest of the haircut.
Straight and wavy hair can show the extended progression clearly. Apply heat protectant before heat styling, use a medium round brush to create a broad outward sweep, and smooth lightweight serum through the ends. A quick refresh can focus on restoring the front curve. Full wash-day styling takes longer when the surrounding hair extends well below the shoulders.
At the salon, identify the shortest cheekbone point and where the outer fringe should meet the jaw. Keeping the section relatively light preserves its fringe-like movement. Grow-out is forgiving because the pieces simply merge farther into the face frame. A targeted reshape becomes useful when the front loses its distinct progression rather than according to a rigid timetable.
Pro tip:
Place the round brush behind the fringe and shape it in one broad movement away from the cheek. The extra length responds better to a large curve than several tight bends.
Make It Work for You:
If you dislike hair near your eyes, this longer version keeps the wispy effect lower on the face. It can also be tucked easily when you want an unobstructed front.
Watch Out For:
Do not make the shortest pieces too similar to the next face-framing layer. Without a visible length progression, the fringe can disappear and simply read as ordinary long layers.
Tousled Long Wispy Fringe Hairstyle

A tousled finish gives long wispy fringe irregular movement instead of a perfectly balanced center sweep. Some pieces can fall near the eyes, others drift toward the cheeks, and the outer strands blend loosely with face-framing layers. An off-center or imperfect middle opening suits the texture. The surrounding hair can carry loose bends so the fringe feels integrated rather than carefully arranged.
Straight and naturally wavy textures can create this finish with different levels of effort. Apply heat protectant before using a small flat iron for loose directional bends, then use texturizing spray for dry separation. A quick refresh may involve only several flattened front pieces. Full wash-day styling takes longer on straight hair because the irregular movement needs to be built.
At the salon, ask for enough fringe density to preserve movement even when the pieces separate. Identify the shortest dry point and keep the outer corners long enough to blend. As the fringe grows, tousled styling can disguise some change, but eventually the front becomes too heavy to separate easily. A targeted reshape restores the lighter proportions.
Pro tip:
Change the direction of only a few fringe pieces and leave neighboring strands calmer. Mixed movement creates a relaxed finish without making every section look intentionally curled or flipped.
Make It Work for You:
If your hair already bends irregularly, use those natural changes instead of adding heat everywhere. Define only flat pieces and let existing texture supply most of the tousled effect.
Watch Out For:
Do not keep adding texturizing spray when the fringe starts falling flat. Product buildup can reduce movement, so reset the hair before assuming that more texture or hold is needed.
Conclusion
Long wispy fringe hairstyle ideas can range from eye-skimming pieces to cheekbone and jawline sections that behave almost like face framing. Center parts create balanced openings, while side-swept and off-center versions shift volume across the forehead. Bobs make the airy fringe more prominent, whereas shoulder cuts, shags, and long layers provide gradual transitions. Waves and curls create separation through natural texture, while straight hair shows the light edge clearly.
Fine hair often benefits from a shallow fringe section with preserved weight, while dense hair may need targeted bulk adjustment. Consider natural growth direction, shrinkage, face shape, fringe width, layer placement, styling effort, and grow-out. Keeping the outer sections long and the internal density controlled usually makes the fringe easier to adapt between trims.
Before Your Salon Visit
Choose one or two favorites and save references showing the fringe in its normal dry position. Discuss your texture, density, face shape, hairline growth direction, preferred length, upkeep, and everyday styling routine. Point out the exact shortest fringe point, width, outer-corner length, part position, face-framing layers, volume, and finish you like. If your hair waves or curls, discuss shrinkage. Also explain whether you want the fringe to remain distinct or gradually blend into longer layers as it grows.
FAQs
How long should a long wispy fringe be?
There is no single correct length. Some versions begin near the eyes or upper cheeks, while lower-maintenance options can start around the cheekbones. The important details are light separation and longer outer sections that connect naturally with the surrounding haircut rather than forming a dense, blunt bang.
Can fine hair have long wispy fringe?
Yes. Fine describes strand diameter rather than overall density. A shallow or narrow fringe section can preserve more hair through the sides while still creating soft front movement. Avoid assuming that fine strands require heavy texturizing, because excessive removal may make the fringe harder to control.
How should curly long wispy fringe be cut for shrinkage?
Plan the important landmarks using the normal dry curl pattern. Individual curl groups can shrink by different amounts, so stretched or wet measurements alone are not reliable. Keeping selected groups longer also helps create an airy edge while preserving enough length around the eyes, cheeks, and temples.
Is long wispy fringe difficult to grow out?
Its extra length generally provides a forgiving transition. As the center grows, it moves toward the cheeks while the outer pieces merge into existing face-framing layers. You can reshape the shortest sections to maintain a fringe or let everything continue toward cheekbone and jaw-level framing.