20 Low Ponytail Hairstyles With Statement Clips
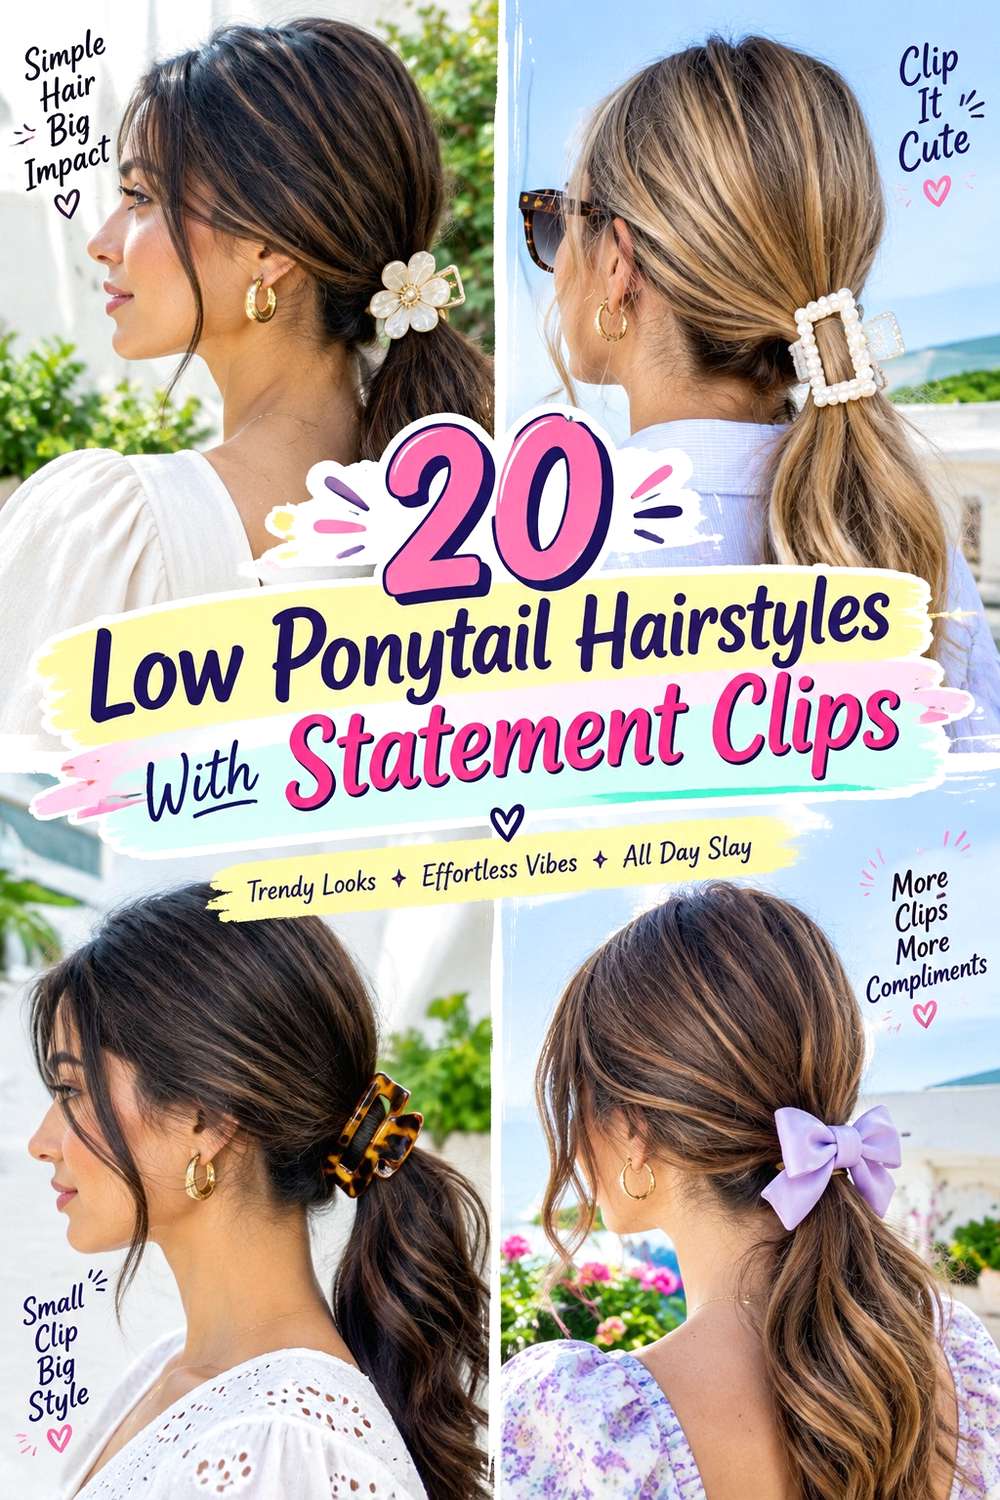
Low ponytail hairstyles with statement clips combine a simple nape-level base with one accessory that carries most of the visual detail. The ponytail itself can stay straight, wavy, curly, softly textured, wrapped, or lightly braided, while the clip may sit directly over the anchor, just above it, or slightly to one side. Center and side parts change the front balance, and shorter fringe or layers can remain loose around the face instead of being forced into the base.
The idea works across many textures and densities, but clip scale matters. Dense hair often needs a larger clasp or a clip attached over an already secured ponytail rather than one expected to hold all the weight. Lower-density hair usually suits lighter accessories that do not overpower the tail. Curly and coily hair can retain natural volume, and shorter lengths can use compact clips positioned close to the nape.
Styling effort ranges from a quick elastic-and-clip combination to a longer wash-day finish with shaped waves or carefully defined curls. Maintenance is mostly about grip, accessory position, surface frizz, and comfortable tension. A statement clip should decorate or reinforce a stable anchor; it should not need to pinch the scalp or strain its clasp to keep the ponytail in place.
Quick List
- Pearl-Barrette Low Ponytail Hairstyle
- Oversized Geometric Clip Low Ponytail Hairstyle
- Sculptural Gold Clip Low Ponytail Hairstyle
- Tortoiseshell Statement Clip Low Ponytail Hairstyle
- Crystal Cluster Clip Low Ponytail Hairstyle
- Minimal Metal Statement Clip Low Ponytail Hairstyle
- Floral Statement Clip Low Ponytail Hairstyle
- Bow Clip Low Ponytail Hairstyle
- Double Statement Clip Low Ponytail Hairstyle
- Side-Placed Statement Clip Low Ponytail Hairstyle
- Center-Part Statement Clip Low Ponytail Hairstyle
- Deep Side-Part Statement Clip Low Ponytail Hairstyle
- Wrapped-Base Statement Clip Low Ponytail Hairstyle
- Soft Face-Framing Statement Clip Low Ponytail Hairstyle
- Wavy Statement Clip Low Ponytail Hairstyle
- Curly Statement Clip Low Ponytail Hairstyle
- Textured Volume Statement Clip Low Ponytail Hairstyle
- Braided-Detail Statement Clip Low Ponytail Hairstyle
- Chain-Link Clip Low Ponytail Hairstyle
- Short-Length Statement Clip Low Ponytail Hairstyle
Pearl-Barrette Low Ponytail Hairstyle
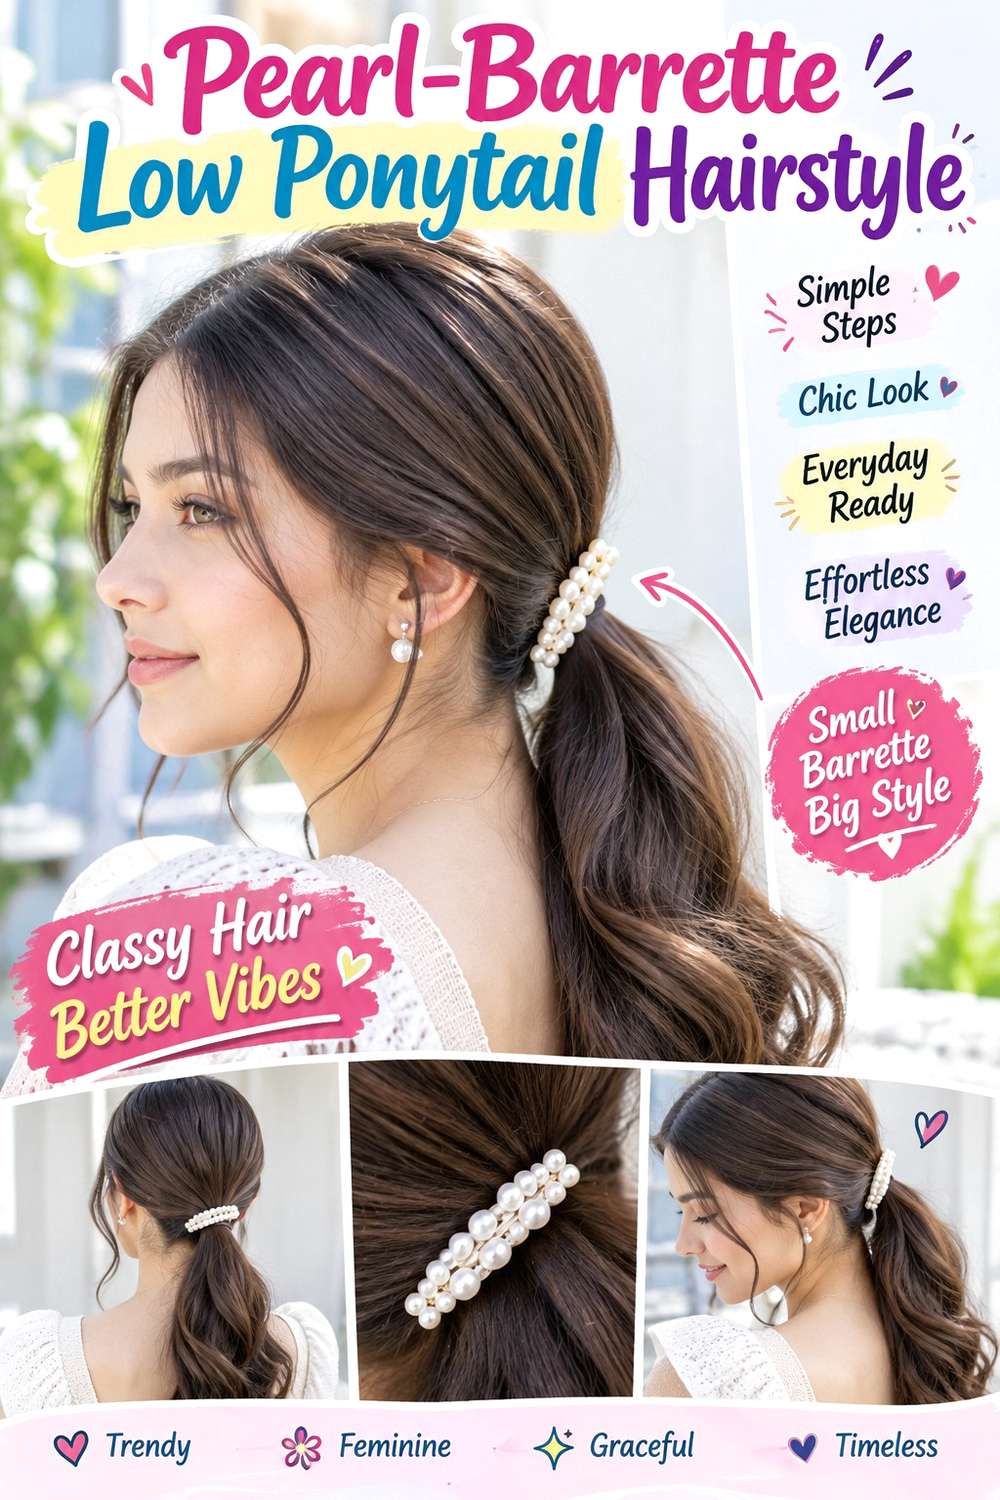
A pearl barrette gives a plain low ponytail a defined focal point without covering much of the hair. Gather the length directly at the nape with a center or soft off-center part, then position the barrette horizontally just above the ponytail anchor. Keeping the crown relatively smooth makes the row of pearls easy to see, while a straight or gently bent tail keeps movement below the accessory.
This arrangement works particularly well on medium and long hair because the ponytail remains visible beneath the decorative line. Straight and wavy textures create clear contrast, while curls can soften the overall shape. Use a fabric-covered elastic for structural hold, a pearl barrette as the statement piece, and light styling cream to control surface flyaways. A quick refresh between washes usually means checking that the barrette remains level and smoothing the crown; full wash-day styling takes longer only if the texture needs resetting.
If a stylist is creating the look, specify whether the barrette should sit directly over the elastic or slightly above it, and whether the ears should remain exposed. The accessory should not carry the full ponytail weight unless its clasp is designed for that amount of hair.
Pro tip:
Secure the ponytail before placing the pearl barrette, then view the accessory from behind before closing it fully. A small adjustment in height can keep the row level across the nape.
Make It Work for You:
For dense hair, let the barrette grip only a controlled surface section above the elastic. The pearls remain visible without forcing the clasp around more hair than it can hold.
Watch Out For:
Do not keep pressing a strained barrette closed over a thick base. If the clasp resists, reposition it decoratively above the elastic rather than risking pinching or breakage.
Oversized Geometric Clip Low Ponytail Hairstyle
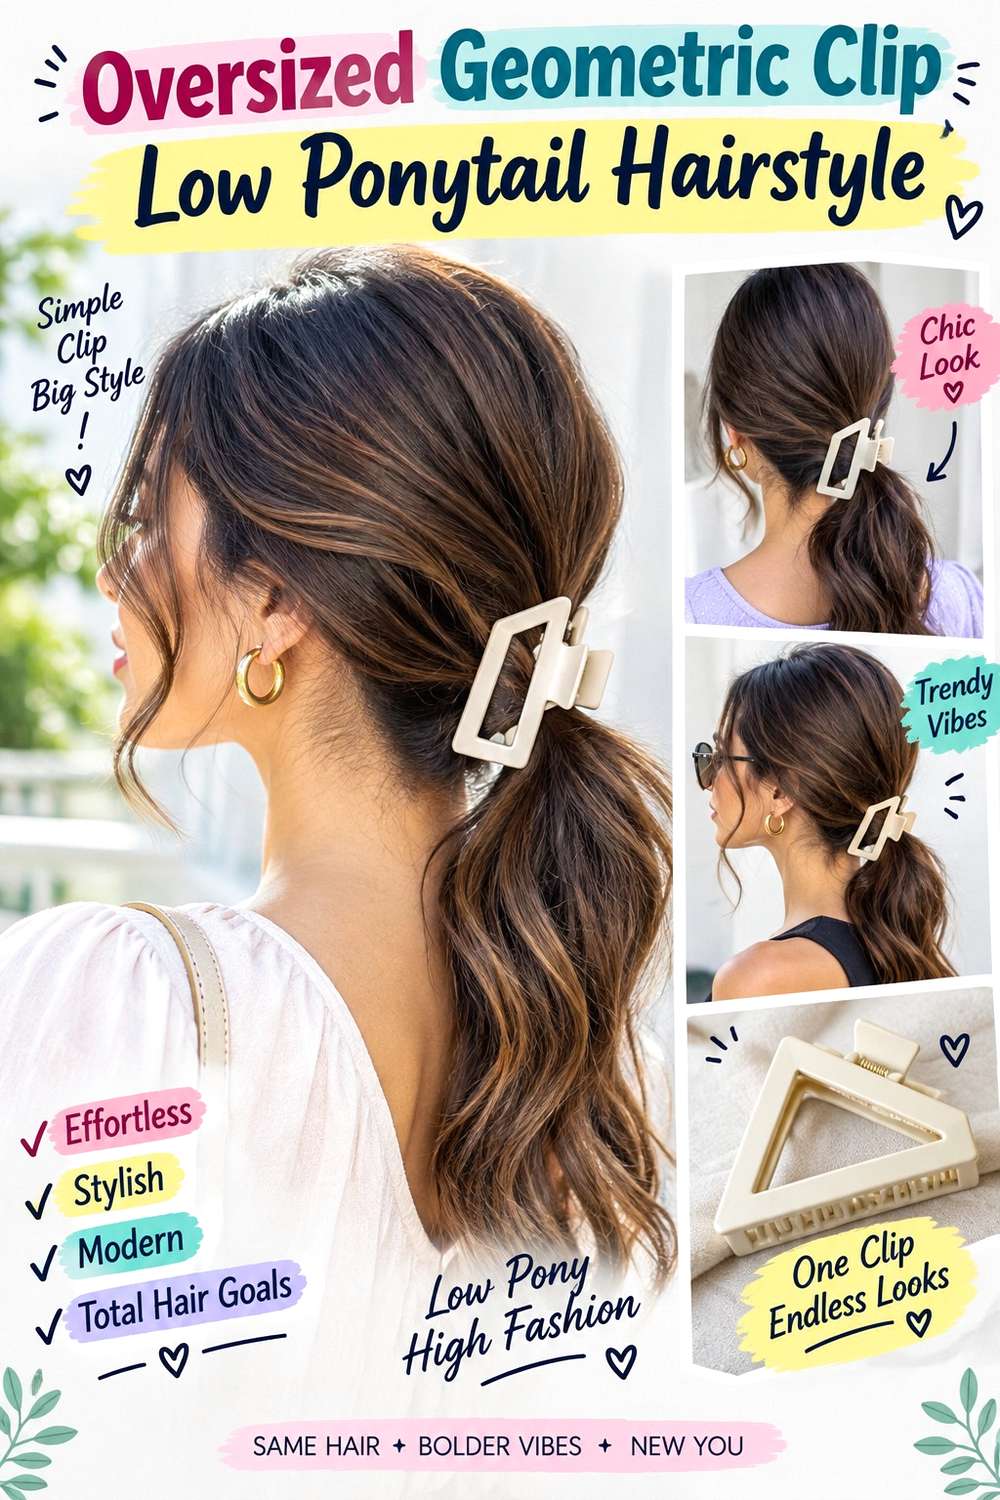
A large geometric clip works best when the ponytail underneath stays uncomplicated. Gather the hair low and centered, then place a square, oval, or angular clip over the base so its shape becomes the dominant detail. Keep the front softly brushed back or lightly parted, and let the tail fall in one clean line. A controlled crown prevents the accessory from competing with excessive volume near the nape.
Medium to long hair gives the clip enough visual space, although the hardware should still match the actual amount of hair it grips. Dense hair often needs an elastic underneath so the clip functions mainly as decoration. Use a strong fabric-covered elastic for the ponytail, an oversized geometric clip for the focal point, and lightweight styling cream to keep shorter pieces from crossing the accessory. A quick refresh usually involves recentering the clip and smoothing the base; full styling after washing depends mostly on your chosen texture.
For professional styling, explain whether you want the clip centered, slightly raised, or spanning the elastic horizontally. Its widest edge should sit where it looks balanced against the ponytail rather than where it presses most firmly against the scalp. Comfort matters because larger hardware adds weight even when it is not carrying the full style.
Pro tip:
Test the oversized clip while moving your head gently before leaving it in place. If its weight causes it to tilt, shift the attachment point closer to the secured base.
Make It Work for You:
If your ponytail is lower density, choose a large clip with a lightweight open-frame design. You can keep the geometric scale without adding unnecessary weight at the nape.
Watch Out For:
Avoid choosing clip size by appearance alone. A heavy oversized piece can slide even on secure hair, so reduce the scale or reposition it when the base repeatedly tips downward.
Sculptural Gold Clip Low Ponytail Hairstyle
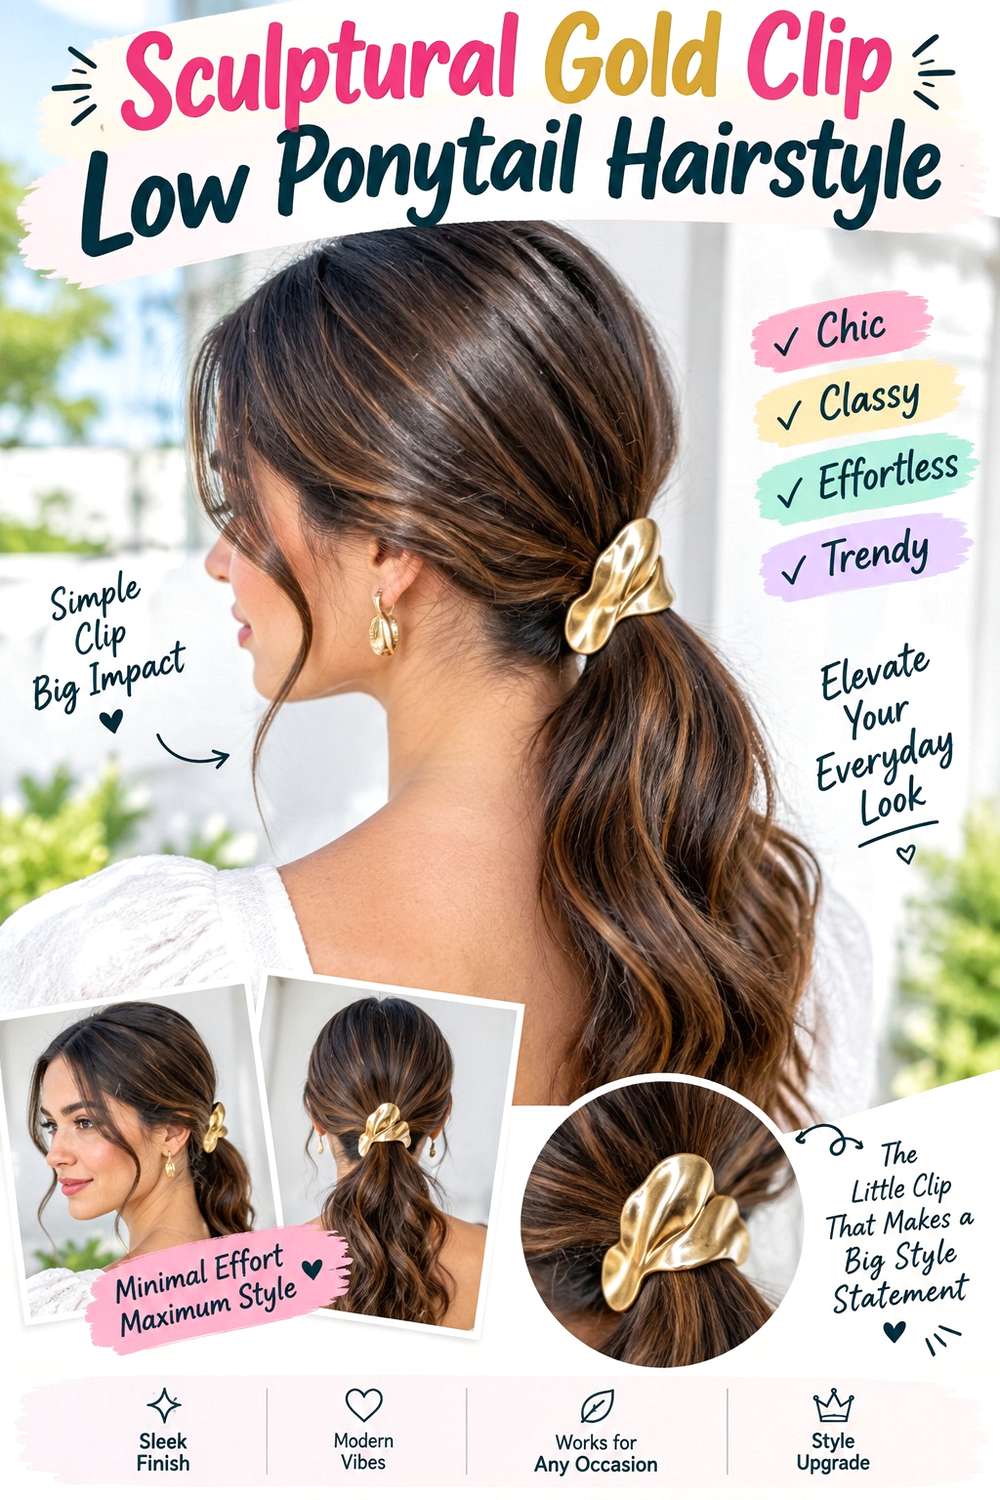
A curved gold clip creates a jewelry-like accent when it follows the shape of the low ponytail base. Keep the hair gathered close to the nape, with a clean center or natural part, then place the clip vertically or on a slight diagonal above the elastic. The tail can remain straight, softly bent, or naturally textured, while the metallic shape provides the strongest visual line.
This design suits readers who want one clear accessory rather than multiple decorative elements. Medium and long hair provide a balanced background, while shorter hair can use a smaller sculptural piece. Use a snag-free elastic to secure the ponytail, a sculptural gold clip for decoration, and flexible hairspray to control flyaways around the accessory without making the hair rigid. A quick refresh may only require adjusting the clip angle and smoothing the nape; full styling takes longer when the chosen tail texture needs preparation.
If a stylist is placing the clip, explain whether you want it centered over the anchor or offset to show more from one side. Also check where the metal edges meet the hair. A visually striking piece should still lie comfortably and should not depend on sharp pressure points to remain secure.
Pro tip:
Angle the gold clip to follow the natural direction of the gathered hair instead of forcing it perfectly vertical. Alignment with the base often improves both balance and grip.
Make It Work for You:
For shorter ponytails, use a narrower sculptural clip that ends close to the anchor. The metallic detail stays noticeable without visually outweighing the available length beneath it.
Watch Out For:
Do not ignore an edge that catches individual strands. Reposition the clip immediately if hair snags when you move, because decorative hardware should release cleanly when the style is removed.
Tortoiseshell Statement Clip Low Ponytail Hairstyle
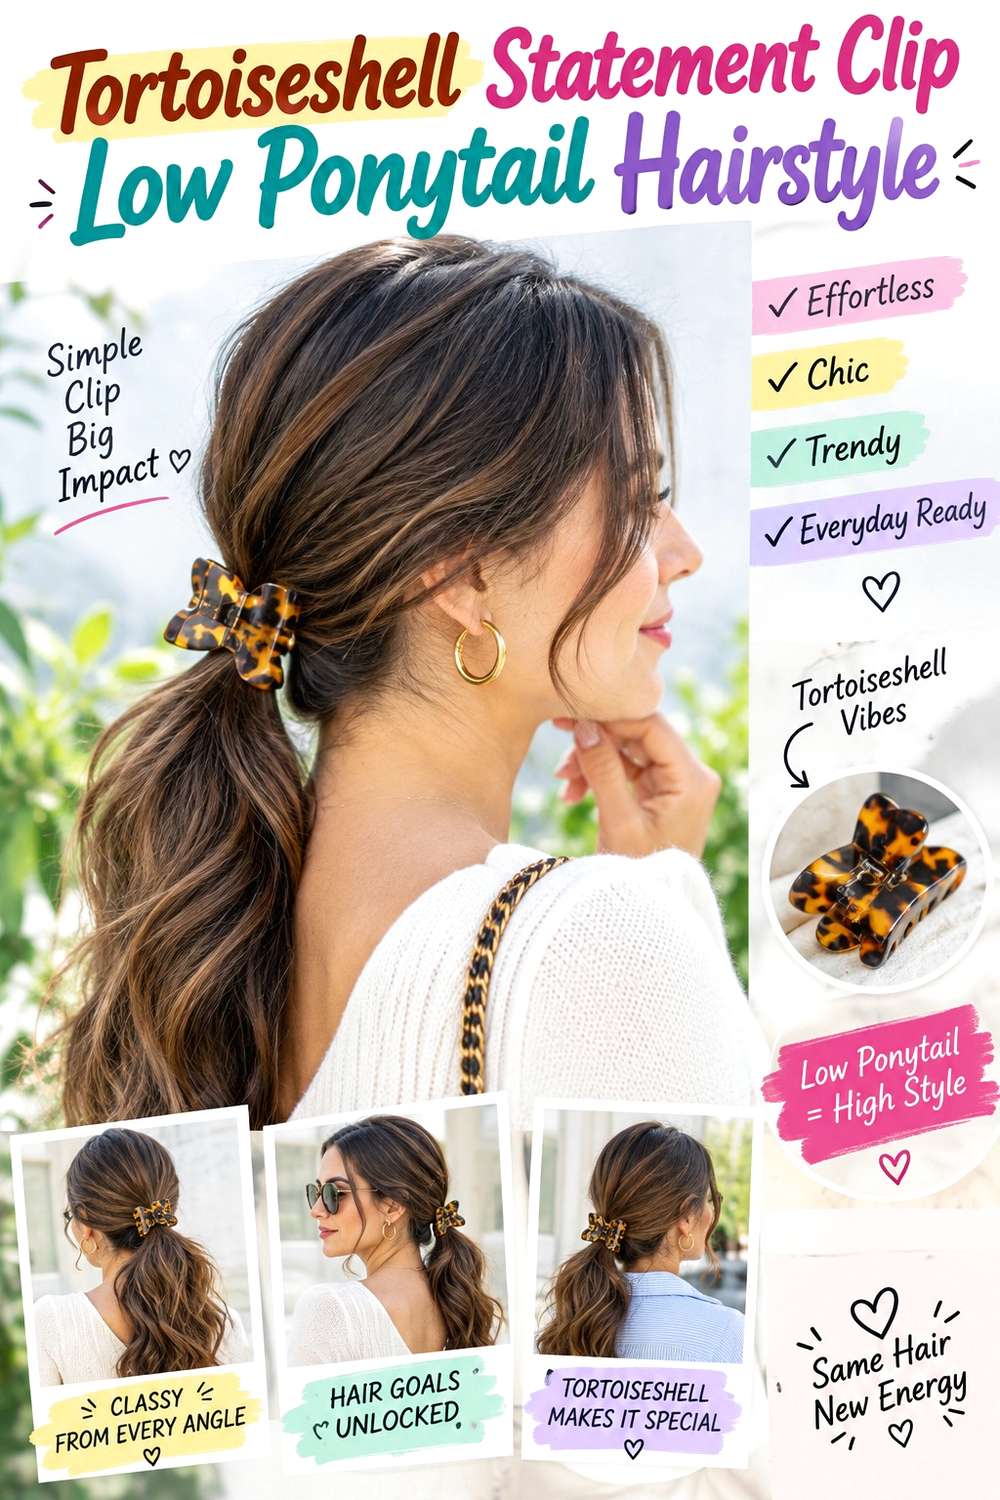
A broad tortoiseshell clip adds pattern while keeping the low ponytail casual and controlled. Secure the ponytail just above the nape, then place a curved clip horizontally across the top of the base. A shallow side part or natural part works well because the accessory already provides visual interest. Let the tail keep a soft bend or natural texture rather than adding another elaborate detail.
Straight, wavy, curly, and coily textures can all use this combination, but the clip capacity should match density. Fuller hair often works better with an elastic doing the structural work underneath. Use a fabric-covered elastic for the anchor, a tortoiseshell statement clip as the visible accent, and light texturizing spray when extra surface grip helps prevent sliding. A quick refresh usually means lifting and replacing the clip if it has shifted; full wash-day styling depends on how much texture preparation the ponytail itself requires.
If a stylist is creating the look, specify whether the clip should fully cover the elastic or sit slightly above it. The curved shape should follow the nape rather than stick out sharply from the head. If it rocks when you move, changing the position is more useful than clamping it tighter.
Pro tip:
Place the curved clip against the direction of the gathered hair and check that both ends contact the base evenly. Balanced contact helps prevent one side from lifting first.
Make It Work for You:
If your hair is slippery, keep the ponytail structurally secure underneath and let the tortoiseshell clip grip only the top layer. This reduces the amount of hair the clasp must control.
Watch Out For:
Avoid forcing a flat clip against a very rounded ponytail base. Poor contact can make the accessory rock or slide; choose a curve that follows the nape more closely.
Crystal Cluster Clip Low Ponytail Hairstyle
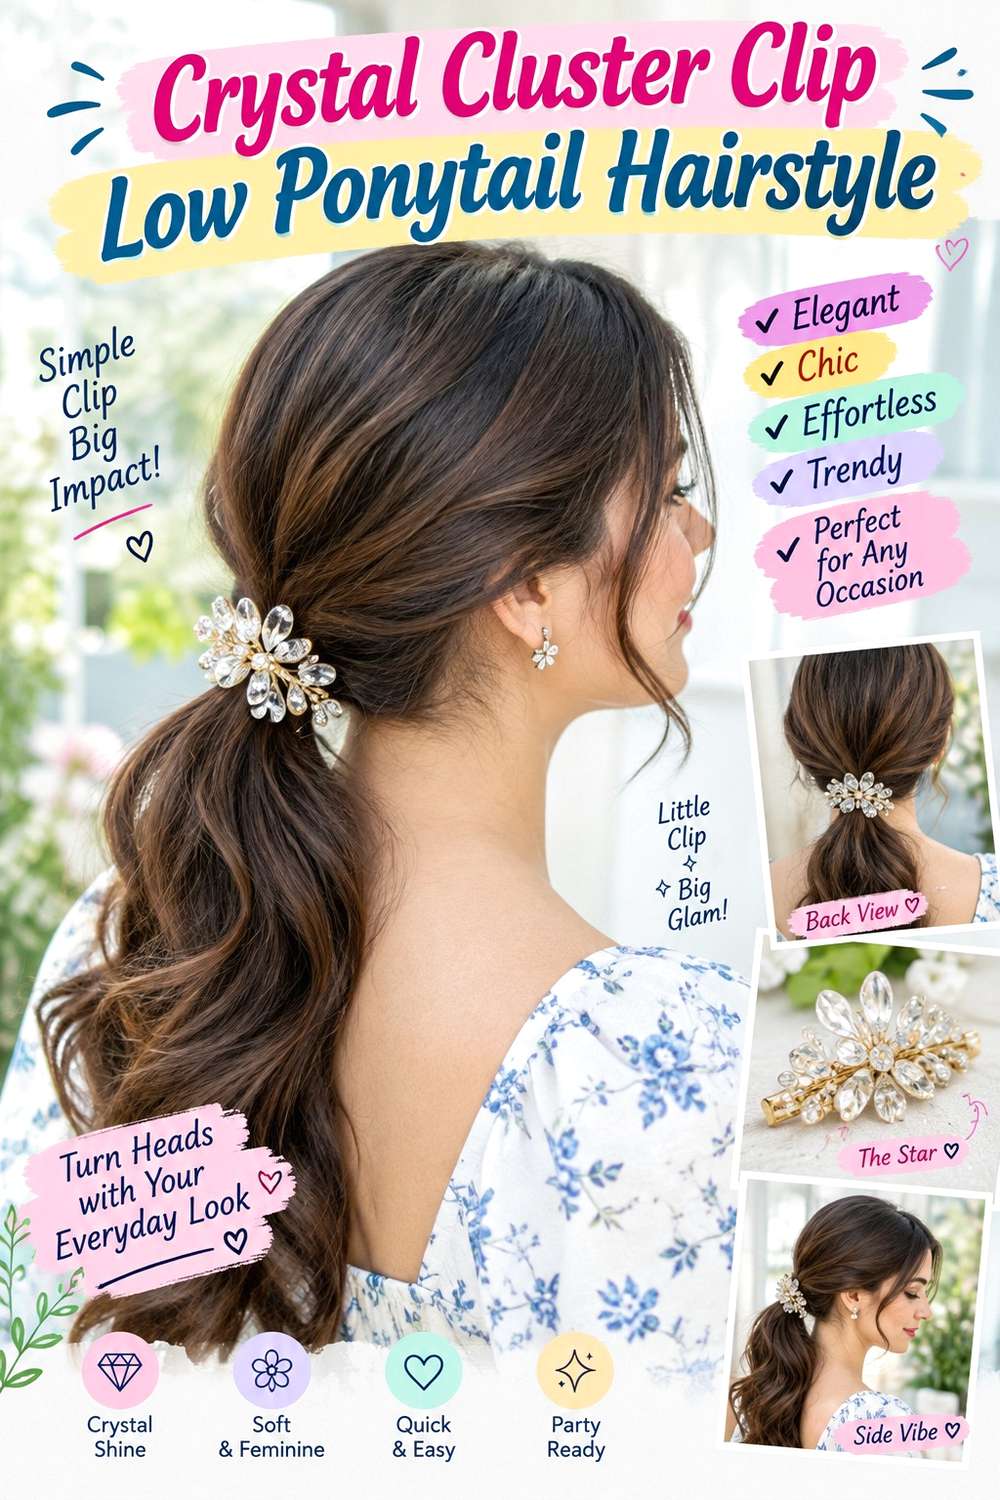
A crystal cluster clip can sit just above a simple low ponytail and create a concentrated point of shine without decorating the entire tail. Keep the base centered and relatively smooth, then angle the clip slightly across one side of the anchor. Leaving the opposite side visually quiet prevents the accessory from feeling crowded, while the tail can stay straight or carry soft natural movement.
This option works well for medium and long hair at dinners, ceremonies, or other dressed-up occasions. The accessory may be visually dense even when it is small, so lower-density hair often suits a compact cluster better than a large heavy piece. Use a fabric-covered elastic for the main anchor, a crystal cluster clip as decoration, and light styling cream to keep nearby strands controlled. A quick refresh means checking that the cluster has not rotated and resetting the crown if needed; full styling after washing depends on the tail finish.
If a stylist is placing it, specify which side should show most clearly in photographs and how close the crystals should sit to the elastic. The clip should not be the main structural anchor unless its mechanism is appropriate for the ponytail weight.
Pro tip:
Place the crystal cluster after the ponytail is fully secure, then turn your head gently in both directions. If the piece shifts, adjust its grip rather than tightening the base.
Make It Work for You:
For lower-density hair, choose a compact cluster with visual sparkle but little weight. A smaller accessory can still read clearly when it sits close to the low anchor.
Watch Out For:
Do not let crystal prongs catch loose strands during removal. Open the clip fully and free nearby hair first instead of pulling the accessory straight out of the ponytail.
Minimal Metal Statement Clip Low Ponytail Hairstyle
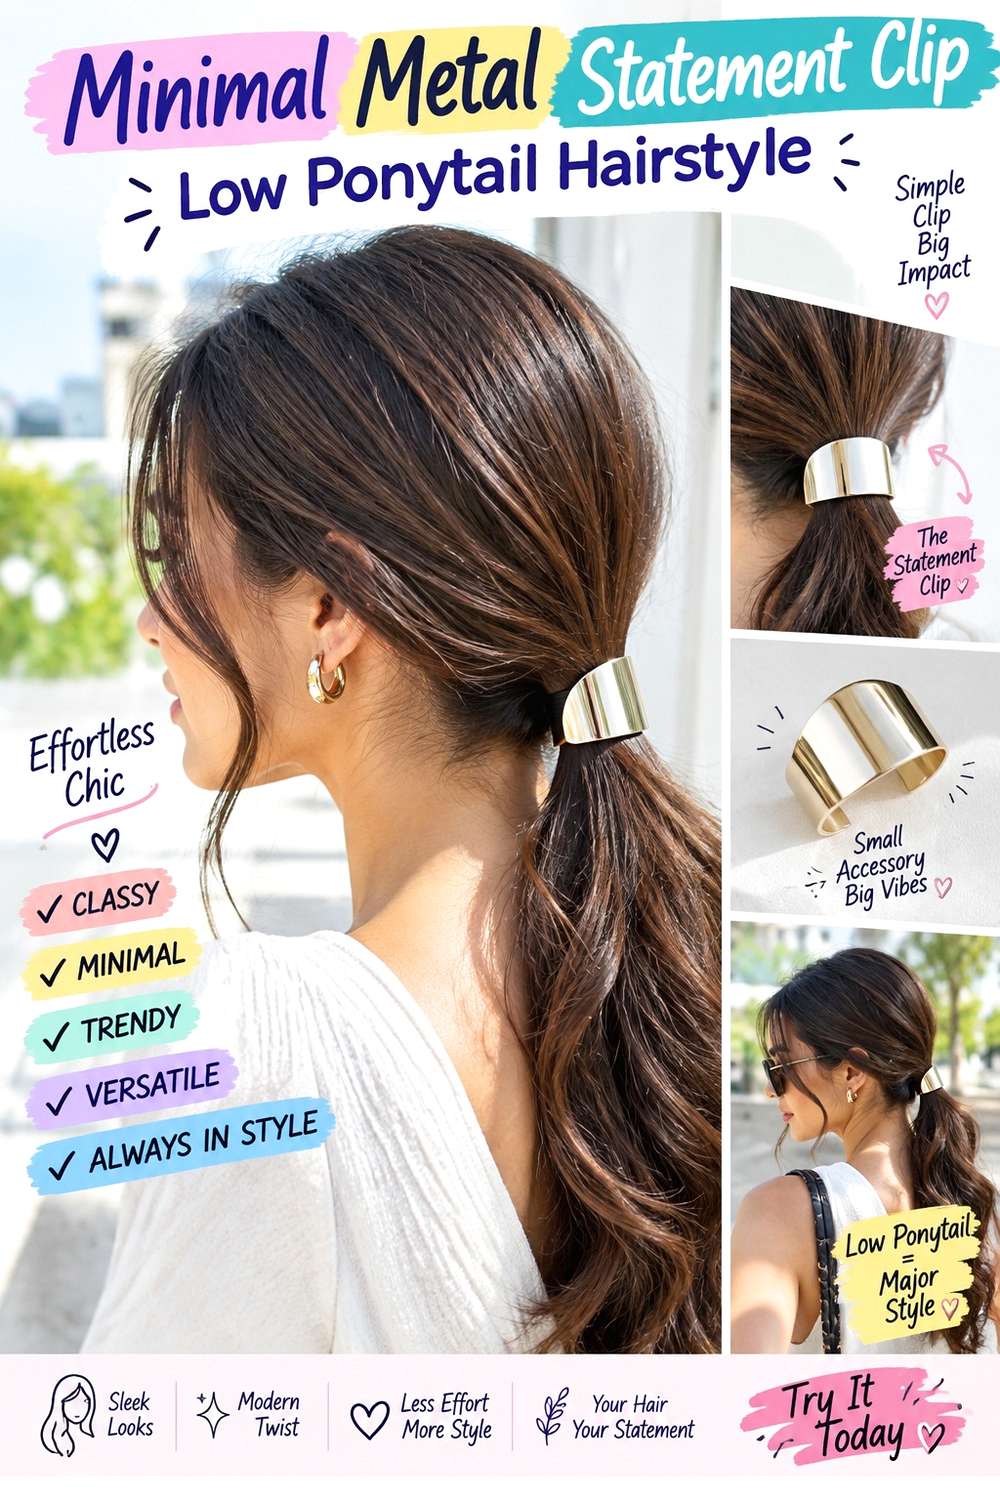
A long, narrow metal clip gives the low ponytail a clean architectural detail without adding much visual bulk. Gather the hair at the nape with a center, side, or brushed-back front, then place the clip horizontally across the base. Keep the tail simple and relatively narrow so the metallic line stays crisp. Straight ends create the sharpest contrast, although subtle waves can soften the result.
This version suits medium and long hair and is useful when you prefer statement accessories with a restrained shape. Dense hair may need the clip to sit over an already secured elastic instead of closing around the full ponytail. Use a fabric-covered elastic for structural hold, a slim metal clip as the accent, and lightweight styling cream for smooth surface control. A quick refresh means realigning the clip and smoothing the base; full styling takes longer only if the tail requires additional texture work.
If a stylist is creating it, show whether you want the metal line to cover the elastic exactly or sit a little higher. Its ends should not press into the scalp when you turn your head. The cleanest result comes from proportion and placement, not from squeezing the accessory more tightly.
Pro tip:
Check the metal clip from the back before closing it completely. Even a small tilt becomes noticeable with a straight horizontal accessory, so adjust the line first.
Make It Work for You:
For very dense hair, let the clip secure only a slim section immediately above the ponytail. The metal accent stays visible while the elastic carries the actual weight.
Watch Out For:
Avoid choosing a rigid clip that is too narrow for the nape area. If its ends press into the scalp, switch position or scale rather than tolerating discomfort.
Floral Statement Clip Low Ponytail Hairstyle

A floral clip adds shape and dimension when it sits slightly to one side of a low ponytail rather than covering the entire base. Gather the hair centrally at the nape, keep the crown softly controlled, and place the flower near the upper edge of the elastic. Let the ponytail fall beneath it with natural movement, leaving enough open space around the accessory for the petals to remain distinct.
This approach suits medium and long hair, especially when the clip has noticeable scale. Wavy or curly texture can echo the softness of the floral shape, while straight hair creates stronger contrast. Use a fabric-covered elastic for the anchor, a floral statement clip as the focal point, and light texturizing spray to give the attachment area extra grip. A quick refresh generally means resetting the flower if it rotates and smoothing the nearby surface; full wash-day styling takes longer only if the tail texture needs rebuilding.
If a stylist is creating it, specify whether the flower should show more from the back or a three-quarter angle. Also identify the exact attachment point so it does not sit directly where a collar will rub. The accessory should attach to a secure base instead of carrying the ponytail itself.
Pro tip:
Position the floral clip after checking your neckline. Keeping petals away from a stiff collar reduces friction that can rotate the accessory or loosen the hair beneath it.
Make It Work for You:
For shorter or lower-density hair, choose one medium flower instead of a wide cluster. The focal point remains clear without overwhelming the size of the ponytail.
Watch Out For:
Do not place a bulky flower directly over a loose elastic. If the base shifts, the whole accessory will tilt; stabilize the ponytail first and decorate second.
Bow Clip Low Ponytail Hairstyle
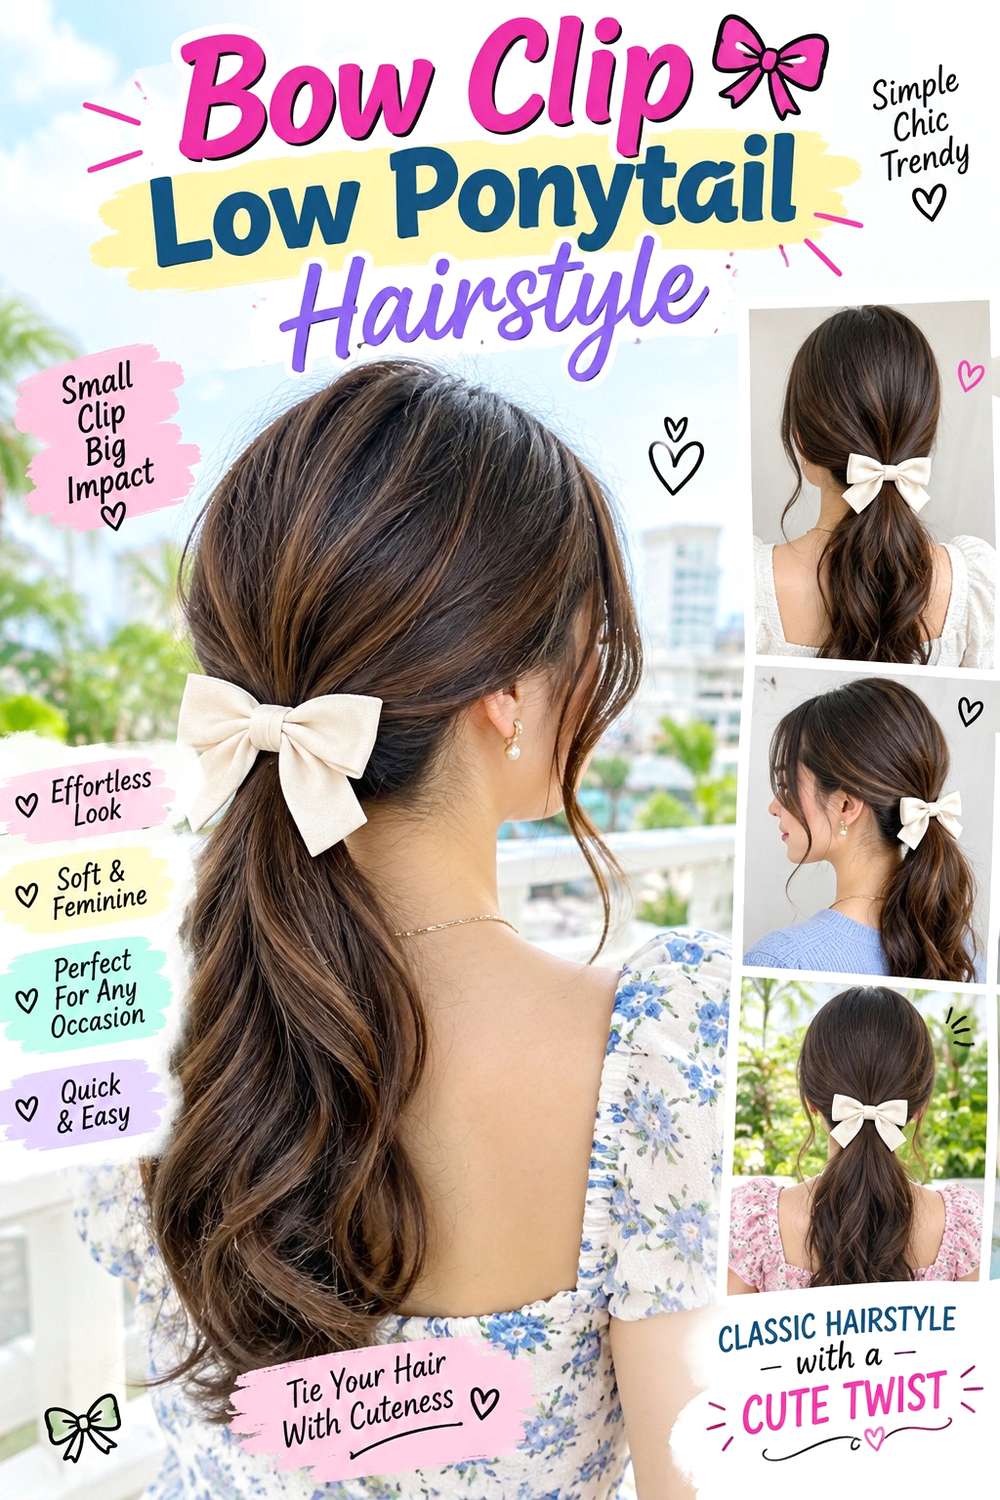
A structured bow clip can make the low ponytail feel more defined without changing the basic shape. Secure the hair at the nape, then attach the bow directly above or over the elastic so its tails fall alongside the ponytail rather than across it. A center or soft side part works well, while keeping the crown relatively simple gives the bow enough visual space.
This idea suits medium and long hair, but accessory scale should stay proportional to the tail. Lower-density ponytails often pair better with a smaller bow, while fuller hair can support a broader piece. Use a fabric-covered elastic for the structural base, a bow clip for decoration, and light styling cream to control strands near the attachment point. A quick refresh means recentering the bow and smoothing the base; full wash-day styling depends mainly on whether you want straight, wavy, or naturally textured lengths.
If a stylist is creating the look, specify how high the bow should sit and whether its tails should overlap the ponytail. The clip should attach to an already stable anchor. If the bow droops, correcting its attachment angle is more effective than pulling the ponytail tighter.
Pro tip:
Attach the bow so its center sits directly over the stable part of the base, then spread the fabric tails afterward. This keeps decoration from shifting the anchor.
Make It Work for You:
For a shorter ponytail, choose a bow with short tails that finish near the upper length. The accessory stays proportional and does not visually cover most of the hair.
Watch Out For:
Avoid using a large fabric bow to hide an unstable ponytail base. The extra weight may increase slipping, so rebuild the elastic before adding the decorative clip.
Double Statement Clip Low Ponytail Hairstyle
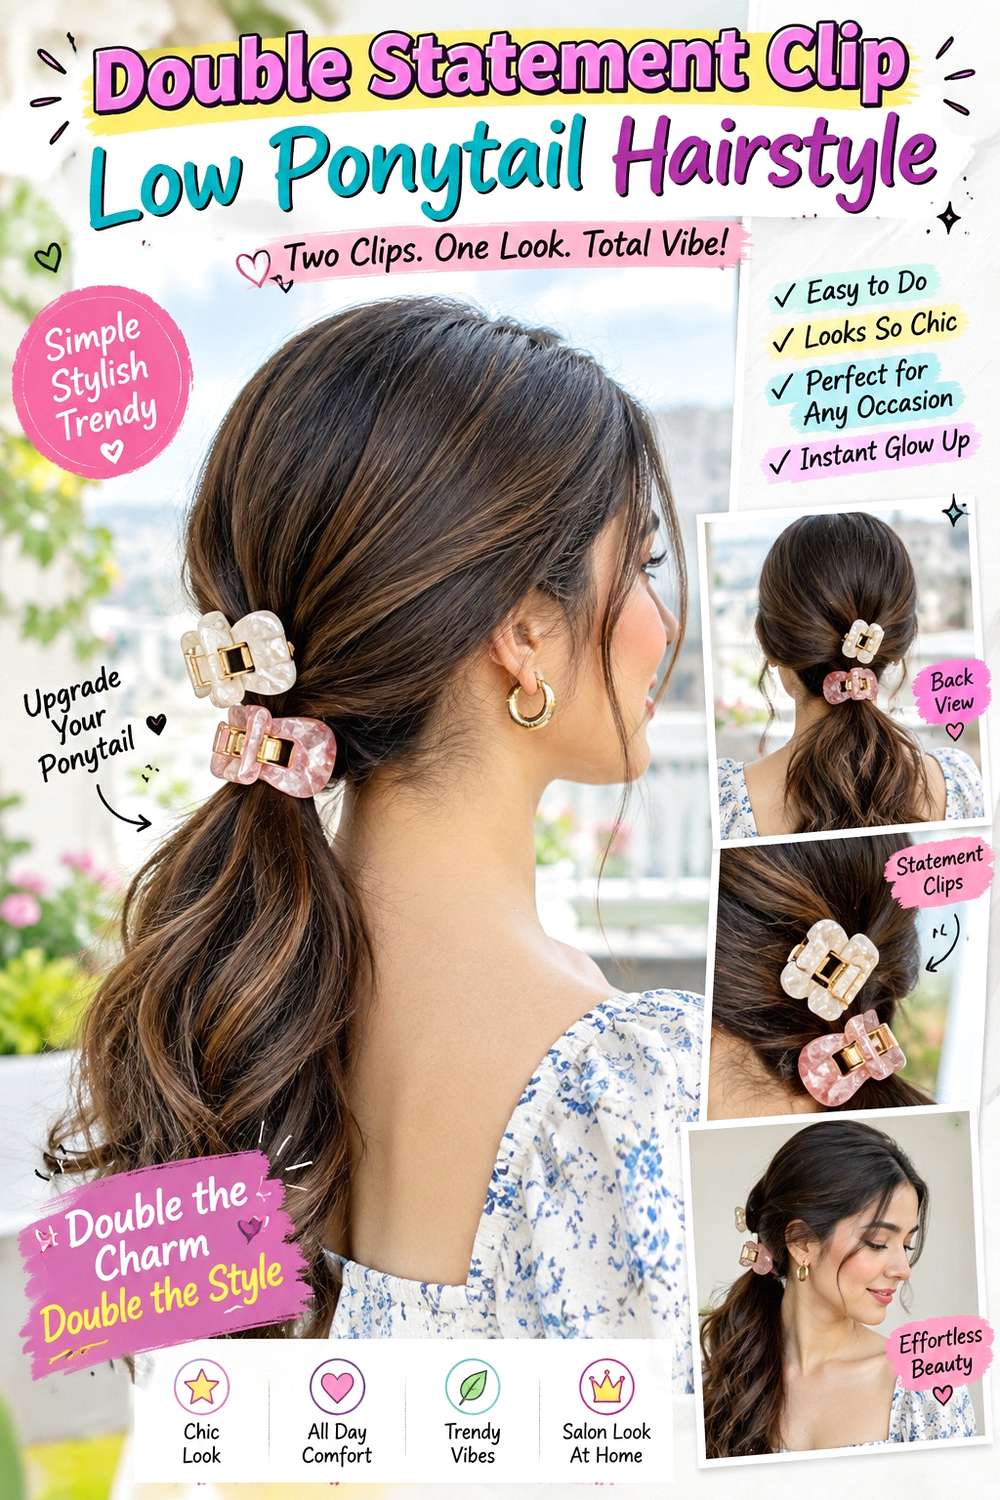
Two smaller statement clips can frame a low ponytail without requiring one oversized accessory. Secure the base at the nape, then place matching or coordinated clips on opposite sides of the elastic. Keep them close enough to read as a pair but leave the center visible. A simple part and smooth tail prevent the two accessories from making the back look too busy.
This version works well for medium and long hair and can be adjusted for density by changing clip scale. Dense hair may let each clip grip a small side section, while lower-density hair benefits from lightweight pieces that do not drag the base downward. Use a fabric-covered elastic for the ponytail, two small statement clips for side placement, and flexible hairspray for light surface control. A quick refresh means checking that both clips remain level; full styling after washing depends on the finish of the tail.
If a stylist is creating it, specify the spacing between the clips and whether they should sit horizontally or on matching diagonals. Each accessory should have its own stable grip point rather than both competing for the same narrow section of hair.
Pro tip:
Place the first clip lightly, then position the second before securing either one firmly. Comparing them together makes it easier to keep the pair balanced around the ponytail.
Make It Work for You:
For lower-density hair, choose two lightweight clips with open designs. You can keep the paired effect without adding enough hardware to weigh down the nape anchor.
Watch Out For:
Do not stack both clips into the same central section. Concentrated hardware can pinch and tilt; spread their grip across opposite sides of the secured ponytail base.
Side-Placed Statement Clip Low Ponytail Hairstyle
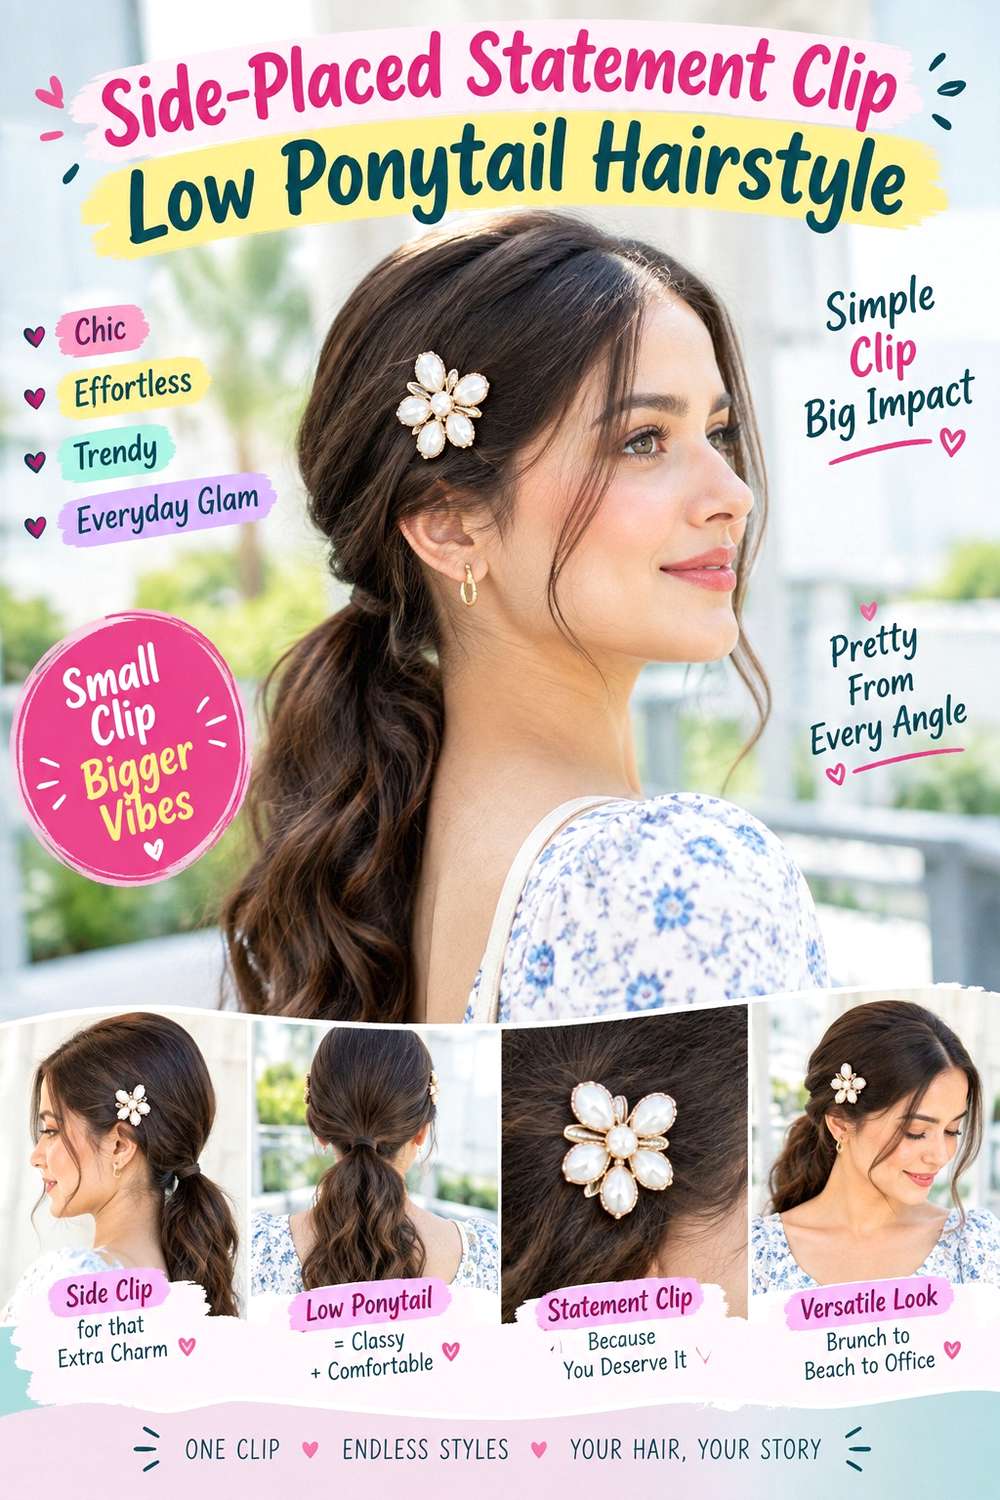
An off-center accessory lets the ponytail stay simple while creating a more directional finish. Keep the actual ponytail anchor centered at the nape, then place a large clip just to one side so it is visible from a three-quarter angle. The tail can fall straight down, while a shallow side part or tucked ear on the same side connects the front to the accessory placement.
This idea suits medium and long hair, especially when the clip has an interesting shape that deserves to be seen from more than directly behind. Straight and wavy textures make the asymmetry clear, while curls can add softness around the hardware. Use a fabric-covered elastic for the centered base, a statement clip for the offset detail, and light styling cream to control the side section beneath it. A quick refresh means correcting the clip angle rather than rebuilding the whole ponytail; full styling takes longer only if the chosen texture needs preparation.
If a stylist is placing it, point to exactly how far from center you want the accessory and which viewing angle matters most. The ponytail itself should remain balanced so one side of the scalp is not carrying extra tension.
Pro tip:
Keep the elastic centered and shift only the decorative clip. This creates asymmetry without dragging the ponytail toward one ear or changing the comfortable balance of the base.
Make It Work for You:
If you prefer a subtle effect, move the clip only slightly beyond center. The accessory will still show from the side while the ponytail remains visually balanced.
Watch Out For:
Avoid relocating the whole ponytail just to display the clip. A side-pulled anchor can create uneven tension; adjust the accessory placement instead of the structural base.
Center-Part Statement Clip Low Ponytail Hairstyle
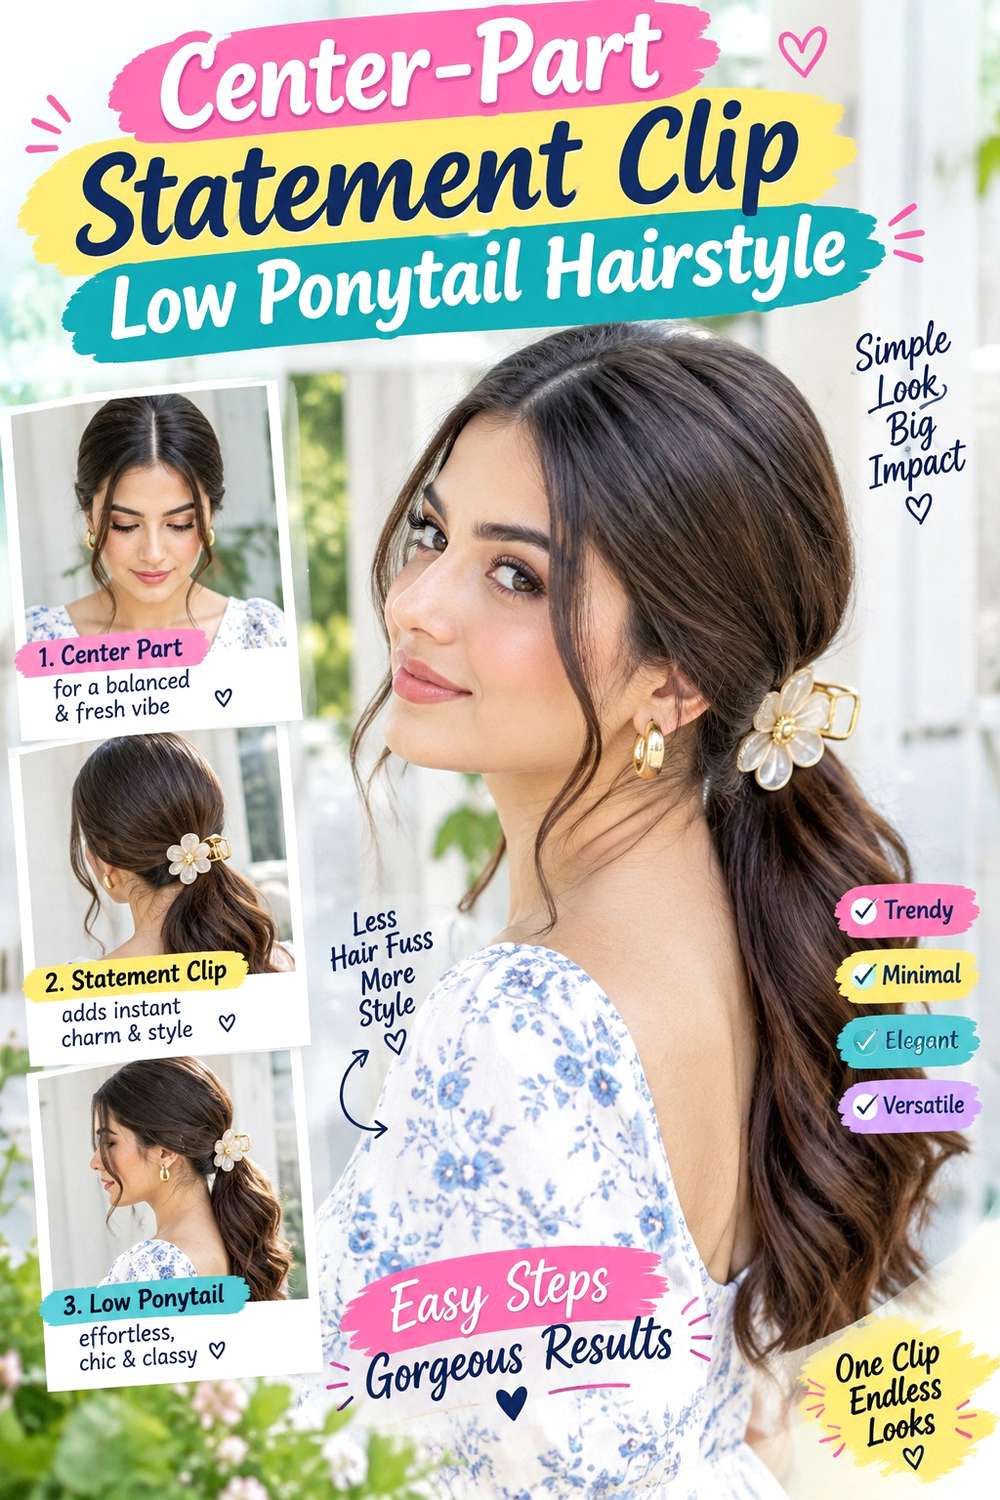
A precise middle part creates a clean front line that balances a bold clip at the nape. Smooth each side toward a low centered ponytail, then position one statement clip directly over the anchor. The accessory may be wide, jeweled, sculptural, or patterned, but the rest of the style stays controlled. A straight or gently curved tail keeps attention on the contrast between the symmetrical front and decorative back.
Straight hair reaches the polished shape quickly, while wavy, curly, and coily textures can keep some natural body rather than being flattened throughout. Use a tail comb to establish the part, a fabric-covered elastic for the base, and a statement clip for decoration. A quick refresh means redefining the part and checking the accessory position; full wash-day styling takes longer when the surface needs more preparation.
If a stylist is creating the look, specify how flat you want the crown and whether the ears should remain exposed or lightly covered. The clip should sit on the visual centerline of the part when viewed from behind. Any sleekness should come from careful gathering, not from tightening the base until the temples feel strained.
Pro tip:
Create the part before gathering the ponytail, then check that the clip aligns with that same centerline. Small corrections are easier before the accessory is fully secured.
Make It Work for You:
For curly or coily hair, keep the center part defined while allowing controlled root texture around it. The symmetry remains clear without requiring the entire surface to lie flat.
Watch Out For:
Do not repeatedly tighten the elastic to correct an uneven middle part. Release and reset the front sections instead, since base tension cannot fix inaccurate parting.
Deep Side-Part Statement Clip Low Ponytail Hairstyle

A deep side part adds movement across the front while a bold clip finishes the low anchor at the back. Sweep the fuller section toward the nape, keep the ponytail centered, and place the clip slightly toward the heavier side. Let the tail remain simple so the asymmetrical front and accessory placement feel connected rather than competing with extra styling.
Medium and long hair works especially well because the side sweep has enough length to reach the base smoothly. Straight and wavy textures show the direction clearly, while curls can retain more volume around the part. Use a tail comb to establish the part, a fabric-covered elastic for the nape anchor, and a statement clip for the decorative finish. A quick refresh usually involves smoothing the fuller side and resetting the clip angle; complete wash-day styling takes longer because the front direction must be recreated.
For salon styling, specify the depth of the part and whether the accessory should sit exactly over the elastic or slightly to one side. The fuller front section should reach the anchor comfortably. If it begins to pull above the ear, loosen and regather rather than tightening the ponytail further.
Pro tip:
Set the deep part while the hair is loose and guide the fuller section toward the nape before securing anything. This reduces ridges and makes the sweep easier to control.
Make It Work for You:
If your natural growth direction already favors one side, use that as the starting point. The shape can look deliberate while requiring less manipulation through the roots.
Watch Out For:
Avoid dragging the fuller side too tightly across the crown. Uneven tension can shift the ponytail and make the decorative clip look crooked even when it is centered.
Wrapped-Base Statement Clip Low Ponytail Hairstyle
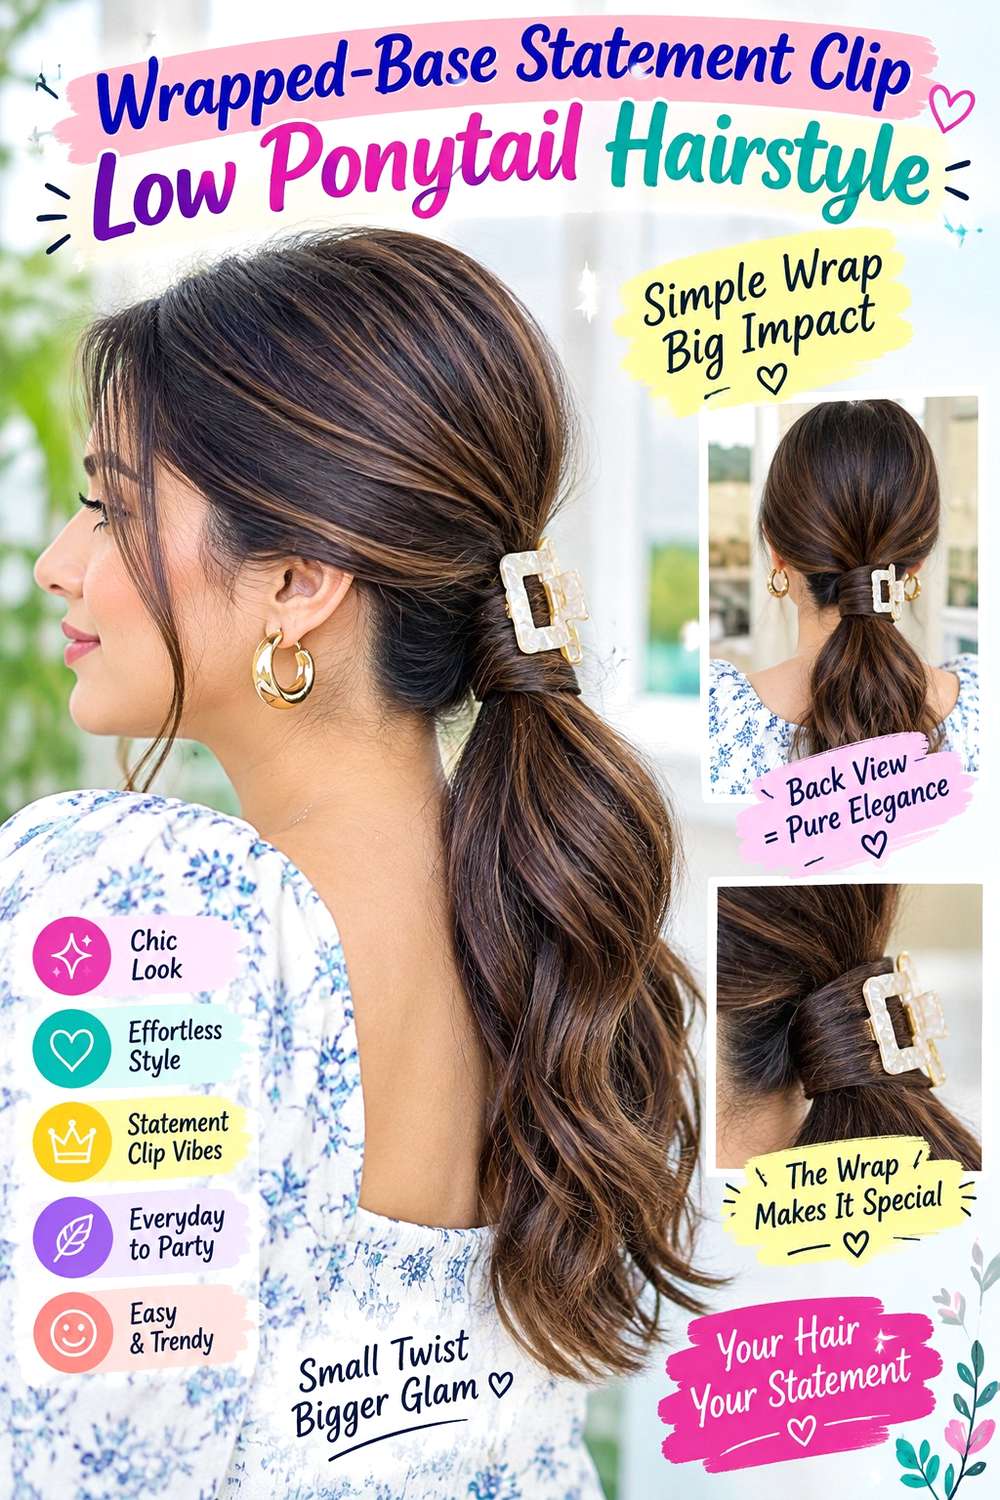
A narrow hair wrap can conceal the elastic while a statement clip sits just above the finished base. Secure the ponytail at the nape, reserve a slim section from underneath, circle it around the elastic, and tuck the end out of sight. Position the clip above the wrapped band rather than over it so both details remain visible. Keep the tail relatively simple to prevent the back from becoming crowded.
This version suits medium and long hair because the wrap needs usable length without taking too much volume from the tail. Straight and wavy textures show the separation between band and clip clearly, while curls create a softer transition. Use a fabric-covered elastic for the anchor, a statement clip as the accent, and bobby pins to secure the wrapped end. A quick refresh may involve retucking the wrap and realigning the clip; full styling takes longer because the base detail needs rebuilding.
If a stylist is creating it, specify the wrap width and exact gap between the band and accessory. The clip should decorate an already stable base rather than being expected to hold the wrapped section together. Comfortable placement is more important than packing both details tightly into one small area.
Pro tip:
Finish the hair wrap completely before placing the clip. Keeping the construction separate prevents the accessory from lifting the wrapped section when it is removed or repositioned.
Make It Work for You:
For lower-density hair, reserve a very narrow wrapping section and use a lighter clip. This keeps more fullness in the tail while preserving both decorative details.
Watch Out For:
Do not place the clip directly through the tucked end of the wrap. If the accessory moves, it can loosen the band; secure each element independently instead.
Soft Face-Framing Statement Clip Low Ponytail Hairstyle

Loose pieces around the face balance a bold clip by giving the front a softer finish. Choose a center or relaxed side part, separate a few narrow sections around the cheekbones or jaw, then gather the rest into a low ponytail. Place the statement clip directly above the anchor and keep the tail natural or softly bent. The accessory remains structured while the front has movement.
This arrangement works across straight, wavy, curly, and coily textures, especially when existing front layers do not comfortably reach the nape. The loose sections should stay restrained enough that the ponytail retains stability. Use a fabric-covered elastic for the base, a statement clip for the focal point, and light styling cream to define the face-framing pieces. A quick refresh usually means reshaping those front sections and checking the clip; full wash-day styling takes longer if their natural texture needs resetting.
If a stylist is creating the look, point to the exact strands you want left out and where you prefer them to finish. Also specify the clip height so it remains visible without pushing the ponytail upward. Pulling extra pieces from an already secured base can weaken the anchor, so decide on the face frame before gathering.
Pro tip:
Separate the face-framing sections before securing the ponytail. Choosing them early prevents accidental loosening at the sides and helps the final clip sit against a stable base.
Make It Work for You:
If your front layers are short, leave only the sections that naturally fall around the face. A smaller frame preserves ponytail fullness while keeping the overall finish soft.
Watch Out For:
Avoid pulling additional strands out after the statement clip is attached. Removing hair from the base can reduce support and make a previously level accessory start to tilt.
Wavy Statement Clip Low Ponytail Hairstyle

Broad waves through the tail give a statement clip a softer background without hiding it. Create large bends through the mid-lengths, gather the hair at the nape, and attach the clip directly over or just above the anchor. Keep the first strong wave below the accessory so the area around the clasp remains relatively flat and secure. The ends can stay gently bent rather than tightly curled.
Medium and long hair provides enough space for both the clip and visible wave pattern. Naturally wavy hair may need only selective reshaping, while straighter hair requires more styling. Apply heat protectant before using a curling iron for broad bends, then use a statement clip to finish the base. A quick next-day refresh can target flattened sections and realign the accessory; a full wash-day style takes longer because the waves should be set before the ponytail is gathered.
If a stylist is creating it, specify where the first visible bend should begin and whether you want the clip centered or slightly offset. Keeping excess wave volume away from the clasp improves contact and helps the accessory remain visible rather than disappearing into the textured tail.
Pro tip:
Let heated waves cool fully before gathering the ponytail. Cooling first helps the bends retain shape when the length is brought together and secured beneath the statement clip.
Make It Work for You:
If your hair is naturally wavy, reshape only uneven areas instead of restyling every section. The existing movement can provide most of the texture with less heat and time.
Watch Out For:
Do not build bulky curls directly beneath the clip. Extra expansion around the clasp can weaken grip and make the accessory appear buried rather than intentionally placed.
Curly Statement Clip Low Ponytail Hairstyle

A statement clip can frame natural curls without flattening the ponytail into a sleek finish. Gather the hair low while preserving some root texture, secure the base comfortably, and place the accessory over a controlled section near the anchor. Let the curls remain full through the tail, with shorter face or nape pieces free when they do not reach naturally. The contrast comes from a defined accessory against springy texture.
This version works best when the ponytail position is judged at the hair’s finished dry length because shrinkage changes reach and volume. Clip capacity also matters: a decorative clasp does not need to contain every curl if the elastic already supports the base. Use curl gel for grouped definition, a fabric-covered elastic for the anchor, and a statement clip as the focal point. A quick refresh may involve reshaping visible curl groups and repositioning the accessory; full wash-day styling takes longer because curl definition must be restored first.
If a stylist is creating the look, discuss where the ponytail should sit after shrinkage and whether the clip should grip the full base or only a surface section. Avoid compressing the root area simply to make a decorative clasp close around more hair.
Pro tip:
Attach the clip around stable curl groups rather than splitting many dry curls apart. Keeping sections intact can improve grip while preserving definition around the low ponytail base.
Make It Work for You:
For tighter shrinkage, use a smaller accessory positioned close to the elastic. The clip remains visible without requiring the curls to be stretched into a longer, flatter base.
Watch Out For:
Avoid forcing a narrow clasp around a full curly ponytail. If it cannot close comfortably, let the elastic hold the weight and use the clip on a smaller surface section.
Textured Volume Statement Clip Low Ponytail Hairstyle
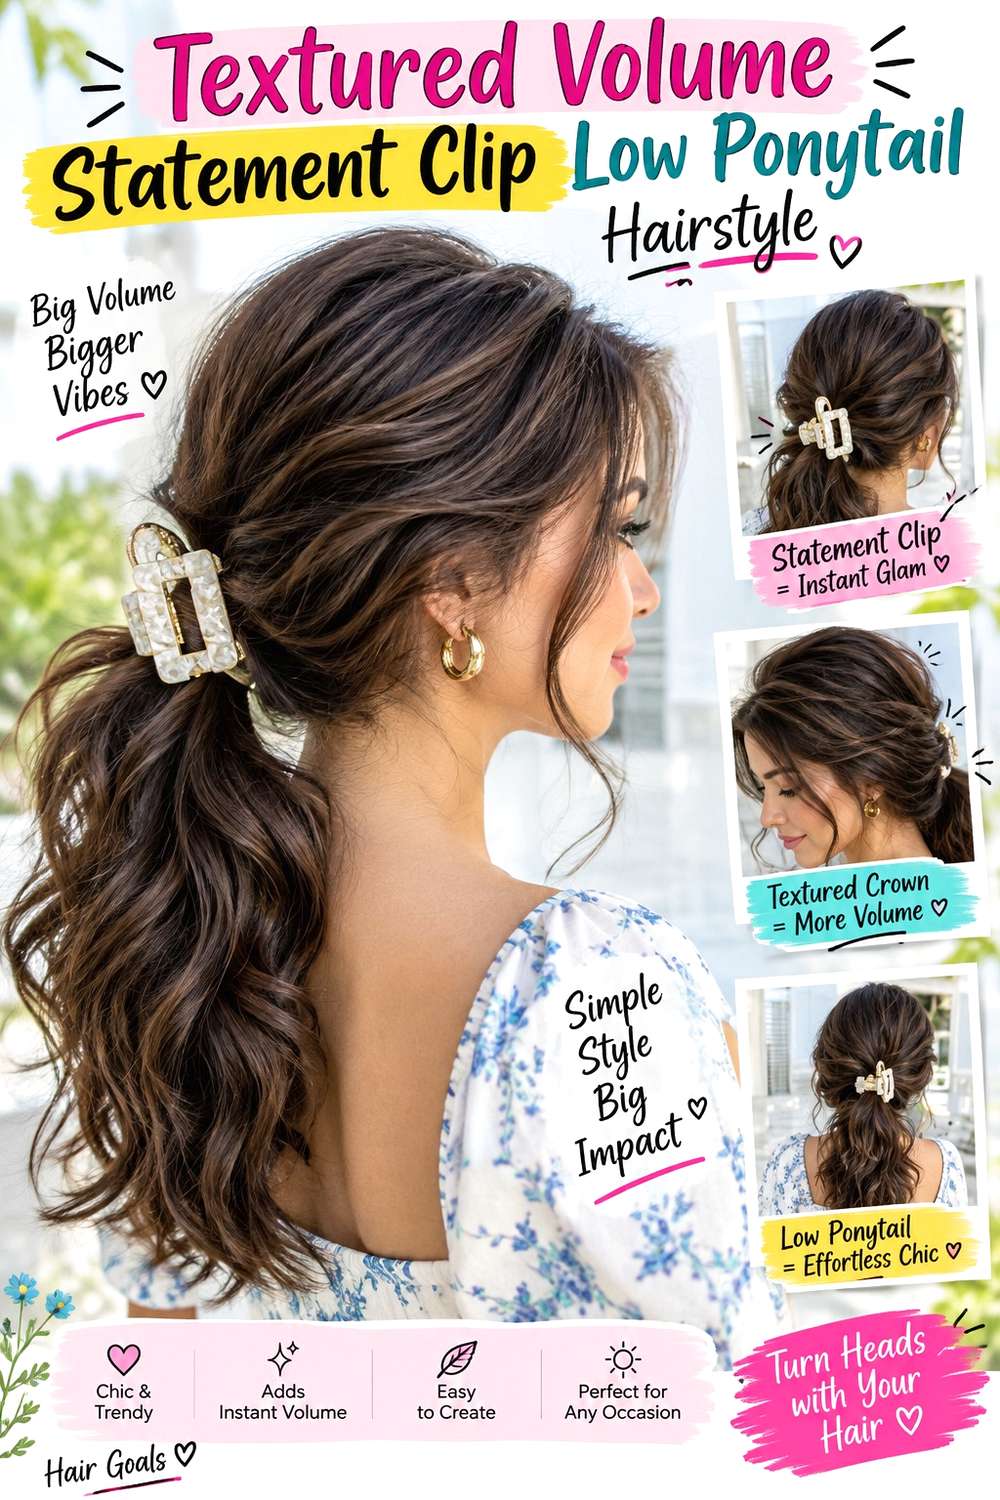
Soft crown volume can balance a large statement clip without making the low ponytail feel overly formal. Keep some lift through the roots and sides, gather the hair at the nape, and place the accessory over the secure base. Let the ponytail retain irregular bends or airy movement, but keep the immediate attachment area controlled so the clip sits flat rather than floating on top of the texture.
This option suits wavy, curly, naturally full, or lightly tousled hair. Dense hair may need a stronger underlying anchor, while lower-density hair can keep the crown gently lifted to preserve visual fullness. Use lightweight mousse for root support, a fabric-covered elastic for the ponytail, and a statement clip for the decorative finish. A quick refresh involves restoring flattened crown areas and checking the clip angle; a full wash-day style takes longer because the volume should be established before the base is secured.
If a stylist is creating it, explain how much crown height you want and whether the volume should stay mainly at the top or continue through the sides. The clip should sit against a stable section of hair, not depend on compressing all the texture beneath its clasp.
Pro tip:
Create crown lift before forming the low ponytail, then leave that area mostly untouched. Pulling upward afterward can loosen the base and cause the statement clip to tilt.
Make It Work for You:
For very dense hair, keep the sides slightly narrower and concentrate volume near the crown. This preserves dimension while giving the accessory a cleaner area around the nape.
Watch Out For:
Do not treat surface frizz as useful volume. Smooth only the outermost layer when needed while preserving the internal lift that gives the style its soft shape.
Braided-Detail Statement Clip Low Ponytail Hairstyle

A narrow braid can lead into the low ponytail while a statement clip marks the final anchor. Start with one small side section near the temple or above the ear, braid it toward the nape, then combine it with the rest of the hair in a low ponytail. Place the clip over the base, leaving enough of the braid visible before it reaches the accessory. Keep the loose tail simple so the two details remain distinct.
Medium and long hair works best because the braid needs enough length to reach the nape without excessive pulling. Straight and wavy hair show the braid clearly, while curly or coily textures can create a fuller accent. Use a small snag-free elastic for the braid end, a fabric-covered elastic for the ponytail, and a statement clip for the anchor. A quick refresh means smoothing the braid edge and resetting the clip; full styling takes longer because the accent section must be rebuilt.
If a stylist is creating it, specify the braid width, starting point, and comfortable tension near the temple. The braid should meet the ponytail naturally rather than being pulled tight just to reach the clip. The accessory remains decorative and should not carry the braid’s tension.
Pro tip:
Finish the braid before placing the statement clip so you can see exactly where the braided section enters the ponytail. This makes the accessory easier to position without hiding the detail.
Make It Work for You:
For lower-density hair, keep the accent braid narrow and use only a small side section. Most of the hair then remains available to create a fuller-looking ponytail.
Watch Out For:
Avoid tightening the braid near the temple simply to reach the nape. If the section feels strained, start the braid farther back or leave shorter pieces free.
Chain-Link Clip Low Ponytail Hairstyle
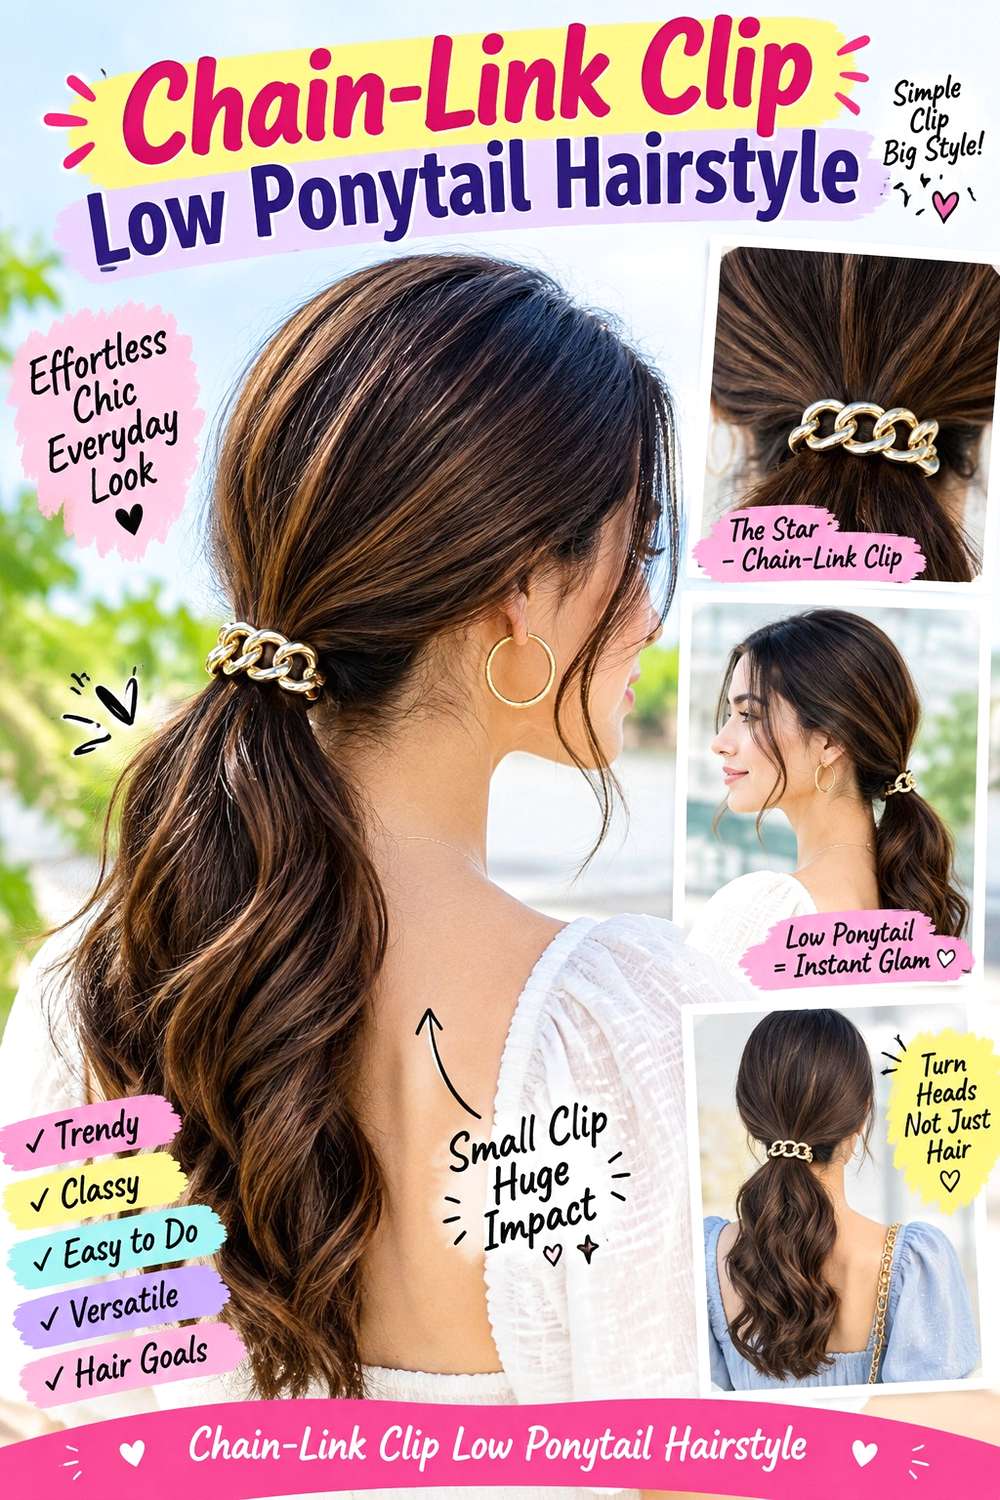
A chain-link style clip adds repeated metallic shapes across the base while the ponytail underneath remains straightforward. Gather the hair low and centered, then position the elongated clip horizontally over the elastic so the linked design spans the anchor. Keep the front relatively simple and let the tail fall straight or with gentle natural texture. The accessory already provides enough pattern without extra wrapping.
This design suits medium and long hair, especially when the clip is wide but relatively lightweight. Dense hair may need the elastic to carry most of the ponytail weight, while the linked clip rests over a smaller surface section. Use a fabric-covered elastic for structure, a chain-link clip for decoration, and light styling cream to control strands around the clasp. A quick refresh means checking that the clip stays level and smoothing the base; full styling after washing depends on the chosen texture.
If a stylist is creating it, explain whether you want the linked section centered precisely or extending slightly farther to one side. The accessory should lie flat enough that its ends do not catch clothing or press into the scalp. Secure placement matters more than forcing the clasp around the entire ponytail.
Pro tip:
Check both ends of the chain-link clip after securing it. A wide accessory can look centered while one edge lifts, so make sure the clasp contacts the base evenly.
Make It Work for You:
For a smaller ponytail, choose a narrower linked design or let the clip sit over the surface above the elastic. This preserves proportion without sacrificing the statement effect.
Watch Out For:
Do not place a wide linked clip where its ends rub against a high collar. Repeated contact can shift the accessory, snag hair, and loosen an otherwise secure base.
Short-Length Statement Clip Low Ponytail Hairstyle
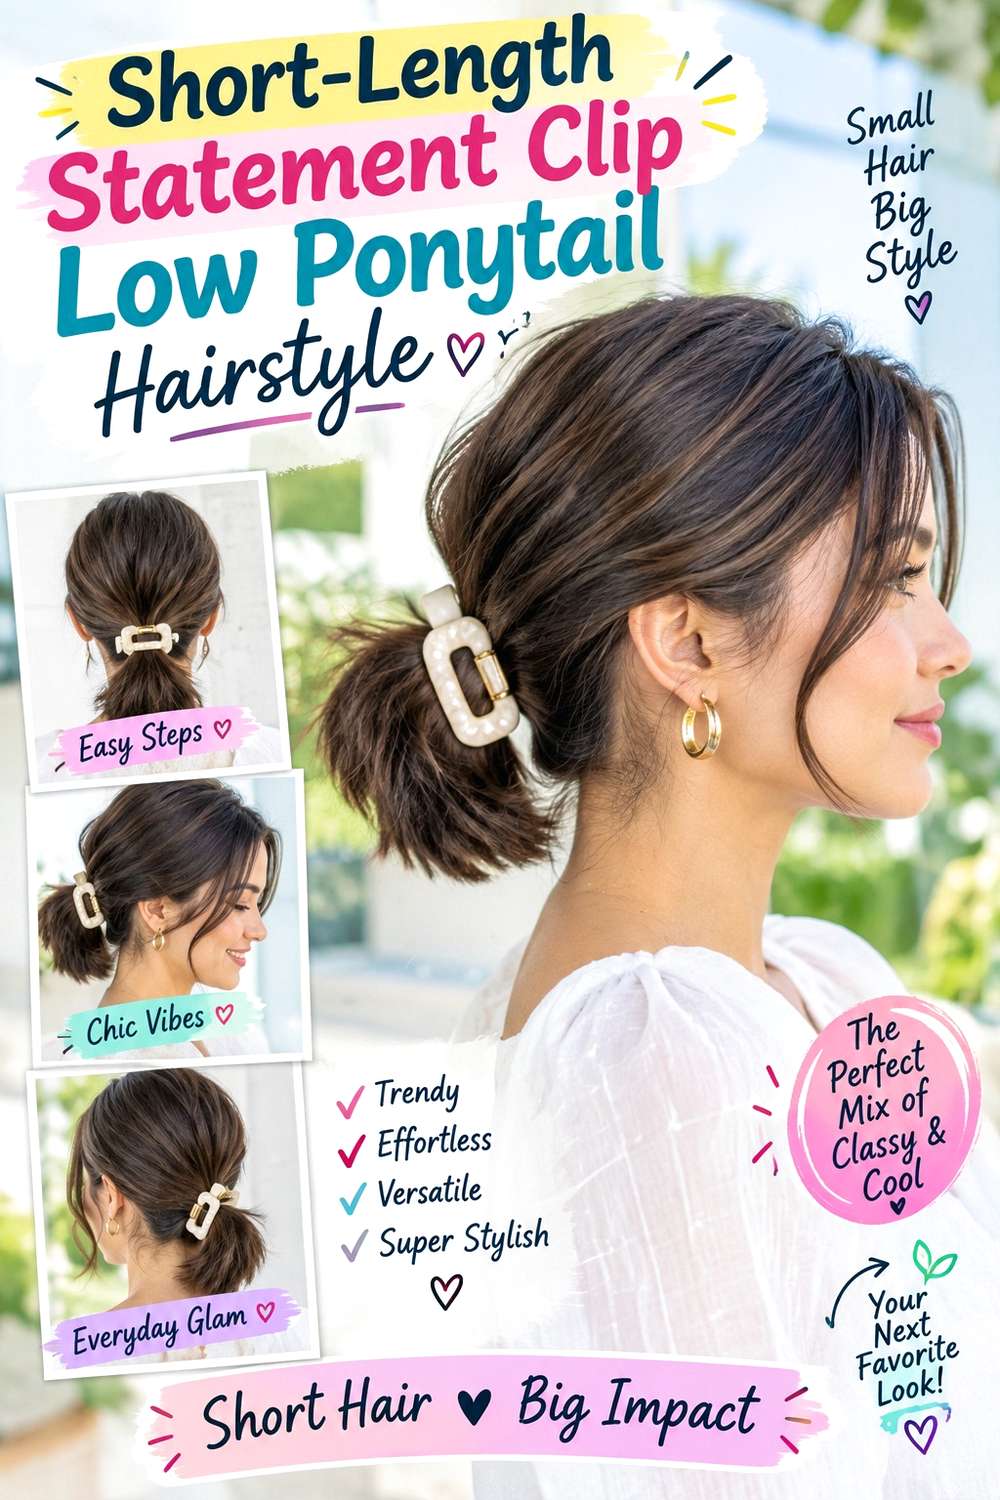
Shorter hair can support a statement clip when the ponytail stays compact and the accessory is scaled to the available length. Gather whatever hair reaches comfortably at the nape, allow short face or nape pieces to remain free, and position the clip directly above the elastic rather than trying to enclose the entire small ponytail. A center, side, or natural part can define the front, while the short tail remains visible below the accessory.
This version works best on shorter medium lengths that can form a stable base without excessive stretching. Straight and wavy textures show the compact outline clearly, while curly or coily hair should be judged near its intended dry length because shrinkage affects reach. Use a small snag-free elastic for the anchor, a lightweight statement clip for decoration, and light styling cream to control reachable surface pieces. A quick refresh usually involves retucking one strand and resetting the clip; full wash-day styling takes longer if natural texture also needs preparation.
If a stylist is creating it, specify which shorter pieces can remain loose and how large the clip should appear relative to the tail. A secure small ponytail is more practical than forcing limited length into a tighter base simply to support a larger accessory.
Pro tip:
Test the statement clip against the finished short ponytail before committing to placement. A slightly smaller accessory often balances the length better and puts less weight on the anchor.
Make It Work for You:
For curls or coils, assess the ponytail after shrinkage and choose the clip from that finished proportion. A lightweight piece can stay visible without stretching shorter sections.
Watch Out For:
Do not force every short nape strand into the elastic just to create a cleaner background for the clip. Comfortable loose pieces are better than an over-tightened base.
Conclusion
Low ponytail hairstyles with statement clips can range from polished pearl barrettes and sleek metal pieces to floral, geometric, crystal, or oversized accessories. Long hair gives more space beneath a large clip, while shorter or lower-density ponytails often suit lighter, more compact designs. Dense hair usually benefits from a strong elastic carrying the weight so the accessory can remain decorative. Straight finishes create crisp contrast, while waves, curls, and textured volume give the clip a softer background. Center and side parts change the balance, and face-framing pieces can reduce formality without disturbing the nape anchor. Choose the clip by weight, clasp capacity, placement, and comfort as well as appearance; a statement piece works best when the ponytail beneath it is already secure.
Before Your Salon Visit
Choose one or two favorites and save references that clearly show the front, nape, and accessory placement. Discuss your natural texture, density, usable length, face shape, normal parting, and styling routine. Point out the exact ponytail height, crown volume, loose pieces, clip angle, accessory scale, and finish you want. Because these are temporary styles, focus on a comfortable anchor and reliable clip placement rather than changing your haircut simply to support the accessory.
FAQs
How do I keep a statement clip from slipping on a low ponytail?
Secure the ponytail first with an elastic that suits your density, then attach the statement clip to a stable section around the base. If it still slides, adjust the clip angle or gripping area rather than tightening the ponytail repeatedly. Heavy accessories may need a lighter or smaller alternative.
Can statement clips work with thick or dense hair?
Yes, but the clip does not need to hold the full ponytail. A strong elastic can carry the weight while the accessory grips a smaller surface section above it. Choose a clasp with enough capacity, and never force a decorative clip shut if it strains or pinches.
Are statement clips suitable for curly and coily ponytails?
Yes. Curls and coils can remain naturally defined, and the clip can sit over an already secured base rather than compressing the entire texture. Consider shrinkage when choosing ponytail height and accessory scale, and use a clasp large enough to close comfortably around the section it actually grips.
How large should a statement clip be for a short low ponytail?
Choose a clip that looks proportional to the visible tail and does not outweigh the anchor. Shorter lengths usually work better with lightweight medium or compact pieces placed above the elastic. A large accessory can still work if it is very light and attaches securely without pulling.