13 Wide Fabric Headband Hairstyles
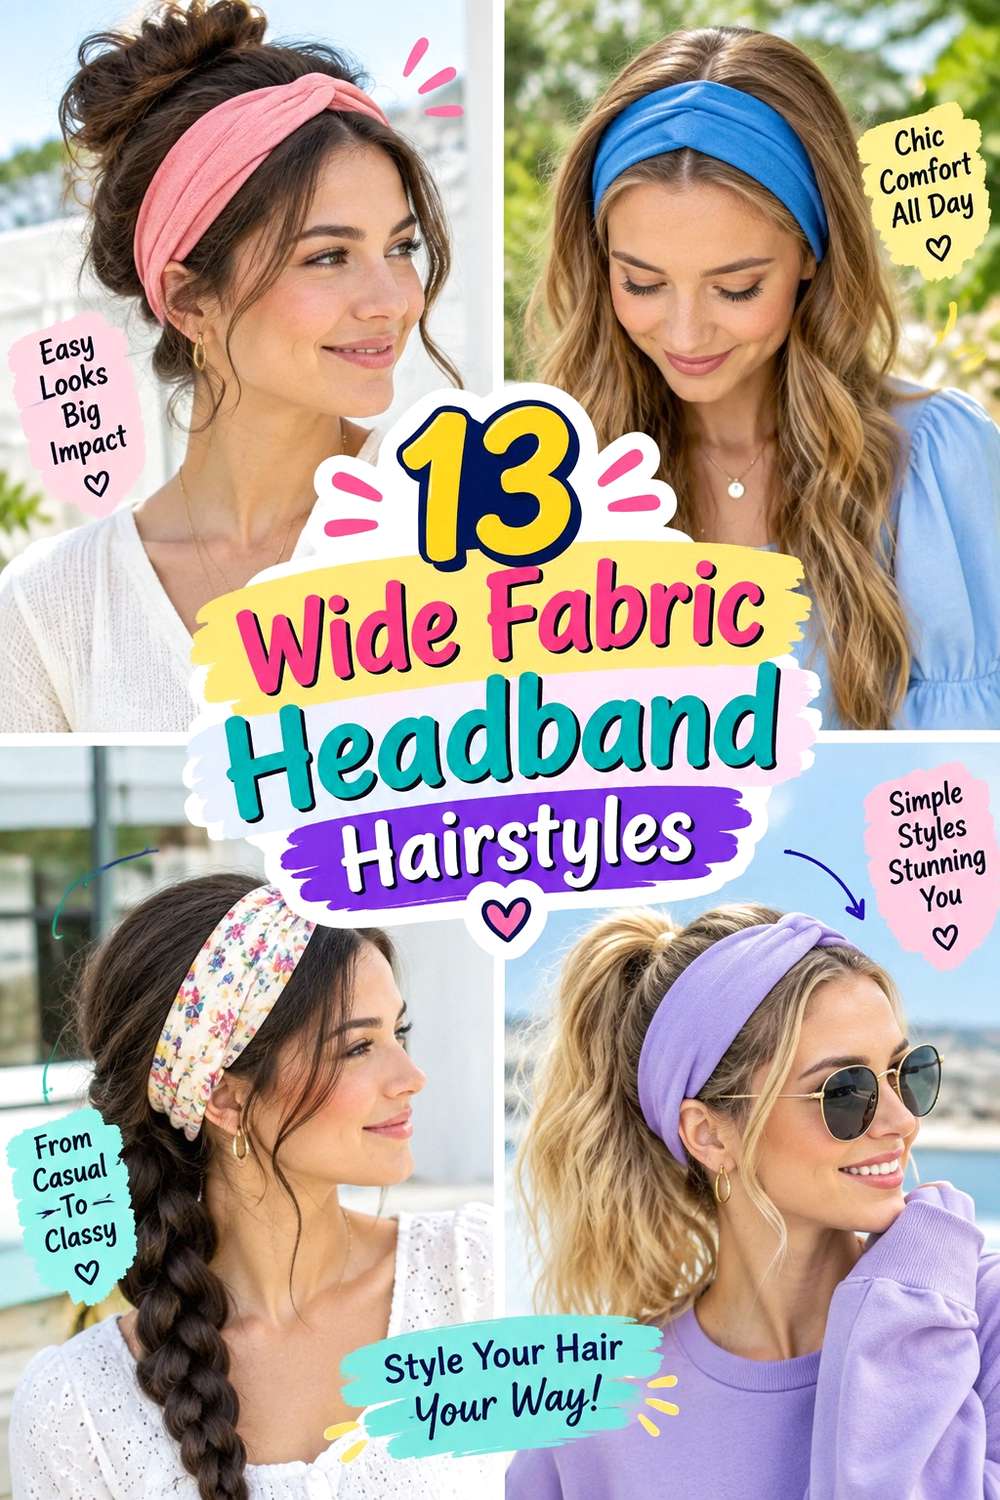
Wide fabric headband hairstyles use a broad band as a visible part of the silhouette rather than a tiny accessory hidden in the hair. The band can sit just behind the hairline, farther back across the crown, or above a low ponytail, while the remaining hair stays straight, wavy, curly, coily, half-up, or softly gathered. Fringe and face-framing pieces can remain outside the fabric, which changes how open or covered the front appears. Because this is an accessory family, placement, scale, grip, and the supporting hairstyle matter as much as the band itself.
A wide band can work with different textures and densities, but proportion changes the result. Dense hair may visually balance a broader band, while lower-density hair often benefits from preserving crown lift behind the fabric. Curly and coily textures can keep their natural pattern instead of being flattened for a polished finish. Shorter lengths may suit simpler headband placements, while longer hair supports half-up and low-ponytail variations.
Daily effort is usually modest. A quick refresh may mean repositioning the band, smoothing one section, or redefining fringe, while full wash-day styling takes longer if waves or curl definition must be rebuilt. If the band slips or presses, changing placement or anchoring is more useful than simply wearing it tighter.
Quick List
- Classic Center-Part Wide Fabric Headband Hairstyle
- Soft Side-Part Wide Fabric Headband Hairstyle
- Brushed-Back Wide Fabric Headband Hairstyle
- Curtain-Fringe Wide Fabric Headband Hairstyle
- Wispy-Bangs Wide Fabric Headband Hairstyle
- Loose-Wave Wide Fabric Headband Hairstyle
- Natural-Curl Wide Fabric Headband Hairstyle
- Coily-Volume Wide Fabric Headband Hairstyle
- Half-Up Wide Fabric Headband Hairstyle
- Low-Ponytail Wide Fabric Headband Hairstyle
- Tucked-Behind-Ears Wide Fabric Headband Hairstyle
- Face-Framing Wide Fabric Headband Hairstyle
- Short-Length Wide Fabric Headband Hairstyle
Classic Center-Part Wide Fabric Headband Hairstyle
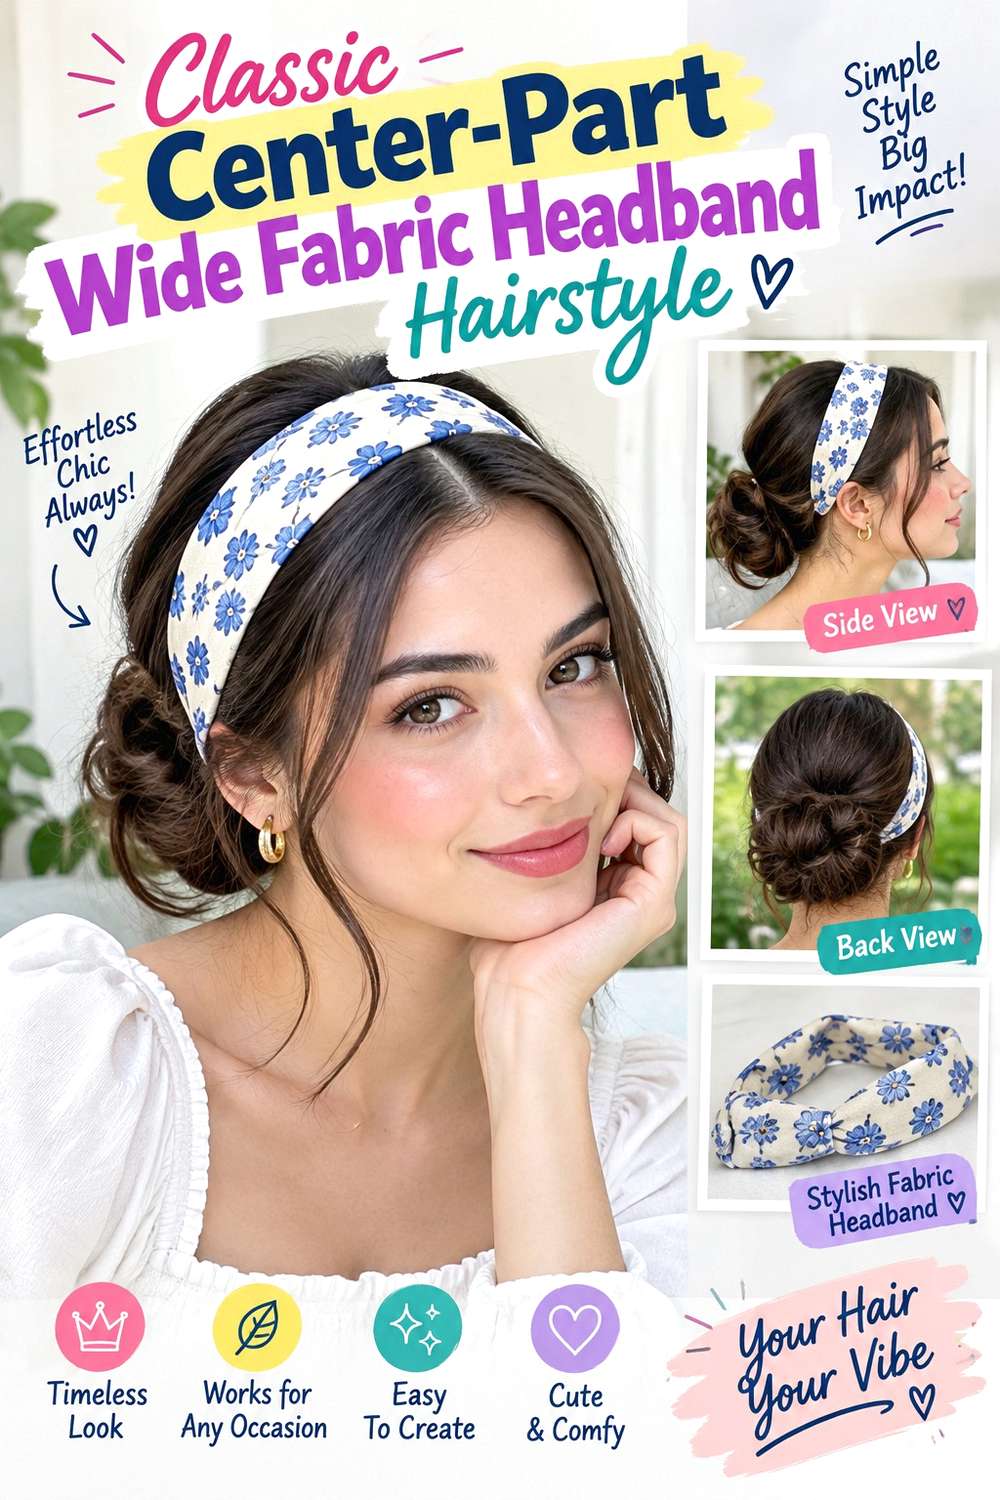
A centered part gives a wide fabric band a clear, balanced frame. Keep the part visible at the front, place the headband several centimeters behind the hairline, and let the remaining length fall naturally behind the shoulders. The crown should retain a little height so the broad fabric does not flatten the entire top. Straight ends make the shape cleaner, while slight bends create a softer finish without changing the basic placement.
This works well on medium and long hair with straight, wavy, or lightly textured patterns. Lower-density hair often benefits from leaving more root lift behind the band rather than smoothing the crown closely. Use a wide fabric headband as the main accessory, bobby pins near the temples for discreet grip, and light styling cream to keep flyaways around the part controlled. A quick refresh usually means centering the band and smoothing the front; full wash-day styling takes longer only when the underlying texture needs resetting.
If a stylist is setting the look, specify exactly how far behind the hairline you want the band and whether the ears should remain exposed. If you are also discussing the haircut, point to the face-frame length you want visible in front of the accessory.
Pro tip:
Place the headband after establishing the middle part, then check both sides in a mirror. Equal visible spacing between the part and band helps the front read cleanly from different angles.
Make It Work for You:
For lower-density hair, move the band slightly farther back and preserve lift through the crown. More visible hair at the front can keep the broad accessory from dominating the shape.
Watch Out For:
Avoid pressing the band hard against the temples when it slips. Add discreet anchoring or adjust its angle instead, because extra pressure may cause discomfort without improving long-term grip.
Soft Side-Part Wide Fabric Headband Hairstyle
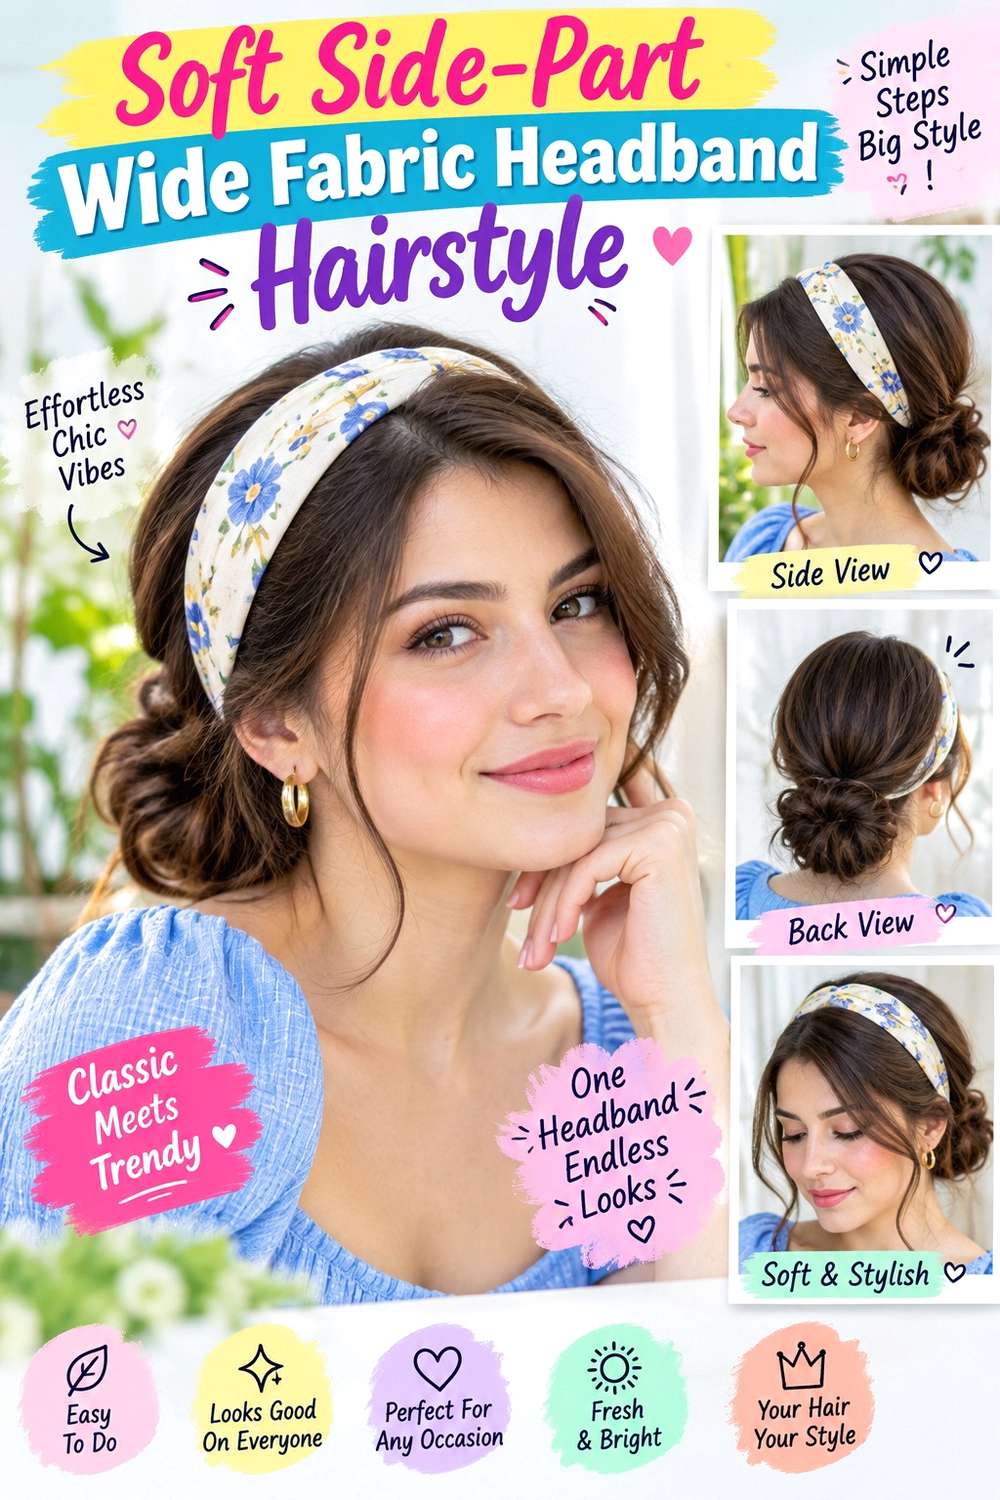
A shallow side part changes the balance of a wide headband without requiring a dramatic styling change. Let the fuller front section sweep gently across the forehead or temple, then position the fabric behind that movement instead of covering it. The smaller side can sit behind the ear, while the lengths remain straight, softly bent, or naturally textured. Keeping the crown relaxed prevents the broad accessory from looking overly rigid.
This option suits straight, wavy, curly, and coily textures because the part can follow the hair’s preferred direction. Medium and long hair gives the side sweep enough room to settle naturally, though shorter cuts can use the same front placement. Use a wide fabric headband for the main shape, a tail comb to establish the part, and light styling cream to keep the fuller side controlled. A quick refresh means resetting the sweep and moving the band back into position; full wash-day effort depends on the natural texture beneath it.
If a stylist is arranging it, show how deep you want the side part and whether the heavier section should partly cover the ear. If front layers are involved, specify where the shortest piece should finish so it does not disappear awkwardly beneath the band.
Pro tip:
Set the part before putting on the headband and guide the fuller side in its natural direction. This reduces bumps where the fabric meets the swept section.
Make It Work for You:
If one side naturally has more root lift, use that side as the fuller section. The band can remain centered while the front works with the hair’s existing growth direction.
Watch Out For:
Do not drag the fuller side tightly under the headband to make it smooth. Excess pulling can create a ridge or uncomfortable tension near the opposite temple.
Brushed-Back Wide Fabric Headband Hairstyle
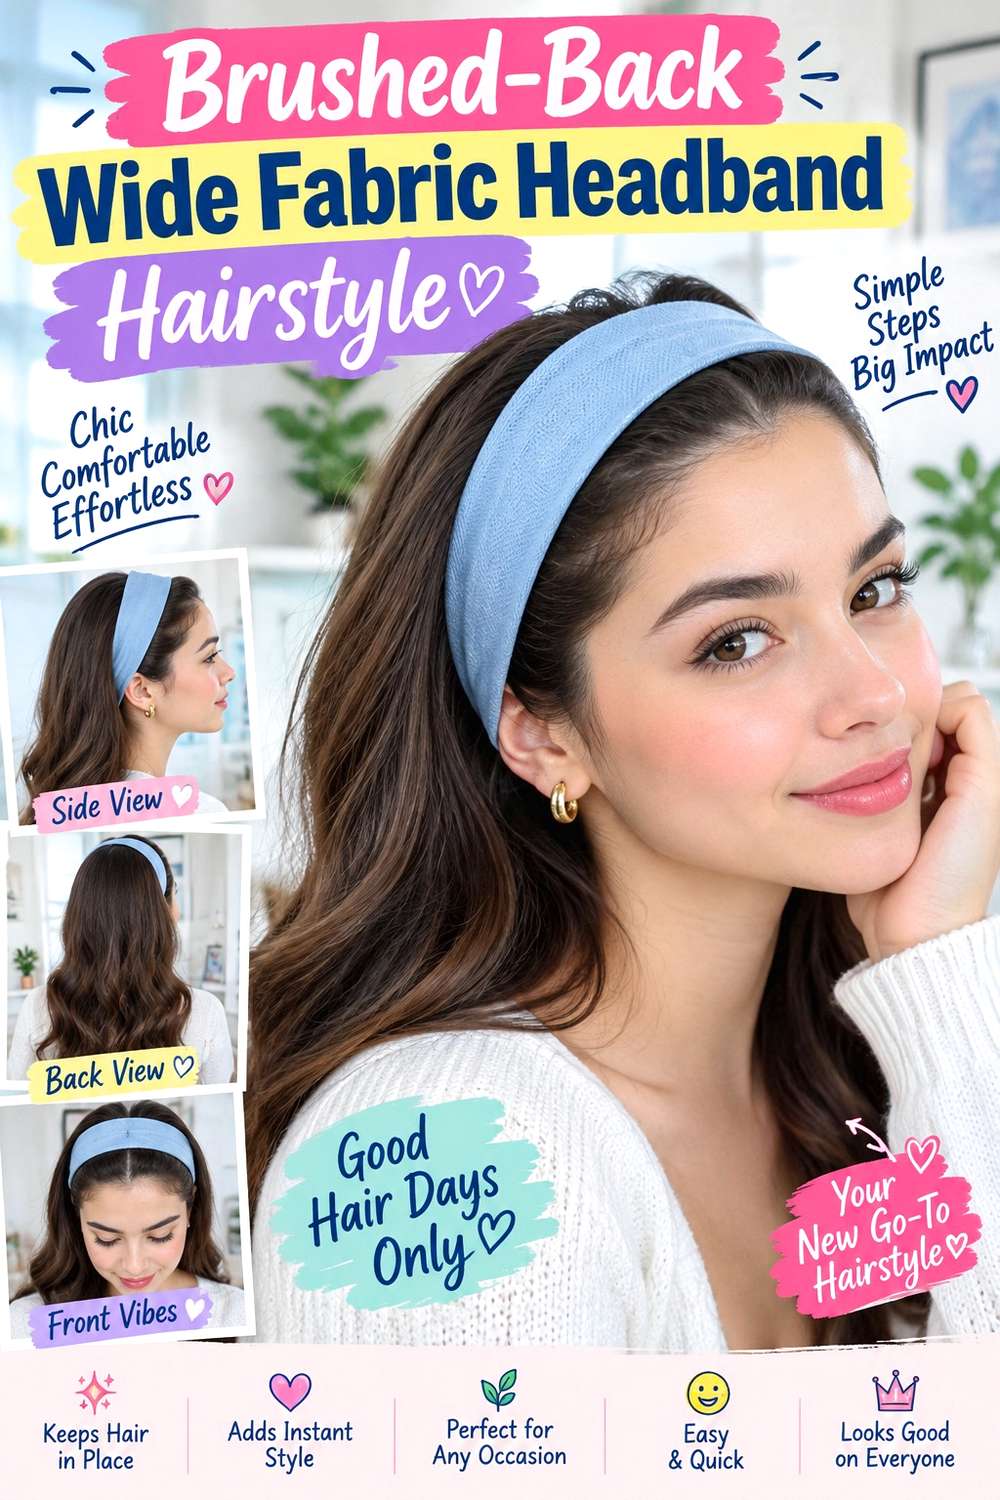
Removing the visible part creates a continuous brushed-back line that works especially well with a broad headband. Direct the front hair away from the face, place the band behind the hairline, and allow some crown volume to rise just behind it. The lengths can remain loose and straight or carry natural bends. A few short pieces may stay soft around the ears, but the main effect comes from the open forehead and uninterrupted fabric line.
This approach works best when the front hair naturally moves backward without strong resistance. Straight and wavy textures can look smooth with little effort, while curls and coils can keep more root texture rather than being pressed flat. Use a paddle brush to guide the front, a wide fabric headband for the anchor point, and lightweight styling cream to control obvious flyaways. A quick refresh usually means brushing the front back into place and repositioning the band; full wash-day styling takes longer if the underlying texture needs definition.
If a stylist is setting the look, explain how much forehead exposure and crown lift you prefer. If your haircut has short front layers, identify which pieces can sit comfortably behind the band instead of forcing every section backward.
Pro tip:
Brush the front backward in small sections before adding the headband. This gives you better control over bumps and keeps the fabric from becoming the tool that does all the pulling.
Make It Work for You:
For curls or coils, keep visible root texture behind the band rather than forcing a flat surface. The brushed-back direction remains clear while the natural pattern stays intact.
Watch Out For:
Avoid using a very tight headband to hold resistant front pieces in place. If sections keep springing forward, adjust their placement separately instead of increasing pressure around the head.
Curtain-Fringe Wide Fabric Headband Hairstyle
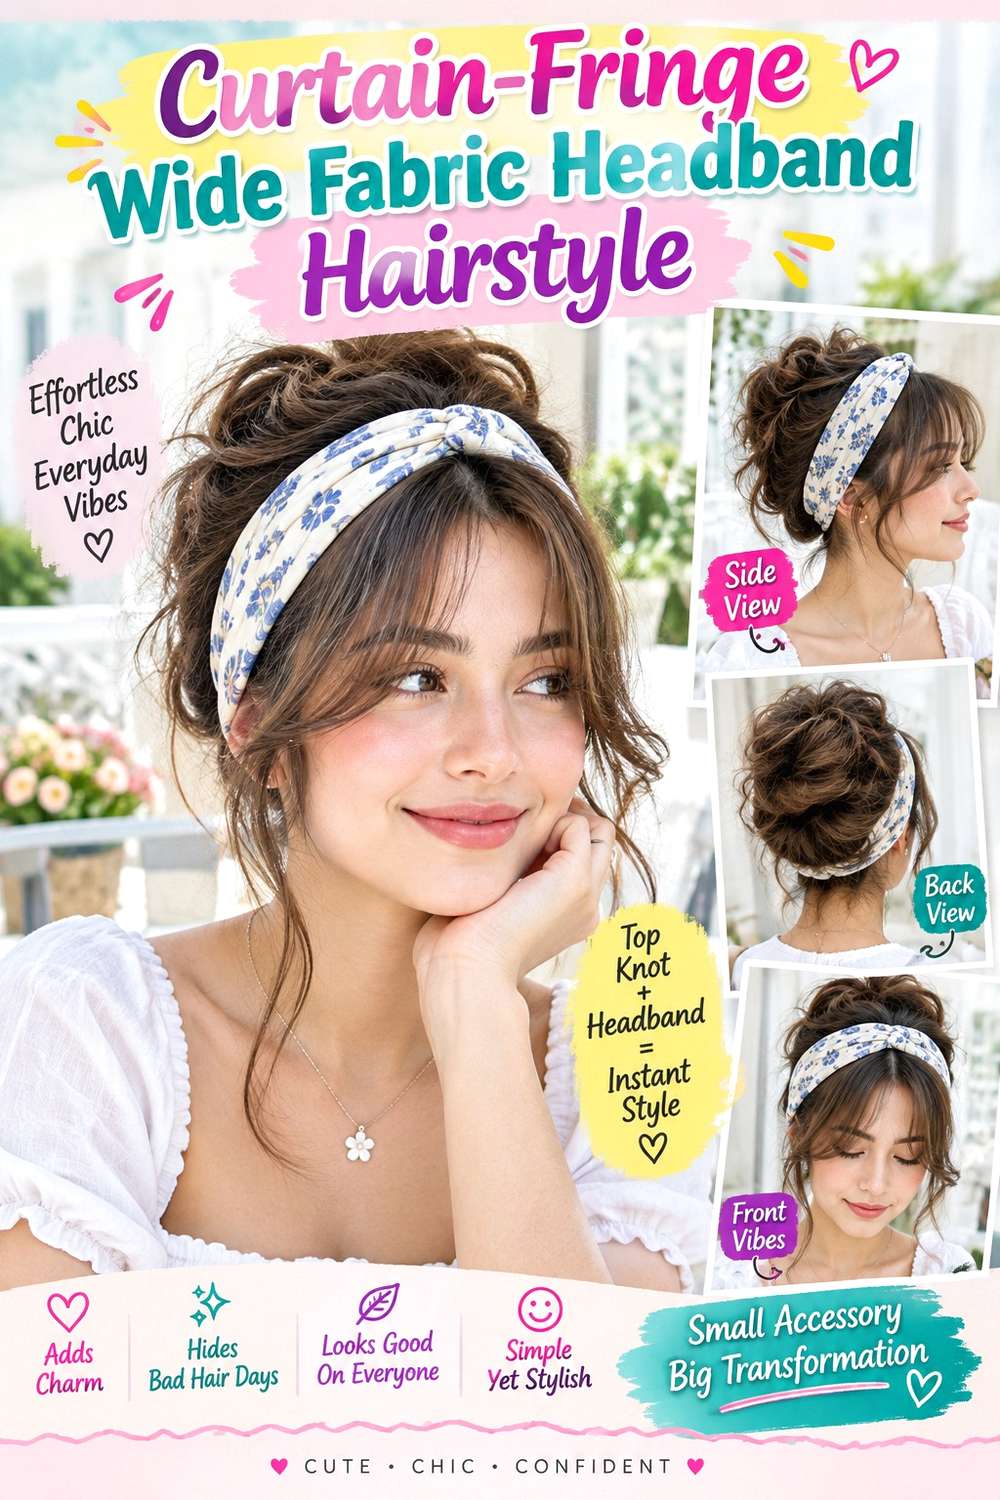
Curtain fringe works especially well with a wide band because the open center remains visible while the accessory begins farther back. Style the fringe so the middle separates softly and the outer corners sweep toward the temples, then place the fabric behind the fringe roots. The remaining hair can fall straight, wavy, or naturally textured, with the broad band forming a strong line across the crown.
This idea is easiest when the fringe already has enough length to open rather than dropping straight into the eyes. Straight and wavy fringe may need a brief refresh even when the rest of the hair still looks good. Use a round brush to guide the front outward, heat protectant if warm styling is used, and a wide fabric headband as the finishing accessory. A quick morning refresh may focus only on the fringe and band position; a full wash-day style takes longer if the entire length requires drying or shaping.
If a stylist is cutting the fringe, point to the finished center length you prefer and ask for longer outer corners that blend toward the cheekbones. Curly or strongly wavy fringe should be assessed dry because shrinkage changes the final position.
Pro tip:
Style the curtain fringe first and allow it to settle before adding the band. Placing the headband last helps preserve the center opening and outward movement at the corners.
Make It Work for You:
For wavy or curly fringe, keep the center slightly longer if shrinkage is noticeable. The curtain shape can remain open without exposing more forehead than you prefer.
Watch Out For:
Do not place the wide band directly over the fringe roots. Excess pressure can flatten the center and make the outer corners separate awkwardly instead of blending softly.
Wispy-Bangs Wide Fabric Headband Hairstyle
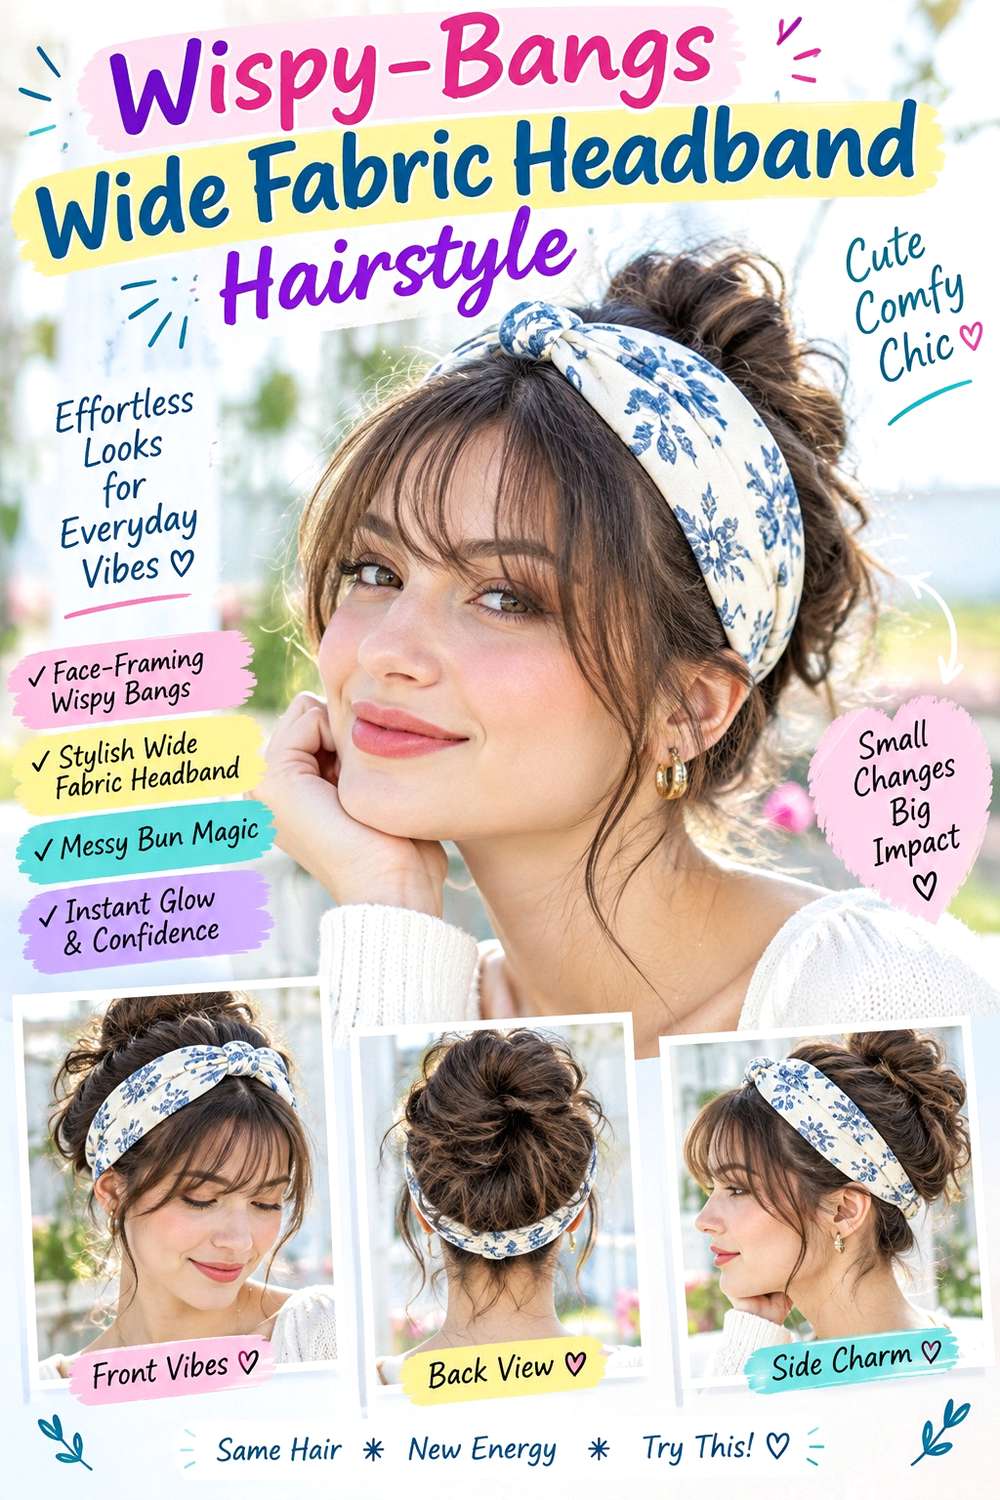
Lightly separated bangs create a softer contrast with a wide fabric band than a dense straight fringe. Keep the bang section airy across the forehead, with small gaps between pieces, and place the headband behind the fringe so its width remains fully visible. The outer bang corners can blend toward the temples, while the rest of the hair stays straight, softly waved, or naturally textured.
This works well when you want visible fringe without making the front feel heavily covered. Lower-density hair may suit a narrower bang section so the temples and crown retain more fullness. Use a round brush to guide the fringe, a wide fabric headband for the main accessory, and light styling cream only on the tips if they need separation. A quick refresh usually means redirecting the bangs and repositioning the band; full wash-day styling takes longer if the complete hairstyle needs drying.
If a stylist is shaping the bangs, specify the finished dry length, the width of the fringe section, and how separated you want the tips to appear. The accessory does not require a new fringe, so choose the cut only if you also like it without the headband.
Pro tip:
Arrange the fringe before putting on the band and leave it mostly untouched afterward. This keeps the width controlled and prevents extra strands from being pulled forward unintentionally.
Make It Work for You:
For sparse temples, keep the fringe section narrower and place the band slightly farther back. More visible side hair can preserve fullness around the front while retaining the airy effect.
Watch Out For:
Avoid coating wispy bangs with too much product. Heavy application can make the pieces clump into thicker sections, which changes the light, separated finish the style depends on.
Loose-Wave Wide Fabric Headband Hairstyle
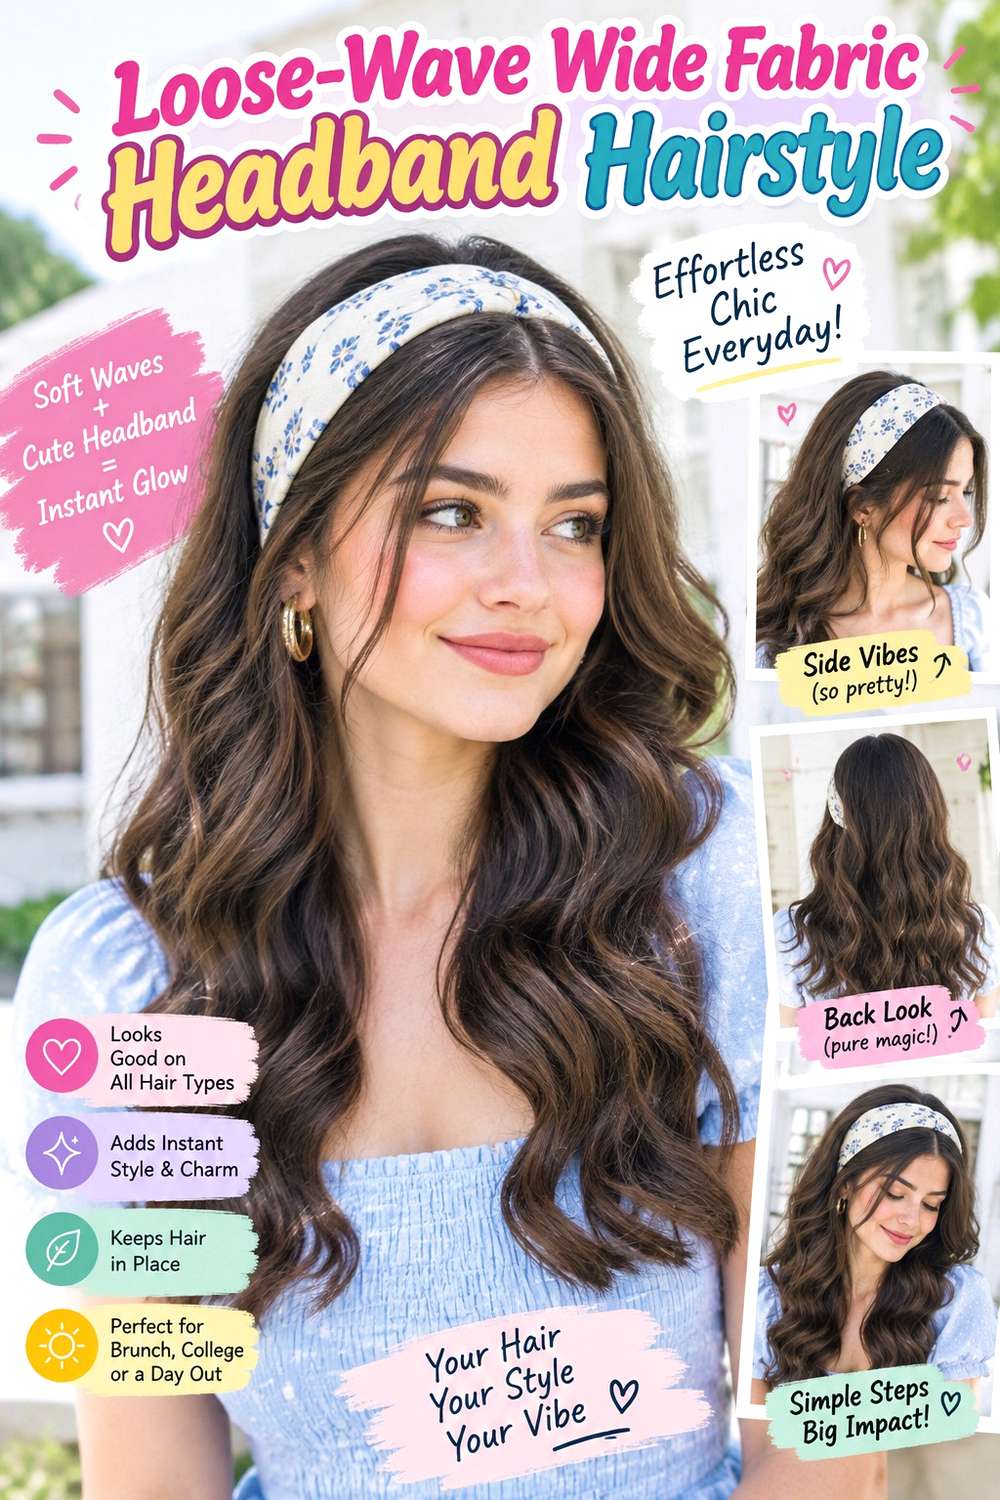
Broad waves give a wide fabric band a softer frame by adding movement through the lengths without building extra bulk at the crown. Keep the roots relatively smooth, position the band behind the hairline, and begin the strongest bends around the cheekbones or lower. The mid-lengths can carry loose S-shaped movement, while straighter tips prevent the finish from becoming too curled or rounded.
Medium and long hair shows the wave pattern most clearly, though shoulder-length cuts can use fewer, broader bends. Naturally wavy hair may need only selective reshaping, while straighter hair requires more preparation. Apply heat protectant before using a curling iron, then add the wide fabric headband after the waves have cooled. A quick refresh between washes may involve reshaping one flattened section and repositioning the accessory; a full wash-day style takes longer because the waves must be created through more of the length.
If a stylist is creating the look, specify where you want the first strong bend to begin and how much root lift should remain behind the band. If you have layers, point to the shortest wave-bearing section so the movement does not become too concentrated near the face.
Pro tip:
Let the waves cool completely before putting on the headband. Adjusting the fabric while the hair is still warm can stretch the bends nearest the temples and crown.
Make It Work for You:
If your hair already has natural waves, reshape only the straighter sections. The wide band adds structure while the existing texture keeps the full styling process shorter.
Watch Out For:
Avoid creating tight curls directly beside the band. Too much volume near the accessory can make it lift or slide; keep stronger movement through the mid-lengths instead.
Natural-Curl Wide Fabric Headband Hairstyle
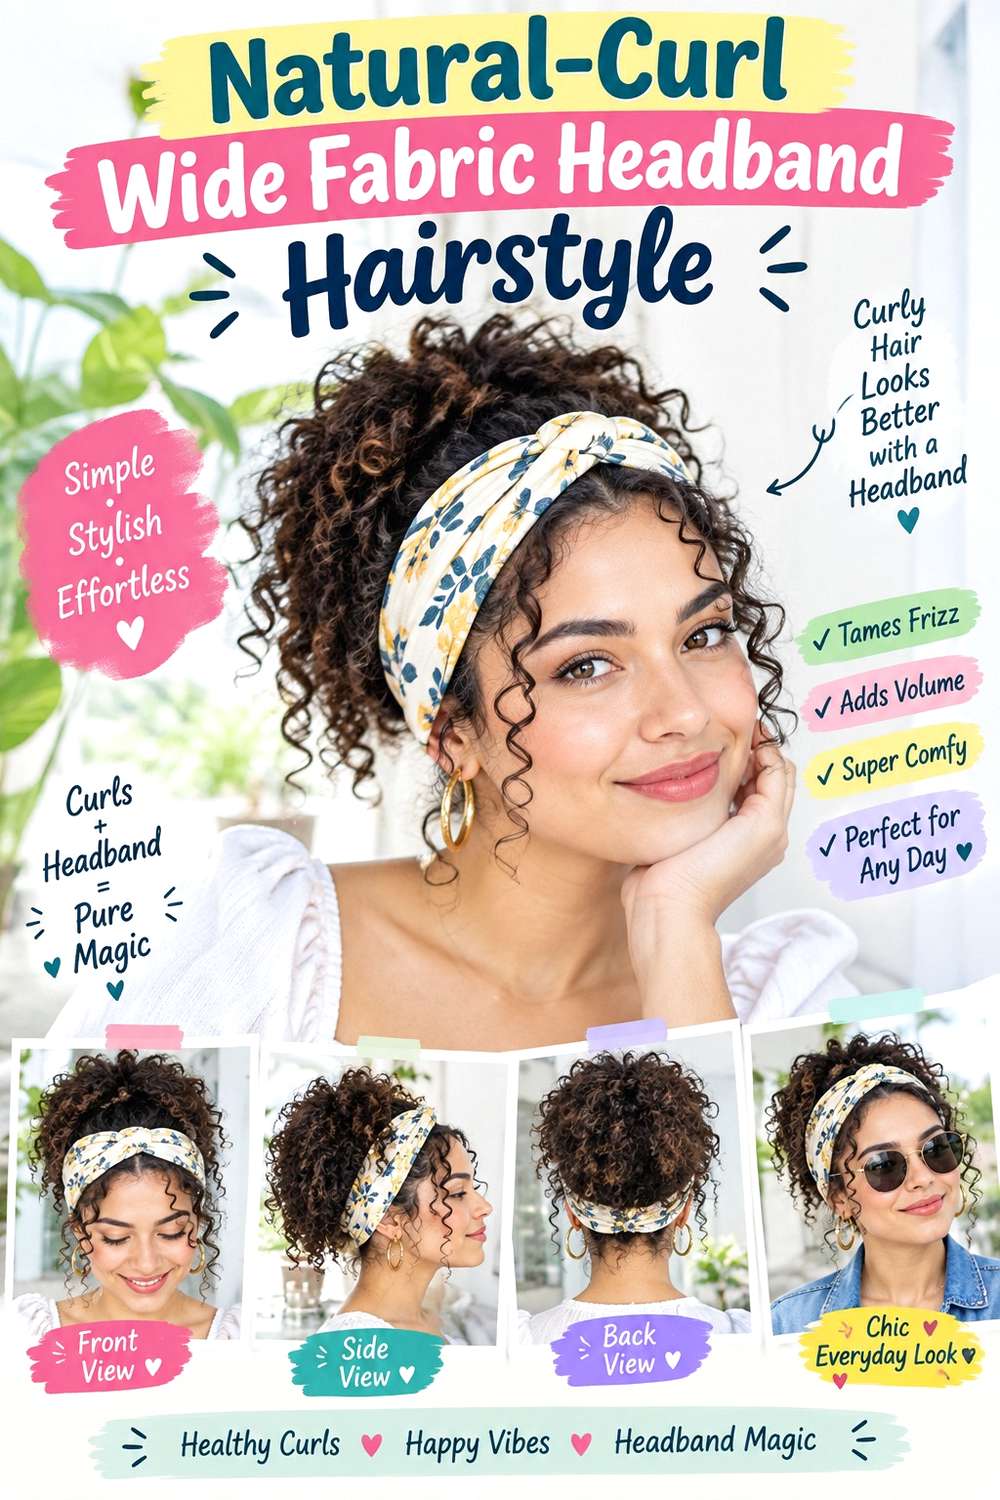
Defined curls can frame a wide headband without being flattened into a smooth crown. Let the curl groups form first, then place the band several centimeters behind the hairline so front curls remain visible. Keep some lift behind the fabric, and let the lengths fall with their natural spring through the sides and back. The contrast comes from the clean fabric line against rounded, defined texture.
This style works best when the accessory is added after the curls are dry or close to their finished state. Shrinkage affects how much length sits in front of, behind, or below the band, so final placement matters. Use lightweight leave-in conditioner for pliability, curl gel for grouped definition, and a wide fabric headband for the accessory. A quick refresh may involve reactivating a few front curls and repositioning the band; full wash-day styling takes longer because definition must be rebuilt before the accessory is added.
If a stylist is shaping the haircut, discuss where the front curls should land when dry and how much crown volume you want to preserve behind the band. Avoid using the headband to compress sections that naturally need more space.
Pro tip:
Add the headband only after the curls have settled into their finished shape. Moving a broad band through damp curl groups can stretch sections unevenly and disturb definition.
Make It Work for You:
For tighter curls, place the band slightly farther back so the front groups retain more room. The accessory stays visible while the hairline texture keeps its natural lift.
Watch Out For:
Do not separate many dry curl groups just to fit them around the band. Move complete groups together whenever possible so definition remains clearer and frizz stays controlled.
Coily-Volume Wide Fabric Headband Hairstyle
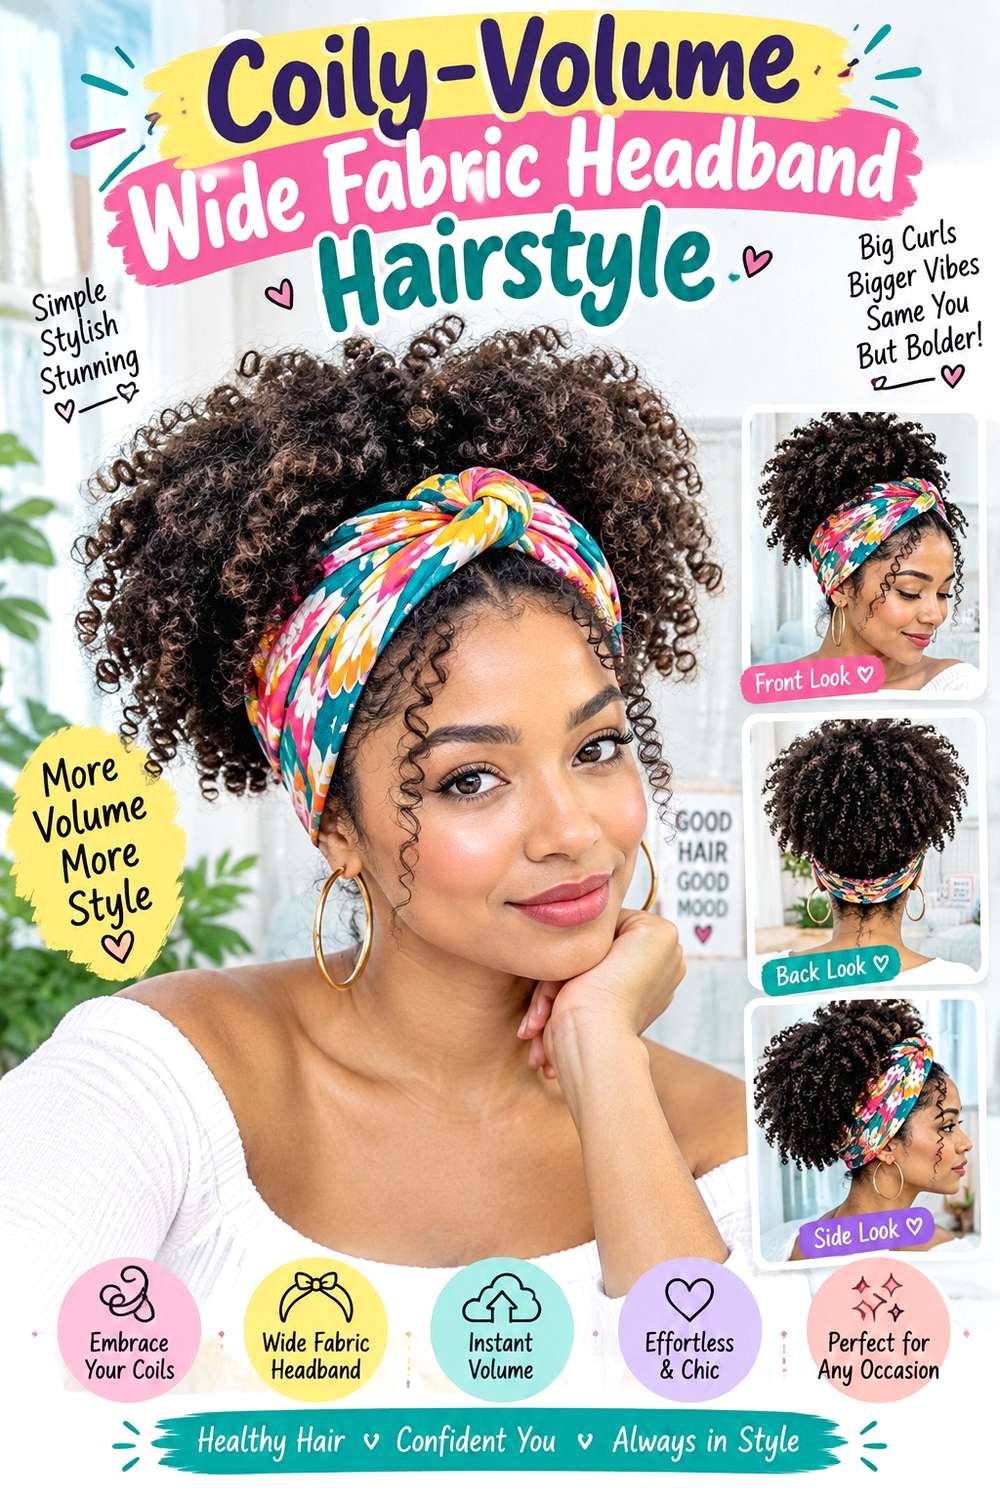
Coily volume can make a wide fabric band especially visible when the accessory is placed against the hair rather than used to flatten it. Keep selected front coils loose, position the broad band behind them, and allow the crown to rise naturally above or behind the fabric. The remaining hair can stay fully loose, gather softly at the back, or form a rounded shape depending on length and shrinkage.
Dense coily hair may visually balance a wider band, while lower-density coils may suit slightly less fabric so more texture remains visible. Use lightweight leave-in conditioner for pliability, a wide fabric headband for the main shape, and bobby pins at the sides if extra grip is needed. A quick refresh usually means reshaping the front coils and resetting the band; full wash-day styling takes longer because the natural pattern must dry and settle first.
If a stylist is shaping the hair, discuss the dry crown volume, perimeter, and where shorter front coils should finish. Controlled bulk placement may matter for some dense shapes, but the headband itself should not be used as a tool for forcing volume flat. Fit and placement should work with the finished texture.
Pro tip:
Position the band after the coils have settled close to their final volume. Seeing the finished shape first makes it easier to choose the most balanced placement.
Make It Work for You:
For very dense coils, use a broad but lightweight band so pressure is distributed across more surface area. This keeps the accessory visible without relying on excessive tightness.
Watch Out For:
Avoid pulling the headband far back under strong tension to compress the crown. Improve side anchoring instead if the band moves, preserving both comfort and natural volume.
Half-Up Wide Fabric Headband Hairstyle
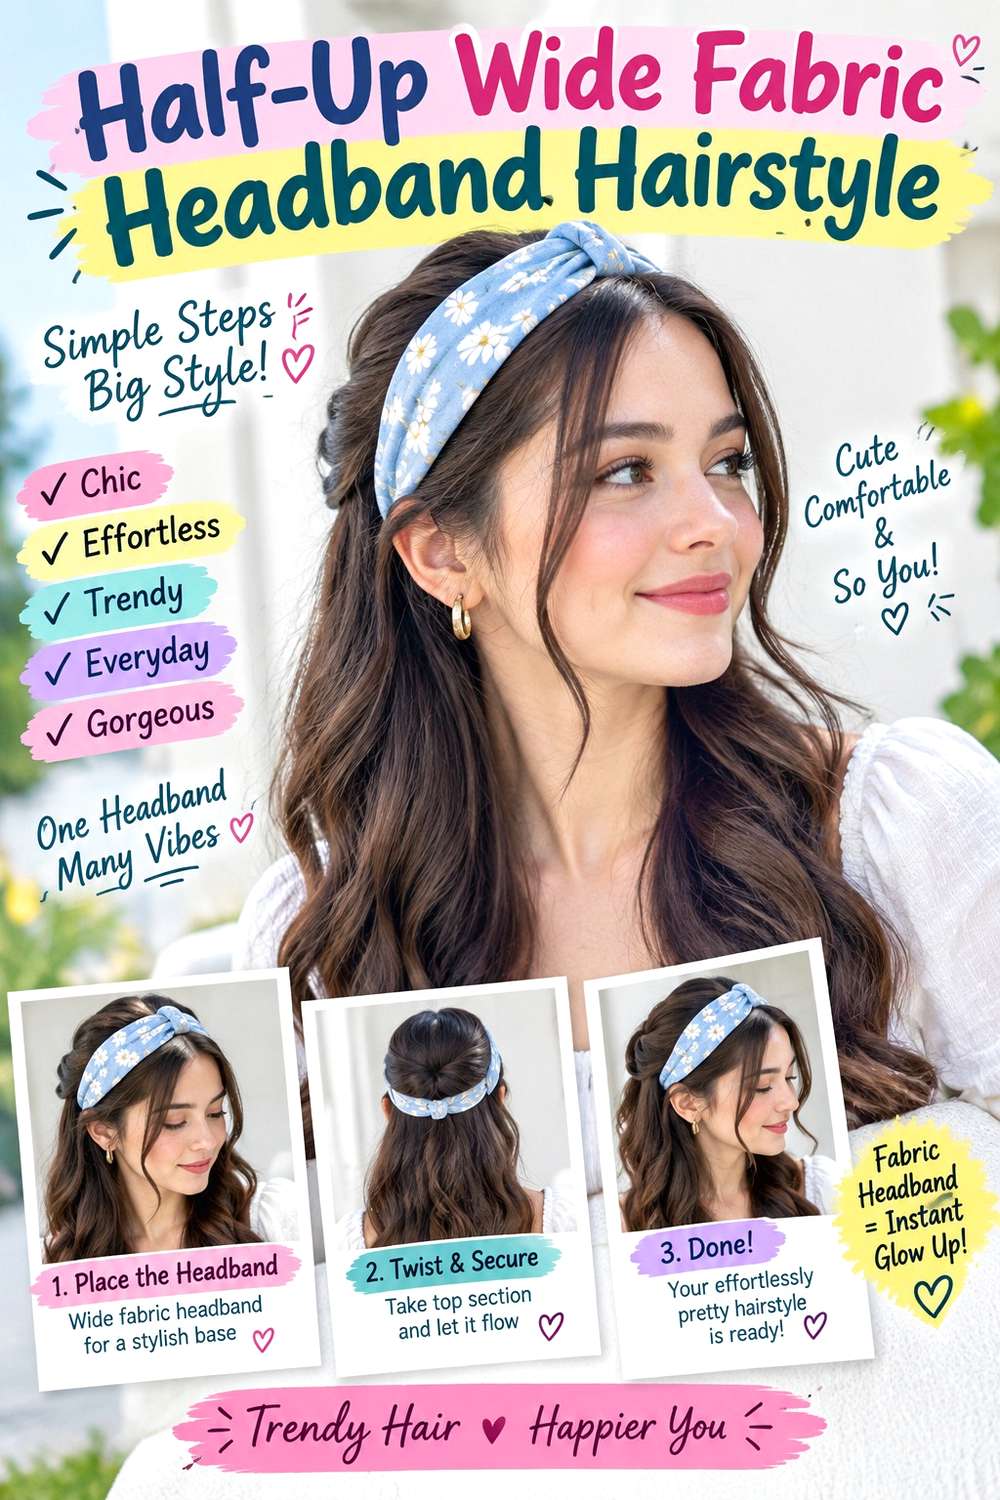
A half-up shape adds structure behind a wide headband while leaving most of the length loose. Place the band behind the hairline, then gather a section from above the ears into a small anchor at the back. Keep some crown lift between the fabric and half-up base so the top does not look pressed flat. The lower hair can remain straight, wavy, curly, or naturally textured.
This works particularly well on medium and long hair because the half-up section keeps the front controlled without gathering the full weight. Lower-density hair should use a smaller upper section to preserve fullness underneath. Use a small snag-free elastic for the half-up anchor, a wide fabric headband for the front, and light styling cream to control shorter crown pieces. A quick refresh means resetting the band and smoothing the half-up section; full wash-day styling depends on the loose texture below.
If a stylist is creating the arrangement, specify how much hair should be gathered from above the ears and where the anchor should sit. If you are discussing the haircut too, identify any shorter layers that should remain loose rather than being forced into the half-up section.
Pro tip:
Place the headband first, then create the half-up anchor behind it. This lets you judge how much crown volume should remain visible between the two elements.
Make It Work for You:
For lower-density hair, gather only a narrow upper section and keep the lower lengths full. The wide band remains prominent without making the back look sparse.
Watch Out For:
Do not pull the half-up section so tightly that it drags the headband backward. Secure each element independently so adjusting one does not destabilize the other.
Low-Ponytail Wide Fabric Headband Hairstyle
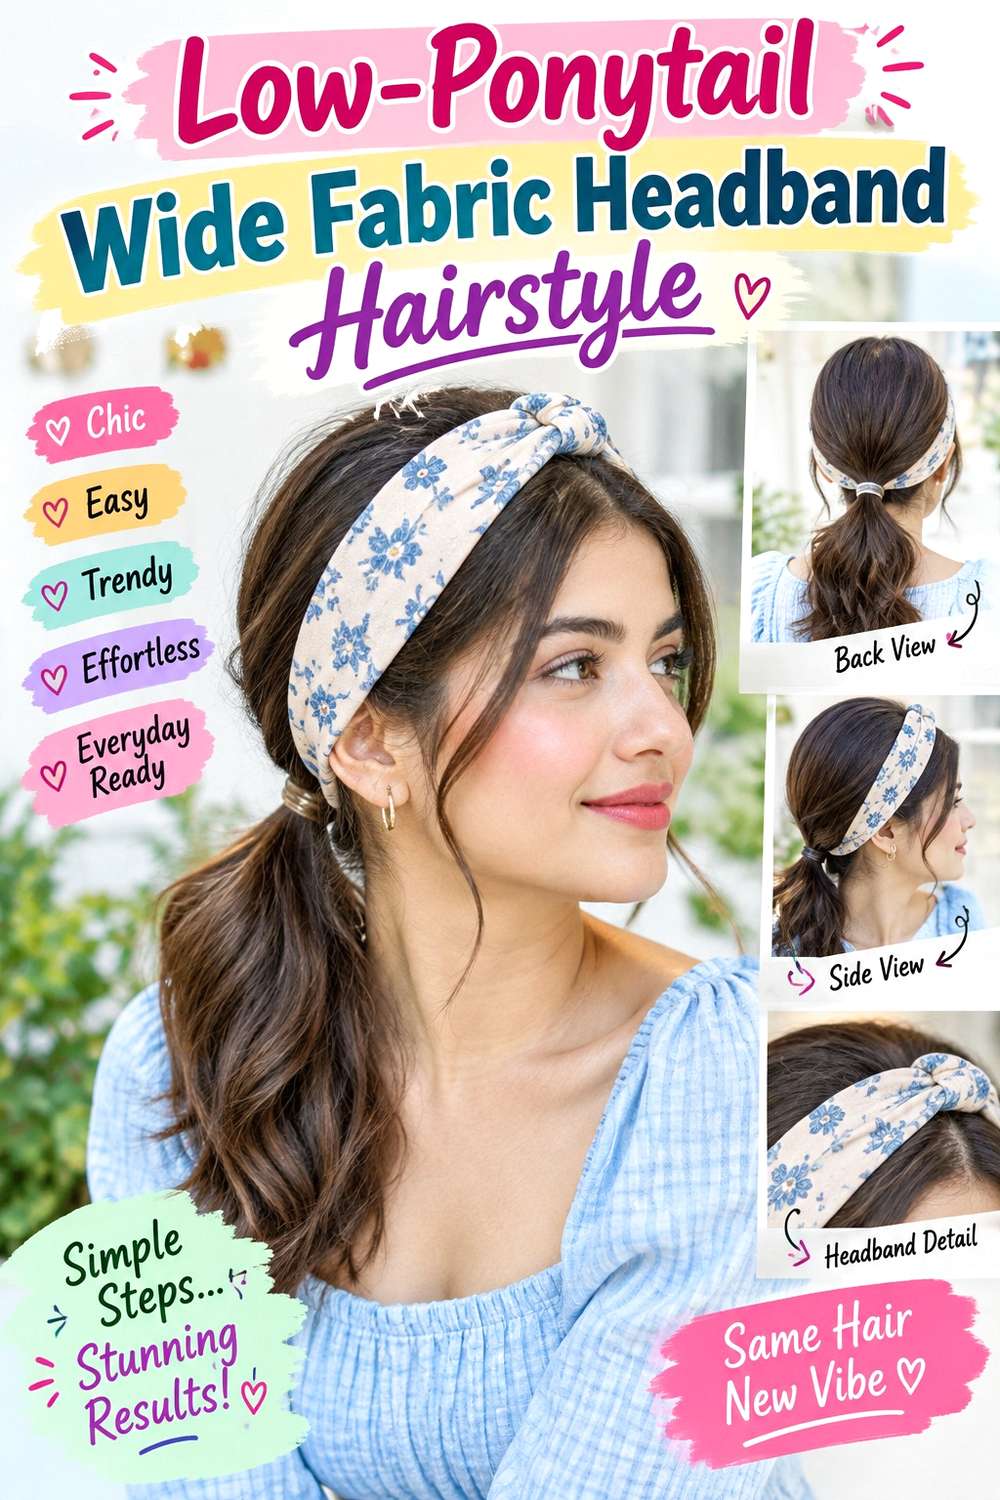
Pairing a low ponytail with a wide band keeps the front controlled while the length stays gathered at the nape. Position the headband behind the hairline, allow slight crown lift, and secure the ponytail low enough that the headband and base remain visually separate. The tail can fall straight, wavy, curly, or naturally textured, while a few short front pieces may stay outside the band if desired.
Medium and long hair supports the low anchor most easily. Dense hair should rely on the ponytail base for structural hold rather than expecting the headband to control the weight. Use a fabric-covered elastic for the ponytail, a wide fabric headband for the crown, and light styling cream to manage nape flyaways. A quick refresh usually means resetting the band and checking the base; a full wash-day style takes longer when the tail texture requires drying or definition.
If a stylist is setting the look, specify the ponytail height and how far back you want the fabric placed. The two anchors should not create competing tension. If you are wearing face-framing pieces, point to their finished length before the ponytail is secured.
Pro tip:
Secure the low ponytail after the headband is in position. This makes it easier to preserve crown softness without pulling the accessory backward while gathering the lengths.
Make It Work for You:
For dense hair, use a strong comfortable elastic at the nape and let the headband stay purely decorative. Separating the jobs improves security and reduces unnecessary pressure.
Watch Out For:
Avoid tightening the headband because the ponytail base feels loose. These are separate issues; reset the elastic anchor instead of increasing pressure across the crown.
Tucked-Behind-Ears Wide Fabric Headband Hairstyle
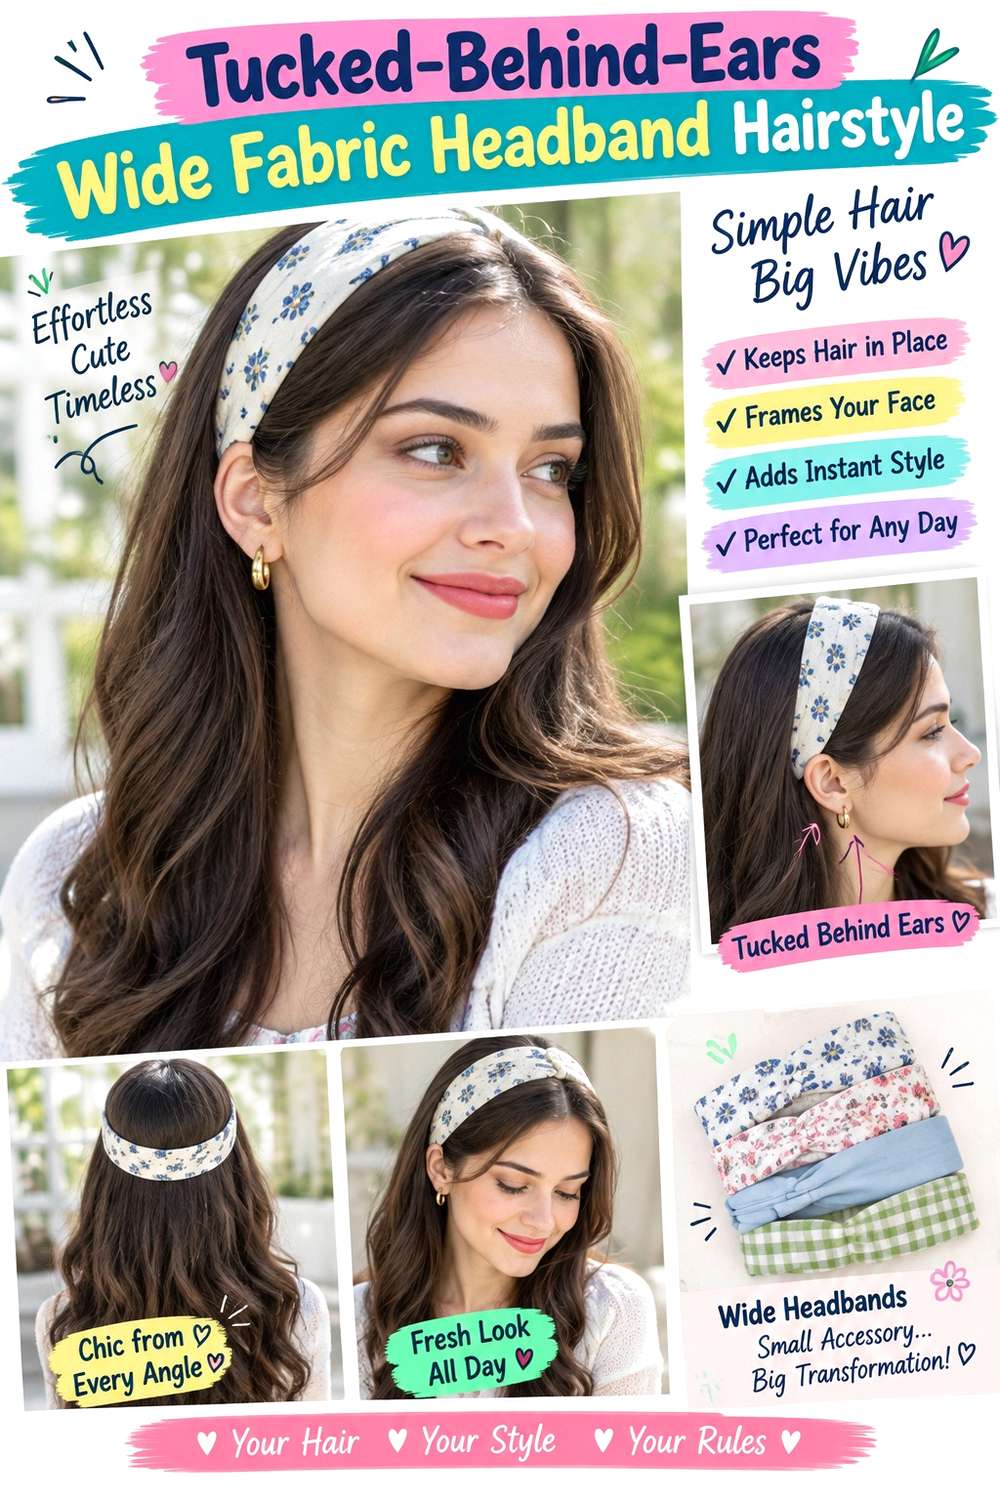
Tucking both sides behind the ears gives a wide headband a clean, open frame around the face. Position the band behind the hairline, guide the side sections neatly behind the ears, and let the remaining length fall loose. A center or shallow side part can remain visible in front of the fabric, while straight, wavy, or softly textured ends keep the back simple.
This works best when the side pieces are long enough to tuck comfortably without strong tension. Straight and wavy hair generally stays behind the ears more easily, while curls may need a softer variation with a few loose sections. Use a wide fabric headband as the main accessory, light styling cream to control the ear sections, and bobby pins only where discreet support is necessary. A quick refresh means retucking the sides and repositioning the band; full wash-day styling depends on the texture left loose.
If a stylist is helping shape the cut, explain that you often tuck the sides and point out any pieces that repeatedly fall forward. Their length may affect how cleanly the ears stay exposed. The headband should support the overall direction rather than function as the only restraint.
Pro tip:
Tuck both sides before finalizing the band position. Once the hair sits comfortably behind the ears, slide the accessory into a place that does not disturb those sections.
Make It Work for You:
If one side is shorter, tuck only the side that reaches naturally and leave the other soft around the cheek. The wide band can still balance the asymmetry.
Watch Out For:
Do not force short side pieces backward by tightening the band. Let them remain loose or support them separately, because excessive pressure can become uncomfortable around the ears.
Face-Framing Wide Fabric Headband Hairstyle

Cheekbone-, jaw-, or chin-length pieces can stay outside a wide headband while the rest of the hair sits behind it. Select the face-framing sections first, position the fabric behind those pieces, and allow the front to curve or fall naturally. The remaining length can be straight, wavy, curly, or coily, while the broad band creates a strong visual break between the frame and crown.
This style works across different densities, but lower-density hair usually benefits from narrower front sections so the sides retain fullness. Use a wide fabric headband for the main accessory, light styling cream to define the face frame, and bobby pins if the band needs discreet temple grip. A quick refresh involves reshaping the front pieces and resetting the band; full wash-day styling takes longer only when the underlying texture also needs preparation.
If a stylist is cutting the face frame, point to the exact finished landmark you want and discuss how those pieces blend into the rest of the length. Curly or coily sections should be judged dry when shrinkage affects placement. The accessory does not require extra layers, so choose them only if they suit your usual styling as well.
Pro tip:
Separate the face-framing pieces before putting on the headband. Choosing their width early prevents you from tugging random strands forward and loosening the accessory later.
Make It Work for You:
For lower-density hair, keep the face frame narrow and preserve more hair through the sides. The broad band stays visible without making the front look overly depleted.
Watch Out For:
Avoid pulling increasingly large sections out from behind the headband for softness. Too much removal can weaken the side shape and reduce the band’s stable contact with the hair.
Short-Length Wide Fabric Headband Hairstyle

Short hair can carry a wide fabric headband well because the accessory creates an instant focal line without requiring enough length for a ponytail or updo. Place the band behind the hairline and allow a bob, lob, crop, or short textured shape to remain visible around the ears and nape. A center or side part can stay in front, while the ends remain straight, bent, curly, or naturally coily.
The key is proportion. A very broad band can dominate a compact haircut, while a medium-wide version often leaves enough hair visible to balance the accessory. Use a lightweight wide fabric headband for the main shape, bobby pins for discreet side grip, and light styling cream to control shorter hairline pieces. A quick refresh usually means repositioning the band and reshaping the perimeter; full wash-day styling depends on the haircut’s natural texture.
If a stylist is shaping the cut, point to the finished perimeter you want around the chin, jaw, ears, or nape and explain how much of it you like visible beneath the band. Do not change the haircut solely for the accessory unless that adjustment also works when the hair is worn without it.
Pro tip:
Check the headband width against the finished short hairstyle before settling on placement. Moving it slightly farther back can reveal more perimeter and keep the proportions balanced.
Make It Work for You:
For very short or lower-density hair, choose a lightweight band with moderate width rather than the largest option. More visible hair around the sides preserves the overall silhouette.
Watch Out For:
Avoid using an oversized heavy band to stop short hair from moving. Extra weight can increase slipping or pressure; improve fit and anchoring instead of relying on bulk.
Conclusion
Wide fabric headband hairstyles can look balanced or dramatic depending on band width, placement, texture, and how much hair remains visible around the front. Center and side parts preserve a defined hairline, while brushed-back versions create a more open shape. Fringe and face-framing pieces soften the fabric line, and waves, curls, or coils add movement behind it. Longer hair supports half-up and low-ponytail options, while shorter cuts usually benefit from simpler placements that keep the perimeter visible. Density matters too: fuller hair may balance a broad band easily, whereas lower-density hair often benefits from crown lift and narrower front sections. Choose the version that matches your natural texture, accessory comfort, and realistic daily styling effort.
Before Your Salon Visit
Choose one or two favorites and save references that clearly show the headband width, placement, and supporting hairstyle. Discuss your natural texture, density, face shape, preferred length, fringe or face-framing pieces, upkeep, and normal routine. Point out the exact crown volume, parting, finished fringe length, loose-piece placement, or perimeter you like. Because the headband itself is temporary, focus on comfortable styling and secure placement rather than changing your haircut solely for the accessory unless you also want that change without it.
FAQs
How do I stop a wide fabric headband from slipping?
Start by changing placement rather than adding more tension. A band may grip better slightly farther forward or back, and discreet side anchoring can help on smooth hair. The supporting hairstyle also matters; crown texture or a stable part can give the fabric better contact without making the band painfully tight.
Can a wide fabric headband work with curly or coily hair?
Yes. Let curls or coils settle near their finished shape first, then place the band where it can stay visible without compressing the natural volume. Wider lightweight bands may suit dense texture, while front curl groups can remain free. Shrinkage should guide any fringe or face-framing placement.
What width works best for short or lower-density hair?
A moderate-width band is often easier to balance because it leaves more of the haircut and crown visible. Lower-density hair may also benefit from preserving root lift behind the fabric. There is no single correct width, so compare the accessory scale with your actual perimeter, volume, and preferred front coverage.
Should a wide headband sit behind or over bangs?
Usually, bangs look more natural when the band sits behind their roots so the fringe can move independently. Curtain or wispy bangs especially need room to separate. If you prefer the fabric farther forward, test the placement carefully so it does not flatten the fringe or push the pieces into an awkward direction.