20 Loose Braid Hairstyles for Fall for an Effortless Style

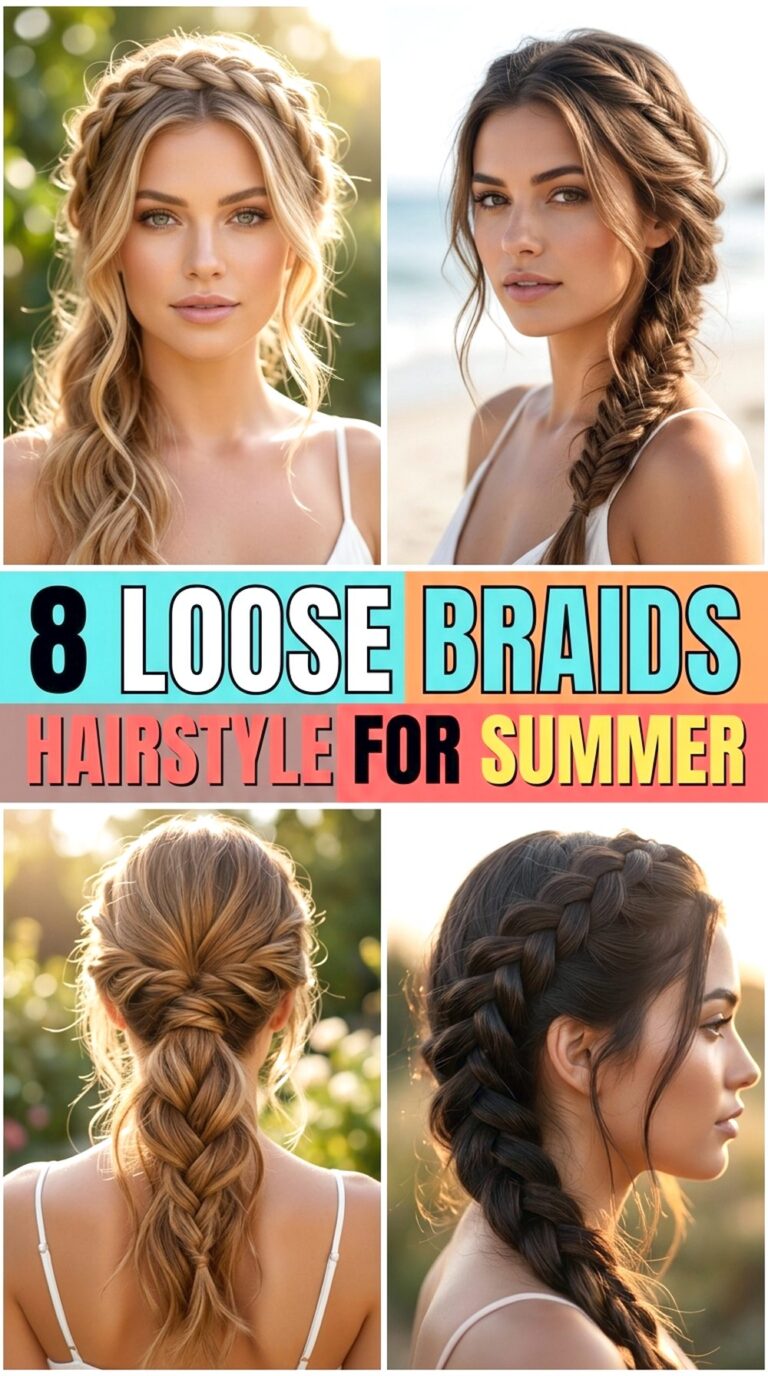
Loose braid hairstyles for fall combine secure structure with enough softness to keep the finished shape relaxed. Some versions sit over one shoulder, while others travel down the center, split into two braids, or use a smaller braided section with loose hair underneath. Wider crossings, gently expanded edges, face-framing pieces, and visible natural texture create movement without requiring every strand to sit perfectly in place. The most successful designs still keep a stable base beneath that softness.
Texture and density affect how much a braid should be loosened. Fine strands may look fuller when the center stays compact and only selected edges are expanded, while dense hair can support wider sections with less pulling. Curly and coily textures can retain their natural pattern instead of being straightened first. Face-framing pieces can finish around the cheekbone, jaw, or chin, and shorter layers should be left free when they cannot reach the braid comfortably.
Most loose braids need only a short refresh when the upper crossings begin to sag or the end elastic shifts. Full wash-day styling takes longer if you are also creating waves, defining curls, or smoothing the hair. For fall, consider scarves and coat collars when choosing braid placement so the length does not rub constantly against heavy fabric.
Quick List
- Loose Side Braid With Soft Waves Hairstyle
- Low French Braid With Face-Framing Pieces Hairstyle
- Relaxed Dutch Braid Hairstyle
- Messy Fishtail Side Braid Hairstyle
- Center-Parted Double Loose Braids Hairstyle
- Low Rope Braid With Soft Ends Hairstyle
- Curly Loose Braid Hairstyle
- Coily Side Braid Hairstyle
- Half-Up Loose Braid Hairstyle
- Crown-to-Nape Loose Braid Hairstyle
- Loose Bubble Braid Hairstyle
- Scarf-Woven Loose Braid Hairstyle
- Ribbon-Tied Low Braid Hairstyle
- Fine-Hair Airy Braid Hairstyle
- Dense-Hair Wide Braid Hairstyle
- Short-Hair Mini Side Braid Hairstyle
- Long Hair Cascading Braid Hairstyle
- Face-Framing Layer Braid Hairstyle
- Low Braided Ponytail Hairstyle
- Textured Wavy Side Braid Hairstyle
Loose Side Braid With Soft Waves Hairstyle
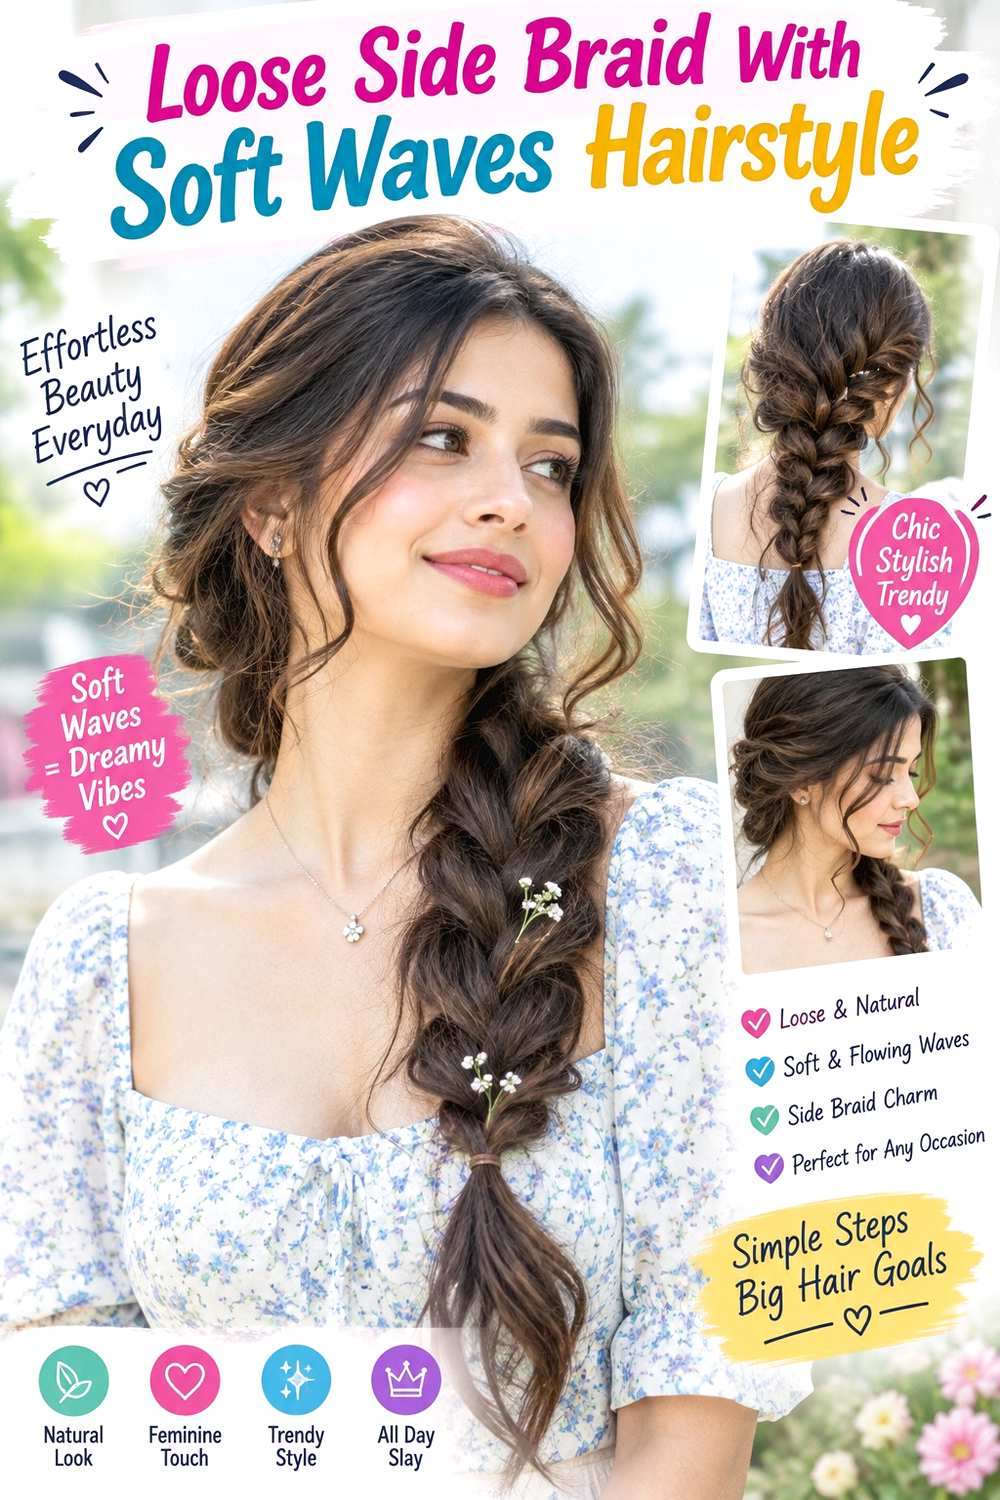
A loose side braid gains extra movement when the unbraided front and tail keep a soft wave. Start with a side or off-center part, gather the hair behind one ear, and begin a three-strand braid around the lower ear or nape. Keep the first crossings secure, then gently widen the lower braid while leaving a few cheekbone- or jaw-length pieces free. The braid can fall over one shoulder, with softly bent ends rather than a tightly woven finish all the way down.
Medium to long hair gives the design enough length, and straight or wavy textures are especially easy to shape. Apply heat protectant before using a large-barrel curling iron on the visible front pieces and tail, then secure the braid with a small fabric-covered elastic. A quick refresh usually means tightening the upper crossings and reshaping one front wave; a full wash-day version takes longer if all the hair needs drying first.
If the braid starts sagging near the ear, rebuild that section rather than pulling the entire braid tighter. For salon or occasion styling, specify which shoulder the braid should fall over, how wide the lower crossings should appear, and how much tension feels comfortable around the ear.
Pro tip:
Keep the first three or four crossings relatively firm before loosening the lower braid. That stable upper section lets you create softness without losing the side placement.
Make It Work for You:
For fine hair, widen only the outer edge of selected crossings and keep the tail fairly compact. This creates airy texture without exposing large gaps between strands.
Watch Out For:
Loosening the braid all the way to its base can make it slip behind the shoulder. Preserve structure near the ear and soften the portion that remains visible.
Low French Braid With Face-Framing Pieces Hairstyle
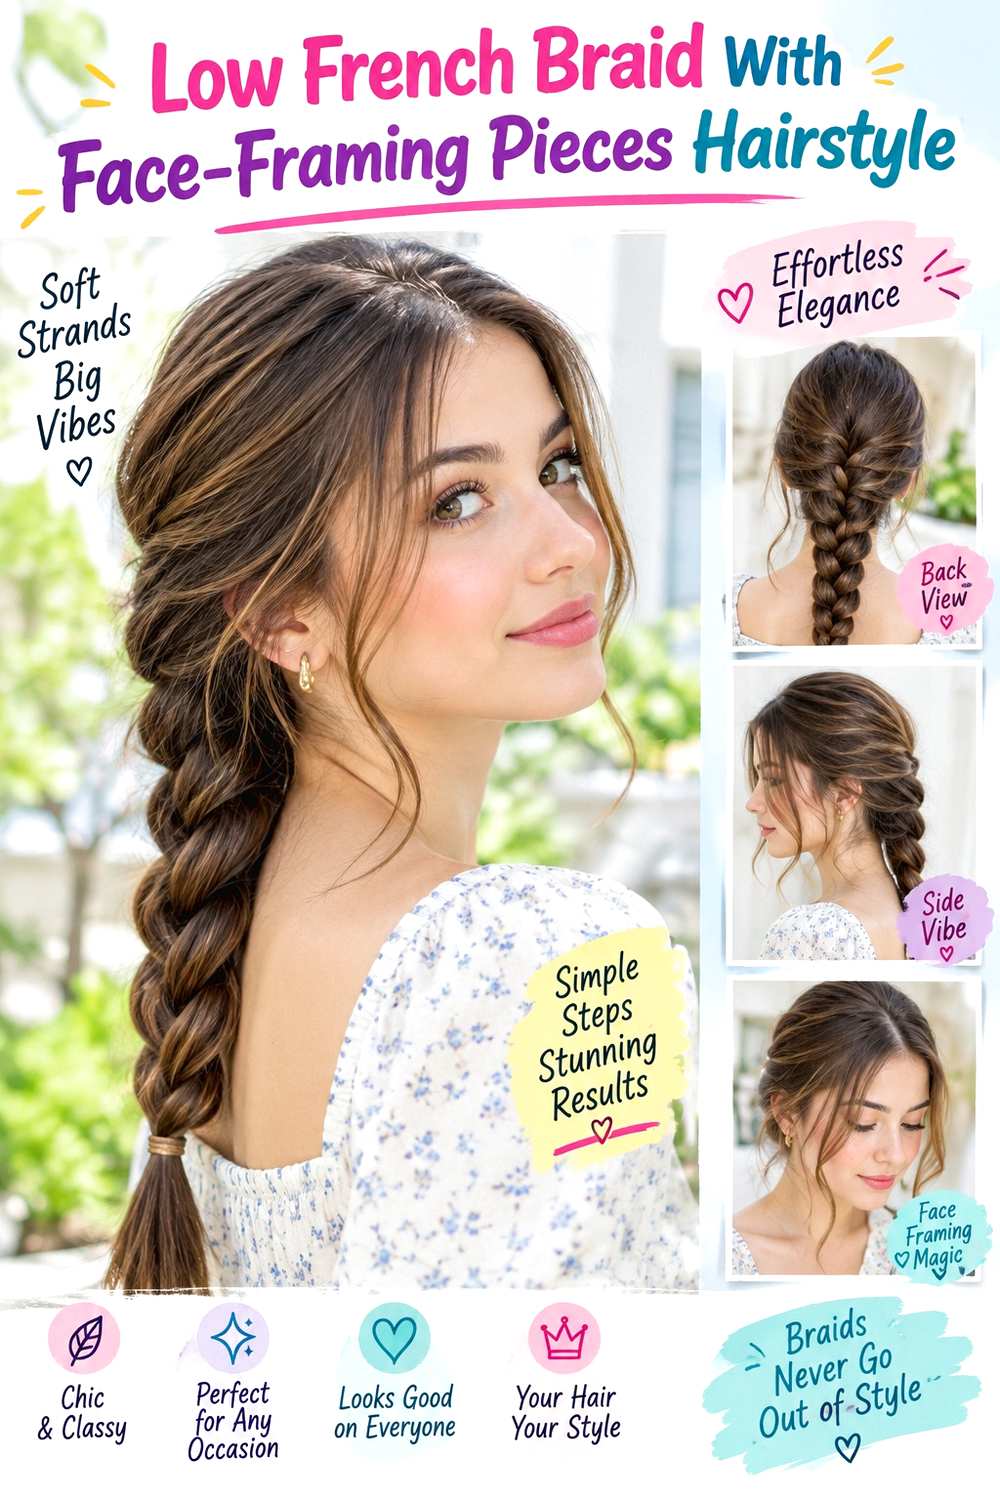
A low French braid keeps the crown relatively relaxed by starting the main woven section farther back instead of high at the hairline. Leave out two narrow face-framing pieces first, then begin adding hair around the middle back of the head and continue toward the nape. Once all the side sections are incorporated, finish with a regular braid and gently soften the lower crossings. The front pieces can remain straight, wavy, or naturally textured.
Medium and long hair work best because the braid needs enough length below the nape to remain visible. Use light styling cream to control flyaways and a small fabric-covered elastic to secure the tail. A quick refresh involves tightening a loose section near the nape and smoothing the front; full wash-day styling takes longer only if you change the natural texture beforehand.
If short layers continually escape, leave them intentionally loose instead of pulling harder. For professional styling, specify where you want the French-braid section to begin and how much hair should remain around the face. A lower starting point creates a softer crown while comfortable tension prevents the braid from feeling too rigid against the scalp.
Pro tip:
Separate the face-framing pieces before beginning the braid. Choosing them early prevents you from tugging random strands out later and weakening the side sections.
Make It Work for You:
For layered hair, add smaller sections as the braid travels downward. Short pieces are easier to capture gradually, while the face frame can stay intentionally loose.
Watch Out For:
Starting too high with very tight sections can change the relaxed character of the style. Lower the first crossings and keep the crown gently controlled instead.
Relaxed Dutch Braid Hairstyle
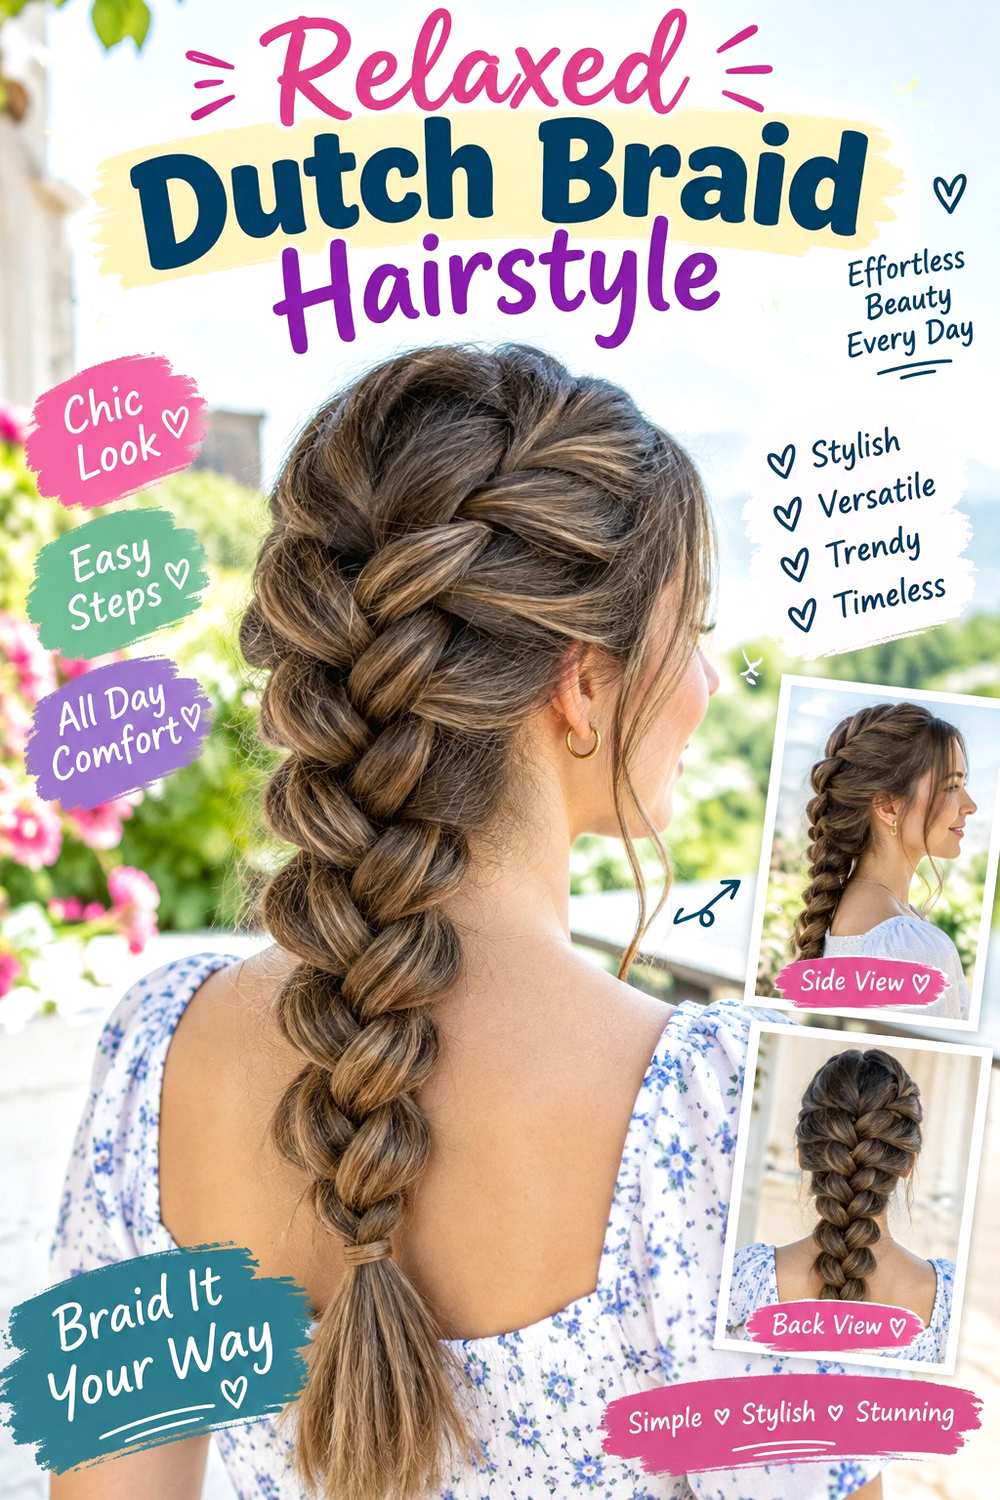
A Dutch braid creates a raised woven line because the sections cross underneath rather than over the center. For a softer fall version, start near the upper back of the head, work down toward the nape, and widen the outer loops only after the braid is secure. Keep the crown smooth but not stretched flat, then allow the finished tail to remain a little narrower so the expanded upper pattern stays the main detail.
Medium to long hair is easiest for this design, particularly when there is enough density to show the raised braid without excessive pulling. Use light texturizing spray for grip and a small fabric-covered elastic to secure the tail. A quick refresh usually means tightening one loose crossing and reshaping the outer edges; recreating the entire braid after wash day takes longer depending on detangling and drying time.
If the braid begins losing its raised structure, stop widening it and rebuild any loose upper section. For salon or event styling, specify the width you want through the center back and whether the braid should sit directly in the middle or slightly off-center. Comfortable, even tension matters more than making every crossing identical.
Pro tip:
Finish the entire braid before pulling at the outer loops. Widen the sections gradually from the bottom upward so you can control how much fullness develops.
Make It Work for You:
For lower-density hair, keep the center compact and expand only a few alternating loops. The raised pattern remains visible without stretching the braid into a thin-looking shape.
Watch Out For:
Pulling every loop as wide as possible can flatten the Dutch-braid ridge. Soften the outer edges while leaving the center crossings firm enough to show.
Messy Fishtail Side Braid Hairstyle
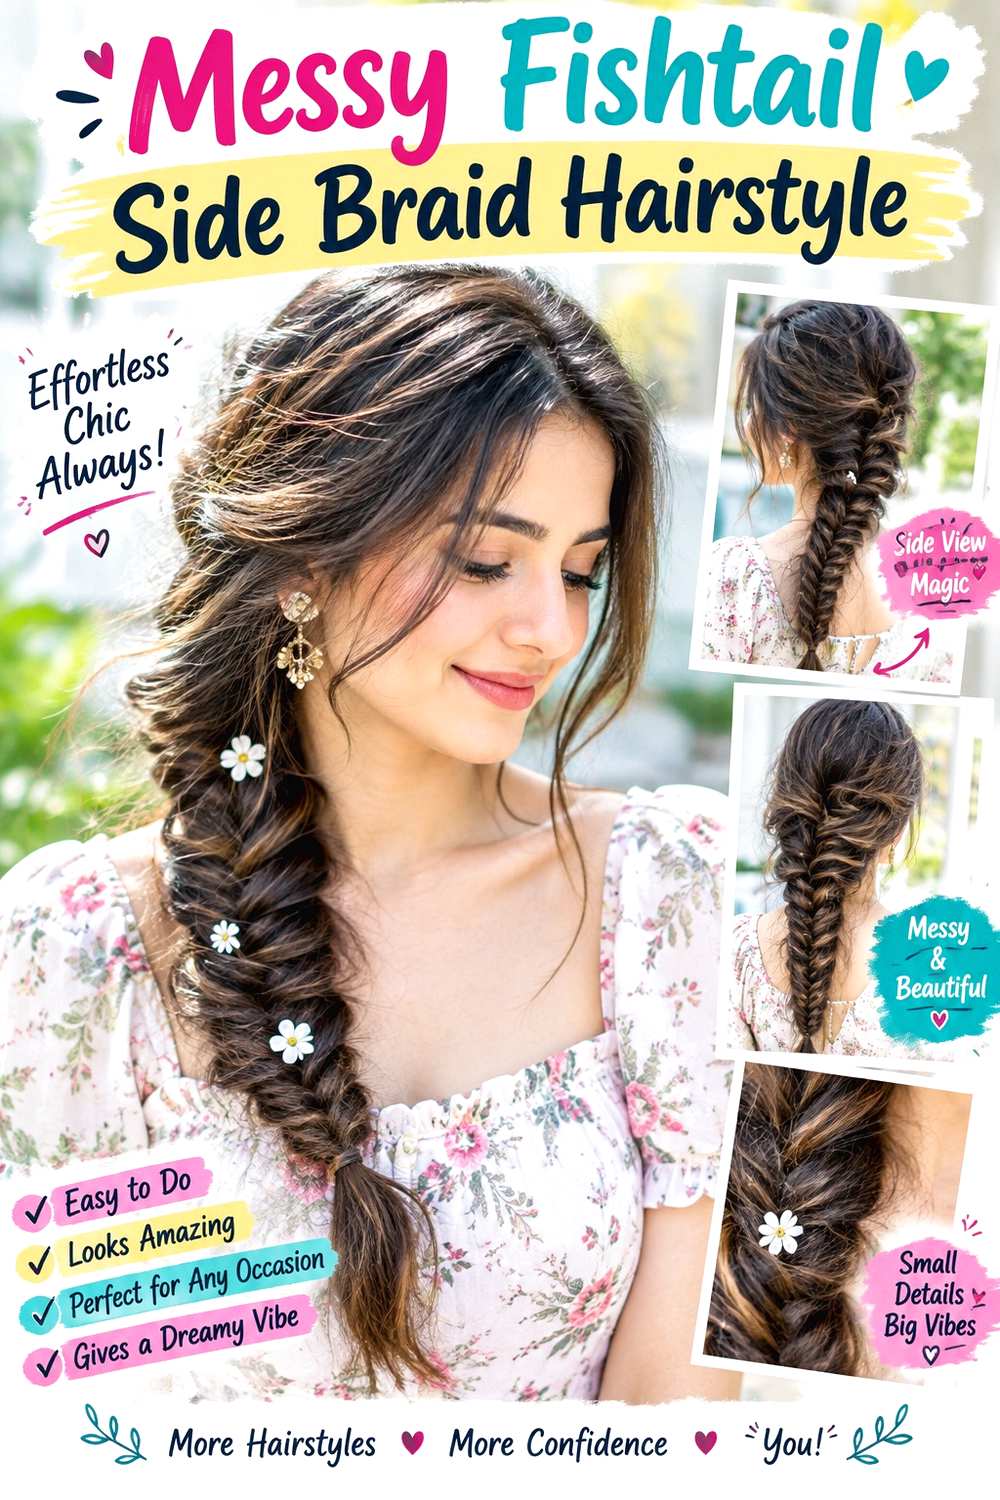
A fishtail braid creates finer texture than a standard three-strand braid, and shifting it over one shoulder makes the detail easy to see. Gather the hair low behind one ear, divide it into two sections, and alternate small pieces from the outside of each side. Keep the top of the braid moderately firm, then gently loosen selected crossings through the middle and lower length. A side part and a few soft pieces around the jaw help connect the braid to the face.
Long hair shows the fishtail pattern most clearly, though medium lengths can work with slightly larger sections. Use light texturizing spray to improve grip and a small fabric-covered elastic to secure the end. A brief refresh may mean tightening the top and retucking a loose piece; a full wash-day style takes longer only when drying or smoothing is needed first.
If the woven pattern disappears, reduce how much you widen each section. For salon or occasion styling, specify the braid width, which shoulder it should rest over, and how much deliberate looseness you want. Keeping the base comfortable behind the ear is more important than pulling the braid tightly.
Pro tip:
Use smaller crossing pieces near the top and slightly larger ones toward the end. This keeps the upper fishtail defined while making the lower braid quicker to complete.
Make It Work for You:
For very long hair, stop loosening the braid several inches above the elastic. A narrower tail gives the expanded middle section more visible contrast.
Watch Out For:
Over-pulling the fishtail can erase its distinctive woven pattern. If the braid starts looking like a loose rope, tighten a few crossings and reduce expansion.
Center-Parted Double Loose Braids Hairstyle
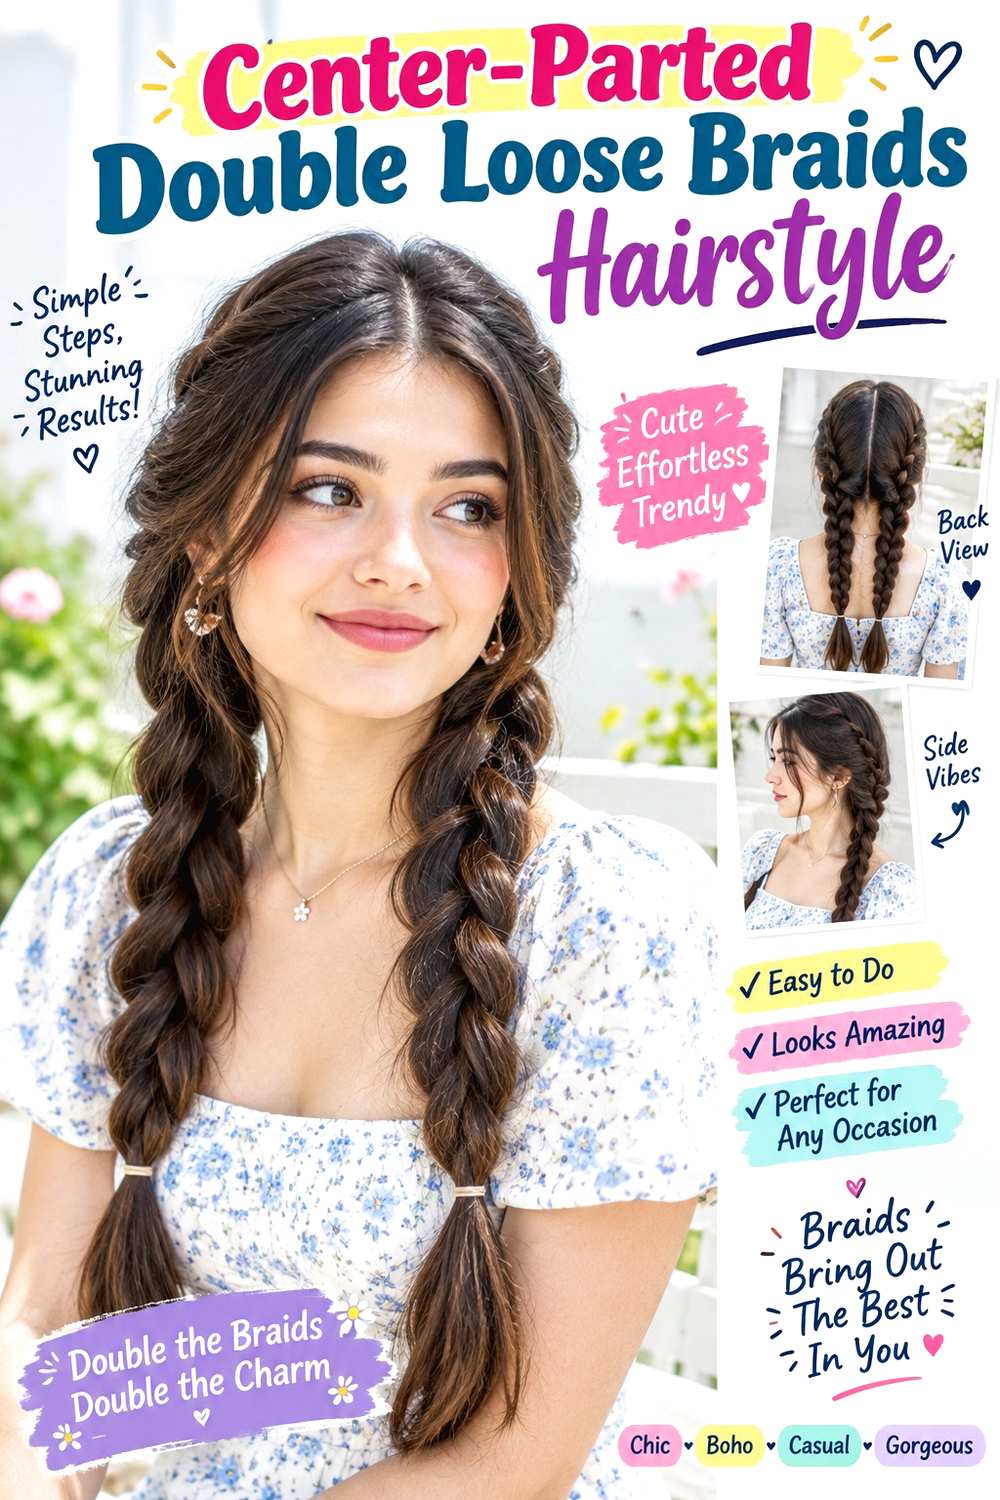
Two loose braids create a balanced shape and keep long hair from tangling against scarves or coats. Make a center part from the forehead through the back, then begin each braid below the ears so the crown remains smooth. Keep the first crossings secure and gently widen the middle sections, allowing both braids to fall forward over the shoulders. Shorter front pieces can stay loose, while the tail ends remain slightly more compact.
Medium to very long hair suits this design, and dividing dense hair into two sections may feel more comfortable than one heavy braid. Use a lightweight leave-in conditioner to reduce friction and two fabric-covered elastics to secure the ends. A quick refresh may involve redoing one fuzzy braid or correcting the center part; full wash-day styling takes longer when detangling or drying comes first.
If one braid appears larger, compare the section sizes instead of pulling the smaller braid wider. For salon or event styling, specify where each braid should begin, how loose the mid-lengths should look, and what tension feels comfortable behind the ears. The two sides do not need perfect symmetry, but their placement should feel balanced.
Pro tip:
Check both braid bases before finishing the lengths. Matching the starting height first is easier than trying to correct an uneven pair after loosening the crossings.
Make It Work for You:
For layered hair, start each braid slightly farther back and leave short front sections free. This catches more usable length without forcing pieces tightly around the temples.
Watch Out For:
Uneven sectioning can make one braid heavier and pull the style off balance. Repart the back before tightening either side rather than compensating afterward.
Low Rope Braid With Soft Ends Hairstyle
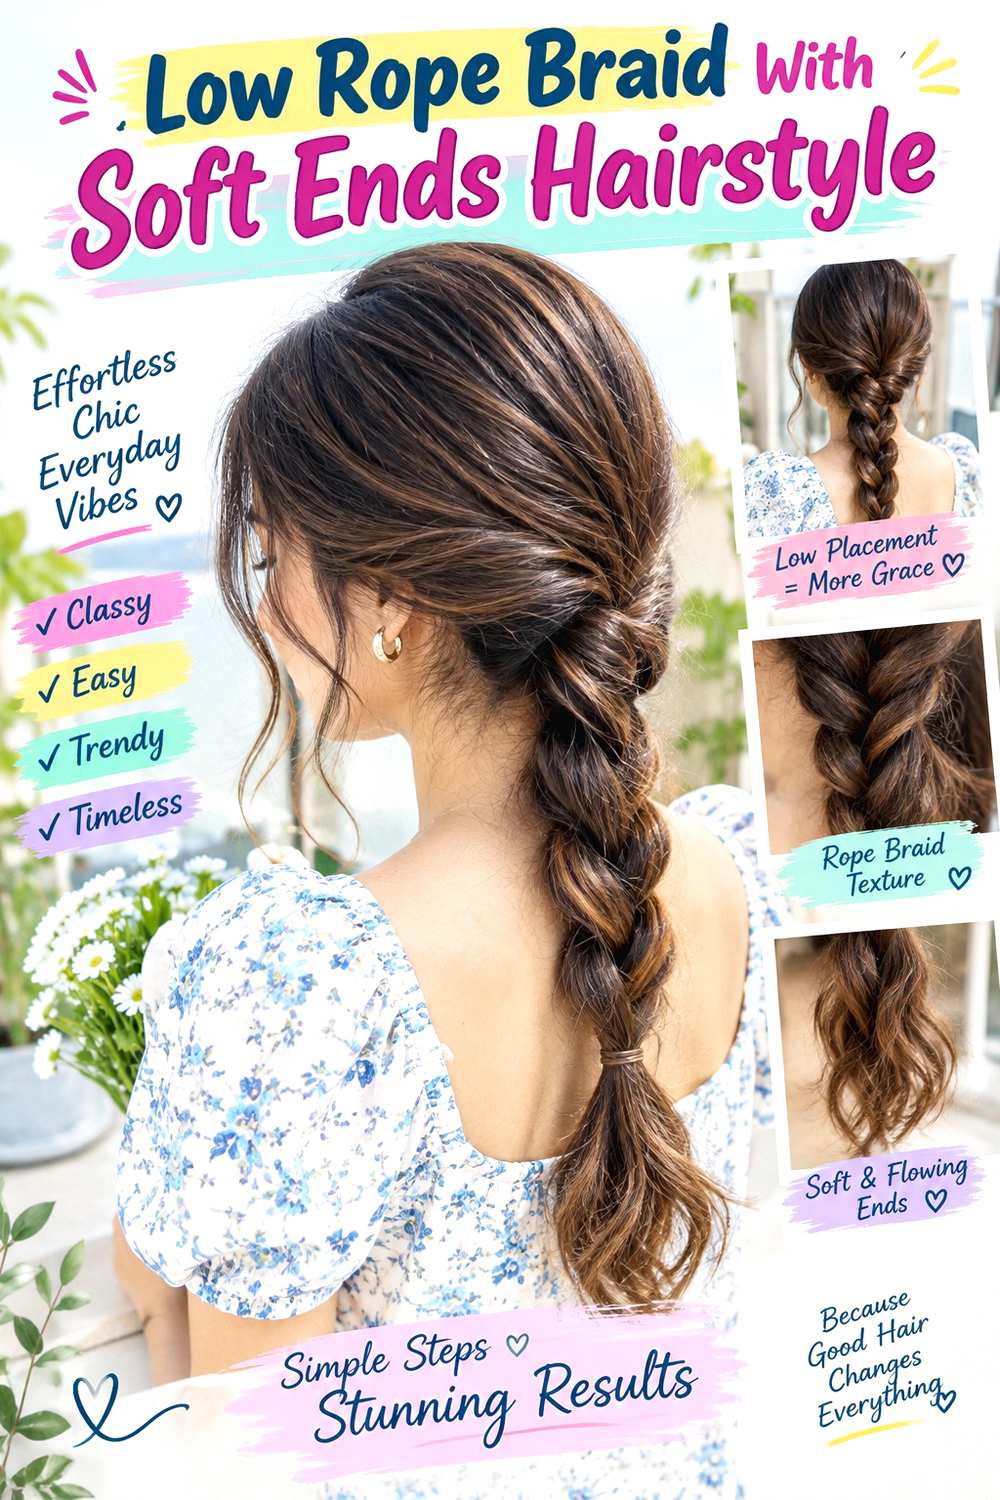
A rope braid gives a cleaner twist than a three-strand braid while still looking relaxed when the lower section is gently softened. Gather the hair at the nape, divide it into two equal sections, twist both in the same direction, then wrap them around each other in the opposite direction. Keep the upper rope defined and allow a few inches at the end to remain softly bent rather than tightly twisted to the elastic.
Medium to very long hair shows the rope pattern clearly, and dense hair can be contained without creating a very wide braid. Use light styling cream to control surface flyaways and a fabric-covered elastic to secure the end. A quick refresh means retwisting the lower section if it starts opening; full wash-day styling takes longer only if drying or detangling is needed beforehand.
If the rope repeatedly unravels, check the twist directions instead of pulling harder. For salon or event styling, specify whether the rope should sit centered or over one shoulder and how much of the tail you want left soft. The nape base should remain secure without excessive tension.
Pro tip:
Twist both sections in one direction and wrap them together in the opposite direction. That opposing motion is what gives the rope enough structure to stay defined.
Make It Work for You:
For slippery hair, keep the upper half firmer and soften only the final section. You retain the loose appearance without sacrificing the rope’s main structure.
Watch Out For:
Twisting and wrapping everything in the same direction can make the braid open quickly. Correct the wrapping direction before adding tension or extra styling product.
Curly Loose Braid Hairstyle
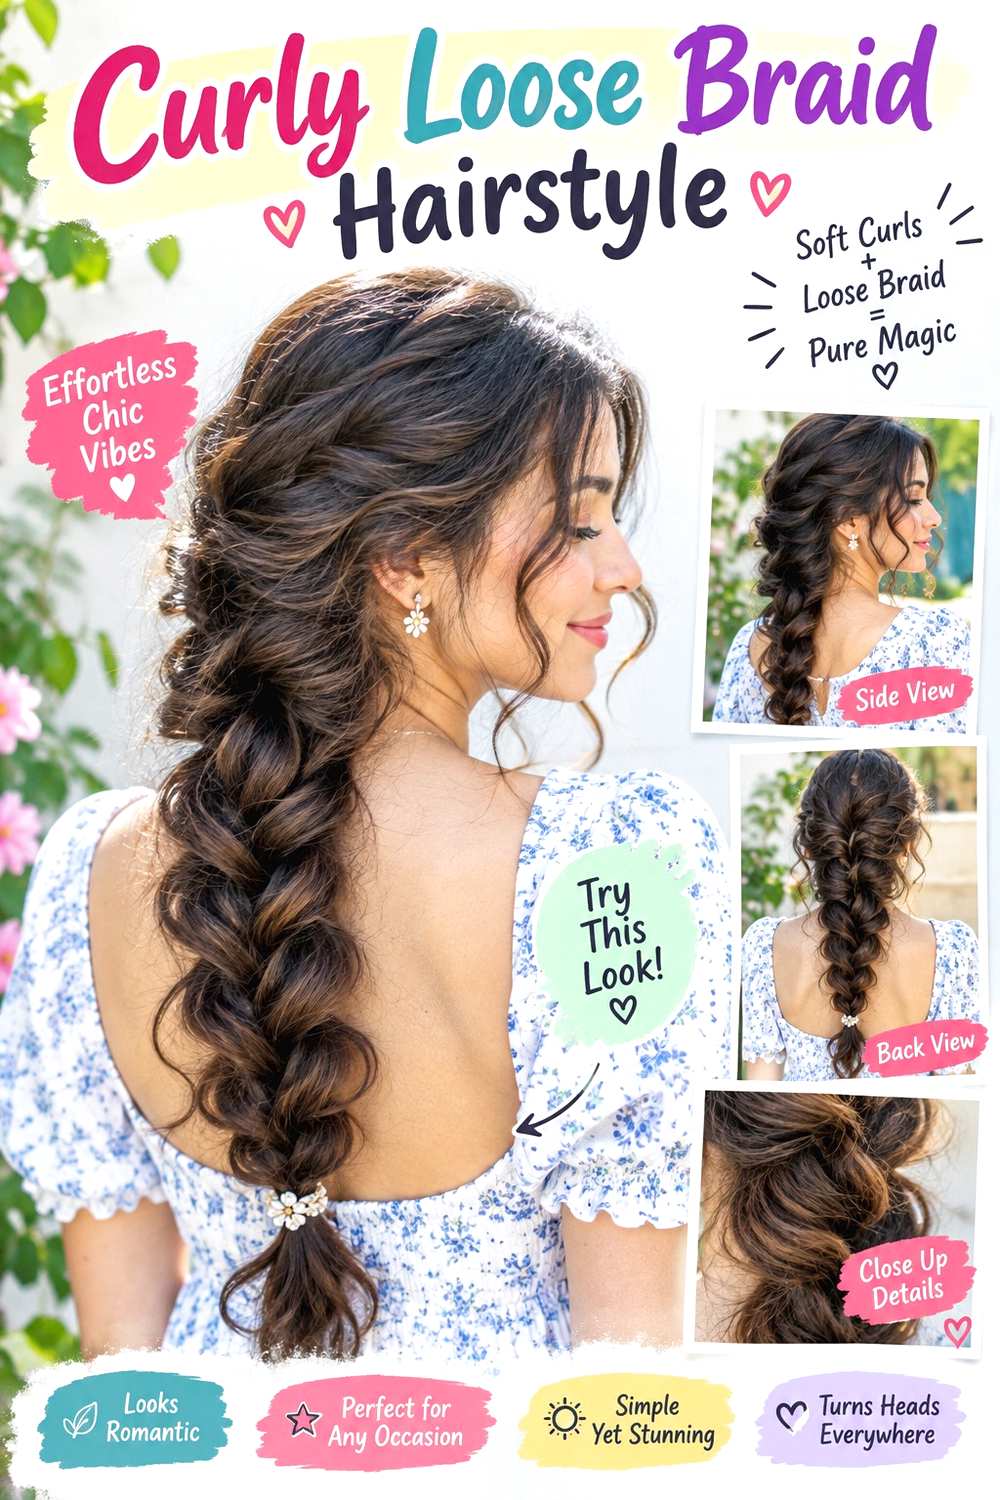
Natural curls give a loose braid visible texture without needing every section smoothed first. Keep your usual part or gently direct the hair backward, then gather it at the nape and create a broad three-strand braid. Let some curl definition remain on the surface and around the tail, while one or two selected curls frame the face. Loosen only a few crossings so the braid stays secure and does not turn into an undefined bundle.
Medium to long curly hair works best when the sections can cross without being stretched excessively. Use lightweight leave-in conditioner for softness, curl gel to preserve definition, and a fabric-covered elastic to secure the tail. A quick refresh may involve dampening the front curls and rebuilding one loose crossing; a full wash-day routine takes longer according to density, shrinkage, and drying method.
Avoid brushing dry curls solely to make the braid smoother. For salon or event styling, specify the braid width, the amount of visible curl texture you want, and which front curls should stay free. Comfortable nape tension matters, and the finished length should respect the hair’s normal shrinkage rather than relying on stretching.
Pro tip:
Choose the curls you want around the face before braiding. Leaving them out from the start protects their definition and prevents you from disturbing neighboring curl groups.
Make It Work for You:
For dense curls, use three broad sections and loosen the braid minimally. The natural texture already adds dimension, so extra pulling is often unnecessary.
Watch Out For:
Dry brushing can create frizz without making the braid more secure. If the surface feels too loose, rebuild the upper crossing instead of smoothing the entire head.
Coily Side Braid Hairstyle
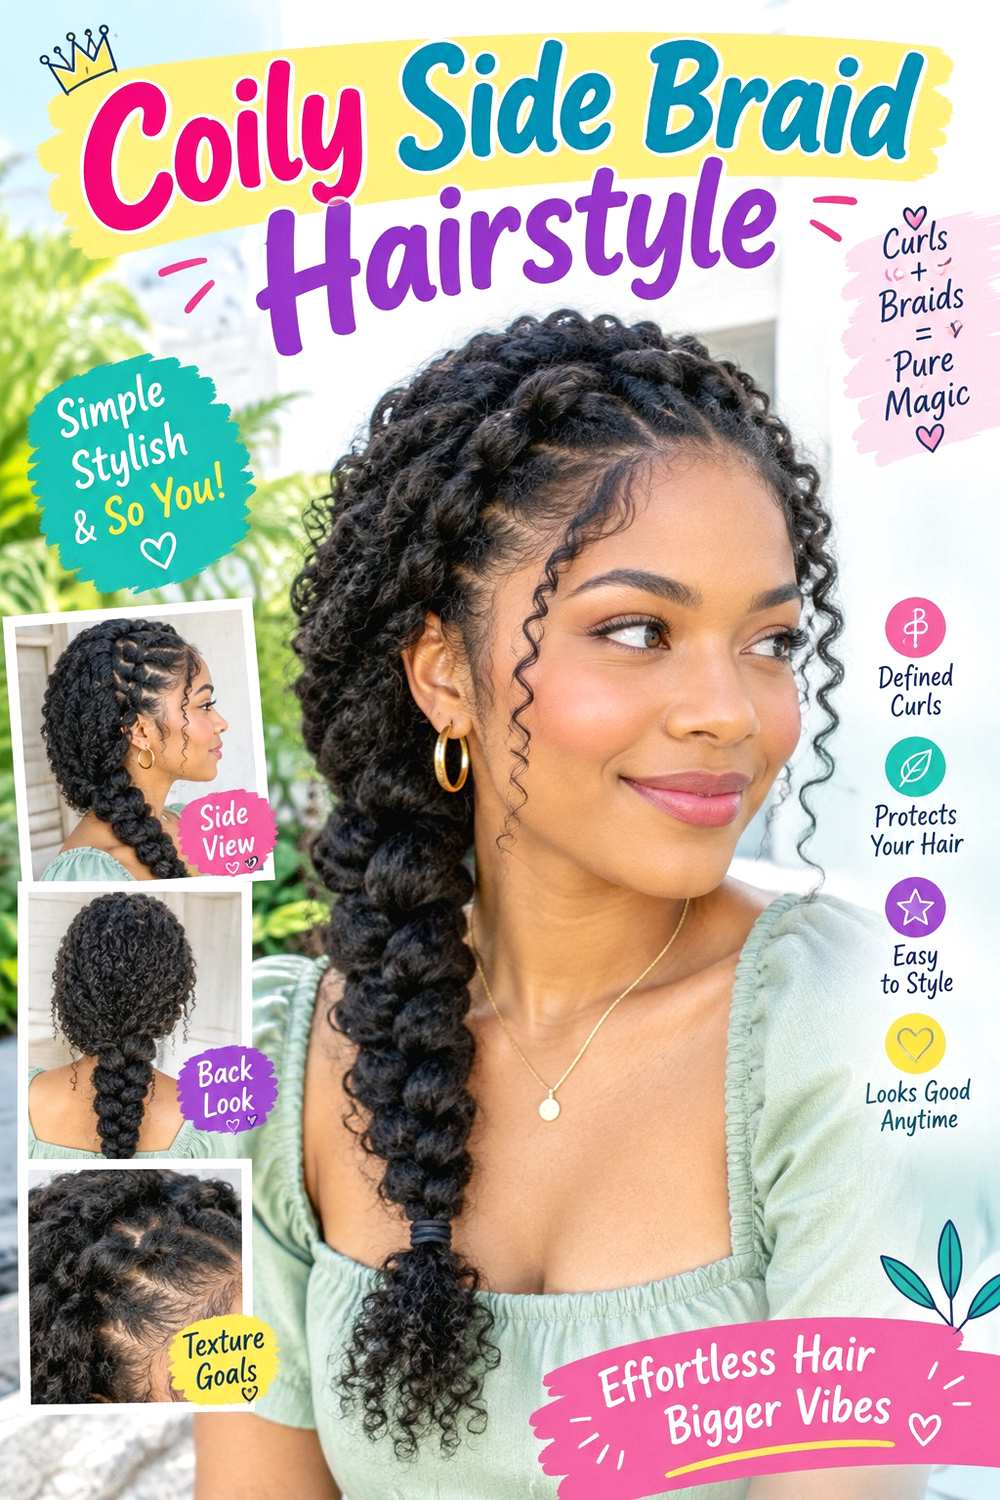
A low side braid can keep coily lengths controlled while preserving texture around the hairline and braid surface. Gather the hair toward one shoulder with comfortable tension, then create a broad braid beginning below or just behind the ear. Allow the coil pattern to remain visible rather than forcing the sections perfectly smooth. Small coils around the temples can stay free, and the braid can widen slightly through the middle while the tail remains compact.
Coily hair with enough length to gather can use the style without straightening or stretching solely for appearance. Apply moisturizing leave-in conditioner for softness, curl gel to define visible coils, and a fabric-covered elastic to secure the end. A quick refresh may involve retwisting an escaped section and reshaping the front coils; a full wash-day routine takes longer according to density, shrinkage, detangling, and drying.
If the braid shortens noticeably after styling, work with that normal shrinkage rather than pulling it longer. For professional styling, specify which shoulder should carry the braid, how wide the woven section should be, and the tension you find comfortable around the ear and hairline.
Pro tip:
Let the finished braid settle for a few minutes before loosening any crossing. Normal shrinkage can change its width, so assess the shape after the hair relaxes.
Make It Work for You:
For strong shrinkage, start the braid slightly higher behind the ear and keep the tail compact. The side placement remains clear without stretching the hair unnecessarily.
Watch Out For:
Do not increase tension just because the braid looks shorter than expected. Preserve comfort at the hairline and let the natural coil pattern determine the finished length.
Half-Up Loose Braid Hairstyle

A half-up braid keeps the front sections controlled while leaving most of the hair loose through the back. Gather a moderate section from above each ear, join them below the crown, and braid only that combined section. Keep the braid relatively narrow at the top, then loosen its outer edges slightly. The remaining hair can stay straight, wavy, curly, or coily, creating contrast between the woven center and free-moving lower lengths.
Medium and long hair suit the design, especially when you want braid detail without containing all the density. Use light texturizing spray to give the upper section grip and a small fabric-covered elastic to secure the braid end. A quick refresh usually means tightening the top connection or reshaping one crossing; full wash-day effort depends on how you style the loose hair.
If the lower lengths begin looking thin, reduce how much hair you gather into the braid. For salon or event styling, specify how wide the half-up section should be and where the braid should start below the crown. Keeping the center anchor modest allows the braid to stay visible without dominating the rest of the hairstyle.
Pro tip:
Take less hair than you think you need for the half-up section. You can always add more, while an oversized braid quickly removes fullness from the loose lengths.
Make It Work for You:
For fine hair, use narrow side sections and keep the braid compact. Let most of the density remain down so the ends retain a fuller appearance.
Watch Out For:
Pulling the half-up braid too wide can make the lower hair look sparse. Soften only selected edges and leave the center of the braid secure.
Crown-to-Nape Loose Braid Hairstyle
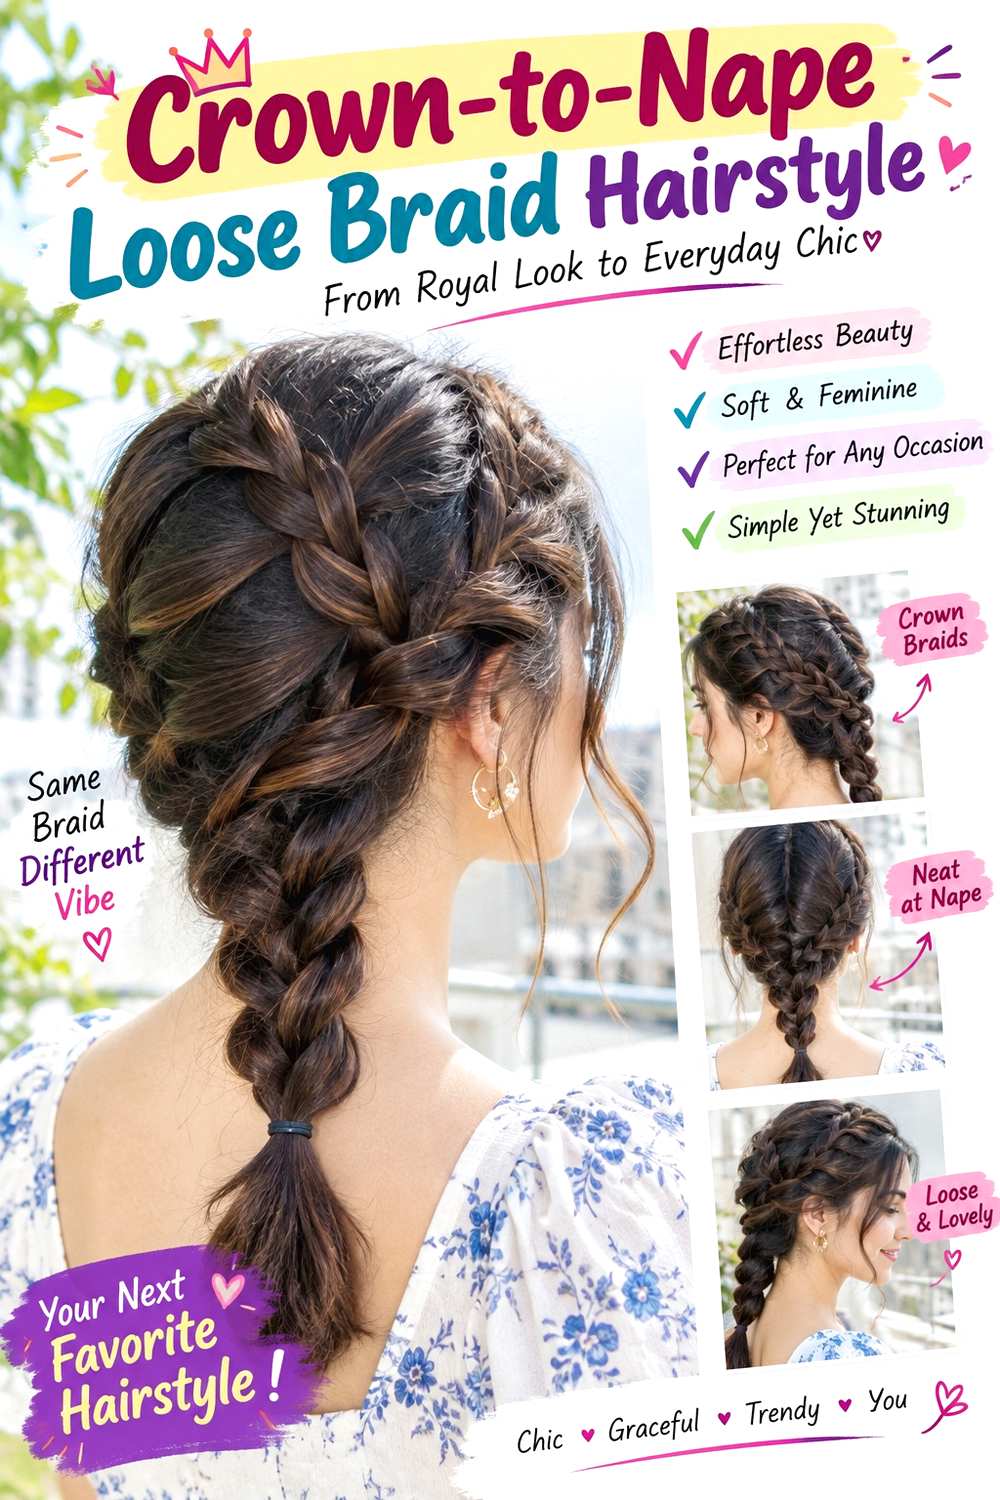
A crown-to-nape braid creates a visible center line from the upper back of the head down into a loose tail. Begin below the crown rather than directly at the hairline, add sections gradually as you move downward, and transition into a regular braid at the nape. Keep the upper woven section controlled while gently widening the lower braid. A few front pieces can remain loose, especially when shorter layers do not reach the first crossings comfortably.
Medium to long hair works best, and medium or dense hair can show the center braid without much expansion. Use light texturizing spray to improve grip and a fabric-covered elastic to secure the tail. A quick refresh may mean tightening one crossing near the nape and smoothing a loose side section; full wash-day styling takes longer if detangling or drying comes first.
If the crown begins bulging, reduce the amount of hair added to each crossing rather than pulling the braid tighter. For salon or event styling, specify the starting height, center alignment, and how wide the braid should become below the nape. Even tension matters more than making the braid extremely tight.
Pro tip:
Use smaller added sections near the crown and gradually increase them as you move downward. This helps the braid stay smooth while creating a natural widening toward the nape.
Make It Work for You:
For layered hair, leave the shortest front pieces free and add side sections gradually. This reduces slipping without changing the centered braid structure.
Watch Out For:
Adding large sections too early can create a bulky ridge at the crown. Keep the upper braid compact and save most of the looseness for below the nape.
Loose Bubble Braid Hairstyle
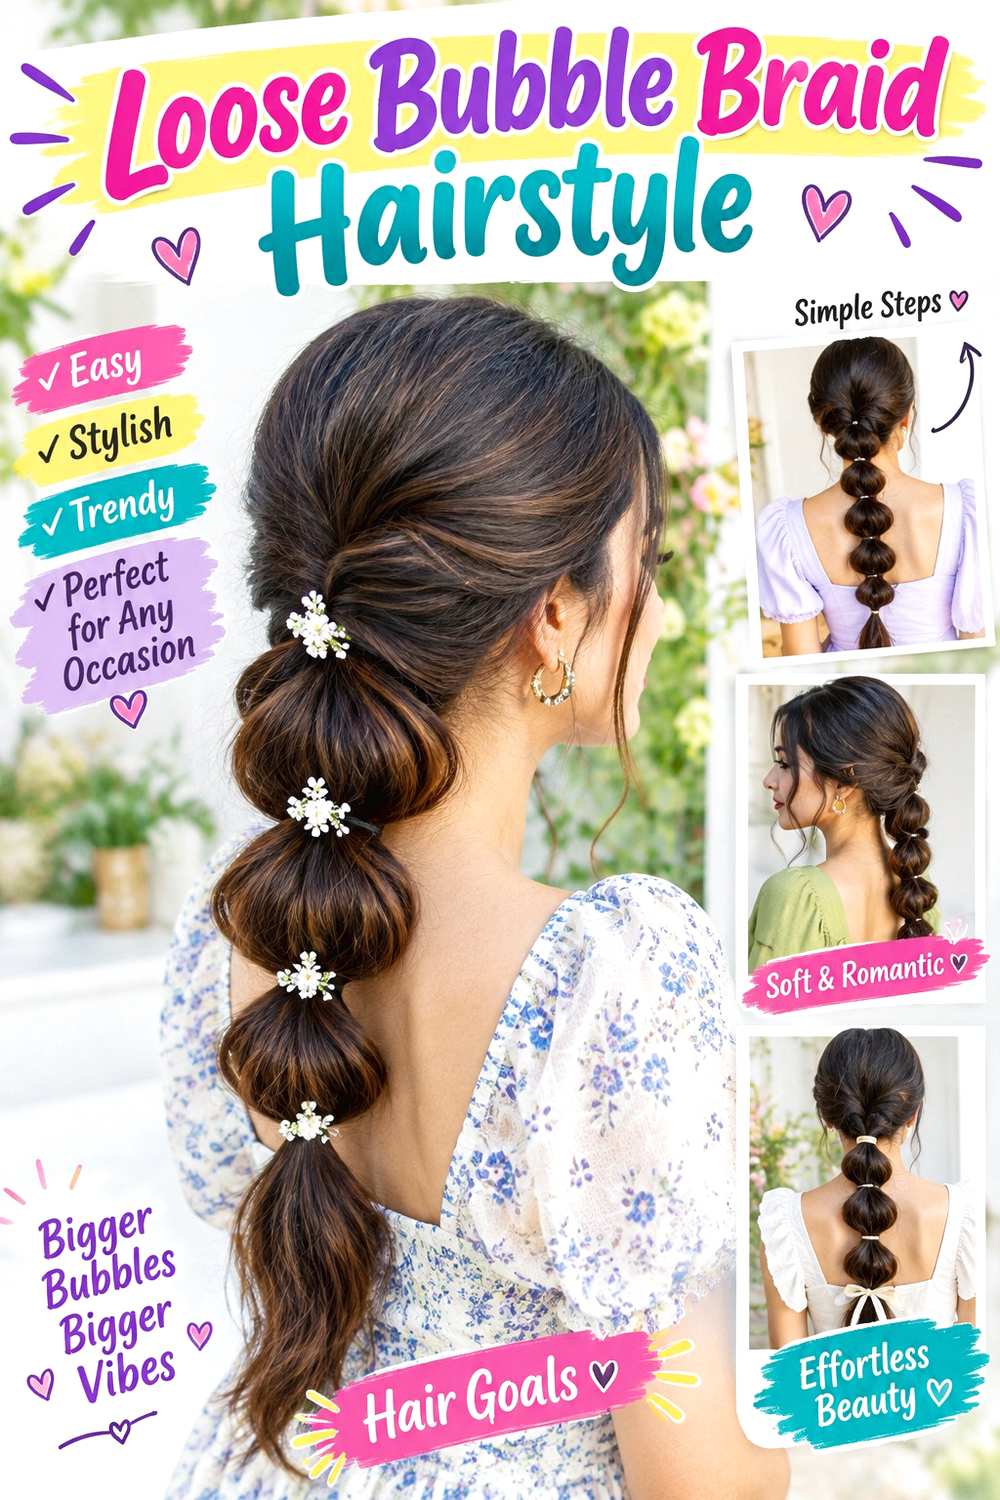
A bubble braid creates repeated rounded sections rather than woven crossings, making it an easy alternative when you want a braid-like silhouette with less technique. Gather the hair into a low ponytail, add small elastics at even intervals, and gently expand each section between them. Keep the bubbles softly rounded rather than pulling them to maximum width, and leave the final tail narrower for a cleaner finish.
Medium to long hair works best because several sections are needed for the repeated shape. Medium and dense hair usually creates fuller bubbles with less expansion, while finer hair benefits from smaller spacing. Use snag-free elastics for the anchors and light styling cream to control flyaways near the ponytail base. A quick refresh means tightening one elastic and reshaping a bubble; a full wash-day version takes longer only if drying or smoothing happens first.
If the spacing begins collapsing, replace stretched elastics instead of pulling the ponytail tighter. For professional styling, specify the bubble size, spacing, and low base position. The first rounded section should begin below the nape or coat collar rather than being compressed against it.
Pro tip:
Expand each bubble gradually after all the elastics are in place. Comparing one section with the next makes it easier to keep the repeated shape balanced.
Make It Work for You:
For fine hair, use smaller bubbles with closer spacing. This creates clear repetition without stretching each section until gaps become visible around the elastics.
Watch Out For:
Over-expanding the upper bubble can loosen the entire ponytail base. Keep the first section controlled and add more width gradually farther down the length.
Scarf-Woven Loose Braid Hairstyle
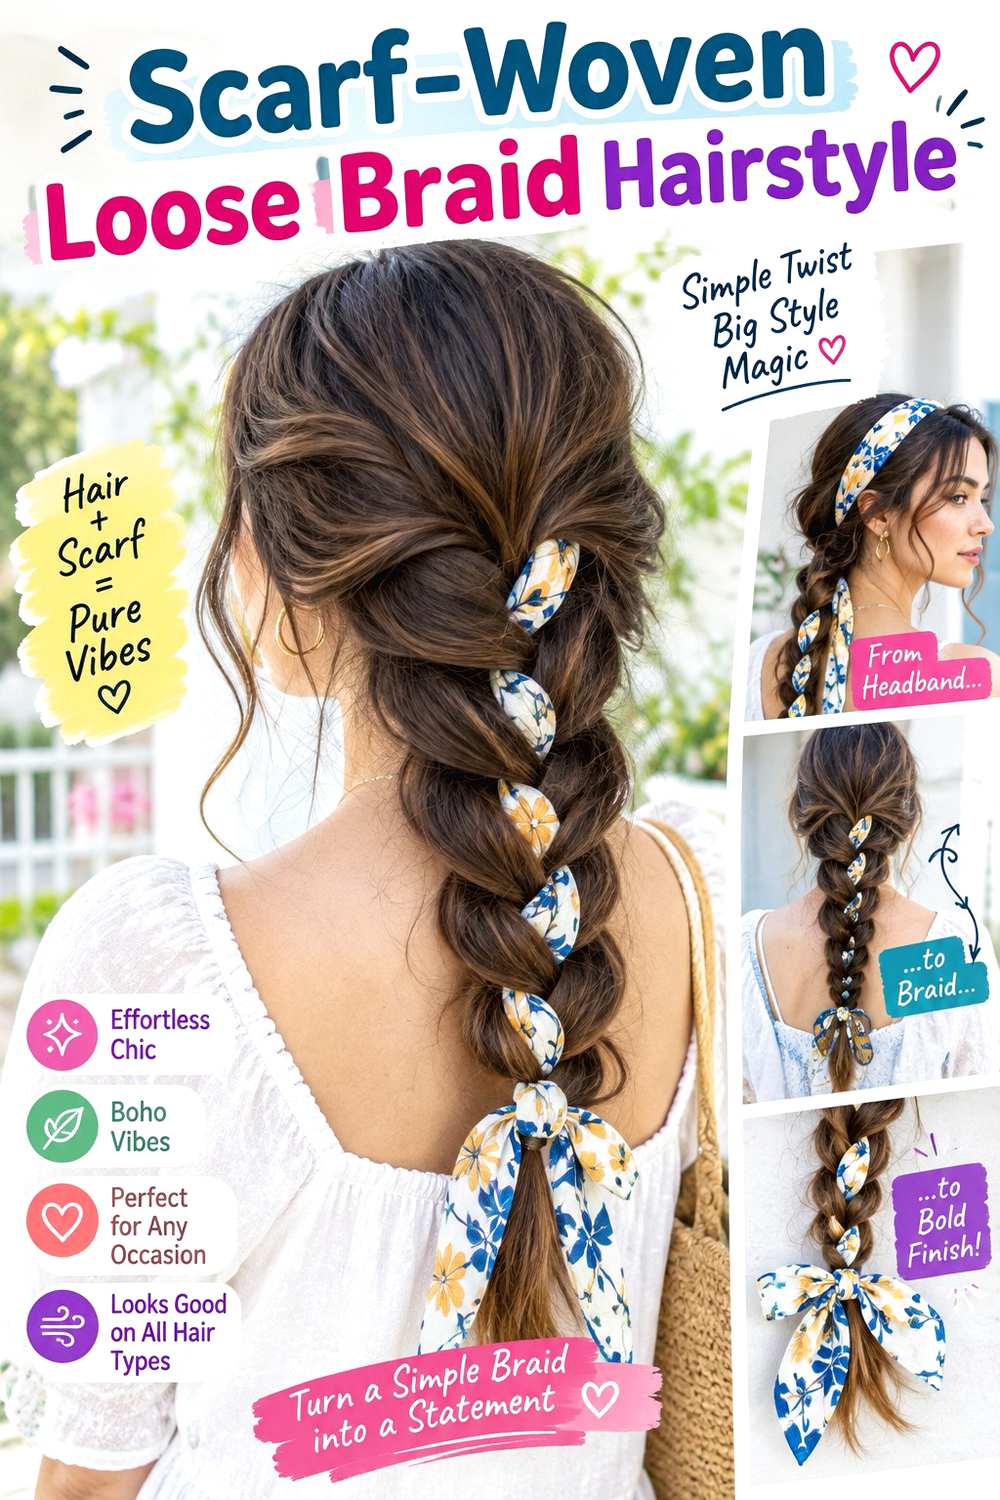
A narrow scarf woven through a braid adds color and texture while still letting the hair remain the main part of the style. Begin with a low three-strand braid and incorporate the scarf into one section near the nape. Continue crossing the fabric with the hair, allowing small portions of the scarf to appear between the woven sections. Keep the braid moderately loose and let the scarf ends finish near or slightly below the hair.
Medium to long hair provides enough length to show the fabric repeatedly through the braid. Use a small fabric-covered elastic to create a stable starting base and a narrow hair scarf as the woven accessory. A quick refresh usually means tightening the scarf near the first crossing or rebuilding a loose lower section; wash-day styling depends on your natural texture beforehand.
The scarf should not be responsible for holding an unstable braid together. For salon or event styling, specify how much fabric you want visible, whether the braid should sit centered or over one shoulder, and where the scarf ends should finish. A stable first crossing makes the decorative weave easier to maintain.
Pro tip:
Anchor the scarf securely near the braid base before you begin weaving. A stable starting point prevents the fabric from sliding downward as the braid loosens.
Make It Work for You:
For fine hair, choose a slim scarf and keep the braid moderately compact. Too much fabric can visually overwhelm the hair and hide the woven pattern.
Watch Out For:
A slippery scarf threaded through an already loose braid may shift quickly. Secure the braid structure first, then soften selected crossings after the fabric is woven.
Ribbon-Tied Low Braid Hairstyle
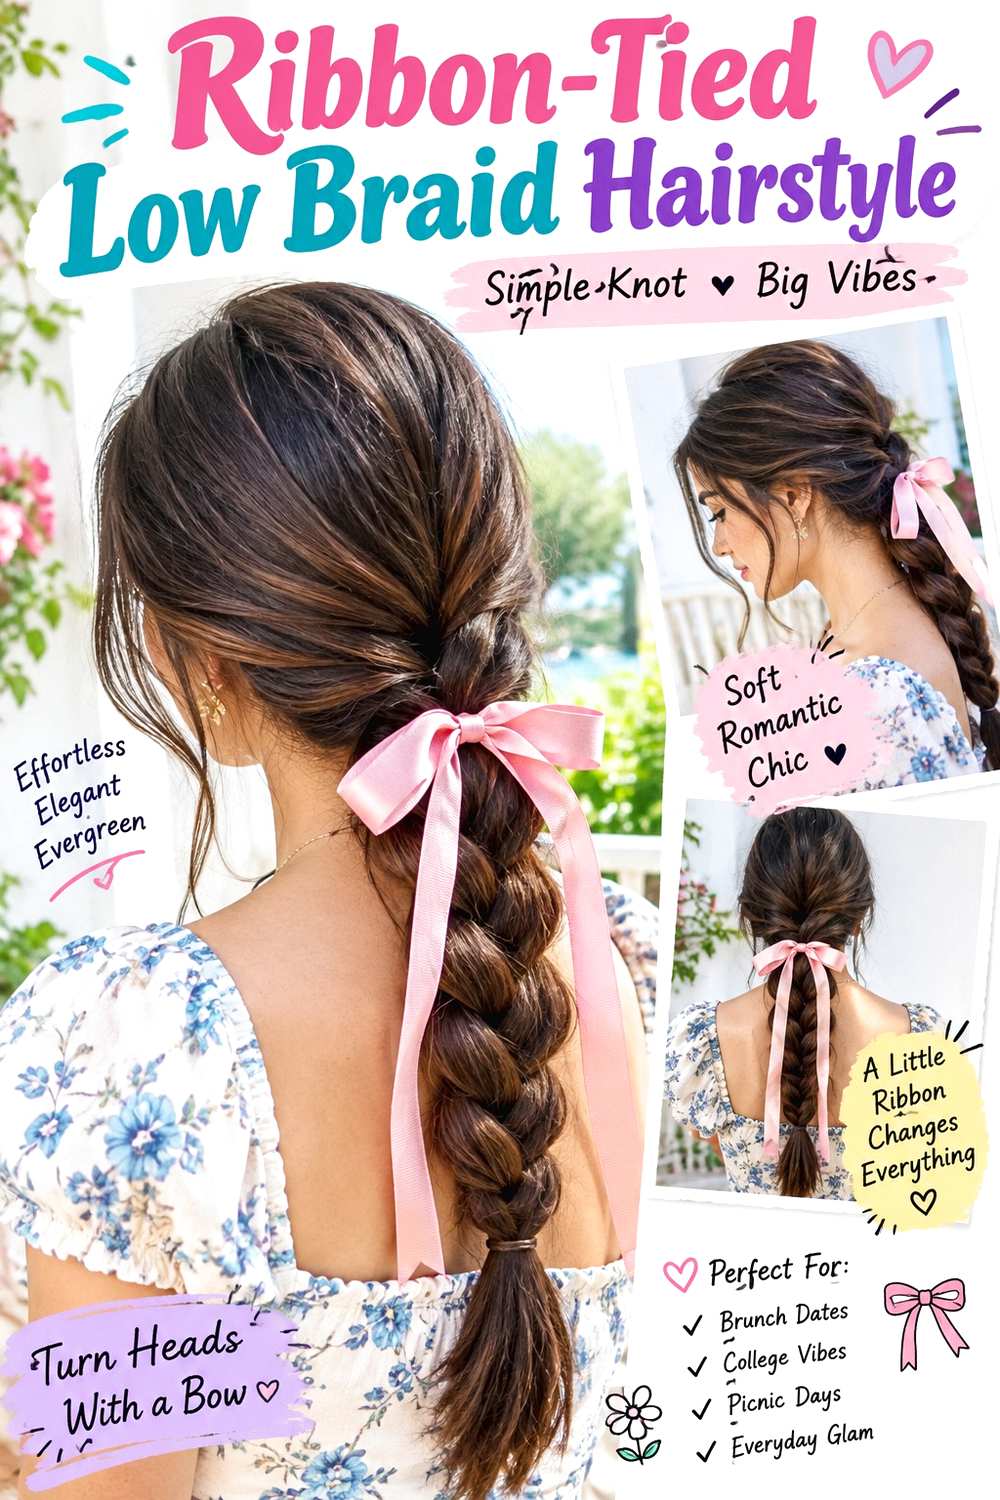
A ribbon at the end of a low braid adds a small decorative finish without changing the simple structure. Keep the crown smooth or naturally textured, gather the hair at the nape, and create a three-strand braid with even crossings. Loosen the middle section lightly while leaving the final inches more compact, then tie a narrow ribbon over the end elastic. A center or side part can work, with small pieces around the face if preferred.
Medium to long hair gives the ribbon enough separation from the nape to remain visible. Use a small fabric-covered elastic to secure the braid and a narrow hair ribbon for the decorative finish. A quick refresh usually means retightening the ribbon and reshaping one or two crossings; full wash-day styling takes longer only when drying or texture changes happen first.
The ribbon should cover or decorate the elastic rather than replace a secure fastening. For salon or event styling, specify the braid width, where the looseness should begin, and how long you want the ribbon tails to fall. Shorter tails are useful when wearing thick scarves because they are less likely to tangle with outerwear.
Pro tip:
Secure the braid with the elastic first, then tie the ribbon over it. The hidden anchor keeps the style stable even if the decorative bow loosens during the day.
Make It Work for You:
For dense hair, use a slightly wider ribbon so its scale matches the braid. Keep the bow simple so it does not add unnecessary bulk near the ends.
Watch Out For:
Relying on the ribbon alone can let the braid loosen as the knot shifts. Keep a secure elastic underneath and treat the ribbon only as decoration.
Fine-Hair Airy Braid Hairstyle
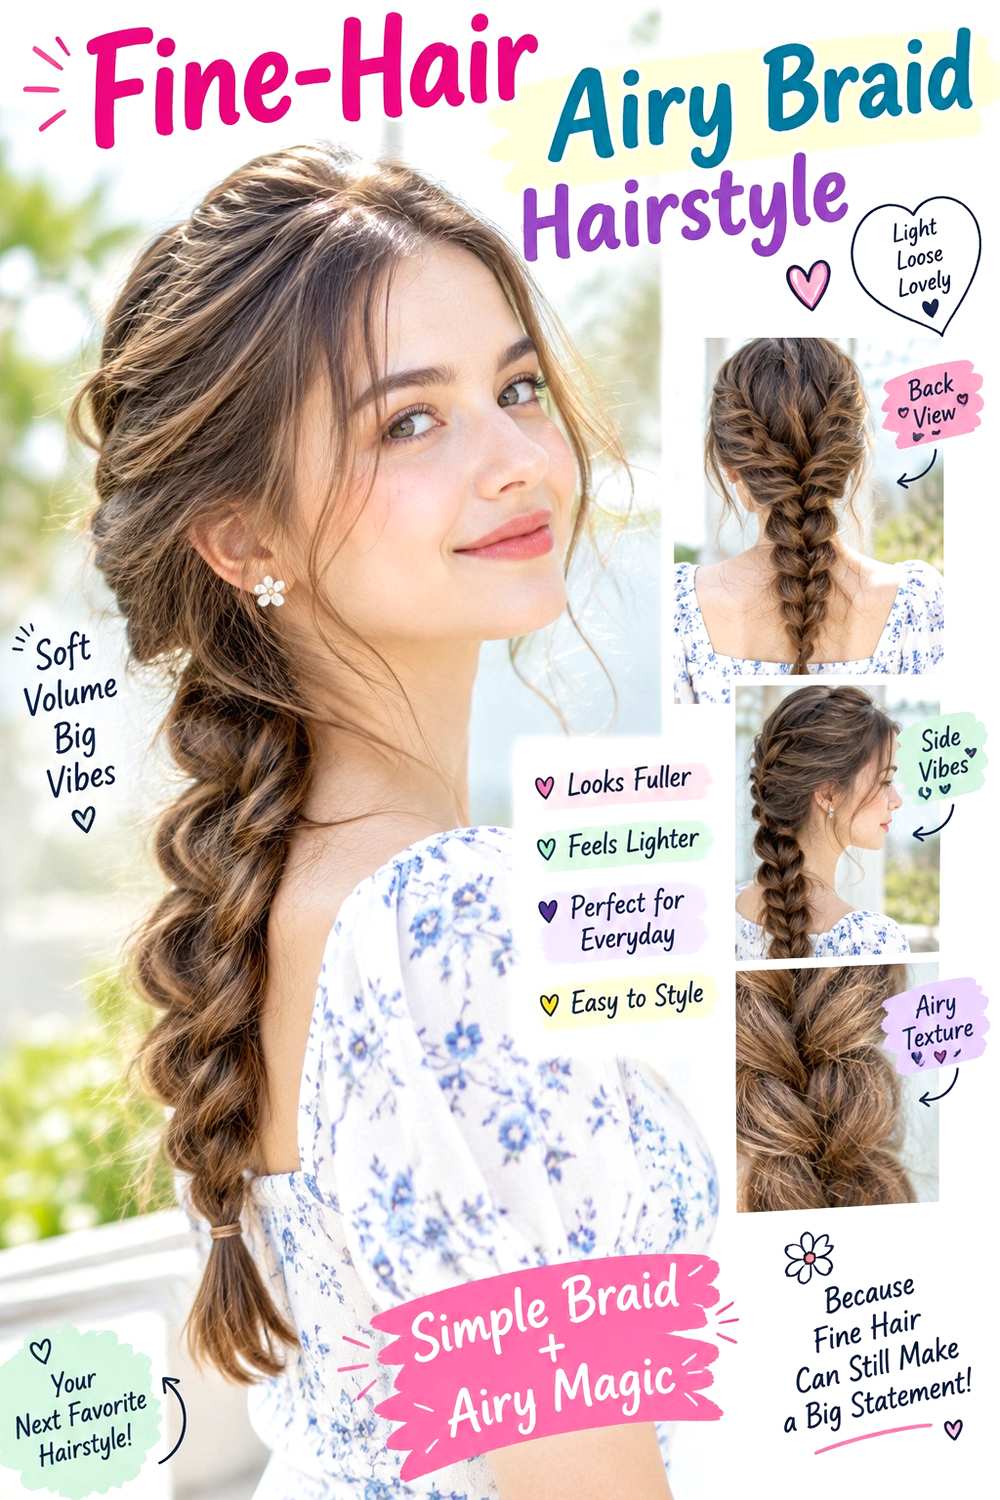
Fine hair can create an airy braid without being pulled so wide that the sections begin to look sparse. Gather the length low at the nape and make a compact three-strand braid first. Once it is secure, widen only the outer edge of selected crossings, leaving the center firm and the tail relatively narrow. A few slim pieces around the face can add softness, but keeping most hair inside the braid preserves useful density.
Fine strands can be low, medium, or high density, so the braid width should match the actual amount of hair available. Use lightweight mousse to provide grip and a small fabric-covered elastic to secure the end. A quick refresh means tightening one crossing or smoothing a flyaway; a full wash-day version takes longer only if drying is needed first.
If gaps become visible, stop expanding the braid and gently compress that section again. For salon or occasion styling, explain that you want a compact center with selectively loosened edges rather than an oversized braid. Specify how much hair should remain around the face so the braid retains enough body through its full length.
Pro tip:
Widen every second or third crossing instead of every loop. The alternating softness creates movement while keeping enough compact sections to support the overall braid.
Make It Work for You:
If your fine strands are dense, use a slightly wider braid but keep the tail compact. You can create scale without teasing or excessive pulling.
Watch Out For:
Trying to imitate a very thick braid by stretching every crossing can expose gaps. Keep the center secure and add softness only where the hair supports it.
Dense-Hair Wide Braid Hairstyle
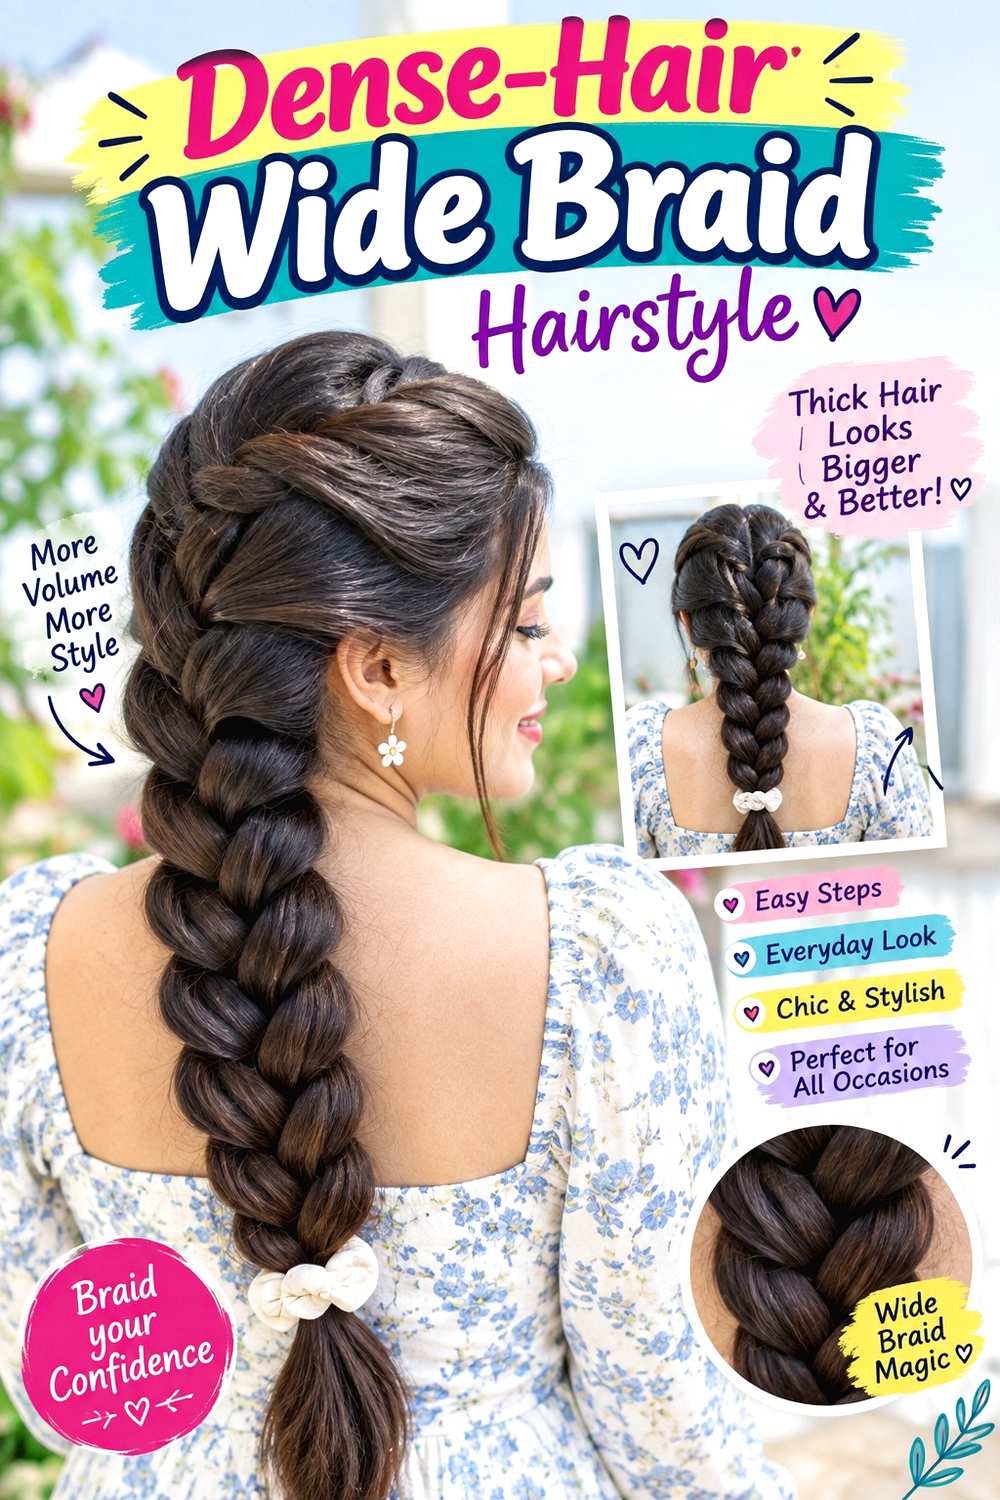
Dense hair can support a broad loose braid with substantial sections and visible width from the nape downward. Gather the hair low, divide it into three generous sections, and braid with moderate tension before gently expanding the outer edges. Keep the upper crossing relatively close to the head so the weight stays controlled, then allow more width through the middle. A few front pieces can remain loose without removing too much density from the main braid.
Medium to long dense hair suits this construction, especially when one compact braid would otherwise feel heavy. Use light styling cream to control shorter surface pieces and a strong fabric-covered elastic to secure the end. A quick refresh usually means retightening the top crossing or smoothing the surface; wash-day styling takes longer according to drying and detangling needs.
If the braid pulls downward, reduce the amount of expansion near the nape rather than tightening the entire style. For salon or event styling, specify how wide you want the braid to appear, where the base should sit, and what level of tension feels comfortable. Bulk should be distributed through the braid instead of compressed into one tight starting point.
Pro tip:
Loosen the middle and lower sections more than the first crossing. This creates width where it is visible while keeping the heavy braid stable at the nape.
Make It Work for You:
For very dense hair, use larger braid sections and fewer adjustments after weaving. The natural volume already creates width, so extensive pulling is rarely necessary.
Watch Out For:
Aggressively widening the braid at its base can make a heavy style sag. Keep the top secure and soften the braid gradually as it moves downward.
Short-Hair Mini Side Braid Hairstyle
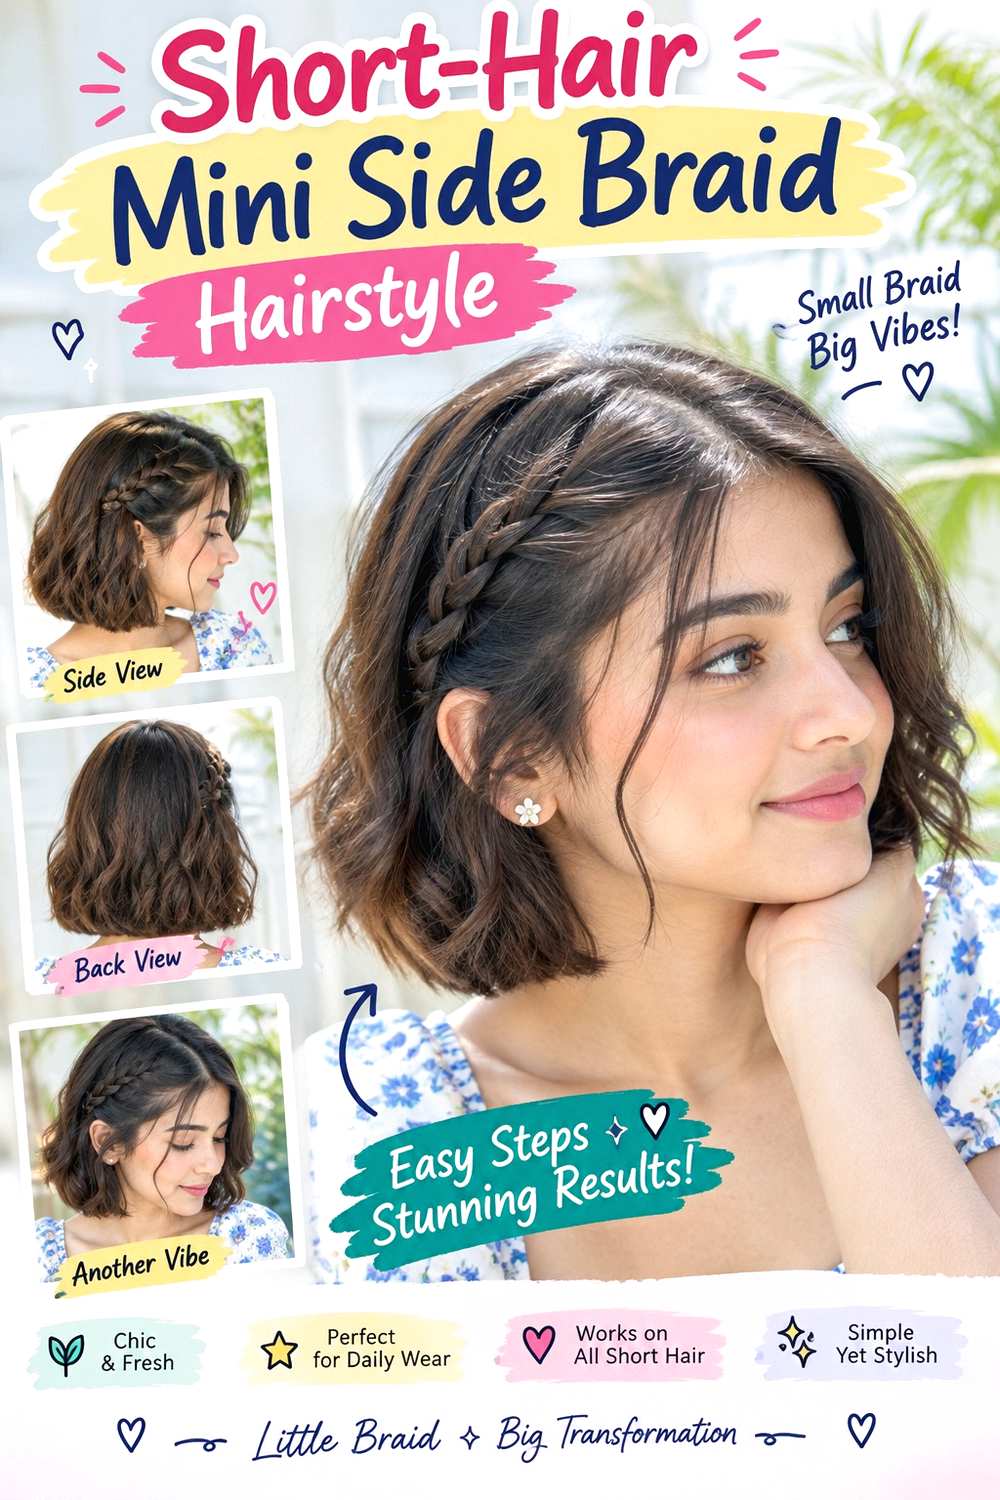
A mini side braid adds woven detail to shorter hair without asking the full length to reach one large braid. Start with a side part and take a narrow section above the temple or ear, then braid it backward along the side of the head. Secure the end behind the ear or blend it into the loose hair. The rest of a bob or lob can remain straight, wavy, or naturally textured, with its perimeter fully visible.
Bobs, lobs, and shoulder-skimming cuts work well because the braid only needs a small amount of length. Use light texturizing spray to improve grip and a small grip clip to secure the braid where it finishes. A quick refresh takes only a few minutes; full wash-day styling depends mainly on how you wear the loose portion.
If short layers slip from the braid, reduce the section width or stop the braid slightly earlier rather than tightening harder. For salon or occasion styling, specify the braid’s starting point, width, and ending position behind the ear. Comfortable temple tension matters because a short braid can look defined without being pulled tightly against the scalp.
Pro tip:
Begin the braid slightly behind the hairline so the section contains more usable length. This reduces flyaways while leaving the shortest front pieces available for framing.
Make It Work for You:
For a blunt bob, keep the braid narrow and let the strong bottom edge remain the main shape. The woven accent should add detail without hiding the perimeter.
Watch Out For:
Forcing short layers into a long braid can create tension and constant slipping. End the braid where the hair naturally reaches and secure it discreetly.
Long Hair Cascading Braid Hairstyle

Long hair gives a loose braid enough length to change gradually from controlled at the top to airy through the lower sections. Start the braid at the nape or slightly below it, keep the first few crossings moderately firm, then increase the width through the middle. Let the final section narrow again before the elastic so the braid has a flowing, tapered outline. A center or soft side part keeps the crown simple and allows the long braid to remain the main feature.
Very long straight, wavy, curly, or coily hair can use this structure, though natural texture changes how much loosening is necessary. Use lightweight leave-in conditioner to reduce friction through the length and a fabric-covered elastic to secure the end. A quick refresh means tightening the top crossing and smoothing the tail; a full wash-day version can take considerably longer due to drying and detangling.
If the braid feels heavy, keep more structure near the nape rather than increasing tension everywhere. For professional styling, specify the starting point, maximum width, and where you want the taper to begin. This helps the braid look intentional instead of equally loose from top to bottom.
Pro tip:
Expand the middle third most and leave the top and tail more compact. This creates a cascading shape while keeping the long braid supported at both ends.
Make It Work for You:
For very dense long hair, loosen fewer crossings and use the natural braid width. This reduces weight shifting while preserving the flowing outline.
Watch Out For:
Loosening every section equally can make a long braid stretch downward quickly. Keep structure near the nape so the style does not sag during wear.
Face-Framing Layer Braid Hairstyle
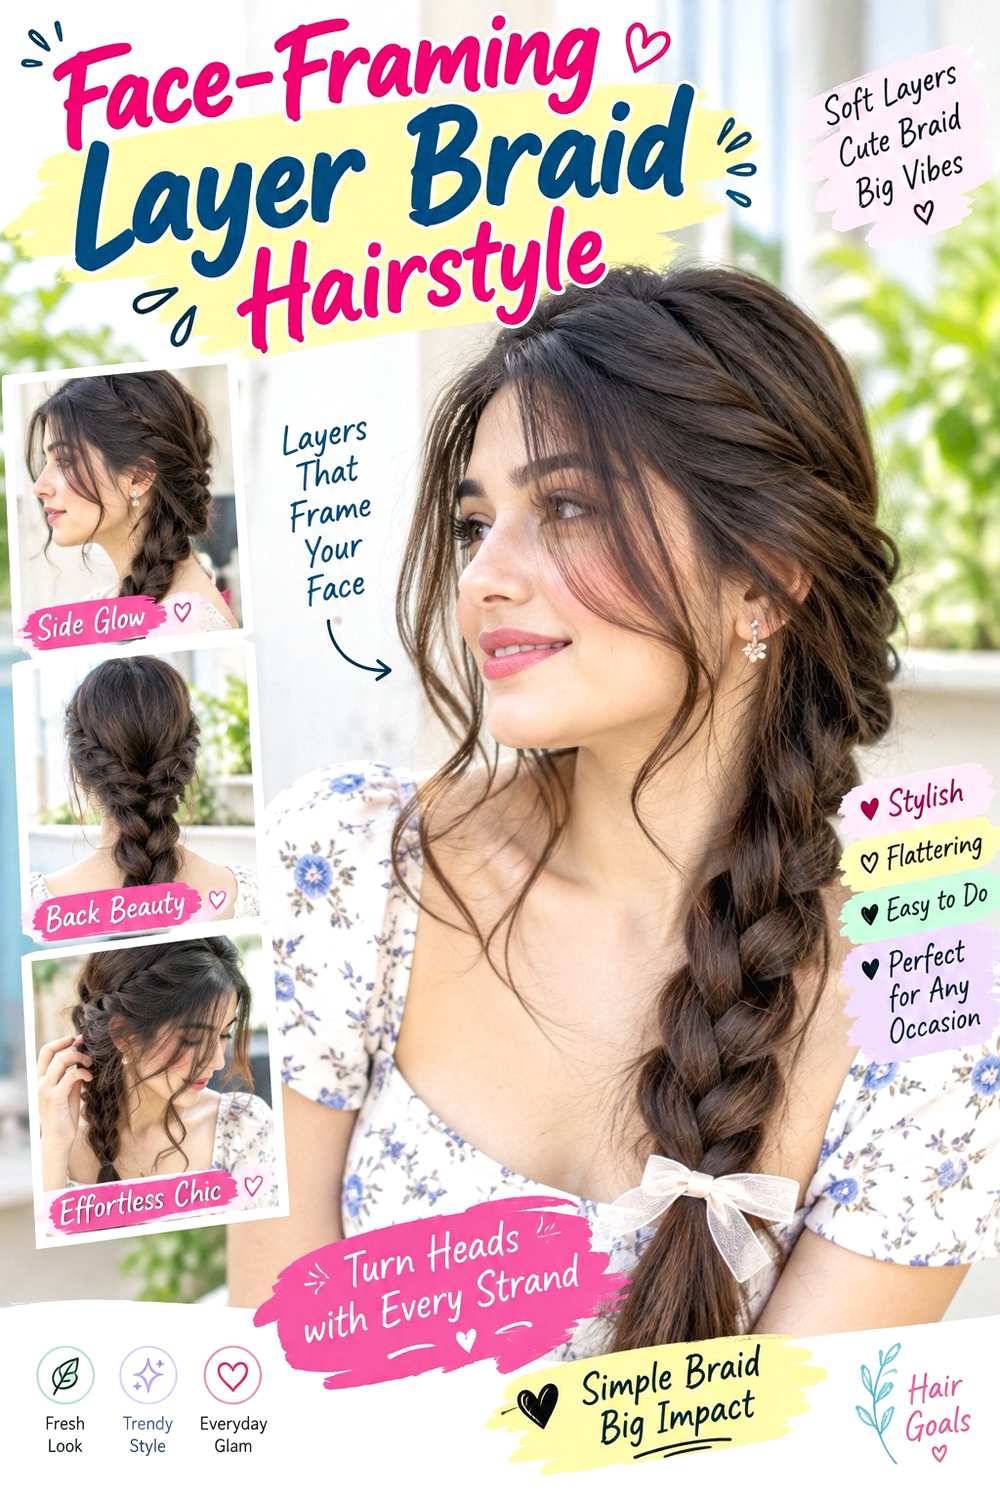
A loose braid can highlight face-framing layers when the shorter front pieces are separated before the longer hair is gathered. Choose a center or soft side part, leave the shortest layers around the cheekbone, jaw, or chin, then create a low braid with the remaining length. Keep the upper crossings neat and widen the lower section slightly so the braid looks soft without competing with the visible front pieces.
Straight and wavy hair shows the layered framing clearly, while curly hair needs the front length judged in its normal dry state. Apply heat protectant before shaping the front with a round brush, then use a small fabric-covered elastic to secure the braid. A quick refresh focuses on the face frame and top crossing; full wash-day styling takes longer according to density and drying time.
As front layers grow, they may stop sitting where intended even though the braid still works. At the salon, identify the exact landmark where you want the shortest layer to finish and explain that you often leave those pieces outside braids. This helps the front blend when worn down as well.
Pro tip:
Separate the face-framing layers before braiding the rest. Choosing them in advance keeps both sides balanced and prevents you from weakening the finished braid afterward.
Make It Work for You:
For fine hair, keep the front sections narrow so most density stays inside the braid. A small amount of framing can still create visible movement.
Watch Out For:
Pulling out too many side pieces can make the braid noticeably thinner. Keep the face frame intentional and leave the remaining side sections inside the braid.
Low Braided Ponytail Hairstyle
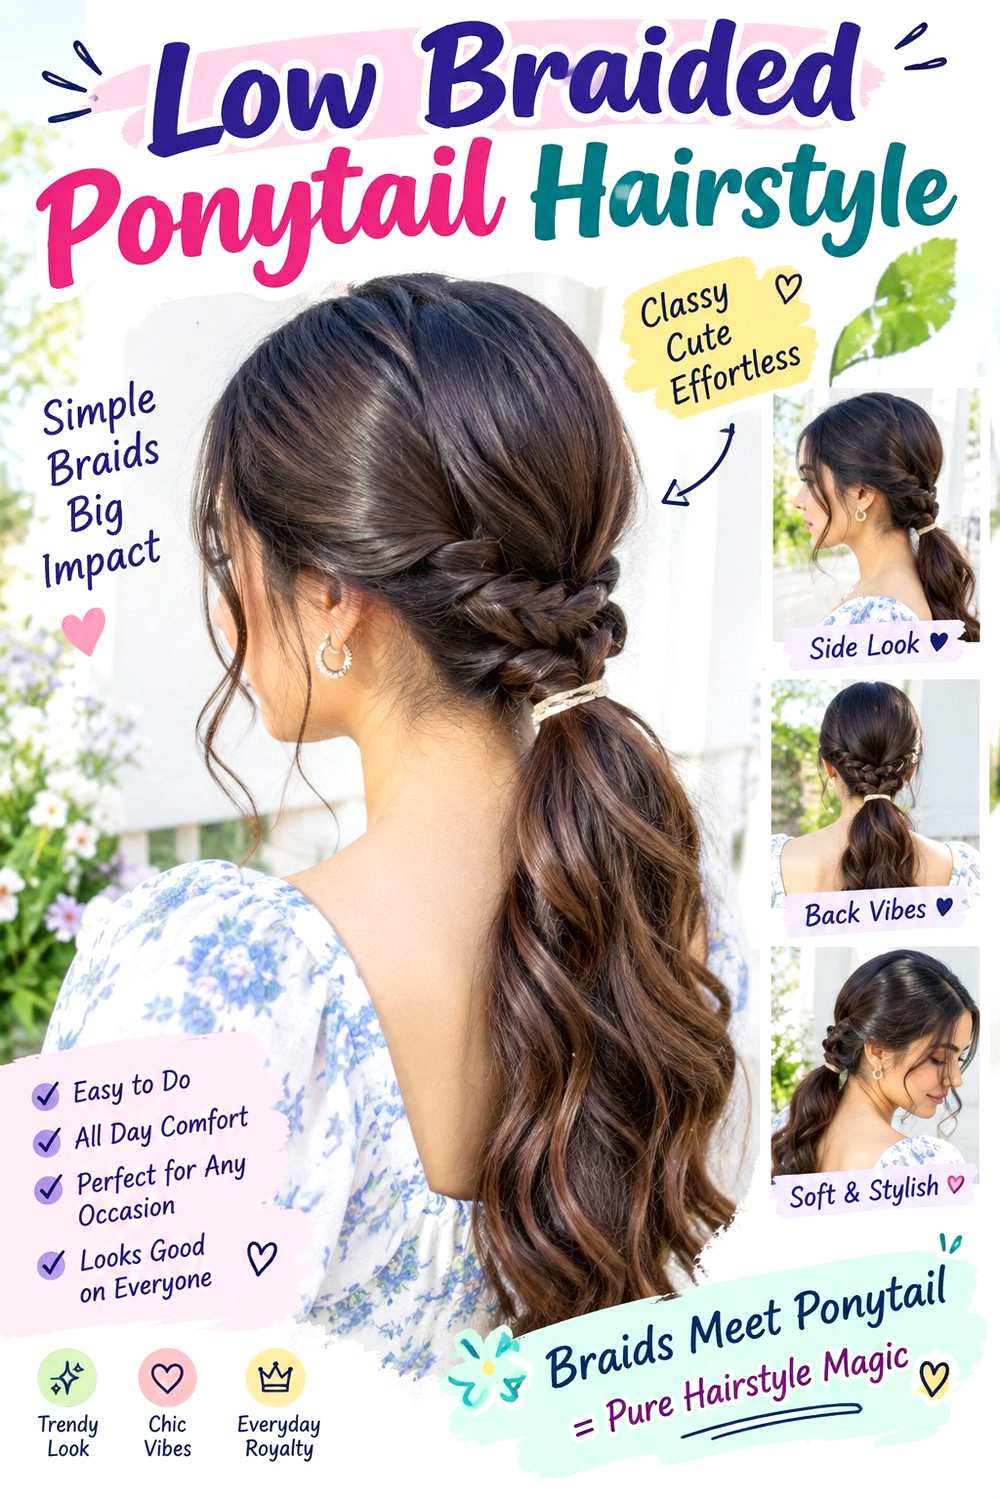
A low braided ponytail begins with a secure nape anchor, then places the braid entirely below it. Smooth or softly direct the crown toward a low ponytail, secure it first, and braid the loose length afterward. Keep the first crossings controlled, then widen the middle of the braid slightly for a relaxed finish. A center or side part can remain visible, while one or two narrow front pieces soften the hairline.
Medium to long hair works well, especially when you want the braid to stay stable during a long day. Use a soft-bristle brush to guide the surface, a fabric-covered elastic to create the ponytail base, and a second small elastic to secure the braid end. A quick refresh usually means tightening the lower braid or smoothing the crown; full wash-day styling depends on whether the starting texture needs drying or smoothing.
If the braid pulls downward, check the ponytail anchor rather than tightening the woven sections. For salon or event styling, specify the exact ponytail height, braid width, and comfortable tension around the nape. The separate anchor makes this version more structured than a braid that begins directly from loose hair.
Pro tip:
Secure the ponytail first and test its comfort before braiding the length. A stable, comfortable base makes it easier to loosen the braid without shifting the anchor.
Make It Work for You:
For dense hair, keep the ponytail base firm but use larger braid sections below it. This contains the weight without requiring a tightly woven length.
Watch Out For:
A very tight ponytail combined with a tight braid can create unnecessary tension. Keep the base secure, then let the woven section carry a softer finish.
Textured Wavy Side Braid Hairstyle
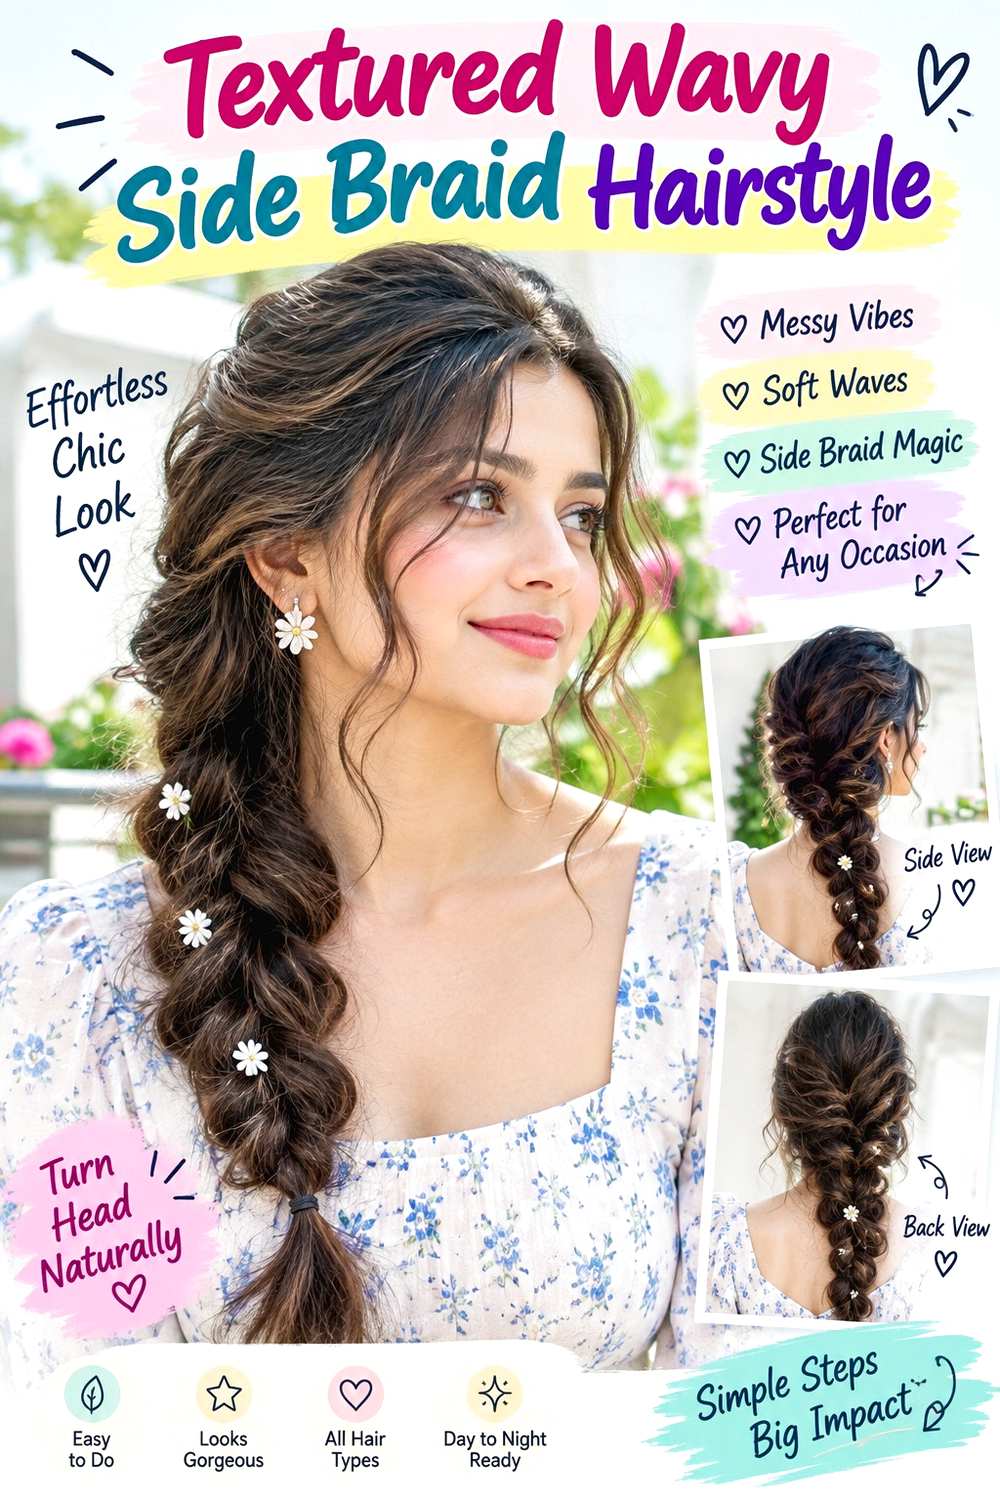
Naturally wavy hair creates a loose side braid with built-in texture, so the style can stay soft without much additional shaping. Keep your usual side or off-center part, gather the hair over one shoulder, and braid from just below the ear. Allow the surface waves to remain visible instead of smoothing them flat, and loosen only a few lower crossings. Shorter wavy pieces around the face can stay free, while the tail keeps its natural bend.
Medium to long wavy hair is especially practical for this between-wash style. Use lightweight mousse to support the existing wave pattern and a small fabric-covered elastic to secure the braid. A quick refresh may involve dampening one front section and rebuilding the first crossing; a full wash-day routine takes longer depending on density and whether you air-dry or use another drying method.
Avoid brushing aggressively before braiding, which can turn defined waves into unwanted puffiness. For salon shaping, explain which face-framing pieces you usually leave free and where they should finish when your hair is naturally wavy. For occasion styling, specify the braid side, width, and comfortable tension near the ear.
Pro tip:
Gather the braid while preserving the direction of your natural waves. Let those bends remain visible on the surface instead of stretching every section completely smooth first.
Make It Work for You:
For loose waves that flatten easily, keep the braid narrower and leave more hair around the front. The natural texture can provide softness without heavy pulling.
Watch Out For:
Brushing vigorously before braiding can erase wave groups and create frizz. Detangle earlier in your routine, then arrange the braid mostly with your hands.
Conclusion
Loose braid hairstyles for fall range from compact side braids and raised Dutch patterns to textured curls, double braids, decorative ribbons, and long cascading shapes. Fine hair generally benefits from controlled expansion, while dense hair can use broader sections without much pulling. Curly and coily textures can keep natural definition, and shorter cuts can use small accent braids instead of forcing every strand into one style. Side placement adds asymmetry, while center braids and double braids create more balance. Consider your length, density, natural texture, face-framing pieces, coat collars, and everyday effort together. A braid that follows your normal texture and stays comfortable at the base will usually require fewer corrections throughout the day.
Before Your Salon Visit
Choose one or two favorite braid references and save views that clearly show the starting point, braid width, loose pieces, and finished placement. Discuss your natural texture, density, face shape, preferred length, upkeep, and usual styling routine. Point out the exact face-framing pieces, braid tension, section size, accessory placement, or finish you like. Because most braids are temporary, focus on comfortable anchoring and realistic hold rather than requesting a haircut solely to recreate the braided style.
FAQs
How do I loosen a braid without making it fall apart?
Finish and secure the braid first, then gently pull only the outer edges of selected crossings. Keep the first few sections near the base more compact because they carry much of the structure. If the braid starts slipping, rebuild the loose upper crossing instead of continuing to widen the rest.
Can loose braids work on fine or lower-density hair?
Yes. Use smaller sections, keep the center of the braid compact, and widen only a few outer loops. Leaving fewer face-framing pieces can also preserve more hair inside the braid. An airy effect comes from controlled expansion, not from stretching every crossing as wide as possible.
How should I braid curly or coily hair without losing its texture?
Work with the existing curl or coil pattern instead of brushing it completely smooth first. Keep tension comfortable, preserve selected front curls, and use normal shrinkage to guide the finished length. A loose braid can show natural texture through its surface while still maintaining a stable woven structure.
How can I stop a loose braid from rubbing against fall scarves and coats?
Choose a side, center, or higher starting point that keeps the thickest part of the braid away from the collar edge. You can also bring a long braid forward over one shoulder. Test the placement with your usual outerwear before loosening the final crossings.