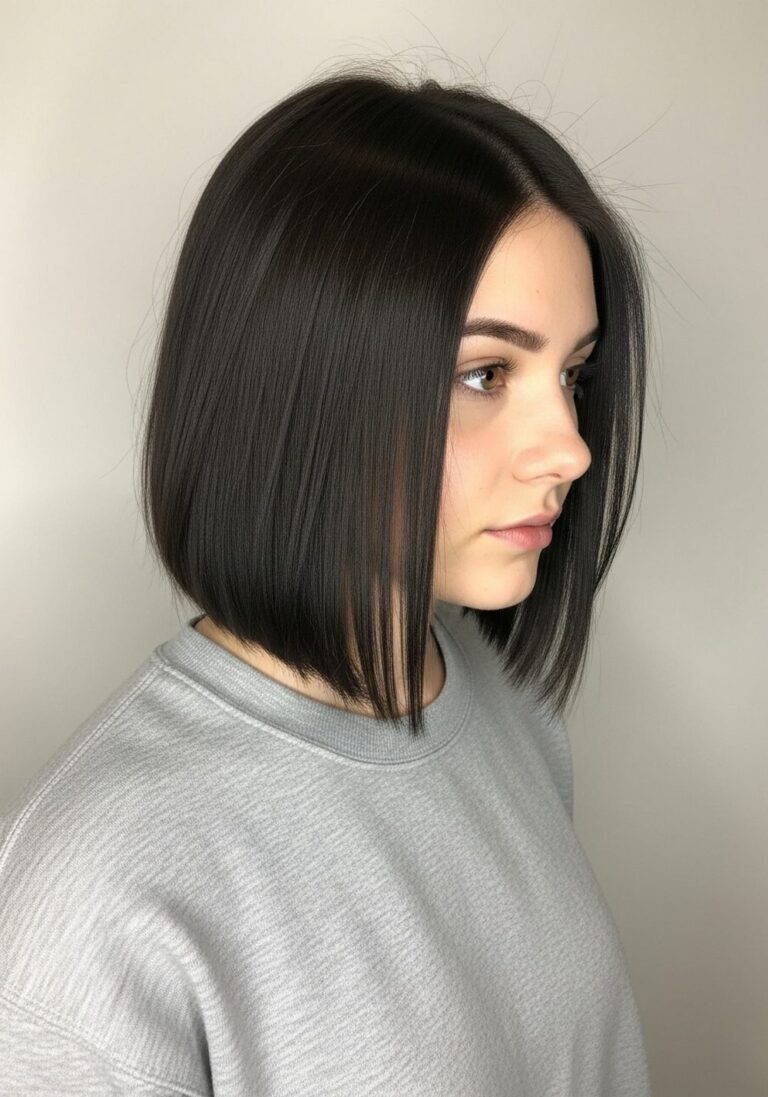
15 Brushed-Out Crimp Wave Hairstyle Ideas
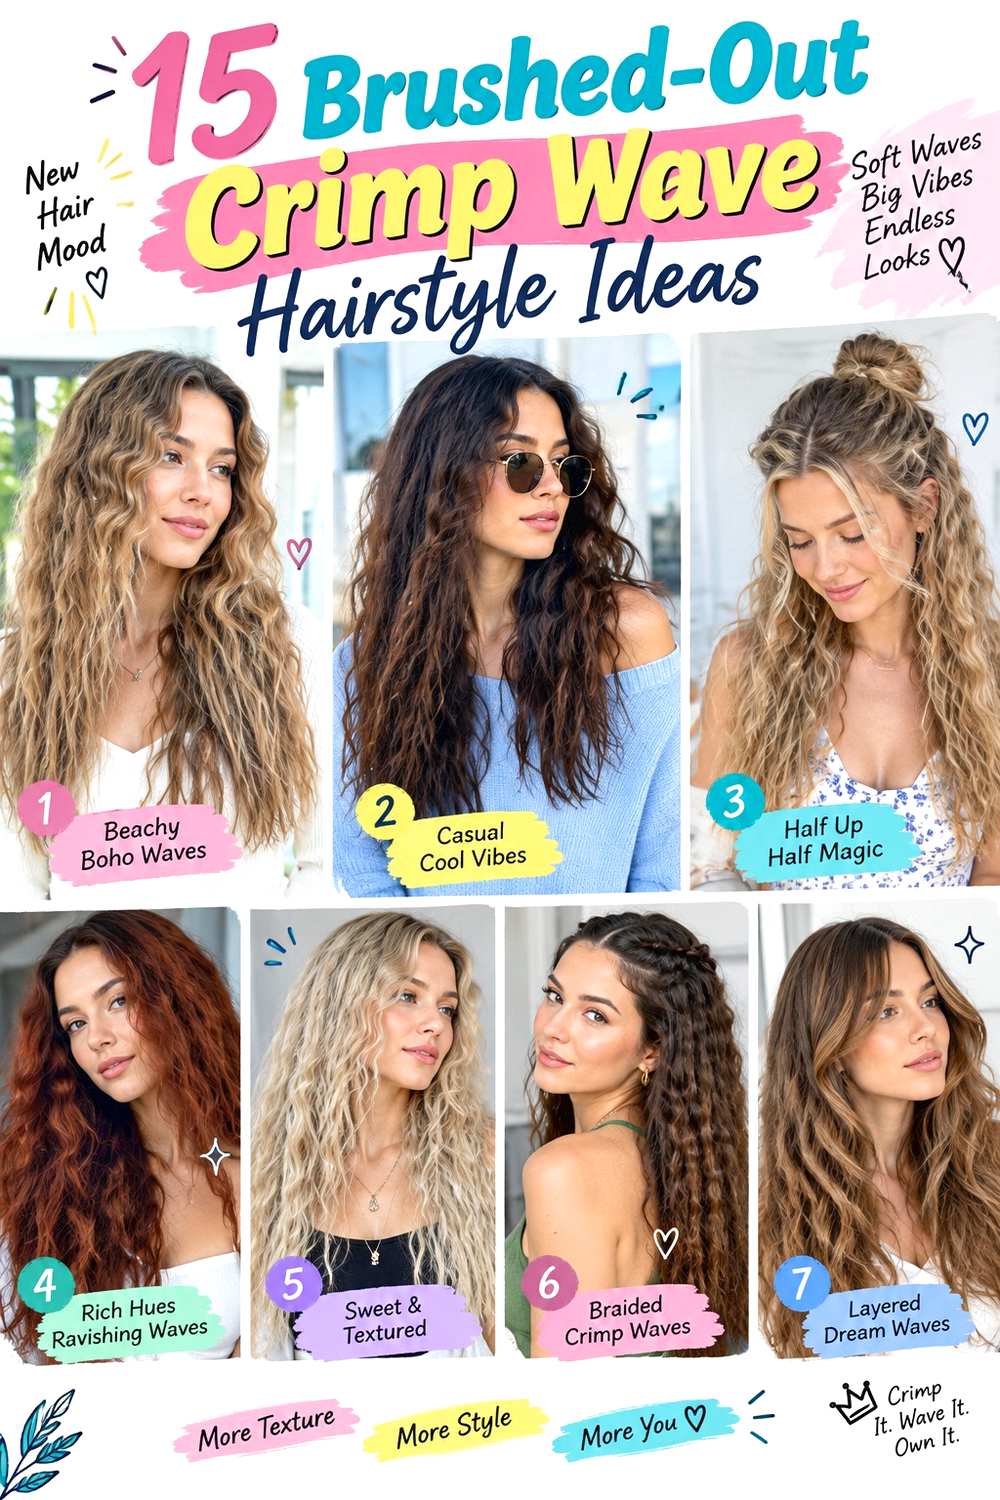
Brushed-out crimp wave hairstyles soften the sharp zigzag pattern of traditional crimping into a fuller, cloudier texture. The defining shape comes from repeated bends that are gently separated after cooling, creating movement through the mid-lengths and ends instead of leaving each ridge highly defined. Hair can be worn long, bobbed, layered, center-parted, or side-parted, with fringe kept smoother or blended into the texture. The amount of brushing controls whether the finish looks airy, fluffy, or more clearly waved.
Straight and naturally wavy hair can take the pattern readily, while curly or coily hair may need a different preparation depending on whether the goal is to preserve some natural texture or create a more uniform crimp. Density also changes the result: fine or lower-density hair often benefits from smaller sections and restrained brushing, while dense hair may need deliberate sectioning so the interior does not become overly bulky. Face-framing can begin around the cheekbones, jaw, or lower.
Most versions require heat styling, so the full process is longer than a simple morning refresh. A next-day touch-up may involve reshaping only flattened areas and controlling frizz, while a complete set means drying, sectioning, crimping, cooling, and then brushing. Styling effort and haircut maintenance should be treated separately.
Quick List
- Center-Part Brushed-Out Crimp Wave Hairstyle
- Deep Side-Part Brushed-Out Crimp Wave Hairstyle
- Crown-Lift Brushed-Out Crimp Wave Hairstyle
- Mid-Length Brushed-Out Crimp Wave Hairstyle
- Face-Framing Brushed-Out Crimp Wave Hairstyle
- Blunt Bob Brushed-Out Crimp Wave Hairstyle
- Long Layered Brushed-Out Crimp Wave Hairstyle
- Curtain Fringe Brushed-Out Crimp Wave Hairstyle
- Fine Crimp Brushed-Out Wave Hairstyle
- Wide Crimp Brushed-Out Wave Hairstyle
- Low Pony Brushed-Out Crimp Wave Hairstyle
- Half-Up Brushed-Out Crimp Wave Hairstyle
- Curly-Blend Brushed-Out Crimp Wave Hairstyle
- Sleek-Root Brushed-Out Crimp Wave Hairstyle
- Airy-End Brushed-Out Crimp Wave Hairstyle
Center-Part Brushed-Out Crimp Wave Hairstyle

A precise center part gives the soft crimp texture an even frame on both sides of the face. Keep the roots comparatively smooth, begin the repeating bends around temple or cheekbone level, and continue through the length before gently separating the cooled pattern. The result should look full through the sides without becoming triangular at the ends. Long and medium hair show the repeated movement clearly, while face-framing layers can blend into the first softened bends.
For heat styling, use heat protectant before a crimping iron, then finish with a wide-tooth comb to soften the pattern without completely erasing it. Fine or lower-density hair usually needs smaller sections and less combing so the ends retain substance; dense hair can handle broader sections but may need the interior separated carefully. A quick next-day refresh should focus only on flattened pieces, while a full wash-day set takes considerably longer because every section must cool before brushing. Frizz can be controlled by handling the surface lightly rather than repeatedly combing it.
At a salon styling appointment, specify where you want the first crimp to begin and how much smooth root area should remain around the center part. That starting point strongly changes the finished width.
Pro tip:
Let every crimped section cool completely before separating it, especially near the front. Cooling helps the bend hold while still allowing a softer brushed finish afterward.
Make It Work for You:
If your hair is fine, keep the root area smooth and brush only once or twice through the lower lengths. This preserves visible wave without making the ends look overly airy.
Watch Out For:
Avoid starting the crimp too close to the scalp on both sides of a center part. Excess root width can overpower the face; begin slightly lower instead.
Deep Side-Part Brushed-Out Crimp Wave Hairstyle
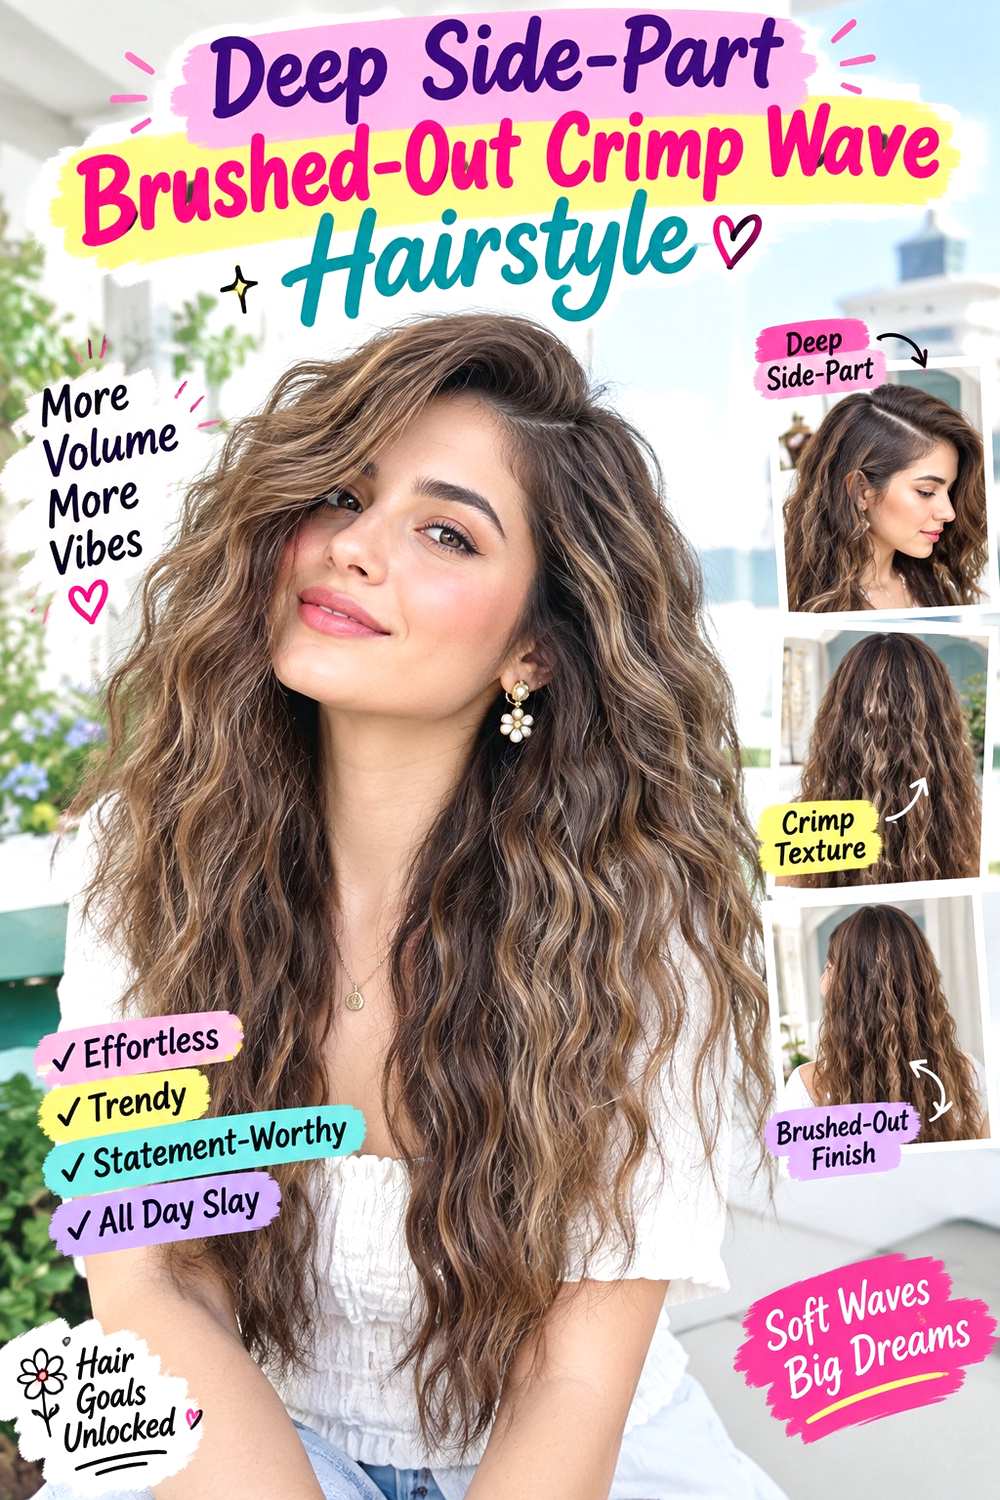
A deep side part shifts most of the brushed-out volume to one side, making the crimp texture look more directional than symmetrical. Keep the lighter side closer to the head and allow the fuller side to carry broad, softened bends from around the temple downward. The ends can stay slightly straighter so the volume does not become too round. Shorter front layers may sweep across the forehead or blend into the larger side section.
Use heat protectant before a crimping iron, then soften the cooled texture with a paddle brush for a broader, less separated finish. Medium and long hair give the side sweep enough length to move, while dense hair may need smaller interior sections so the heavy side does not become excessively wide. A quick refresh can target only the flatter top pieces and the front sweep; a full wash-day style requires complete sectioning and therefore takes longer. If the part loses definition overnight, reset it before touching the waves so you do not reshape unnecessary areas.
For salon styling, show how deep you want the part and where the first visible bend should begin on the heavier side. Keeping the lighter side smoother creates intentional contrast instead of uniform volume around the whole head.
Pro tip:
Direct the fuller side away from the part while the crimped hair cools. This helps the brushed texture fall with the side sweep rather than back toward center.
Make It Work for You:
If your hair is dense, keep the lighter side only softly textured and concentrate stronger crimping through the fuller side. This controls width while preserving the asymmetrical idea.
Watch Out For:
Do not brush both sides to the same fullness after creating a deep part. Preserve the flatter side so the directional shape remains visible and balanced.
Crown-Lift Brushed-Out Crimp Wave Hairstyle
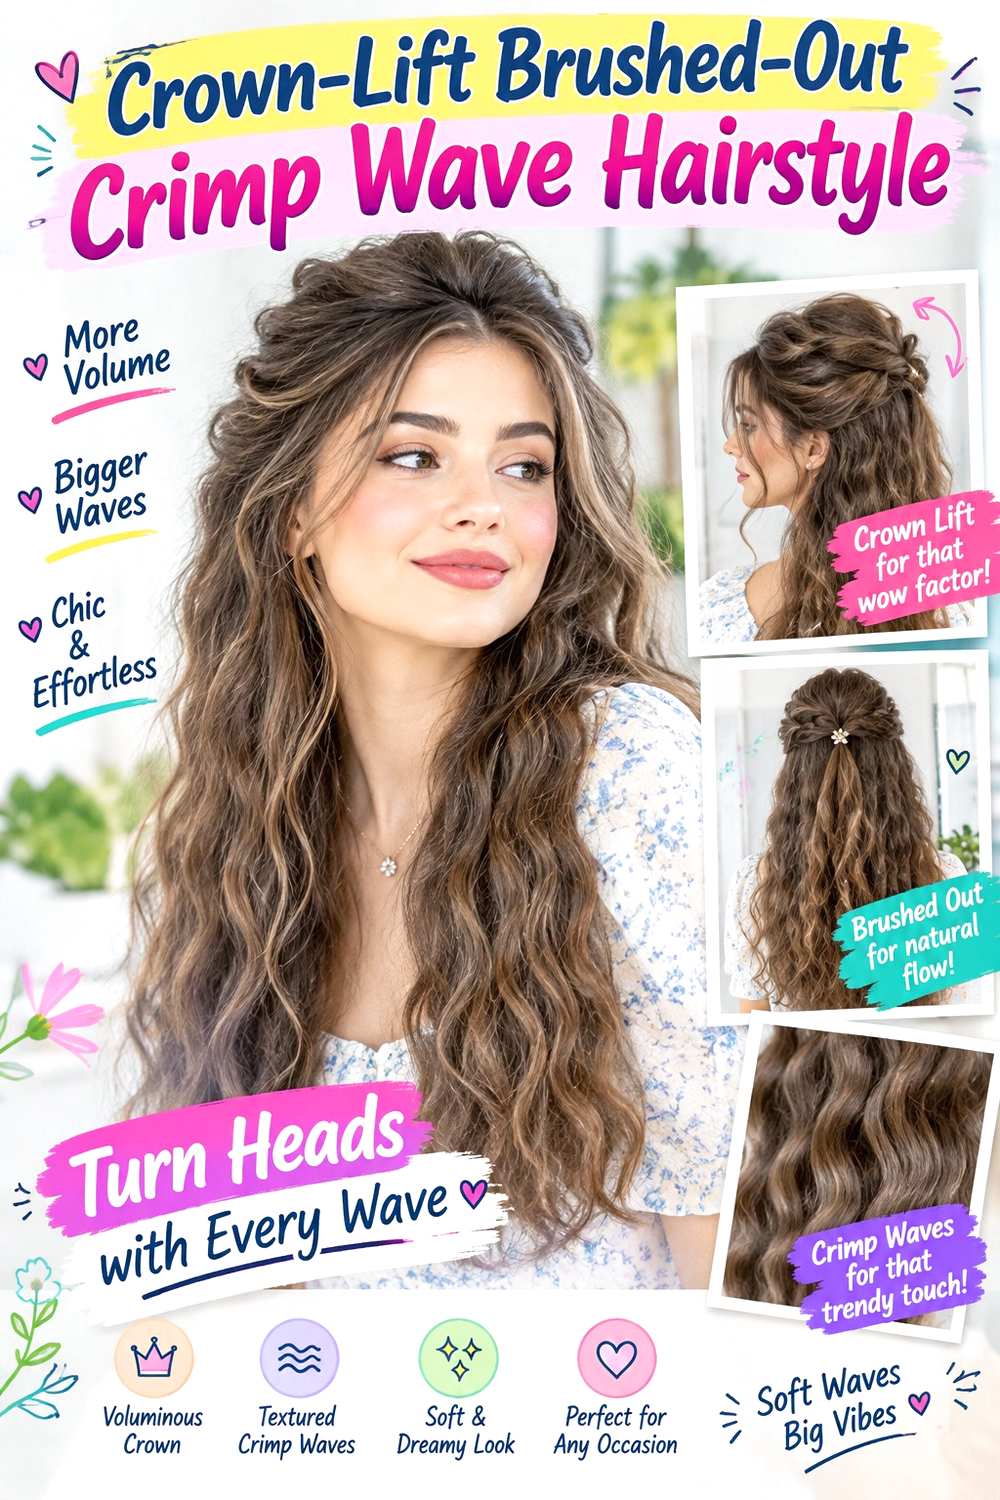
This version concentrates lift through the crown before the crimp pattern expands through the lower hair. Keep the first inch or two near the hairline smoother, build controlled height behind the top of the head, and begin the crimp through the upper mid-lengths. Once brushed, the texture should rise behind the crown and then fall into airy waves rather than spreading equally at the temples. A center or soft off-center part both work with the lifted profile.
Use heat protectant before a crimping iron and root-lift spray only at the crown where extra support is needed. Medium and long hair provide enough length for the raised top to transition gradually into the textured ends. Fine hair can benefit from restrained root lift, while dense hair should avoid excessive product near the crown because the crimp itself already adds fullness. A quick refresh may involve lifting the crown and re-crimping only a flattened top section; full wash-day styling takes longer because root direction and the entire crimp set need rebuilding.
At a salon styling appointment, specify exactly where the crown height should peak and where the crimp should begin. Keeping the volume behind the top rather than beside the temples prevents the silhouette from becoming uniformly wide.
Pro tip:
Direct the crown sections upward as they cool instead of pressing them flat. This supports height without requiring heavier product after the crimp pattern has been softened.
Make It Work for You:
For fine strands, use subtle crown lift and keep the lower crimp airy rather than oversized. The hairstyle gains height without sacrificing too much visual density at the ends.
Watch Out For:
Avoid adding root-lift spray throughout the whole head. Too much support plus brushed crimping can create unwanted width instead of focused crown volume.
Mid-Length Brushed-Out Crimp Wave Hairstyle

Leaving the roots and lower tips relatively smooth makes the crimp texture feel concentrated through the middle of the hair. Begin the pattern around cheekbone or jaw level, continue through most of the mid-lengths, and stop before the last few inches. After cooling, brush only enough to soften the ridges into connected bends. The straighter roots keep the crown controlled, while the quieter ends give the style a lighter finish than all-over crimping.
Use heat protectant before a crimping iron, then a wide-tooth comb to merge the mid-length pattern without disturbing the straighter ends. Medium and long hair work best because there is enough distance to show three distinct zones: smooth root, textured middle, and softer tip. Fine hair may benefit from this approach because the ends retain more visual weight, while dense hair can use the smoother root area to control bulk. A quick refresh targets only sections where the middle pattern has flattened; a full wash-day set takes longer but does not require crimping every inch.
At a salon styling appointment, specify both the starting and stopping points of the texture. Those landmarks matter more than making every ridge identical because the contrast creates the design.
Pro tip:
Leave a small gap between the final crimped section and the ends. That straighter finish makes the brushed texture look softer and helps the perimeter remain defined.
Make It Work for You:
If your ends are sparse, extend the smoother tip section slightly higher. You keep the crimped movement through the middle while preserving a more substantial-looking lower edge.
Watch Out For:
Do not keep crimping downward automatically once the mid-length pattern is complete. Over-texturing the tips can make the intended three-zone shape disappear.
Face-Framing Brushed-Out Crimp Wave Hairstyle

Face-framing sections can carry a softer version of the crimp while the back stays fuller. Start the front bends around the cheekbones or jaw, depending on where you want movement to appear, and use slightly larger sections around the face so the texture does not become too busy. The back lengths can take a more continuous crimp pattern, then be brushed into airy waves. A center part suits balanced framing, while a side part allows one front section to sweep more dramatically.
Use heat protectant before a crimping iron and finish with flexible hairspray to support the softened bends without making them stiff. Medium to long layered hair gives the front sections room to move independently from the back. Fine hair benefits from restrained brushing around the face, while dense hair can use slightly larger front sections to avoid excess width. A quick refresh should focus on the first few face-framing pieces rather than resetting the whole head; full wash-day styling requires complete crimping and cooling.
For a salon styling appointment, point out exactly where the shortest face-framing piece finishes and where you want its first visible bend. This keeps the front movement deliberate and prevents the texture from starting too high around the cheeks.
Pro tip:
Crimp the front sections with slightly less pressure than the back if you want a softer frame. The pattern will blend more naturally once brushed.
Make It Work for You:
For shorter face-framing layers, begin the crimp lower on those pieces and leave the tips smoother. This keeps the framing light instead of creating excessive width near the cheeks.
Watch Out For:
Avoid brushing the front sections repeatedly in an attempt to soften them. Overworking them can create frizz and erase the controlled face-framing bend.
Blunt Bob Brushed-Out Crimp Wave Hairstyle

A blunt bob turns brushed-out crimping into a compact, full shape with a clearly visible bottom edge. Keep the roots moderately smooth, begin the texture around temple or cheekbone level, and stop just before the ends so the perimeter remains recognizable. The crimped sections should be small enough to create movement but not so fine that the bob expands into a round halo. A center or side part can work, while short fringe may stay smoother for contrast.
Use heat protectant before a crimping iron and soften the cooled texture with a wide-tooth comb. Chin- to shoulder-length bobs show the technique most clearly because the wave pattern has limited space and therefore changes the silhouette quickly. Lower-density hair should be brushed cautiously to protect the fullness of the blunt edge; dense hair may need slightly larger sections so the sides do not spread too far. A quick refresh often means reshaping only one flattened side, while a full wash-day set is shorter than on long hair but still requires careful cooling.
At a salon visit, ask to preserve the strength of the bottom edge if you like the blunt silhouette, and explain that you plan to wear brushed crimp texture so bulk placement can be considered.
Pro tip:
Stop the crimp slightly above the blunt perimeter and leave the tips quieter. This keeps the bottom edge visible instead of turning the entire bob into one expanded shape.
Make It Work for You:
If your bob is very dense, use broader crimp sections and brush lightly. You can keep the textured surface without adding unnecessary width through the sides.
Watch Out For:
Do not over-expand a lower-density bob with aggressive brushing. The perimeter may look thinner once the crimp is pulled apart, so soften the texture gradually.
Long Layered Brushed-Out Crimp Wave Hairstyle
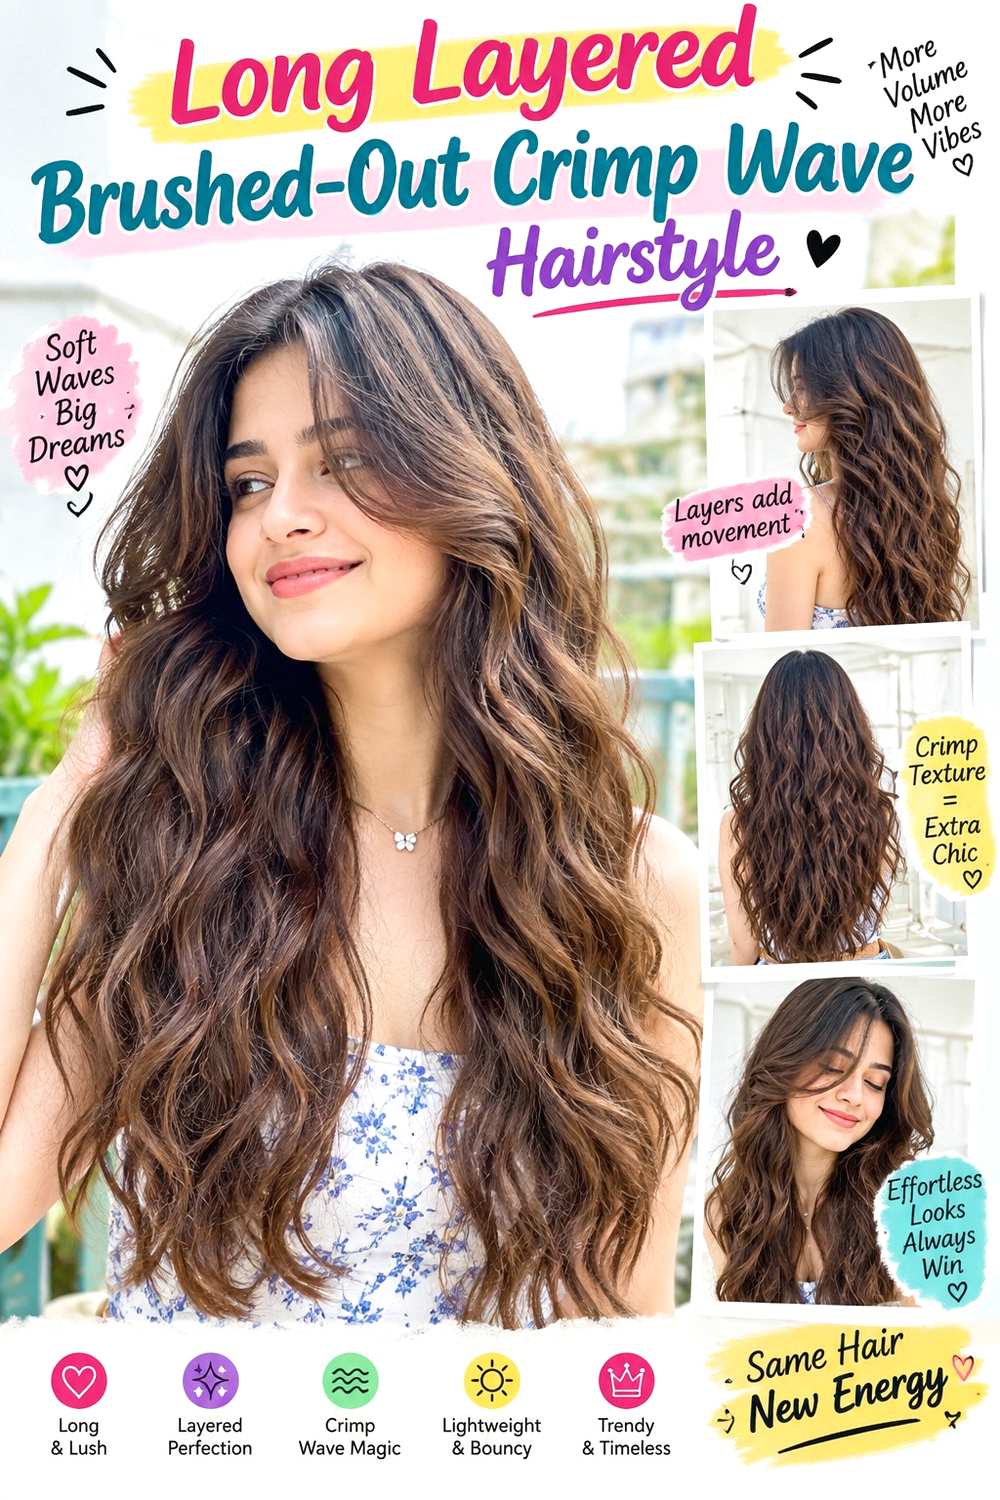
Long layers allow the brushed-out crimp pattern to break at different lengths, creating movement without making the entire shape look uniformly heavy. Begin the texture below the crown, crimp through the longer sections, and let cheekbone-, jaw-, or collarbone-level layers separate naturally after brushing. The longest ends can stay slightly straighter, while the shorter layers show more airy bends around the upper body of the style. A center or soft side part both suit this layered movement.
Use heat protectant before a crimping iron and flexible hairspray after brushing to keep the softened pattern from collapsing too quickly. Long layered hair takes time to section, so a full wash-day set is a longer styling session; a next-day refresh should target only the pieces that have lost definition. Fine or lower-density hair benefits from controlling how much the shortest layers are expanded, while dense hair can use the layered structure to distribute volume. Frizz control comes from letting each section cool before separation rather than repeatedly brushing.
At a salon appointment, show where you want the shortest visible layer to begin and explain that you plan to create brushed crimp texture. Excessive removal through the lower lengths can change how full the ends look once expanded.
Pro tip:
Brush the longest layers first, then assess the shorter ones before touching them. Upper layers often need less separation because they already lift away from the base.
Make It Work for You:
If your ends are fine, keep the lower layers fuller and concentrate most of the brushed texture higher up. This preserves movement without making the perimeter look sparse.
Watch Out For:
Avoid crimping every layer with identical intensity. Shorter sections can become disproportionately fluffy, so reduce pressure or brushing where the hair already has natural lift.
Curtain Fringe Brushed-Out Crimp Wave Hairstyle
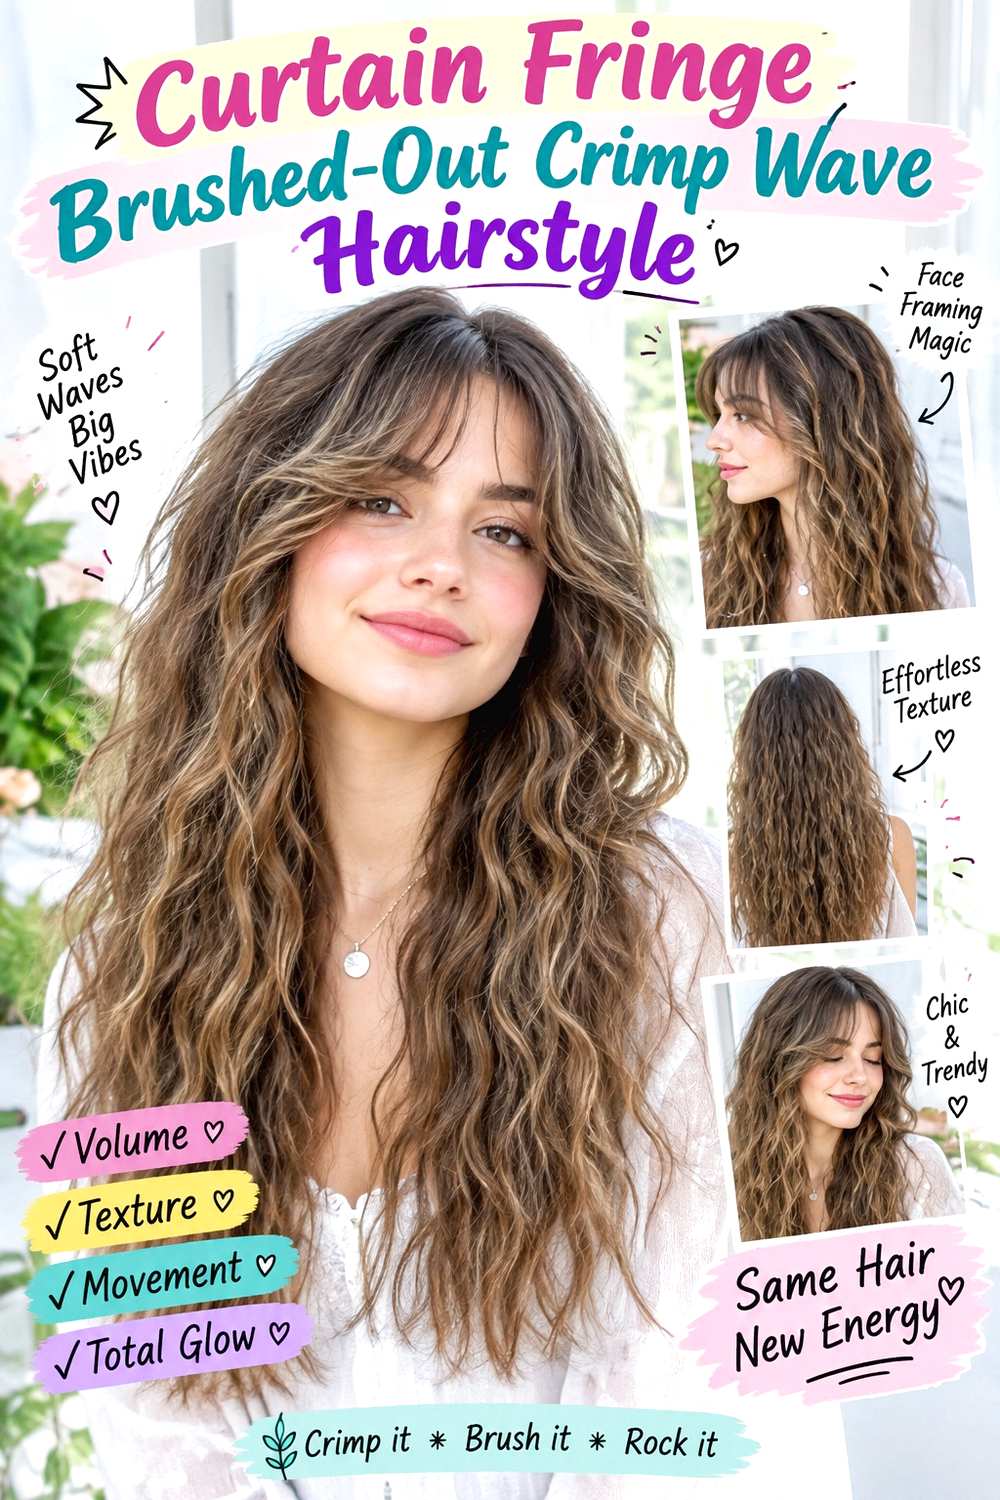
Curtain fringe creates a smoother opening through the front while the brushed-out crimp begins farther back. Part the fringe in the center, shape it so the shortest area sits around brow or cheek level, and let the outer corners blend toward the temples. Begin stronger crimping behind the fringe or lower on its longer edges, then carry the pattern through the rest of the hair. This keeps the front readable instead of turning the entire fringe into fine zigzags.
Use heat protectant before a crimping iron and a round brush for the fringe’s curved, separated shape. Medium and long hair give the outer fringe corners enough room to connect with the textured lengths. A quick morning refresh may involve only the fringe because it can lose shape faster than the crimped body; a full wash-day set takes longer because the fringe and lengths require different styling methods. If the fringe grows into the eyes or stops opening cleanly, that is a more useful upkeep signal than a fixed trim schedule.
At a salon appointment, discuss the finished dry fringe length, the outer-corner blend, and your preferred center opening. Keep the crimp pattern secondary around the fringe so its shape remains distinct.
Pro tip:
Style the curtain fringe before brushing the crimped lengths. Keeping those tasks separate helps prevent the front from being accidentally pulled into the fluffier texture.
Make It Work for You:
For wavy or curly fringe, work with the natural bend and keep the crimp mostly behind it. The center opening can stay soft without forcing a different front texture.
Watch Out For:
Do not crimp short fringe sections too close to the root. Strong bends near the forehead can make the fringe spring upward instead of framing smoothly.
Fine Crimp Brushed-Out Wave Hairstyle
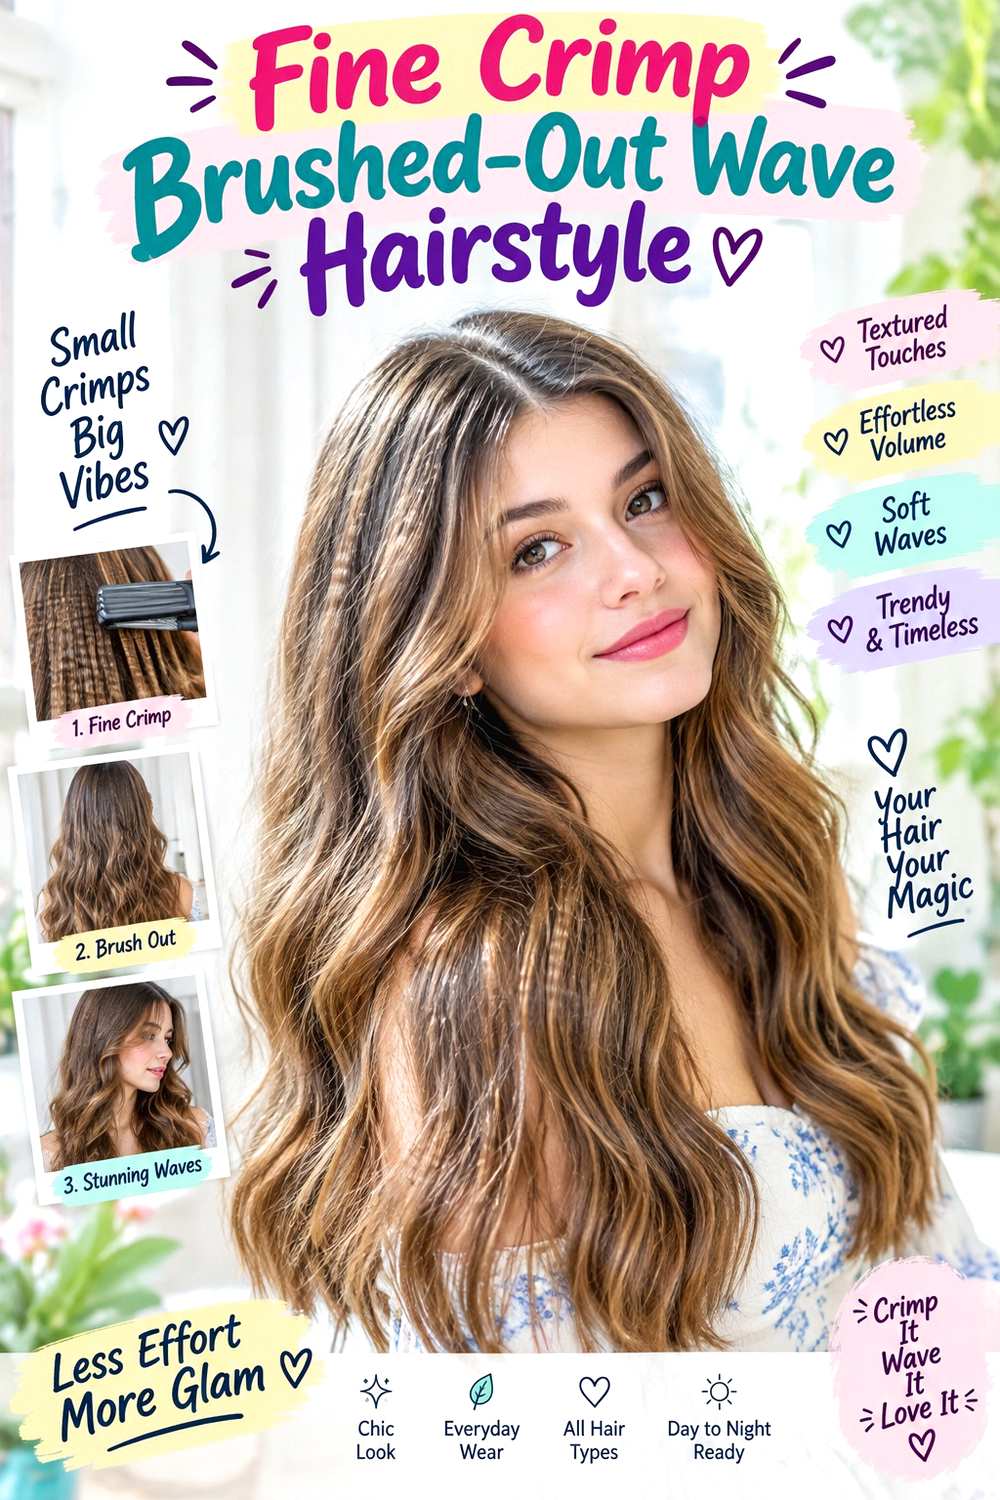
A fine crimp pattern creates many small bends that become cloud-like once brushed, producing the most diffuse texture in this group. Keep the sections narrow, work from below the root area through the mid-lengths, and stop before the tips if you want a lighter perimeter. After the pattern cools, brush gradually until the tiny ridges merge into soft volume rather than disappearing completely. A simple center or off-center part lets the detailed texture remain the main feature.
Use heat protectant before a fine-plate crimping iron and finish with flexible hairspray once the texture reaches the desired softness. Medium and long hair show the repeated pattern most clearly. Fine strands can gain visible fullness, but lower-density hair should be brushed cautiously because separating every tiny ridge can make the ends look airy. Dense hair may need smaller working sections and more time to ensure the interior is styled evenly. A quick refresh targets only flattened areas; a full wash-day set is relatively time-intensive because fine crimping requires many passes.
At a salon styling appointment, specify that you want small-scale crimping softened into volume rather than left sharply defined. Also explain where you want the pattern to start so the root area does not become too wide.
Pro tip:
Brush the fine crimp in stages, checking the shape after each pass. Once the tiny ridges are fully dispersed, it is difficult to restore their definition without restyling.
Make It Work for You:
For lower-density hair, leave more definition in the lower half and brush mainly through the upper lengths. This creates fullness without making the ends overly wispy.
Watch Out For:
Avoid repeatedly passing the hot tool over the same section to intensify the fine pattern. One controlled pass is preferable to unnecessary repeated heat exposure.
Wide Crimp Brushed-Out Wave Hairstyle
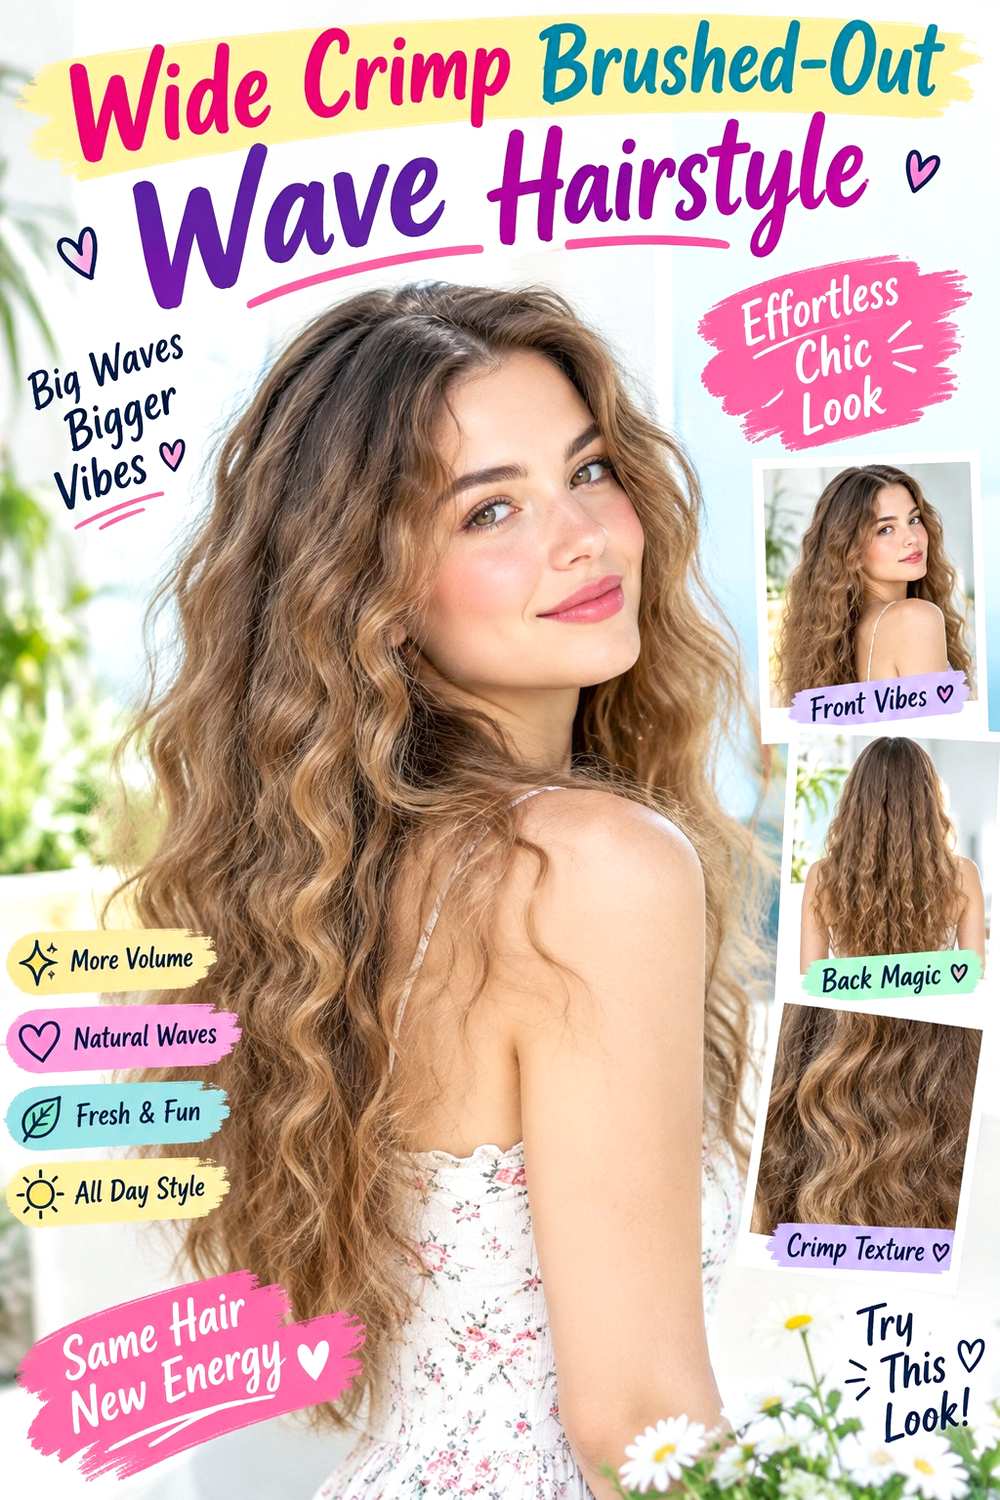
Wide crimping creates larger, slower bends that resemble broad waves once brushed, giving the style more movement and less fluffy expansion. Start the pattern below the root, use larger sections through the mid-lengths, and leave the final tips slightly straighter for contrast. When the hair cools, soften the ridges enough that neighboring bends connect without disappearing. The finish works especially well on medium and long hair where the wider pattern has room to repeat several times.
Use heat protectant before a wide-plate crimping iron and a paddle brush to merge the cooled ridges into broad movement. Fine or lower-density hair can benefit from the larger wave because it adds shape without creating as much diffuse separation as micro-crimping. Dense hair may still need careful sectioning so the interior pattern matches the surface. A quick refresh usually involves only one or two flattened panels; a full wash-day set takes longer but can be faster than fine crimping because each pass covers more area. Frizz is easier to control when brushing is limited.
At a salon styling appointment, specify how broad you want the wave and where the first bend should sit. A wider crimp beginning near the cheekbones creates a very different proportion from one starting at the crown.
Pro tip:
Align each wide crimping pass carefully with the previous one so there are no abrupt flat gaps. The brushed result will flow more continuously from bend to bend.
Make It Work for You:
If your hair is fine, keep the wide wave slightly more defined through the lower lengths. The larger pattern adds movement while preserving a substantial-looking perimeter.
Watch Out For:
Do not overbrush wide crimps until they become shapeless. A few deliberate passes are usually enough to soften the ridges while retaining broad wave movement.
Low Pony Brushed-Out Crimp Wave Hairstyle

A low ponytail concentrates the brushed crimp texture through the tail while keeping the crown calmer. Create a center or side part, leave the roots smooth, and gather the hair at the nape after crimping and cooling the lengths. Brush the ponytail section until the zigzags become soft waves, then secure it low enough that the texture can fall freely without bunching against the neck. Face-framing pieces may remain loose and can be smoother than the tail.
Use heat protectant before a crimping iron and a fabric-covered elastic to form the ponytail after the texture is finished. Medium and long hair work best because the crimped tail needs enough length to show movement below the base. A quick refresh often means touching up one flattened area of the tail and smoothing the crown; a full wash-day version takes longer because the texture should be created before gathering. Dense hair may need slightly looser brushing so the ponytail does not become overly wide, while fine hair can keep more defined crimp through the lower half.
At a styling appointment, specify the nape height and whether you want the crimp to begin above or only below the ponytail base.
Pro tip:
Create and cool the crimp before securing the ponytail. Styling the pattern after gathering can produce uneven pressure and make the back sections difficult to reach consistently.
Make It Work for You:
For fine hair, keep the upper half of the tail softly brushed and the lower half slightly more defined. This preserves both movement and visible density.
Watch Out For:
Do not tighten the ponytail repeatedly if the textured tail feels heavy. Reset the base once instead of adding scalp tension to compensate for extra volume.
Half-Up Brushed-Out Crimp Wave Hairstyle
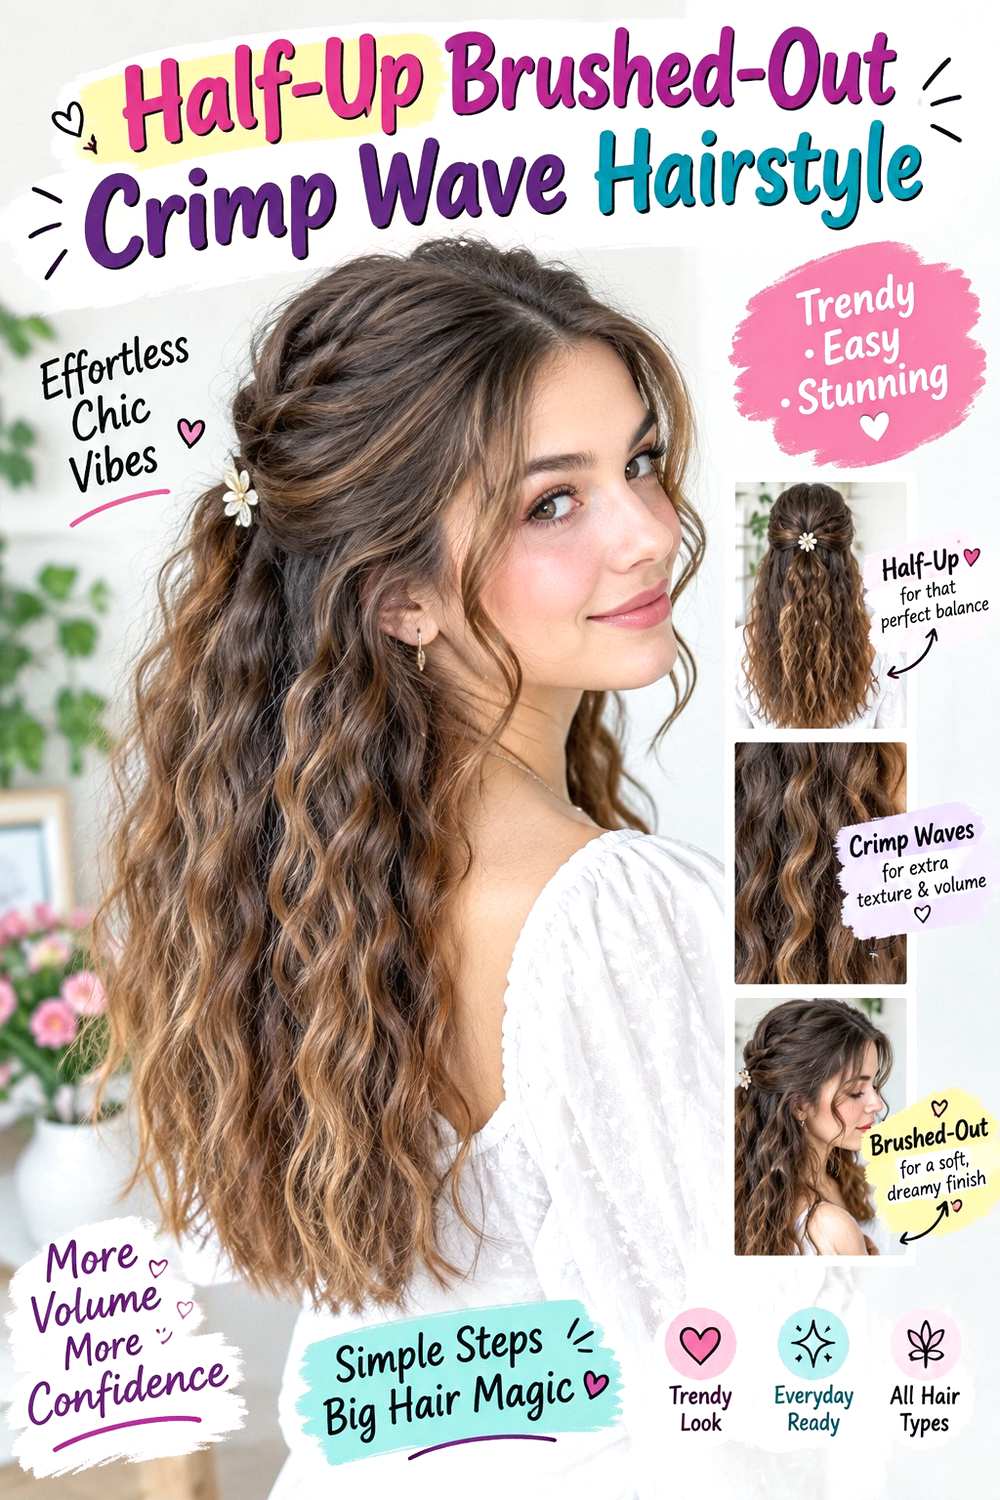
A half-up section controls crown volume while leaving the brushed crimp texture visible through most of the length. Create the crimp through the loose hair first, cool it completely, then gather shallow sections from above the ears toward the rear crown. Keep the upper section relatively smooth so the lower texture provides the contrast. A center part feels balanced, while a soft side part adds more movement around one temple. Face-framing layers can stay free and carry lighter bends.
Use heat protectant before a crimping iron and a small fabric-covered elastic to secure the half-up section. Medium and long hair give the loose lengths enough room to show the softened pattern. Fine hair benefits from gathering only a small upper section so the lower body remains full; dense hair can use a broader section to control width around the sides. A quick refresh may mean resetting the half-up base and touching only flattened lower pieces, while a full wash-day set takes longer because the entire texture must be recreated before gathering.
At a salon styling appointment, specify the rear-crown anchor height and how much hair should remain loose. If you want face-framing layers, identify their finished length separately from the temporary half-up placement.
Pro tip:
Brush and soften the crimp before creating the half-up anchor. This avoids disturbing the gathered section later when you are trying to loosen the texture below.
Make It Work for You:
For dense hair, gather a slightly broader upper section while leaving the lower texture airy. This reduces side width without removing the defining brushed crimp pattern.
Watch Out For:
Avoid securing the half-up section too tightly against the crown. Flattening the top excessively can make the transition into the voluminous lower texture look abrupt.
Curly-Blend Brushed-Out Crimp Wave Hairstyle
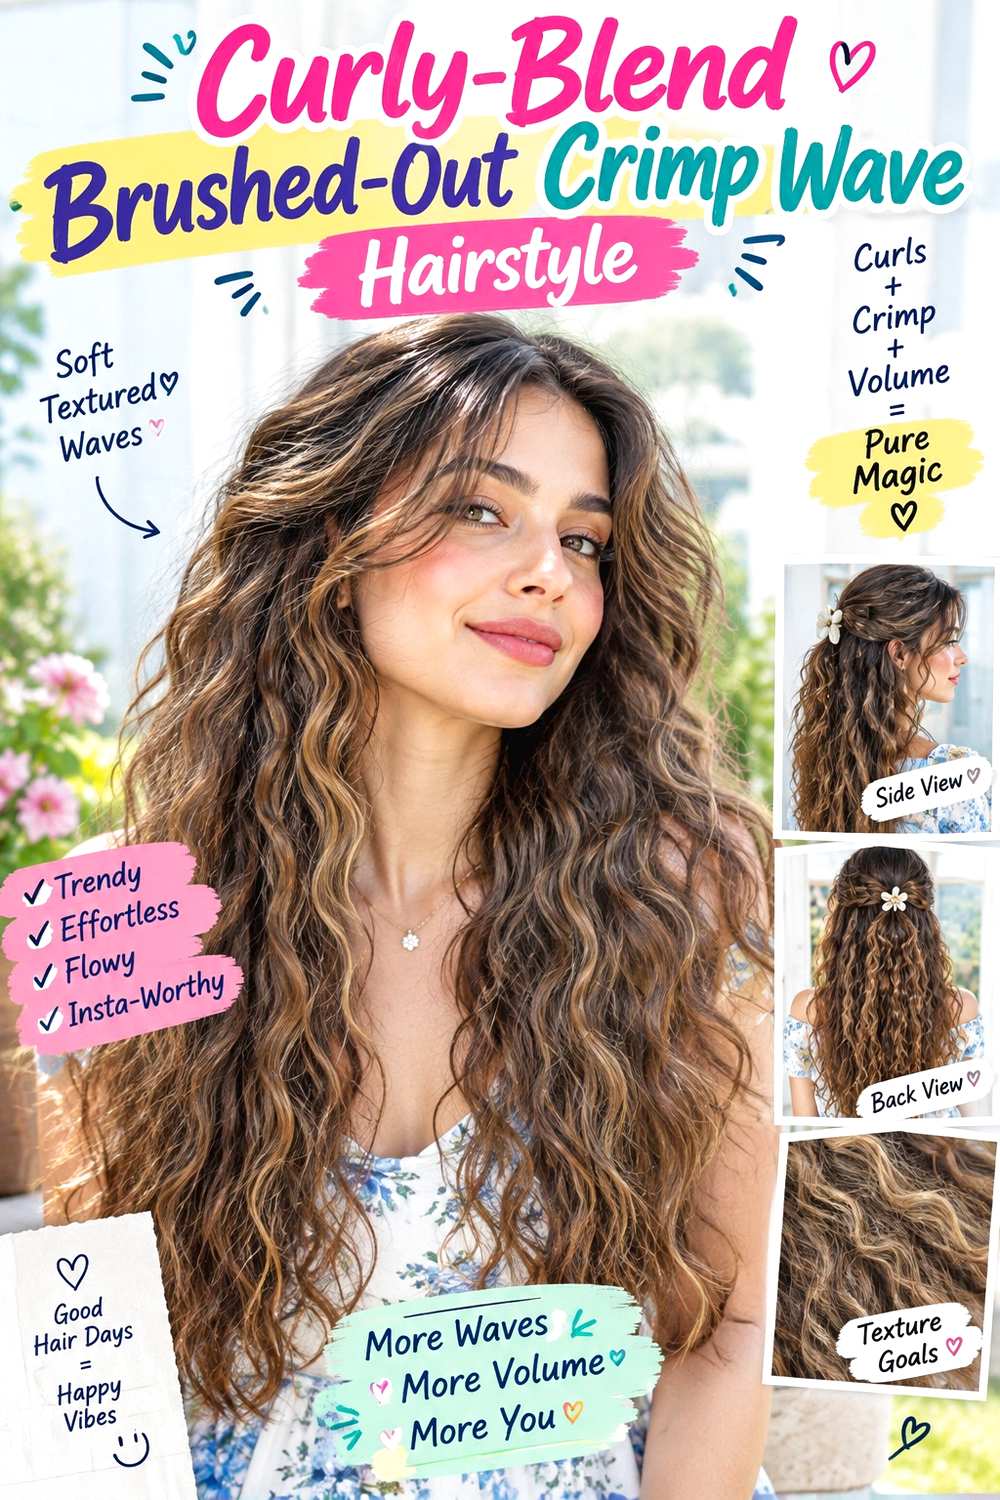
This version blends selected crimped sections into naturally curly or strongly wavy hair rather than forcing every strand into one uniform pattern. Keep some existing curl groups intact, then add crimped bends through straighter, stretched, or less-defined areas that need more visual continuity. After cooling, separate the crimp lightly so it merges with the surrounding texture. The finished shape should preserve natural volume instead of reading as a fully crimped set from root to tip.
Use heat protectant on any section receiving heat, a crimping iron for the selected panels, and lightweight curl gel on untouched curls that need definition. This approach can reduce the amount of heat compared with crimping the whole head, though the result will intentionally vary from section to section. A quick refresh usually means redefining natural curls and retouching only a flattened crimped panel; full wash-day styling takes longer if both texture types need resetting. Shrinkage should be considered when judging the final length and balance.
At a salon styling appointment, explain that you want crimped texture blended into the existing curl pattern rather than replacing it. Identify where extra width or definition is useful so the heat-styled sections are placed selectively.
Pro tip:
Compare the natural curl size with the crimp pattern before styling large sections. A closer scale blends more easily once the heated pieces are softened and separated.
Make It Work for You:
For tighter curls, crimp only a few stretched or less-defined panels and keep most coils untouched. The overall shape stays natural while the added texture fills specific gaps.
Watch Out For:
Do not brush through all the natural curls just because the crimped sections need softening. Separate the two textures and handle each according to its own pattern.
Sleek-Root Brushed-Out Crimp Wave Hairstyle
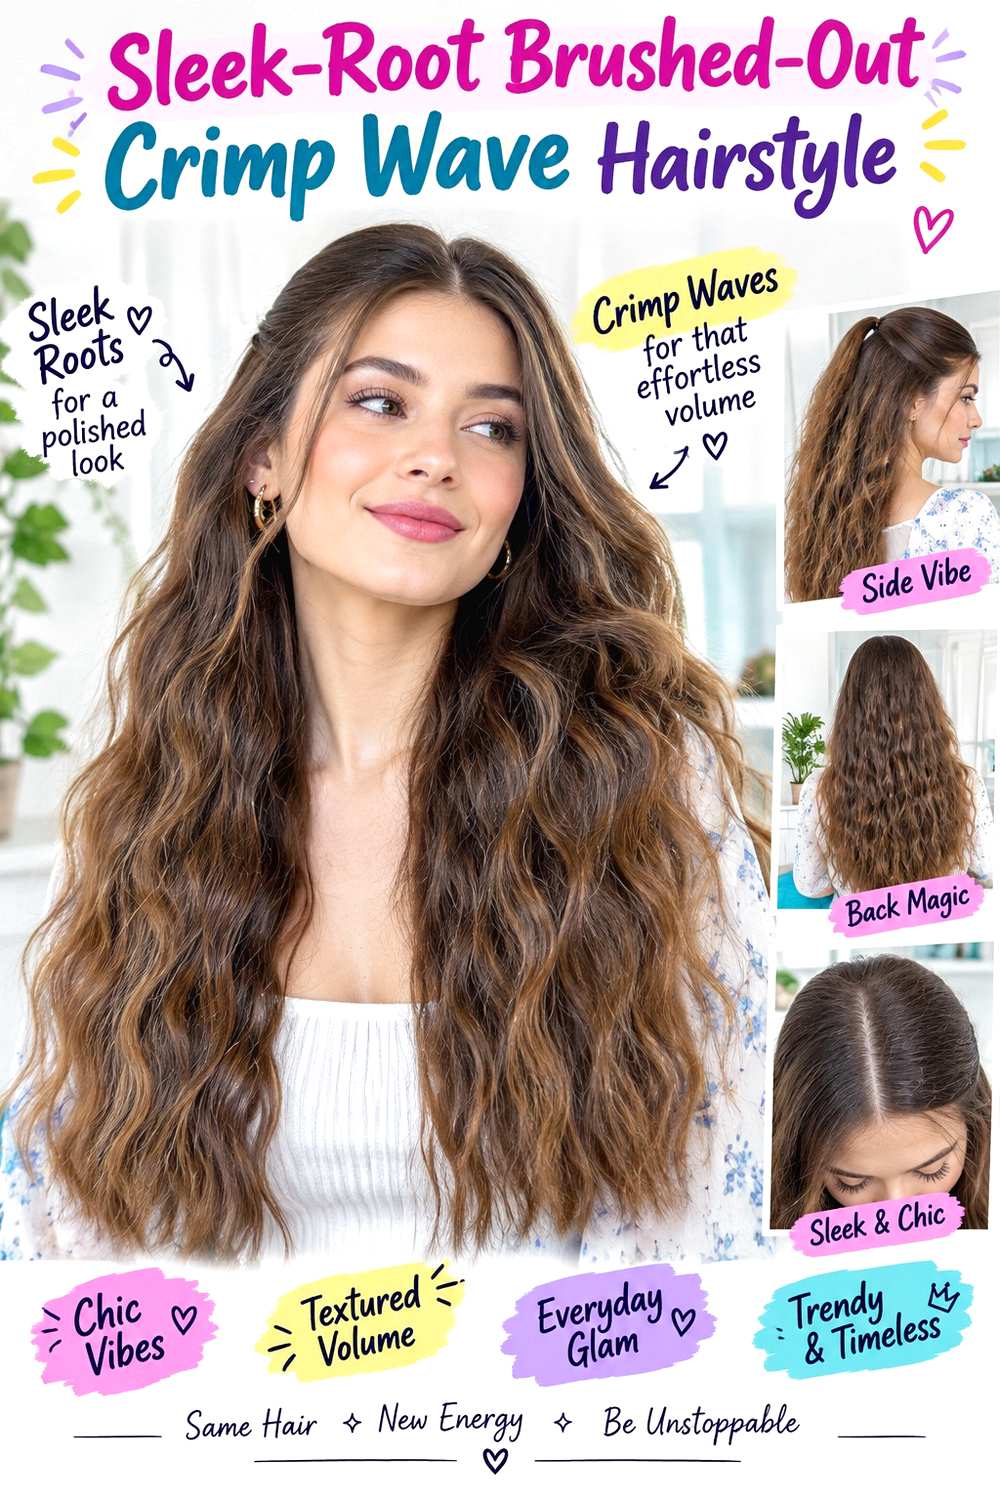
A sleek-root version creates strong contrast between a controlled crown and full brushed-out texture below. Make a center or deep side part, keep several inches near the scalp smooth, and begin crimping around ear or jaw level. Continue through the mid-lengths and most of the ends, then brush the cooled pattern into airy waves. The smooth upper area narrows the silhouette around the head while the lower texture expands gradually, making the transition point especially important.
Use heat protectant before a crimping iron and lightweight smoothing cream only on the root area. Medium and long hair show the contrast most clearly, and dense hair often benefits from the controlled crown because it limits overall width. Fine hair can keep the smooth section shorter so the lower volume begins sooner. A quick refresh may involve smoothing the part and retouching one lower panel; a full wash-day set takes longer because the roots and textured lengths need different finishing steps. Keep smoothing product away from the crimped area so it does not weigh down the softened bends.
At a salon styling appointment, specify exactly how many inches of smooth root you want and where the textured transition should begin around the face.
Pro tip:
Create the smooth root finish before brushing the crimped lengths, then handle the transition gently. This keeps the boundary clean without flattening the first visible bends.
Make It Work for You:
If your hair is fine, shorten the sleek-root zone and begin the crimp closer to the cheekbones. Earlier texture can provide more body without widening the scalp area.
Watch Out For:
Avoid applying smoothing cream through the crimped mid-lengths. Extra weight can collapse the brushed texture and make the transition look uneven rather than intentional.
Airy-End Brushed-Out Crimp Wave Hairstyle

Airy ends place the softest part of the style near the lower length, with the crimp gradually loosening as it approaches the perimeter. Begin with more defined bends through the mid-lengths, then use lighter pressure or larger sections toward the ends. Once everything is cool, brush the lower portion slightly more than the upper texture so the finish becomes feathery without looking disconnected. Keep the roots smooth or only lightly textured, and use a center or side part according to the preferred frame.
Use heat protectant before a crimping iron and flexible hairspray after brushing to support the airy shape. Medium and long hair are most suitable because there is enough length for the pattern to transition gradually. Dense hair can carry the expanded ends easily, while lower-density hair should keep the perimeter less brushed so it does not appear too thin. A quick refresh involves reshaping only flattened mid-length bends; the airy tips usually need less direct restyling. A complete wash-day set takes longer because the crimp intensity changes from section to section.
At a salon appointment, explain that you want movement without excessive thinning at the perimeter. If your ends are already sparse, keeping more weight at the bottom will support this finish.
Pro tip:
Brush from the lower mid-lengths downward in short passes rather than sweeping from roots to ends. This keeps the upper pattern defined while the tips become softer.
Make It Work for You:
For sparse ends, reduce the amount of brushing at the bottom and create most of the airy effect several inches higher. The perimeter can remain visibly fuller.
Watch Out For:
Do not keep separating the tips once they already look light. Overworking the perimeter can create frizz and remove the visual weight needed for balance.
Conclusion
Brushed-out crimp wave hairstyles can range from fine, cloud-like texture to broad waves with only a hint of the original crimp. Length and density affect how much brushing the hair can handle, while layers and fringe determine where the texture breaks and moves. Smooth roots create a narrower crown, whereas higher crimp placement builds more overall volume. Center parts feel balanced, side parts create direction, and softer ends can keep the finish lighter. Natural curls can be blended selectively rather than fully replaced. Because most versions use heat, consider both your styling routine and how often you want to recreate the pattern. The most useful choice is one that gives you the desired texture without sacrificing comfortable maintenance or the fullness of your ends.
Before Your Salon Visit
Choose one or two favorite references and point out the exact crimp size, starting point, root smoothness, brushing level, parting, fringe, layers, volume, and end finish you like. Discuss your natural texture, density, face shape, preferred length, upkeep, and usual heat-styling routine. Because brushed-out crimp waves are primarily a styling effect, focus on how the texture should be created and placed rather than requesting a haircut solely for the temporary finish. If layers are already part of your plan, show where you want the shortest pieces to sit.
FAQs
How Do You Brush Out Crimped Hair Without Making It Frizzy?
Let the crimped sections cool fully before separating them, then brush gradually rather than making repeated aggressive passes. The amount of brushing depends on the desired finish and hair density. Fine or sparse ends usually need less separation, while denser hair can tolerate more softening through the interior.
Do Brushed-Out Crimp Waves Require Heat?
Most traditional crimped versions use a heated crimping iron, so heat protectant should be part of that process. The styling effect does not require one universal temperature or repeated passes. If you prefer to limit heat, use it selectively or explore non-heated texture methods, understanding that the resulting pattern may differ.
How Long Do Brushed-Out Crimp Waves Stay Defined?
Hold varies with natural texture, density, humidity, products, sleeping habits, and how much the pattern was brushed. A next-day refresh often needs only a few flattened sections rather than a complete restyle. Avoid repeatedly applying heat everywhere when a small targeted adjustment can restore the shape.
Can Fine Hair Wear Brushed-Out Crimp Waves?
Yes, but fine strands and lower-density hair benefit from controlled brushing and thoughtful placement. Keep the perimeter relatively full, avoid over-expanding the ends, and consider starting the texture below the roots. Smaller styling sections can add visible movement without requiring heavy layering or excessive product.