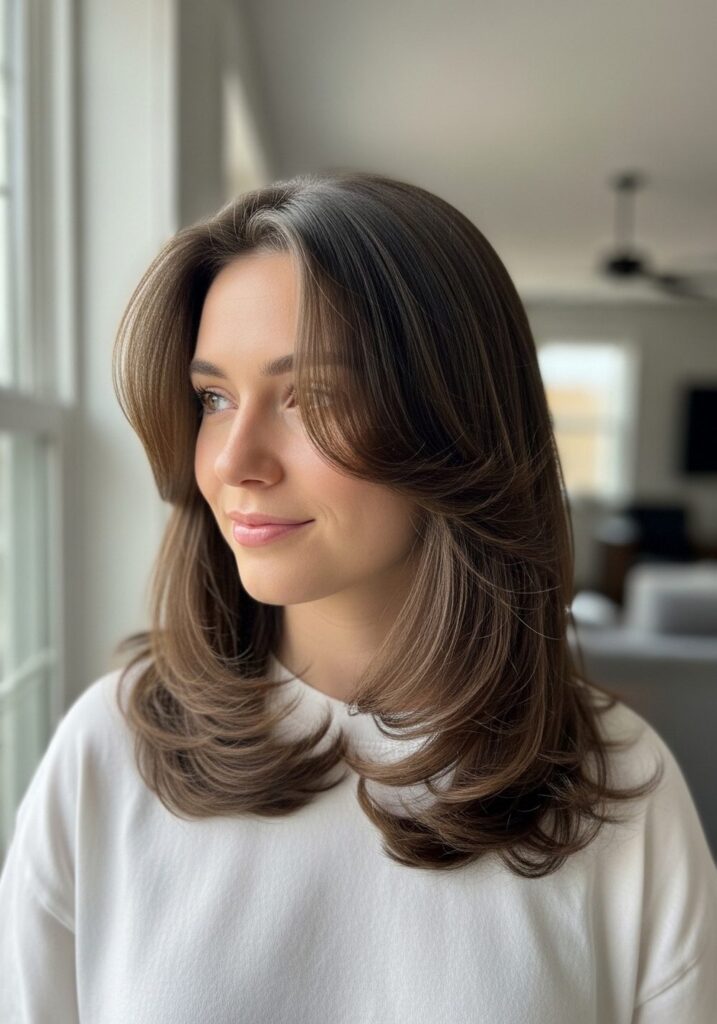
17 Curtain Crop Hairstyle Ideas for a Cool Fall Look

Curtain crop hairstyle ideas combine a short, compact haircut with fringe that opens through the center or slightly off-center and moves away from the face. The cropped back and sides keep the silhouette light, while extra length through the top allows the fringe to split, bend, or curl around the forehead. Feathered layers create movement, whereas a stronger perimeter makes the cut feel cleaner and more graphic.
Straight, wavy, curly, and coily textures can all interpret the shape differently. Fine strands may benefit from restrained layering and lightweight lift, while dense hair can need carefully placed internal weight reduction rather than aggressive thinning. The curtain fringe can finish near the brows, temples, or cheekbones, and its dry length should reflect natural growth direction, curl pattern, and shrinkage.
Styling can be as simple as resetting the center opening with damp fingers or as involved as blow-drying the fringe and shaping the top. Fall weather may add hat flattening, wind, or static, so easy root recovery matters. Cut maintenance is separate from daily styling: reshape the crop when the sides, nape, or fringe grow past the intended silhouette.
Quick List
- Feathered Curtain Crop Hairstyle
- Tapered Nape Curtain Crop Hairstyle
- Textured Wavy Curtain Crop Hairstyle
- Soft Curly Curtain Crop Hairstyle
- Sleek Center-Part Curtain Crop Hairstyle
- Side-Shifted Curtain Crop Hairstyle
- Airy Fine-Hair Curtain Crop Hairstyle
- Dense-Hair Sculpted Curtain Crop Hairstyle
- Cheekbone-Length Curtain Crop Hairstyle
- Shaggy Curtain Crop Hairstyle
- Rounded Curtain Crop Hairstyle
- Piecey Curtain Fringe Crop Hairstyle
- Wet-Look Curtain Crop Hairstyle
- Flipped-End Curtain Crop Hairstyle
- Coily Curtain Crop Hairstyle
- Undercut Curtain Crop Hairstyle
- Grown-Out Curtain Crop Hairstyle
Feathered Curtain Crop Hairstyle

Feathered layers give a curtain crop soft movement through the top while keeping the sides and back compact. Let the fringe divide near the center and sweep toward the temples, with the shortest pieces finishing around the brows and the outer sections extending slightly longer. The crown should stay light rather than heavily stacked, and the ends can taper softly so they move when the head turns. This version works especially well on straight or gently wavy hair with enough top length to show separation.
Apply heat protectant before using a blow-dryer and small round brush to direct the fringe away from the center. A full wash-day style may take moderate effort because the roots and fringe need shaping, while a quick morning refresh can focus only on dampening and redirecting the front. If the cut starts losing its feathered effect, the issue may be grown-out layers rather than lack of product.
At the salon, specify where the center fringe should finish when dry and where the outer pieces should blend into the sides. Ask for soft movement without removing so much perimeter weight that the crop looks thin. The fringe usually signals the need for reshaping before the back does.
Pro tip:
Dry the fringe briefly toward the opposite side before sweeping it back into place. That root redirection helps the curtain opening stay soft instead of splitting into two flat sections.
Make It Work for You:
For finer strands, keep the feathering concentrated through the top and front rather than thinning the perimeter. This preserves enough visible density around the sides and nape.
Watch Out For:
Avoid over-rounding the fringe with the brush. Too much bend can make the curtain pieces curl toward the forehead instead of opening cleanly around the face.
Tapered Nape Curtain Crop Hairstyle

A tapered nape gives the curtain crop a cleaner back profile while leaving enough length through the top for a soft center opening. Keep the fringe longer than the sides, with the inner sections around brow level and the outer corners extending toward the temples. The sides can hug the head more closely, then transition into a neat taper at the nape. This sharper lower shape works well if scarves and high collars tend to make a fuller neckline feel bulky.
Use lightweight styling cream to separate the fringe, a vent brush to guide the top, and a blow-dryer for root direction. The full style is fairly quick because the tapered back needs little work; the morning refresh usually involves only the fringe and crown. Straight and wavy textures adapt easily, while curlier hair can keep more surface texture through the longer top.
At the salon, be specific about how tight you want the nape taper and how gradually it should blend into the sides. A very high taper changes the crop dramatically, while a lower taper keeps more softness. Upkeep becomes noticeable when the nape loses its clean outline or the fringe falls heavily into the eyes, so these areas may need attention at different times.
Pro tip:
Check the nape placement with your usual fall jackets. A clean taper sitting above the collar can reduce rubbing and help the back retain its intended shape.
Make It Work for You:
If you prefer a softer neckline, ask for a low taper with a little length left over the nape. The crop stays neat without becoming sharply exposed.
Watch Out For:
Do not assume a tighter taper automatically means easier upkeep. Very short nape work shows growth quickly, so choose a finish that matches how often you want reshaping.
Textured Wavy Curtain Crop Hairstyle

Natural waves can give a curtain crop movement without making the cut look overly styled. Keep the top long enough for bends to form, with the fringe separating near the center and curving toward the temples. Shorter sides maintain the cropped outline, while lightly layered ends prevent the wave pattern from becoming triangular around the ears. The crown can hold moderate volume, and the fringe should follow the natural bend instead of being forced into perfect symmetry.
Use lightweight mousse for flexible body, curl cream to encourage the wave pattern, and a wide-tooth comb only when detangling damp hair. A full wash-day routine takes longer because the waves need time to settle and dry, while a quick refresh can involve damp fingers and a small amount of existing product reactivated at the front. Avoid repeatedly brushing the crop once dry.
At the salon, show where the fringe lands in its natural dry state and discuss where the strongest wave begins. Ask for layers that support movement without removing too much weight around the perimeter. If the crop grows out, the sides may widen before the fringe becomes unmanageable; reshaping the side bulk can restore balance without automatically shortening the top.
Pro tip:
Encourage the curtain opening while the hair is damp, then leave the front mostly untouched as it dries. Less handling often helps natural wave groups stay connected.
Make It Work for You:
For lower-density waves, keep the sides less heavily layered and let the front provide most of the movement. A stronger perimeter can help the crop retain visual fullness.
Watch Out For:
Do not separate every wave into tiny pieces once dry. Excess handling can create frizz and make the short silhouette look wider without adding useful shape.
Soft Curly Curtain Crop Hairstyle

A curly curtain crop keeps the top soft and springy while the fringe opens naturally around the forehead. The shortest front curls can sit above or near the brows when dry, with longer outer curls moving toward the temples. Keep enough length at the crown for the curl pattern to form properly, while the sides and nape remain compact. The finished silhouette should be assessed after shrinkage, because wet curls can appear much longer than they will once dry.
Use lightweight leave-in conditioner for flexibility, curl gel for definition, and a microfiber towel to remove excess water without roughing the surface. A full wash-day routine takes longer because the curls need to reach their dry shape, while a quick refresh can target only flattened front curls. This works across several curl patterns as long as the crop keeps enough length for the desired formation.
At the salon, discuss the fringe and side shape using dry landmarks rather than relying only on wet measurements. Ask where the shortest curl will sit after shrinkage and how much bulk should remain over the temples. Cut upkeep becomes useful when the fringe stops opening easily or the sides expand beyond the intended cropped outline.
Pro tip:
Choose the curtain split after the curls are mostly dry. Their finished spring pattern may reveal a more natural opening than the center line you see when the hair is wet.
Make It Work for You:
For tighter curls, leave extra length through the fringe and top to account for shrinkage. The crop can still look compact while the curtain shape remains visible.
Watch Out For:
Avoid stretching curly fringe straight when deciding how short to cut it. Judge the finished dry curl instead so the front does not spring much higher than planned.
Sleek Center-Part Curtain Crop Hairstyle

A sleek center part makes the curtain crop look sharper by emphasizing symmetry and the clean separation through the front. Keep the fringe long enough to divide around the brows, then let the outer pieces taper toward the temples. The sides should follow the head closely without becoming completely flat, while the nape stays compact. A slight inward or outward bend through the fringe prevents the front from hanging like two rigid panels.
Apply heat protectant before smoothing with a flat iron, then use lightweight serum through the ends for shine and frizz control. Naturally straight hair may need only a short styling session, while wavy or curly hair requires more preparation if you choose this finish. A quick refresh should focus on the part and fringe rather than repeating heat throughout the crop.
At the salon, explain exactly where you want the fringe to break at the center and how much weight should remain around the side perimeter. Fine hair often benefits from a cleaner edge rather than excessive thinning. As the cut grows, the center pieces may begin falling into the eyes before the sides lose shape, so fringe maintenance can happen independently of a full reshaping.
Pro tip:
Establish the center part while the roots are still flexible. Once the direction is set, smooth the fringe outward instead of repeatedly combing the entire crop.
Make It Work for You:
For fine strands, use minimal serum and keep it away from the roots. A little natural lift around the crown prevents the sleek finish from becoming flat.
Watch Out For:
Do not press every section tightly to the scalp. The center part can stay precise while a small amount of crown lift keeps the crop dimensional.
Side-Shifted Curtain Crop Hairstyle

A side-shifted curtain crop keeps the open fringe idea but moves the split slightly away from the center for a more relaxed fall shape. Let one curtain panel carry a little more length and volume, while the lighter side curves closer to the temple. The back and sides remain cropped, and the top layers should connect into the fringe without creating a heavy shelf. This version can be useful when a natural growth pattern resists a perfectly centered opening.
Use heat protectant before directing the roots with a blow-dryer, then use a small round brush to bend the fringe away from the face. Add light styling cream through the ends for separation. A full wash-day style is moderate, while the quick refresh can focus only on resetting the shifted part and front panels. Straight and wavy textures usually respond quickly to this directional styling.
At the salon, show the exact off-center point where you want the fringe to divide and explain which side naturally carries more volume. The shortest front pieces should still blend into the longer outer sections. If the part begins wandering as the fringe grows, trimming the front may restore the shape without requiring a full crop overhaul.
Pro tip:
Follow the strongest natural root direction when choosing the shifted part. Working with that movement usually requires less heat and less daily correction than forcing perfect symmetry.
Make It Work for You:
For a strong cowlick, move the opening slightly toward its natural split and keep the resisting side a little longer. The curtain effect can remain balanced without constant fighting.
Watch Out For:
Avoid cutting both curtain panels identically if your growth direction is very uneven. Dry placement matters more than matching wet lengths perfectly from side to side.
Airy Fine-Hair Curtain Crop Hairstyle

An airy curtain crop for fine strands relies on movement without stripping away too much visible density. Keep the perimeter around the sides and nape relatively clean, then use longer top layers to create lift and separation. The fringe can open at the center with wispy ends around the brows, but the section should not be excessively wide. A small amount of crown height helps the crop look light without making the sides appear sparse.
Use heat protectant before blow-drying, a small round brush to lift the front, and lightweight root mousse near the crown. A complete wash-day style is usually fairly quick because fine strands dry fast, while the daily refresh may involve only redirecting the fringe. If the top becomes flat by midday, root direction often matters more than adding more product.
At the salon, ask to preserve enough perimeter weight and explain that you want movement from shape rather than heavy thinning. The shortest layers should support lift without leaving transparent ends. Fringe upkeep becomes useful when the center pieces collapse into the eyes or lose their curtain opening. The overall crop can grow a little longer as long as the sides do not become disproportionately flat or stringy.
Pro tip:
Lift the fringe roots in the opposite direction first, then settle them into the center opening. This can create airy movement with less styling product.
Make It Work for You:
If your fine hair is also dense, keep more fullness through the sides and use subtle top layers. Fine strand diameter does not mean the haircut needs aggressive thinning.
Watch Out For:
Avoid heavy creams at the roots. They can collapse the very lift the crop depends on, making the curtain fringe separate into thin, flat sections.
Dense-Hair Sculpted Curtain Crop Hairstyle

Dense hair can support a strong curtain crop, but the shape needs deliberate bulk placement so the sides do not expand too widely. Keep the top long enough for the fringe to split and sweep outward, while the sides stay compact with internal weight adjusted only where needed. The nape can remain softly tapered, and the perimeter should still look substantial rather than heavily shredded. A controlled crown helps the curtain front remain the main movement.
Use heat protectant before working with a blow-dryer, a vent brush to direct the top, and lightweight styling paste to separate the finished ends. A full wash-day style can take longer because dense hair needs more drying time, while a quick refresh can usually focus on the fringe and crown. The goal is shape, not maximum volume.
At the salon, discuss exactly where the hair feels bulky—often above the ears or through the back—and ask for selective adjustment rather than general thinning everywhere. Explain where the fringe should finish when dry and how much fullness you want retained through the perimeter. As the cut grows, side expansion may signal the need for reshaping before the fringe becomes too long.
Pro tip:
Direct the top first and let the sides settle naturally before deciding they need extra product. Dense hair often looks broader when overworked rather than under-styled.
Make It Work for You:
If your hair is dense and wavy, preserve enough internal length for bends to form. Removing too much bulk can make the wave pattern spring outward unpredictably.
Watch Out For:
Do not request aggressive thinning throughout the entire crop. Too much removal can create short internal pieces that puff up while leaving the perimeter unnecessarily wispy.
Cheekbone-Length Curtain Crop Hairstyle

Longer curtain pieces can give a short crop a softer frame by extending toward the cheekbones while the back and sides remain compact. The center opening begins around the forehead, then the fringe lengthens sharply toward the temples and upper cheeks. This creates more movement than a brow-length version and gives straight or wavy hair room for a visible bend. Keep crown layers relatively long so the front connects smoothly into the rest of the top.
Apply heat protectant before using a small round brush and blow-dryer to sweep the longer fringe away from the face. Finish with light styling cream on the ends. A full styling session takes moderate effort, while a quick refresh can involve dampening only the curtain pieces and restoring their direction. The longer fringe also tends to grow out more softly than a short eyebrow-length section.
At the salon, point directly to the cheekbone area where you want the outer curtain pieces to finish when dry. Ask where the shortest center section should begin so the transition feels gradual rather than stepped. Maintenance becomes useful when the longer pieces start falling toward the mouth or no longer blend cleanly into the side shape.
Pro tip:
Shape the outer curtain pieces away from the face rather than under the cheek. That keeps the cheekbone length visible and prevents the fringe from closing inward.
Make It Work for You:
For wavy hair, let the natural bend determine the exact cheekbone placement. A slightly longer dry length can accommodate waves that spring upward after styling.
Watch Out For:
Avoid cutting the outer fringe too short while it is stretched straight. Natural bend or shrinkage can move the finished piece higher than the intended cheekbone landmark.
Shaggy Curtain Crop Hairstyle

A shaggy curtain crop uses more visible layering than a classic compact version, giving the crown lift and the sides a broken, piecey outline. Keep the fringe center-opened and slightly longer at the temples, then connect it to short layers around the crown and upper sides. The perimeter can look deliberately irregular, but it should still have enough weight to avoid becoming wispy. Straight, wavy, and loose-curly textures can all show the layered movement differently.
Apply heat protectant before shaping selected pieces with a small curling iron, then use light texture spray through the crown for separation. A full wash-day style takes moderate time, while a quick refresh can focus on collapsed top layers and the fringe. The shag shape should rely on the haircut itself, not constant teasing or heavy product.
At the salon, specify where the shortest crown layer should sit and how much perimeter you want left around the ears and nape. If your hair is lower-density, restrained layering is especially important. During grow-out, the shag may become softer rather than immediately losing its shape, but the curtain fringe can still need earlier maintenance when the center begins closing over the eyes.
Pro tip:
Style the shortest crown layers first and let them cool before arranging the fringe. Their direction establishes the lift that gives the crop its shaggy movement.
Make It Work for You:
For lower-density hair, keep the crown layers fewer and slightly longer. You can preserve the shaggy texture without sacrificing too much fullness around the perimeter.
Watch Out For:
Do not curl every short layer identically. Uniform bends can make the crop look round; varied, controlled movement better supports the shaggy silhouette.
Rounded Curtain Crop Hairstyle

A rounded curtain crop keeps more fullness through the sides and crown, creating a softer silhouette than a sharply tapered cut. Let the fringe open in the center and curve outward, while the top layers blend smoothly into fuller side sections around the temples and ears. The nape can stay neat without being clipped extremely close. This version works well for straight or softly wavy hair when you want a compact shape with noticeable body.
Use heat protectant before blow-drying with a small round brush, then work lightweight styling cream through the ends for controlled separation. A complete wash-day style is moderate, while a quick refresh may require only the fringe and crown. Avoid excessive root lift through the sides because the cut already carries volume there.
At the salon, explain where you want the widest point of the rounded silhouette to sit—usually around the upper sides rather than directly at the ears. Ask for the fringe to blend into that shape without a visible step. Dense hair may need selective internal weight adjustment, while fine hair can benefit from keeping the perimeter more substantial. Reshape the crop when the sides drop below the intended curve or the nape becomes too full.
Pro tip:
Direct the side sections slightly downward while lifting only the crown. This keeps the rounded silhouette controlled instead of allowing width to spread around the ears.
Make It Work for You:
For fine hair with good density, preserve a stronger side perimeter and create roundness through styling. This avoids relying on many short layers for body.
Watch Out For:
Avoid adding volume equally everywhere. Too much lift at the sides can turn a controlled rounded crop into a wide triangular shape around the ears.
Piecey Curtain Fringe Crop Hairstyle

Piecey curtain fringe makes the front of a crop look lighter by separating the center sections into defined, narrow groups. Keep the overall cut compact around the sides and nape, then leave enough length through the top for the fringe to split and move toward the temples. The ends should look separated but not sparse, with a few pieces finishing around the brows and longer sections blending outward. A subtle off-center opening can keep the finish from feeling too precise.
Use light styling paste for separation, a fine mist of water to reset the fringe, and a wide-tooth comb for initial placement before the hair dries. This can be a very quick daily style because the defining feature is the fringe rather than a fully reshaped top. The full wash-day effort depends on texture, but most refreshes should target only the front.
At the salon, discuss how wide you want the fringe section and exactly where the shortest pieces should finish when dry. Fine hair may need a narrower fringe so the front does not become see-through. When the pieces grow enough to merge into one heavy curtain, a small fringe reshape can restore separation without shortening the entire crop.
Pro tip:
Separate the fringe into a few larger pieces rather than many tiny strands. Broader sections look intentional and are less likely to turn stringy as the day goes on.
Make It Work for You:
For thicker hair, use slightly wider fringe groups and keep the outer pieces heavier. The piecey finish stays visible without looking overly thinned or feathered.
Watch Out For:
Avoid applying too much styling paste near the roots. Heavy product can make separated fringe pieces look greasy and collapse the soft curtain opening.
Wet-Look Curtain Crop Hairstyle

A wet-look finish gives a curtain crop a sharper, more directional option for evenings or dressier fall plans. Keep the fringe parted through the center or just off-center and guide both sides backward toward the temples. The sides can stay close to the head while the top retains slight separation, preventing the crop from becoming one rigid slicked surface. A compact nape keeps the outline clean and lets the glossy top remain the focal point.
Use strong-hold gel for direction, a fine-tooth comb to shape the curtain panels, and lightweight shine serum sparingly through the exposed ends. This is usually a quick styling session on short hair and does not require heat. A refresh later should target only sections that lift or separate rather than adding another coat of gel across the whole head.
At the salon, specify how much length you want left through the top so the fringe can still split and sweep backward. If the front is too short, the curtain effect becomes difficult to maintain. As the cut grows, the wet-look style may become easier at the front but bulkier around the sides, so reshaping those areas can preserve the silhouette.
Pro tip:
Establish the curtain split before the gel begins setting. Once the root direction is correct, smooth only the sections that need extra control rather than repeatedly combing everything.
Make It Work for You:
For wavy or curly hair, keep some top texture instead of forcing every strand flat. The glossy finish can still look deliberate while preserving natural movement.
Watch Out For:
Do not keep layering gel when one section lifts. Excess buildup can flake or feel sticky; rework only the area that actually loses its direction.
Flipped-End Curtain Crop Hairstyle

Flipped ends add a playful fall finish to a curtain crop by turning the outer fringe and side pieces away from the face. Keep the crop short around the nape, with slightly more length over the temples and top. The center fringe can open softly around the brows, then the outer ends flick outward near the temples or cheekbones. The crown should stay relatively calm so the flipped edges remain the most noticeable movement.
Apply heat protectant before using a flat iron to turn the ends outward, then add flexible hairspray once the shape cools. Straight and wavy textures generally create the flip with moderate effort, while curly hair can use a looser interpretation rather than complete smoothing. A quick refresh should address only sections that have turned inward after wearing a hat or scarf.
At the salon, explain where you want the outer fringe and side pieces to finish so there is enough length for the flip. Preserve some perimeter weight; overly wispy ends will not create a strong outward line. When the crop grows, the flip may move lower or catch on the ears, signaling that the sides need reshaping even if the top still feels manageable.
Pro tip:
Keep the middle lengths smooth before turning the final ends outward. Concentrating the movement at the edge makes the flip look intentional instead of overly curled.
Make It Work for You:
For fine hair, flip broader sections rather than many tiny pieces. A few clean bends preserve more visible fullness through the short perimeter.
Watch Out For:
Avoid flipping every section in a different direction. Too much variation can make the crop look scattered rather than giving it a controlled, playful edge.
Coily Curtain Crop Hairstyle

A coily curtain crop uses the natural spring of the hair to create a compact shape with a visible opening through the front. Leave enough length at the top for coils to form fully, then allow the fringe to separate around the center or natural growth break. The sides can remain shorter while still showing texture, and the nape may taper softly. Because shrinkage can be significant, the dry silhouette matters much more than stretched or wet length.
Use lightweight leave-in conditioner for softness, curl gel to support coil definition, and a microfiber towel to remove excess water gently. The full wash-day routine takes longer because the crop needs to dry before its final proportions are clear. A quick refresh can focus on crushed front coils or flattened crown sections rather than soaking the entire head.
At the salon, discuss the cut in its dry or representative natural state and identify where the shortest front coils should sit after shrinkage. Ask how much fullness you want preserved around the temples and crown. Dense coily hair may need thoughtful bulk placement, but the outer shape should not be thinned indiscriminately. Reshape when the sides expand beyond the intended outline or the curtain opening becomes difficult to see.
Pro tip:
Let the coils dry before deciding where the curtain opening should sit. Natural shrinkage and growth direction may create a stronger split slightly away from the exact center.
Make It Work for You:
For tighter shrinkage, leave extra length through the front and upper sides. The finished crop can still look compact while maintaining enough coil length for the curtain effect.
Watch Out For:
Do not judge fringe length by stretching a coil straight. Use its normal dry spring as the reference so the finished front does not end much higher than intended.
Undercut Curtain Crop Hairstyle

An undercut adds stronger contrast to the curtain crop by keeping the sides and lower back very close while preserving longer movement on top. The curtain fringe can open around the brows and sweep toward the temples, creating a clear distinction between the soft upper section and tighter base. Keep enough top length that the fringe does not stand straight up, and decide whether the undercut should remain hidden beneath some side length or be deliberately visible.
Use heat protectant before directing the top with a blow-dryer, a vent brush for the fringe, and light styling paste to separate the ends. The daily styling is usually quick because the short sides need little attention. A full wash-day session mainly focuses on resetting the top, while the quick refresh may involve only the fringe.
At the salon, specify how high the undercut should begin and whether you want a disconnected or softly blended transition. These choices strongly affect grow-out. A high, obvious undercut requires more frequent reshaping to preserve contrast, while a lower version grows more softly. The curtain fringe should still be assessed at its dry length so it remains long enough to open around the face.
Pro tip:
Decide whether you want the undercut visible when the top falls naturally. That single choice helps determine the height and transition more clearly than asking only for “short sides.”
Make It Work for You:
For dense hair, a lower undercut can remove weight beneath the top while preserving a softer outer shape. It does not need to extend high to change bulk.
Watch Out For:
Do not choose a very high undercut without considering grow-out. The contrast can disappear quickly as the sides lengthen, requiring more frequent maintenance than a blended crop.
Grown-Out Curtain Crop Hairstyle

A grown-out curtain crop keeps the original center-opening fringe but lets the sides, nape, and top become softer and longer. The fringe may fall toward the cheekbones, while the sides begin covering more of the ears and the crown gains extra movement. Instead of fighting the added length, use it to create a relaxed fall silhouette with a slightly less structured perimeter. This works especially well during the transition toward a bixie or short bob.
Use heat protectant before blow-drying, a small round brush to redirect the longer fringe, and lightweight styling cream through the ends for separation. The full style takes slightly longer than a fresh crop because more length needs direction, while the quick refresh can still focus on the front. Straight and wavy hair often show the transition most clearly, though curls can grow into a softer rounded shape.
At the salon, explain whether you want to keep growing the cut or simply make the crop look intentional between shorter appointments. Ask for selective cleanup around the nape and ears without automatically cutting the top back to its original length. The fringe may need only minimal reshaping so it continues to open instead of falling straight across the eyes.
Pro tip:
Use the extra fringe length to create a wider curtain opening rather than trimming it immediately. A broader sweep can make the grow-out feel deliberate instead of overdue.
Make It Work for You:
If you are moving toward a short bob, preserve side and back length while cleaning only bulky areas. This keeps progress without letting the silhouette lose all structure.
Watch Out For:
Avoid repeatedly cutting the sides very short while trying to grow the overall shape. That can trap the haircut in an uneven cycle and delay a balanced transition.
Conclusion
Curtain crop hairstyle ideas can range from sleek and compact to shaggy, curly, rounded, or sharply tapered. Shorter fringe creates a stronger cropped feel, while cheekbone-length panels and grown-out versions give more movement around the face. Fine hair often benefits from preserved perimeter weight, while dense hair may need selective bulk adjustment. Waves, curls, and coils can keep their natural texture, with shrinkage considered before fringe cutting. Center parts emphasize symmetry, while shifted openings work well with natural growth patterns. Styling effort varies from a quick piecey refresh to blow-dried or heat-shaped finishes. Choose the version that fits your texture, density, preferred fall upkeep, and how often you want to reshape the fringe and sides.
Before Your Salon Visit
Choose one or two favorites and save references that clearly show the crop from the front, sides, and back. Discuss your texture, density, face shape, preferred length, upkeep, and normal styling routine. Point out the exact dry fringe length, center or shifted opening, crown volume, side weight, nape shape, and finish you like. If your hair curls or coils, talk about shrinkage before deciding the fringe length, and explain whether you want a crisp crop or an easier grow-out.
FAQs
How often does a curtain crop need reshaping?
There is no single schedule because growth rate and the chosen silhouette vary. Consider a reshape when the fringe stops opening comfortably, the sides widen beyond the intended outline, or the nape loses its shape. A small fringe cleanup can sometimes restore the look without requiring a complete haircut.
Can curly or coily hair work with a curtain crop?
Yes. The fringe can open through a natural center or slightly shifted break while the curls or coils retain their texture. Ask for the front to be judged at its finished dry length, since shrinkage affects where the curtain pieces actually sit around the forehead, temples, and cheekbones.
Will a curtain crop work on fine hair?
It can, but fine strands do not automatically mean low density. Preserve enough perimeter weight, keep layering purposeful, and avoid aggressive thinning. A narrower curtain fringe and lightweight root lift can add movement while leaving sufficient hair around the sides and nape to maintain a clear cropped silhouette.
How can I refresh a curtain crop after wearing a fall hat?
Reset the roots and fringe rather than restyling the entire haircut. Lightly dampen the front if necessary, restore the curtain opening with your fingers, and redirect flattened crown sections. Styles with moderate root volume usually recover more easily than crops that rely on heavy teasing or rigid height.