14 Curly Pixie Cut Hairstyles for a Soft Modern Look
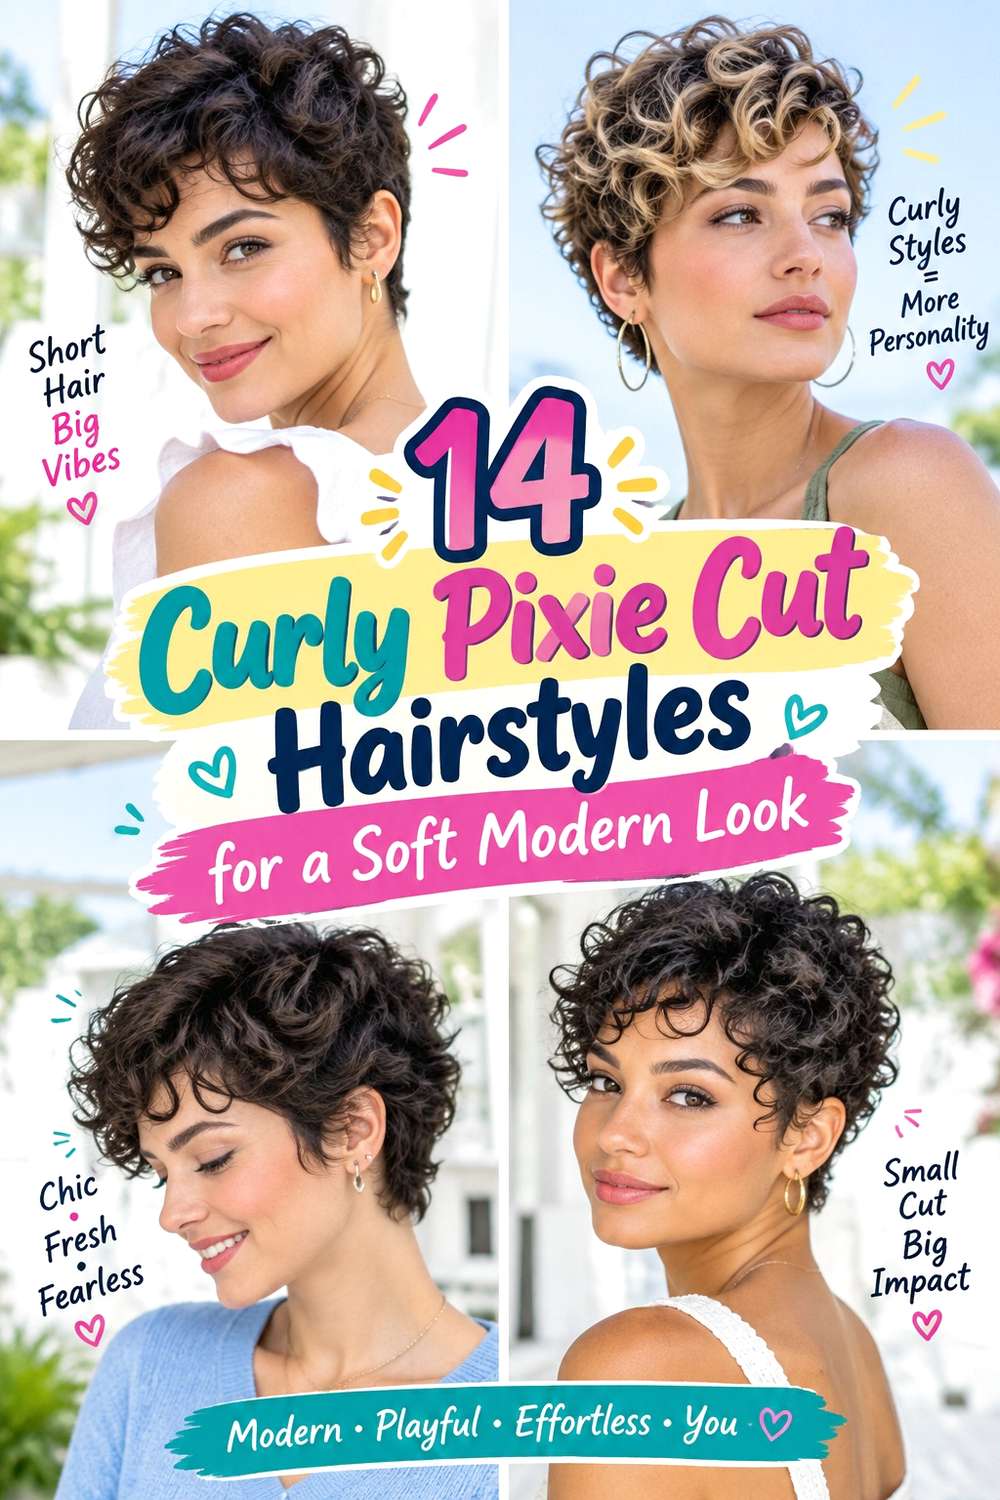
Curly pixie cut hairstyles combine a cropped perimeter with enough length on top for curls or coils to keep their natural spring. The shape can be softly rounded, tapered close at the nape, longer through the fringe, or asymmetric around the temples. Layers control where volume sits, while a curly fringe can open across the forehead, sweep sideways, or fall in short separated pieces. The result feels softer when the perimeter follows the curl pattern instead of looking heavily carved.
Curl pattern, strand thickness, and density all affect the finished shape. Fine strands can still be dense, so layering should respond to actual bulk rather than assumptions about thickness. Dense curls may need selective internal weight adjustment, while tighter coils usually require extra length to allow for shrinkage. Face framing can sit above the brows, across the forehead, or near the temples depending on how each curl contracts when dry.
A full wash-day routine generally takes longer than a morning refresh. Once the pixie is dry and defined, refreshing may mean reshaping the fringe, reviving the crown, or smoothing one side. Cut maintenance is separate: reshaping becomes useful when the nape expands, the sides lose proportion, or the fringe no longer falls where intended.
Quick List
- Soft Fringe Curly Pixie Hairstyle
- Tapered Nape Curly Pixie Hairstyle
- Side-Swept Curly Pixie Hairstyle
- Rounded Volume Curly Pixie Hairstyle
- Piecey Ringlet Curly Pixie Hairstyle
- Coily Crown Curly Pixie Hairstyle
- Long-Top Curly Pixie Hairstyle
- Ear-Tucked Curly Pixie Hairstyle
- Micro Fringe Curly Pixie Hairstyle
- Asymmetric Curly Pixie Hairstyle
- Soft Undercut Curly Pixie Hairstyle
- Fluffy Fine-Hair Curly Pixie Hairstyle
- Dense-Hair Sculpted Curly Pixie Hairstyle
- Grown-Out Curly Pixie Hairstyle
Soft Fringe Curly Pixie Hairstyle
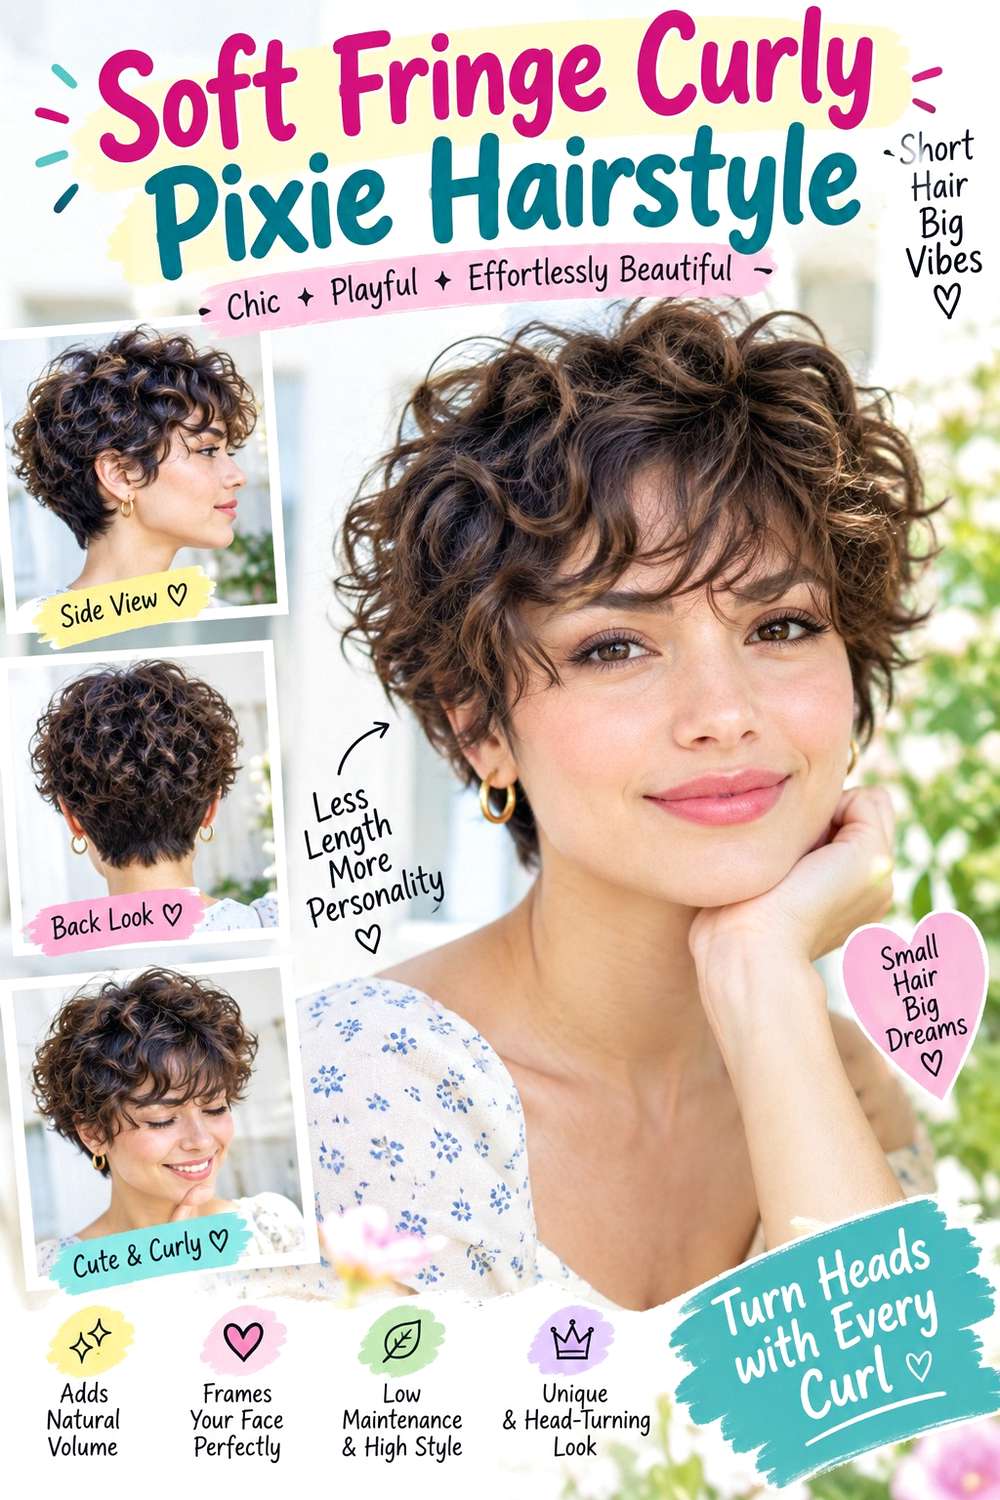
Soft fringe gives a curly pixie movement across the forehead without making the front feel heavy. Keep the sides compact around the ears and the nape neat, then leave enough length through the crown and fringe for individual curls to form. The shortest front curls can sit around the brows when dry, while outer pieces lengthen toward the temples. A loose center or slightly shifted part keeps the fringe mobile rather than forcing every curl into one direction.
Use lightweight leave-in conditioner for flexibility, curl gel for definition, and a diffuser for controlled drying. A complete wash day takes longer because the curls must reach their finished shape before you can judge the silhouette; a quick refresh can focus on dampening two or three front curls and lifting the crown. This version suits curl patterns that hold visible bends or ringlets without needing heavy manipulation.
At the salon, discuss the fringe at its dry finished length and show exactly where you want the shortest curl to land. Shrinkage matters more than stretched length. Ask to keep enough weight around the temples so the front blends naturally into the sides. When the fringe starts covering the eyes or loses its separation, a small reshaping may be enough without recutting the whole pixie.
Pro tip:
Let the fringe dry almost completely before deciding where to split it. The curls may naturally open off-center, and following that movement usually gives a softer result.
Make It Work for You:
For tighter curls, leave extra length through the front so shrinkage does not lift the fringe too high. The pixie can remain cropped around the sides.
Watch Out For:
Do not stretch the fringe straight when judging cutting length. A curl that appears brow-length under tension may spring much higher once it returns to its natural shape.
Tapered Nape Curly Pixie Hairstyle
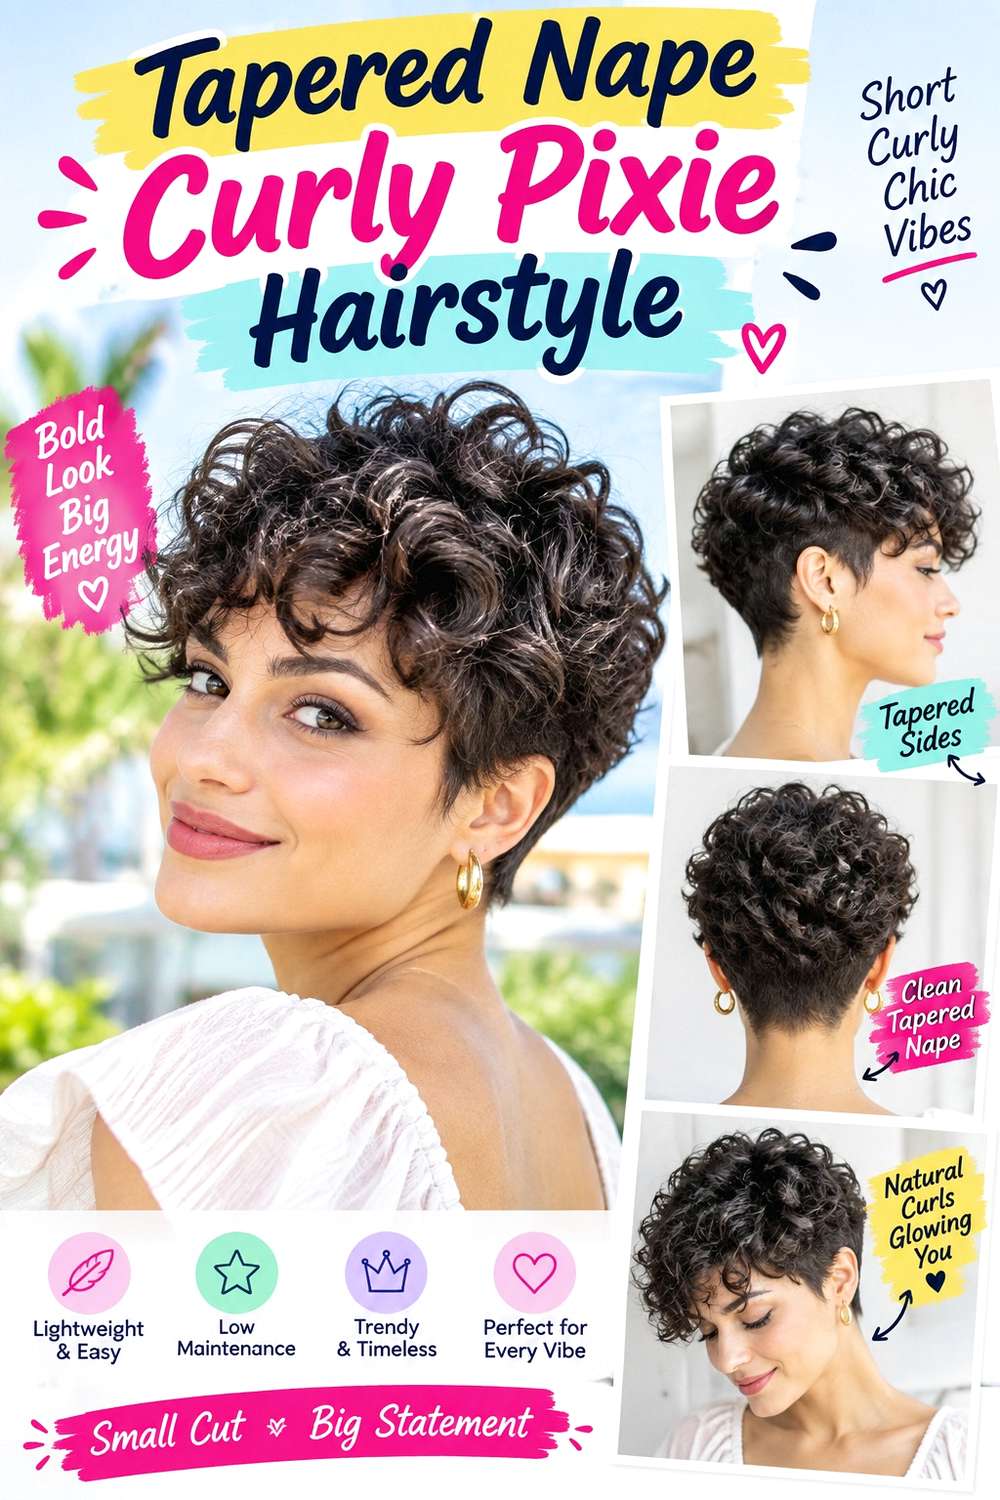
A tapered nape keeps the lower part of a curly pixie clean while allowing more softness through the top. The back gradually shortens toward the neckline, the sides stay compact around the ears, and the crown carries enough length for curls to form instead of standing stiffly. Keep the front slightly longer than the sides so it can sweep, separate, or fall in a light fringe. The contrast between a neat nape and textured top makes the shape clear without looking severe.
Use lightweight curl cream to encourage soft grouping, curl gel for longer-lasting definition, and a diffuser to dry the crown without crushing it. The full wash-day routine is moderate, while the daily refresh can be quick because the tapered nape needs almost no styling. Revive only flattened crown curls or the fringe rather than applying more product everywhere.
At the salon, specify how low and gradual you want the nape taper. A very tight taper exposes more neckline and shows regrowth sooner, while a softer taper has an easier grow-out. Also explain where the longest crown curls should finish when dry. Maintenance becomes useful when the nape loses its clean graduation or the sides begin pushing outward enough to change the silhouette.
Pro tip:
Check the nape shape with your usual collars before choosing how short to go. A slightly higher taper can prevent the back from rubbing against clothing.
Make It Work for You:
For a softer routine, keep the taper low and leave a little curl texture over the neckline. It will grow out less sharply than an ultra-close finish.
Watch Out For:
Do not assume the shortest taper is automatically easiest. Very close nape work can show growth quickly, making the shape feel less crisp sooner than expected.
Side-Swept Curly Pixie Hairstyle
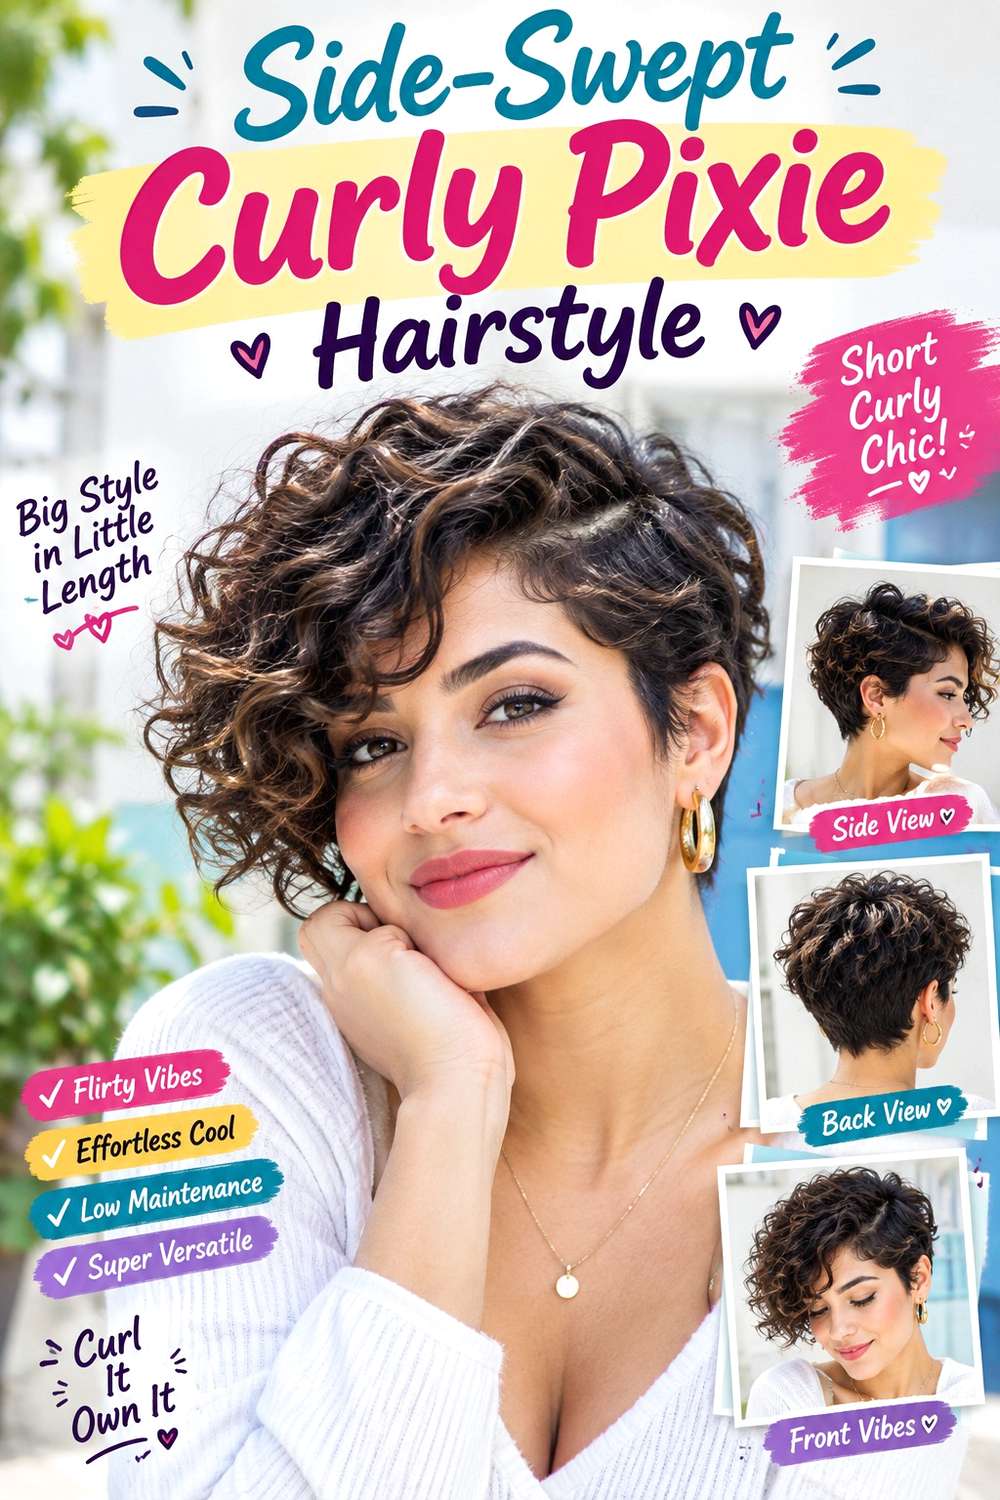
A side-swept pixie uses asymmetry to give short curls a softer, more directional shape. Leave the top and front longer, create a deep or moderate side part, and let the heavier section curve across the forehead before opening toward the temple. Keep the lighter side closer around the ear so the front movement stays obvious. The crown should have enough lift to support the sweep without becoming exaggeratedly tall.
Use lightweight leave-in conditioner for softness, curl gel for hold, and a diffuser to dry the heavier side in its intended direction. A complete wash day takes more time because the part and curl groups need to settle while drying. A quick refresh can focus on resetting the front sweep with damp fingers and reviving the root lift. This shape works particularly well when one side naturally carries more curl volume.
At the salon, identify your natural part and show where you want the longest dry front curl to finish—near the brow, temple, or cheekbone. The side with less volume may need a slightly different length rather than an identical cut. Reshape the pixie when the heavier side begins falling into the eyes or the lighter side grows wide enough to weaken the asymmetry.
Pro tip:
Choose the side part after observing where your dry curls naturally separate. Working with that root direction usually gives the sweep better movement with less daily manipulation.
Make It Work for You:
For lower-density curls, keep the part shallower and move only the front section sideways. More hair remains distributed across both sides, preserving overall fullness.
Watch Out For:
Avoid repeatedly separating curls on the heavier side for more volume. Too much handling can create frizz while making the sweep less defined rather than fuller.
Rounded Volume Curly Pixie Hairstyle

A rounded curly pixie keeps balanced volume through the crown and upper sides instead of tapering everything close to the head. The widest point can sit around the temples, while the nape remains shorter and the top follows a soft dome-like silhouette. A light fringe or open forehead works equally well, depending on the curl pattern. The key is controlled roundness: the curls should build a continuous shape rather than widening abruptly over the ears.
Use curl mousse for flexible body, curl gel for definition, and a diffuser to dry the roots with gentle lift. Dense or springy curls can create the rounded outline naturally, while lower-density hair may need less separation to preserve fullness. The full wash day is mainly about forming and drying the silhouette; a quick refresh can involve lifting the crown and reviving a few side curls with water.
At the salon, explain where you want the widest point of the cut and how much fullness should remain above the ears. Selective internal weight adjustment may help dense hair, but the outer perimeter should remain substantial enough to hold the rounded shape. When the sides begin dropping or expanding beyond the intended curve, reshaping can restore balance without necessarily shortening the crown dramatically.
Pro tip:
Dry the crown with lift but direct the side curls slightly downward. Separating those directions helps maintain roundness without creating unnecessary width around the ears.
Make It Work for You:
For looser curls, leave a little more length through the top so the bends can form fully. The rounded shape will look softer and less cropped.
Watch Out For:
Avoid removing bulk evenly throughout dense hair. Random thinning can create short internal pieces that spring outward and make the rounded silhouette harder to control.
Piecey Ringlet Curly Pixie Hairstyle
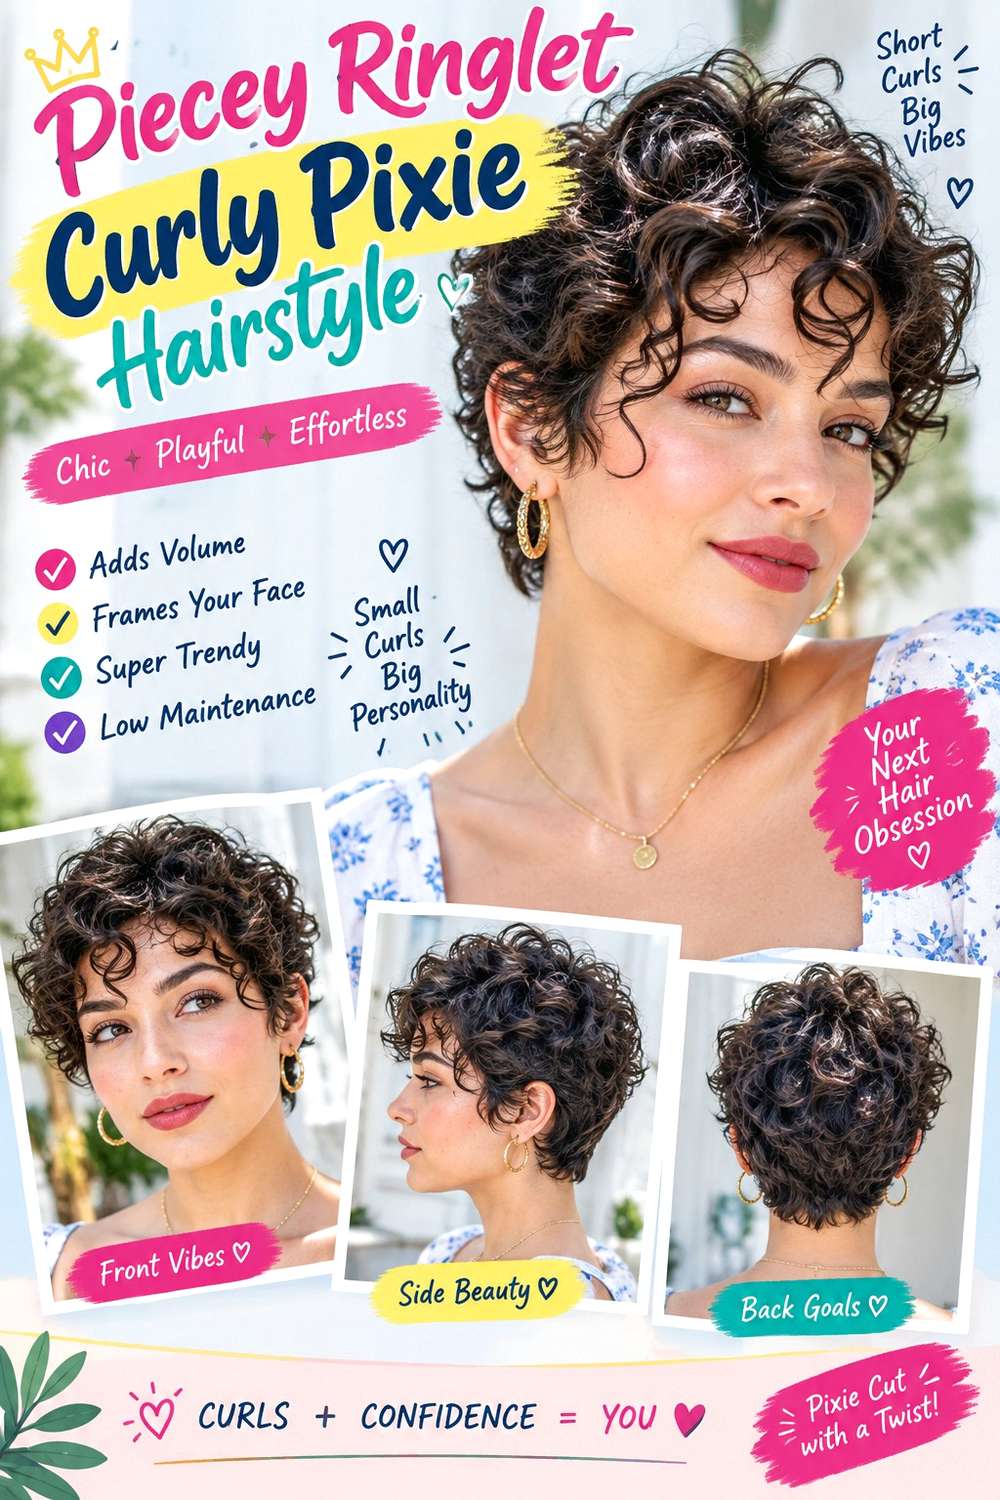
Defined ringlets can make a pixie feel soft and detailed when individual curl groups stay visible instead of blending into one fluffy surface. Keep the sides short enough to maintain the cropped silhouette, but leave extra length through the top so several ringlets can fall across the forehead and crown. The fringe can separate into narrow pieces, with some curls near the brows and slightly longer ones around the temples. The ends should stay springy rather than brushed apart.
Use lightweight leave-in conditioner for moisture, curl gel to hold the ringlet groups, and a diffuser for low-disturbance drying. A full wash day takes moderate time because the sections need to set before they are separated. A quick refresh is much shorter: redefine only the ringlets that have lost shape and leave the stable ones alone. This version is useful for curls that naturally form distinct spirals.
At the salon, ask to preserve enough top length for complete ringlets and discuss where the shortest finished curl should sit when dry. Over-layering can break the curl groups into very short pieces, so the shape should support formation rather than maximum separation. During grow-out, trim when the ringlets begin covering the eyes or the side shape becomes disproportionately heavy.
Pro tip:
Separate only a few ringlets after they are completely dry. Leaving most curl groups intact keeps the finish defined while still giving the top enough natural movement.
Make It Work for You:
For lower-density hair, keep the ringlet groups slightly larger and avoid excessive separation. Broader curl clusters can preserve more visual fullness through the crown.
Watch Out For:
Do not keep twisting every curl around your finger during refreshes. Overworking can stretch the natural pattern and make sections behave differently from the surrounding ringlets.
Coily Crown Curly Pixie Hairstyle
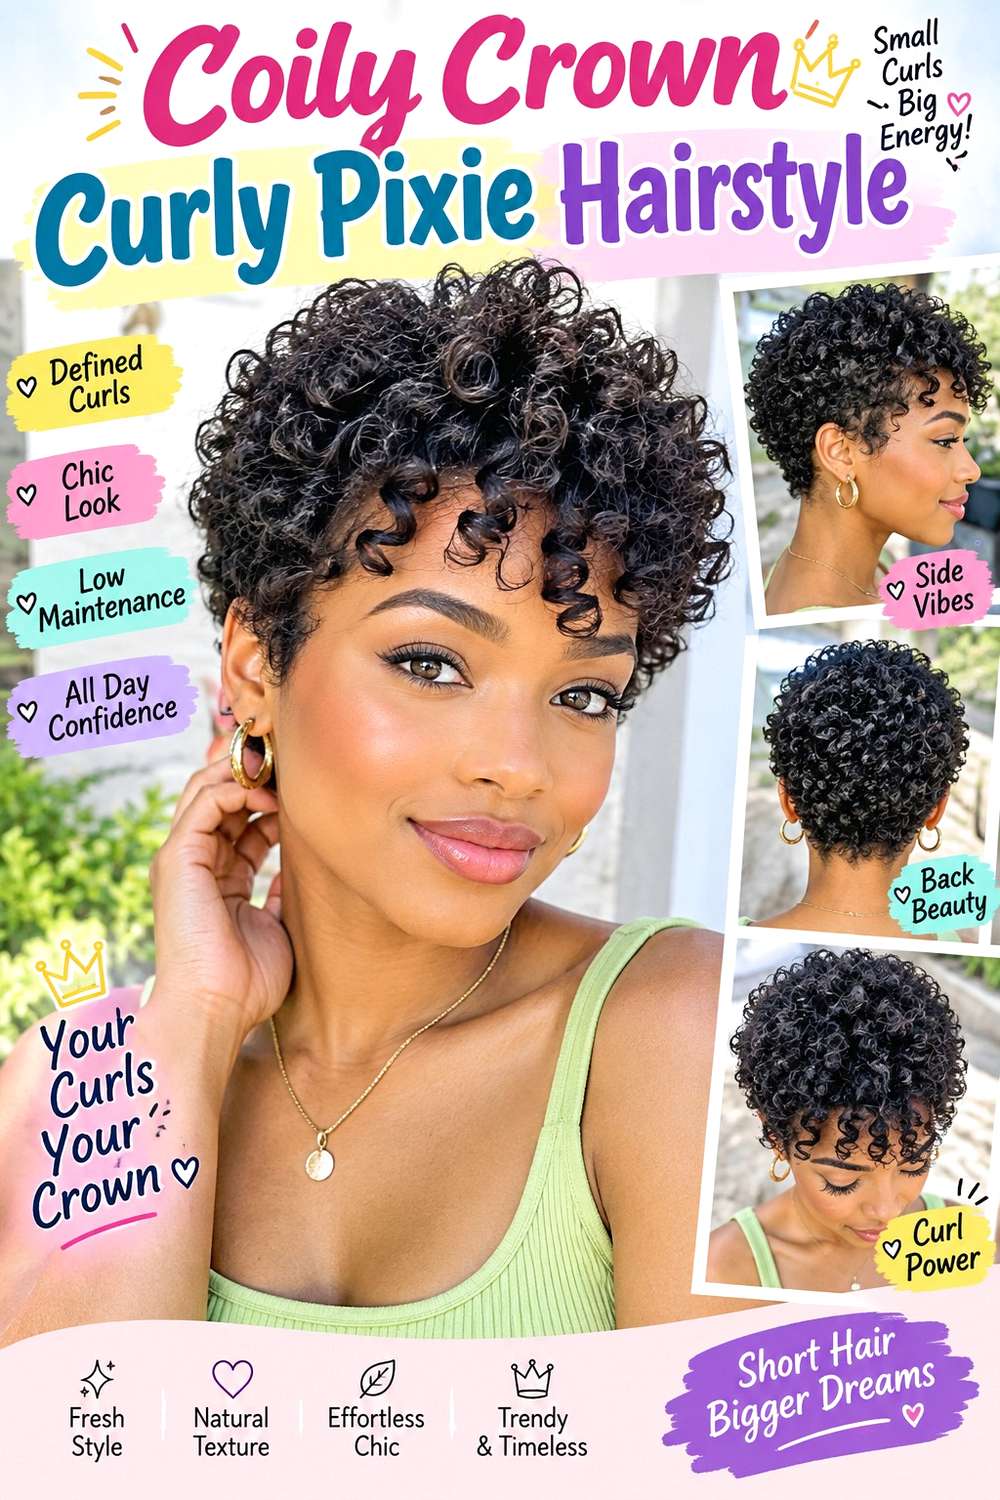
A coily crown pixie keeps the sides and nape compact while allowing the top to form a soft, textured mound of coils. Leave enough length through the crown for the coil pattern to spring clearly, then transition gradually into shorter sides. The front can open naturally, sit in a short coiled fringe, or sweep slightly off-center. Because shrinkage can be significant, the finished dry silhouette is far more useful than stretched length when judging proportion.
Use lightweight leave-in conditioner for softness, curl gel to support coil definition, and a microfiber towel to remove excess water without roughing the surface. The full wash-day routine takes longer because coils should dry before final volume is assessed. A quick refresh can target compressed crown sections or the front rather than rewetting the entire pixie. Dense coils may need careful bulk placement so the crown stays full without widening heavily over the ears.
At the salon, discuss how tall you want the dry crown and exactly where the front coils should finish. Ask for shape based on natural shrinkage and density rather than uniform shortening. The pixie needs reshaping when the sides expand beyond the intended outline or the crown loses its clear transition into the shorter perimeter.
Pro tip:
Let the coils dry before lifting the crown for additional volume. Expanding the roots too early can disturb developing coil groups and create unnecessary surface frizz.
Make It Work for You:
For stronger shrinkage, leave extra length through the crown and fringe. The cut can still appear compact once dry while preserving clear, springy coil formation.
Watch Out For:
Avoid judging the front while the coils are stretched. Cutting to a stretched landmark can leave the finished fringe much shorter than intended after shrinkage returns.
Long-Top Curly Pixie Hairstyle

Keeping extra length on top gives a curly pixie more styling flexibility without sacrificing the short sides and nape. The crown and fringe can stay several curl lengths longer than the perimeter, allowing the top to sweep sideways, fall forward, or lift away from the forehead. The sides should remain compact enough to preserve the pixie outline, while the transition into the longer top can be blended softly rather than sharply disconnected.
Use curl cream for flexible definition, curl gel for hold, and a diffuser to set the longer sections in their preferred direction. The full wash day takes moderate time because the top holds more moisture and needs careful drying. A quick refresh can focus on two or three front curls and the crown. This cut suits anyone who enjoys changing the part or direction without growing into a full bob.
At the salon, specify how much dry length you want at the longest point of the top and where the transition to the sides should begin. Ask how the extra length will behave with your shrinkage. Maintenance is often driven by side growth: the perimeter may become bulky before the top feels too long. Cleaning up the sides can preserve the shape while allowing the crown to keep growing.
Pro tip:
Change the top direction occasionally during refreshes instead of forcing the same part every day. Extra length gives enough flexibility for several soft shapes.
Make It Work for You:
For loose curls, preserve slightly more top length so complete bends can develop. Shortening the crown too much may leave the texture standing instead of curving.
Watch Out For:
Do not keep removing top length just because the sides feel bulky. Reshape the perimeter first so you can judge whether the longer crown actually needs shortening.
Ear-Tucked Curly Pixie Hairstyle
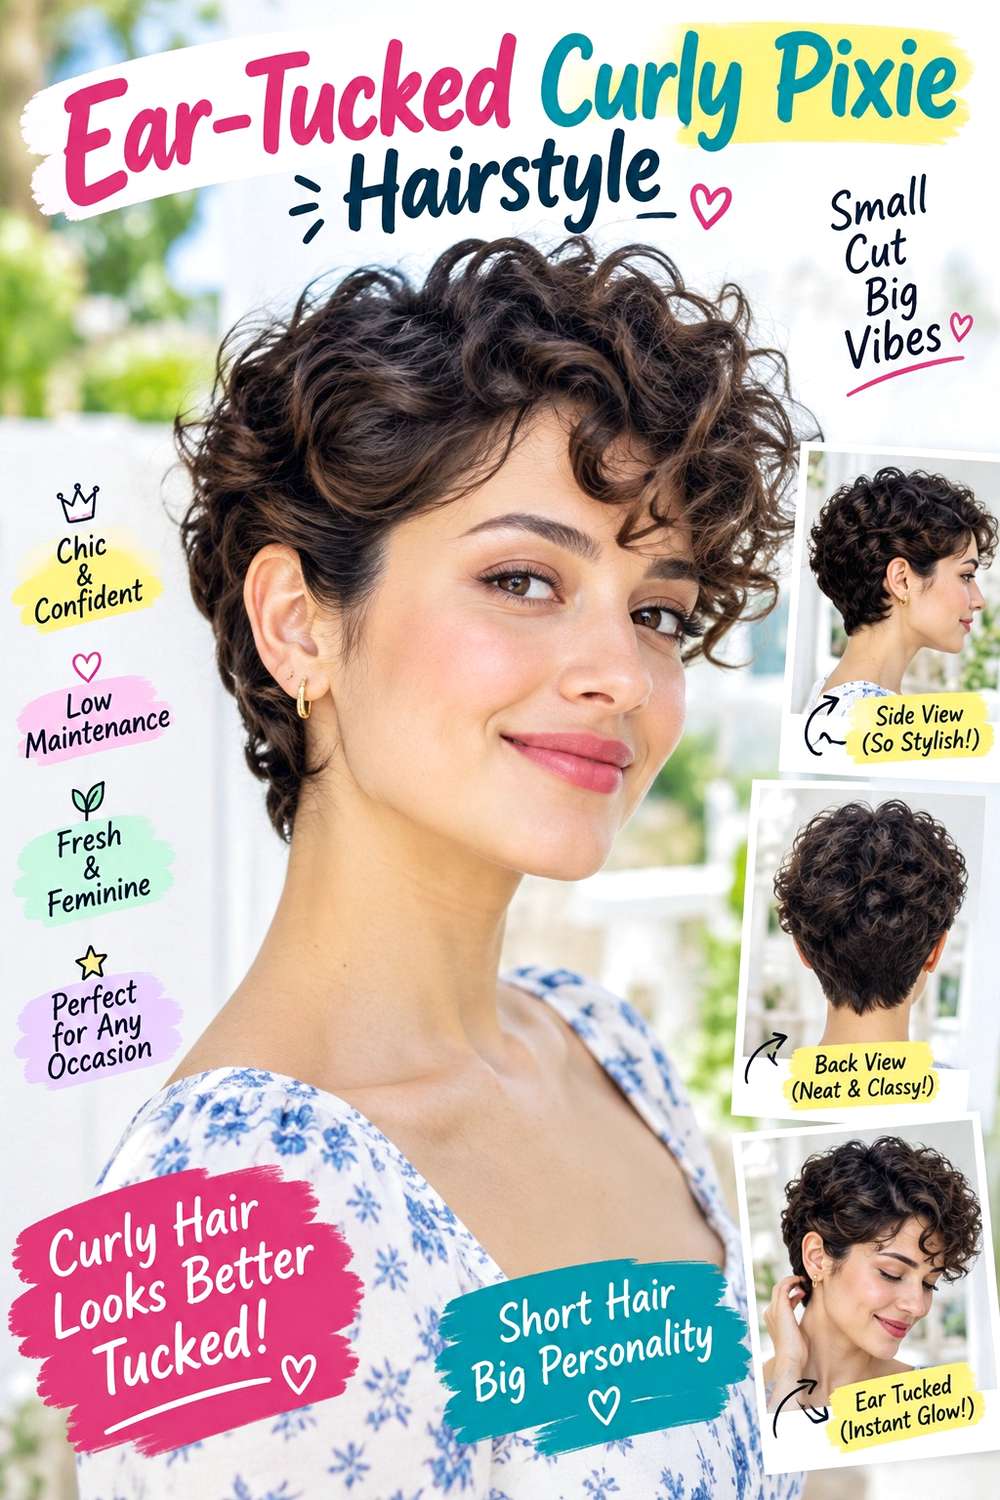
An ear-tucked curly pixie uses clean side placement to show the face while leaving soft texture through the top. Keep one or both sides long enough to sit around the ear without creating excessive bulk, then let the crown and fringe remain fuller. A center part gives the tuck balance, while a side part can leave more curl volume over one temple. The nape should stay compact so the tucked sides do not compete with a heavy back shape.
Use lightweight curl cream for softness, curl gel for definition, and a diffuser to set the top before arranging the sides. A complete wash day takes moderate time, while a quick refresh can simply revive the front curls and reset the tuck. This works well for curls that stay flexible enough to move without losing their pattern. Shorter side pieces can remain naturally visible instead of being forced flat.
At the salon, explain that you want the sides to tuck comfortably and show exactly where they should finish around the ear when dry. Ask to preserve enough length to avoid constant springing forward. When the sides grow too bulky to tuck cleanly or the front loses its balance, a perimeter cleanup may restore the shape without dramatically changing the crown.
Pro tip:
Arrange the ear tuck after the curls are fully dry. Moving wet curls behind the ear can encourage an unintended flat spot as the texture sets.
Make It Work for You:
For dense curls, tuck only a narrow front section and let the rest remain softly textured above the ear. This preserves volume while keeping the face open.
Watch Out For:
Avoid coating the side with heavy product just to keep it tucked. A slippery or stiff surface can make the placement less comfortable and harder to refresh.
Micro Fringe Curly Pixie Hairstyle

A short curly micro fringe creates a stronger cropped effect while the rest of the pixie stays soft and textured. Keep the front curls noticeably shorter than the crown, allowing them to sit above the brows when fully dry. The outer fringe can lengthen slightly toward the temples so the transition into the sides feels gradual rather than abruptly horizontal. Crown curls should remain long enough to add movement and prevent the cut from looking uniformly short.
Use lightweight leave-in conditioner for flexibility, curl gel to define the tiny front curls, and a diffuser for controlled drying. The full wash day takes moderate time because the micro fringe must dry in its natural shape before you know where it sits. Daily refreshes are quick and should focus on individual front curls rather than the whole pixie.
At the salon, determine the fringe length on dry curls and account carefully for shrinkage. Even a small cutting change becomes visually significant with a micro fringe. Ask the stylist to preserve a soft transition at the outer corners rather than creating a harsh line. Maintenance becomes useful when the fringe falls onto the brows and loses the intended short separation, although the rest of the pixie may not yet need reshaping.
Pro tip:
Start slightly longer than your imagined finished micro fringe if your curls shrink strongly. You can assess the dry result before deciding whether additional shortening is actually needed.
Make It Work for You:
For looser curls, keep the micro fringe a little longer so each front section still forms a complete bend rather than sticking straight outward.
Watch Out For:
Do not cut the fringe by stretching curls flat against the forehead. Their natural spring determines the actual finished height, especially at very short lengths.
Asymmetric Curly Pixie Hairstyle

An asymmetric curly pixie builds softness and interest by keeping one side or front section noticeably longer than the other. The heavier side can sweep toward the temple or cheekbone, while the opposite side remains cropped close around the ear. Keep the nape neat and allow enough crown length to connect the two sides smoothly. The difference should look intentional from the front rather than like uneven grow-out.
Use curl cream to keep the longer side flexible, curl gel for definition, and a diffuser to set the asymmetrical direction. Full wash-day styling takes moderate time, especially if the longer section needs controlled root placement. A quick refresh can focus almost entirely on that side and the crown. This cut can work well with a natural part that already produces more volume on one side.
At the salon, point to the dry landmark for the longest curl—temple, upper cheek, or another clear point—and specify how closely you want the opposite side cropped. Discuss how shrinkage differs across the head if your curl pattern varies. Maintenance is useful when the shorter side loses its contrast or the long section begins covering the eye beyond your preferred point.
Pro tip:
Style the shorter side first, then arrange the longer curls against that cleaner outline. The contrast is easier to judge when the compact side is already settled.
Make It Work for You:
For lower-density hair, keep the difference in length moderate rather than extreme. A softer asymmetry can preserve fullness while still giving the pixie directional movement.
Watch Out For:
Avoid cutting the longer side too aggressively when it feels heavy. Adjust internal bulk carefully so you do not lose the asymmetry that defines the cut.
Soft Undercut Curly Pixie Hairstyle
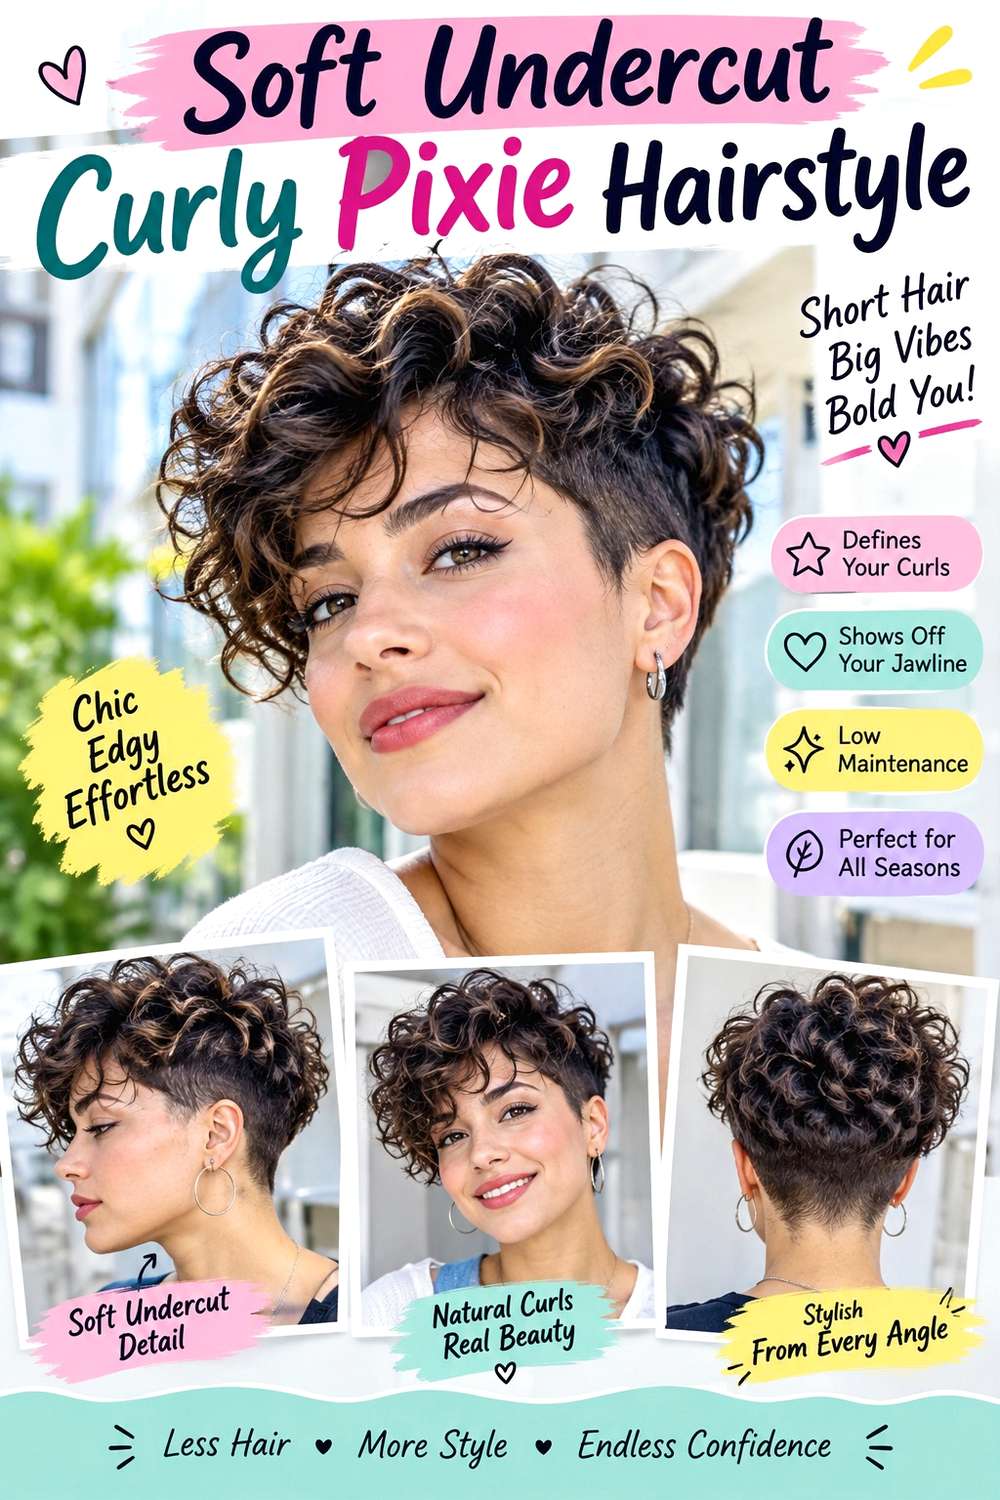
A soft undercut removes some bulk beneath the curls while leaving the outer pixie shape rounded and wearable. Keep the lower sides and nape shorter underneath, then preserve longer curls over the top so the undercut can be partly hidden when the hair falls naturally. The fringe can stay side-swept or open across the forehead, and the crown should connect visually to the longer outer layer instead of appearing like a separate cap.
Use lightweight curl cream for definition, curl gel for hold, and a diffuser to set the longer top. The daily styling can be fairly quick because the short underneath section requires little work. A complete wash day still takes longer while the visible curls dry. This design can be especially practical for dense hair when the goal is reducing internal bulk without thinning every curl.
At the salon, specify how high the undercut should rise and whether you want it visible or mostly concealed. A lower undercut grows out more softly, while a higher one creates stronger contrast and more obvious maintenance. Preserve enough outer length to support complete curls. Reshaping is useful when the undercut loses its distinction or the top begins sitting wider because the hidden section has grown.
Pro tip:
Decide whether you want the undercut visible before the haircut begins. That choice helps set the height and keeps the finished shape aligned with your preferred softness.
Make It Work for You:
For very dense curls, keep the undercut low and remove bulk mainly beneath the outer shape. You can reduce weight without turning the pixie sharply disconnected.
Watch Out For:
Do not take the undercut too high without considering grow-out. A strong contrast requires more frequent reshaping and can become harder to blend later.
Fluffy Fine-Hair Curly Pixie Hairstyle
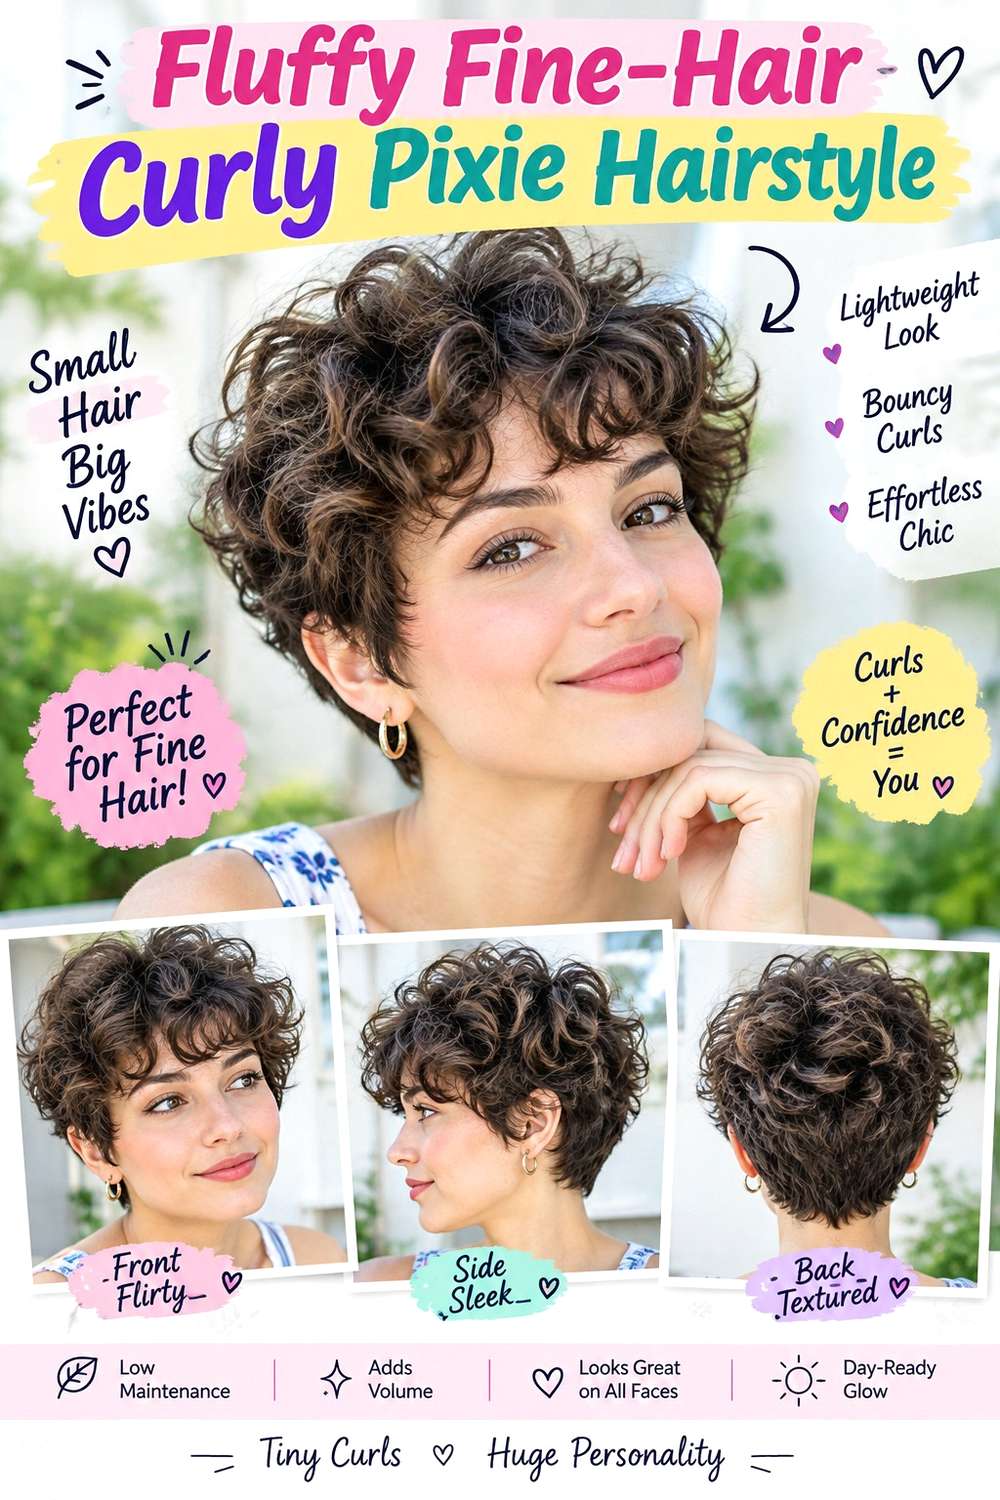
Fine hair refers to strand diameter, not density, so a fine-haired curly pixie can still have plenty of fullness. Keep the sides softly cropped and preserve enough perimeter weight so the ends do not look wispy. Longer crown curls can create airy height, while a light fringe opens around the forehead rather than forming a dense block. Avoid too many tiny layers; the goal is movement through curl formation, not maximum thinning.
Use lightweight mousse for body, curl gel for flexible definition, and a diffuser to lift the crown gently. Fine strands often dry faster, so a full wash-day routine can be relatively short, while a quick refresh may only require damp fingers at the fringe and a small root lift. If the curls fall flat later, changing their direction can be more useful than piling on additional product.
At the salon, explain your actual density and ask to preserve a strong enough perimeter around the sides and nape. The shortest crown layers should support lift without creating transparent ends. Fringe length should be judged dry so the soft opening stays visible. Reshape when the sides become stringy or the crown loses proportion, rather than assuming more layering is always the answer.
Pro tip:
Lift the crown roots in the opposite direction during drying, then let them settle back. This can create airy volume without requiring heavy product or teasing.
Make It Work for You:
If your fine strands are also dense, keep more weight through the sides and crown. Fine texture alone is not a reason to remove large amounts of hair.
Watch Out For:
Avoid heavy creams at the roots. They can collapse delicate curl lift and make a soft pixie look flat long before the actual curl pattern needs refreshing.
Dense-Hair Sculpted Curly Pixie Hairstyle
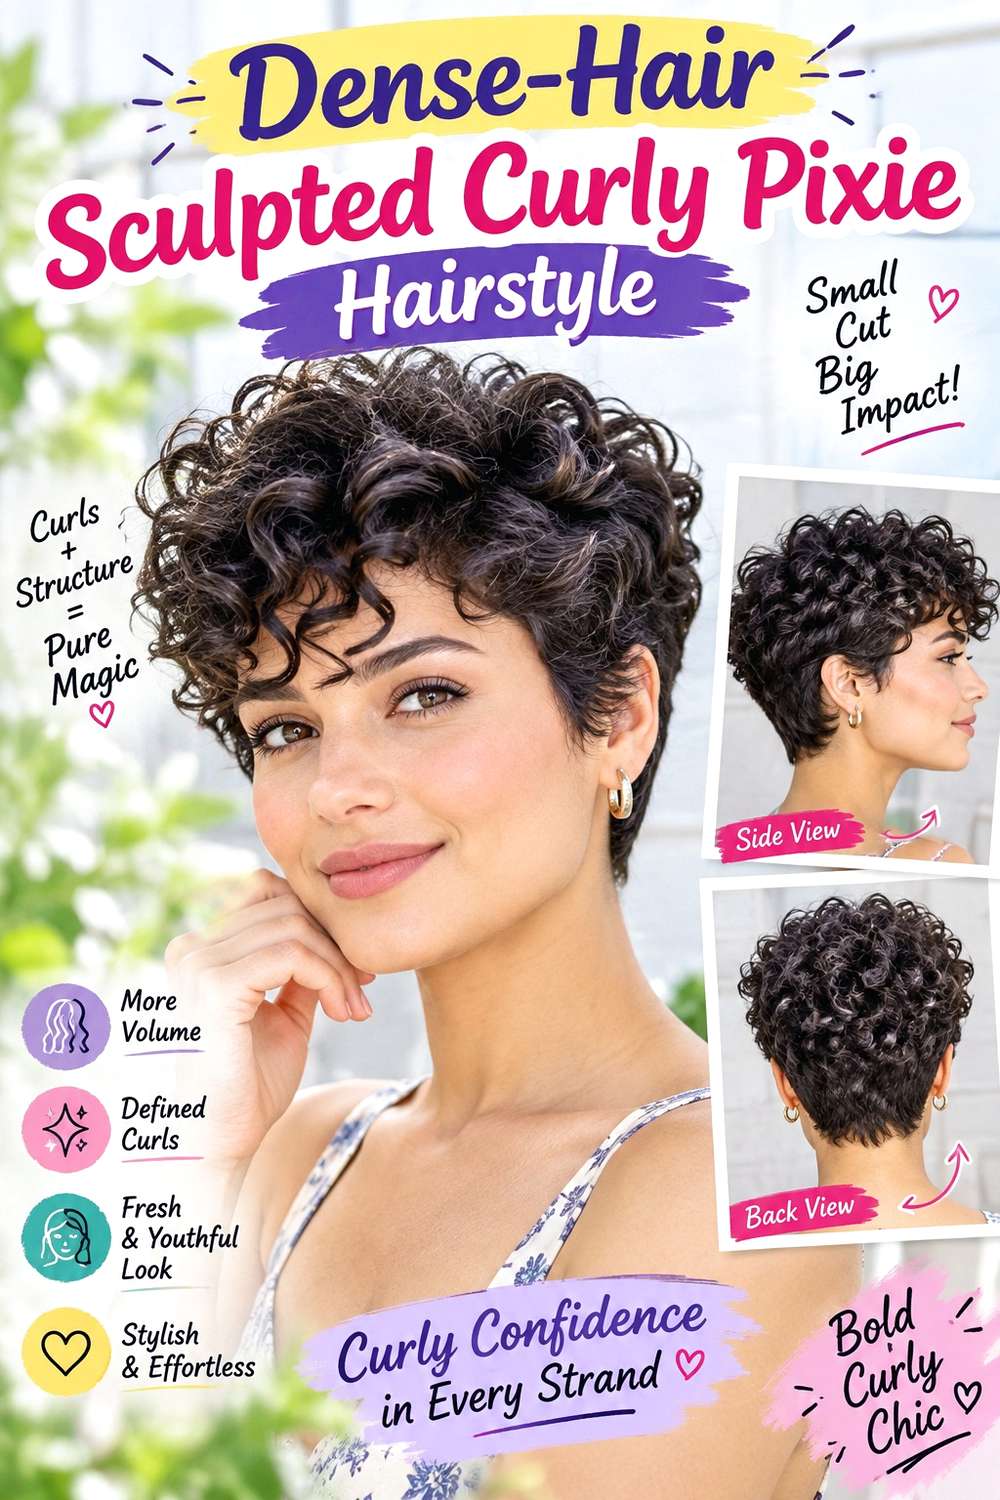
Dense curls can create a beautifully sculpted pixie when bulk is placed intentionally instead of removed everywhere. Keep the crown full, taper the sides enough to reveal the shape, and preserve a substantial outer perimeter so the curls still look connected. The fringe can sweep softly across the forehead or separate near the center, while the nape stays compact. Controlled internal space prevents the sides from forming an overly wide triangle.
Use curl cream for flexible grouping, curl gel for hold, and a diffuser to dry the shape without compressing the crown. Dense hair may require a longer full wash-day session because of drying time, but a quick refresh should target only flattened areas. Adding more product is rarely the first solution when the silhouette feels too large; the cut and root direction matter more.
At the salon, identify exactly where bulk gathers—above the ears, through the back, or beneath the crown—and ask for selective internal adjustment in those areas. Avoid general thinning throughout the entire pixie. Discuss the dry fringe length and the widest point you want in the finished shape. Reshape when side bulk begins overpowering the crown or the nape loses its compact outline.
Pro tip:
Let the cut settle naturally before deciding the sides need more product. Dense curls can become wider when overworked, while controlled drying often reveals the intended sculpted shape.
Make It Work for You:
If your dense curls are loose, preserve enough internal length for complete bends. Removing too much support can make shorter pieces spring outward and increase side width.
Watch Out For:
Avoid aggressive thinning through the whole haircut. Short internal pieces may puff outward while the visible perimeter becomes unnecessarily wispy, creating harder—not easier—styling.
Grown-Out Curly Pixie Hairstyle

A grown-out curly pixie can look intentionally soft when the added length is shaped instead of constantly cut back. Let the crown and fringe extend, allowing curls to fall toward the brows, temples, or upper cheek area, while the sides begin covering more of the ears. The nape can remain softly cleaned up so the haircut does not lose all structure. This stage works well when transitioning toward a bixie or short curly bob.
Use lightweight leave-in conditioner for flexibility, curl gel for definition, and a diffuser to guide the longer crown without flattening it. The full wash day can take slightly longer as the curls gain length, but daily refreshing remains simple: revive the front, lift the crown, and leave stable sections alone. More movement is expected during grow-out, so the goal is balance rather than recreating a freshly cropped silhouette.
At the salon, explain whether you are actively growing toward a longer cut or simply prefer a softer pixie. Ask for selective cleanup around the nape and bulky side areas while preserving top length. The fringe may need a small adjustment so it stays out of the eyes. Avoid repeatedly shortening the sides dramatically if your long-term goal is an even, rounded transition.
Pro tip:
Use the extra front length to create a softer side sweep or wider opening instead of trimming it immediately. The movement can make the grow-out feel intentional.
Make It Work for You:
If you are growing toward a curly bob, preserve side length and clean only areas that become bulky. This keeps progress while maintaining a recognizable shape.
Watch Out For:
Do not repeatedly cut the sides very short while leaving only the crown long. That cycle can make the transition toward a balanced longer shape unnecessarily difficult.
Conclusion
Curly pixie cut hairstyles can feel soft and modern through fringe placement, curl definition, crown volume, and thoughtful side shaping. A tapered nape creates a cleaner outline, while rounded or grown-out versions keep more fullness. Fine strands benefit from preserving useful weight, and dense hair often needs selective bulk control rather than aggressive thinning. Curls and coils should always be judged at their finished dry length because shrinkage changes fringe, temple, and crown placement. Side sweeps add asymmetry, while open or centered fringe feels more balanced. Styling effort is usually highest on wash day; daily upkeep can stay simple when the cut supports the natural pattern. Choose a version that matches your density, shrinkage, grow-out plans, and preferred refresh routine.
Before Your Salon Visit
Choose one or two favorites and save references showing the front, sides, and nape clearly. Discuss your curl pattern, density, face shape, preferred dry length, shrinkage, upkeep, and usual styling routine. Point out the exact fringe placement, crown volume, side fullness, taper, perimeter, or grow-out shape you like. Ask how those details will behave when your curls are completely dry, especially if the front springs significantly shorter than its wet or stretched length.
FAQs
How short should curly pixie fringe be?
The useful length depends on curl pattern, shrinkage, and where you want the finished fringe to sit. Judge it dry whenever possible. Brow-skimming, above-brow, side-swept, and temple-length versions can all work, but stretched measurements may not predict the final spring accurately.
Can a curly pixie work on dense hair without looking too wide?
Yes. Dense curls may need carefully placed internal weight adjustment where bulk collects, often around the sides or back. The outer perimeter should still retain enough substance to define the haircut. Controlled root direction and a compact nape can also help balance crown volume without excessive thinning.
Is a curly pixie suitable for fine hair?
Yes. Fine describes strand diameter and does not automatically mean low density. Preserve useful perimeter weight, avoid unnecessary thinning, and use lightweight styling products. If the hair is also lower-density, smaller fringe sections and restrained layering can help maintain fullness through the crown and sides.
How do I know when my curly pixie needs reshaping?
Look at the silhouette rather than following a rigid schedule. A reshape may help when the nape loses definition, the sides widen beyond the intended outline, the crown becomes unbalanced, or the fringe consistently falls into the eyes. A small perimeter or fringe adjustment may be enough.