17 Gemstone Hair Accessory Hairstyles
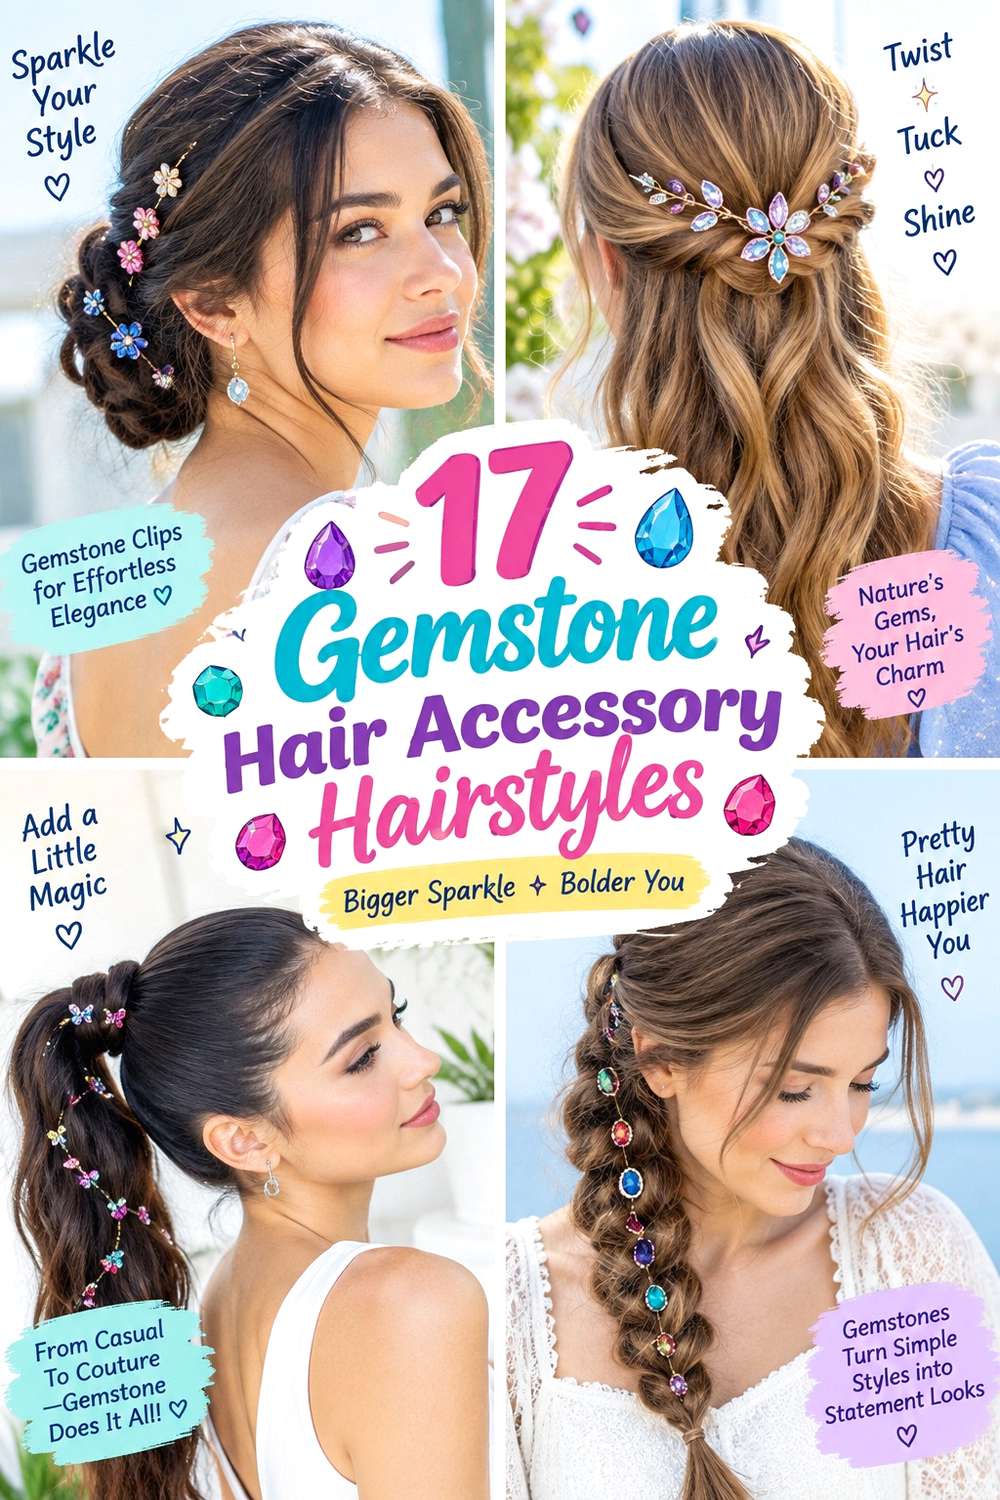
Gemstone hair accessory hairstyles work best when the jewelry has a clear relationship to the shape beneath it. Clips, combs, pins, bands, vines, and chains can highlight a side part, bun, braid, ponytail, bob, or natural texture without taking over the entire design. Placement matters as much as sparkle: an accessory near the temple changes the front view, while one beside a bun or woven through a braid draws attention farther back.
Straight, wavy, curly, and coily textures can all support gemstone details, but density, length, and grip affect which attachment feels secure. Fine or slippery hair may need a smaller, lighter piece anchored into a stable section. Dense curls or coils can carry larger accents, provided the accessory does not compress the texture or create uncomfortable pressure. Face-framing pieces can stay loose, be tucked behind the ear, or be incorporated into the base depending on the desired openness.
Styling effort depends mainly on the supporting hairstyle. Loose waves may need a full set, while a clip over an existing bob can be much quicker. Updos, braids, and chains usually need stronger anchors and more placement checks. For all versions, treat the gemstone piece as decoration rather than the main structural support, and plan removal so it does not snag or disturb the finished hair.
Quick List
- Jeweled Side-Part Waves Gemstone Clip Hairstyle
- Crystal Crown Low Bun Gemstone Headband Hairstyle
- Emerald Barrette French Twist Gemstone Hairstyle
- Ruby Pin Half-Up Waves Gemstone Hairstyle
- Sapphire Comb Low Ponytail Gemstone Hairstyle
- Pearl And Gem Braided Crown Hairstyle
- Amethyst Side Braid Gemstone Hairstyle
- Opal Cluster Curly Updo Gemstone Hairstyle
- Topaz Accent Coily Puff Gemstone Hairstyle
- Gemstone Chain Bubble Ponytail Hairstyle
- Jeweled Bobby Pin Sleek Bob Gemstone Hairstyle
- Gemstone Halo Loose Curls Hairstyle
- Vintage Brooch Chignon Gemstone Hairstyle
- Gemstone Vine Romantic Braid Hairstyle
- Crystal Side Comb Pixie Gemstone Hairstyle
- Multi-Gem Barrette Wavy Lob Hairstyle
- Gemstone Star Pin Twisted Bun Hairstyle
Jeweled Side-Part Waves Gemstone Clip Hairstyle
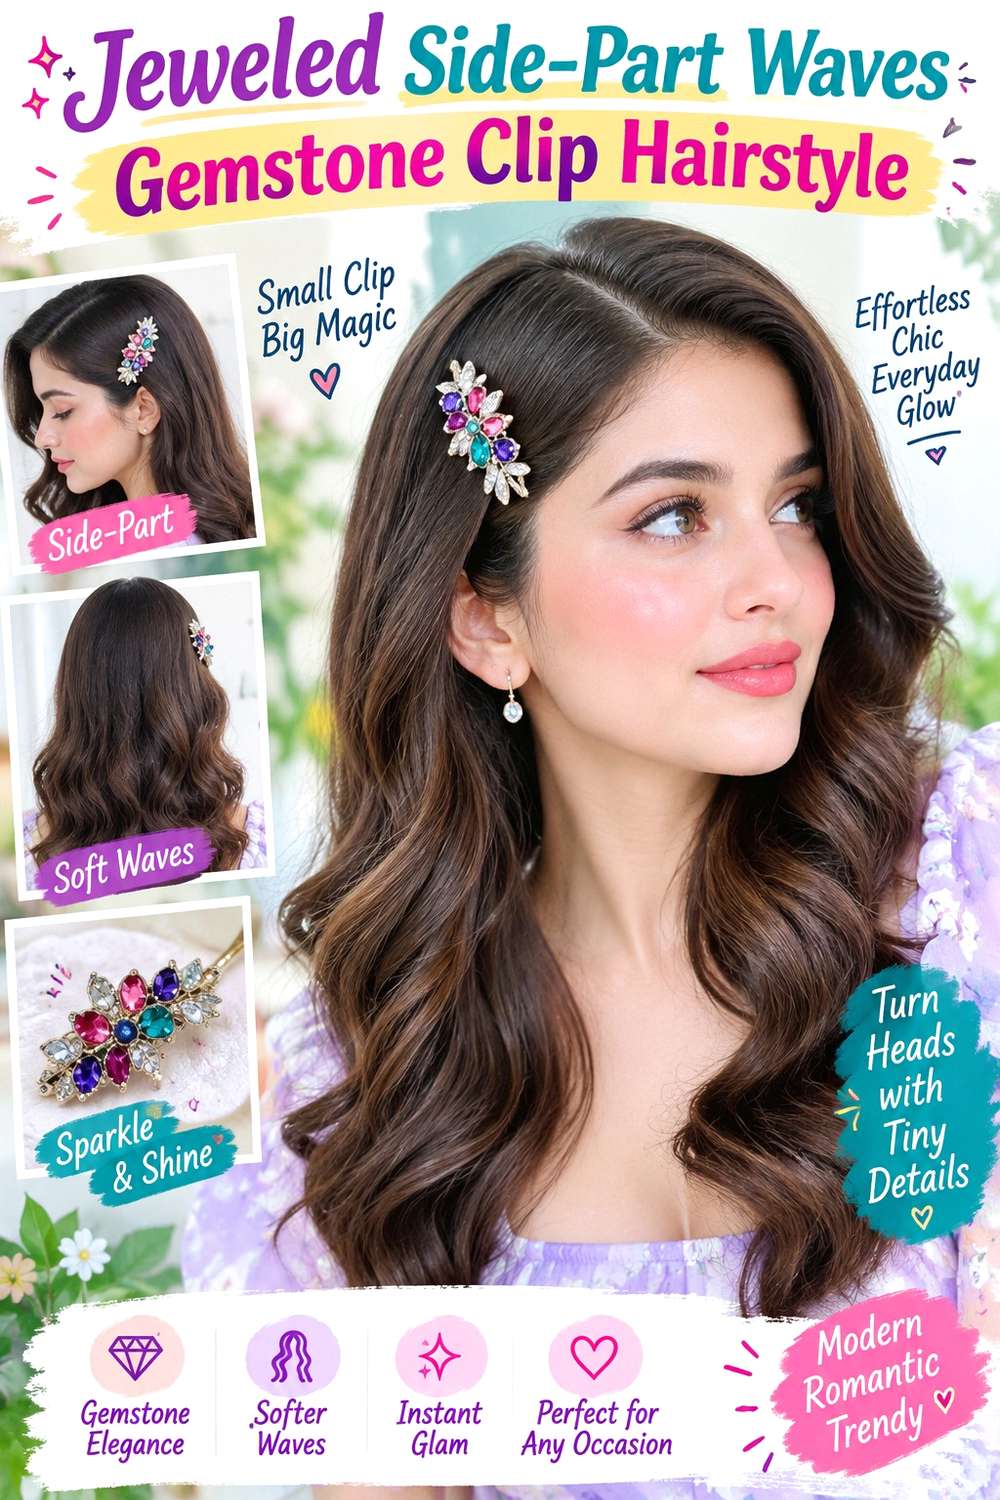
A deep side part gives broad waves a clear direction and creates a natural place for a gemstone clip above the lighter side. Keep the roots fairly smooth, begin the strongest bends around the cheekbones, and let the ends stay softer so the accessory does not compete with overly tight curls. Medium to long hair gives the wave pattern room to show, while straight or naturally wavy textures can both support the shape. A small clip works well for finer density; a larger piece may suit fuller hair if its weight feels secure.
Apply heat protectant before shaping, use a large-barrel curling iron for open bends, and finish with flexible hairspray to hold movement without making the lengths rigid. A full wash-day set takes longer than a quick refresh, which may only require reshaping the front wave and checking the clip. If a stylist is preparing the look, specify exactly where the clip should sit in relation to the part and ear. Anchor it into a stable section instead of loose surface hair, and reset the attachment rather than tightening the entire side if it begins to slip.
Pro tip:
Let the front wave cool completely before placing the clip. Set the accessory slightly above the ear so it supports the side sweep without flattening the strongest bend.
Make It Work for You:
For finer hair, choose a lighter clip and keep more fullness through the lower lengths. The side part and polished wave can stay unchanged while the accessory scale becomes easier to support.
Watch Out For:
Avoid clipping directly into freshly smoothed, slippery hair. If the piece slides, create a firmer tucked section underneath rather than adding pressure or repeatedly reopening the clasp.
Crystal Crown Low Bun Gemstone Headband Hairstyle
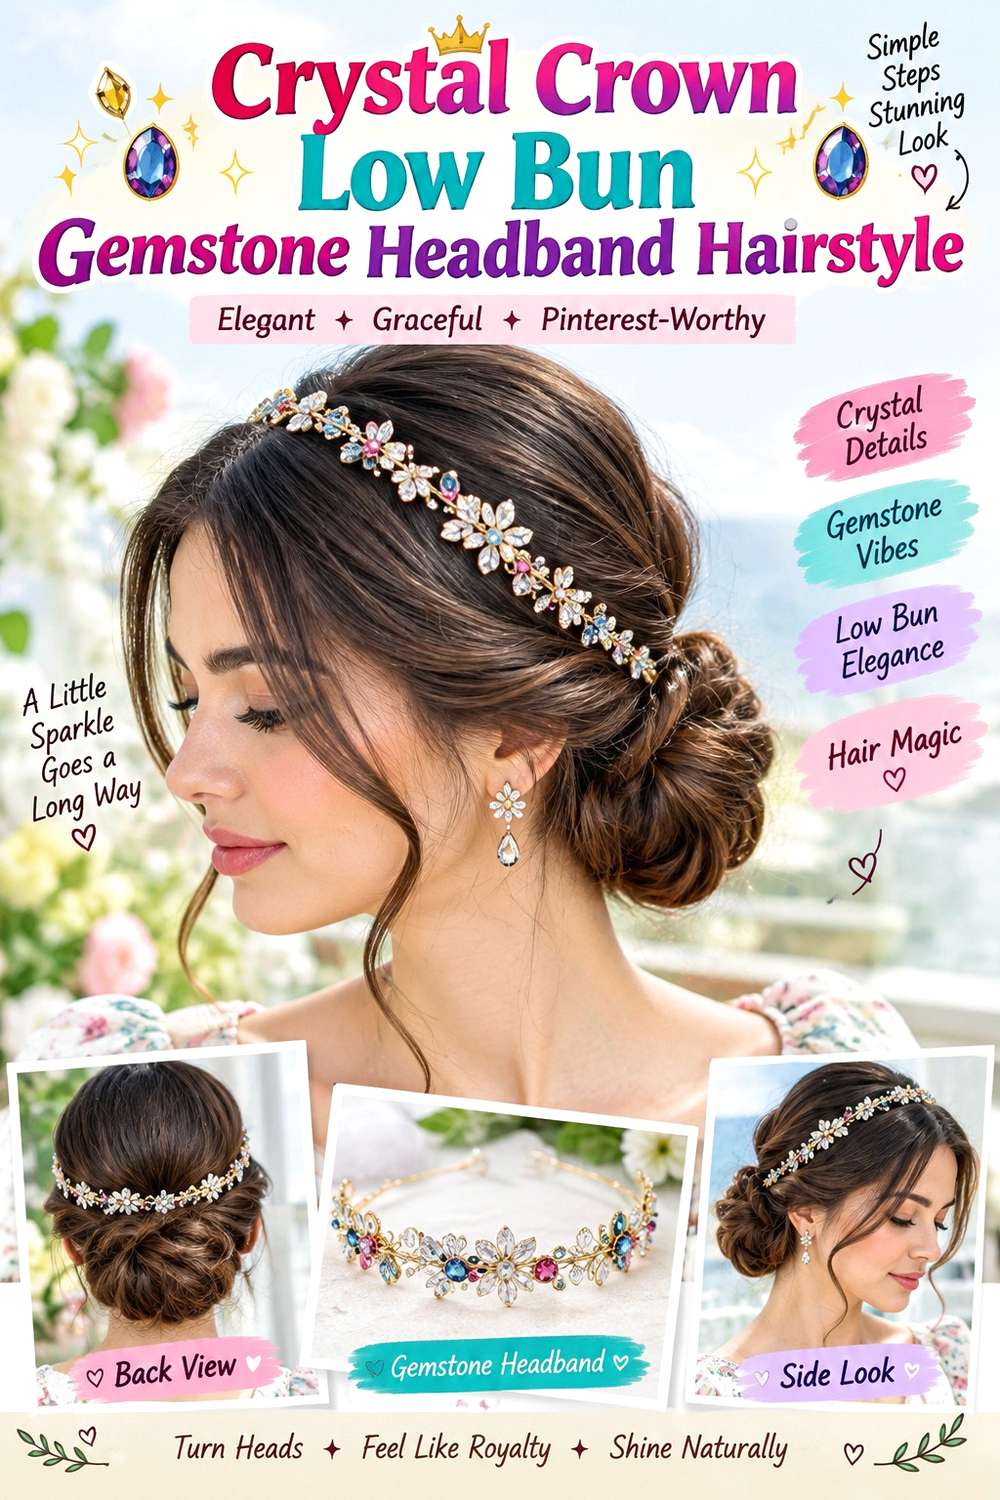
A gemstone headband paired with a low bun creates a balanced shape that keeps the accessory visible from the front while the gathered hair stays compact at the nape. A center or soft side part can work, and a few narrow face-framing pieces may be left loose if you want a softer outline. Medium to long hair is easiest to gather, while dense hair may need a slightly broader bun so the base does not feel excessively tight. Position the headband just behind the hairline and leave enough crown space that it does not press against the bun’s tension line.
Use smoothing cream for surface control, a fabric-covered elastic to create the main anchor, and bobby pins to secure the bun without relying on the headband. Building the style from washed hair takes longer, while a refresh usually means retucking loose ends and resetting the band. If a stylist is creating it, explain the exact bun height and how much crown volume you want left between the headband and nape. Check pressure behind the ears before finishing. If the accessory shifts, move it independently rather than tightening the bun, which can increase discomfort without solving the placement problem.
Pro tip:
Place the headband only after the bun feels secure and comfortable. This lets you judge crown spacing accurately and prevents the accessory from becoming part of the structural tension.
Make It Work for You:
For very dense hair, widen the low bun slightly instead of compressing it into a tiny knot. The headband still frames the front while the gathered weight stays more evenly distributed.
Watch Out For:
Do not push the headband backward until it meets the bun’s tightest area. That can create pressure and encourage slipping; leave a small section of crown hair between them.
Emerald Barrette French Twist Gemstone Hairstyle
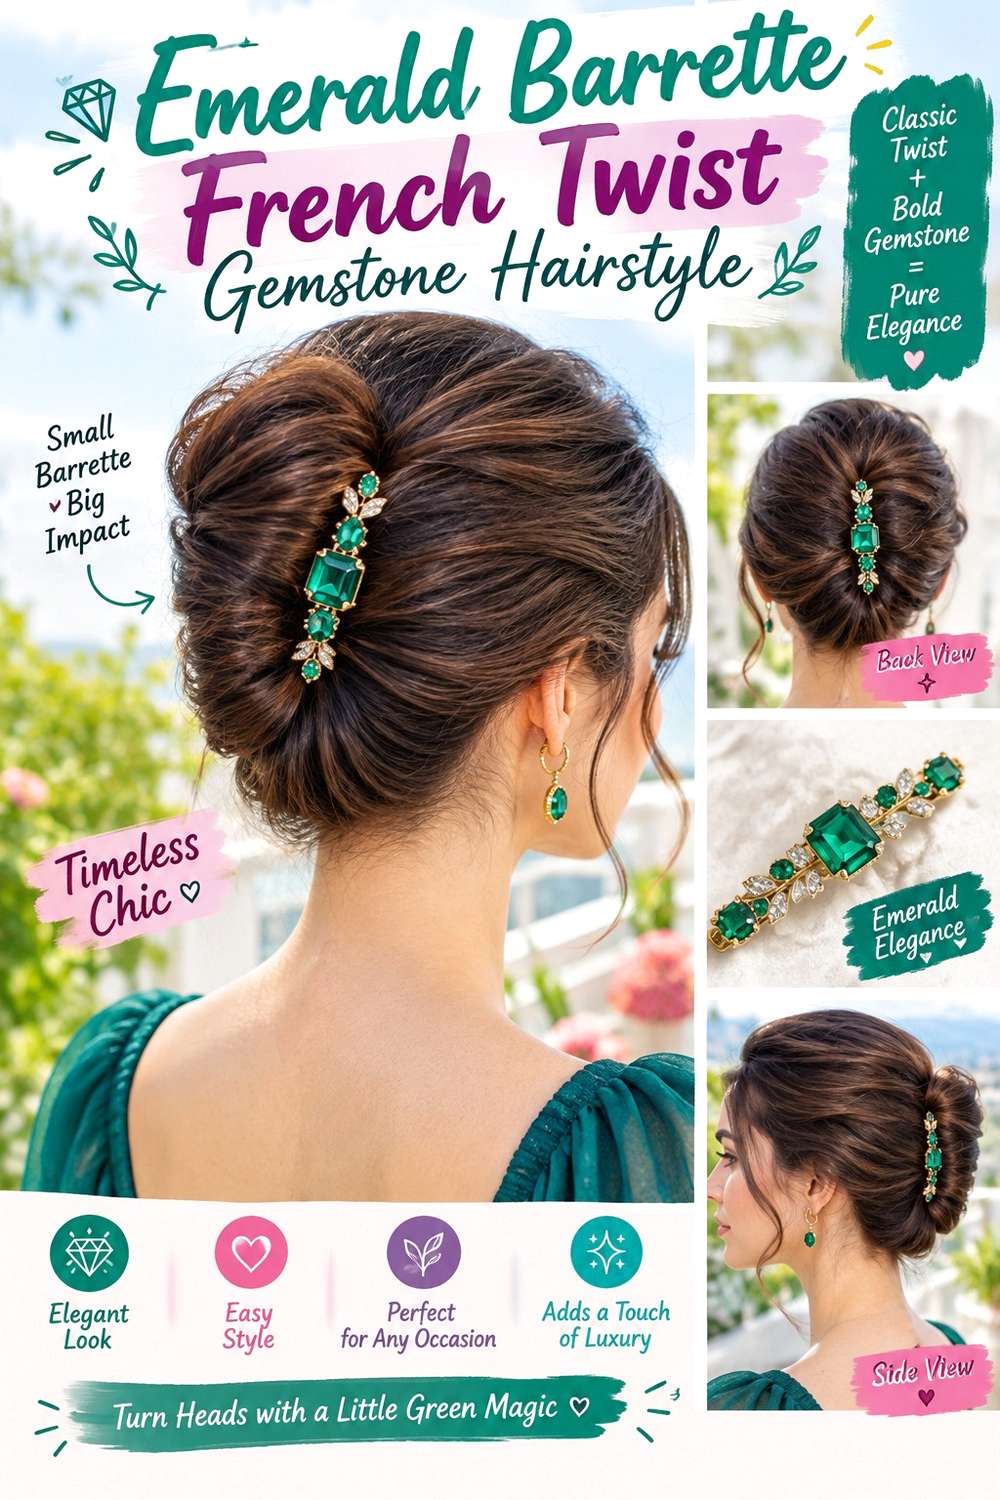
An emerald-toned barrette can sit along the open edge of a French twist, where the vertical shape gives the gemstone detail a clean background. Sweep the lengths inward from the nape and roll them upward, keeping the twist elongated rather than forming a round bun. A slight side part or softly lifted front keeps the profile from feeling too severe. Medium to long hair provides enough length to fold securely, and naturally textured hair can add useful grip as long as the surface remains controlled where the barrette attaches.
Light texturizing spray helps the lengths hold together, bobby pins secure the internal roll, and flexible hairspray controls flyaways without freezing the finish. Creating the twist from scratch takes more time than a quick refresh, which usually involves replacing one loosened pin and checking the barrette. If a stylist is preparing the look, specify whether the twist should sit centered or slightly off-center and where the visible fold should end near the crown. The gemstone barrette should decorate a stable section, not carry the weight of the roll. If it pulls downward, reinforce the hidden anchor first rather than clamping the accessory more tightly.
Pro tip:
Build the hidden pin structure first, then add the emerald barrette along the visible fold. The twist should remain stable even if the decorative piece is removed midway through the event.
Make It Work for You:
For very long hair, fold excess length inside the twist instead of making the roll unnecessarily tall. This preserves the vertical shape while keeping the barrette in proportion.
Watch Out For:
Avoid attaching the barrette only to the outermost loose layer. It may pull the twist open; place it where there is a reinforced section beneath the visible surface.
Ruby Pin Half-Up Waves Gemstone Hairstyle
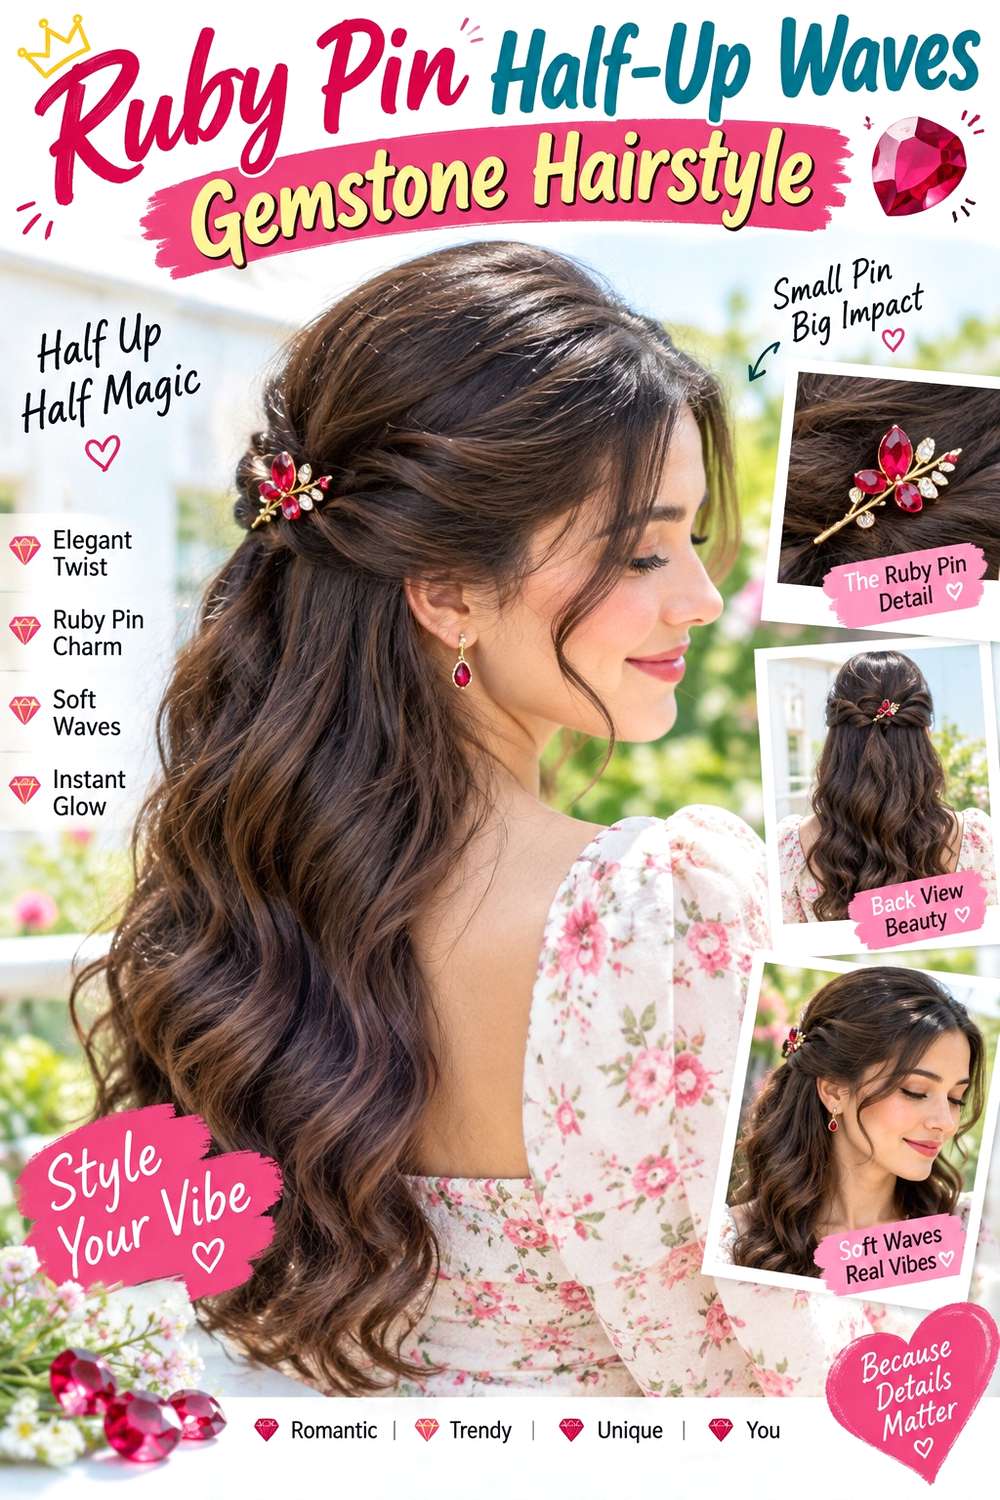
A ruby-colored pin placed at the meeting point of a half-up style gives loose waves a focused accent without covering the movement. Gather the upper side sections toward the back, keeping a little lift through the crown, then let the remaining hair fall in broad bends from around the jaw downward. Medium and long lengths show the contrast between the gathered top and loose bottom most clearly. Finer hair can use a smaller upper section to preserve fullness below, while dense hair can support a wider half-up section without making the lower lengths look sparse.
Apply heat protectant first, form open waves with a curling iron, and use bobby pins to secure the half-up base beneath the decorative pin. Full styling includes shaping the entire length and takes longer, while a quick refresh may focus on the front pieces and crown. If a stylist is creating the look, show how much hair you want gathered and where the shortest visible wave should begin. The gemstone pin should sit over a secure anchor rather than replace it. If the crown starts to sag, adjust the hidden pins instead of pushing the decorative piece deeper into the hair.
Pro tip:
Cross the upper side sections over the hidden anchor before adding the ruby pin. This creates a cleaner meeting point and gives the decorative piece a stable area to sit over.
Make It Work for You:
For naturally wavy hair, keep the existing pattern and refine only the face-framing pieces. The half-up structure and ruby accent remain clear without restyling every section.
Watch Out For:
Do not gather so much hair into the upper section that the loose lengths look noticeably reduced. Return some hair to the bottom if the half-up portion becomes too heavy.
Sapphire Comb Low Ponytail Gemstone Hairstyle
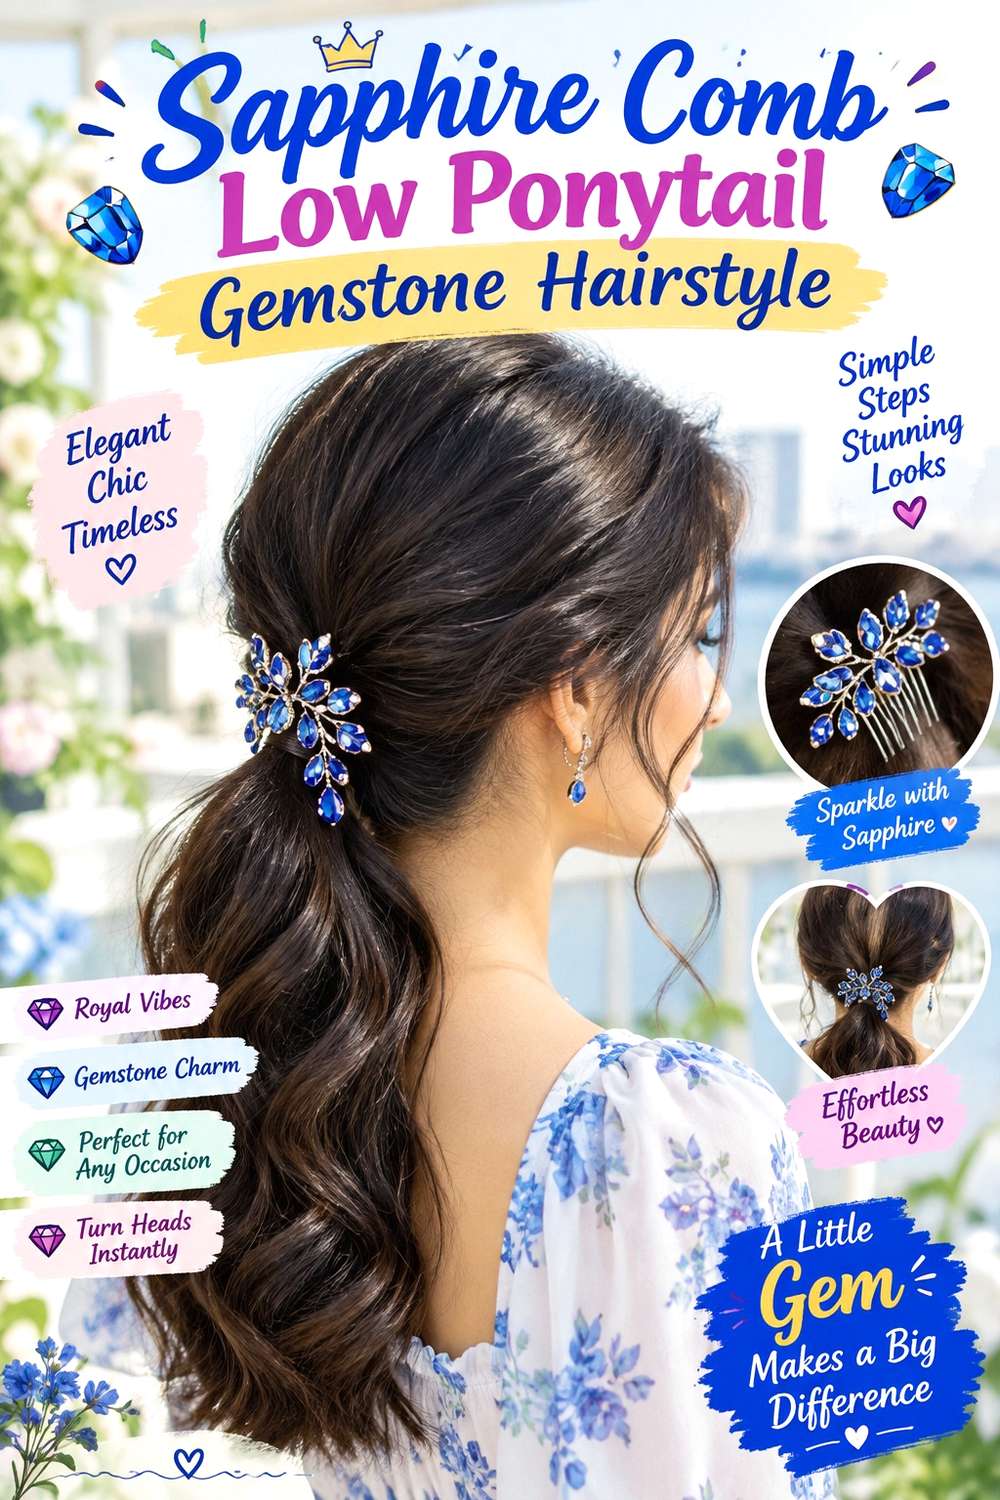
A sapphire-colored comb tucked above a low ponytail adds shine without changing the simplicity of the gathered shape. Create a center or softly off-center part, keep the crown smooth with a little natural lift, and secure the ponytail at the nape. The lengths can stay straight, carry a gentle wave, or keep their natural texture. Medium to long hair works most easily, while finer density benefits from leaving the ponytail softly gathered rather than heavily coated or compressed. Place the comb just above the elastic so its teeth enter a stable section of hair rather than the loose lengths.
Use lightweight smoothing serum to control flyaways, a fabric-covered elastic for the structural anchor, and the gemstone comb as the decorative finish. A full wash-day style may require drying and resetting the part, while a quick refresh often means smoothing the crown and reseating the comb. If a stylist is preparing the look, specify the ponytail height and whether the comb should sit horizontally or at a slight angle. Check that the teeth do not press uncomfortably against the scalp. If the comb slips, change its angle or anchor point rather than tightening the ponytail unnecessarily.
Pro tip:
Insert the comb at a slight angle into hair just above the ponytail base, then check it from the side. A stable angle often holds better than forcing it straight downward.
Make It Work for You:
For curly or wavy lengths, keep the ponytail’s natural texture and smooth only the front if desired. The sapphire comb can still provide a polished focal point at the base.
Watch Out For:
Avoid placing the comb where its teeth press directly against the elastic or scalp. Reposition it into a cushioned section of hair so security does not depend on discomfort.
Pearl And Gem Braided Crown Hairstyle
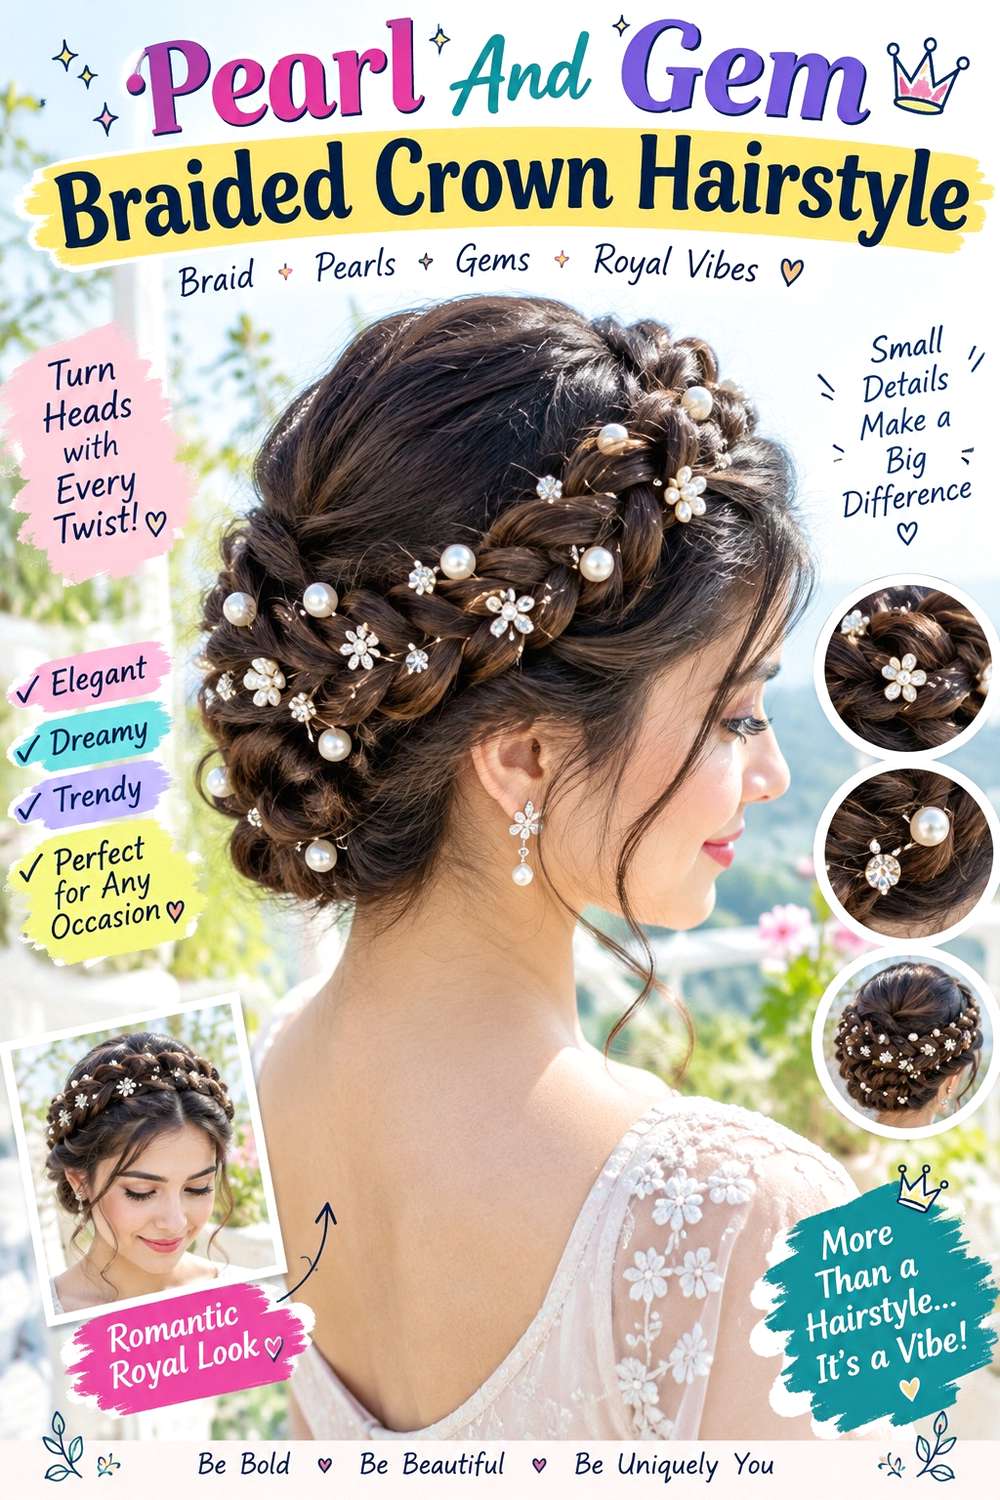
A braided crown gives pearl-and-gem accessories several secure points without requiring them to carry the hairstyle. Build one or two braids along the upper sides of the head, keeping the woven sections close enough to hold but loose enough to stay comfortable. The remaining hair can be pinned into a low shape or left down in soft texture, depending on length. Medium to long hair is easiest to wrap, while shorter layers can remain softly visible around the temples rather than being forced into the braid. Small gemstone pins spaced along the braid keep the decoration readable.
Use light texturizing spray to improve grip, small bobby pins to anchor the braid, and flexible hairspray for surface control after placement. Creating the crown from scratch takes more effort than a quick refresh, which may only require securing one loosened section and straightening a pin. If a stylist is preparing it, specify braid width, height, and comfortable tension before accessories are added. The decorative pins should enter secure woven sections rather than loose edges. If one starts to shift, correct that attachment point individually instead of tightening the entire crown and increasing pressure around the hairline.
Pro tip:
Add decorative pins after the braid is fully anchored and widened. Working in that order lets you correct the crown shape first without repeatedly removing accessories from the woven sections.
Make It Work for You:
For shorter layers, use narrower crown braids and allow soft pieces to remain near the temples. The braided outline stays recognizable without forcing every strand into the structure.
Watch Out For:
Do not place multiple heavy pins on one small section of braid. Uneven weight can pull the crown downward; distribute the accessories or reduce their number around weaker areas.
Amethyst Side Braid Gemstone Hairstyle
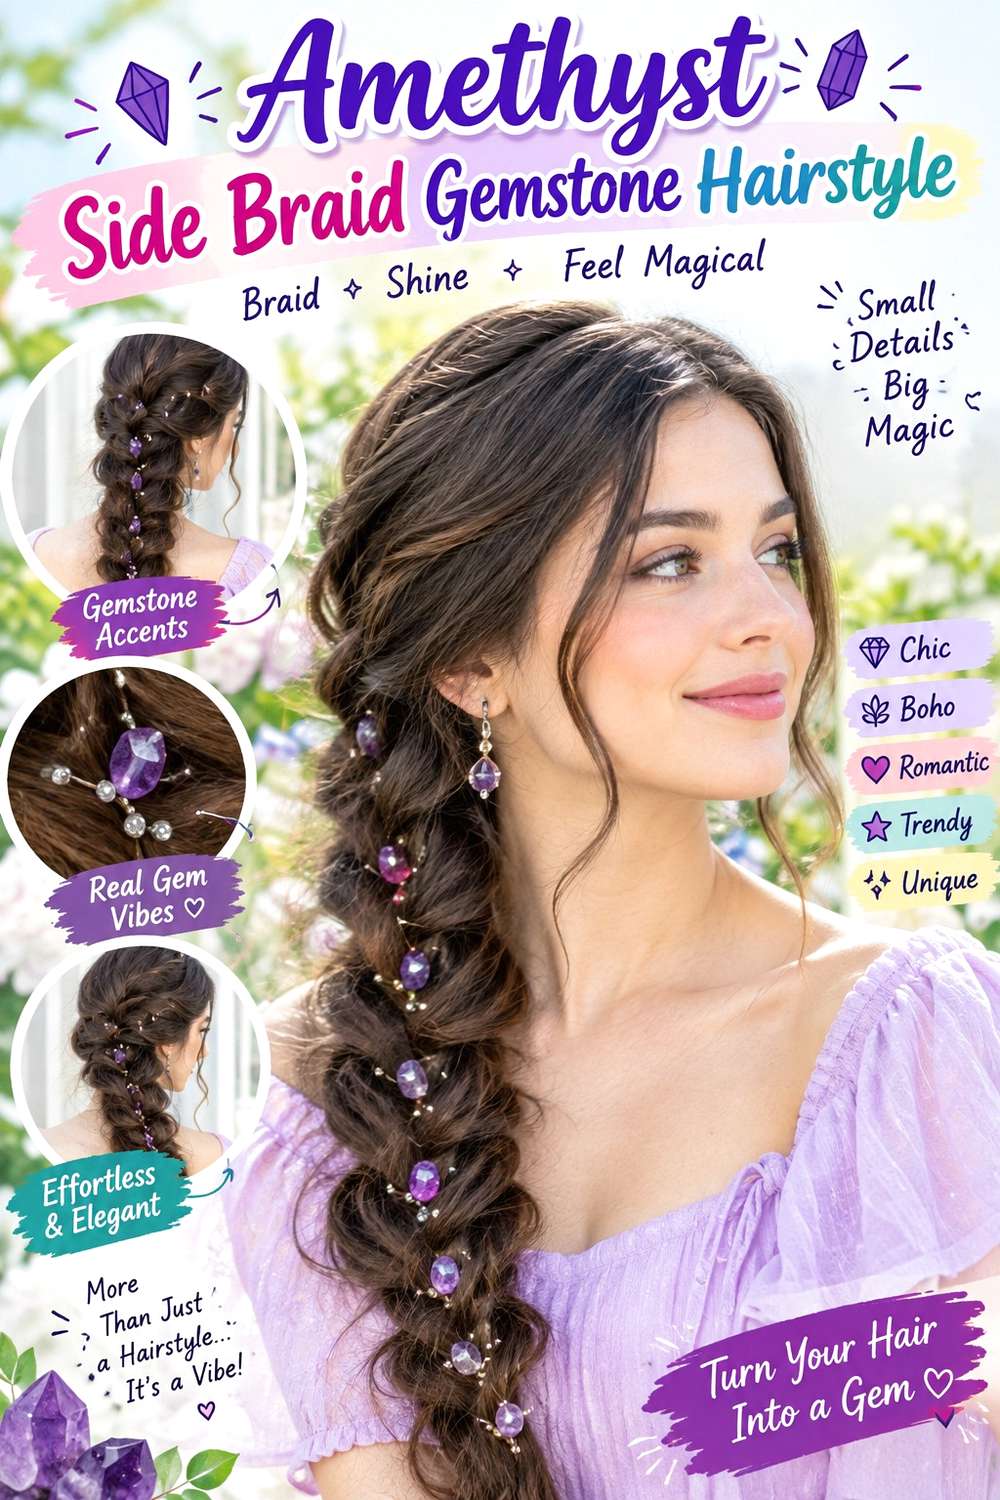
An amethyst accent placed near the start of a side braid draws attention to the diagonal movement without interrupting the woven length. Sweep most of the hair over one shoulder, begin the braid low enough to keep the crown relaxed, and let a narrow face-framing section remain free if you prefer softer balance. Medium to long hair gives the braid enough length to show, and naturally wavy or curly texture can make the outer edges appear fuller with less manipulation. Keep the gemstone piece near the upper anchor where it can stay visible and avoid catching the moving braid.
Light texturizing spray adds grip, a small elastic secures the end, and flexible hairspray controls shorter flyaways after the braid is widened. A complete style takes longer because the braid needs balancing, while a refresh can focus on retightening the end and resetting the accessory. If a stylist is creating the look, specify which shoulder the braid should fall over and how wide you want the finished weave. Comfortable tension matters more than a very tight start. If the gemstone piece moves, support its anchor separately rather than pulling the braid tighter at the scalp.
Pro tip:
Loosen the braid from the bottom upward after securing the end. This gives you better control over width and keeps the upper gemstone anchor from becoming unstable.
Make It Work for You:
For layered hair, keep the internal braid slightly firmer and let the shortest front pieces remain intentional. The side-swept direction still reads clearly without excessive pinning.
Watch Out For:
Avoid anchoring the gemstone to a very loose outer loop of the braid. If that loop stretches, the accessory can rotate; attach it closer to the braid’s stable core.
Opal Cluster Curly Updo Gemstone Hairstyle
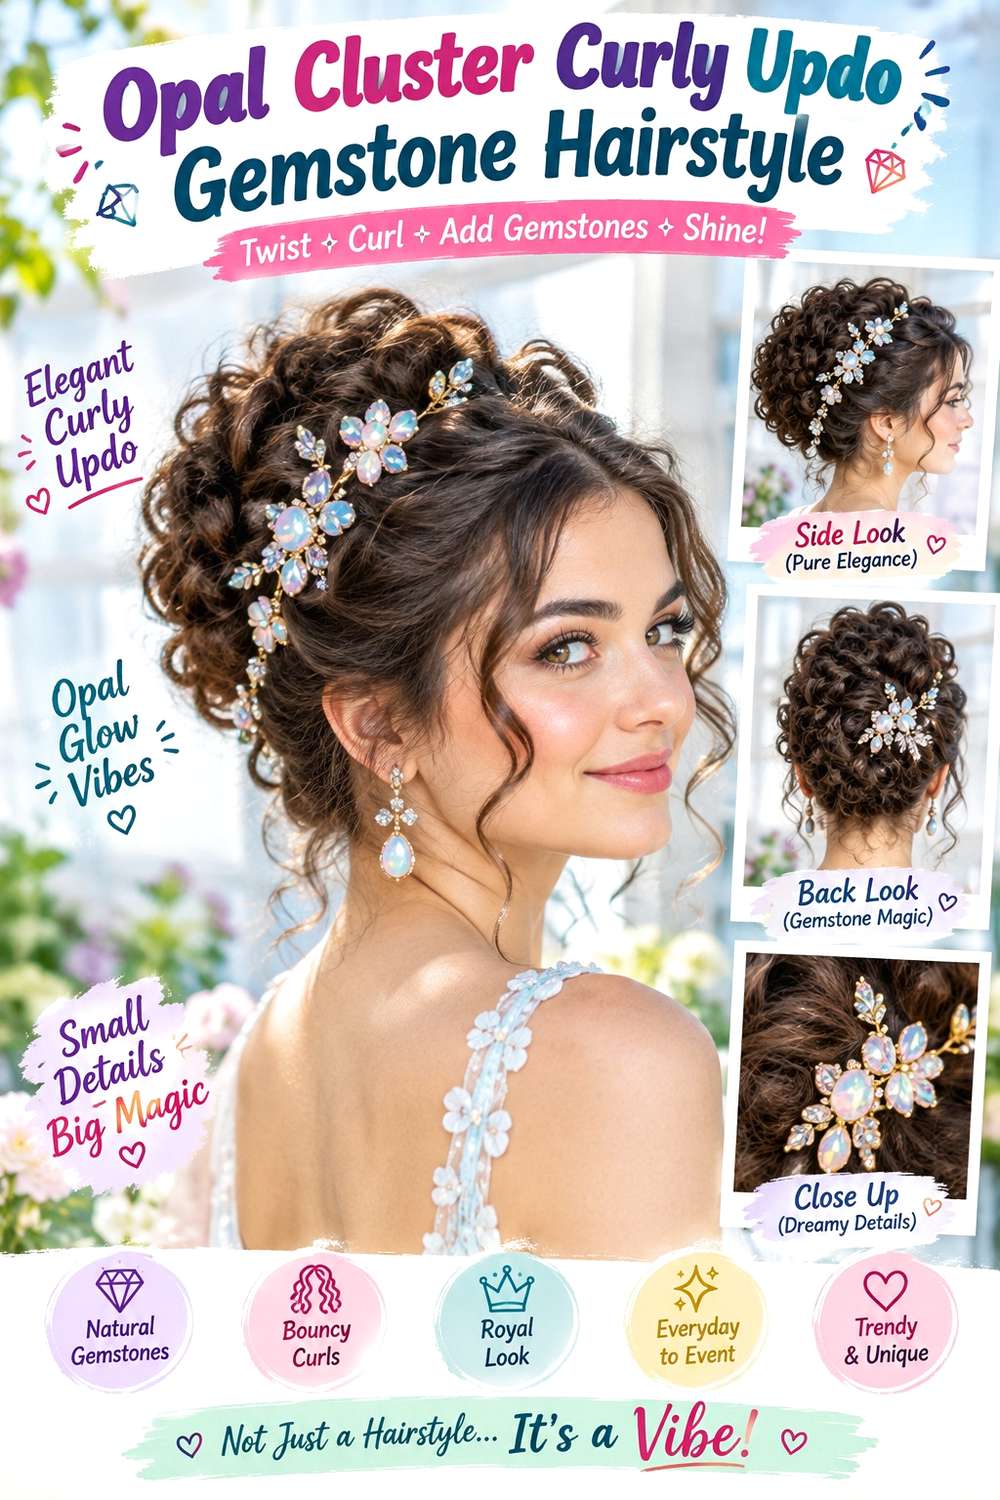
An opal cluster can brighten a curly updo when it sits beside the main gathered shape instead of being buried in the texture. Gather curls into a low or mid-height arrangement, preserving visible curl groups around the outer edge and leaving a few deliberate pieces near the temples if desired. The updo can be asymmetrical, with the gemstone cluster placed on the fuller side or opposite it for contrast. Curly hair at medium or long lengths offers enough material to pin securely, while the finished size will vary with shrinkage and density.
Use lightweight leave-in conditioner to support softness, curl gel to maintain definition, and bobby pins to build the updo without crushing the curl pattern. A full wash-day set can take considerably longer, while a refresh may involve redefining only the outer curls and checking the accessory. If a stylist is preparing the look, discuss the updo placement in its dry finished state and identify exactly where you want the opal cluster visible. Secure the decorative piece into a pinned base rather than individual loose curls. If it shifts, reinforce the anchor underneath instead of compressing the surrounding texture.
Pro tip:
Choose the opal cluster position after the updo is balanced from the front and side. This helps you place sparkle where it stays visible without covering the strongest curl definition.
Make It Work for You:
For shorter curls, build a more compact low updo and keep a few defined groups visible around the edges. The opal accent can remain prominent without requiring extra length.
Watch Out For:
Do not separate multiple curl groups just to make room for the accessory. Create a secure pinned area underneath instead, so the cluster can attach without producing unnecessary frizz.
Topaz Accent Coily Puff Gemstone Hairstyle
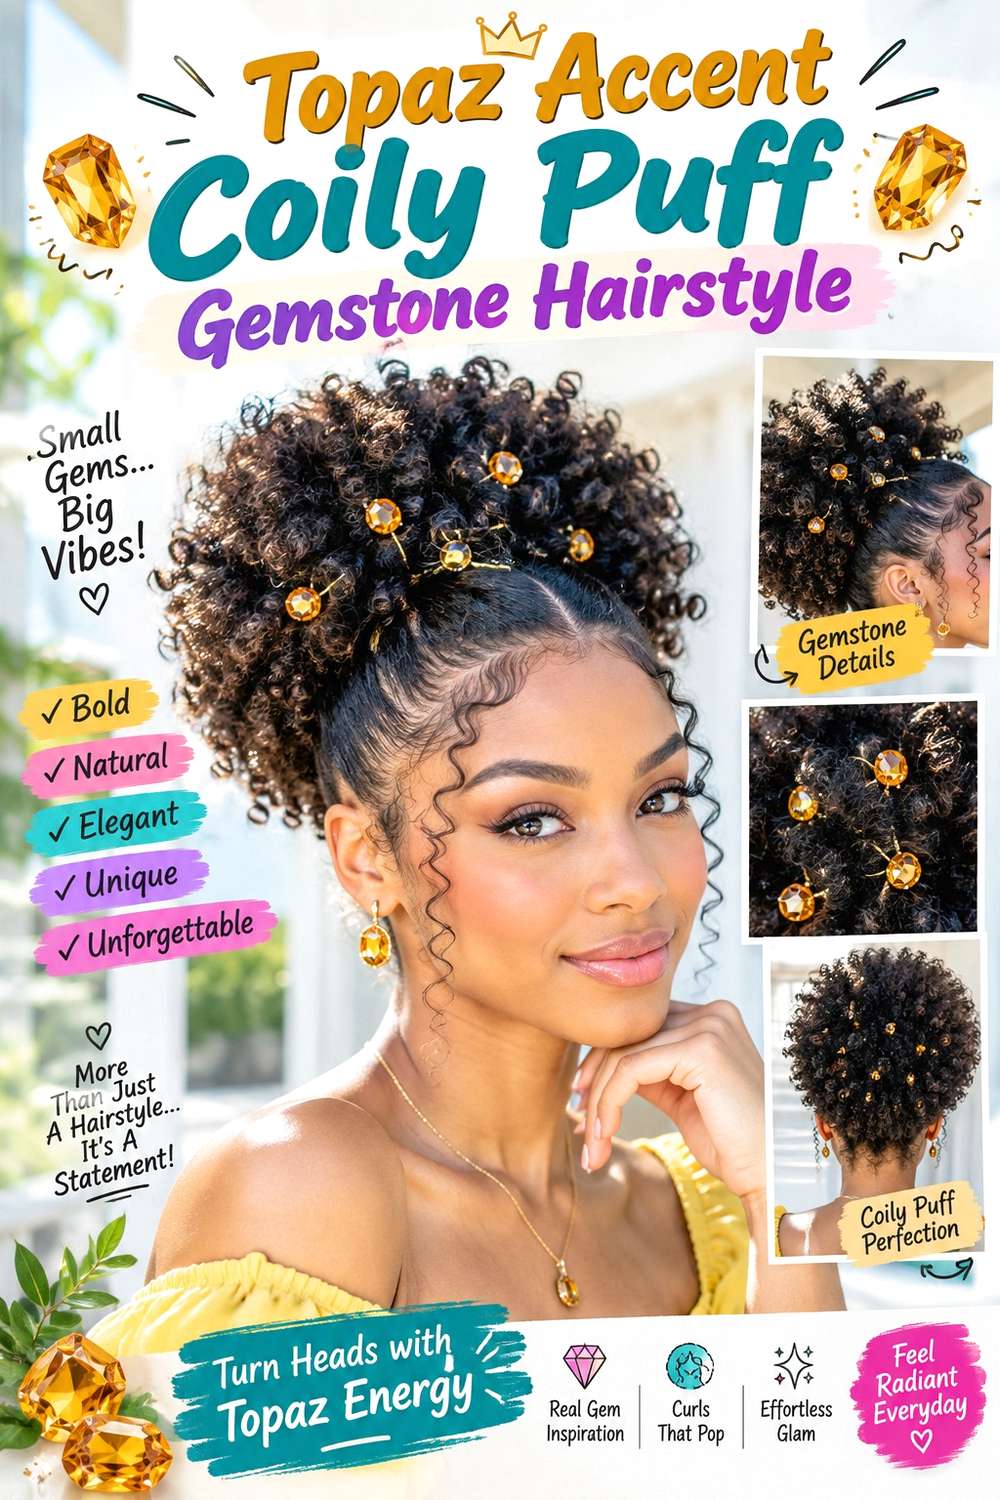
A topaz accent placed beside a high or mid-height coily puff adds a concentrated point of shine while leaving the texture as the main shape. Gather the hair comfortably toward the crown, preserve the rounded puff, and smooth only as much of the front as suits your preferred finish. A few coils can remain visible around the hairline if desired. Short-to-medium coily lengths can create a compact puff, while longer hair produces more height and movement. Choose an accessory scale that stays visible without pressing deeply into the dense texture.
Use moisturizing leave-in conditioner for softness, styling gel for targeted perimeter control, and a soft hair tie to form the puff without excessive tension. Starting from a full wash and definition routine takes longer, while a refresh may focus on the edges, outer puff shape, and gemstone placement. If a stylist is arranging the look, specify the puff height and where the accessory should sit once the hair is fully dry and shrinkage is visible. Anchor the gemstone piece near the secured base rather than through several loose coil groups. If it slips, change the attachment point instead of tightening the puff across the scalp.
Pro tip:
Shape the puff from the outside after securing the base, then place the topaz accent near the strongest anchor. This keeps the accessory visible without flattening the rounded texture.
Make It Work for You:
For a shorter puff, use a smaller gemstone accent and place it closer to the base. The proportion stays balanced while the coily silhouette remains the dominant feature.
Watch Out For:
Avoid using the accessory to press down sections that feel too full. If you want less height in one area, reshape the puff itself instead of adding concentrated pressure.
Gemstone Chain Bubble Ponytail Hairstyle
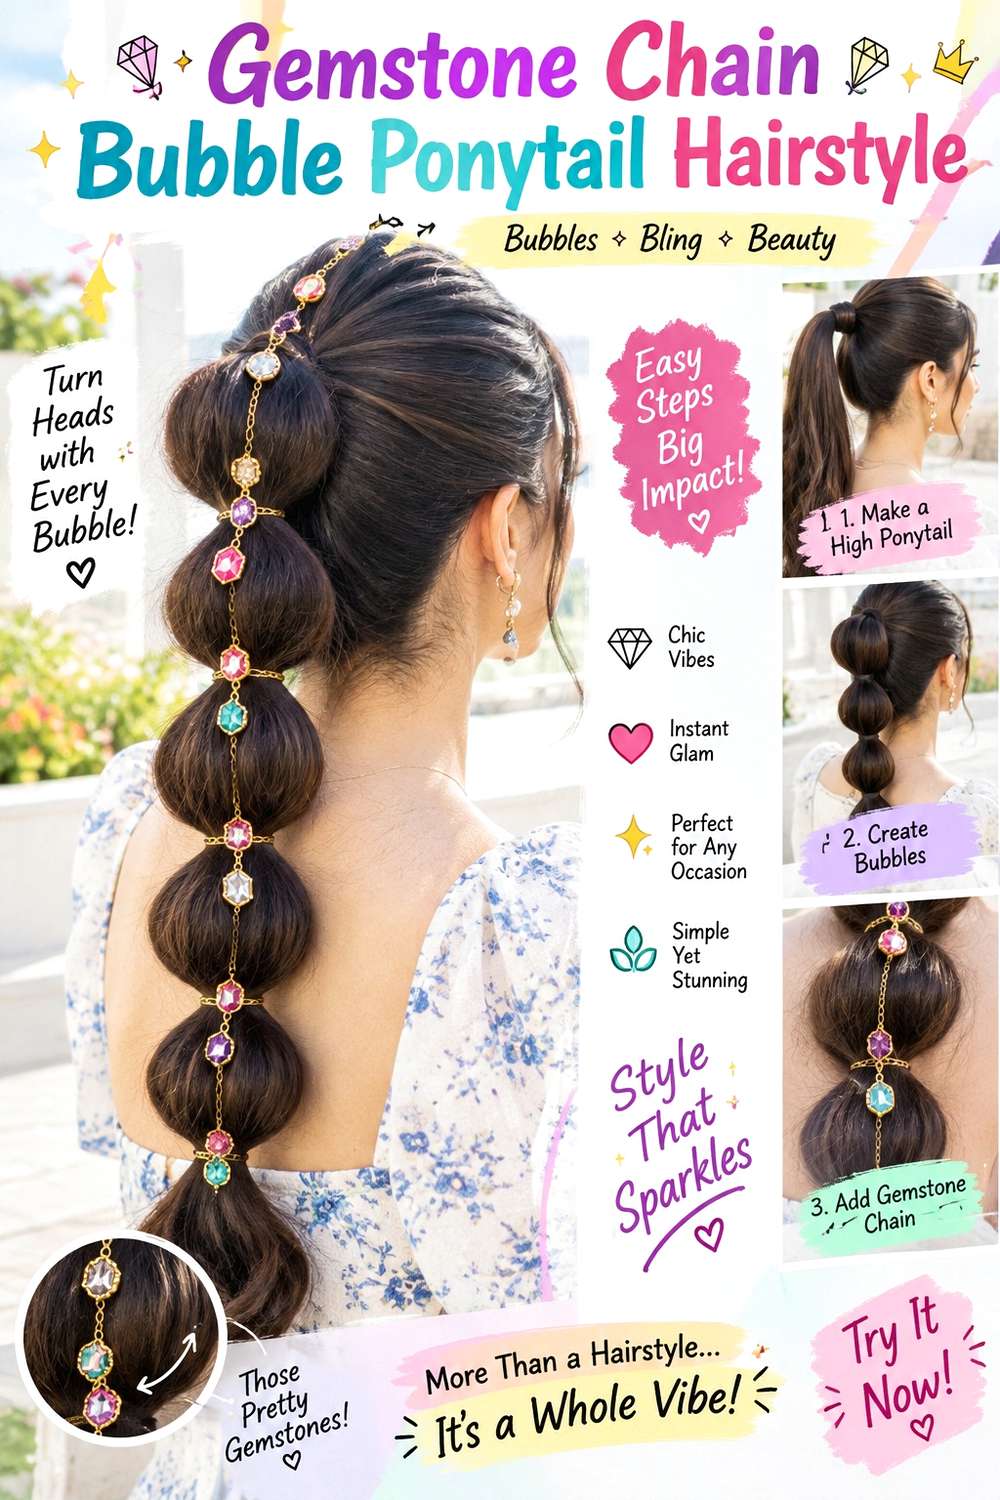
A gemstone chain threaded around a bubble ponytail creates repeated sparkle that follows the length instead of staying only at the base. Start with a secure mid-height or high ponytail, then divide it into rounded sections using even spacing. Let each bubble expand gradually so the outline stays balanced, and weave or wrap the chain around selected divisions rather than across every loose surface. Long hair shows the sequence most clearly, while medium length can use fewer bubbles. Straight, wavy, or stretched textured hair can all support the structure.
Use lightweight mousse for manageable body, snag-free elastics to create the bubble divisions, and the gemstone chain as the decorative layer after the shape is stable. Building the full ponytail takes longer because every section needs balancing, while a refresh often means reshaping one flattened bubble and checking the chain endpoints. If a stylist is preparing it, specify bubble size, ponytail height, and how far down the chain should extend. The chain should never replace the elastics. If a section loosens, repair its structural tie first rather than winding the gemstone detail tighter around the hair.
Pro tip:
Finish shaping every bubble before wrapping the chain. Once the proportions are even, you can follow the structure with the gemstone detail without hiding sections that still need correction.
Make It Work for You:
For medium-length hair, use fewer bubbles and stop the chain earlier. The repeated shape remains clear, and the shorter accessory path is less likely to crowd the ends.
Watch Out For:
Do not tighten the chain around a bubble that has started to flatten. Repair the elastic division and reshape the hair first, then return the decoration to its original spacing.
Jeweled Bobby Pin Sleek Bob Gemstone Hairstyle
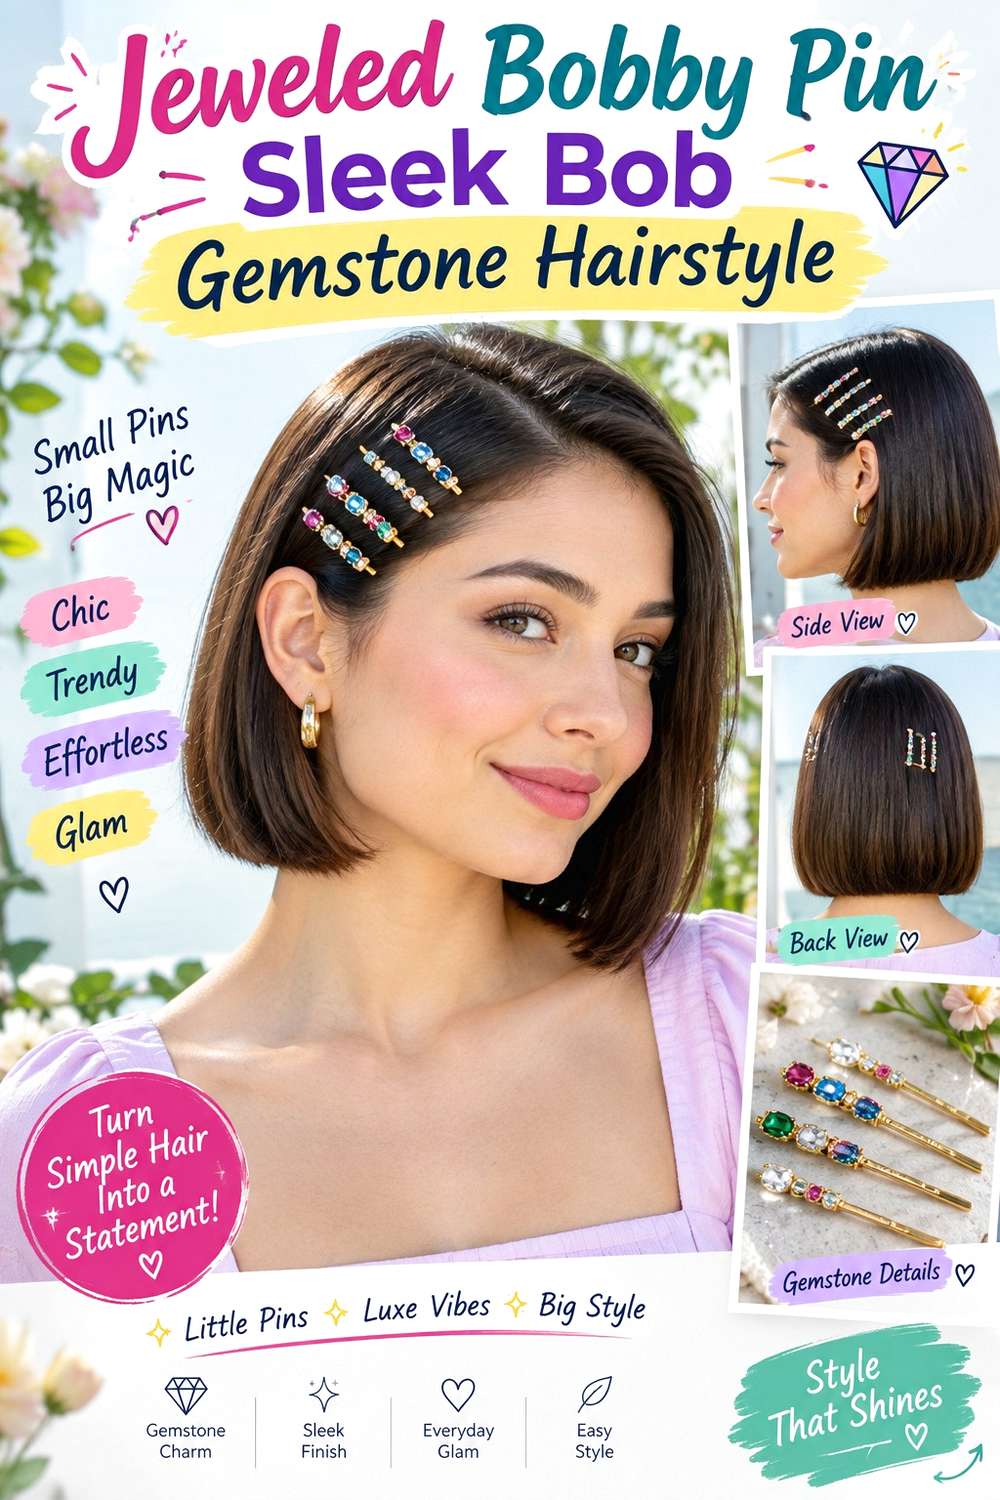
A sleek bob becomes more graphic when several jeweled bobby pins sit in a deliberate row above one ear. Keep the perimeter around the jaw or chin clearly defined, choose a center or shallow side part, and tuck one side back so the gemstone line remains visible. The ends can stay mostly straight with a slight inward bend rather than a full curl. Straight and wavy textures can both adapt to the finish, while finer density often benefits from preserving a fuller bottom edge instead of removing too much weight near the perimeter.
Apply heat protectant before refining the shape, use a flat iron for controlled smoothing and a slight end bend, and place jeweled bobby pins through the tucked side as the final detail. A full wash-day style takes longer, while a refresh may only require correcting the front and reseating one pin. If a stylist is preparing the cut or style, specify the finished perimeter length and exactly how far above the ear you want the pin row to sit. The pins should anchor into stable hair, not just skim the surface. If they slide, cross or reposition the hidden grip rather than pressing them harder against the scalp.
Pro tip:
Arrange the jeweled pins in a clean line only after the tucked side sits where you want it. Starting with the hair shape keeps the accessory row from dictating an awkward angle.
Make It Work for You:
For a naturally wavy bob, smooth only the tucked side and keep soft movement through the opposite lengths. The pin row still looks deliberate without straightening the entire cut.
Watch Out For:
Avoid placing every pin through exactly the same tiny section. Concentrated pressure can feel uncomfortable and reduce grip; stagger the attachment points while keeping the visible row aligned.
Gemstone Halo Loose Curls Hairstyle
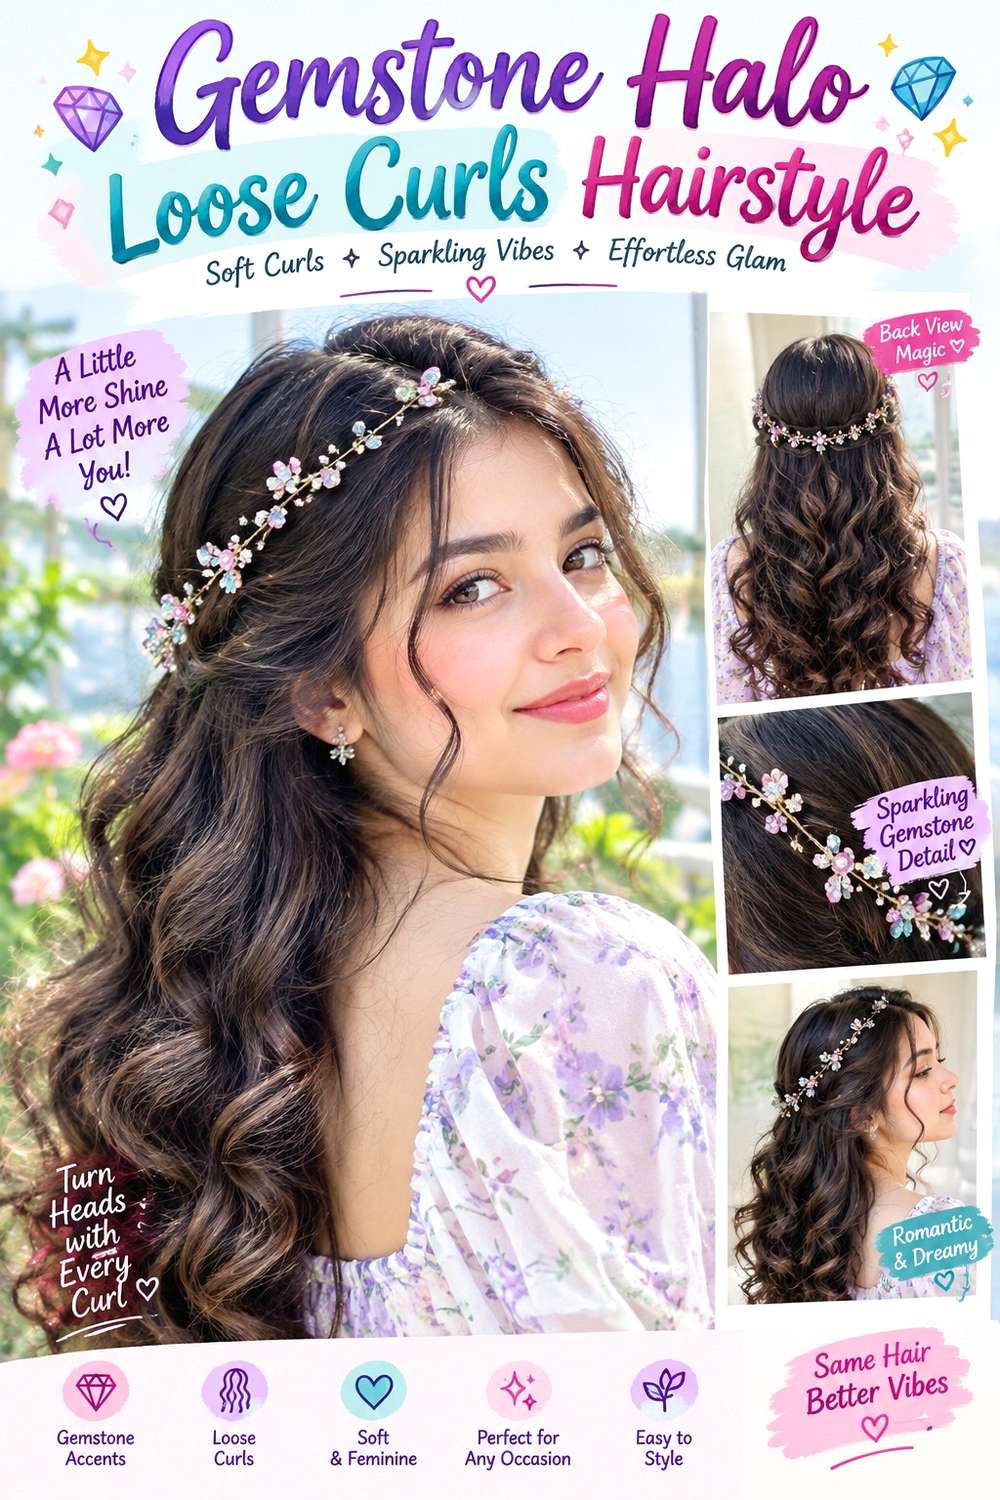
A halo-style gemstone accessory sits around the upper head while loose curls remain visible beneath and behind it. Keep the part soft, allow defined curls to frame the temples, and position the halo where it follows the head without flattening the strongest root volume. Medium to long hair gives the curls space to fall, though shorter curly cuts can create a compact version. The accessory works best when its scale matches the visible texture; a very heavy halo can dominate finer curls, while a delicate one may disappear in dense volume.
Use lightweight leave-in conditioner for slip and softness, curl gel to support definition, and a diffuser when that drying method suits your routine. A full wash-day set takes longer because the curls need to dry and settle before final placement, while a quick refresh can focus on flattened areas around the halo. If a stylist is arranging the look, discuss accessory height and how much hair should remain visible in front of it once the curls are dry. Do not use the halo to force volume downward. If it moves, adjust its hidden anchor or position rather than compressing the curls more tightly against the head.
Pro tip:
Let curls dry completely before setting the halo’s final position. Moving the accessory through damp curls can separate groups and leave flattened areas that become more obvious after drying.
Make It Work for You:
For finer curls, choose a delicate halo and keep some root lift visible around it. A lighter scale preserves the airy shape instead of making the accessory dominate the hairstyle.
Watch Out For:
Do not push the halo down to control volume. If the curls feel too high in one area, reshape that section separately so the accessory can stay comfortable and level.
Vintage Brooch Chignon Gemstone Hairstyle
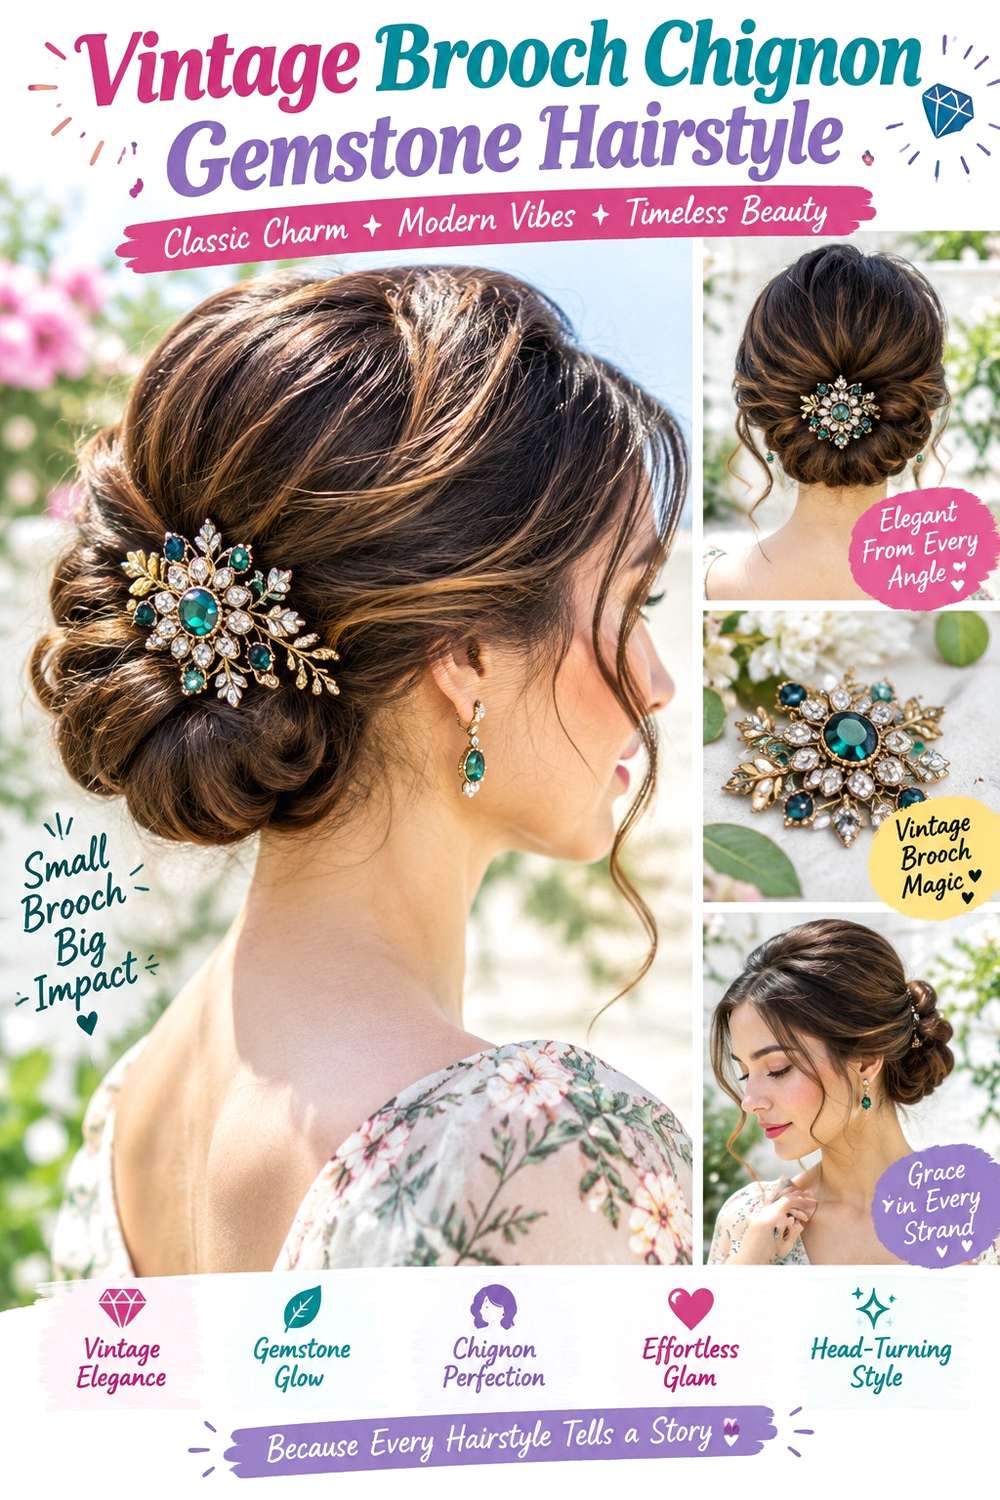
A vintage-style gemstone brooch can sit beside a low chignon as a focal point, provided the decorative piece is anchored independently from the bun’s structure. Gather the hair at the nape, form a compact rounded chignon, and keep the crown softly smooth rather than severely flat. A center or side part can both work, while narrow face-framing pieces may remain loose for a softer finish. Medium to long hair is easiest to fold into the shape, and dense hair may need a broader chignon so the base stays comfortable.
Use smoothing cream to control the surface, a fabric-covered elastic to establish the anchor, and bobby pins to secure the folded bun. Creating the chignon from scratch takes more time than a quick refresh, which usually means retucking an edge and checking the brooch attachment. If a stylist is preparing it, specify the chignon’s width and whether the gemstone piece should sit directly beside it or slightly above. Because a brooch can be heavier than a small pin, attach it to a reinforced section rather than loose hair. If it tilts, strengthen the hidden support instead of tightening the entire bun.
Pro tip:
Test the brooch’s weight against the finished chignon before finalizing its angle. If it pulls, reinforce the nearby pinned section first rather than relying on the clasp alone.
Make It Work for You:
For finer hair, keep the chignon slightly smaller and choose a lighter brooch-style piece. The vintage focal point stays visible without making the gathered base look undersized.
Watch Out For:
Avoid attaching a heavy brooch to the soft outer edge of the bun. If the accessory tilts, move it toward a reinforced section instead of tightening the entire chignon.
Gemstone Vine Romantic Braid Hairstyle
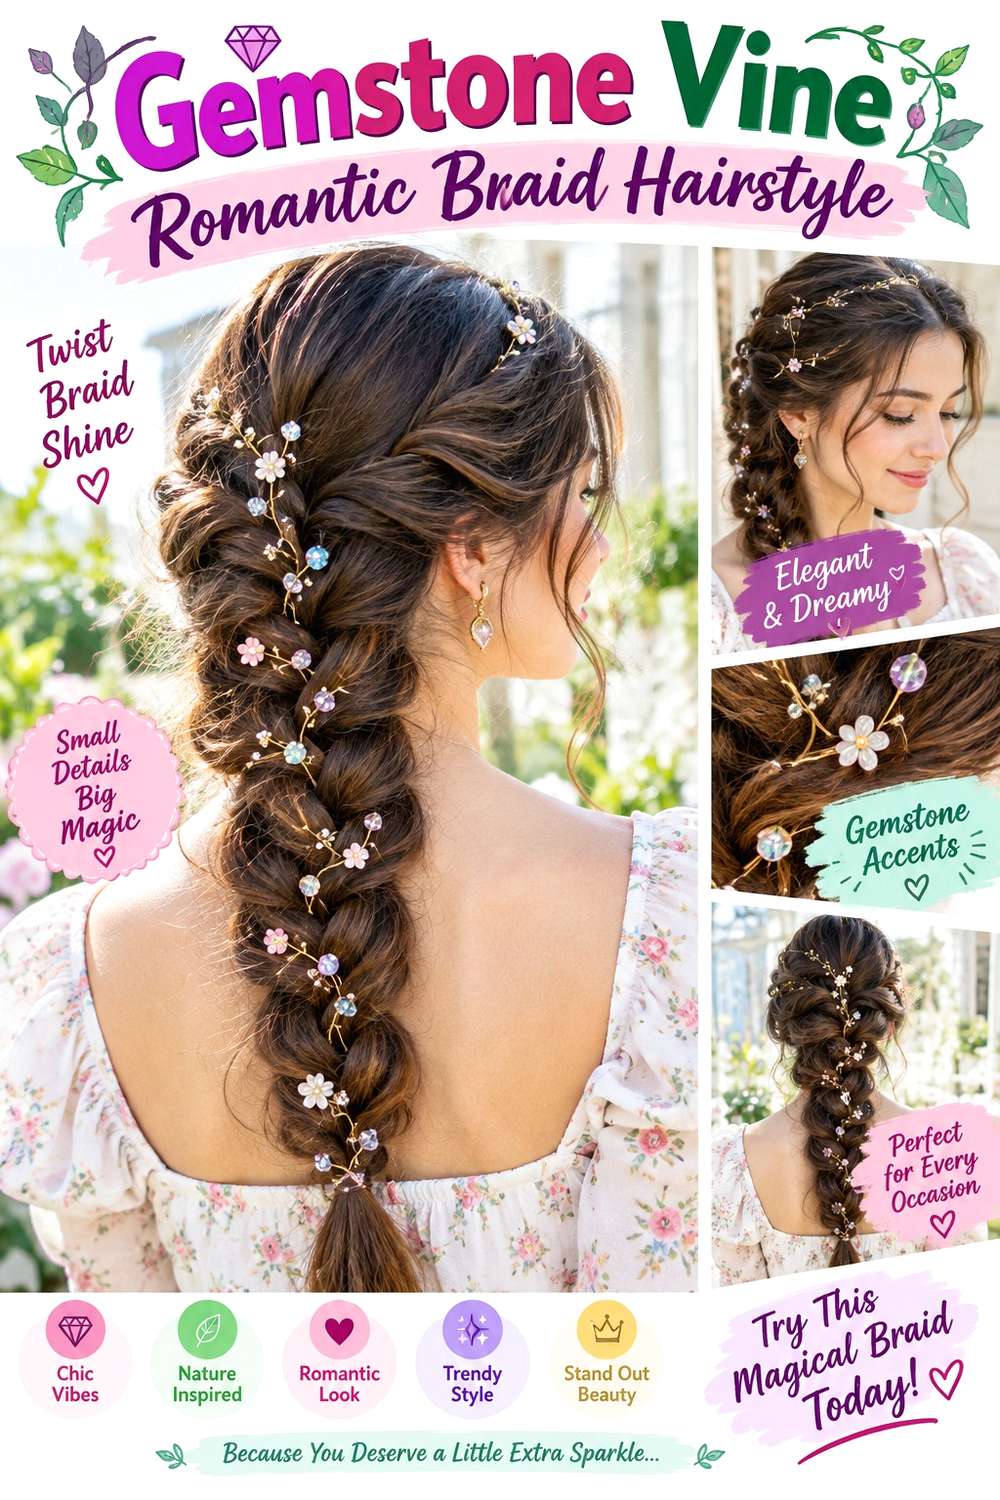
A flexible gemstone vine can trace a loose braid from the upper back of the head into the first part of the woven length. Keep the crown softly lifted, begin the braid low enough to avoid a tight hairline, and widen the outer edges gradually so the vine remains visible against the texture. Medium to long hair works best, while layered hair may need a slightly firmer internal braid to contain shorter pieces. Straight, wavy, and curly starting textures can all support the design when the braid is adjusted to the hair’s natural volume.
Use light texturizing spray for grip, a small elastic to secure the braid, and bobby pins to anchor the gemstone vine at several points without letting it carry the hairstyle. The full style takes longer because both the braid and accessory path need balancing, while a refresh can focus on one loose anchor or flattened section. If a stylist is creating it, specify the braid width and how far down you want the vine to travel. Keep every decorative attachment comfortable and removable. If the vine begins to shift, fix the nearest anchor rather than pulling the braid or winding the accessory more tightly around the hair.
Pro tip:
Anchor the vine at several small points as it follows the braid rather than securing only the ends. Distributed support helps the decorative line stay consistent when the braid moves.
Make It Work for You:
For shorter or heavily layered hair, keep the braid slightly narrower and run the vine over a shorter section. The design remains recognizable without forcing loose ends into place.
Watch Out For:
Do not wrap the vine so tightly that it compresses the braid’s widened edges. If the texture disappears, loosen the accessory path rather than pulling the braid apart again.
Crystal Side Comb Pixie Gemstone Hairstyle
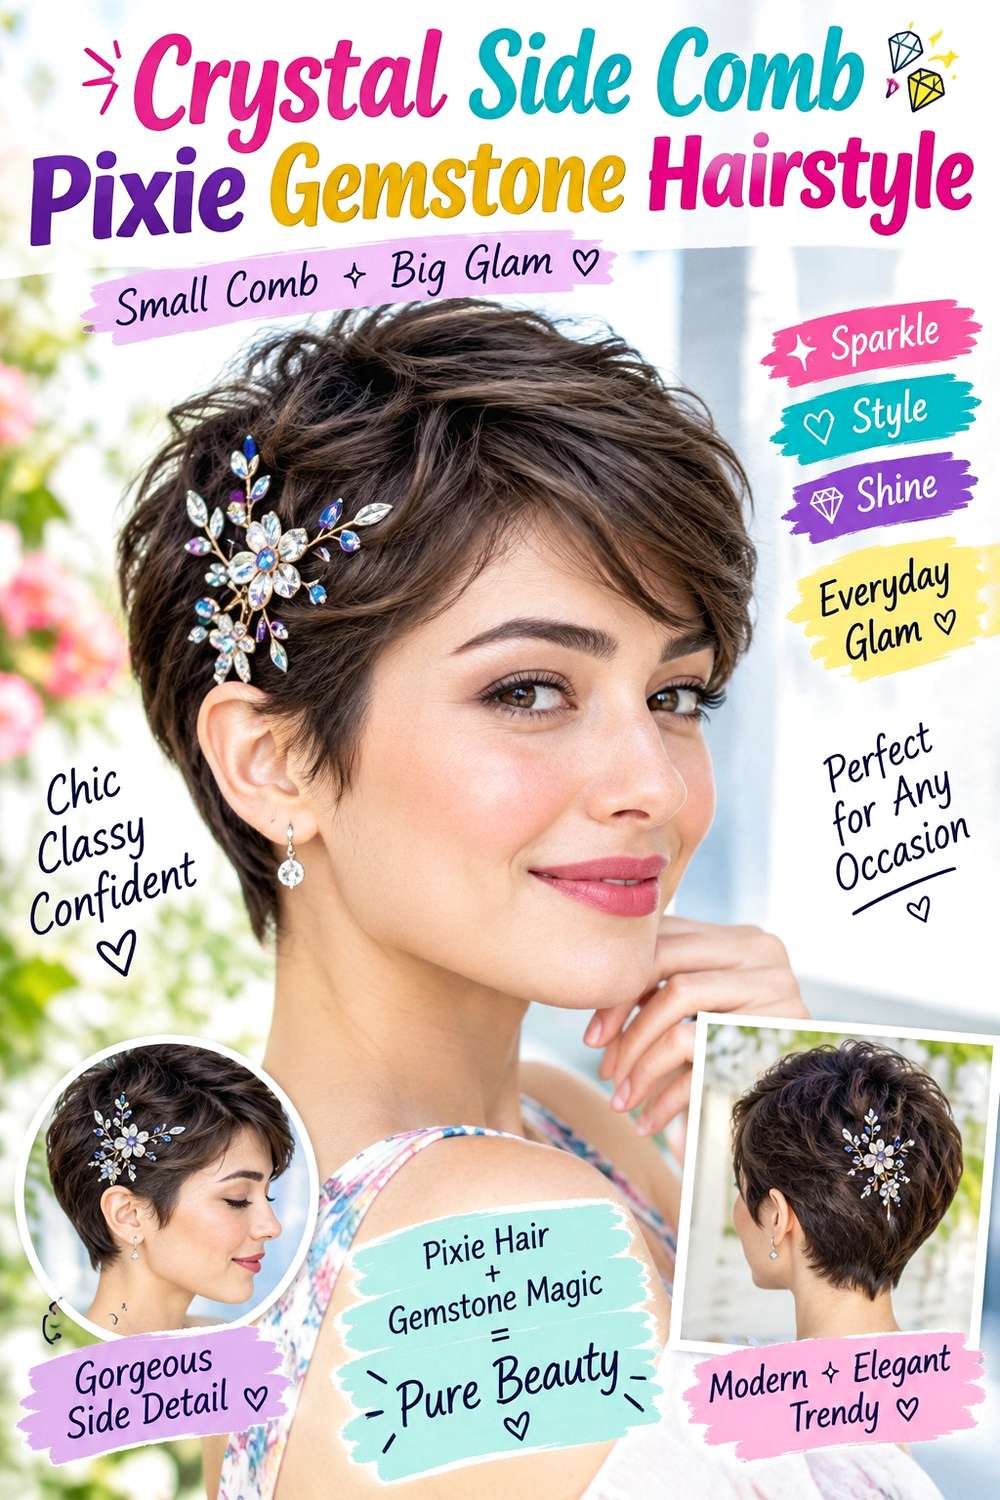
A crystal side comb can give a pixie a clear focal point without requiring long hair or an updo. Sweep the longer top section to one side, keep the shorter sides close to their natural direction, and slide the comb into the fuller side above or behind the temple. The front can remain smooth or lightly textured, but enough top length should stay visible so the accessory does not cover the entire shape. Pixies with a longer fringe offer the most flexibility, while very short cuts may suit a smaller comb.
Use lightweight styling cream to direct the top, texturizing paste to separate selected pieces, and the crystal comb as the final accessory. Styling after washing may take longer because the growth direction needs resetting, while a quick refresh can focus on the fringe and comb position. If a stylist is trimming or arranging the look, specify the finished fringe length and exactly where you want the comb to sit relative to the temple. Its teeth should enter enough hair to hold without scraping the scalp. If it slips, change the angle or choose a smaller piece rather than forcing the comb more tightly into short hair.
Pro tip:
Set the fringe and top direction before inserting the comb. Once the movement is established, place the accessory into that shape instead of using its teeth to force the hair sideways.
Make It Work for You:
For a very short pixie, choose a smaller comb and place it farther back from the temple. The crystal detail stays proportional while the limited top length remains visible.
Watch Out For:
Avoid repeatedly sliding the comb through the same short section to find grip. That can disturb the finish; change the insertion angle or move to a slightly denser area.
Multi-Gem Barrette Wavy Lob Hairstyle
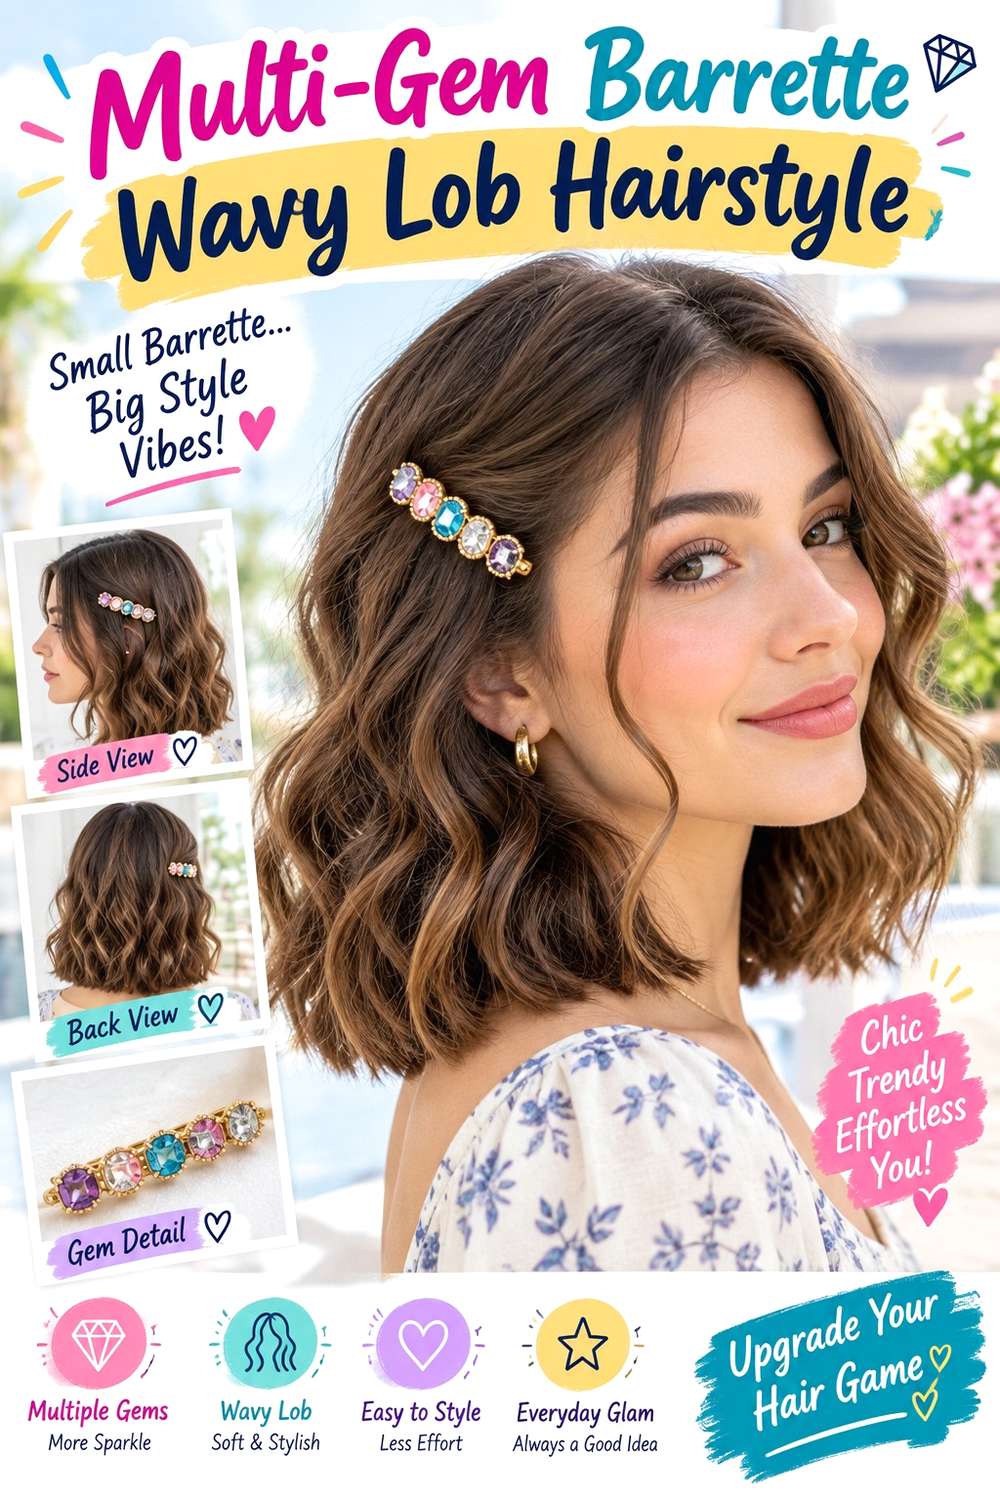
A multi-gem barrette placed above one ear gives a wavy lob a bright side accent while leaving the shoulder-length movement visible. Keep the perimeter around the collarbone, use a center or soft side part, and form broad bends through the mid-lengths with straighter tips. Tuck the lighter side behind the ear and place the barrette slightly above the tuck so it remains visible from the front. Fine or sparse ends may benefit from a fuller bottom line, while denser hair can support more internal movement without losing the lob’s outline.
Apply heat protectant before styling, use a curling iron for open bends, and secure the tucked side with the multi-gem barrette once the waves have cooled. Full wash-day styling takes longer, while a refresh usually means reshaping the front and one or two flattened bends. If a stylist is preparing the cut or finish, identify the exact perimeter length and where the first face-framing piece should end. The barrette should attach to a stable section rather than several loose wave tips. If it begins to slide, reset the tuck beneath it instead of adding pressure at the decorative clasp.
Pro tip:
Let the side wave cool before tucking it behind the ear and closing the barrette. This reduces the chance of creating an unwanted dent beside the accessory.
Make It Work for You:
For sparse ends, keep the lob’s bottom edge fuller and place most movement through the mid-lengths. The barrette can highlight the side without requiring additional thinning or layering.
Watch Out For:
Do not clamp the barrette across several loose wave tips. Those pieces can pull free as they move; attach it closer to the tucked section where the hair is more stable.
Gemstone Star Pin Twisted Bun Hairstyle
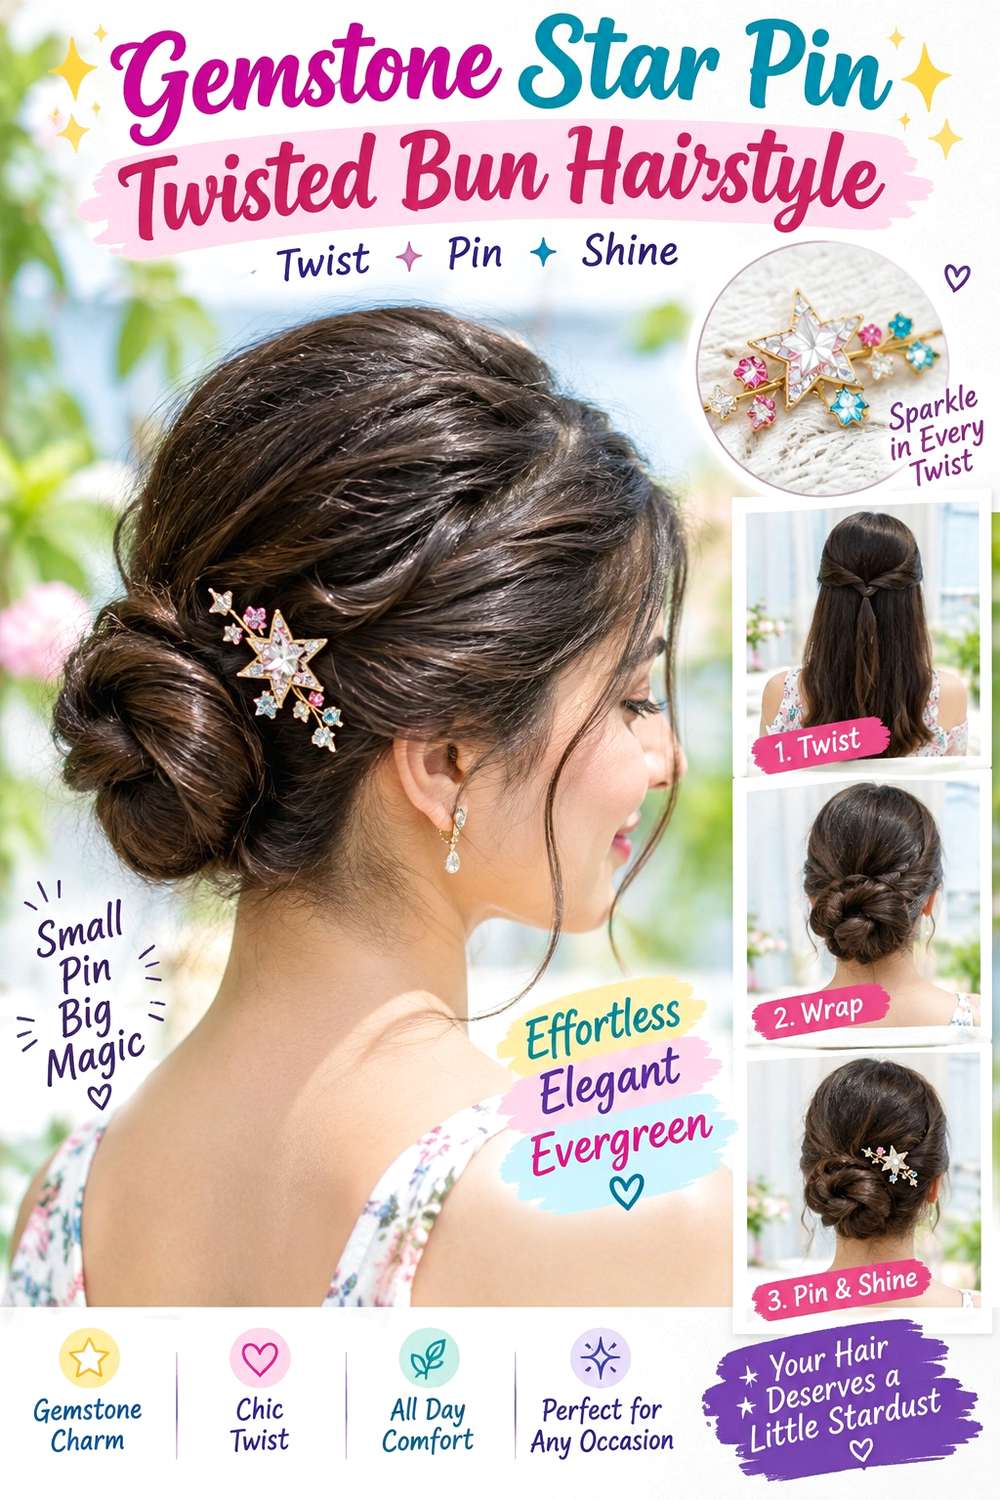
A gemstone star pin adds a concentrated accent to a twisted bun without covering the structure that gives the updo its shape. Gather the hair at low or mid height, twist the lengths into a compact coil, and leave the crown either smooth or gently lifted. Place the star just beside the bun or at the upper edge where it can be seen without taking the bun’s weight. Medium to long hair is easiest to twist securely, while dense hair may need a wider coil so the style remains comfortable rather than overly tight.
Use lightweight smoothing cream to control the surface, a fabric-covered elastic for the base, and bobby pins to secure the twisted coil. A full style takes longer when the bun must be rebuilt from freshly dried hair, while a refresh may only require retucking one end and repositioning the star. If a stylist is preparing the look, specify bun height, twist direction, and the exact side where the gemstone should appear. The star pin should enter a stable pinned area rather than the outermost loose edge. If it rotates, reinforce its anchor instead of tightening the complete bun around it.
Pro tip:
Place the star after the bun has been pinned from multiple directions. A finished structural base lets you choose the prettiest visible angle without asking the accessory to hold the coil.
Make It Work for You:
For very long hair, make a wider twisted bun rather than stacking the coil too high. The star remains visible while the extra length is distributed more comfortably.
Watch Out For:
Avoid pushing the star pin repeatedly into the outer twist if it rotates. Find a stronger pinned section underneath so the accessory can stay upright without distorting the bun.
Conclusion
Gemstone hair accessory hairstyles can look very different depending on length, density, texture, placement, and the amount of visible jewelry. A sleek bob or pixie keeps the accessory close to the face, while buns, braids, ponytails, and longer waves create more space for combs, vines, chains, and clustered pins. Fuller hair may support larger pieces, while finer density often benefits from lighter accessories and preserved perimeter weight. Natural curls and coils can remain defined instead of being smoothed simply for decoration. Compare the parting, volume, face-framing pieces, finish, and styling effort you actually prefer. The best choice is one that stays secure without excessive tension and can be removed cleanly after the event.
Before Your Salon Visit
Choose one or two favorite references and save clear views of the accessory placement as well as the supporting hairstyle. Discuss your natural texture, density, preferred length, face shape, usual routine, and how much upkeep or styling time feels realistic. Point out the exact braid width, bun height, face-framing pieces, crown volume, wave pattern, or finish you like. For temporary gemstone styles, focus on comfortable anchoring, accessory weight, and easy removal rather than assuming a haircut is necessary.
FAQs
Can gemstone hair accessories work with fine or low-density hair?
Yes. Smaller, lighter clips, pins, and combs are often easier to balance on fine or lower-density hair. Anchor them into a stable gathered, tucked, or braided section instead of loose surface strands. Preserving fullness at the ends can also keep the accessory from visually overpowering the hairstyle.
How do I stop a gemstone clip or comb from slipping?
Secure the supporting hairstyle first, then attach the accessory where it can grip a stable section. If it keeps moving, change the angle, placement, or accessory size rather than tightening the whole hairstyle. Heavy serum near the anchor can also reduce grip on very smooth hair.
Can I wear gemstone accessories with curls or coils?
Yes. Choose the placement after curls or coils reach their finished dry shape so shrinkage and volume are already visible. Avoid forcing a rigid piece through several curl groups. Anchoring near a pinned, braided, or gathered section helps protect definition and makes removal easier.
Do gemstone hair accessory hairstyles require heat styling?
No. Braids, puffs, buns, twists, natural curls, and many ponytails can support gemstone pieces without heat. Heat is useful only when you specifically want a smoother finish or shaped waves. When heated tools are part of the design, use heat protectant and limit unnecessary repeat passes.