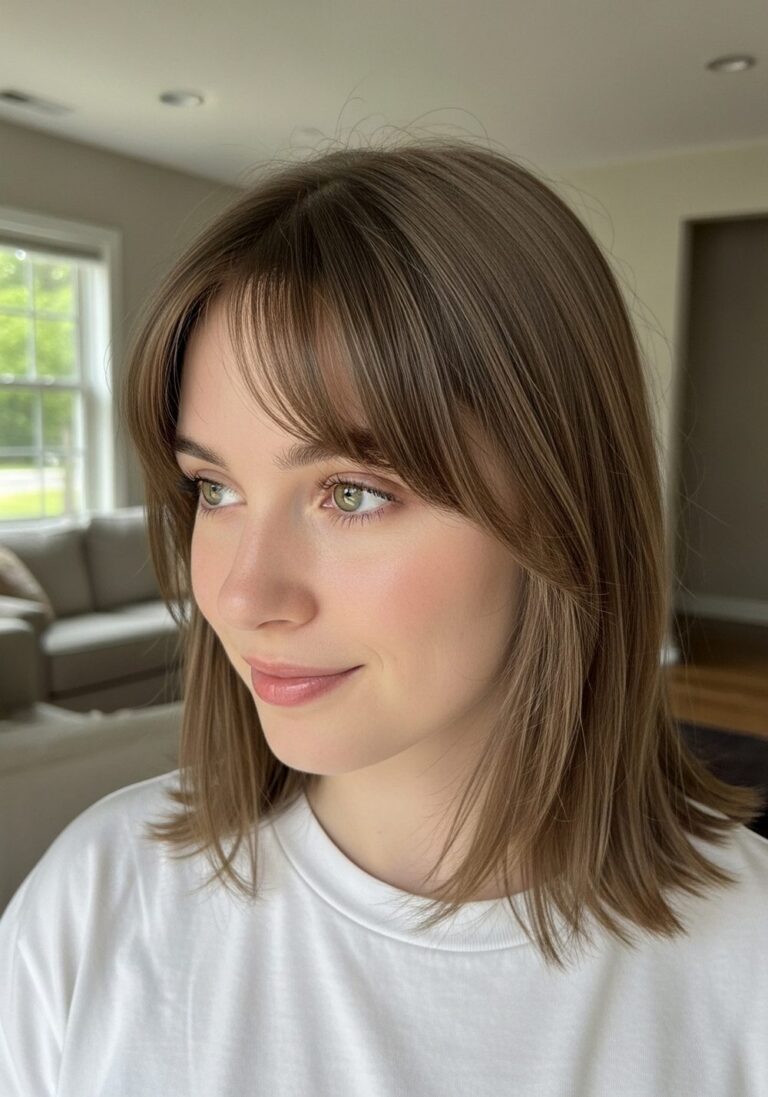
14 Glitter Hair Clip Hairstyles for Parties
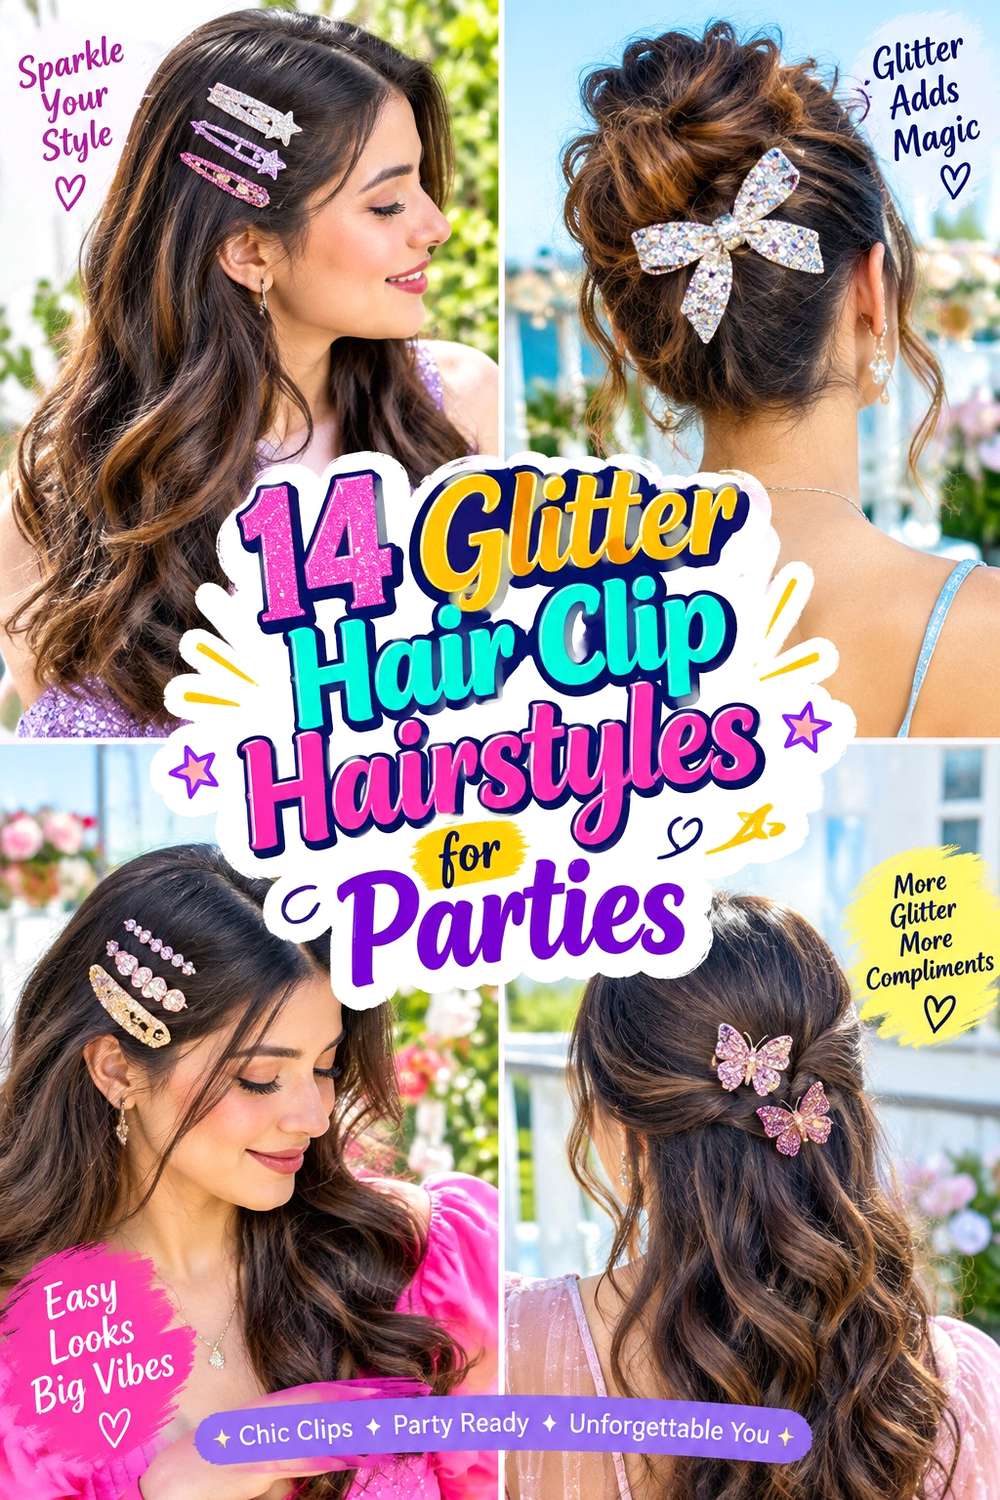
Glitter hair clip hairstyles work best when the accessory highlights an intentional part of the design instead of simply sitting on loose hair. A clip can hold back a side part, cover the anchor of a half-up style, brighten a bun, or add contrast beside curls and braids. Length can range from a pixie to long hair, while the supporting shape may include smooth roots, broad waves, defined curls, a ponytail, or a structured updo.
Straight, wavy, curly, and coily textures can all carry glitter clips, but the size and grip of the accessory should suit the section holding it. Fine or slippery hair may need a lighter piece attached to a secure tuck, while dense hair can support larger clips if the clasp closes comfortably. Face-framing sections can remain loose, be tucked behind one ear, or blend into the gathered style depending on the finish you prefer.
Styling effort varies more with the base hairstyle than with the accessory itself. A bob with one clip can be refreshed quickly, while waves, braids, curls, and formal updos take longer from wash day. For party wear, check security, pressure, and easy removal before leaving so the clip decorates a stable style instead of carrying its weight.
Quick List
- Side-Swept Waves Glitter Clip Hairstyle
- Sleek Low Bun Glitter Clip Hairstyle
- Half-Up Twisted Glitter Clip Hairstyle
- High Ponytail Glitter Clip Hairstyle
- Defined Curls Glitter Barrette Hairstyle
- Coily Puff Glitter Clip Hairstyle
- Braided Crown Glitter Clip Hairstyle
- Romantic Side Braid Glitter Clip Hairstyle
- Wavy Bob Glitter Clip Hairstyle
- Pixie Sweep Glitter Clip Hairstyle
- French Twist Glitter Clip Hairstyle
- Bubble Ponytail Glitter Clip Hairstyle
- Face-Framing Low Ponytail Glitter Clip Hairstyle
- Double Clip Center-Part Glitter Hairstyle
Side-Swept Waves Glitter Clip Hairstyle
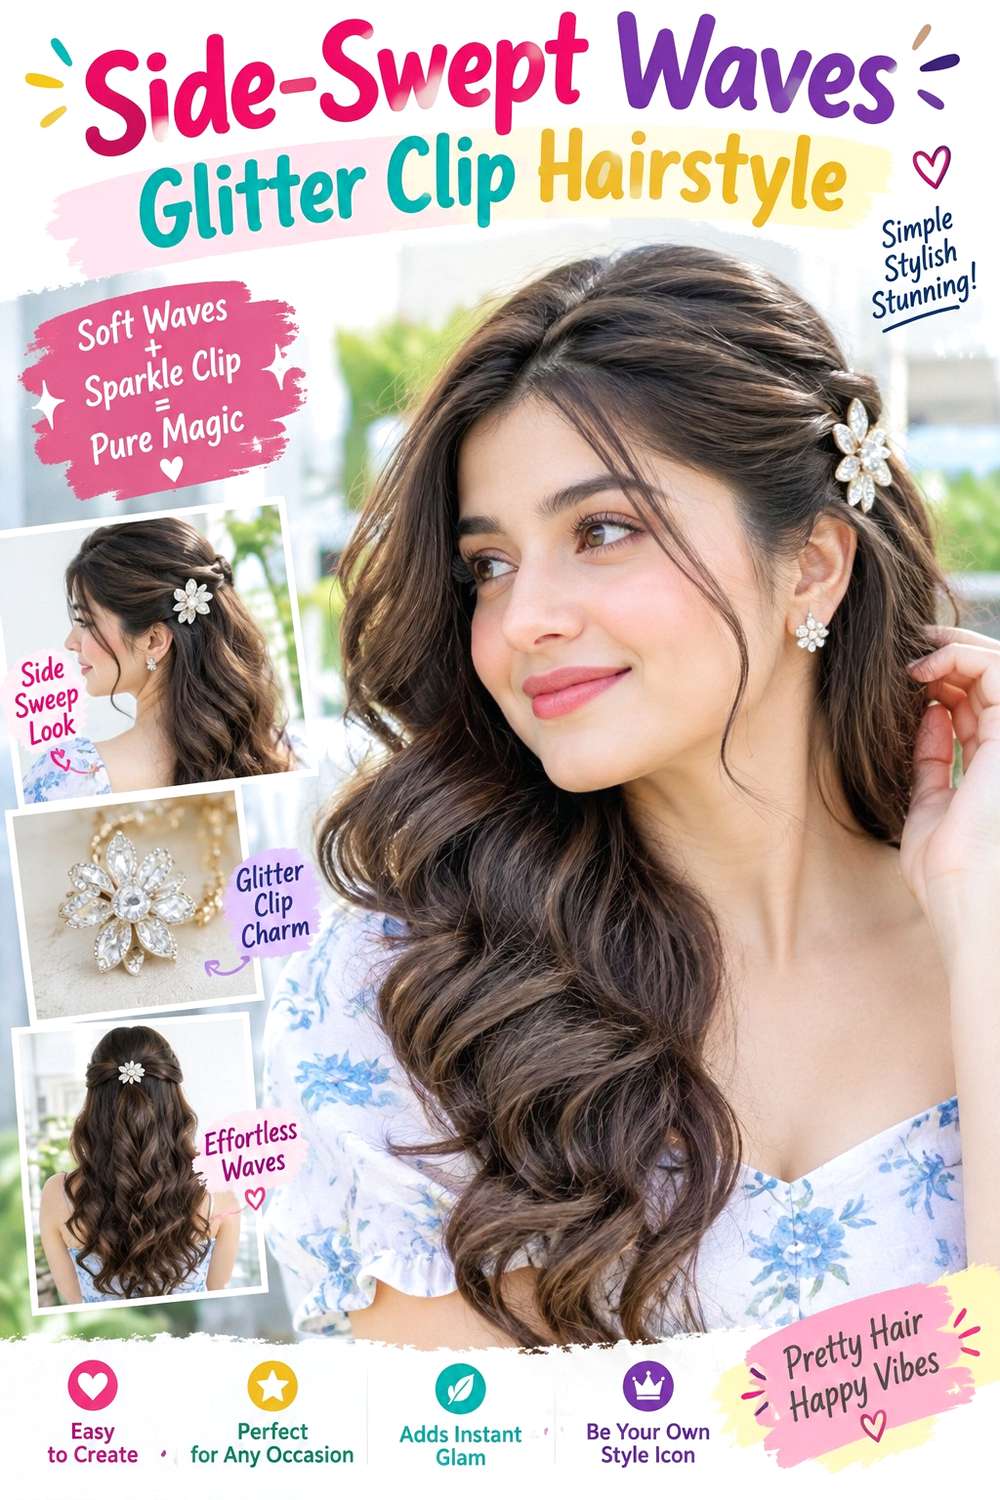
A deep side part gives loose waves a natural place for a glitter clip, especially when the accessory sits above the ear on the lighter side. Keep the roots smooth but not flat, build broad bends from around the cheekbones downward, and leave the tips softer than the mid-lengths. Medium to long hair gives the wave pattern more room, although shoulder-length hair can use slightly smaller bends. Straight or naturally wavy textures are practical starting points, and the clip should be scaled to the amount of hair it needs to hold.
Apply heat protectant before styling, use a large-barrel curling iron for open waves, and finish with flexible hairspray to preserve movement. Creating the full wave pattern after washing takes longer than a quick party refresh, which may only involve reshaping the front and replacing the clip. If a stylist is preparing the look, point out how deep you want the side part and exactly where the front bend should sit. Secure the glitter clip into a stable tucked section above the ear rather than loose surface hair. If it begins sliding, rebuild that tucked anchor instead of repeatedly tightening the clasp.
Pro tip:
Let the wave beside the part cool completely before adding the clip. Positioning the accessory afterward helps preserve the broad bend and prevents an obvious dent from forming too early.
Make It Work for You:
For finer density, choose a lighter clip and keep more fullness through the lower lengths. The deep side sweep remains visible without asking a heavy accessory to grip a small section.
Watch Out For:
Avoid coating the clipped side with too much serum before placement. Extra slip can weaken the anchor; use the clip on a controlled tucked section instead of repeatedly reopening it.
Sleek Low Bun Glitter Clip Hairstyle
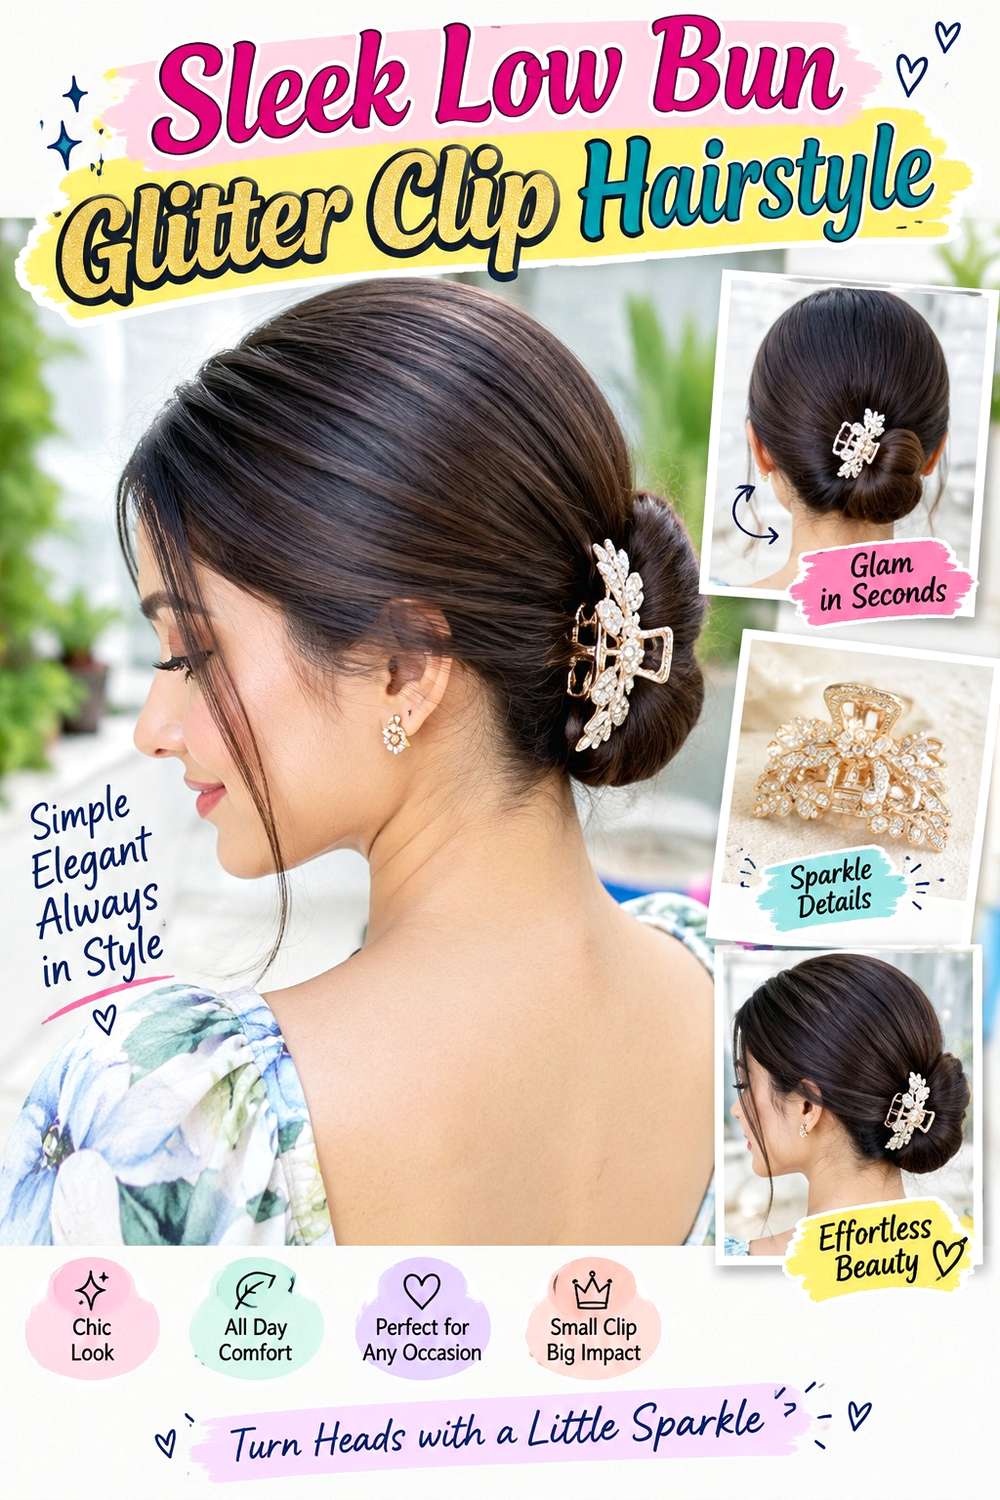
A compact low bun creates a clean background for a glitter clip placed beside or just above the knot. Use a center or softly off-center part, smooth the hair toward the nape, and keep the bun close enough to the head that the accessory remains visible from the side. Medium to long hair is easiest to gather, while dense hair may need a slightly broader bun instead of being forced into a tiny coil. A few narrow face-framing pieces can soften the front, but the main shape depends on a stable low anchor.
Use smoothing cream to control the surface, a fabric-covered elastic to establish the base, and bobby pins to secure the bun. Building the style from freshly washed hair takes longer if the roots need full smoothing, while a refresh usually means retucking an edge and checking the glitter clip. If a stylist is creating it, specify whether the bun should sit directly at the nape or slightly higher and which side should carry the accessory. The clip should attach to a reinforced area rather than hold the bun together. If it shifts during the party, adjust the decorative piece separately so the underlying hairstyle remains comfortable.
Pro tip:
Finish and test the bun before placing the clip. Once the structure feels secure when you move your head, add the glitter piece where it stays visible without covering the knot.
Make It Work for You:
For very dense hair, allow a wider low bun so the weight spreads across a larger area. A side clip will still provide a clear focal point without extra tightness.
Watch Out For:
Do not push the clip deeply into the bun just to stop slipping. Attach it beside a firm pinned section so the clasp does not distort the finished coil.
Half-Up Twisted Glitter Clip Hairstyle
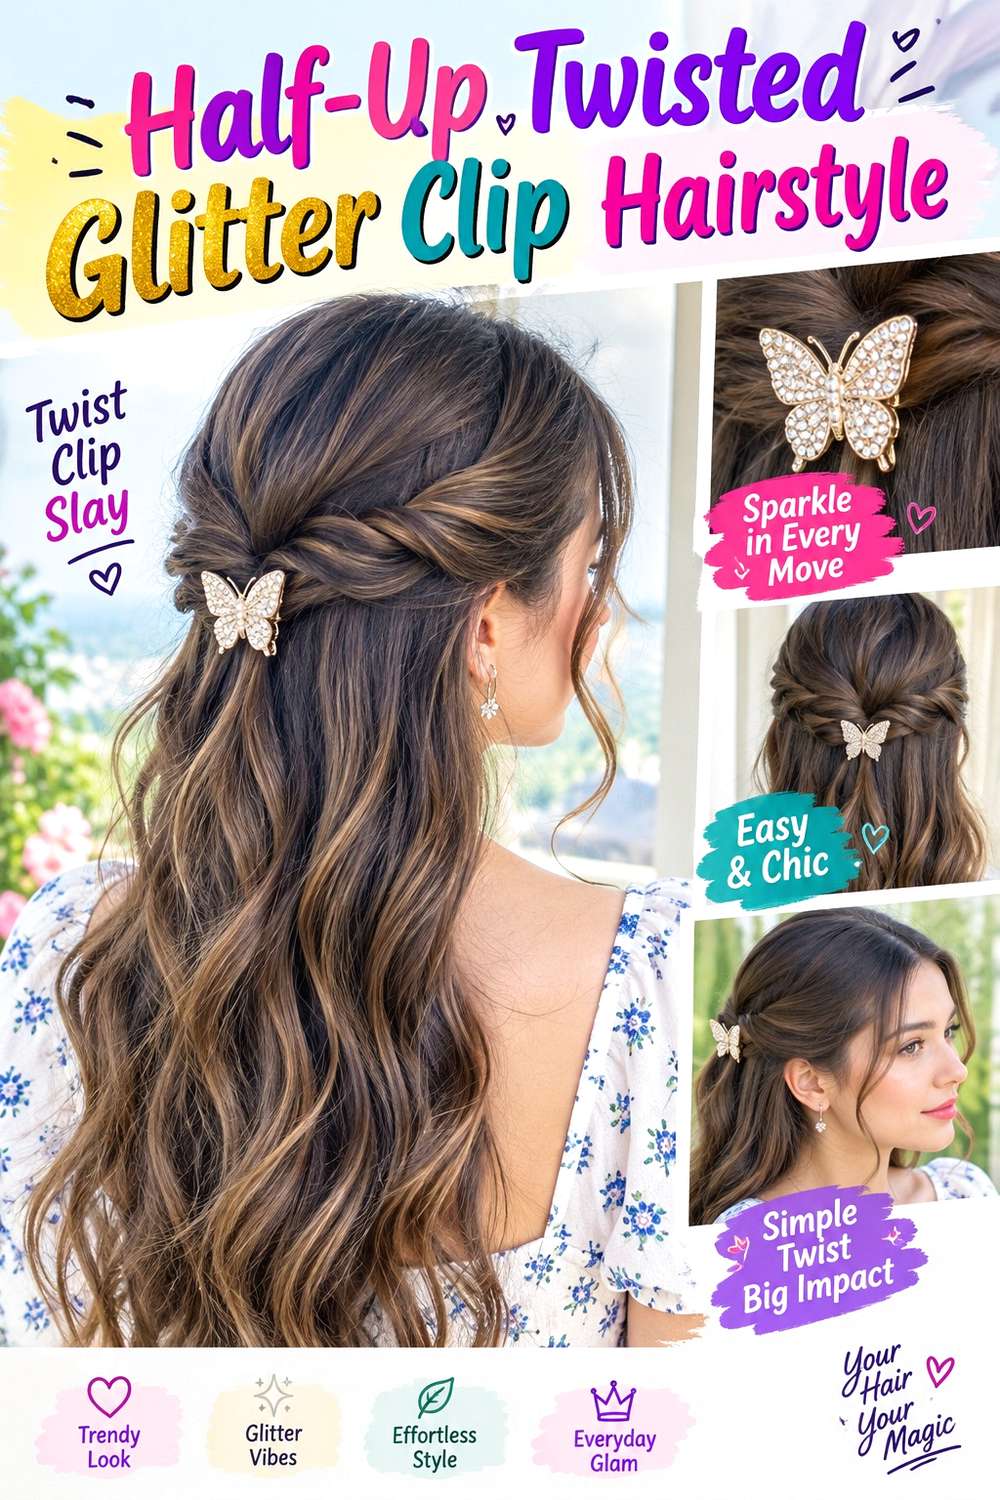
Two softly twisted side sections meeting at the back create a natural anchor for a glitter clip while leaving most of the hair loose. Keep a little lift at the crown, twist each section away from the face, and let the lower lengths fall straight, wavy, or naturally textured. Medium and long hair show the half-up separation most clearly. Finer density may benefit from smaller side sections so enough hair remains loose underneath, while fuller hair can support broader twists without making the bottom look reduced.
Use light texturizing spray to give the twists grip, bobby pins to secure their meeting point, and flexible hairspray to control shorter flyaways. A full wash-day style can include drying and shaping the loose lengths, whereas a quick refresh may only require retwisting the sides and resetting the clip. If a stylist is preparing the look, show exactly where you want the twists to meet and how much crown volume should remain above them. Place the glitter clip over the hidden anchor instead of using it as the only fastener. If the top begins to sag, repair the underlying pins rather than forcing the decorative clasp tighter.
Pro tip:
Cross the two twists slightly before pinning them together. That overlap creates a flatter, more stable platform for the glitter clip and helps conceal the structural pins underneath.
Make It Work for You:
For naturally curly hair, twist larger curl groups without brushing them smooth first. The half-up shape remains defined while the loose lower curls keep their texture and volume.
Watch Out For:
Avoid gathering too much hair into the twists. Oversized sections can make the lower lengths look sparse and create more weight than a small decorative clip can comfortably cover.
High Ponytail Glitter Clip Hairstyle
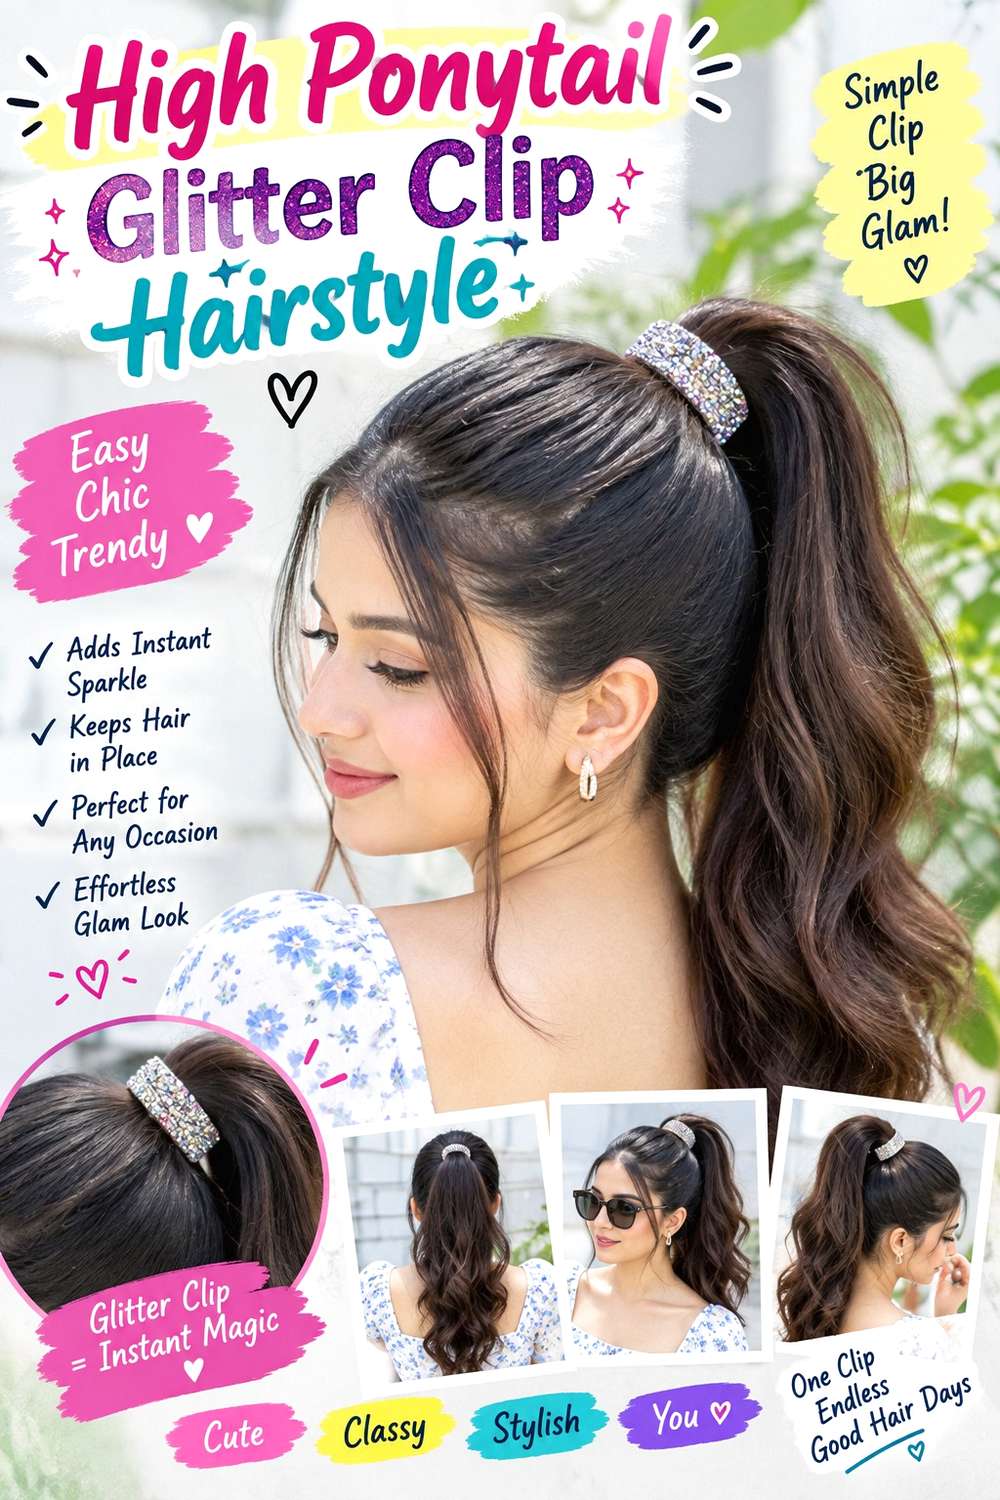
A high ponytail keeps the silhouette lifted while a glitter clip adds detail beside the base or along one smooth side. Gather the hair near the crown, keeping the front evenly directed upward rather than pulling one side tighter. The ponytail can remain straight, softly waved, or naturally textured, and a small wrapped section of hair can conceal the elastic if desired. Medium to long lengths work best, while heavy or very dense hair may feel more comfortable with the anchor placed slightly below the highest point of the head.
Use smoothing gel for controlled roots, a boar-bristle brush to direct the hair into the base, and a fabric-covered elastic for the secure anchor. Full styling takes longer when the ponytail lengths also need shaping, but a quick refresh may only involve smoothing flyaways and reseating the clip. If a stylist is creating the look, specify the ponytail height and whether you prefer a tight or softer crown finish. Place the glitter clip into hair beside the stable base rather than directly through the elastic. If the ponytail starts loosening, correct its anchor first; tightening the accessory will not restore structural support.
Pro tip:
Check the ponytail from both sides before adding the glitter clip. Correcting a tilted anchor first ensures the accessory highlights a balanced base instead of making uneven placement more obvious.
Make It Work for You:
For heavy hair, lower the ponytail slightly from the crown while keeping the front lifted. The style still reads high, but the reduced leverage can make longer party wear easier.
Watch Out For:
Do not attach a large clip where it presses against the ponytail elastic. Keep a little separation so the decorative clasp does not interfere with the anchor or pinch hair.
Defined Curls Glitter Barrette Hairstyle
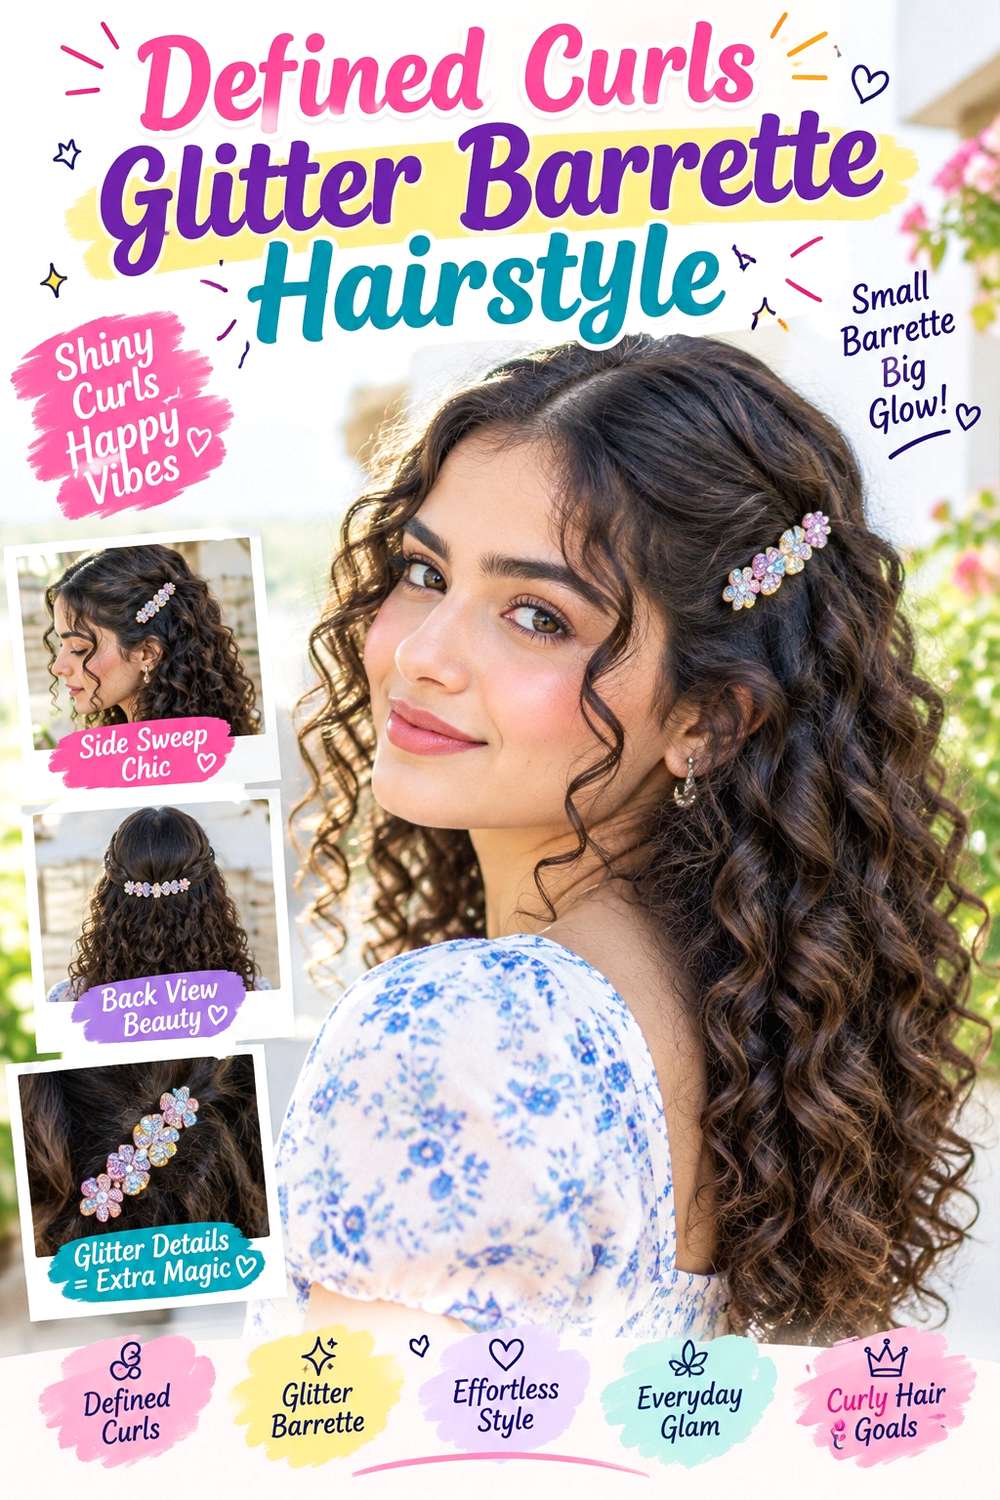
Defined curls pair well with a glitter barrette placed above one ear because the smooth accessory contrasts with the rounded curl pattern. Keep the natural part where the curls settle comfortably, leave several curl groups framing the opposite side, and tuck only the section needed for the barrette. The style works on curly bobs as well as longer hair. Finished length and volume should be judged after drying because shrinkage can change where the clip sits in relation to the cheekbone and ear.
Use lightweight leave-in conditioner for softness, curl gel to support definition, and a diffuser when that drying method suits your routine. A full wash-day set takes longer because the curls need time to dry and settle, while a quick refresh can focus on flattened sections around the barrette. If a stylist is arranging the look, show how much hair you want tucked and where the accessory should sit once the curls are fully dry. Anchor the barrette into a stable tucked section rather than closing it across several loose curl groups. If it begins to move, rebuild the tuck instead of pulling curls tighter or pressing the clasp harder against the scalp.
Pro tip:
Wait until the curls are completely dry before making final clip placement. Adjusting a barrette through damp curl groups can separate definition and leave visible flattened areas afterward.
Make It Work for You:
For tighter shrinkage, choose the accessory position after your curls reach their normal dry shape. This keeps the barrette aligned with the finished volume rather than the wetter length.
Watch Out For:
Avoid clamping the barrette across several active curl groups. The accessory may snag during removal; secure it to a tucked section and leave surrounding curls free to move.
Coily Puff Glitter Clip Hairstyle

A high or mid-height coily puff gives a glitter clip a strong textured backdrop without requiring the front to be completely smooth. Gather the hair comfortably toward the crown, preserve the rounded puff, and leave a few coils around the hairline if that suits your preferred finish. The accessory can sit beside the base or slightly above one temple. Short-to-medium coily lengths create a compact puff, while longer hair produces more height and movement. Choose a clip that remains visible without pressing deeply into the surrounding texture.
Use moisturizing leave-in conditioner for softness, styling gel for targeted perimeter control, and a soft hair tie to secure the puff. A full wash and definition routine takes longer, while a party refresh may focus only on the hairline, outer puff shape, and clip placement. If a stylist is arranging the look, explain the puff height and exact accessory position you prefer after the hair has reached its dry shape. Secure the glitter clip near a stable gathered area rather than through multiple loose coils. If it slides, change its anchor point instead of tightening the entire puff and increasing tension around the scalp.
Pro tip:
Shape the puff first, then place the glitter clip where the base feels most stable. Adding decoration last lets you preserve the rounded outline without flattening one side prematurely.
Make It Work for You:
For shorter coils, use a smaller clip and keep it close to the puff base. The accessory remains visible while the compact texture still carries most of the visual shape.
Watch Out For:
Do not use the clip to press down a section that feels too full. Reshape the puff itself so the accessory can stay decorative instead of becoming a compression tool.
Braided Crown Glitter Clip Hairstyle
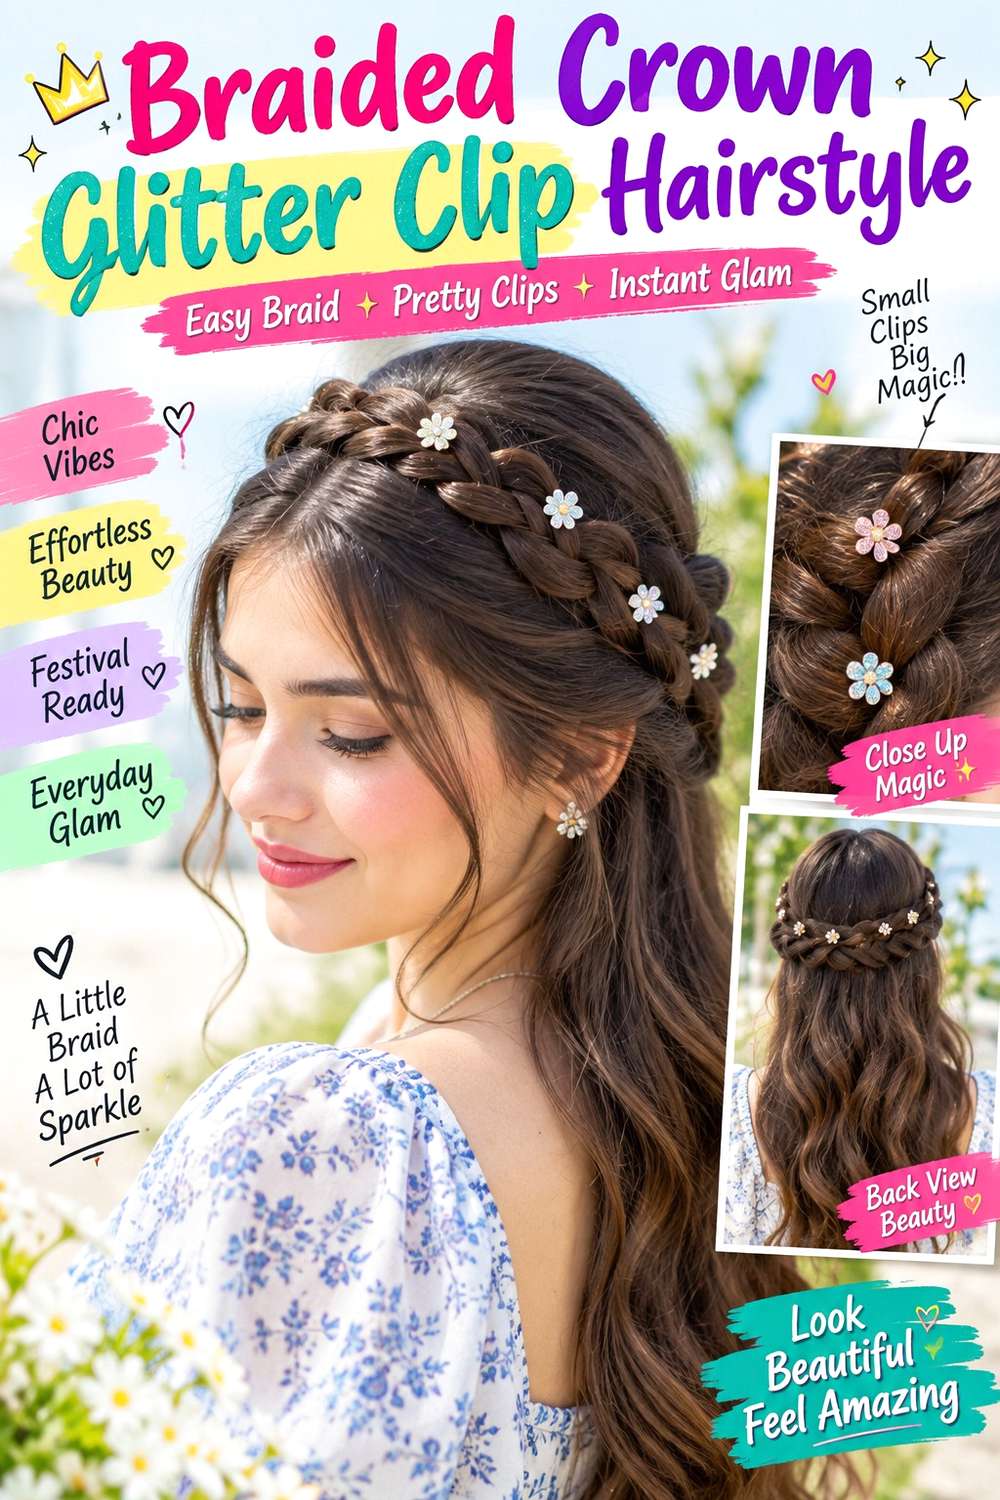
A braided crown provides secure woven sections where a glitter clip can sit without relying on loose surface hair. Create one or two braids along the upper sides of the head, keeping them close enough to hold but comfortable around the hairline. The remaining hair can stay down or be gathered at the back. Medium to long lengths make a full crown easier, while shorter layers can remain softly visible near the temples. A single glitter clip works well near the back meeting point or slightly to one side.
Use light texturizing spray for grip, bobby pins to anchor the braid, and flexible hairspray to control flyaways after the structure is finished. Building the crown from scratch takes more time than a quick refresh, when you may only need to secure one loose section and reposition the clip. If a stylist is creating it, specify the braid width, placement, and comfortable tension before decoration is added. Attach the clip to a stable woven or pinned area rather than a loose braid edge. If it begins tilting, reinforce the nearby anchor instead of tightening the entire crown around the head.
Pro tip:
Finish widening and balancing the braid before adding the glitter clip. This prevents the accessory from getting in the way while you make small adjustments to the crown shape.
Make It Work for You:
For layered hair, choose slightly narrower braids and let the shortest pieces remain softly visible. The crown effect stays clear without forcing every strand into the woven structure.
Watch Out For:
Avoid placing a heavy clip on one loose braid loop. Extra weight can stretch that section downward; attach it closer to a stronger pinned or woven part instead.
Romantic Side Braid Glitter Clip Hairstyle
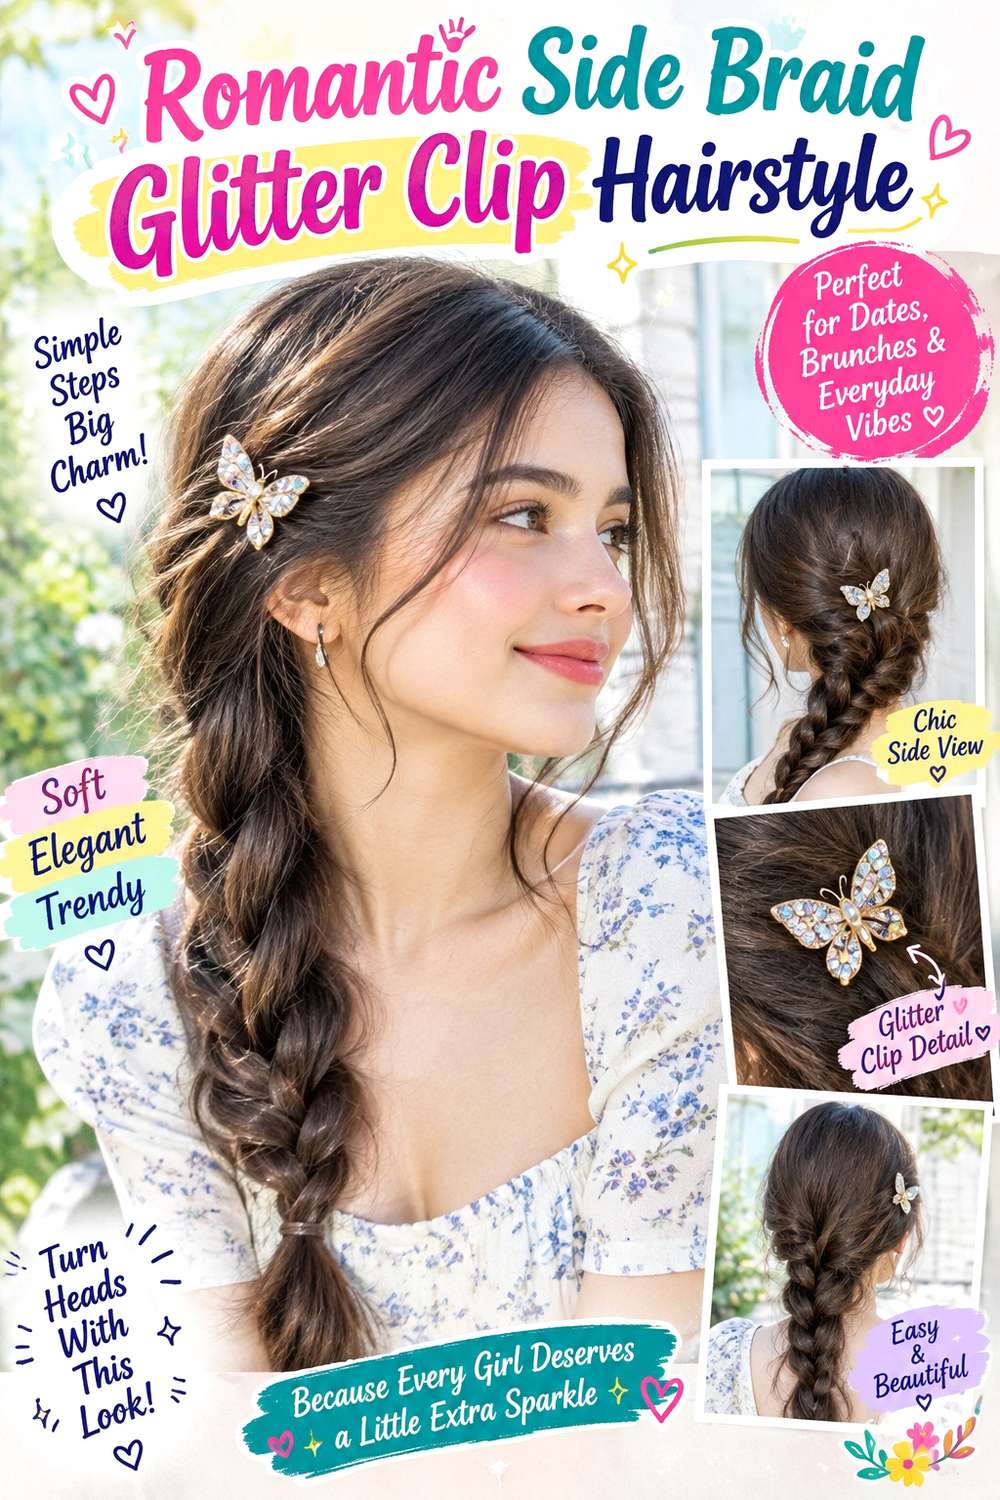
A loose side braid creates an asymmetrical party shape, and a glitter clip can mark the point where the braid begins near the shoulder or lower side of the head. Sweep most of the hair to one side, keep the crown relaxed, and leave a narrow face-framing section on the opposite side if desired. Medium to long hair gives the braid enough length to show. Wavy or curly texture can add natural fullness, while straighter hair may benefit from a little grip before braiding.
Use light texturizing spray to keep sections manageable, a small elastic to secure the end, and flexible hairspray to control short flyaways. Creating the braid from scratch takes more effort than a quick refresh, which may only involve widening an outer section and resetting the glitter clip. If a stylist is preparing the look, specify which shoulder the braid should fall over and how wide you want the finished weave. Position the accessory near a secure upper section instead of a loose outer loop. If the braid starts to droop, reinforce its starting point rather than pulling the clip tighter or increasing tension at the hairline.
Pro tip:
Secure the braid completely before loosening its edges. Work upward from the bottom, then place the glitter clip once the final width and side position are already established.
Make It Work for You:
For layered hair, keep the braid slightly firmer through the middle and allow shorter front pieces to remain free. The side-swept shape stays recognizable without excessive pinning.
Watch Out For:
Do not attach the glitter clip to the widest loosened braid loop. That soft section can stretch further; choose a firmer area closer to the starting anchor.
Wavy Bob Glitter Clip Hairstyle
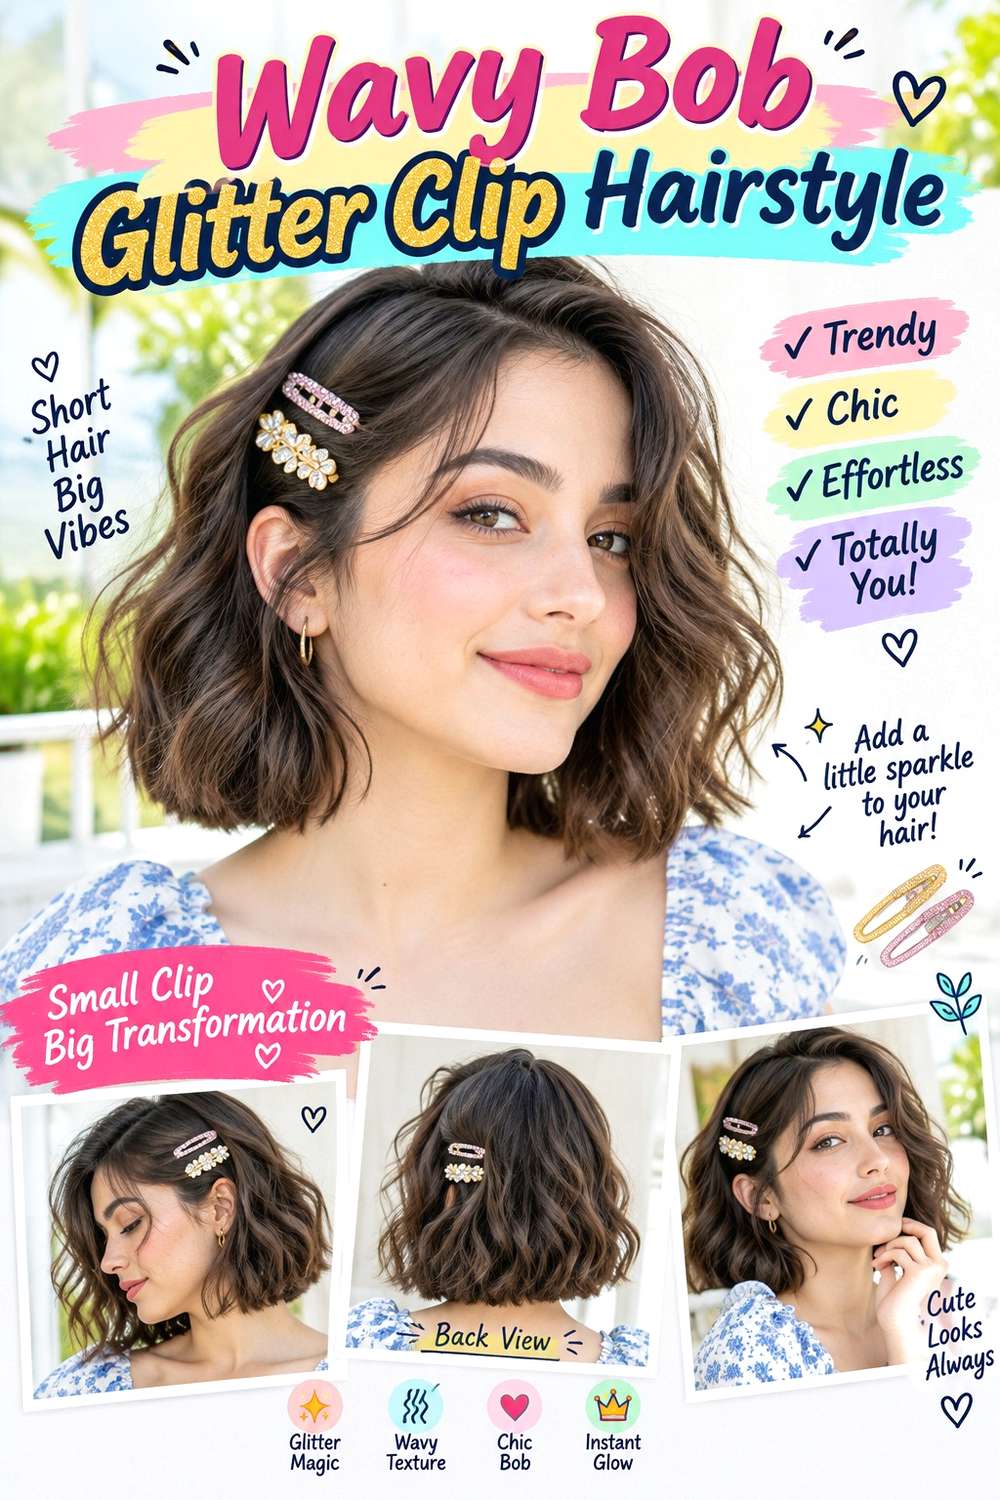
A jaw-length or chin-length bob needs only one well-placed glitter clip to create a party-ready focal point. Use a center or shallow side part, build soft bends through the mid-lengths, and keep the ends relatively controlled so the perimeter remains visible. Tuck one side behind the ear and place the clip just above the tuck. Fine or sparse ends may benefit from a fuller bottom edge, while denser hair can carry more internal movement without losing the compact bob outline.
Apply heat protectant first, use a small or medium curling iron for gentle bends, and finish with lightweight hairspray to keep the front controlled. A complete wash-day style takes longer when the whole bob needs drying and reshaping, but a refresh may involve only two or three front sections and the accessory. If you are discussing the cut or styling with a professional, point to the exact finished perimeter length and how much bend you want through the sides. The clip should secure a tucked section rather than clamp several loose wave tips. As the bob grows, reassess the bottom line when it no longer sits at the intended landmark rather than trimming solely because of the accessory.
Pro tip:
Let the tucked wave cool before adding the clip. Setting the bend first prevents an unwanted crease where the accessory closes and keeps the opposite side looking softer.
Make It Work for You:
For naturally wavy hair, define only the front and clipped side instead of reshaping every section. The bob keeps its own texture while the accessory gives the finish more structure.
Watch Out For:
Avoid curling the ends tightly underneath the jaw. Too much bend can make the bob appear shorter and rounder; keep most movement through the middle lengths instead.
Pixie Sweep Glitter Clip Hairstyle
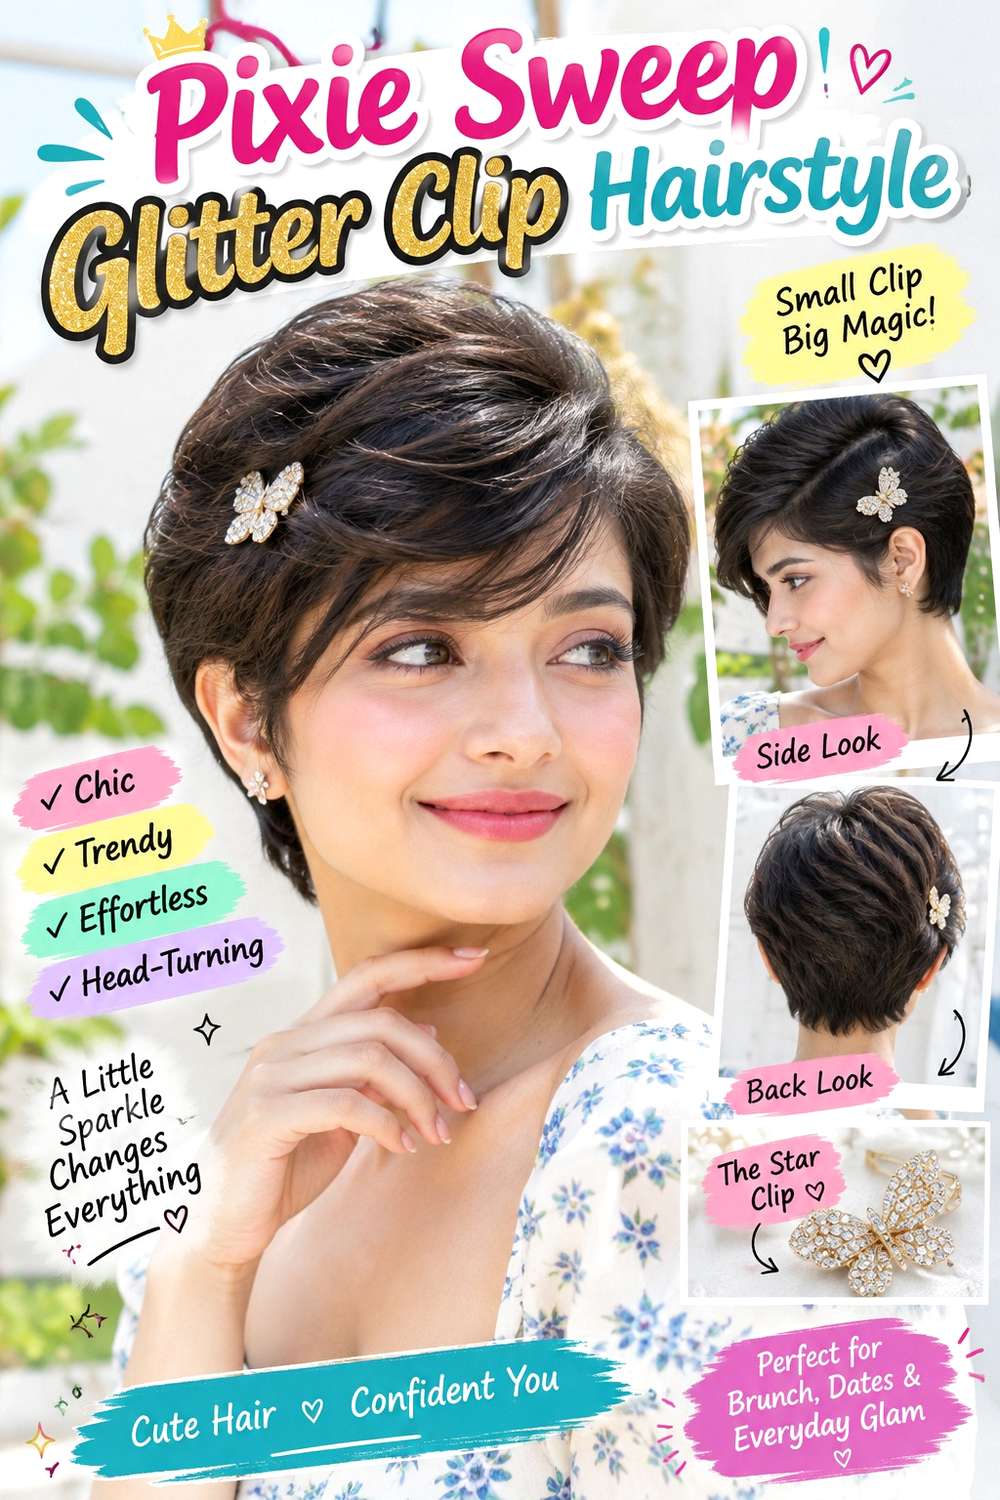
A pixie with a longer top section can carry a small glitter clip above the temple while keeping the front sweep visible. Direct the fringe to one side, let selected pieces separate through the top, and keep the shorter sides close to their natural direction. The accessory should be small enough that it does not cover the entire side profile. Pixies with a grown-out fringe give the most flexibility, while very short cuts may need a lighter clip positioned farther back where there is enough hair for comfortable grip.
Use lightweight styling cream to guide the sweep, texturizing paste to define selected top pieces, and flexible hairspray to help the direction hold. Styling after washing may take longer because growth patterns need resetting, while a quick refresh can focus on the fringe and clip placement. If a stylist is trimming or arranging the look, specify the finished fringe length and the exact area where you want the accessory to sit. Establish the sweep before adding the clip rather than using the clasp to force the hair sideways. If it slips, change the angle or choose a smaller accessory instead of pressing it tightly against short hair.
Pro tip:
Shape the fringe completely before inserting the clip. Once the sideward direction is established, place the accessory into the finished design rather than letting its clasp determine the part.
Make It Work for You:
For a shorter pixie, move the glitter clip farther behind the temple and keep it small. The accessory remains noticeable while the limited top length can still show its texture.
Watch Out For:
Avoid repeatedly opening and closing the clip on the same tiny section. If grip is weak, reposition it into a slightly denser area rather than increasing pressure.
French Twist Glitter Clip Hairstyle
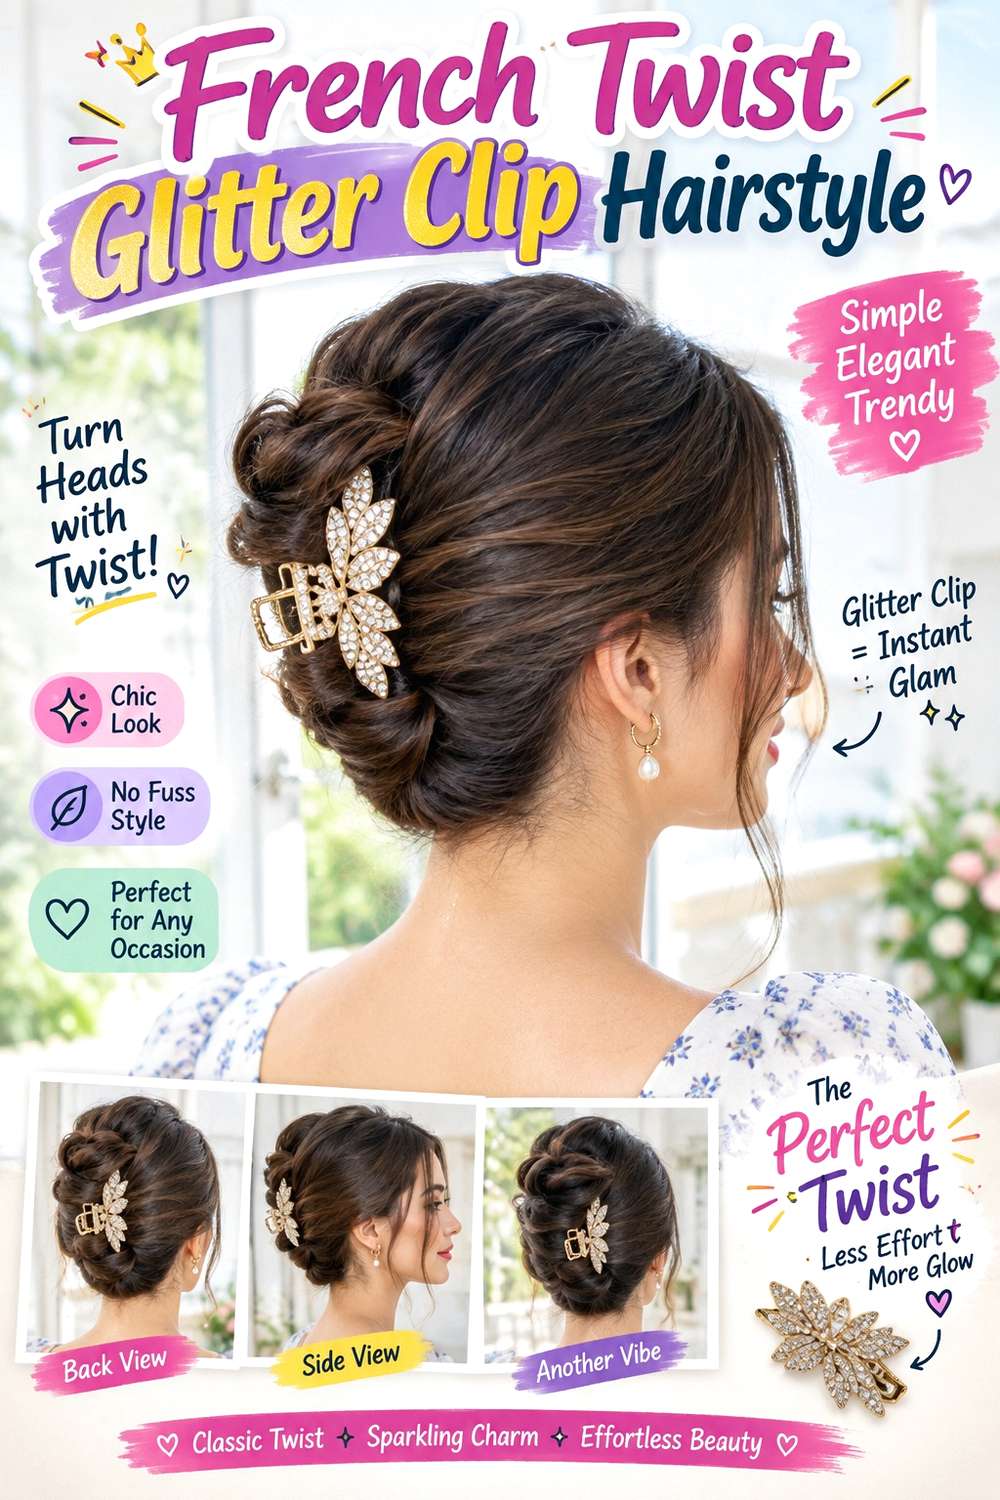
A French twist gives a long glitter clip a clean vertical or diagonal line to follow. Sweep the lengths inward at the back, roll them upward, and secure the inner structure before refining the outer surface. Keep the twist elongated from the nape toward the crown rather than turning it into a round bun. A soft side part or gently lifted front can keep the style from feeling too rigid. Medium to long hair is easiest to fold, while natural texture may provide useful grip.
Use light texturizing spray through the lengths, bobby pins to secure the internal roll, and flexible hairspray to control the finished surface. Building the twist from scratch takes more time than a quick refresh, which may involve replacing one loose pin and resetting the glitter clip. If a stylist is preparing it, specify the twist height and whether you want the visible fold centered or slightly off-center. The decorative clip should sit along a reinforced area rather than hold the roll together by itself. If it begins to tilt, strengthen the hidden pin structure before adjusting the accessory.
Pro tip:
Secure the center of the twist before refining its outer edge. Once the internal roll feels stable, you can place the glitter clip where it follows the shape without carrying weight.
Make It Work for You:
For very long hair, fold extra length inside the twist rather than automatically adding more height. This keeps the profile controlled and the decorative clip visually proportionate.
Watch Out For:
Do not attach the clip only to the soft outer layer of the twist. A reinforced section underneath provides better support and protects the roll from opening.
Bubble Ponytail Glitter Clip Hairstyle
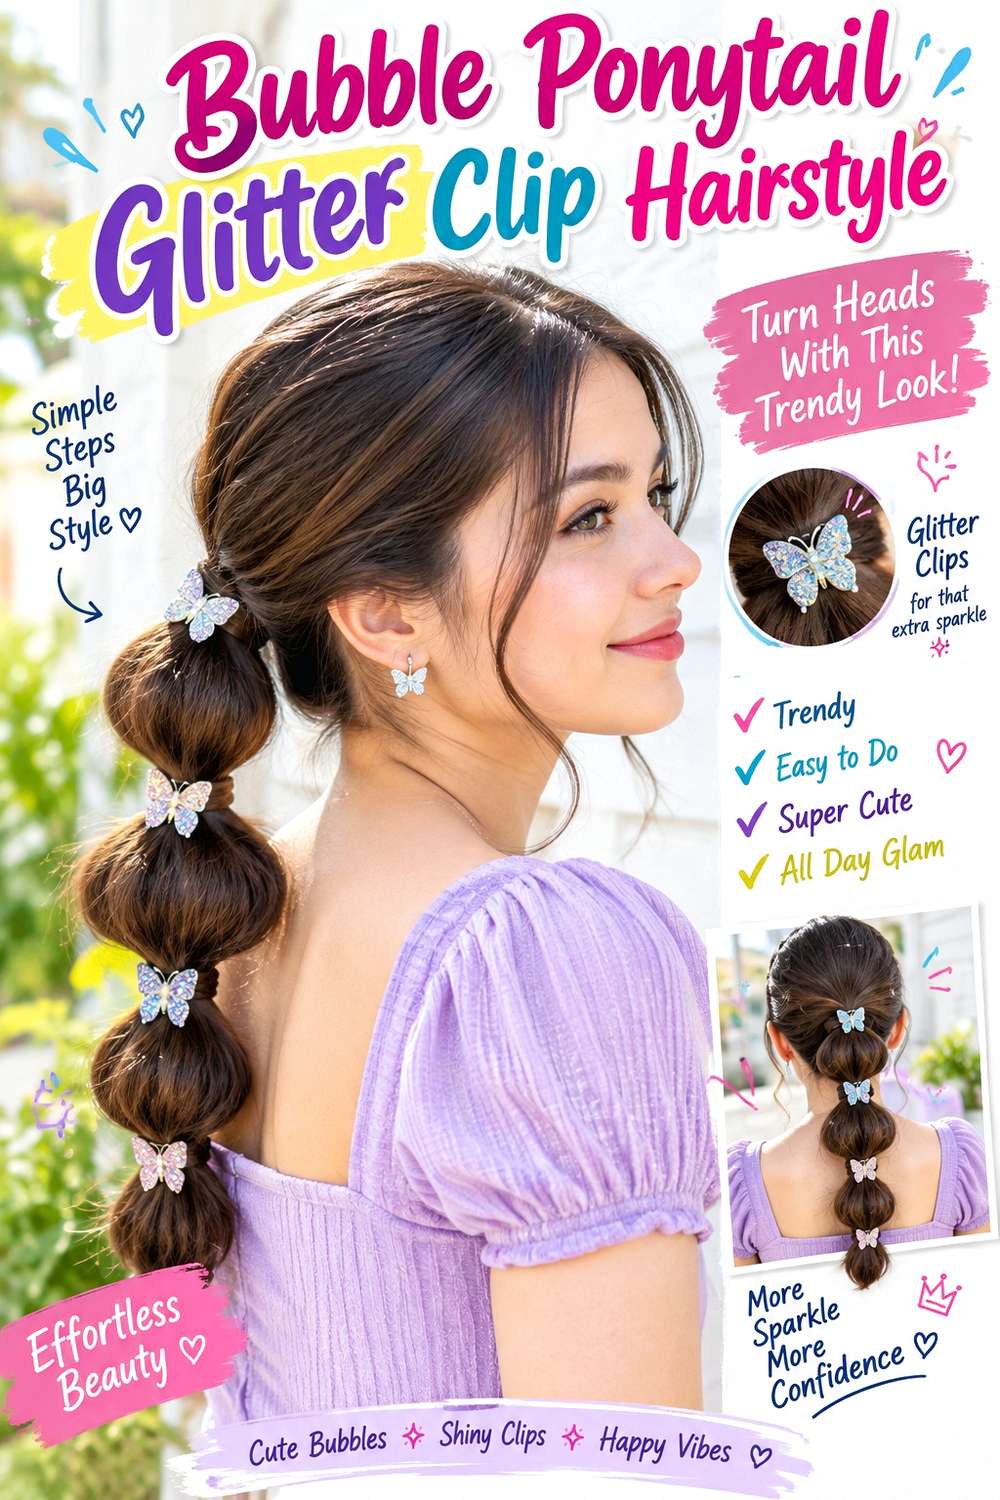
A bubble ponytail offers several clear places for glitter clips instead of concentrating every accessory at the base. Start with a secure high or mid-height ponytail, divide the length into rounded sections, and gently expand each bubble after its elastic is in place. Long hair displays the repeated structure most clearly, although medium hair can use fewer, larger sections. One or two small glitter clips can sit beside selected divisions while the rest of the ponytail remains uncluttered.
Use lightweight mousse for manageable body, snag-free elastics to create the divisions, and flexible hairspray to control flyaways after shaping. A full style takes longer because every bubble needs balancing, while a quick refresh may only involve reshaping a flattened section and repositioning a clip. If a stylist is creating it, specify the ponytail height, bubble size, and which divisions should carry decoration. The clips should attach beside stable elastics rather than replace them. During wear, repair any loosened structural section first. Tightening a decorative clip around a collapsing bubble can compress the hair without restoring the intended rounded shape.
Pro tip:
Shape all the bubbles before adding glitter clips. Seeing the completed proportions first makes it easier to choose decorative points that feel balanced rather than crowded along the length.
Make It Work for You:
For medium-length hair, create two or three larger bubbles instead of many small ones. The repeated structure stays visible and gives the clips enough space to read clearly.
Watch Out For:
Avoid widening one side of a bubble much more than the other. Uneven pulling twists the ponytail and can make carefully placed glitter clips appear crooked from the back.
Face-Framing Low Ponytail Glitter Clip Hairstyle
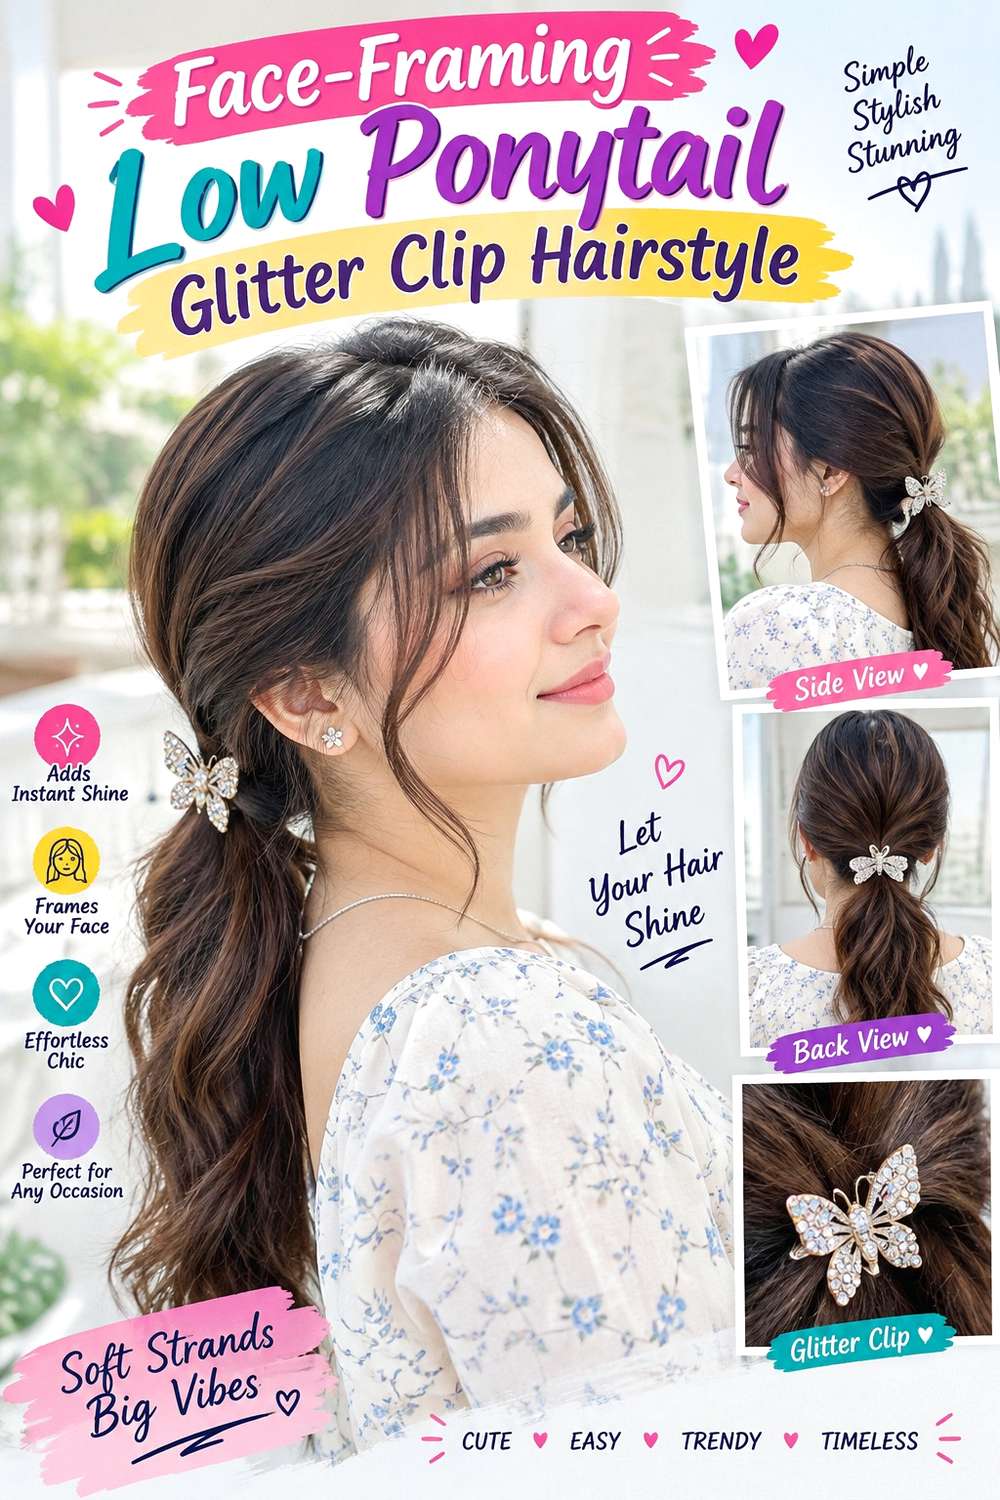
A low ponytail with loose face-framing sections creates a softer party shape while a glitter clip brightens the base or one tucked side. Begin with a center or slightly off-center part, select narrow sections near the temples, and gather the remaining hair at the nape. The ponytail can stay straight, softly waved, or naturally textured. Medium to long lengths make the gathered shape easiest, while the loose pieces should be chosen according to their finished position rather than pulled out randomly after the ponytail is secured.
Apply heat protectant before shaping the front, use a curling iron to create soft bends, and secure the ponytail with a fabric-covered elastic. A full style takes longer when the complete length also needs finishing, but a quick refresh can focus on the exposed face frame and clip placement. If a stylist is preparing the look, identify which sections should remain loose before gathering and show whether you want them to finish around the cheekbone, jaw, or lower. Place the glitter clip near the stable ponytail base or tucked side, not on the moving tendrils. During wear, reshape the loose pieces individually instead of repeatedly loosening the entire anchor.
Pro tip:
Choose the face-framing sections before securing the ponytail. Keeping them separate from the start prevents stretched roots and makes it easier to place the glitter clip without disturbing them.
Make It Work for You:
For curly hair, use naturally formed curl groups as the loose front pieces. Choose them after shrinkage is visible so their finished length frames the face where you want it.
Watch Out For:
Do not leave overly wide sections loose at both temples. They can hide the ponytail and accessory; begin with narrow pieces and release more only if the balance needs it.
Double Clip Center-Part Glitter Hairstyle
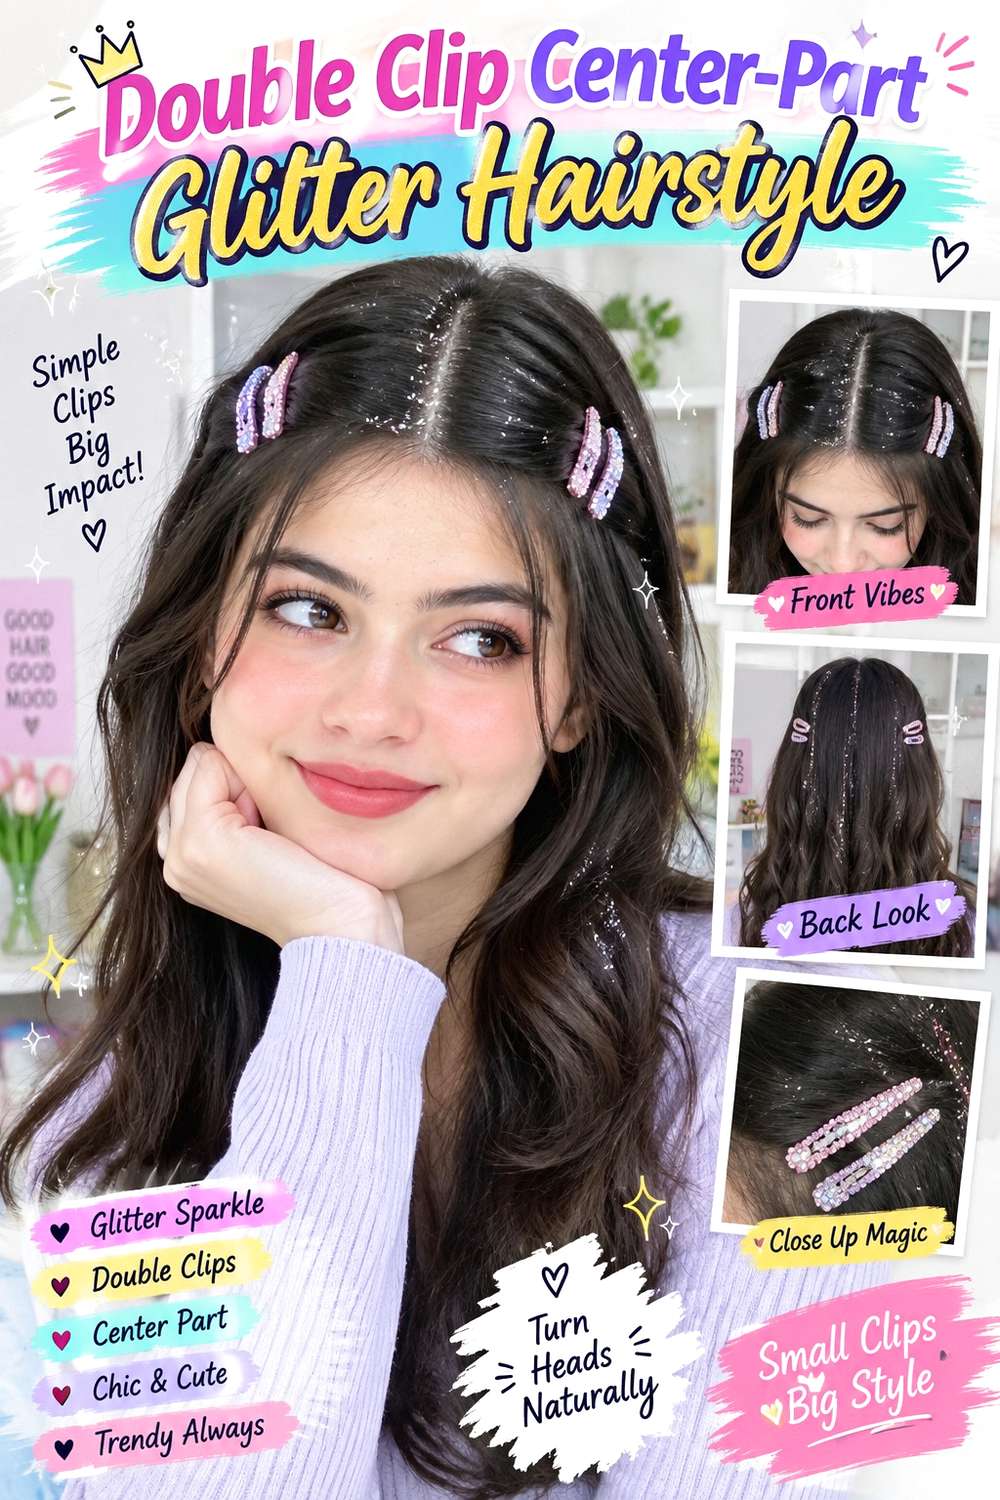
Two matching or coordinated glitter clips placed on either side of a center part create symmetry without requiring an updo. Keep the roots smooth around the part, leave a small front section visible, and position each clip above the temples at the same approximate distance from the hairline. The lengths can stay straight, softly waved, curly, or naturally textured. Shoulder-length and longer hair show the balanced placement clearly, but bobs can use smaller clips to maintain proportion.
Use lightweight styling cream for surface control, a tail comb to establish a clean center part, and the two glitter clips as the final securing details. A complete wash-day finish may take longer if the lengths also need styling, while a quick refresh can focus on the part and accessory alignment. If a stylist is arranging the look, specify exactly how far back you want each clip and how much hair should remain visible in front. The clips should secure comparable section sizes so one side does not appear heavier. If either accessory starts to slip, rebuild that side independently rather than shifting both and losing the centered balance.
Pro tip:
Place the first clip, then use the part and eyebrow line as visual guides before positioning the second. Check the result from the front before finalizing both clasps.
Make It Work for You:
For dense curls or waves, position the clips slightly farther back and use larger section sizes. This preserves natural volume while keeping the paired glitter details visible from the front.
Watch Out For:
Avoid forcing perfect symmetry by pulling one side much tighter than the other. Match the visible placement while keeping both sections comfortable and consistent with their natural growth direction.
Conclusion
Glitter hair clip hairstyles can range from quick bob and pixie accents to structured braids, buns, ponytails, waves, curls, and formal twists. Shorter hair usually benefits from smaller accessories placed close to a stable tuck, while longer or denser hair can support larger clips when the underlying hairstyle carries the weight. Center parts create symmetry, side parts emphasize one decorative focal point, and face-framing pieces soften more controlled shapes. Natural curls and coils can keep their texture instead of being straightened for a polished result. Compare the styling effort, accessory weight, volume, parting, and amount of hold you actually need. A secure base and comfortable placement make the decorative finish much easier to wear through a party.
Before Your Salon Visit
Choose one or two favorite references and save clear views showing both the hairstyle and glitter clip placement. Discuss your natural texture, density, preferred length, face shape, normal routine, and how much styling effort feels realistic. Point out the exact parting, wave shape, braid width, ponytail height, bun position, face-framing pieces, or clip angle you want. Because glitter clips create temporary party styles, focus on secure anchoring, comfortable tension, and easy removal rather than assuming you need a haircut.
FAQs
How Do I Keep a Glitter Hair Clip From Slipping?
Attach the clip to a stable tucked, gathered, braided, or pinned section rather than loose surface hair. Very slippery roots may need more texture and less serum near the anchor. If the accessory keeps moving, change its angle or size instead of tightening the whole hairstyle.
Can Glitter Hair Clips Work With Curly or Coily Hair?
Yes. Place the accessory after curls or coils reach their finished dry shape so natural volume and shrinkage are already visible. Avoid clamping across several active curl groups. A gathered base, tuck, braid, or puff anchor can provide grip while leaving surrounding texture intact.
Do Party Hairstyles With Glitter Clips Need Heat Styling?
No. Braids, buns, puffs, natural curls, ponytails, and many half-up styles can be created without heat. Heated tools are useful only when you specifically want a shaped wave, bend, or smoother finish. When heat is used, apply heat protectant and avoid unnecessary repeated passes.
Will Glitter Clips Work on Short Hair?
Yes. Bobs and pixies can use smaller, lighter clips positioned where there is enough hair for secure grip. A tuck above the ear or a longer top section often provides a useful anchor. Avoid forcing very short pieces into a clasp if they naturally fall free.