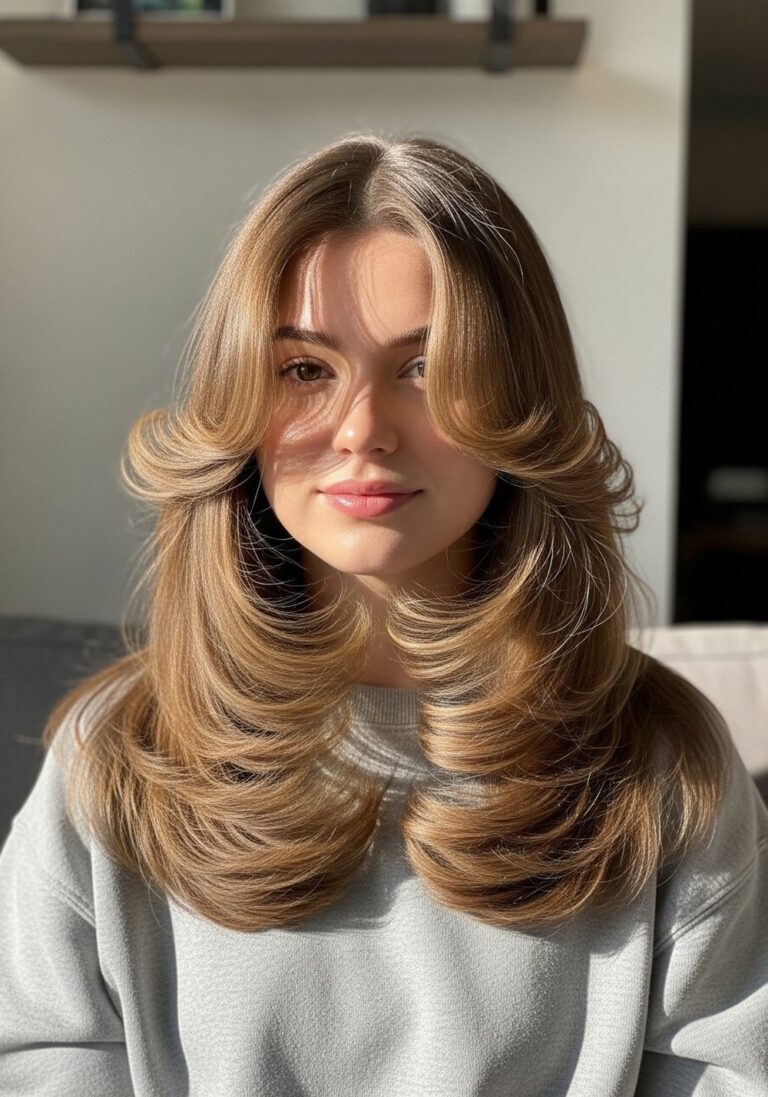
12 Soft Micro Fringe Hairstyle Ideas

A soft micro fringe sits clearly above the brows but avoids the dense, sharply horizontal finish associated with a heavier short bang. Small spaces between pieces, lightly varied ends, or a gentle curve make the fringe easier to blend with the rest of the haircut. It can accompany a bob, shag, or long layers, while the sides may remain open or connect into cheekbone-level framing. The short finished length exposes more forehead, so fringe width and edge shape have a strong effect on the overall design.
Straight and wavy textures show wispy separation easily, while curls create a softer short fringe through natural bends. Fine strands may need a narrower section to preserve density elsewhere. Curly and coily patterns need careful shrinkage allowance because a damp fringe can settle considerably higher when dry. Hairline growth direction also matters at such a short length.
A soft micro fringe usually needs more frequent attention than the surrounding haircut. Daily styling can be brief, but cowlicks or strong bends may require dampening and resetting. Grow-out gradually changes the fringe into short bangs, then longer face framing.
Quick List
- Wispy Soft Micro Fringe Hairstyle
- Piecey Soft Micro Fringe Hairstyle
- Wavy Soft Micro Fringe Hairstyle
- Curly Soft Micro Fringe Hairstyle
- Narrow Soft Micro Fringe Hairstyle
- Rounded Soft Micro Fringe Hairstyle
- Feathered Soft Micro Fringe Hairstyle
- Bob-Length Soft Micro Fringe Hairstyle
- Long Layered Soft Micro Fringe Hairstyle
- Shaggy Soft Micro Fringe Hairstyle
- Fine Hair Soft Micro Fringe Hairstyle
- Side-Swept Soft Micro Fringe Hairstyle
Wispy Soft Micro Fringe Hairstyle
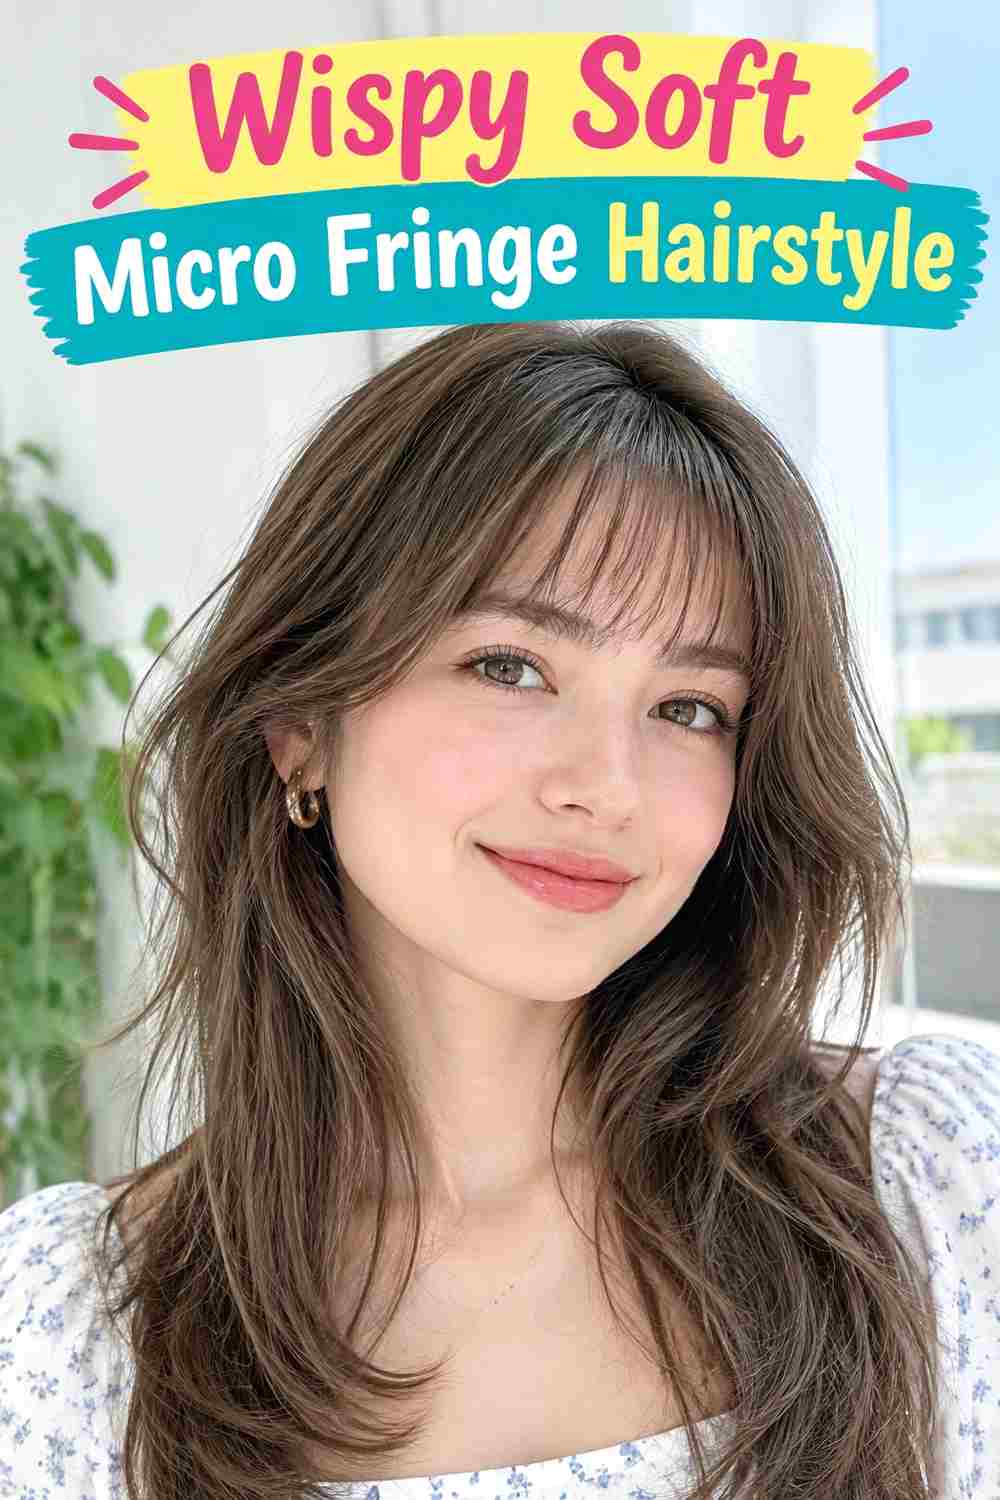
Fine gaps between short fringe pieces create an airy line across the upper forehead rather than a dense band. The center can sit slightly higher, with subtly longer pieces moving toward the temples to soften the outer corners. The remaining hair can be shoulder length or longer with minimal face framing, allowing the small fringe to stay the main short feature. A natural center or off-center division behind the fringe works without disturbing its forward fall.
Straight and softly wavy textures make this separated finish easy to see. Lightweight mousse gives the roots mild support, a small round brush redirects stubborn sections, and heat protectant should be used when styling with hot airflow. A quick fringe refresh may take only several minutes after dampening the roots. Full wash-day styling takes longer when the surrounding lengths also need drying.
At the salon, agree on the shortest dry point and fringe width before cutting. Hairline growth direction should be checked because a short cowlick can lift pieces higher than expected. Maintenance becomes useful when the fringe begins approaching the brows or loses its deliberately short proportion. During grow-out, keeping the outer corners slightly longer helps the fringe blend progressively into the sides.
Pro tip:
Mist only the fringe roots when they wake up in the wrong direction, then dry them forward with light tension. Resetting the base is usually more effective than repeatedly pressing dry ends into place.
Make It Work for You:
For lower-density hair, use a shallower fringe section and leave more hair in the surrounding lengths. A narrow veil of short pieces can preserve the softness without reducing overall front density.
Watch Out For:
Avoid repeatedly thinning the fringe whenever pieces clump together. Oil, moisture, or styling product can reduce separation, so refresh or cleanse the section before deciding it needs additional hair removed.
Piecey Soft Micro Fringe Hairstyle

A piecey micro fringe uses small defined sections instead of an evenly dispersed veil. The ends sit above the brows at slightly varied points, creating a broken edge that looks intentional without becoming jagged. Longer temple pieces can connect the short fringe with cheekbone framing, while the remaining haircut may be a bob, lob, or longer shape. The fringe itself falls mostly forward rather than being divided by a strong part.
Straight and slightly wavy hair can show the individual sections clearly. Heat protectant prepares the fringe for heated styling, a mini flat iron can redirect only stubborn pieces, and lightweight styling cream helps separate the finished ends. A quick morning reset is usually limited to the fringe. Full wash-day styling takes longer according to the surrounding haircut rather than the small bang section alone.
At the salon, discuss how much variation you want across the finished edge. The goal is controlled separation, not random short points. Growth direction should be checked before the shortest pieces are established. As the fringe grows, the broken edge becomes less obvious and starts behaving like a short conventional bang. A light perimeter refinement can restore the micro proportion without repeatedly reducing density.
Pro tip:
Warm a tiny amount of styling cream between your fingertips and touch only selected dry ends. Targeting individual pieces gives definition without coating the whole fringe or collapsing its light root movement.
Make It Work for You:
If your strands are thicker, keep the piecey groups slightly broader rather than removing large amounts of hair. Wider sections can show separation while retaining enough substance for a soft finish.
Watch Out For:
Do not create every piece at exactly the same width and spacing. Excessive uniformity can make the fringe look segmented; combine smaller and broader groups while preserving an overall balanced edge.
Wavy Soft Micro Fringe Hairstyle

A short wavy fringe uses natural bends to interrupt the line above the brows. Instead of forcing every piece straight, the fringe can contain small curves with subtly different finished lengths. Longer wavy sections near the temples connect it to cheekbone or jaw-level layers, while the rest of the hair can sit at the shoulders or below. Moderate volume keeps the short front from appearing isolated.
Naturally wavy hair often needs less manipulation than a straightened micro fringe. Lightweight mousse supports the bends, curl cream controls frizz, and a diffuser helps dry the short sections without brushing them smooth. A quick refresh can involve dampening two or three flattened pieces and diffusing briefly. A complete wash-day routine takes longer because the full wave pattern needs to dry before the fringe’s finished height is clear.
At the salon, establish the micro length using the normal dry wave pattern rather than stretching the fringe downward. Ask for enough softness at the outer corners to connect with surrounding layers. As it grows, the fringe develops deeper bends and gradually approaches the brows. Reshaping can restore its short proportion while preserving the natural variation that keeps the edge soft.
Pro tip:
Diffuse the fringe from a short distance before lifting it toward the diffuser. Letting the initial wave pattern establish with less compression can prevent tiny sections from springing into unexpectedly tight bends.
Make It Work for You:
For very loose waves, keep the fringe a little longer and let only the highest bends reveal extra forehead. This preserves the micro effect without requiring an unusually short baseline.
Watch Out For:
Avoid stretching the fringe straight while measuring its finished position. A section that appears safe under tension can rise significantly once its natural wave returns, leaving the result shorter than planned.
Curly Soft Micro Fringe Hairstyle

Short curls can form a micro fringe through individual arcs rather than a straight horizontal line. Some curls may settle higher on the forehead while neighboring groups fall slightly lower, creating a soft irregular edge. Longer curls at the temples can reach the cheekbones and connect with layered sides. The surrounding haircut may remain rounded, shoulder length, or longer depending on the preferred volume.
Shrinkage is central to planning this version. Lightweight leave-in conditioner provides slip, curl gel supports the small groups, and a diffuser helps set the fringe without pulling it downward. Refreshing one or two compressed curls can be relatively quick. A complete wash, product application, and diffuse requires more time, particularly when the surrounding hair is dense or long.
At the salon, assess the fringe in its dry curl pattern and agree on the highest acceptable finished point. Individual curl groups can shrink differently, so identical stretched lengths are not the goal. As the fringe grows, curls become heavier and begin settling lower toward the brows. Trimming only the groups that disrupt the intended shape can preserve variation while avoiding unnecessary shortening across the entire front.
Pro tip:
Let the fringe curls dry fully before separating any groups. Once set, divide only selected sections that look too broad; keeping other curls intact maintains definition around such a short, visible area.
Make It Work for You:
If your curls shrink strongly, start with a longer dry target and approach the micro proportion conservatively. You can preserve visible forehead without risking unexpectedly high curls around the hairline.
Watch Out For:
Never use wet length alone to decide how short the fringe should be. Water stretches curls, and the finished dry position may rise substantially once the curl pattern contracts.
Narrow Soft Micro Fringe Hairstyle

A narrow micro fringe occupies only the central forehead, leaving the temple areas long and open. Its short pieces can sit well above the brows with a lightly broken edge, while longer side sections begin around the cheekbones or jaw. This creates a small focal point rather than a full-width bang. Long hair, lobs, and softly layered cuts can all support the contrast.
Straight and softly wavy textures make the narrow width particularly clear. Lightweight mousse gives the small fringe section controlled lift, a small round brush resets its root direction, and heat protectant is needed when hot airflow is used. A quick refresh takes little time because only a compact section needs attention. Full wash-day styling depends mainly on the length and texture of the surrounding haircut.
At the salon, agree on fringe width before discussing length. Extending the section too far toward the temples changes the design significantly and removes more hair from the sides. Hairline direction should also be checked because a central cowlick can affect how the narrow fringe separates. Grow-out is relatively simple: the short center gradually becomes a longer central fringe while the untouched temple pieces continue framing the face.
Pro tip:
Keep the outermost fringe pieces fractionally longer than the center. This small length progression softens the transition into untouched temple hair and prevents the narrow section from looking abruptly cut off.
Make It Work for You:
For low-density hair, this compact fringe uses less hair than a broad bang. Keep the section shallow as well as narrow so the surrounding front retains more of its natural fullness.
Watch Out For:
Avoid gradually widening the fringe during home trims. Separate the original section carefully before cutting, or small additions from the temples can eventually turn a narrow fringe into a much broader one.
Rounded Soft Micro Fringe Hairstyle

A rounded micro fringe follows a gentle arc instead of forming a perfectly straight line. The center sits slightly higher above the brows, while the outer sections become subtly longer toward the temples. That curve can echo rounded layers, a bob, or fuller side volume without creating a heavy bowl-like shape. The ends remain light enough to show small spaces across the forehead.
Straight and softly wavy hair can display the arc clearly. Apply heat protectant before heated styling, use a small round brush to encourage a shallow forward curve, and finish with flexible hairspray if the fringe needs extra control. A fringe-only refresh may be brief. Full wash-day styling takes longer when the surrounding haircut also depends on smooth rounded movement.
At the salon, discuss the center and outer dry lengths separately rather than requesting one measurement across the fringe. The difference should remain subtle if softness is the goal. Growth direction can distort the arc, so assess how the hairline behaves naturally. As the fringe grows, the curve drops toward the brows and becomes less obviously micro. Refining the edge restores the proportion without requiring additional width.
Pro tip:
Create the curve through the fringe’s overall length rather than curling every end underneath. A shallow arc in the cut and root direction looks softer than a strongly rolled finish.
Make It Work for You:
If you prefer less forehead exposure, lower the entire arc while keeping the center visibly above the brows. The rounded progression remains intact even with a slightly longer micro length.
Watch Out For:
Do not make the temple ends dramatically longer than the center. Too much difference changes the shape toward curtain bangs; keep the progression restrained so the fringe remains recognizably short.
Feathered Soft Micro Fringe Hairstyle
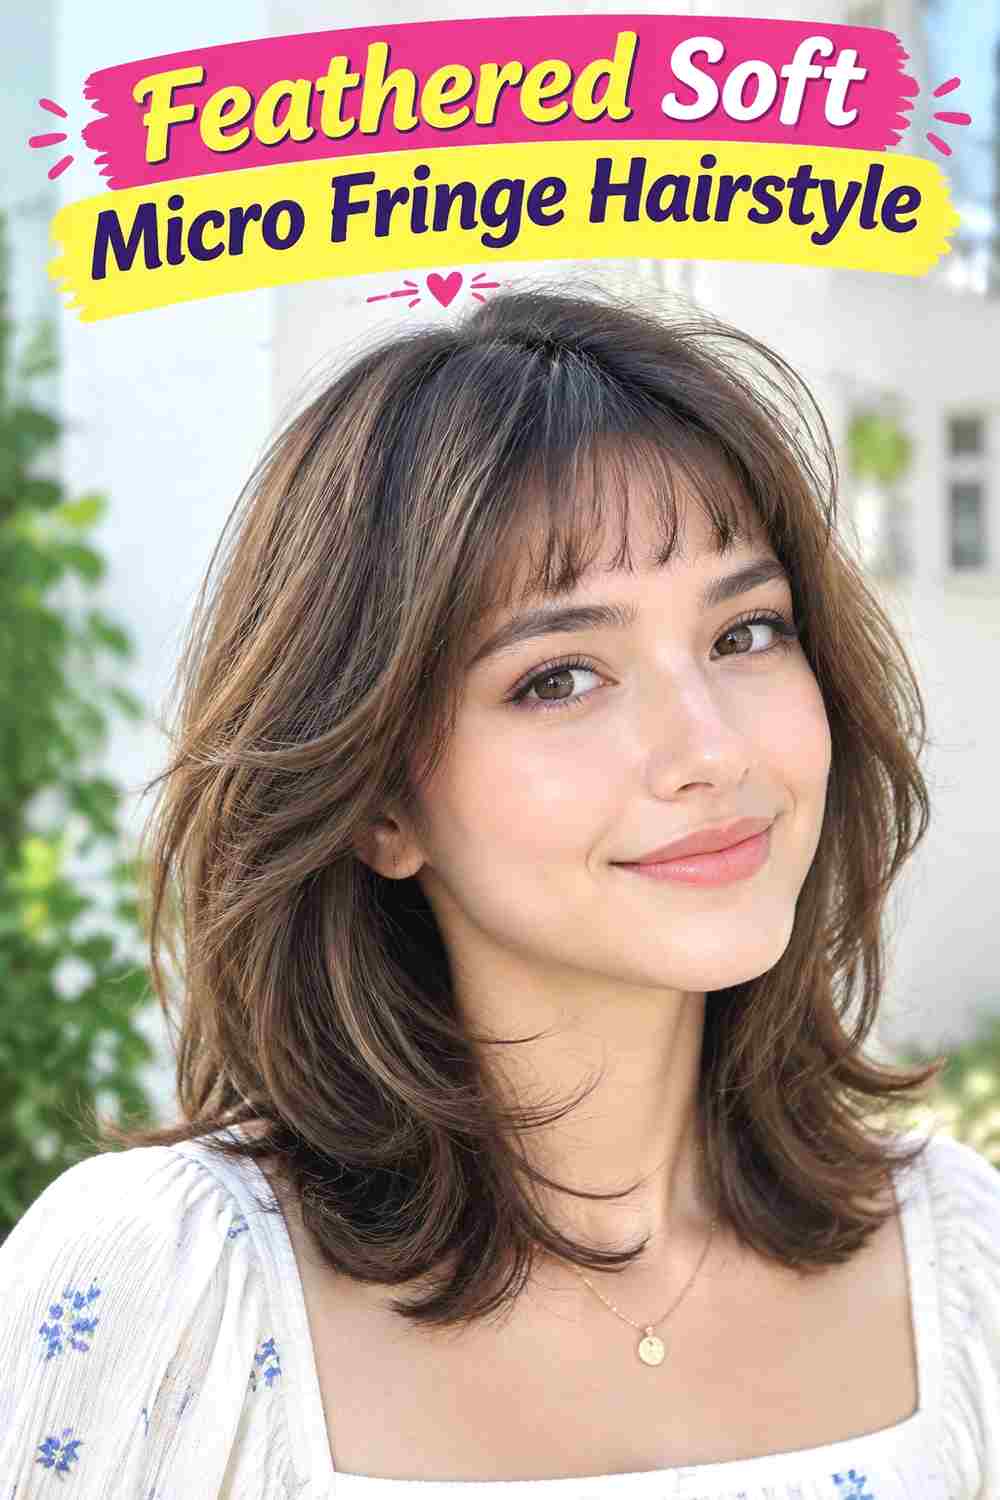
Feathered ends make a micro fringe look mobile by allowing tiny sections to overlap rather than forming a solid edge. The finished length remains above the brows, with slightly longer pieces near the outer corners. Softly layered sides can begin around the cheekbones, continuing the light movement through the haircut. The surrounding length may be short or long as long as the front transitions gradually.
Straight and gently wavy textures show feathered separation especially well. Heat protectant prepares the hair for heated airflow, a small round brush creates subtle direction, and lightweight styling cream can define selected ends. A quick refresh focuses on resetting the fringe roots and separating several pieces. Full wash-day styling takes longer if the surrounding layers also require controlled movement.
At the salon, describe how much density you want retained within the fringe before discussing feathering. Softness should come from careful edge treatment rather than automatically removing large amounts of hair. Hairline direction matters because short feathered pieces can lift where growth patterns are strong. As the fringe grows, its overlapping pieces become heavier and less distinct. A small edge refinement can restore movement without repeatedly thinning the whole section.
Pro tip:
After drying, direct only a few fringe ends slightly sideways rather than making every piece point forward. Small direction changes reveal the feathered edge while keeping the overall bang cohesive.
Make It Work for You:
For thicker strands, retain more weight within each feathered piece. Softness can come from the changing edge and direction rather than making individual sections extremely thin or transparent.
Watch Out For:
Excessive thinning can turn feathering into sparse, flyaway ends. Preserve enough density for the fringe to hold its shape, then use styling to create additional separation where it is actually needed.
Bob-Length Soft Micro Fringe Hairstyle

A bob gives micro fringe a strong length contrast: the short forehead section sits well above the brows while the main perimeter finishes near the jaw or chin. The bob can remain relatively blunt, with only light face framing at the temples. A center or soft off-center part behind the fringe keeps the sides balanced, while the short bang introduces the main texture change.
Straight and wavy hair can both support the combination. Apply heat protectant before heat styling, use a paddle brush to smooth the bob, and a small round brush to reset the fringe separately. A quick morning refresh may involve only the bangs. Full wash-day styling takes longer because the bob perimeter and short fringe require different brush positions and drying directions.
At the salon, discuss the fringe and bob as two separate landmarks: the dry micro length and the jaw or chin perimeter. Keep enough weight through the bob so the short fringe does not make the whole haircut feel overly layered. The fringe will show growth sooner than the perimeter. Maintaining only the bangs between larger reshapes can preserve the contrast while allowing the bob to grow naturally.
Pro tip:
Style the micro fringe before smoothing the bob. Setting the shortest section first prevents the larger brush movements used on the sides from accidentally sweeping the fringe away from its intended position.
Make It Work for You:
For lower-density hair, keep the bob perimeter full and choose a shallower fringe section. The strong difference in length provides visual interest without requiring extensive layers or density removal elsewhere.
Watch Out For:
Avoid matching a very light fringe with excessively thinned bob ends unless that is specifically desired. Preserving a stronger perimeter gives the haircut useful contrast and maintains visible lower fullness.
Long Layered Soft Micro Fringe Hairstyle
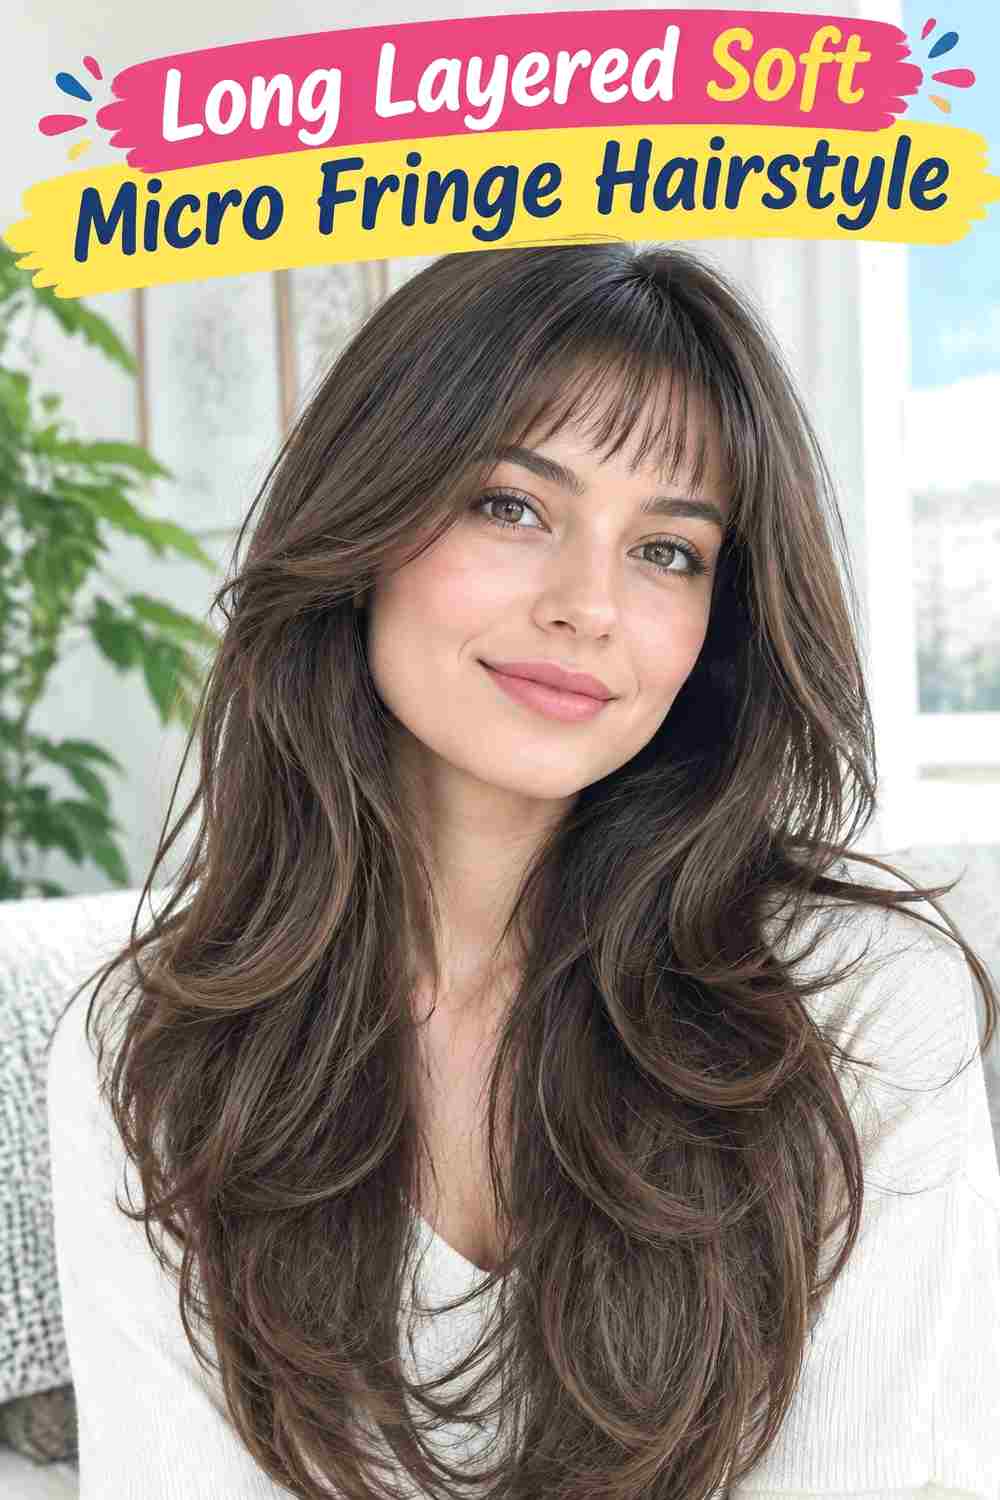
Long hair creates the greatest contrast with a micro fringe because the shortest pieces sit high on the forehead while layers continue far below the shoulders. Cheekbone and jaw-level framing can bridge that distance, preventing the fringe from appearing completely detached. The main lengths may be straight, wavy, or softly curved, with movement concentrated through the front rather than excessive short layers throughout.
Straight and wavy textures make the changing lengths easy to see. Heat protectant is essential before heat styling, a large round brush shapes the long face frame, and a small round brush controls the fringe. A quick bang refresh takes only a fraction of a full styling session. Complete wash-day drying takes considerably longer because of the overall hair length.
At the salon, establish the dry micro fringe first, then decide where the next face-framing layer should begin. A cheekbone-level transition can connect the very short front to longer sections. As the fringe grows, it gradually becomes a short conventional bang while the long layers change much more slowly. Separate fringe maintenance prevents unnecessary trimming of the rest of the haircut.
Pro tip:
Keep the longest outer fringe pieces distinct from the cheekbone layers rather than blending everything immediately. A small visual pause between lengths can make the short fringe look deliberate against long hair.
Make It Work for You:
If you prefer fewer layers, keep the long lengths mostly intact and add only narrow cheekbone framing. That limited transition can connect the micro fringe without changing the density of the entire haircut.
Watch Out For:
Do not add numerous short layers simply to connect the fringe to long hair. Too much graduation can change the whole haircut; a few deliberate front lengths are often enough.
Shaggy Soft Micro Fringe Hairstyle

A shag gives a micro fringe surrounding movement through shorter crown and face-framing layers. The fringe sits above the brows with an irregular soft edge, while temple pieces lengthen toward the cheekbones. Crown layers create lift, and the sides progress through jaw, shoulder, and longer sections depending on the haircut length. The overall finish can be wavy or tousled rather than carefully polished.
Wavy hair can make the shaggy structure relatively low effort. Lightweight mousse supports crown movement, curl cream manages frizz, and a diffuser dries the layers without smoothing away their bends. A quick refresh can target the fringe and crown. A complete wash-day diffuse takes longer because several layer levels need to dry before the silhouette can be assessed.
At the salon, identify both the dry micro fringe length and the shortest substantial crown layer. Keeping these landmarks distinct prevents the entire upper haircut from becoming uniformly short. As the shag grows, the fringe approaches the brows and crown volume moves lower. Targeted reshaping of those areas restores the original proportions while longer perimeter sections can remain largely unchanged.
Pro tip:
Diffuse the fringe with less lift than the crown. Keeping the short bang closer to the forehead while expanding the upper layers creates separation between the two features instead of one continuous volume zone.
Make It Work for You:
For lower-density hair, lengthen the crown layers and keep the shag progression restrained. The micro fringe can provide the strongest short detail while more weight remains through the sides.
Watch Out For:
Avoid combining an extremely short fringe with excessively short crown layers unless strong upper volume is intended. Too many short sections can make the haircut difficult to control during grow-out.
Fine Hair Soft Micro Fringe Hairstyle

Fine strands can create a delicate micro fringe, but the section should preserve enough density to avoid looking unintentionally sparse. A narrow or medium-width fringe can sit above the brows with softly varied ends, while the surrounding hair retains a stronger perimeter. Longer temple pieces help connect the fringe to a bob, lob, or layered length without requiring substantial removal around the front.
Fine strand diameter does not automatically mean low density, so both characteristics should guide the design. Lightweight mousse gives the roots support, heat protectant prepares the fringe for heated airflow, and a small round brush provides gentle direction. A quick refresh can be very short because the fringe contains little length. Full wash-day effort depends mostly on the surrounding haircut.
At the salon, discuss strand thickness and overall density separately. Ask how deep the fringe section can be without taking more hair from the sides than you want. The short edge needs maintenance as it approaches the brows, but repeated thinning is rarely necessary simply because it grows. Keeping the perimeter stable while adjusting length helps preserve substance throughout the fringe’s grow-out.
Pro tip:
Lift the fringe only slightly at the roots when drying. Excessive volume can separate fine strands too widely, while gentle support keeps the short pieces airy without making the section appear sparse.
Make It Work for You:
If your fine hair is densely distributed, a somewhat broader fringe may still feel substantial. Adjust width according to actual density instead of assuming every fine-haired fringe needs to be extremely narrow.
Watch Out For:
Do not repeatedly texturize fine fringe ends to maintain softness. Length changes alone may restore the light edge; excessive removal can leave too little weight for the pieces to sit predictably.
Side-Swept Soft Micro Fringe Hairstyle
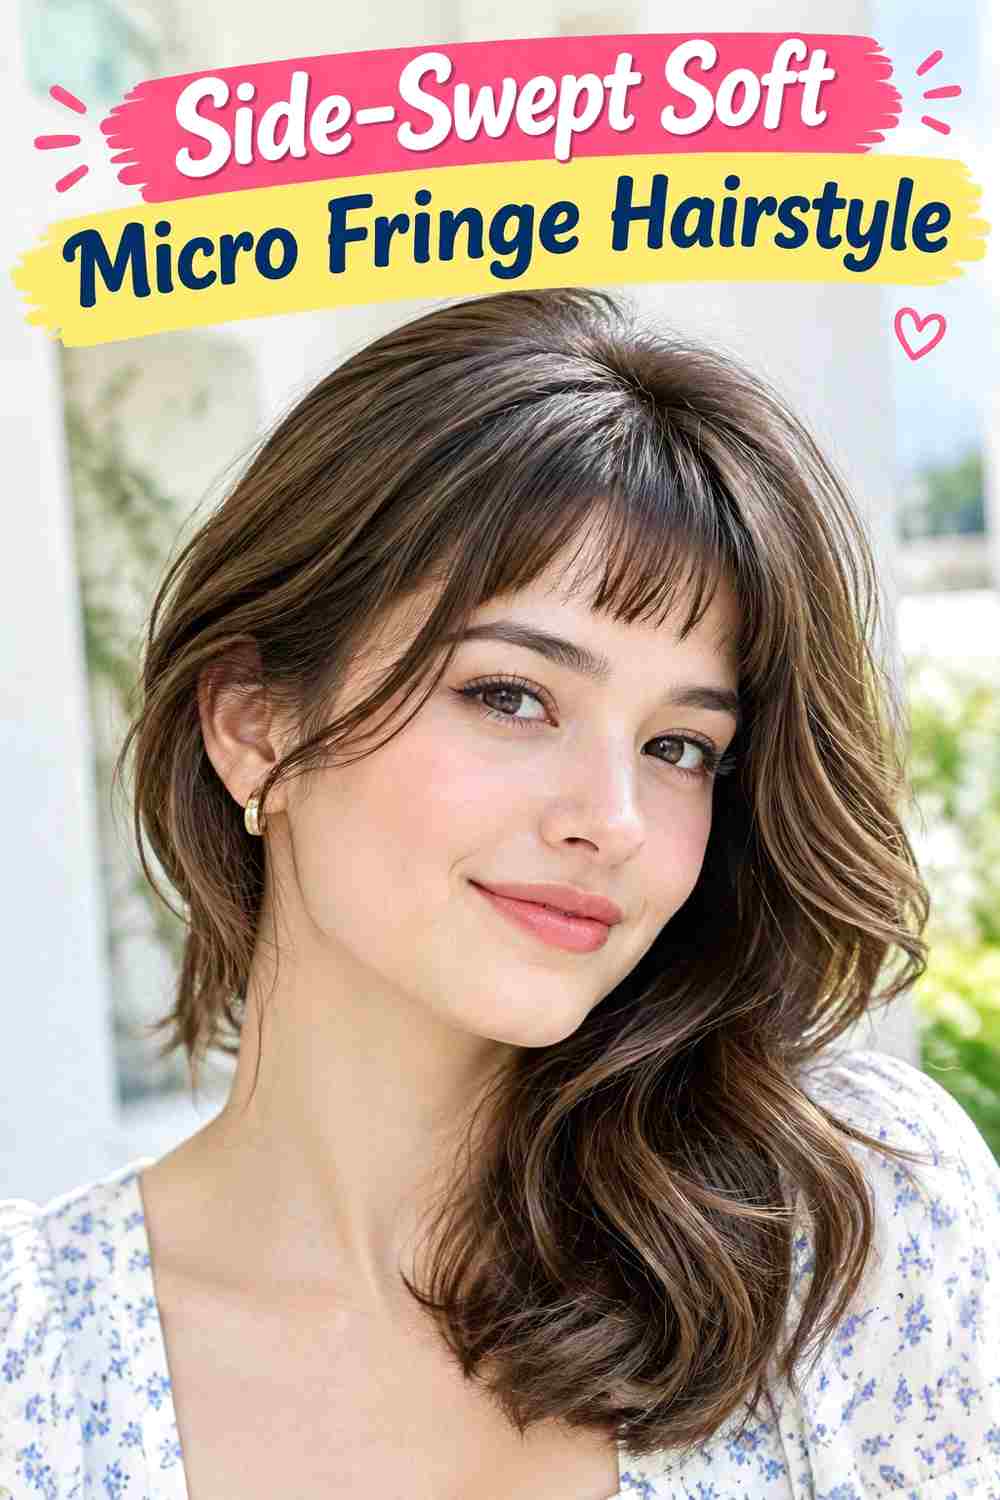
A side-swept micro fringe keeps the short length but directs most pieces diagonally instead of straight down. The shorter side can sit high above one brow, while the opposite edge becomes subtly longer toward the temple. The surrounding hair may be bobbed or long, with gentle cheekbone framing helping the diagonal fringe merge into the side. An off-center part supports the directional movement.
Straight and softly wavy textures can hold the sweep clearly. Apply heat protectant before heated styling, use a small round brush to guide the fringe across the forehead, and add flexible hairspray if extra hold is necessary. A quick refresh focuses on dampening and resetting the roots. Full wash-day styling takes longer when the rest of the haircut also needs shaping.
At the salon, wear your preferred part and identify the shortest dry point before creating the diagonal edge. Hairline growth direction matters because a strong cowlick can oppose the sweep. As the fringe grows, the longer side begins blending naturally into the temple while the short side loses its micro proportion first. Targeted trimming can restore the angle without cutting the entire fringe uniformly.
Pro tip:
Direct the damp roots briefly opposite the final sweep, then guide them into place. This can loosen a stubborn part and give the fringe enough flexibility to sit diagonally without heavy product.
Make It Work for You:
If you prefer a subtle sweep, keep the length difference between both sides small. You can maintain the directional effect while making grow-out easier and reducing the need for precise daily styling.
Watch Out For:
Avoid creating the diagonal only by cutting one side dramatically shorter. Root direction and gentle length progression should work together, or the fringe may appear uneven whenever it falls forward naturally.
Conclusion
Soft micro fringe hairstyle ideas can range from narrow wisps and piecey edges to rounded, wavy, curly, or side-swept shapes. Bob-length hair creates strong contrast, while long layers and shags use face framing to connect the short fringe with longer lengths. Density affects fringe width and depth, and natural texture determines how much the finished length rises after drying. Fine hair often benefits from restrained thinning, while curls require careful shrinkage allowance.
Because the fringe sits above the brows, growth direction, upkeep, and styling routine matter as much as face shape. Choose a width, edge finish, and surrounding layer pattern that suit your natural hair. A softer design should retain enough weight to behave predictably while still showing light movement across the forehead.
Before Your Salon Visit
Choose one or two favorites and save clear references showing the fringe at its normal dry length. Discuss your texture, density, face shape, hairline growth direction, preferred length, upkeep, and daily styling routine. Point out the exact fringe width, shortest point, outer-corner length, face-framing layers, and finish you like. If your hair waves or curls, ask to account for shrinkage before shortening. Also discuss how you want the fringe to transition as it grows toward the brows.
FAQs
How short does a soft micro fringe need to be?
There is no single measurement because forehead proportions, hairline position, texture, and shrinkage vary. The defining visual is a fringe that finishes clearly above the brows. Decide on its dry position rather than copying a fixed measurement, particularly if your hair bends, waves, or curls.
Can curly hair have a soft micro fringe?
Yes. Curly micro fringe can use individual curl groups to create a soft, irregular edge. Shrinkage is the main consideration, so assess the intended length when dry rather than stretching curls downward. Keeping some groups slightly longer can also create a more forgiving transition toward the temples.
How often does micro fringe need trimming?
Use the finished position as your guide rather than following one universal schedule. A trim becomes useful when the fringe approaches the brows, loses its intended short proportion, or becomes difficult to style. If you are growing it out, you can instead let it transition gradually into longer bangs.
What should I do if my micro fringe has a cowlick?
Growth direction should ideally be considered before the fringe is cut. For daily styling, dampen the roots and redirect them while drying rather than repeatedly pressing only the ends. A strong cowlick may also make a slightly longer or narrower micro fringe easier to manage than an extremely short, broad section.