15 Zigzag Headband Hairstyles for Straight Hair

Zigzag headband hairstyles for straight hair use the accessory’s separated teeth or patterned edge to move selected strands away from the face while keeping the rest of the length smooth and visible. The band can sit close to the hairline for a stronger pushed-back effect or farther toward the crown for more softness around the front. Straight hair makes the repeated zigzag sections easy to see, while face-framing layers, fringe, tucked sides, or softly bent ends can change how structured the finish feels.
Fine strands and lower-density hair often benefit from preserving some root lift instead of pressing the crown completely flat. Dense straight hair may need a stronger accessory or a more secure ponytail anchor when the band is combined with a gathered style. Medium and long lengths offer the widest range of ponytails, half-up shapes, and buns, while bobs can use close-set or deep-set placements without needing extra length.
Most versions are quick to refresh because the headband provides much of the structure. Full wash-day styling takes longer only when the hair also needs smoothing, end shaping, or fringe work. If the band slips, adjust its angle, depth, or grip rather than tightening it until the temples or ears feel uncomfortable.
Quick List
- Classic Center-Part Zigzag Headband Straight Hairstyle
- Soft Side-Part Zigzag Headband Straight Hairstyle
- Brushed-Back Zigzag Headband Straight Hairstyle
- Hairline-Set Zigzag Headband Straight Hairstyle
- Deep-Set Zigzag Headband Straight Hairstyle
- Face-Framing Zigzag Headband Straight Hairstyle
- Curtain-Fringe Zigzag Headband Straight Hairstyle
- Sleek Length Zigzag Headband Straight Hairstyle
- Soft-Bend Ends Zigzag Headband Straight Hairstyle
- Half-Up Zigzag Headband Straight Hairstyle
- Low-Ponytail Zigzag Headband Straight Hairstyle
- Low-Bun Zigzag Headband Straight Hairstyle
- Tucked-Behind-Ears Zigzag Headband Straight Hairstyle
- Double-Band Zigzag Headband Straight Hairstyle
- Short-Bob Zigzag Headband Straight Hairstyle
Classic Center-Part Zigzag Headband Straight Hairstyle

A clean middle part gives the zigzag headband a balanced starting point and makes the front separation easy to see. Establish the part first, leave a narrow section visible on each side, and place the band several centimeters behind the hairline. The crown can stay softly lifted rather than pressed flat, while the lengths fall straight through the shoulders or back with a clean, uncomplicated finish. If shorter pieces sit near the cheekbones, let them remain outside the band rather than forcing them backward.
This works well for medium and long straight hair, especially when the natural growth pattern already supports a center part. Fine or lower-density hair can keep more lift at the roots so the band does not expose too much scalp. Use a tail comb to define the part, a zigzag headband for the separated front, and light styling cream to control flyaways. A quick refresh usually means resetting the part and band; full wash-day styling takes longer only if the length needs smoothing or blow-drying.
If a stylist is shaping the haircut, point to the shortest front layer you want visible outside the accessory and explain whether you usually wear a center part. Preserving enough perimeter weight can also help straight ends look fuller.
Pro tip:
Create the middle part before putting on the headband, then slide the accessory backward in one controlled motion. This keeps both front sections even and reduces repeated disturbance around the roots.
Make It Work for You:
For lower-density hair, place the band slightly farther back and preserve more crown lift. The zigzag effect remains visible without making the front look overly separated or flat.
Watch Out For:
Avoid pushing one side farther back when the part looks uneven. Remove the headband, correct the part itself, and replace the accessory rather than forcing symmetry with tension.
Soft Side-Part Zigzag Headband Straight Hairstyle
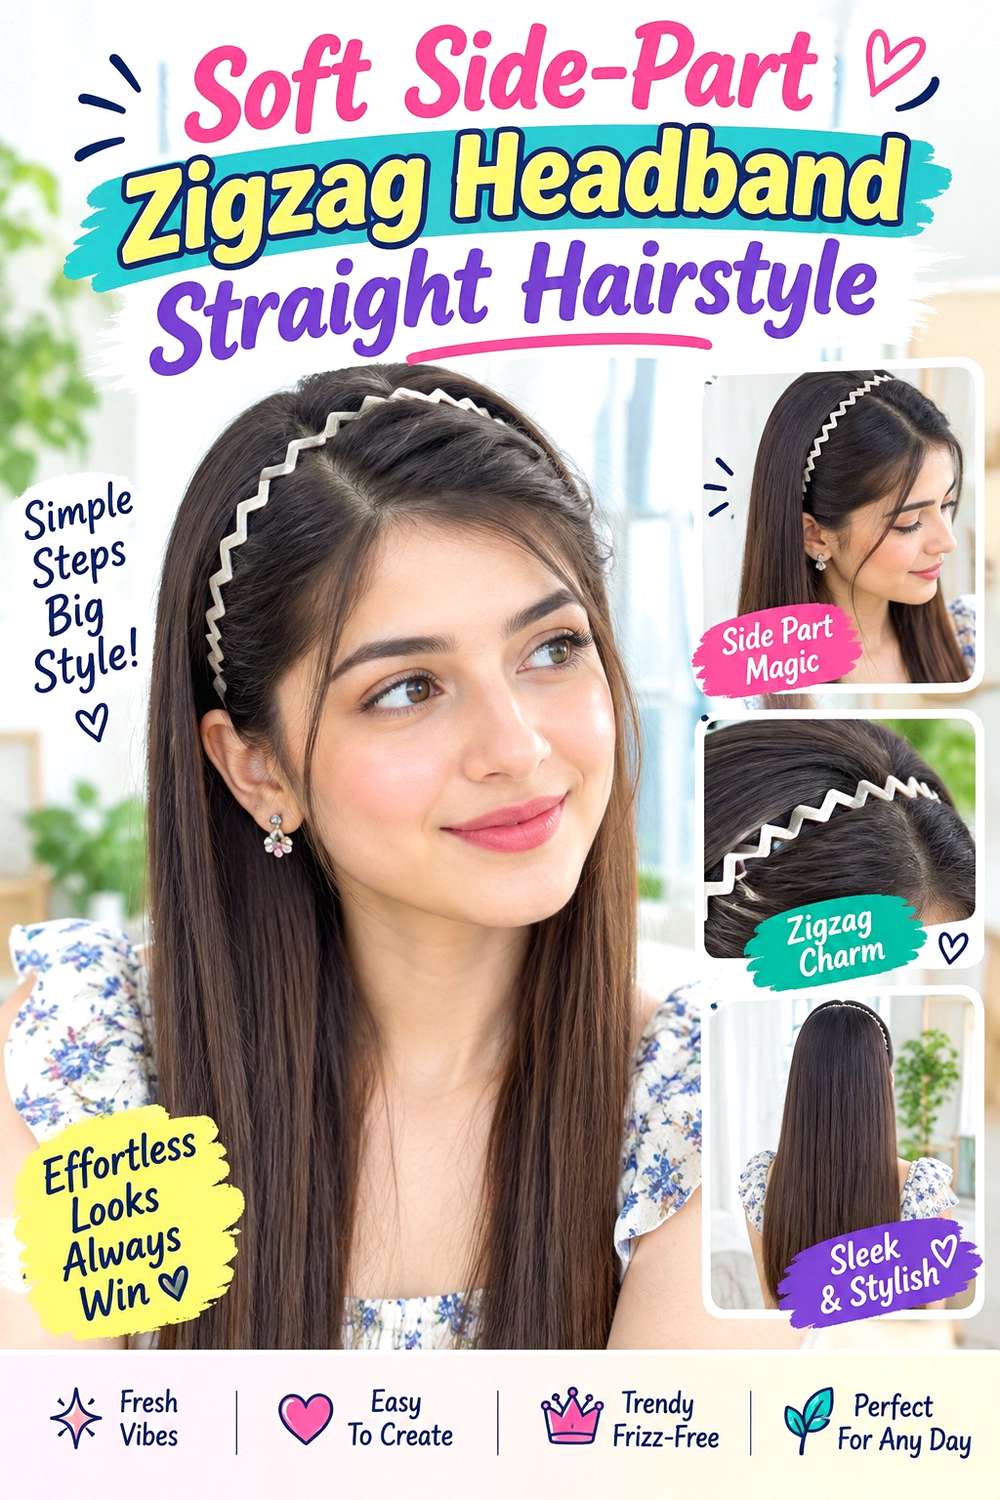
A soft side part gives straight hair direction while the zigzag headband controls the area behind it. Let the fuller side sweep naturally across the forehead or temple, then place the band behind that movement so the part remains visible. The smaller side can sit closer to the head or tuck behind the ear. Keep the lengths straight and smooth, with enough root lift that the larger front section does not look pasted down.
This arrangement works best when the hair already prefers one side, because following the natural growth direction reduces daily correction. Medium and long straight hair shows the contrast between the directional front and symmetrical band clearly. Use a tail comb to set the side part, a zigzag headband for the controlled root pattern, and lightweight styling cream to smooth flyaways. A quick refresh can focus on the fuller front section and band angle; full wash-day styling takes longer if the roots need blow-drying into a new direction.
If a stylist is cutting face-framing pieces, specify which side you usually part on and where the shortest section should finish. Keeping those pieces long enough to sit either outside or behind the headband gives more styling flexibility as the cut grows.
Pro tip:
Set the side part while the hair is loose, then guide the fuller section into place before adding the band. This prevents ridges where the headband meets the swept front.
Make It Work for You:
If one side naturally has more root lift, use that as the fuller side. The hairstyle will need less product and less manipulation while keeping the asymmetric front clear.
Watch Out For:
Do not drag the fuller side tightly beneath the band to make both sides match. Uneven root volume can be intentional, while excess pulling may create scalp discomfort.
Brushed-Back Zigzag Headband Straight Hairstyle
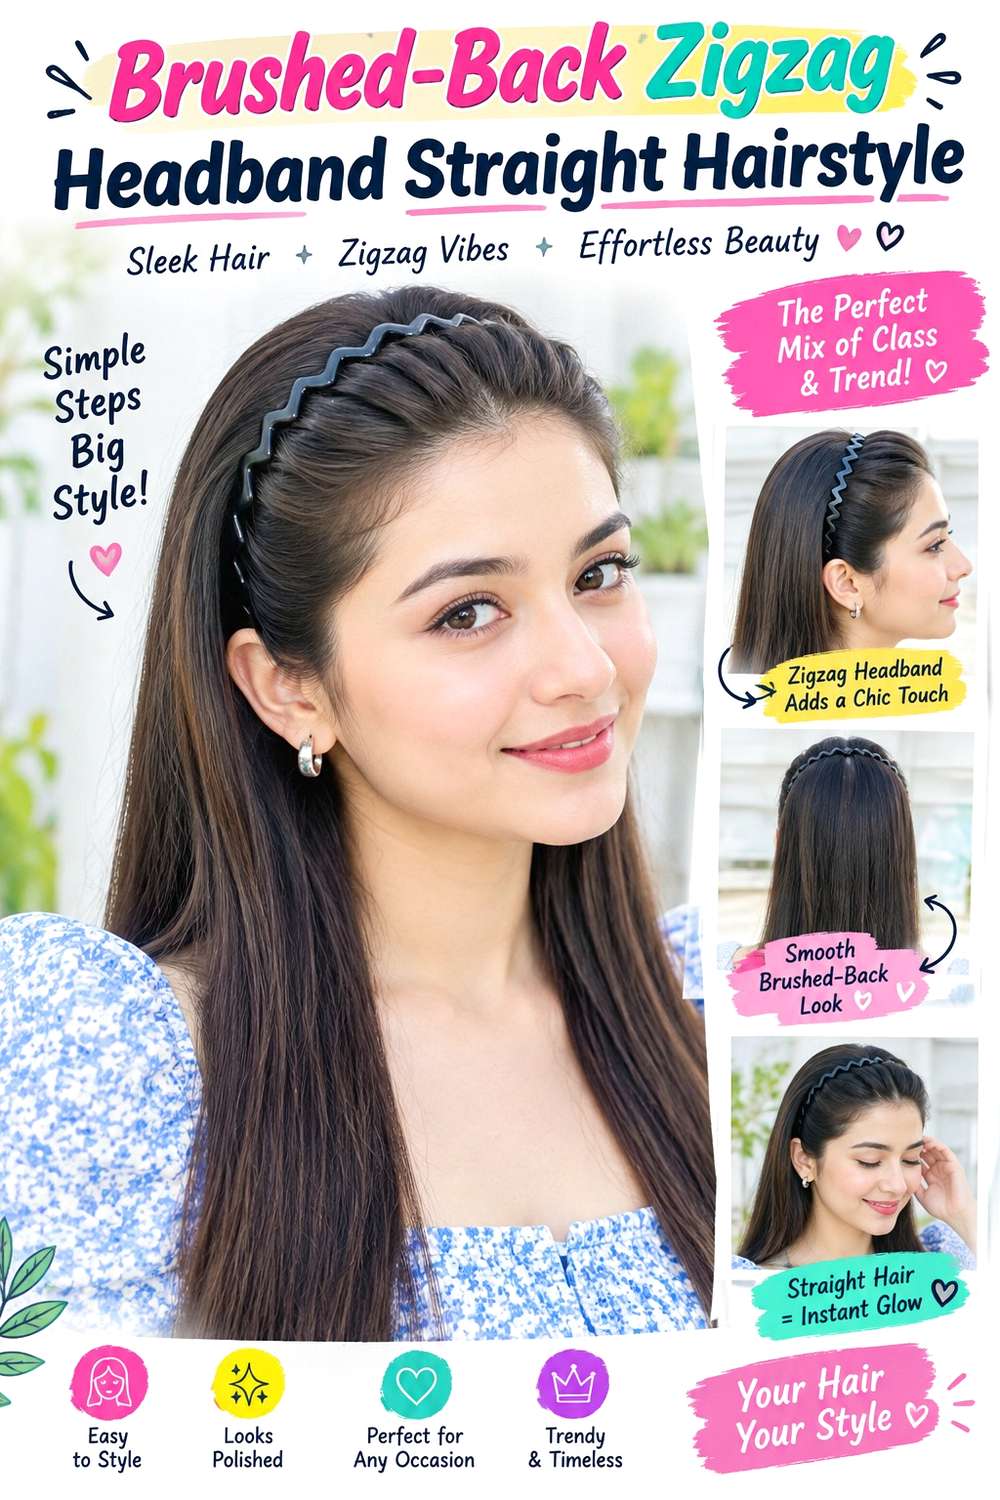
A brushed-back front removes the visible part and lets the zigzag headband become the main structure at the hairline. Direct the first few centimeters of hair away from the forehead, then place the band so its teeth divide the front into narrow sections. Keep the crown slightly lifted behind it, while the lengths fall straight and smooth down the back. The open forehead and clean ends make the accessory easy to see without extra decorative elements.
This version suits straight hair that naturally moves backward without strong resistance. Fine strands may need only light root control, while dense hair can use a firmer headband that stays secure without squeezing. Use a paddle brush to guide the front, a zigzag headband for root separation, and lightweight styling cream for small flyaways. A quick refresh means brushing the front back into place and resetting the band; full styling takes longer if the length also needs a smooth blowout.
If a stylist is shaping the front, explain that you sometimes wear it fully brushed back and want enough length around the temples to reach behind the accessory comfortably. Shorter face-framing sections can remain loose when forcing them backward creates tension.
Pro tip:
Brush the front backward before inserting the band rather than using the headband teeth to drag hair into place. Pre-directing the roots creates a cleaner finish and less pulling.
Make It Work for You:
For fine hair, keep a small amount of crown lift behind the band instead of pressing everything flat. The style stays sleek while retaining more visible body.
Watch Out For:
Avoid repeatedly raking the headband through the same section when placement looks wrong. Remove it fully and restart so the roots do not become fuzzy or tangled.
Hairline-Set Zigzag Headband Straight Hairstyle
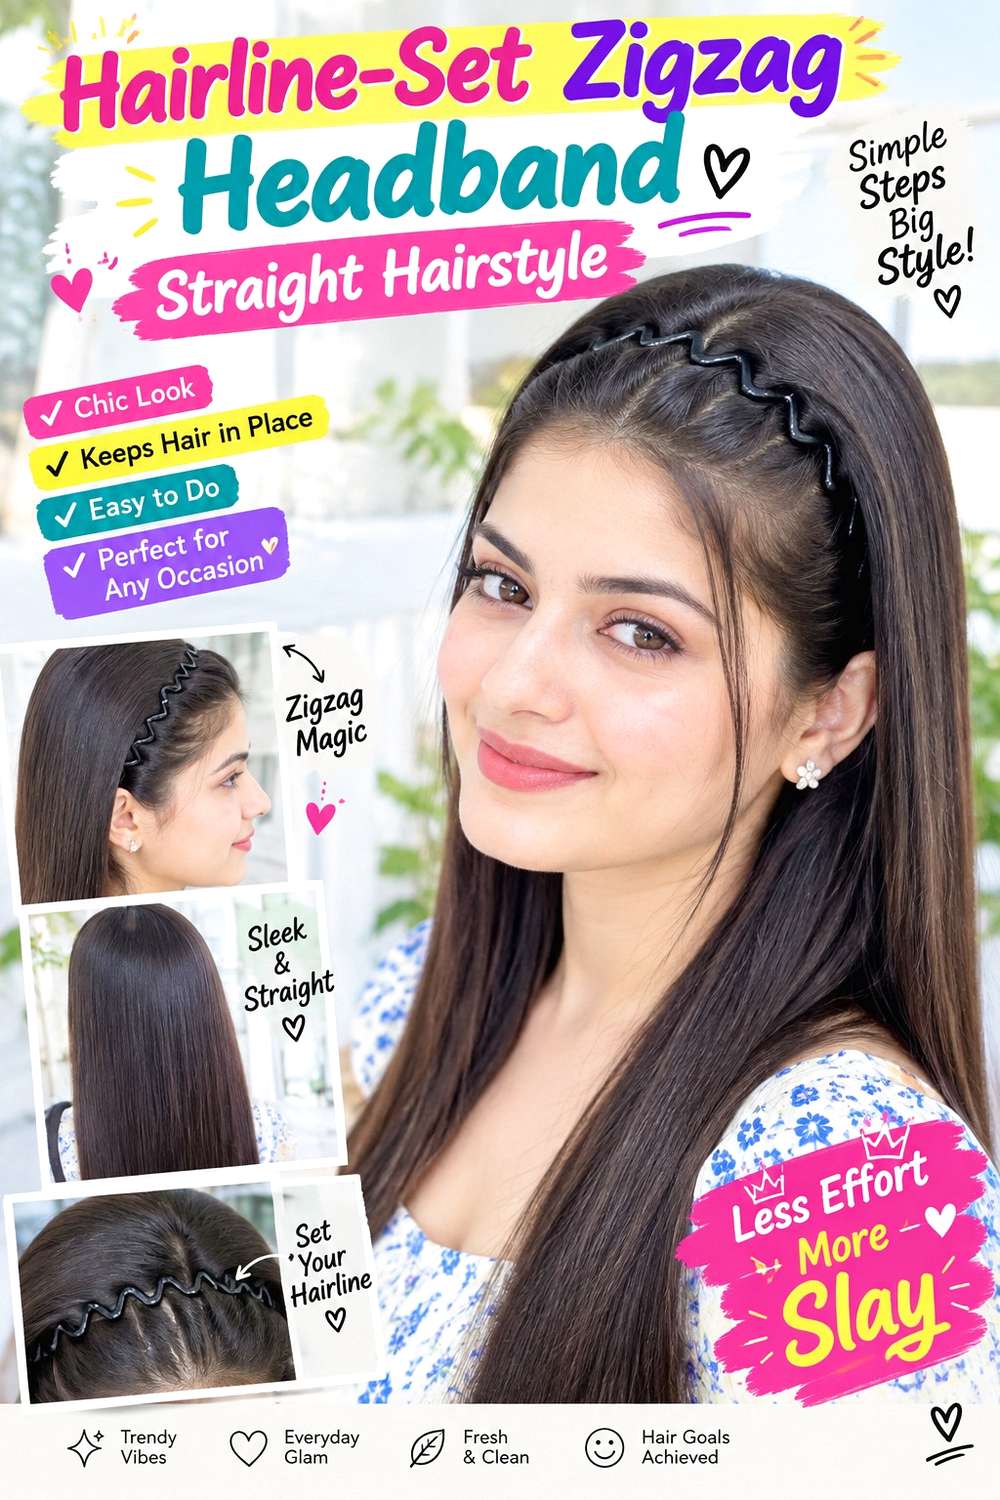
Placing the zigzag band close to the hairline creates the strongest pushed-back effect because very little hair remains in front of the accessory. Direct the front backward with your hands, position the band just behind the forehead, and let the crown rise immediately behind it. The lengths can fall pin-straight or follow their natural smooth shape, while the ends remain simple and visible. This placement opens the face more than deeper-set versions.
Straight hair shows the repeated zigzag separation clearly, but the accessory should sit where the temples feel comfortable. Lower-density areas may look more exposed with very close placement, so leaving a few fine front pieces can soften the effect. Use light styling cream for the first few centimeters, a zigzag headband for the main structure, and a paddle brush for gentle backward direction. A quick refresh takes little more than resetting the band and smoothing the hairline; full wash-day styling depends on the length.
If a stylist is shaping front layers, explain that you sometimes wear the hairline exposed and need enough usable length to move sections backward comfortably. A dramatic haircut change is unnecessary simply to support the accessory.
Pro tip:
Guide the hair backward with your hands before setting the band near the hairline. The accessory should refine the direction, not do all the pulling from the roots.
Make It Work for You:
If your temples are lower density, leave a few fine pieces outside the band or move it slightly back. You can preserve the close-set effect without exposing more scalp than preferred.
Watch Out For:
Do not tolerate pinching just to keep the closest possible placement. Shift the band a little farther back if the teeth or ends create immediate pressure at the temples.
Deep-Set Zigzag Headband Straight Hairstyle
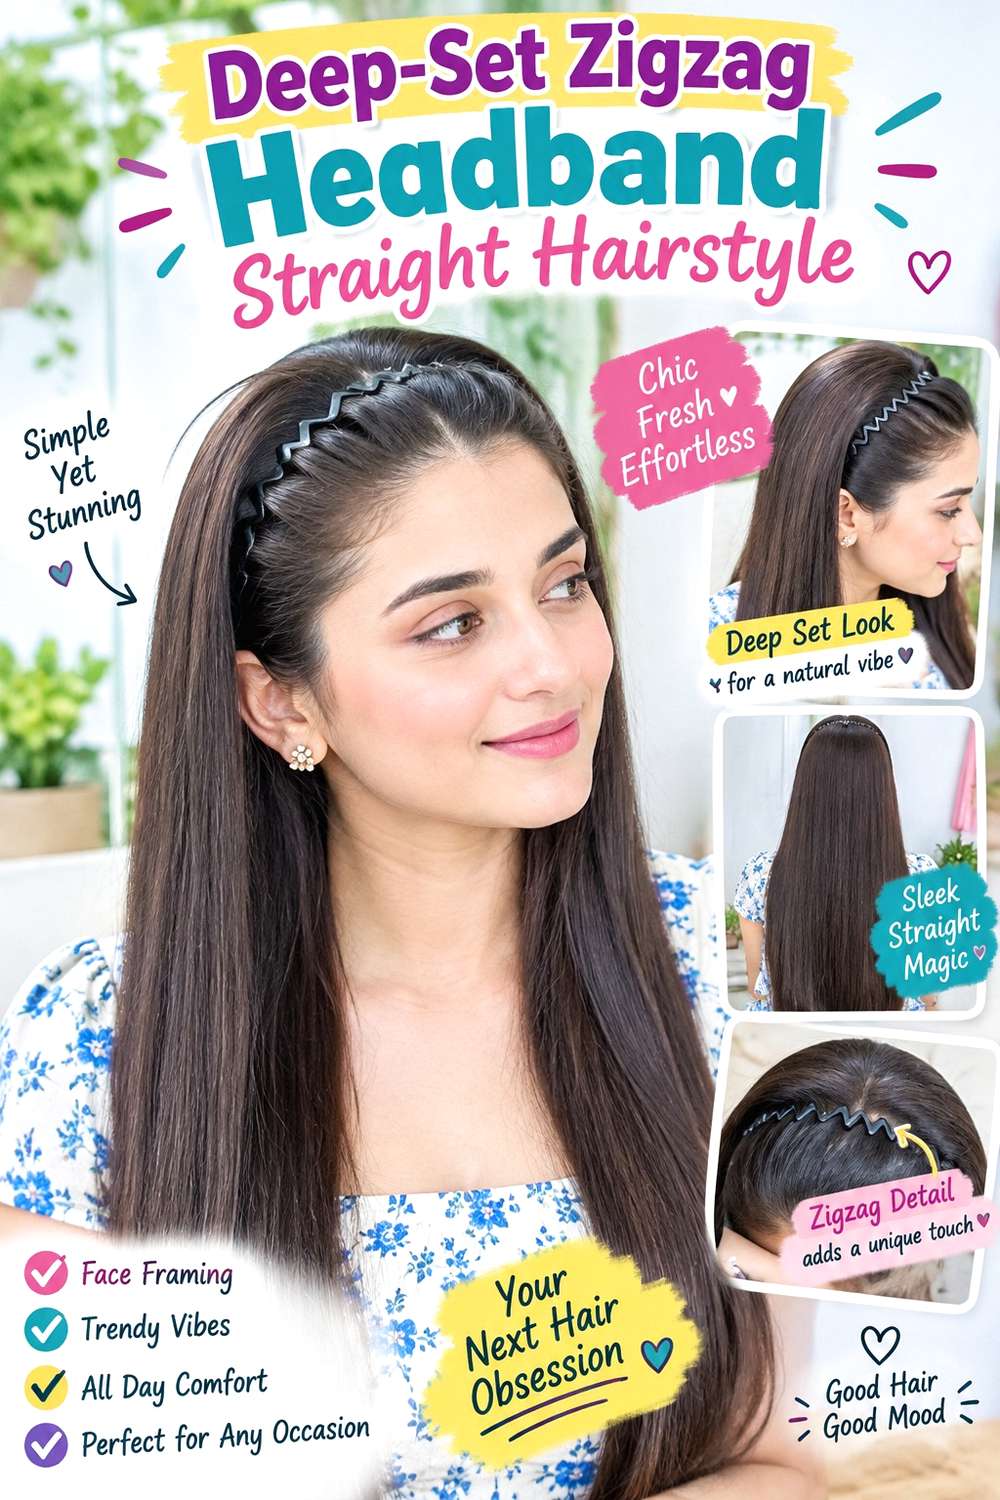
A deep-set zigzag headband sits farther toward the crown, leaving more straight hair visible around the front. Keep a center, side, or natural part, allow the front sections to fall softly near the cheekbones, and place the band behind them. The accessory then controls the middle crown rather than the hairline, creating a layered effect with loose front pieces, structured roots, and straight lengths behind.
This version is useful when very close headband placement feels severe or when front layers naturally fall forward. It also suits lower-density hair because more hair remains visible around the temples. Use a zigzag headband for the deeper placement, light styling cream to keep the front pieces smooth, and bobby pins only if extra side grip is needed. A quick refresh generally means reshaping the front and sliding the band back into position; full styling takes longer only if the lengths need smoothing.
If a stylist is shaping the cut, point to where you want the loose front pieces to finish and explain that they should remain visible with a headband. Cheekbone-, jaw-, or chin-length pieces can all work as long as they blend into the rest of the straight perimeter.
Pro tip:
Separate the front sections before inserting the headband. Placing the accessory behind them in one motion keeps the deep-set position intentional and prevents random strands from becoming trapped.
Make It Work for You:
For lower-density hair, leave more front hair outside the band and preserve root lift behind it. The deeper position gives structure without exposing the entire hairline.
Watch Out For:
Avoid placing the band so far back that the crown collapses behind it. Move it slightly forward if the accessory begins flattening the highest point of the head.
Face-Framing Zigzag Headband Straight Hairstyle
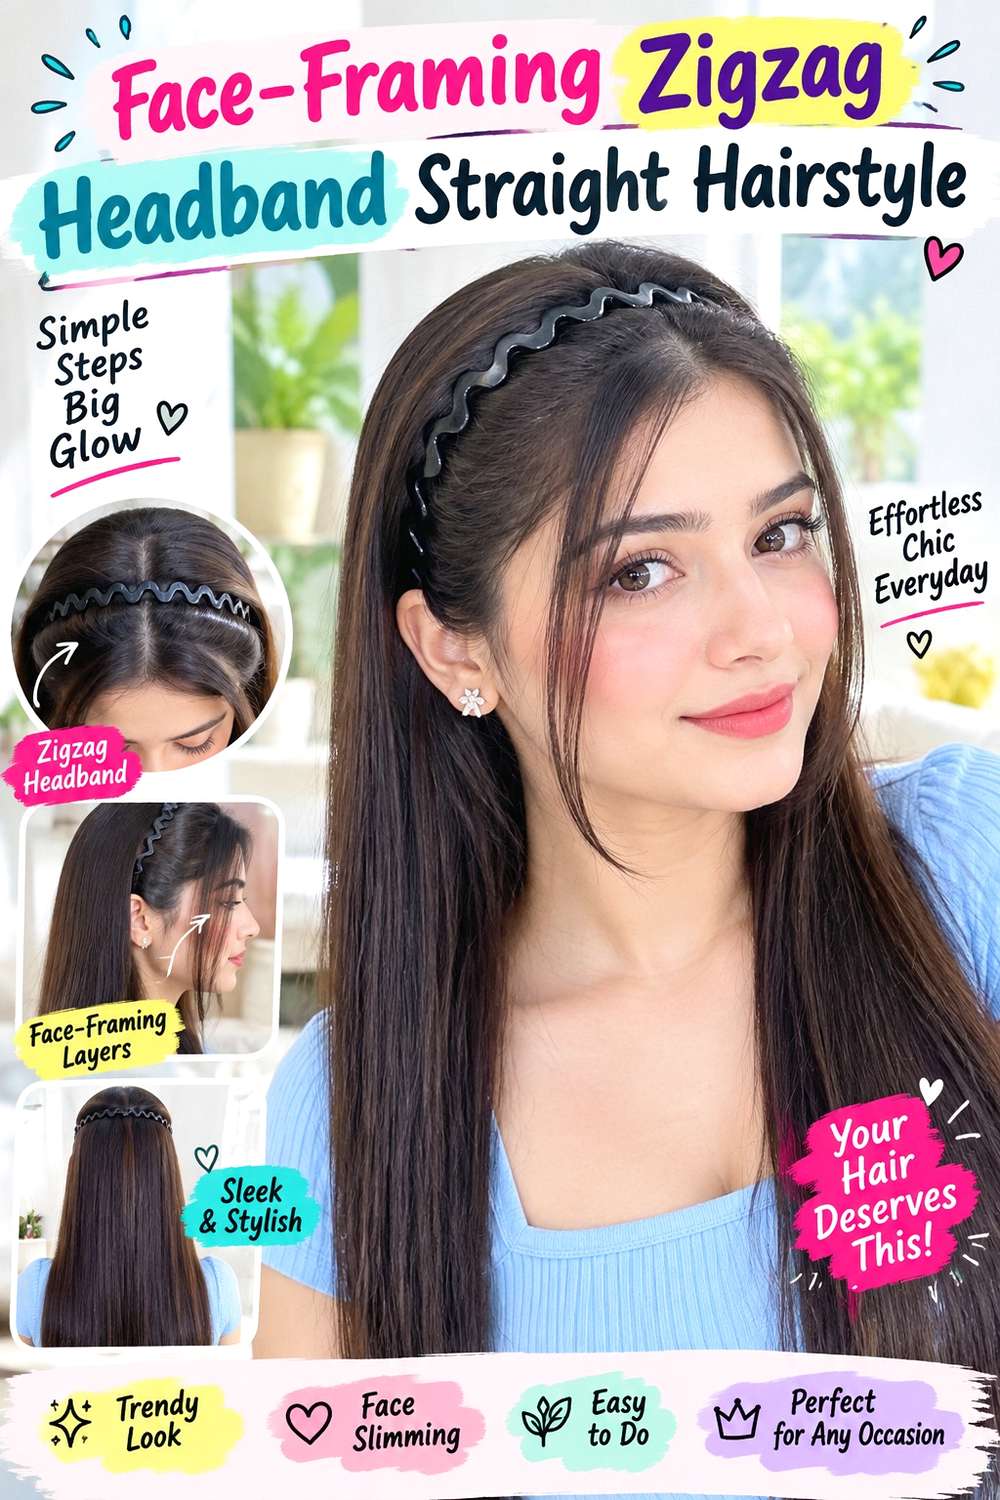
Straight face-framing pieces create clean vertical lines in front of a zigzag headband. Choose narrow sections around the cheekbones, jaw, or chin before placing the accessory, then guide the remaining hair backward and let the lengths fall smoothly behind the shoulders. A center or soft side part can stay visible, while the headband sits behind the loose pieces so they move independently rather than becoming trapped at the roots.
This style works particularly well when existing layers already provide shorter front sections. Lower-density hair should keep those sections narrow so the longer sides remain full. Use a zigzag headband for controlled root placement, a fine-tooth comb to select the face frame, and light styling cream to keep those pieces smooth without stiffness. A quick refresh usually means redefining the front sections and adjusting the band; full wash-day styling takes longer only if the length requires blow-drying.
If a stylist is cutting the face frame, point to the exact finished landmark you want and explain how much perimeter fullness you prefer. Straight hair shows changes in weight clearly, so avoid removing more around the front than your density can comfortably support.
Pro tip:
Choose the face-framing sections before putting on the headband and keep their width consistent. This prevents you from pulling random hair forward later and disturbing the accessory’s grip.
Make It Work for You:
For fine or lower-density hair, use very narrow front pieces and keep more length behind the band. The frame remains visible without making the sides look sparse.
Watch Out For:
Do not keep widening the face frame after the band is secure. If the balance feels wrong, remove the accessory and reselect the sections rather than tugging hair through its teeth.
Curtain-Fringe Zigzag Headband Straight Hairstyle

Curtain fringe can stay completely outside the zigzag headband, giving the front softness while the accessory controls the roots behind it. Part the fringe near the center, direct the outer corners toward the temples, and place the band behind the fringe’s starting point. The remaining straight hair can fall naturally down the back, with the crown kept softly lifted so the accessory does not flatten the transition.
This works best when the fringe already has enough length to open to both sides. Straight hair makes the shape easy to refresh, though the fringe may need separate attention even when the rest of the hair remains smooth. Use a round brush to direct the fringe outward, heat protectant whenever warm styling is used, and a zigzag headband as the finishing accessory. A quick refresh can focus only on the fringe and band; full wash-day styling takes longer when the entire length also needs drying.
If a stylist is shaping the fringe, specify the finished center length and ask that the outer corners remain long enough to blend toward the cheekbones. Fringe upkeep becomes more relevant when the center drops into the eyes or no longer opens comfortably.
Pro tip:
Style the curtain fringe before adding the headband and let the front settle first. Position the band afterward so the center opening stays soft and the outer corners retain direction.
Make It Work for You:
If your fringe grows forward strongly, place the band a little farther back and leave more root space. This allows the curtain shape to move without fighting the accessory.
Watch Out For:
Avoid catching the outer fringe corners inside the zigzag teeth. Trapped pieces can pull backward and break the gradual connection between the fringe and longer side sections.
Sleek Length Zigzag Headband Straight Hairstyle
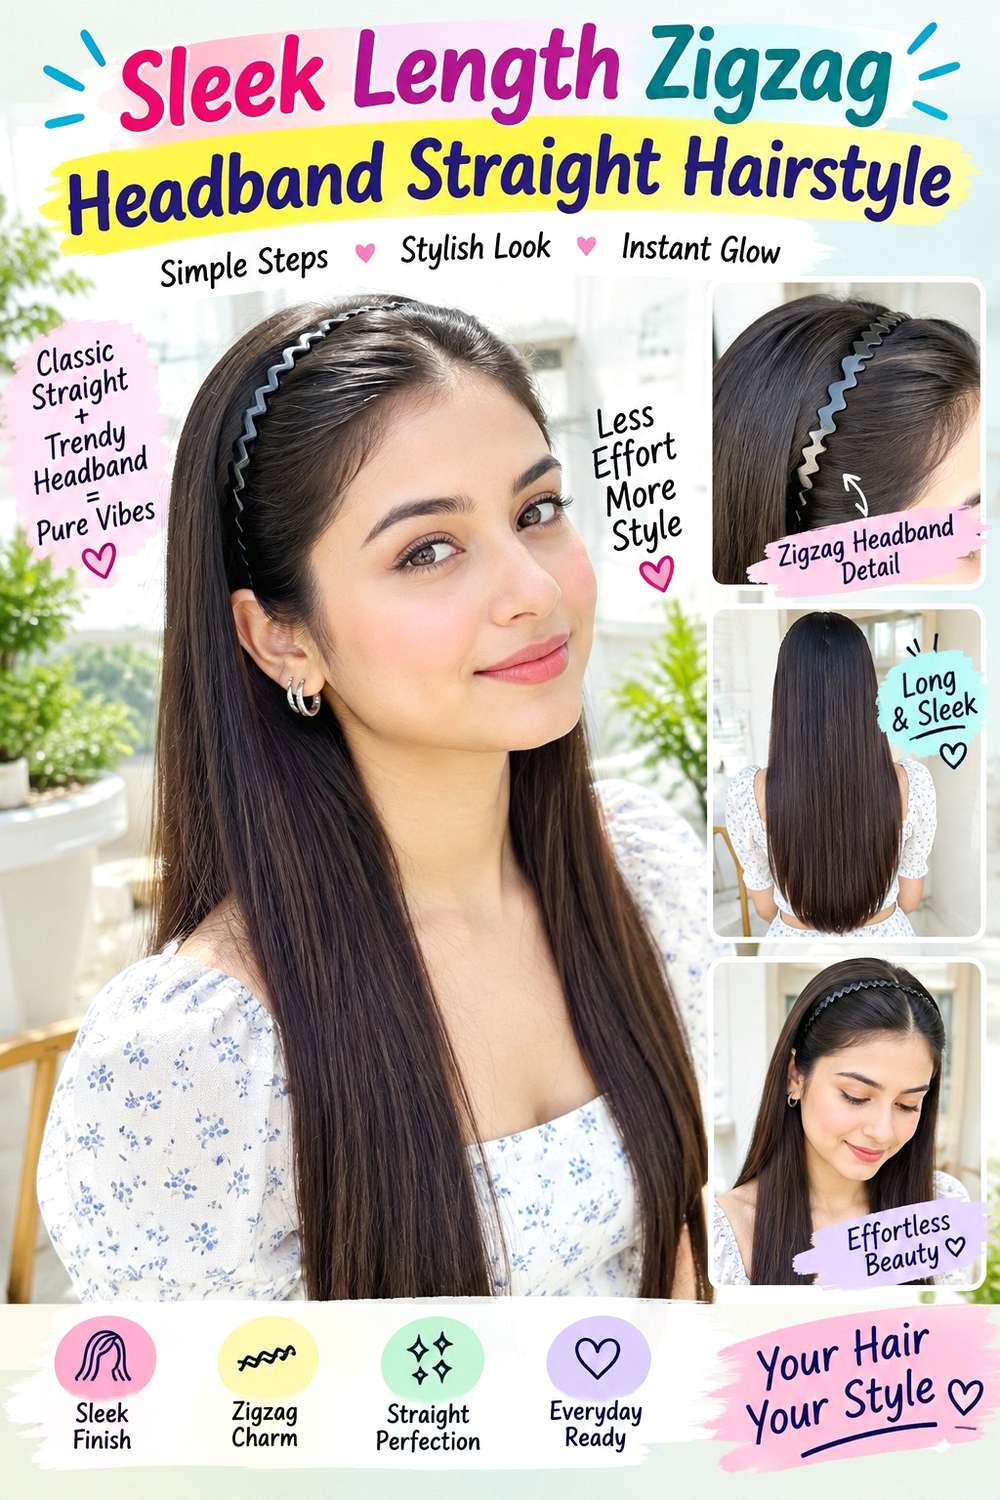
A sleek straight length makes the zigzag headband look especially graphic because the accessory introduces texture at the roots while the rest of the hair stays smooth. Place the band close to or slightly behind the hairline, keep the crown controlled, and let the lengths fall in one clean line. Ends can remain straight rather than curled, emphasizing the contrast between the patterned front and simple perimeter.
Naturally straight hair may need little preparation beyond smoothing, while wavy hair requires more effort if a fully straight finish is desired. Apply heat protectant before using a flat iron, then add the zigzag headband after the hair has cooled. Lightweight styling cream can be used sparingly around the hairline if needed. A quick refresh may involve smoothing a bent section and resetting the band; a full wash-day style takes longer when the entire length must be straightened.
If a stylist is shaping the cut, specify how much perimeter weight you want at the ends and whether long layers should remain subtle. Straight, sleek finishes make sparse tips especially visible, so preserving enough fullness through the bottom can support the look better than excessive layering.
Pro tip:
Finish any heat straightening before inserting the headband. Styling the length while the accessory is already in place can create awkward bends near the roots and require unnecessary repeat passes.
Make It Work for You:
If your hair is naturally straight, smooth only the areas that need correction instead of applying heat throughout. The headband adds structure even when the length keeps its normal finish.
Watch Out For:
Do not chase absolute flatness with repeated hot-tool passes. A clean direction and smooth surface are enough; excessive heat adds effort without improving the headband placement itself.
Soft-Bend Ends Zigzag Headband Straight Hairstyle

Straight hair with softly curved ends gives the zigzag headband a less severe finish without turning the style into waves. Keep the roots smooth, place the band behind the hairline, and let the lengths remain straight until the last several centimeters. A gentle inward or outward bend at the bottom adds movement while preserving the clean vertical shape through the mid-lengths. The front can stay brushed back or show a visible part.
Medium and long hair displays the contrast clearly, although shoulder-length cuts can use a smaller bend. Apply heat protectant before using a flat iron or large round brush to shape the ends, then use the zigzag headband as the finishing accessory. A quick next-day refresh may involve correcting only the ends and repositioning the band; full wash-day styling takes longer when the length also requires drying.
If a stylist is shaping the haircut, specify where you want the perimeter to finish and how much weight you want to keep at the bottom. Straight hair with bent ends often looks fuller when the perimeter remains clear. If layers are present, keeping them long can prevent the tips from appearing too separated.
Pro tip:
Create the end bend before placing the headband and let the hair cool in its finished direction. This helps the curve hold without needing repeated touch-ups once the accessory is on.
Make It Work for You:
For fine hair, keep the bend subtle and concentrated near the bottom edge. A smaller curve preserves the clean silhouette and avoids making sparse ends look overly separated.
Watch Out For:
Avoid curling the ends so strongly that they form obvious loops. The defining feature is a straight length with a soft finish, not a curled hairstyle.
Half-Up Zigzag Headband Straight Hairstyle
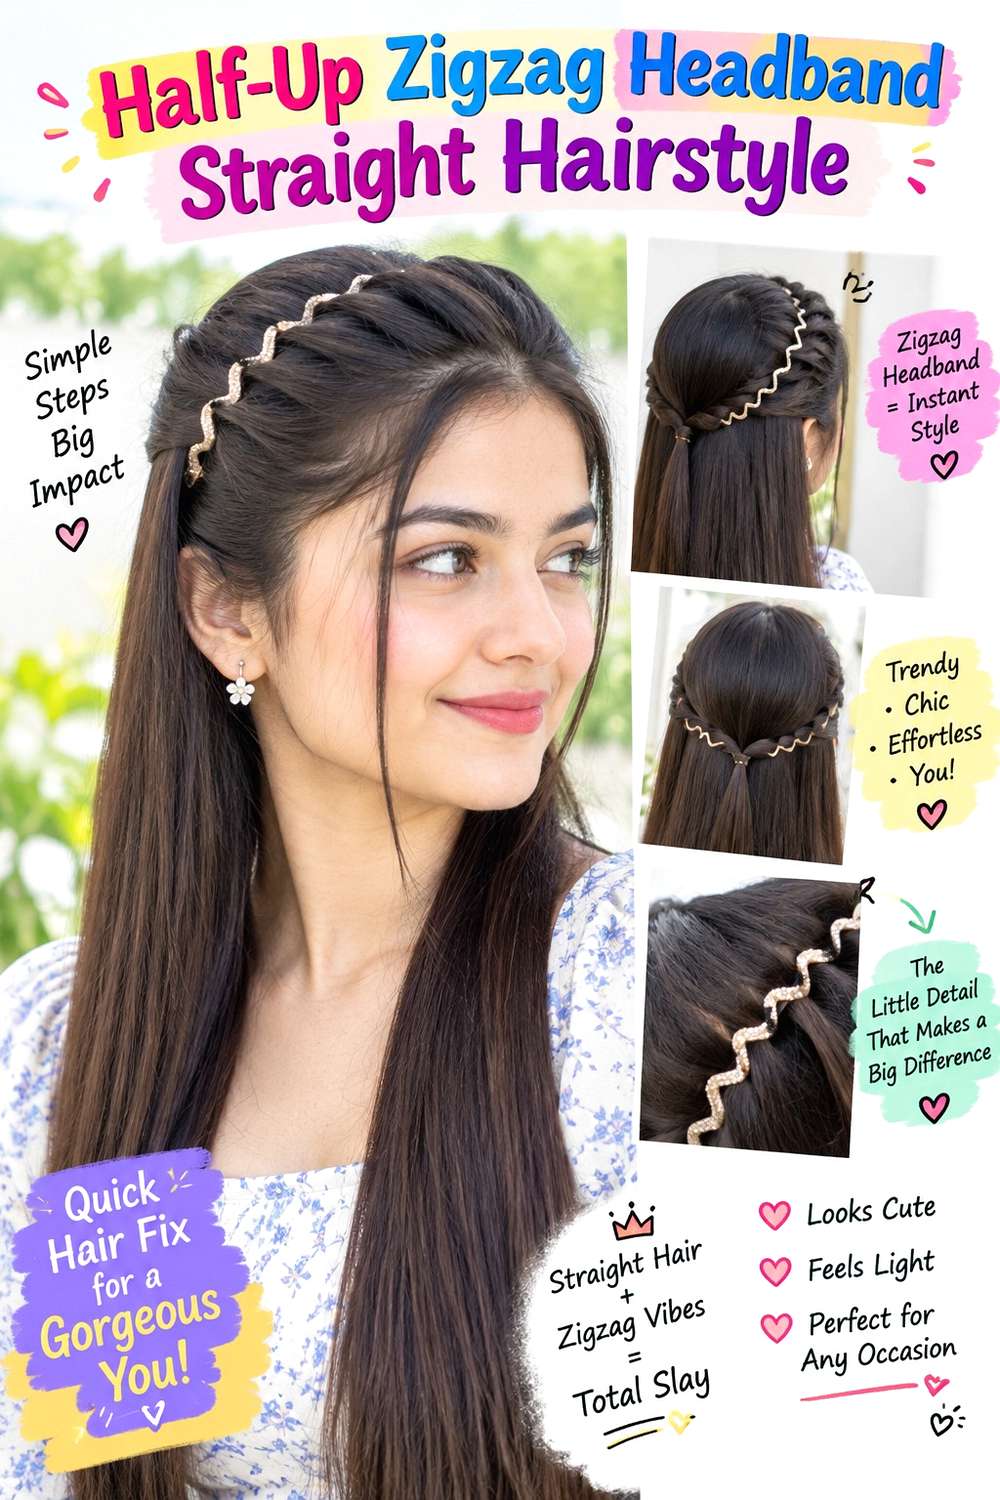
A half-up section gives straight hair extra structure behind the zigzag headband while leaving most of the length loose. Place the band first, then gather hair from above the ears into a small anchor at the back. Keep slight lift between the accessory and half-up base rather than pulling the crown flat. The lower lengths can remain straight and smooth, with clean ends falling behind the shoulders.
This works well on medium and long hair and can help control front sections without gathering the full weight. Lower-density hair should use a smaller upper section so the lower lengths retain fullness. Use a zigzag headband for the front, a small snag-free elastic for the half-up anchor, and light styling cream to control shorter crown pieces. A quick refresh means resetting the band and elastic; full wash-day styling takes longer only when the loose length also needs smoothing.
If a stylist is creating the look, specify how much hair should be gathered from above the ears and how high the half-up anchor should sit. If your haircut contains shorter layers, identify which ones should remain free rather than being pulled tightly into the back.
Pro tip:
Set the headband before gathering the half-up section. This lets you judge how much crown lift should remain between the accessory and back anchor before anything is tightened.
Make It Work for You:
For lower-density straight hair, gather only a slim upper section and keep the bottom length full. The half-up structure remains visible without making the loose hair look sparse.
Watch Out For:
Do not pull the half-up elastic so tightly that it drags the headband backward. Keep both anchors independent so adjusting one does not destabilize the other.
Low-Ponytail Zigzag Headband Straight Hairstyle
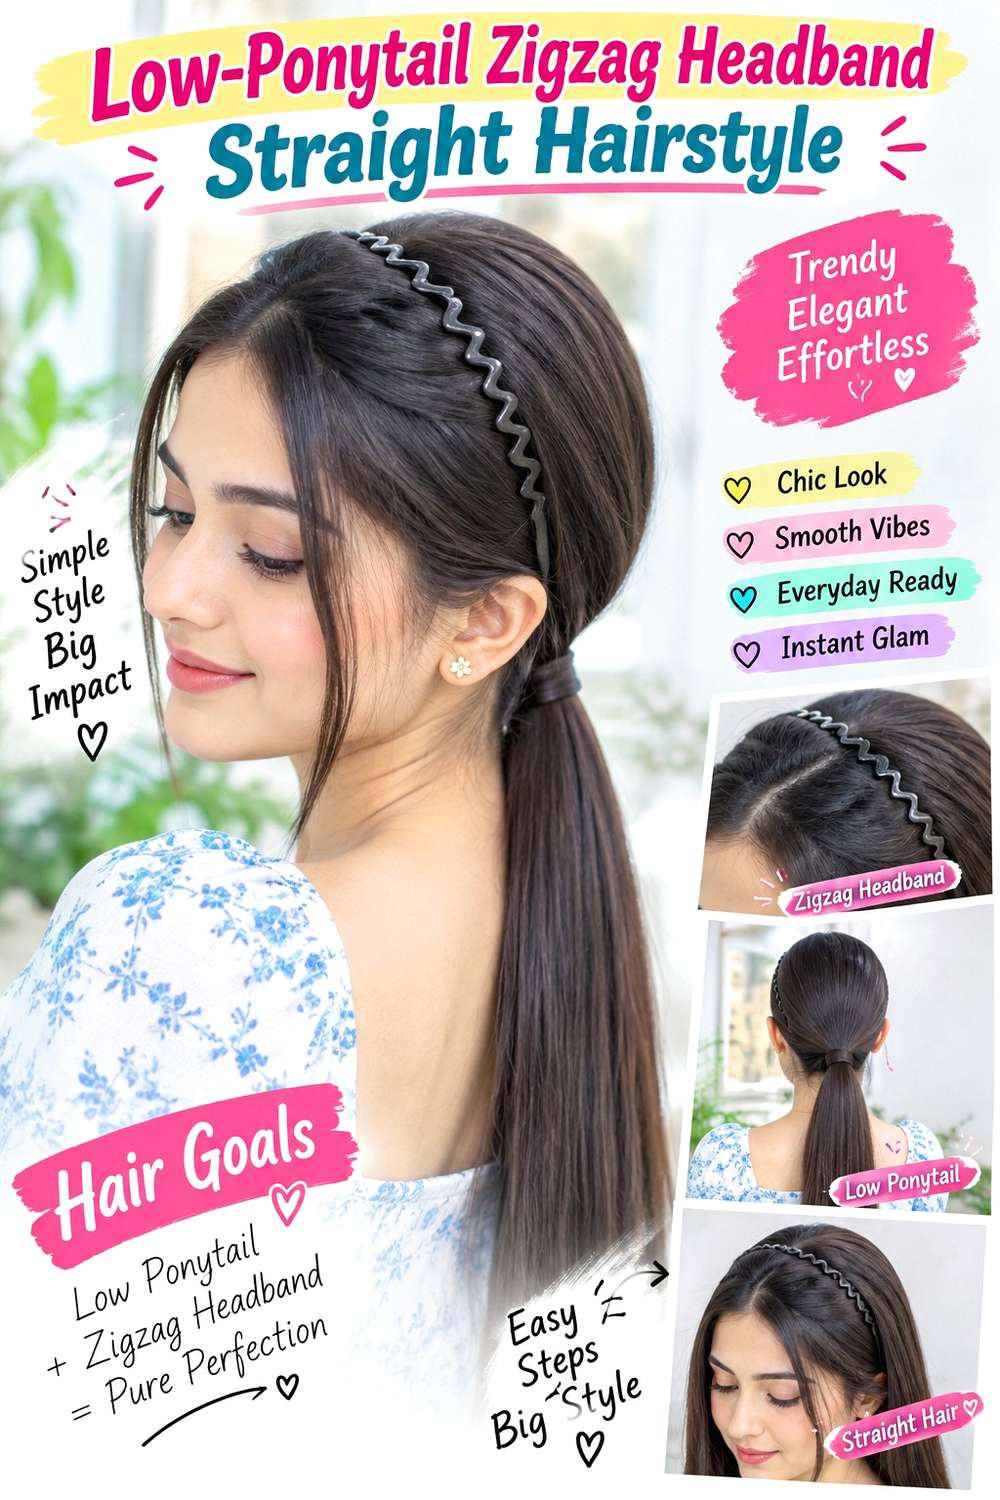
A low ponytail creates a clean back shape while the zigzag headband keeps the front open. Position the band near the hairline or slightly deeper toward the crown, preserve a small amount of root lift, and gather the length at the nape. The tail can fall perfectly straight or retain a natural slight bend through the ends. Keeping the base centered prevents the accessory and ponytail from creating competing directions.
This works best on medium and long straight hair with enough length to reach a comfortable low anchor. Dense hair may need a stronger elastic, while fine hair often benefits from keeping the crown softly lifted. Use a zigzag headband for the front, a fabric-covered elastic for the ponytail, and light styling cream for nape flyaways. A quick refresh usually means resetting either anchor independently; full wash-day styling takes longer only when the tail requires smoothing.
If a stylist is creating it, specify the exact ponytail height and how much crown softness you want between the band and elastic. If shorter layers do not reach the nape comfortably, let them stay loose rather than tightening the base to capture them.
Pro tip:
Place the headband first, then gather the ponytail behind it. This keeps the front separation intact and helps prevent the elastic from pulling the accessory backward during anchoring.
Make It Work for You:
For fine hair, keep the ponytail softly gathered and avoid flattening the crown completely. A little root lift can preserve fullness while the nape remains neat.
Watch Out For:
Do not tighten the ponytail every time the headband shifts. They are separate anchors; correct the slipping accessory instead of adding unnecessary tension at the nape.
Low-Bun Zigzag Headband Straight Hairstyle

A low bun combines the patterned front of a zigzag headband with a compact, controlled shape at the nape. Place the accessory first, gather the straight hair low, and coil or fold the length into a simple bun. Keep the crown smooth with slight softness rather than pulling everything rigidly backward. The bun should stay relatively flat so the headband remains the stronger visible detail from the front.
Medium and long straight hair gives enough length for the bun, while dense hair may need a broader, flatter shape to avoid excessive bulk. Use a zigzag headband for the front, a fabric-covered elastic for the initial base, and bobby pins to secure the bun. A quick refresh may involve replacing one pin and resetting the accessory; a complete restyle takes longer because the bun must be rebuilt from the nape anchor.
If a stylist is creating it, specify the bun width, nape height, and comfortable tension around the sides. Shorter face-framing layers can stay loose if needed. The headband should not be used to pull those sections backward more tightly just because the hair is gathered.
Pro tip:
Finish the headband placement before building the bun, then keep the nape anchor independent. This lets you adjust the accessory later without disturbing the support holding the hair.
Make It Work for You:
For very dense straight hair, make the bun wider and flatter instead of stacking it outward. This distributes weight and keeps the back more comfortable.
Watch Out For:
Avoid using the headband to compensate for a slipping bun. If the nape structure loosens, rebuild the pins or elastic rather than increasing pressure around the front.
Tucked-Behind-Ears Zigzag Headband Straight Hairstyle
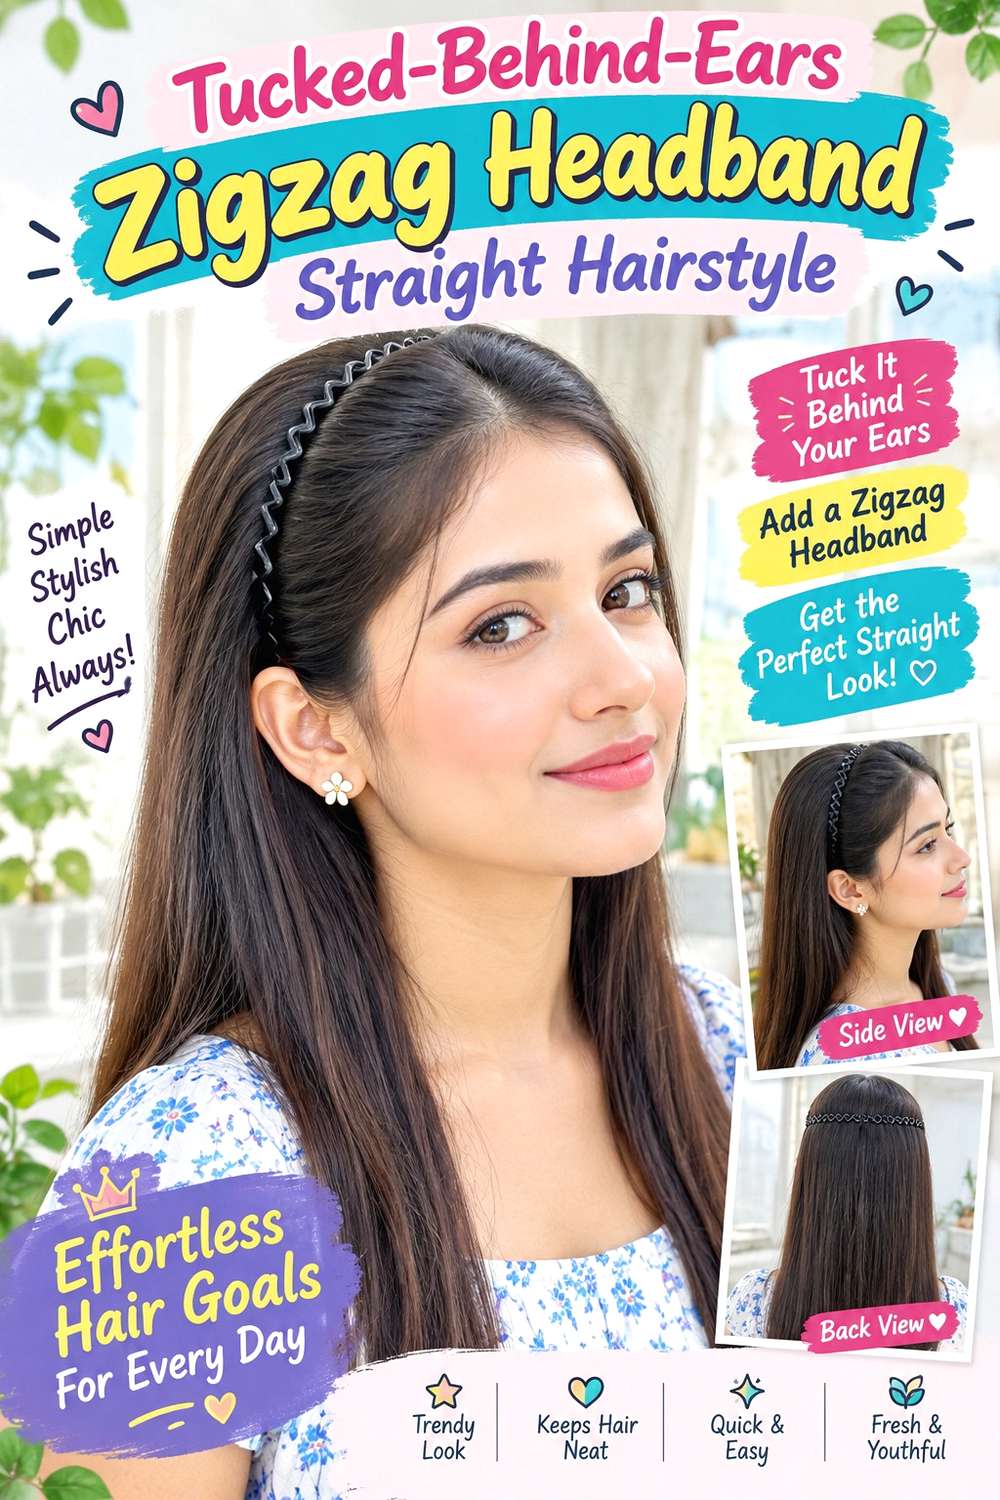
Tucking both sides behind the ears gives straight hair a clean, open shape while the zigzag headband sits farther back on the crown. Begin with a center or shallow side part, guide the side sections behind the ears, then position the band so it supports the overall direction without pressing directly on the ear area. The lengths can remain straight through the shoulders or back, with a simple, even perimeter.
This version works particularly well on straight hair because the side sections tend to sit neatly without much bulk. Shorter layers may need to remain loose if they cannot stay tucked comfortably. Use a zigzag headband as the main accessory, light styling cream to control the side sections, and bobby pins only where discreet extra support is needed. A quick refresh generally means retucking the sides and resetting the band; full wash-day styling depends on how smooth you want the length.
If a stylist is shaping the cut, explain that you often tuck the sides and point out which sections repeatedly fall forward. Preserving enough side length can make the tucked version easier without requiring extra tension from the accessory.
Pro tip:
Tuck the sides before finalizing the headband position. Once the ear sections sit comfortably, adjust the accessory so it does not push those pieces upward into bumps.
Make It Work for You:
If one side is slightly shorter, tuck only the side that reaches naturally and leave the opposite section soft around the cheek. The band can still balance the front.
Watch Out For:
Do not force short side pieces behind the ears by tightening the headband. Leave them loose or support them separately so the accessory remains comfortable.
Double-Band Zigzag Headband Straight Hairstyle
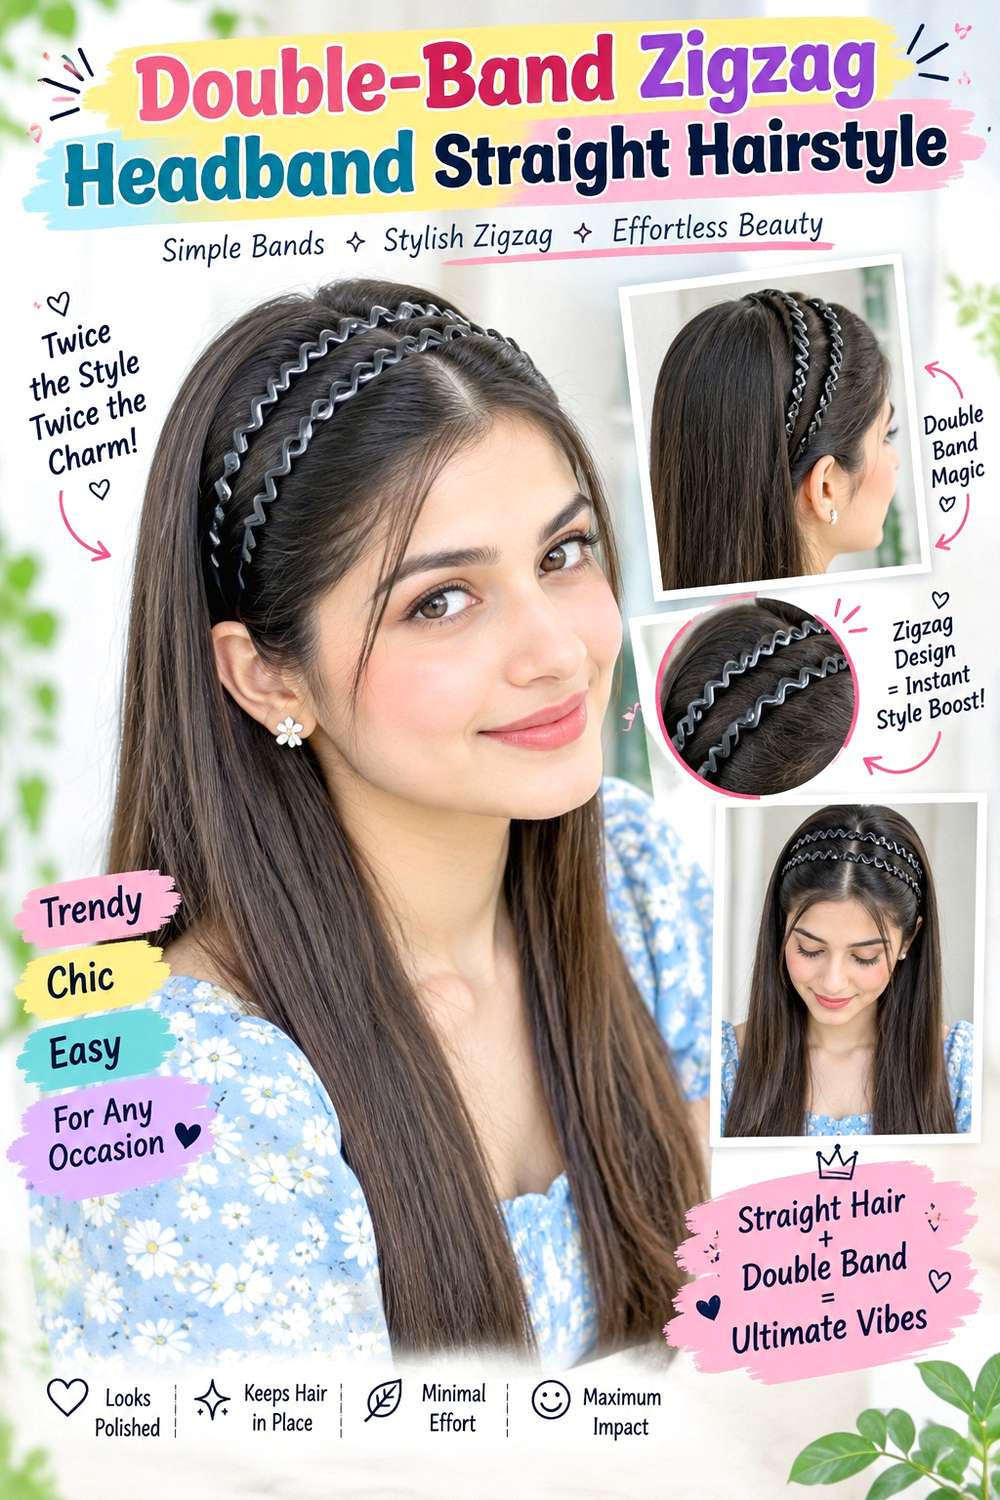
Two slim zigzag bands create a repeated graphic pattern across straight hair, with a narrow strip of visible roots between them. Place the first band near the hairline and the second several centimeters farther back, keeping both on the same angle. The crown can stay smooth or slightly lifted behind the second band, while the lengths remain straight and simple so the paired accessories stay easy to read.
This works best on medium to dense straight hair because two bands create more visual and physical structure. Lower-density hair may need wider spacing so the front does not look compressed. Use two slim zigzag headbands for the design and light styling cream to control the exposed strip between them. A quick refresh generally means correcting their spacing and smoothing that middle section; full wash-day styling depends entirely on the length beneath the accessories.
If a stylist is arranging the look, specify how much root space you want between the bands and whether the second should sit before or at the crown. Both accessories should feel comfortable independently. If the combined pressure feels strong, reduce the grip or use a single band instead.
Pro tip:
Place the front band first and check comfort before adding the second. Match their angle from temple to temple so the visible strip between them stays even.
Make It Work for You:
For lower-density hair, increase the spacing between bands and keep more lift behind the second one. This prevents the paired accessories from compressing too much visible hair.
Watch Out For:
Avoid stacking both bands on the same pressure points behind the ears. Shift one slightly or choose finer accessories if the double placement starts feeling uncomfortable.
Short-Bob Zigzag Headband Straight Hairstyle
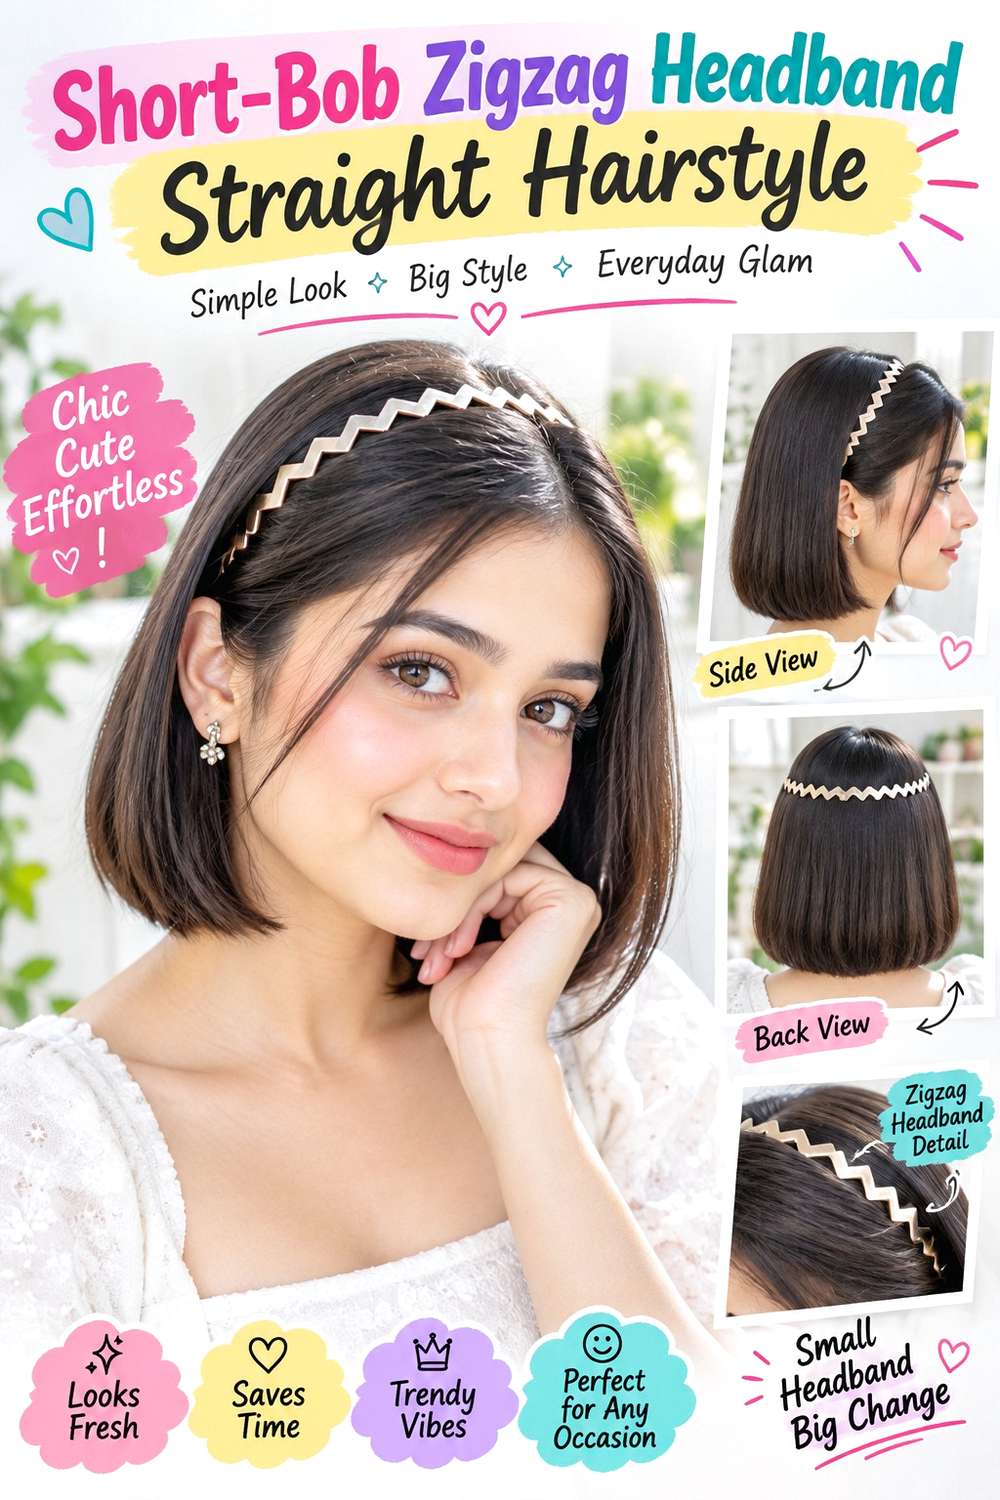
A straight bob makes the zigzag headband especially visible because the short perimeter leaves little competing length. Place the band close to the hairline for a stronger pushed-back effect or farther toward the crown to preserve front pieces. Keep the bob smooth around the jaw, chin, or upper neck, with the ends remaining straight or only lightly bent. A center or side part can stay visible with deeper placement.
This works well for chin- to shoulder-length straight hair and does not require enough length for a ponytail. Use a zigzag headband for the accessory, light styling cream to control short hairline pieces, and bobby pins only if discreet side anchoring helps. A quick refresh usually means resetting the band and smoothing the perimeter; full wash-day styling takes longer only when the bob requires blow-drying.
If a stylist is shaping the cut, point to the exact finished perimeter you prefer and explain whether you normally tuck the sides or leave them loose. Preserving enough bottom weight can help straight ends look fuller. The headband itself does not require extra layers, so choose them only if they suit how you wear the bob without the accessory.
Pro tip:
Check the headband position against the bob perimeter from the side. Moving the accessory slightly backward can reveal more cheek or jaw-level shape and improve the overall proportion.
Make It Work for You:
For fine or lower-density bobs, place the band deeper and preserve more front hair. The short shape keeps its fullness while the zigzag detail remains visible farther back.
Watch Out For:
Avoid pushing the entire bob tightly backward under the accessory. Removing too much volume from the front can make a short straight perimeter look narrower than intended.
Conclusion
Zigzag headband hairstyles for straight hair can look sharply structured or softly casual depending on parting, placement, fringe, crown volume, and how much length stays loose. Close hairline placement creates the strongest pushed-back effect, while a deeper band leaves more face-framing hair visible. Medium and long lengths support ponytails, half-up styles, and buns, whereas short bobs work well with simple open placements. Fine hair often benefits from preserving crown lift, while dense hair may need stronger anchors for gathered styles. Straight lengths can remain sleek, finish with a soft bend, or frame curtain fringe without changing the accessory’s role. Choose the placement that stays secure without squeezing and that fits your normal styling effort.
Before Your Salon Visit
Choose one or two favorites and save references showing the headband depth, front shape, and supporting hairstyle. Discuss your straight hair’s density, face shape, preferred length, usual parting, fringe, upkeep, and normal styling routine. Point out the exact face-framing length, fringe finish, crown volume, perimeter weight, ponytail placement, or end shape you like. Because the zigzag headband is temporary, focus on styling and comfortable grip rather than requesting layers or fringe unless you also want them when the accessory is removed.
FAQs
How do I stop a zigzag headband from slipping on straight hair?
Straight hair can be slippery, so start by adjusting the band’s angle and depth instead of tightening it. A slightly deeper placement, clean roots, or discreet side anchoring may improve grip. The accessory should stay secure without pinching the temples or pressing heavily behind the ears.
Can fine straight hair wear a zigzag headband without looking flat?
Yes. Keep some root lift behind the band, avoid pressing every section tightly backward, and consider a slightly deeper placement that leaves more hair visible around the front. Lower-density hair often looks fuller when the accessory controls direction without flattening the entire crown.
Do I need heat styling for zigzag headband hairstyles?
No. Naturally straight hair can often be worn as it is, with the band providing the main structure. Heat is optional when you want a sleeker length, softer end bend, or refreshed fringe. If you use hot tools, apply heat protectant before styling.
Can a zigzag headband work with a straight bob or curtain fringe?
Yes. A bob can use close or deep placement depending on how much front hair you want visible. Curtain fringe usually works best when the band sits behind its roots, allowing the center and outer corners to move independently instead of being pressed flat.