12 Crochet Scrunchie Hairstyle Ideas

A crochet scrunchie adds texture and a soft, handcrafted finish around the point where hair is gathered, so the base hairstyle matters as much as the accessory itself. It can finish a high ponytail, low bun, half-up style, puff, braid, or top knot without covering the crown. The defining details are placement, gathered height, visible parting, loose front pieces, and how much volume sits above or below the scrunchie.
Straight, wavy, curly, and coily textures can all work with crochet scrunchie hairstyle ideas, but the best version depends on density and how firmly the hair needs to be anchored. Fine or lower-density hair may need a smaller scrunchie over a secure elastic, while dense hair often benefits from a stronger base before the crochet piece is added. Curly hair can keep its natural shape, and face-framing sections can be adjusted for shrinkage, preferred length, and routine.
Most versions are quick to refresh once the base is established, but a full wash-day set, curl routine, or polished updo takes longer. The scrunchie should decorate a stable hairstyle rather than carry all the tension. Maintenance usually means rebuilding a sagging base, smoothing only visible frizz, and checking that the accessory has not stretched or shifted during wear.
Quick List
- High Ponytail Crochet Scrunchie Hairstyle
- Low Ponytail Crochet Scrunchie Hairstyle
- Messy Top Knot Crochet Scrunchie Hairstyle
- Sleek Low Bun Crochet Scrunchie Hairstyle
- Half-Up Waves Crochet Scrunchie Hairstyle
- Bubble Ponytail Crochet Scrunchie Hairstyle
- Side Braid Crochet Scrunchie Hairstyle
- Braided Ponytail Crochet Scrunchie Hairstyle
- High Puff Crochet Scrunchie Hairstyle
- Low Puff Crochet Scrunchie Hairstyle
- Short Bob Half-Up Crochet Scrunchie Hairstyle
- Twisted Low Pony Crochet Scrunchie Hairstyle
High Ponytail Crochet Scrunchie Hairstyle

A high ponytail puts the crochet scrunchie near the crown, where its texture stays visible. Keep the ponytail centered or slightly behind the highest point of the head, with the roots smooth but not pulled completely flat. Straight lengths can fall cleanly, waves can add swing through the middle, and curls can keep their natural volume. This placement suits medium to long hair and works especially well when you want the accessory to be part of the silhouette rather than a small detail at the nape.
Build the ponytail first with a fabric-covered elastic, using a paddle brush to guide the surface without repeatedly dragging through the ends. Add a light smoothing serum only where flyaways need control, then wrap the crochet scrunchie around the established base. A full wash-day style takes longer if the lengths also need drying, curling, or defining; a quick refresh usually means resetting the ponytail and smoothing the crown. If the base starts to sag, redo the elastic rather than adding more scrunchie loops. For salon or event styling, specify the ponytail height, how much root lift you want, and whether front pieces should remain loose. Check comfort after several minutes, because a high anchor can feel tighter once the hair settles.
Pro tip:
Secure the ponytail first, then gently lift the crown with your fingertips before adding the scrunchie so the base stays stable without looking overly flat.
Make It Work for You:
For fine or lower-density hair, choose a smaller crochet scrunchie and keep the ponytail slightly lower so the accessory adds texture without overpowering the gathered section.
Watch Out For:
Do not keep adding scrunchie loops when the ponytail starts slipping. Rebuild the elastic base instead, because extra wrapping can increase tension without fixing the anchor.
Low Ponytail Crochet Scrunchie Hairstyle
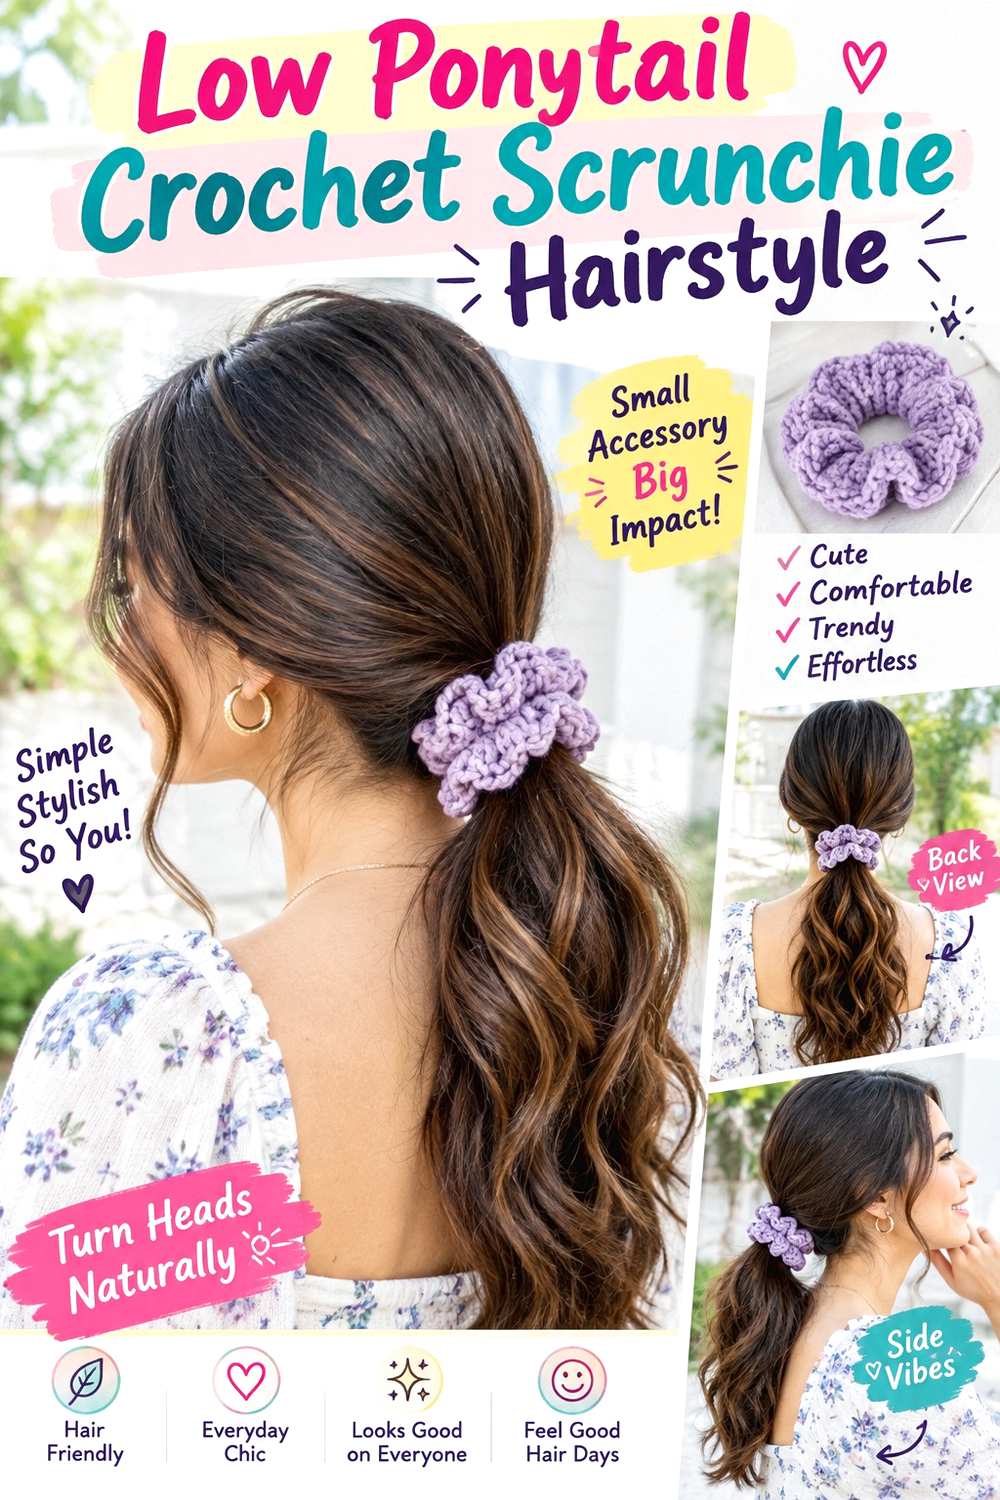
A low ponytail places the crochet scrunchie close to the nape, which makes the style feel grounded and keeps the crown open for a visible center or side part. Let the ponytail sit straight down the back or angle slightly over one shoulder. Smooth lengths give a cleaner line, while waves or curls create more fullness below the accessory. Medium and long hair are easiest to gather, and the lower placement can be useful when you want less tension than a high ponytail.
Use a wide-tooth comb to organize the part, secure the base with a fabric-covered elastic, and apply a small amount of lightweight cream through exposed flyaways. The elastic should hold the structure; the crochet scrunchie can then sit over it without being stretched excessively. A complete style after washing may involve drying or defining the lengths first, while a morning refresh is usually limited to rebuilding a loose base and reshaping the ends. If the nape becomes puffy, smooth only that area rather than coating the whole ponytail. For professional styling, point to the exact ponytail height and explain whether you want the ears covered, exposed, or framed by loose pieces. Rebuild the base when it drops instead of repeatedly tightening the accessory.
Pro tip:
After securing the ponytail, tilt your chin up briefly and check the nape; this helps reveal whether the base feels too tight before you add the scrunchie.
Make It Work for You:
For dense or curly hair, let the ponytail stay fuller below the scrunchie and smooth only the front, preserving natural volume instead of compressing the entire length.
Watch Out For:
Avoid placing the scrunchie over a loose elastic base. It may look secure at first, then slide downward as the ponytail settles.
Messy Top Knot Crochet Scrunchie Hairstyle
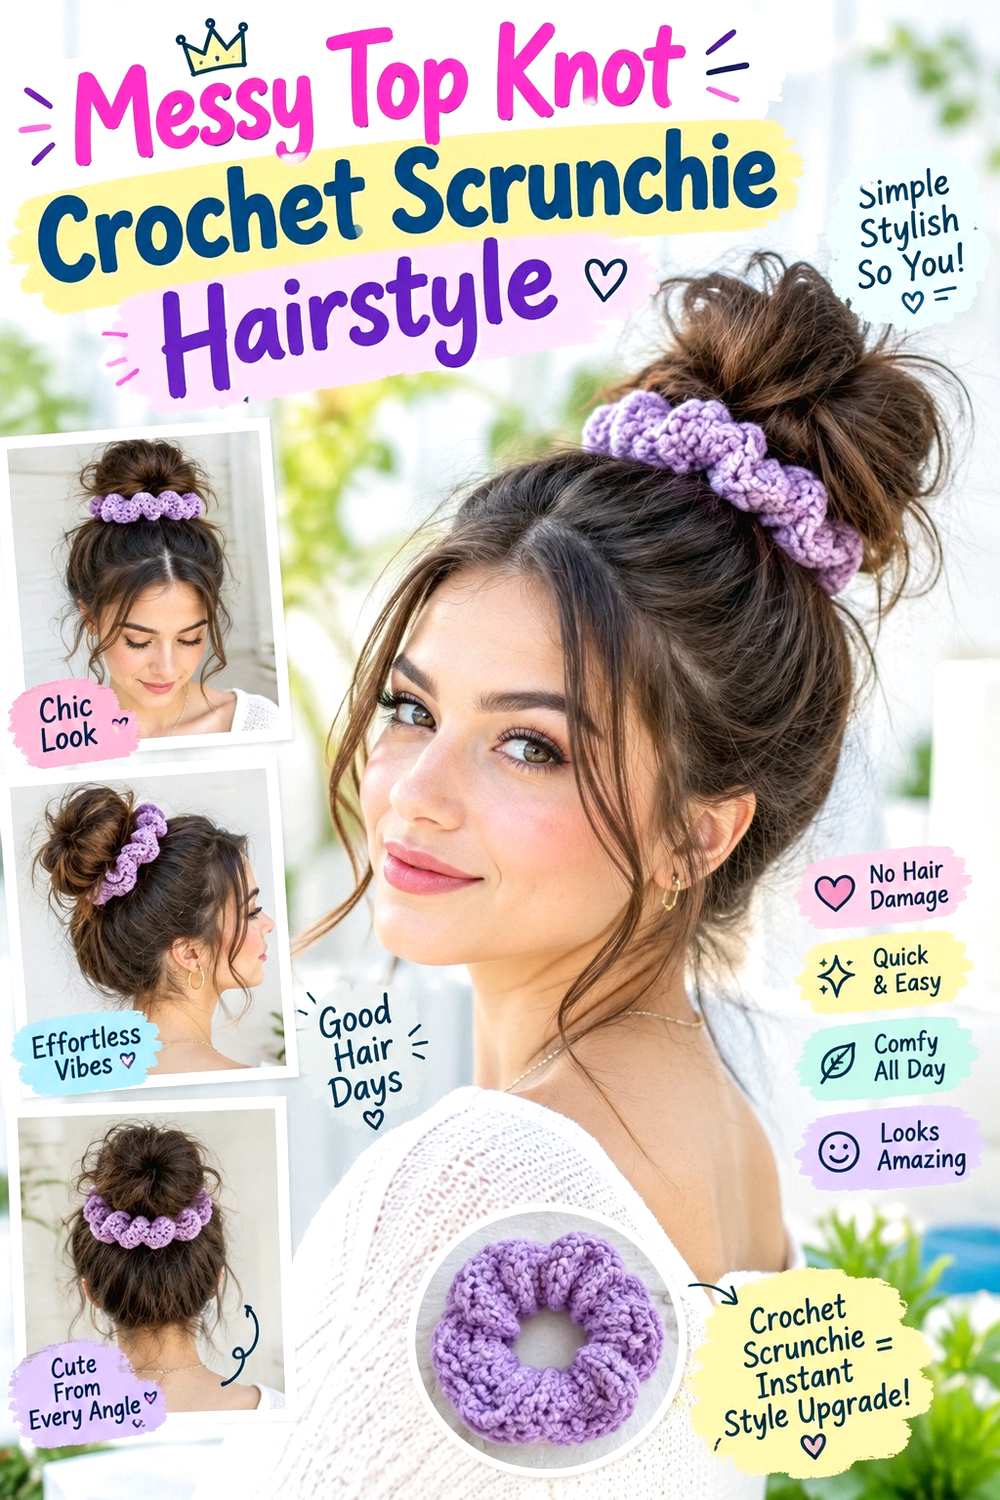
A messy top knot keeps the crochet scrunchie high and visible while allowing a few controlled ends to soften the shape. Gather the hair near the crown, wrap the length into a loose knot, and leave the surface slightly relaxed instead of flattening every bump. Short face-framing pieces can stay free, and the knot can lean a little backward so it does not sit directly on top of the forehead. Medium to long hair works best, especially when you want an easy updo that still shows texture.
Start with a soft elastic to establish the base, use bobby pins to secure ends that will not tuck, and mist flexible hairspray lightly over flyaways. Those supplies support the structure without making the scrunchie responsible for holding the bun together. A full wash-day version takes longer if the hair must be dried or defined first, while a quick refresh may only require re-pinning the knot and replacing the accessory. If the top knot begins to collapse, rebuild the elastic base rather than wrapping the crochet scrunchie more tightly. For salon or event styling, specify how high the knot should sit and how many loose pieces you want around the face. Comfortable tension matters more than a perfectly tight outline.
Pro tip:
Leave the final inch or two of the knot slightly loose before pinning; controlled softness keeps the bun relaxed without letting the whole shape collapse.
Make It Work for You:
If your hair is shorter, build a smaller knot and let a few ends remain visible around the scrunchie rather than forcing every piece into the base.
Watch Out For:
Do not mistake discomfort for security. If the top knot pulls at the hairline, loosen the elastic and rebuild it with a softer anchor.
Sleek Low Bun Crochet Scrunchie Hairstyle
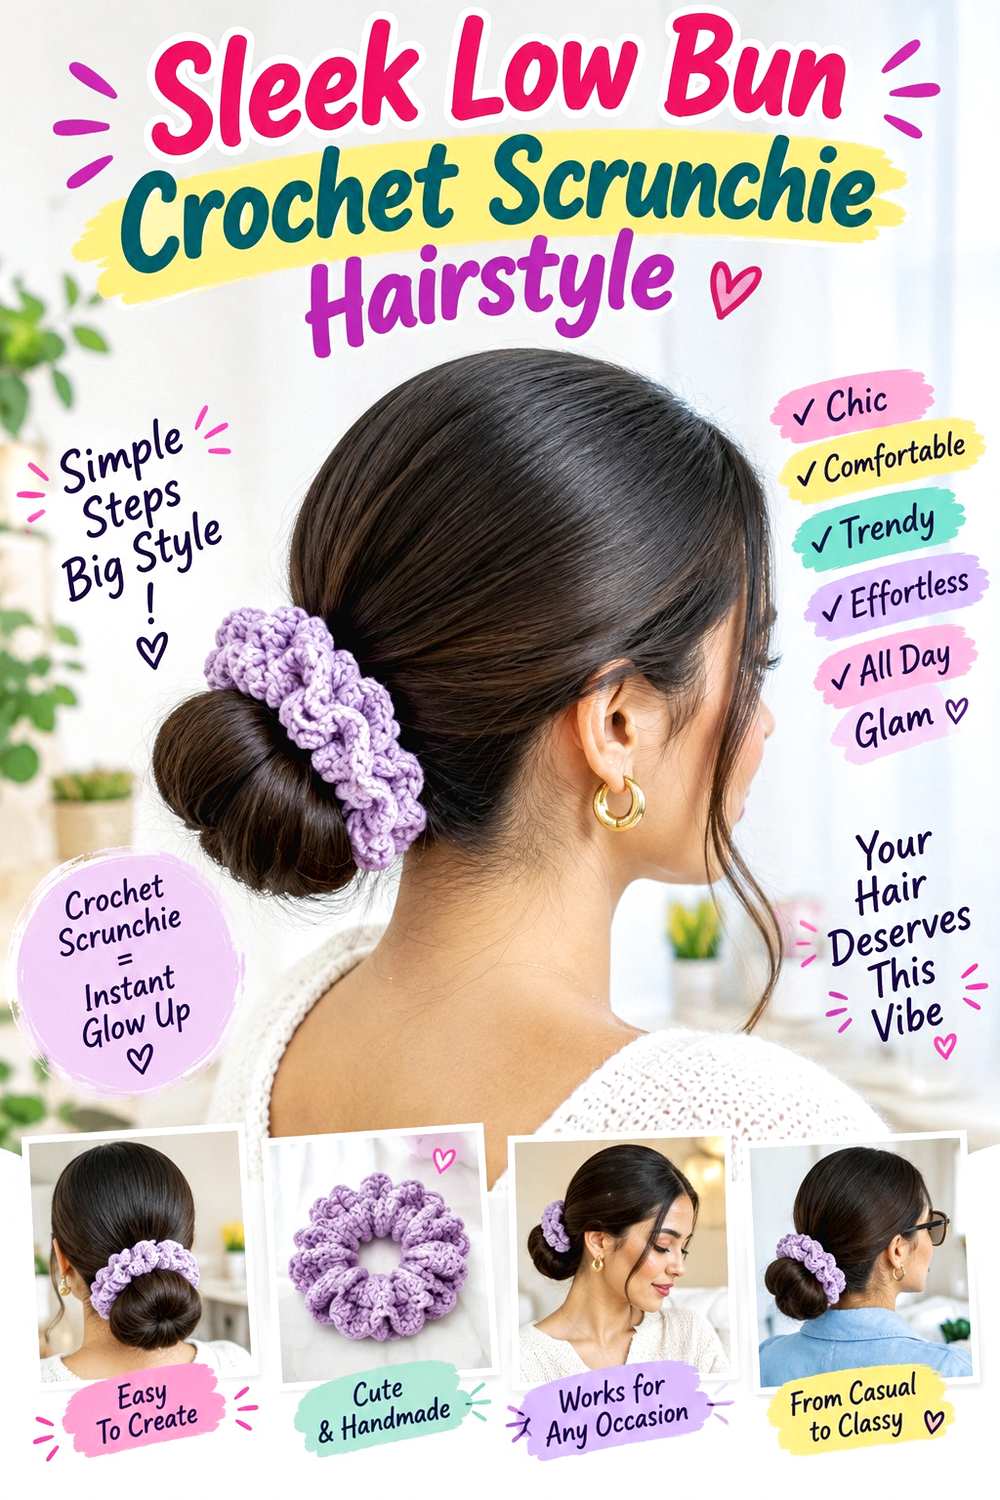
A sleek low bun creates a clean contrast with the softer texture of a crochet scrunchie. Keep the part precise, gather the hair at the nape, and form a compact bun with the ends tucked rather than fanned out. A center part gives symmetry, while a deep side part adds more visual weight to one side. Straight, stretched, or smoothly gathered textures can all support the shape, and medium to long hair provides enough length for a secure wrap.
Use a fine-tooth comb to direct the surface, a fabric-covered elastic to create the bun base, and a small amount of smoothing gel to control flyaways around the part and hairline. The scrunchie should sit over the stable anchor without pulling the bun tighter. A full polished style usually takes longer than a casual low ponytail because the surface needs more attention; a quick refresh can focus on the part, hairline, and any loosened sections. If the bun shifts, rebuild its anchor instead of adding more gel. For professional styling, specify the exact bun height and how flat or softly rounded you want the crown. Maintenance means smoothing only visible areas, keeping the nape comfortable, and replacing stretched elastics before the base starts to slide.
Pro tip:
Smooth the part and hairline before wrapping the bun, then add the scrunchie last so you can correct surface bumps without disturbing the accessory.
Make It Work for You:
For curly or coily hair, keep the natural texture in the bun while smoothing only the front if desired; the contrast still preserves the sleek outline.
Watch Out For:
Too much gel can leave the surface stiff and make touch-ups obvious. Use only enough to control visible flyaways, then leave the rest flexible.
Half-Up Waves Crochet Scrunchie Hairstyle
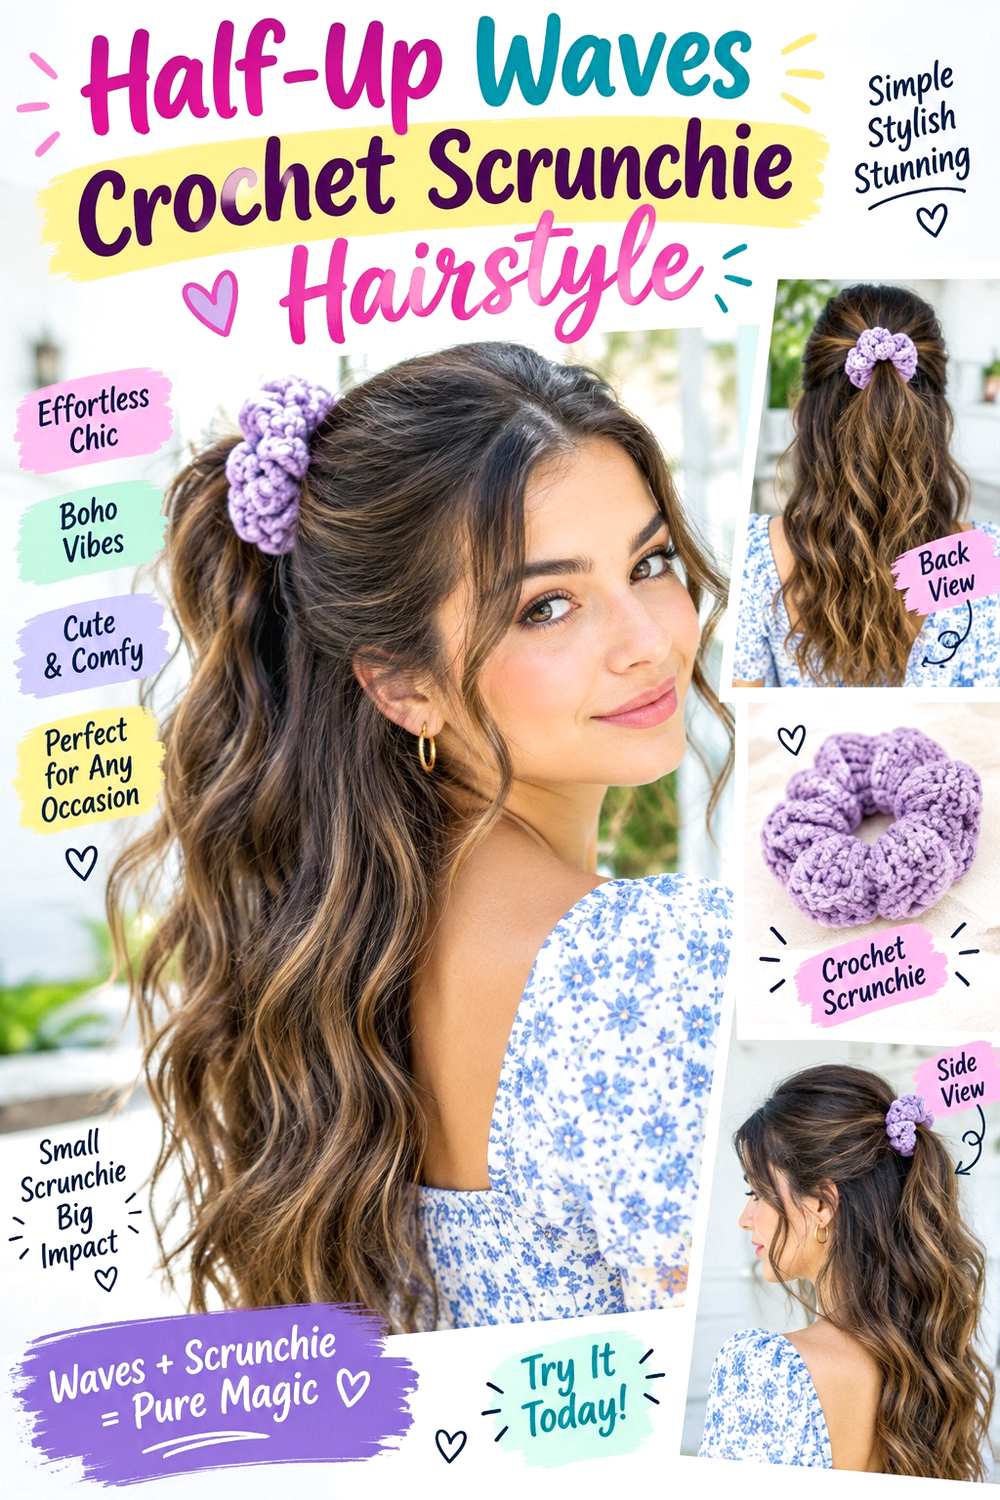
A half-up wave style places the crochet scrunchie at the back of the crown while leaving most of the length loose. Gather a moderate section from above the ears, keep the top softly lifted, and let broad bends begin through the mid-lengths rather than curling tightly from the roots. A center or off-center part can stay visible in front, with longer pieces framing the face. This works well on long straight or wavy hair and can also suit curls when the natural pattern is left intact.
Apply heat protectant before shaping selected sections with a curling iron, then secure the half-up section with a small elastic before adding the crochet scrunchie. Those three supplies keep the waves defined and the anchor stable. A full set takes longer after washing, especially on dense or very long hair, while a quick refresh can target only flattened bends and the front pieces. If the crown loses lift, gather slightly less hair instead of pushing the scrunchie upward. For professional styling, show where you want the half-up section to begin and how much hair should remain over the ears. Maintenance is mainly about restoring the base when it loosens and reshaping only the sections that have dropped, rather than reheating the entire length.
Pro tip:
Place the half-up anchor just below the crown’s highest point, then loosen a small amount above it so the scrunchie does not flatten the top.
Make It Work for You:
If your hair is naturally curly, skip reshaping the whole length and gather the top section over your existing pattern, preserving curl definition below the scrunchie.
Watch Out For:
Avoid gathering too much hair into the half-up section. A bulky anchor can overwhelm the scrunchie and leave the loose lengths looking unexpectedly thin.
Bubble Ponytail Crochet Scrunchie Hairstyle
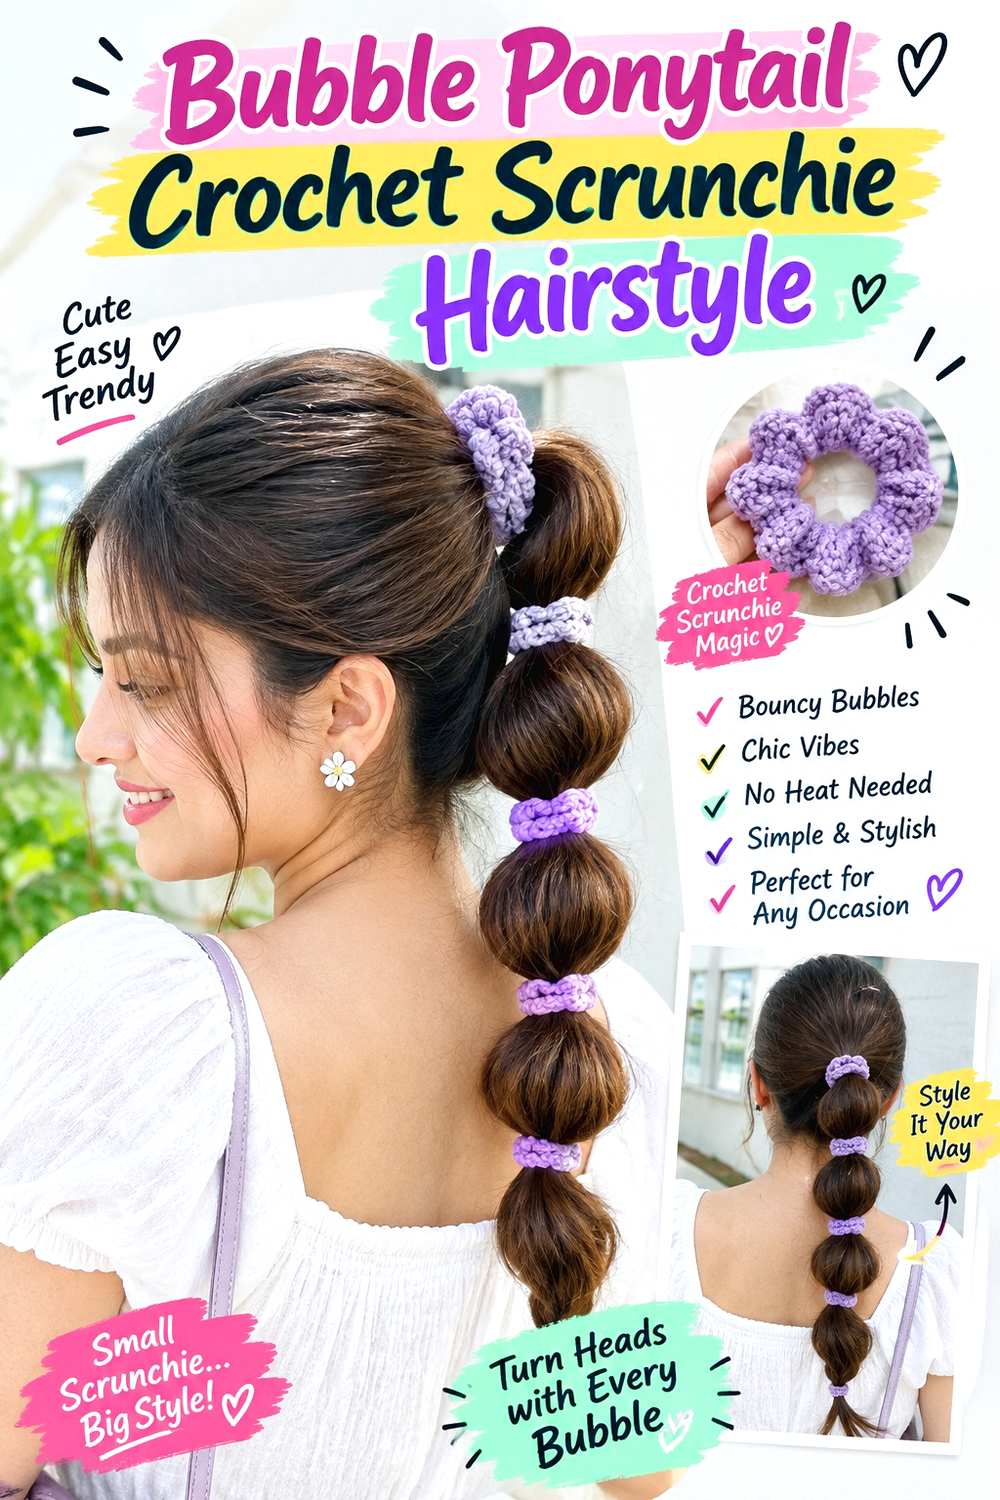
A bubble ponytail gives the crochet scrunchie a clear starting point while repeated rounded sections add shape through the length. Place the main ponytail at mid-height or low on the back of the head, cover its first anchor with the crochet scrunchie, then create evenly spaced bubbles below. Keep the crown smoother than the ponytail so the details do not compete. Medium to long hair works best because enough length is needed for several sections, and straight or softly textured hair makes the spacing easy to see.
Use fabric-covered elastics for each bubble, a wide-tooth comb to organize the ponytail, and light texturizing spray if slippery hair needs more grip. A full style takes longer than a standard ponytail because each section must be balanced and gently expanded; a refresh can be shorter if only one bubble has flattened. If the lower sections become uneven, adjust them individually rather than tightening the first anchor. For salon or event styling, specify the ponytail height, bubble size, and whether you want compact or softly expanded sections. Maintenance means checking stretched elastics and rebuilding any collapsed bubble without disturbing the whole style. The crochet scrunchie should remain the decorative top anchor, not the only support holding the weight of the ponytail.
Pro tip:
Expand each bubble from the outer edges a little at a time, working downward so the sections stay even instead of becoming progressively larger.
Make It Work for You:
For finer hair, make smaller bubbles with closer spacing and keep the crochet scrunchie proportionate; this preserves the repeated shape without stretching sections too thin.
Watch Out For:
Do not pull hard on one bubble to match another. Loosen each side gradually, or the elastic may shift and make the spacing uneven.
Side Braid Crochet Scrunchie Hairstyle
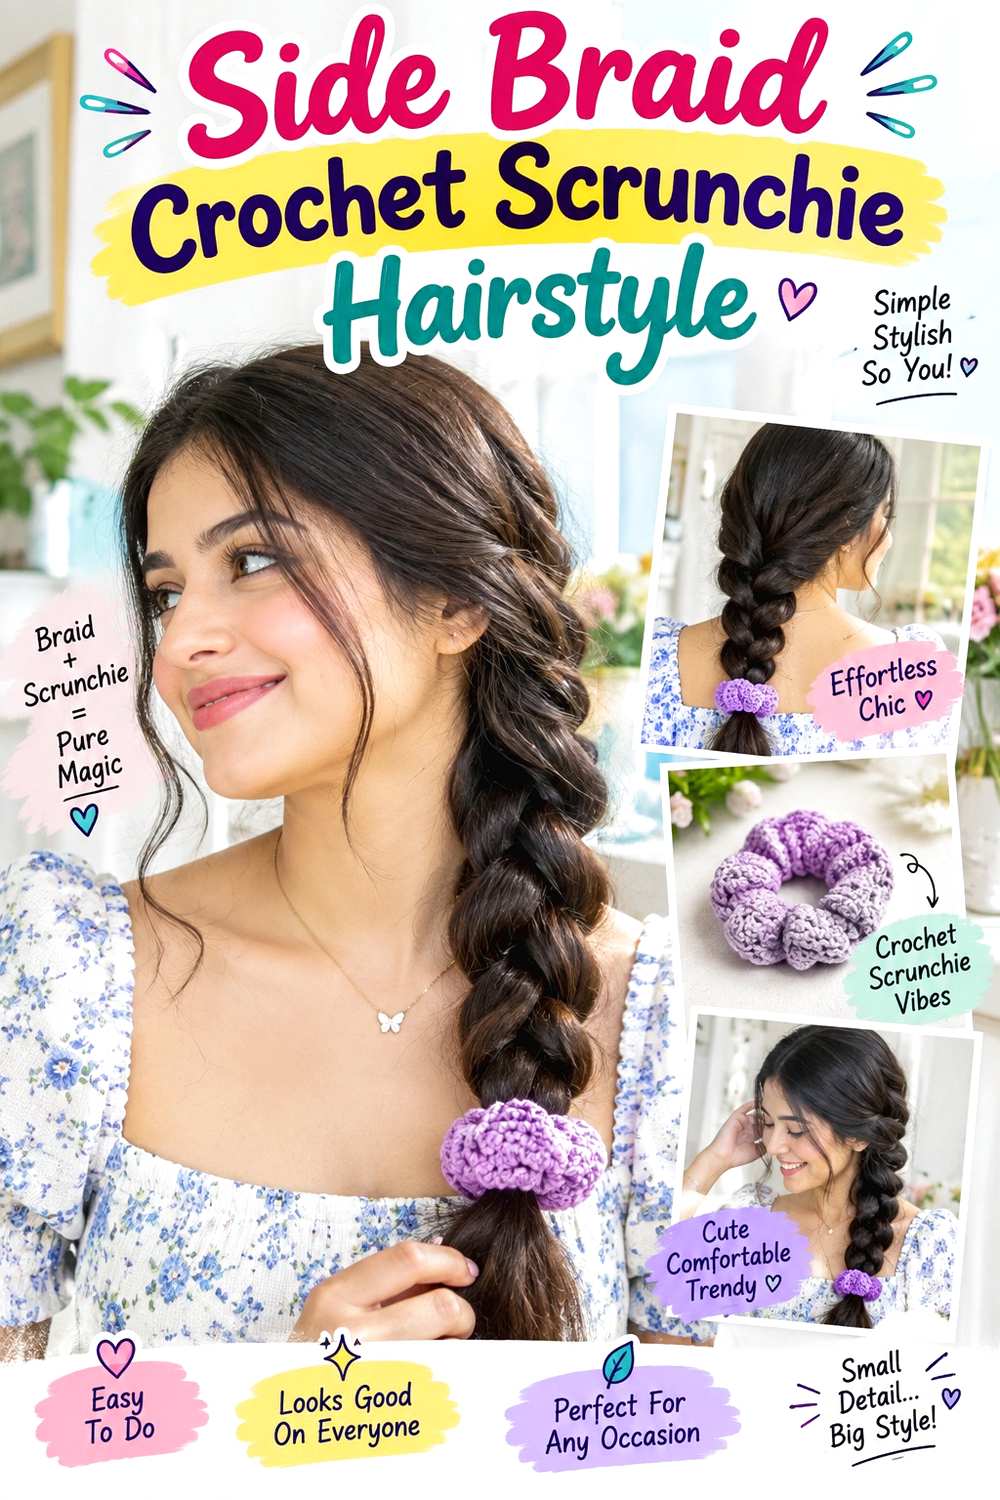
A side braid finished with a crochet scrunchie keeps the accessory low and visible near the shoulder instead of at the crown. Sweep the hair toward one side, begin the braid near the nape, and keep the sections broad enough to show texture without becoming overly loose. A side part can echo the braid direction, while a center part gives a more balanced front. This option suits medium to long hair and works with straight, wavy, curly, or coily textures once the base is comfortable and detangled.
Use a wide-tooth comb to organize the sections, apply light texturizing spray if extra grip is needed, and secure the braid first with a small elastic before placing the crochet scrunchie over it. A full wash-day version may take longer if the hair needs detangling or curl definition, while a quick refresh usually means reworking fuzzy braid sections and resetting the end. If the braid twists backward, correct the first few crossings rather than pulling the finished braid forward. For professional styling, specify the braid width and which shoulder you want it to fall over. Maintenance is mostly about keeping the lower anchor secure and preventing the scrunchie from sliding off a tapered braid end as the style loosens.
Pro tip:
Angle the first few braid crossings toward the chosen shoulder before tightening them gently; this encourages the braid to fall sideways without twisting at the nape.
Make It Work for You:
For slippery straight hair, keep the upper braid moderately firm and loosen only the outer edges afterward, creating visible width without weakening the secure anchor.
Watch Out For:
Do not place the crochet scrunchie on a very narrow braid tip. Move it slightly higher or secure beneath it so the accessory cannot slip off.
Braided Ponytail Crochet Scrunchie Hairstyle

A braided ponytail combines a clean gathered base with a single braid through the length, while the crochet scrunchie sits around the ponytail anchor. Position the base high, mid-height, or low depending on how much lift you want at the crown, then braid the tail with even sections so the accessory remains the transition point between smooth roots and woven length. Medium to long hair is most practical, and dense hair can create a fuller braid without needing to loosen every crossing.
Use a paddle brush to gather the surface, secure the ponytail with a fabric-covered elastic, and apply a small amount of styling cream through the braid if flyaways need control. Add the crochet scrunchie only after the ponytail base feels stable. A complete wash-day style takes longer if the hair needs drying or stretching first, while a quick refresh may involve redoing only the braid. If the base sags, reset the elastic rather than tightening the braid itself. For professional styling, explain the ponytail height and braid width you want, including whether the braid should remain compact or be gently expanded. Maintenance means keeping the anchor firm, smoothing only visible frizz, and rebraiding when the woven sections lose their shape rather than layering on more product.
Pro tip:
Keep the first braid crossing close to the ponytail base so there is no loose gap between the crochet scrunchie and the start of the braid.
Make It Work for You:
For very dense hair, use a broader three-section braid and keep the crossings controlled; the fuller shape usually needs less pulling apart to look substantial.
Watch Out For:
Avoid tightening the braid to rescue a sagging ponytail. The problem is at the base, so reset the elastic before rebraiding the length.
High Puff Crochet Scrunchie Hairstyle
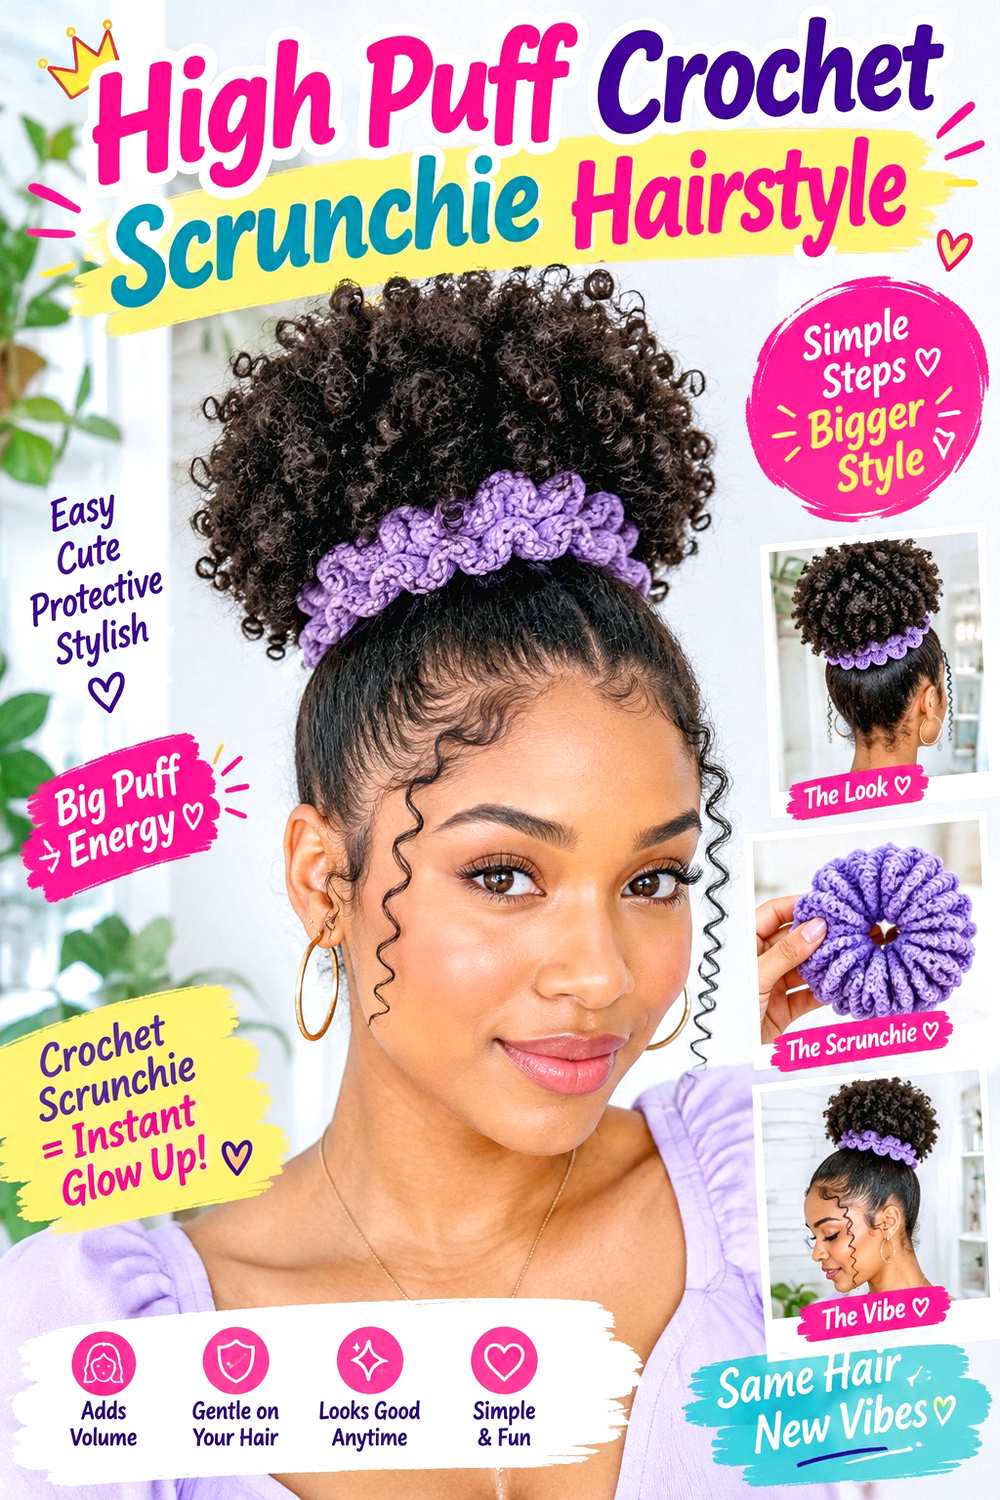
A high puff lets a crochet scrunchie circle the gathered base while natural curls or coils create most of the volume above it. Position the puff near the crown rather than directly at the hairline, and keep the front softly smoothed or leave a few curls free around the temples. The ends should remain full instead of being stretched into a uniform shape. This design is useful for curly and coily hair with enough length to gather comfortably, and it can be adjusted for different densities without forcing the puff smaller.
Use a soft elastic to establish the base, a wide-tooth comb to organize the front, and a small amount of edge gel only where extra control is wanted. Add the crochet scrunchie after the puff is secure. A full wash-day style takes longer when curls need defining and drying first, while a short refresh usually means fluffing flattened areas and resetting the base. If the puff leans backward, redo the elastic rather than tightening the scrunchie. For salon or event styling, specify the puff height, how much hairline texture should remain visible, and how loose the base needs to feel. Maintenance should focus on comfort, balanced volume, and preserving the curl pattern rather than repeatedly smoothing the front.
Pro tip:
After securing the puff, separate only the outer curls with your fingers before adding the scrunchie so the shape keeps width as well as height.
Make It Work for You:
If your hair is extremely dense, position the puff slightly lower and allow a wider outline; this reduces strain while keeping the scrunchie clearly visible.
Watch Out For:
Do not smooth the hairline repeatedly throughout the day. If the puff shifts, rebuild the base instead of adding more product and tension.
Low Puff Crochet Scrunchie Hairstyle
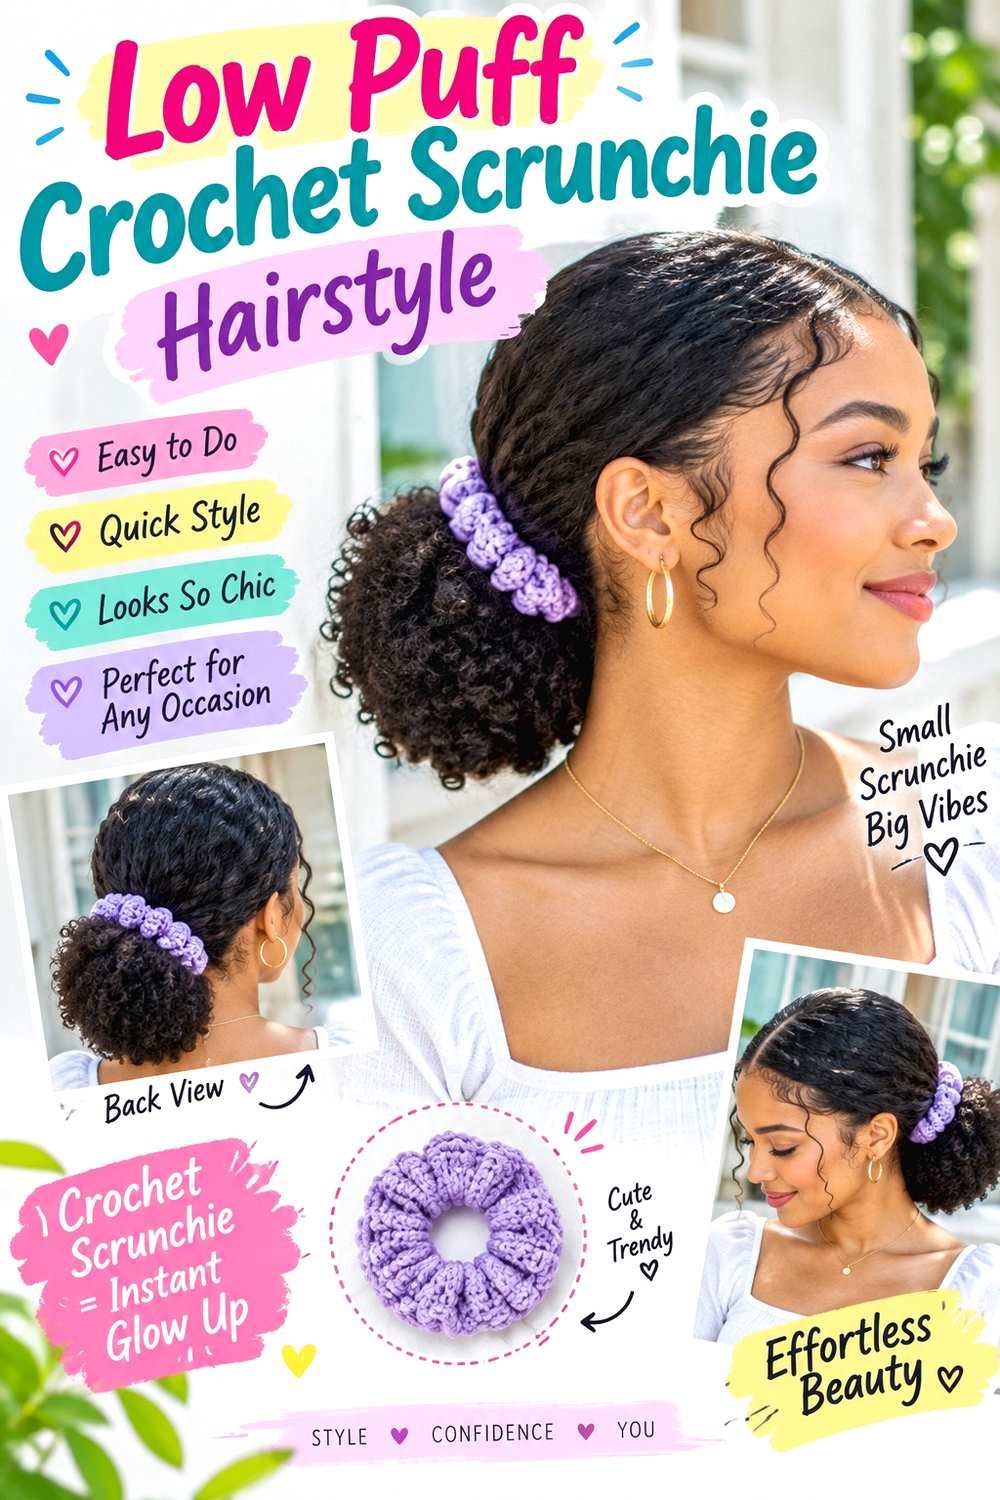
A low puff keeps curly or coily volume close to the nape, with the crochet scrunchie creating a visible textured ring around the gathered base. Use a center or soft side part if you want a defined front, or sweep the roots back for a simpler outline. The puff can stay rounded and compact or spread slightly wider across the shoulders depending on length and density. This placement is useful when a high puff feels too tight or when you want the crown to remain flatter under hats or scarves.
Use a soft elastic to secure the nape, a wide-tooth comb to arrange the part, and lightweight curl cream to revive dry-looking ends without coating the roots. Place the crochet scrunchie over the established base rather than stretching it repeatedly around the hair. A full wash-day style may include detangling and curl definition, while a quick refresh can focus on the puff and exposed front sections. If the nape loosens, rebuild the elastic anchor instead of adding more loops. For professional styling, specify how low the puff should sit and whether you want the ears covered or exposed. Maintenance means reshaping compressed curls, keeping the base comfortable, and avoiding excess product that can make the front feel heavy.
Pro tip:
Set the part before gathering the nape, then check both sides in a mirror so the crochet scrunchie sits level beneath the puff.
Make It Work for You:
For strong shrinkage, keep the puff compact at first and let the curls expand naturally after securing it, rather than stretching the ends for extra length.
Watch Out For:
Avoid wrapping the scrunchie repeatedly around a bulky base. Too many loops can compress the puff and create unnecessary pressure at the nape.
Short Bob Half-Up Crochet Scrunchie Hairstyle
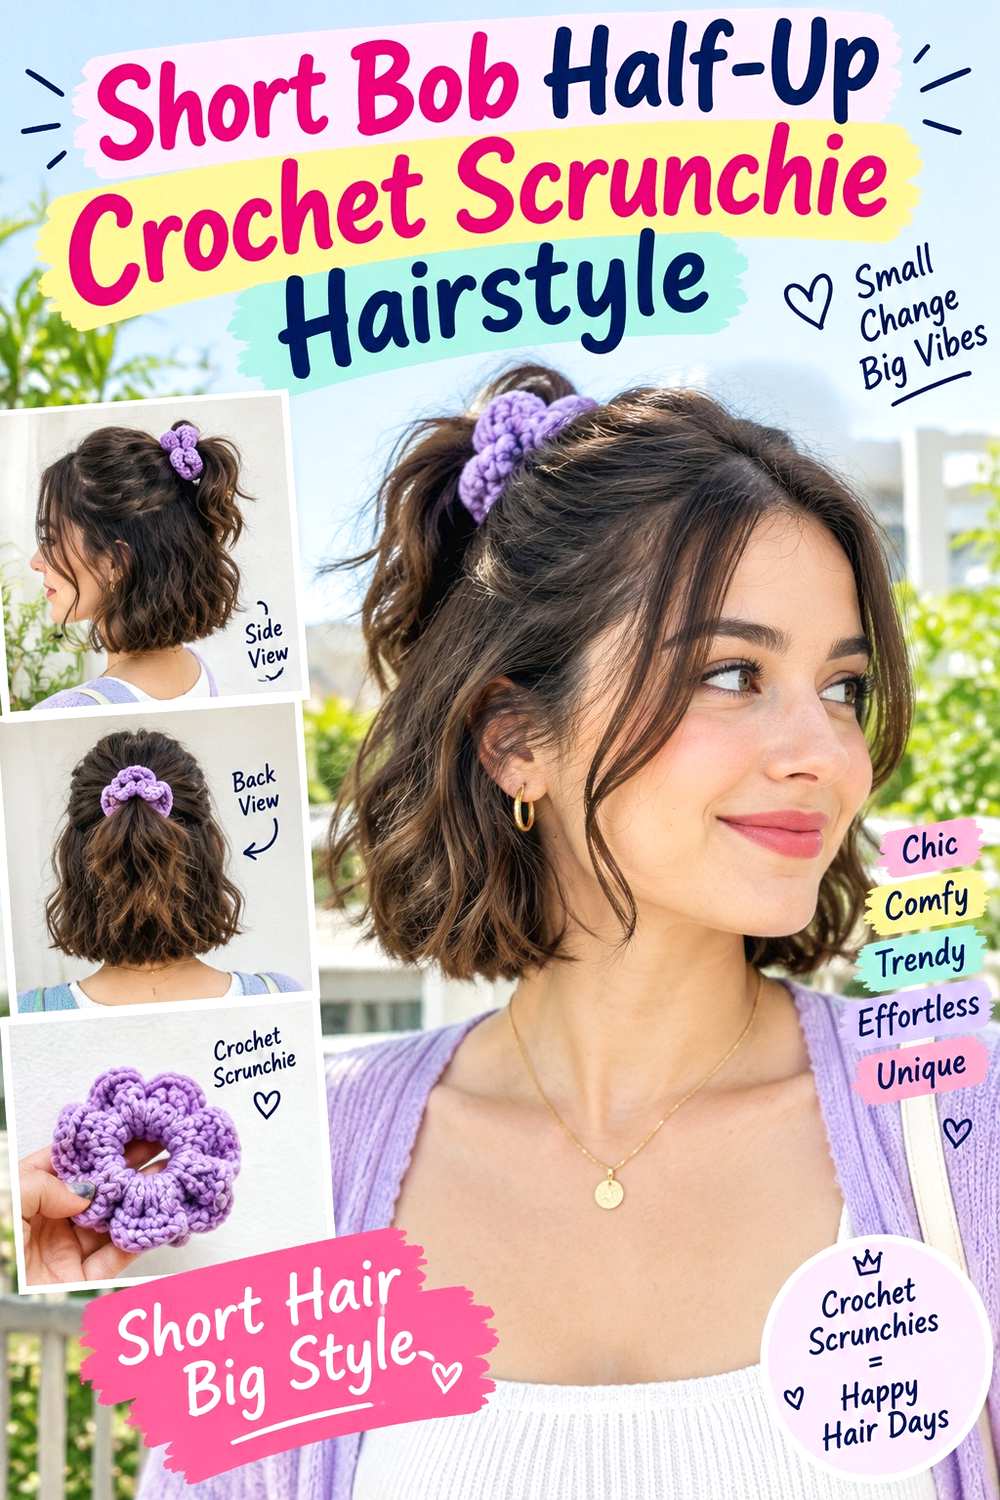
A short bob can still carry a crochet scrunchie when only the upper section is gathered. Take hair from the temples or just above the ears, secure it at the back of the crown, and leave the lower layers loose around the jaw or neck. A center part gives a balanced front, while a side part makes the gathered section feel less symmetrical. Straight, wavy, and curly bobs can all use the idea, provided the top section is long enough to reach the anchor without pulling.
Use a small elastic to secure the half-up section, a wide-tooth comb to arrange the part, and a tiny amount of lightweight cream on exposed ends if they need smoothing. The crochet scrunchie should cover the elastic without overwhelming the compact silhouette. A full wash-day style may require reshaping the bob first, while a quick refresh is usually limited to the crown and ends. If short pieces fall out, let them frame the sides rather than forcing them into a tighter base. For salon styling, explain how much hair you want gathered and whether the bottom edge should remain visible beneath the accessory. Maintenance is mostly about preserving the bob’s outline and rebuilding the small anchor when it loosens.
Pro tip:
Gather only the top layer from the temples and leave shorter side pieces free; this reduces pulling and keeps the bob’s lower outline visible.
Make It Work for You:
For a curly bob, follow the natural curl groups when choosing the top section instead of dividing them rigidly, which helps the loose sides stay defined.
Watch Out For:
Do not force short nape pieces into the half-up anchor. Let them fall naturally, or the base may become tighter than the length can comfortably support.
Twisted Low Pony Crochet Scrunchie Hairstyle
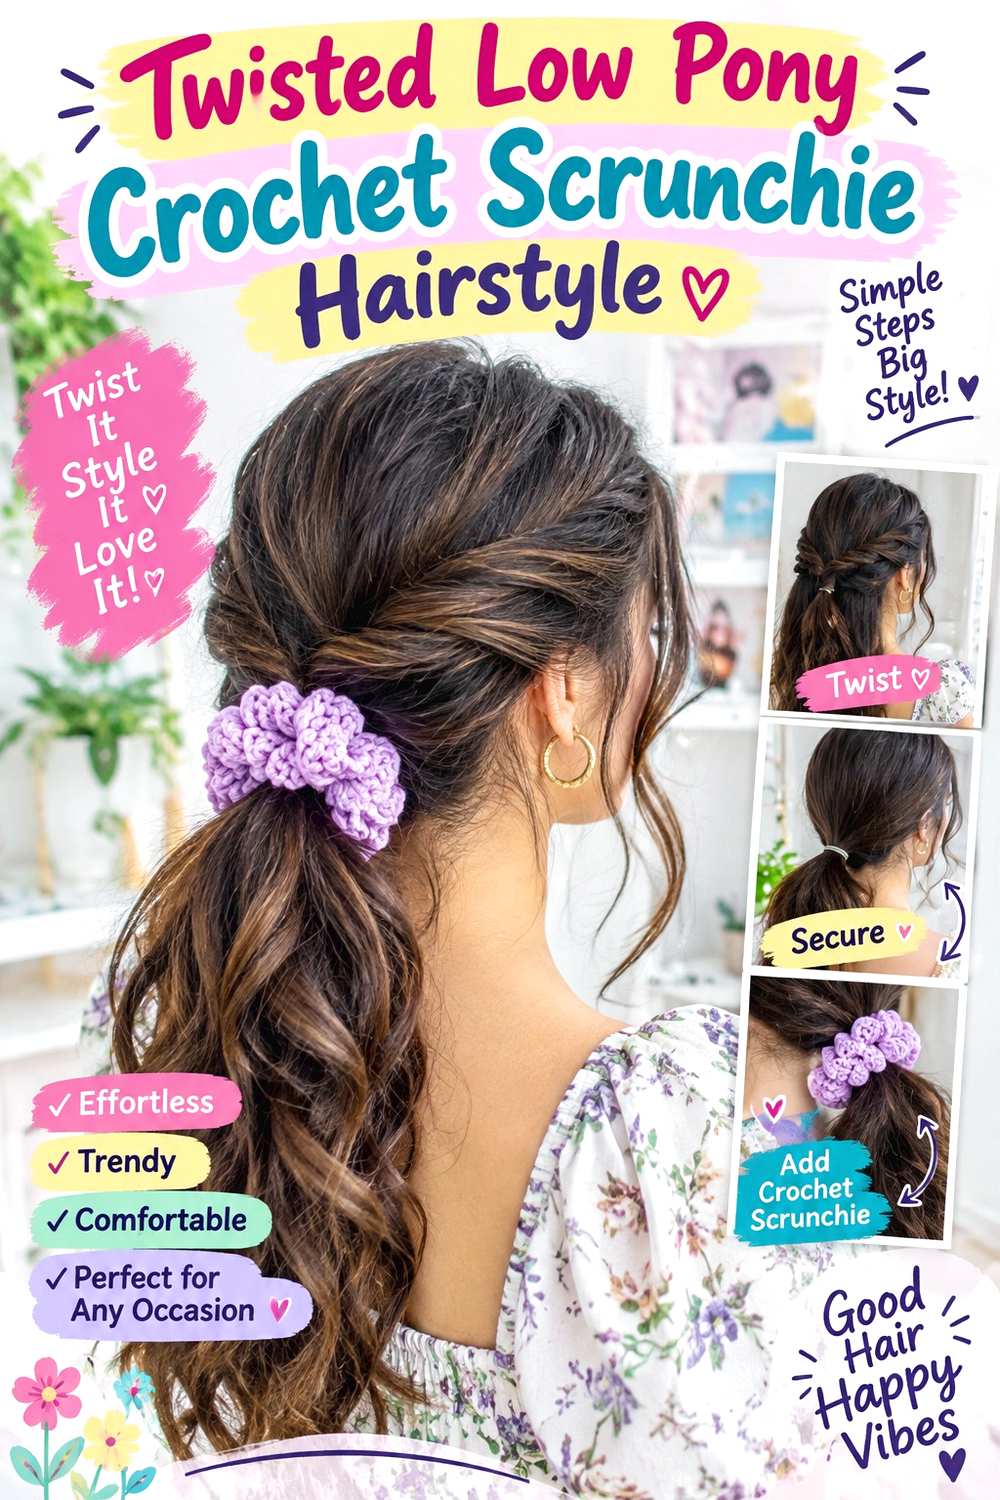
A twisted low pony adds detail above the crochet scrunchie without turning the style into a full updo. Create two side sections, twist them gently toward the back, and join them with the remaining hair at the nape. The scrunchie sits around that combined anchor, while the ponytail stays straight, wavy, or naturally textured below. Medium to long hair works best because the side sections need enough length to reach the center without being pulled tight, and the twists should stay soft rather than rope-like.
Use bobby pins to hold the side twists temporarily, secure the combined ponytail with a fabric-covered elastic, and apply light texturizing spray if the roots need grip. Add the crochet scrunchie after the anchor is stable. A full style takes longer when the lengths also need waves or curl definition, while a quick refresh usually means redoing one twist and smoothing the nape. If the sides collapse, rebuild the twist placement instead of tightening the ponytail. For professional styling, point to where the twists should begin and how much volume you want left at the crown. Maintenance means checking that both sides remain balanced and that pins are not pressing underneath the accessory as the style settles.
Pro tip:
Twist each side only until it reaches the back center, then secure both before forming the ponytail so the sections keep equal tension.
Make It Work for You:
For fine hair, keep the twists slightly wider and looser through the sides while maintaining a firm ponytail base, which adds detail without exposing sparse gaps.
Watch Out For:
Avoid hiding uneven twists beneath the scrunchie. If one side collapses, reset that section first so the accessory sits over a balanced foundation.
Conclusion
Crochet scrunchie hairstyle ideas can feel very different depending on placement, density, texture, and how much hair is gathered. High ponytails and puffs emphasize height, while low buns, low puffs, and nape ponytails create a calmer silhouette. Half-up options preserve loose length and movement, whereas braids and bubble ponytails give the accessory a more structured base. Straight hair may need extra grip, while curls and coils often benefit from preserving natural volume instead of compressing it. Parting, face-framing pieces, and crown lift can all change the balance without requiring a haircut. Choose a version that matches your usual styling effort, then let the secure base carry the tension so the crochet scrunchie remains decorative, comfortable, and easy to reposition.
Before Your Salon Visit
Choose one or two favorite references before your salon or styling appointment and save views that clearly show both the crochet scrunchie and its base hairstyle. Discuss your natural texture, density, face shape, preferred length, upkeep, and normal routine. Point out the exact ponytail or bun height, parting, loose pieces, braid width, puff volume, or finish you want. Because these are temporary styles, focus on comfortable anchoring and practical placement rather than assuming you need a haircut.
FAQs
How Do I Keep a Crochet Scrunchie From Sliding Out?
Build the hairstyle with a secure base first rather than asking the crochet scrunchie to hold all the weight. A small elastic underneath can help on ponytails, buns, and half-up styles. If the scrunchie still slips, adjust its size or placement instead of wrapping it until the base feels tight.
Can Crochet Scrunchies Work With Curly or Coily Hair?
Yes. They can finish puffs, ponytails, buns, braids, and half-up styles while leaving the natural curl pattern visible. Choose a base that accommodates your density and shrinkage, and avoid stretching curls simply to make the accessory sit flatter. Comfort and stable anchoring matter more than a perfectly smooth surface.
Do I Need Heat to Style Hair With a Crochet Scrunchie?
No. Natural curls, air-dried waves, braids, puffs, buns, and textured ponytails can all work without heat. Hot tools are only needed when you specifically want a heat-shaped finish such as smooth lengths or defined waves. When heat is used, apply heat protectant and avoid unnecessary repeat passes.
How Do I Choose the Right Crochet Scrunchie Size?
Match the accessory to both your hair density and the size of the gathered base. A very large scrunchie can overwhelm a small half-up section, while a tight, small one may compress a dense ponytail or puff. The best fit should cover the anchor without requiring repeated, uncomfortable wrapping.