16 Crochet Bandana Hairstyle Ideas
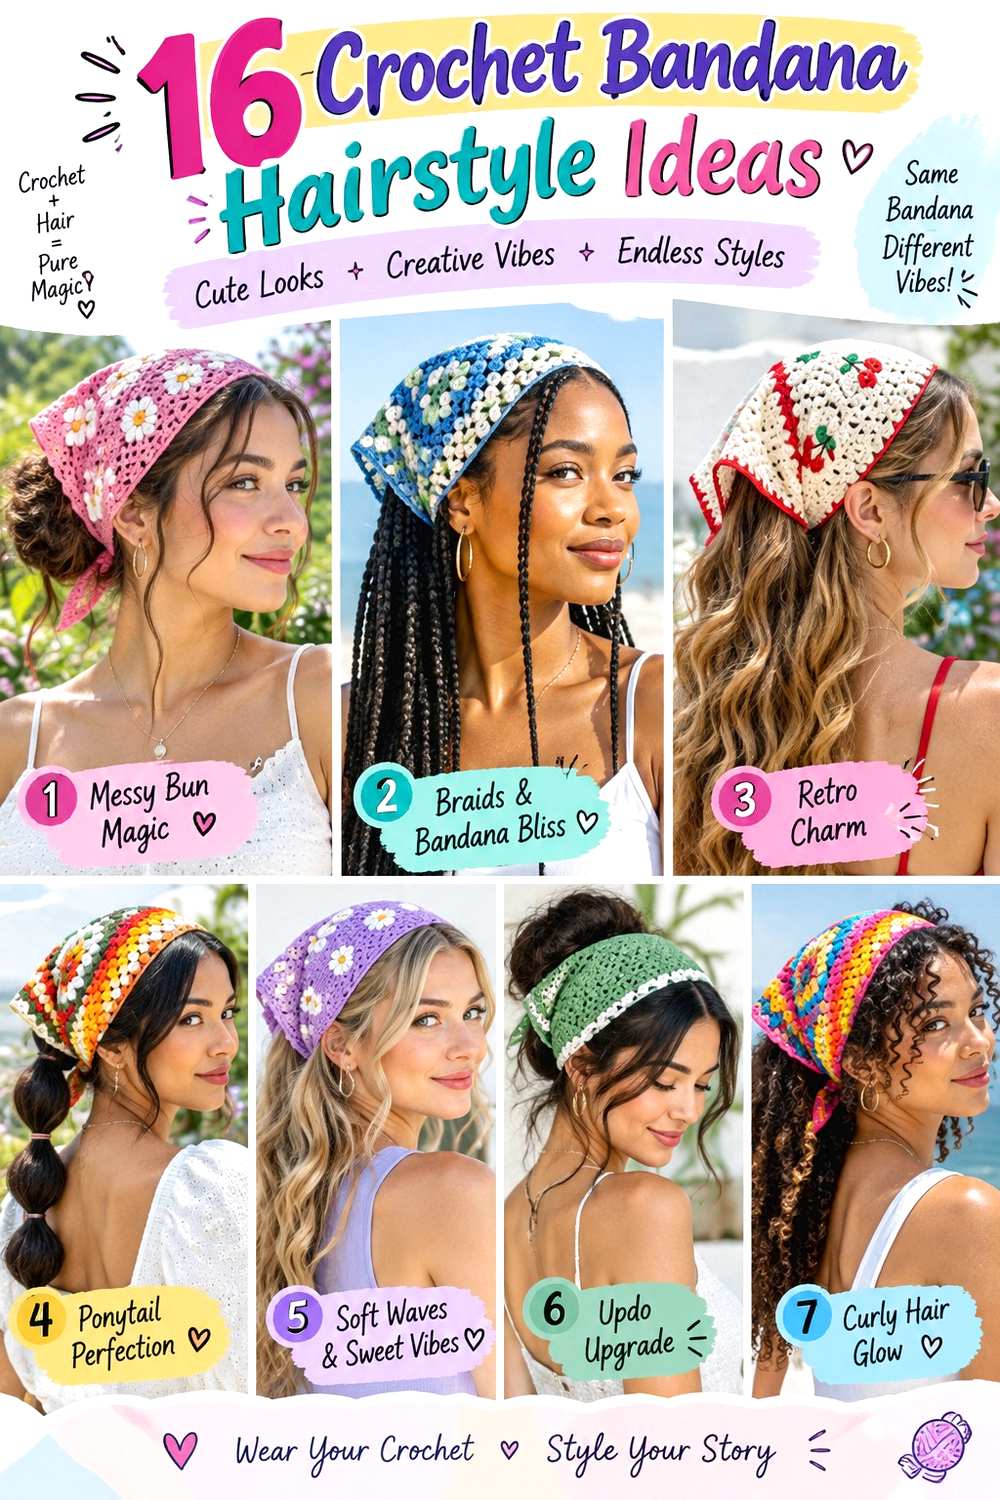
Crochet bandanas create a textured frame over the crown, so the hairstyle underneath determines whether the finished shape feels relaxed, polished, or more structured. Some designs leave the hairline and part visible, while others cover more of the top and direct attention toward curls, braids, a ponytail, or an updo. Length, face-framing pieces, root volume, and movement at the ends all affect how the bandana sits.
Straight, wavy, curly, and coily hair can all work with crochet bandana hairstyle ideas, but the best placement depends on density, texture, and the amount of hair gathered underneath. Fine or lower-density hair may feel balanced with a lighter, narrower piece, while dense curls can need extra room so the crown is not compressed. Front pieces can also be adjusted for preferred framing rather than following rigid face-shape rules.
Styling effort ranges from a brief morning reset to a longer wash-day routine. Loose hair may need only a quick refresh, while defined curls, braids, or pinned updos take more preparation. The main maintenance concerns are slipping, bunching, frizz around exposed sections, and pressure near the temples or ears. A secure bandana should complement the base hairstyle without relying on uncomfortable tension.
Quick List
- Loose Wave Crochet Bandana Hairstyle
- Natural Curl Crochet Bandana Hairstyle
- Low Bun Crochet Bandana Hairstyle
- High Puff Crochet Bandana Hairstyle
- Side Braid Crochet Bandana Hairstyle
- Half-Up Crochet Bandana Hairstyle
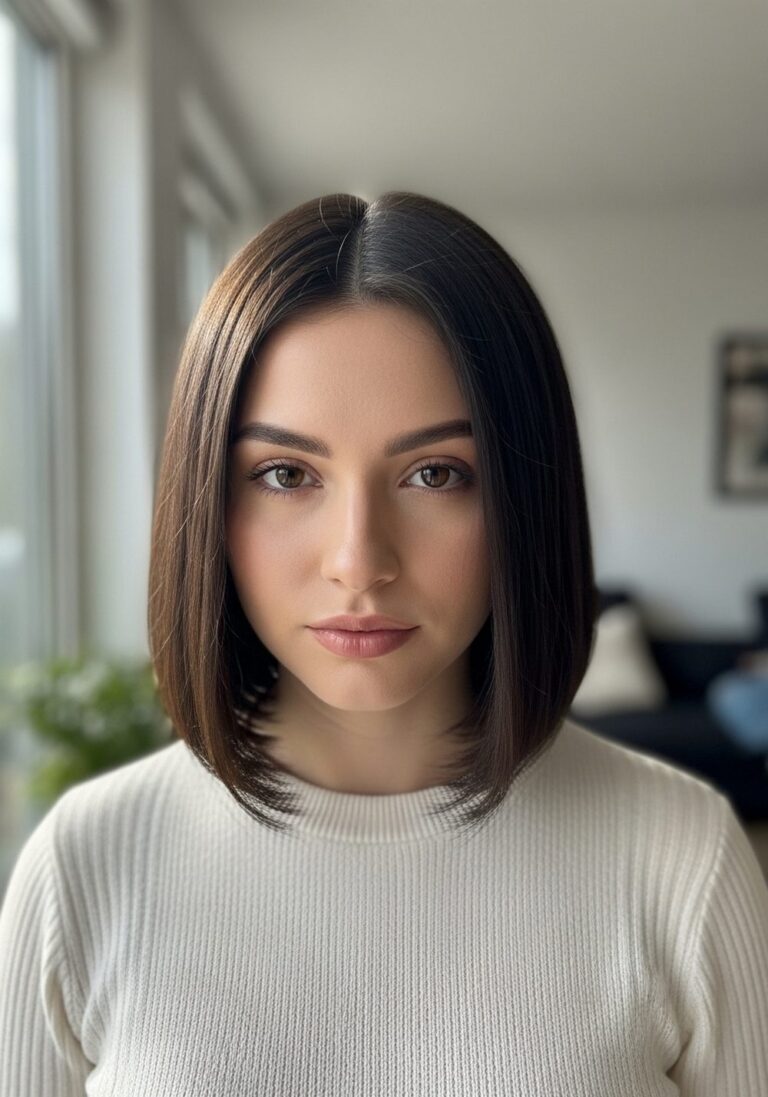
- Bob-Length Crochet Bandana Hairstyle
- Long Straight Crochet Bandana Hairstyle
- Low Ponytail Crochet Bandana Hairstyle
- Double Braid Crochet Bandana Hairstyle
- Short Curl Crochet Bandana Hairstyle
- Twisted Updo Crochet Bandana Hairstyle
- Messy Top Knot Crochet Bandana Hairstyle
- Bubble Ponytail Crochet Bandana Hairstyle
- Braided Crown Crochet Bandana Hairstyle
- Claw Clip Crochet Bandana Hairstyle
Loose Wave Crochet Bandana Hairstyle
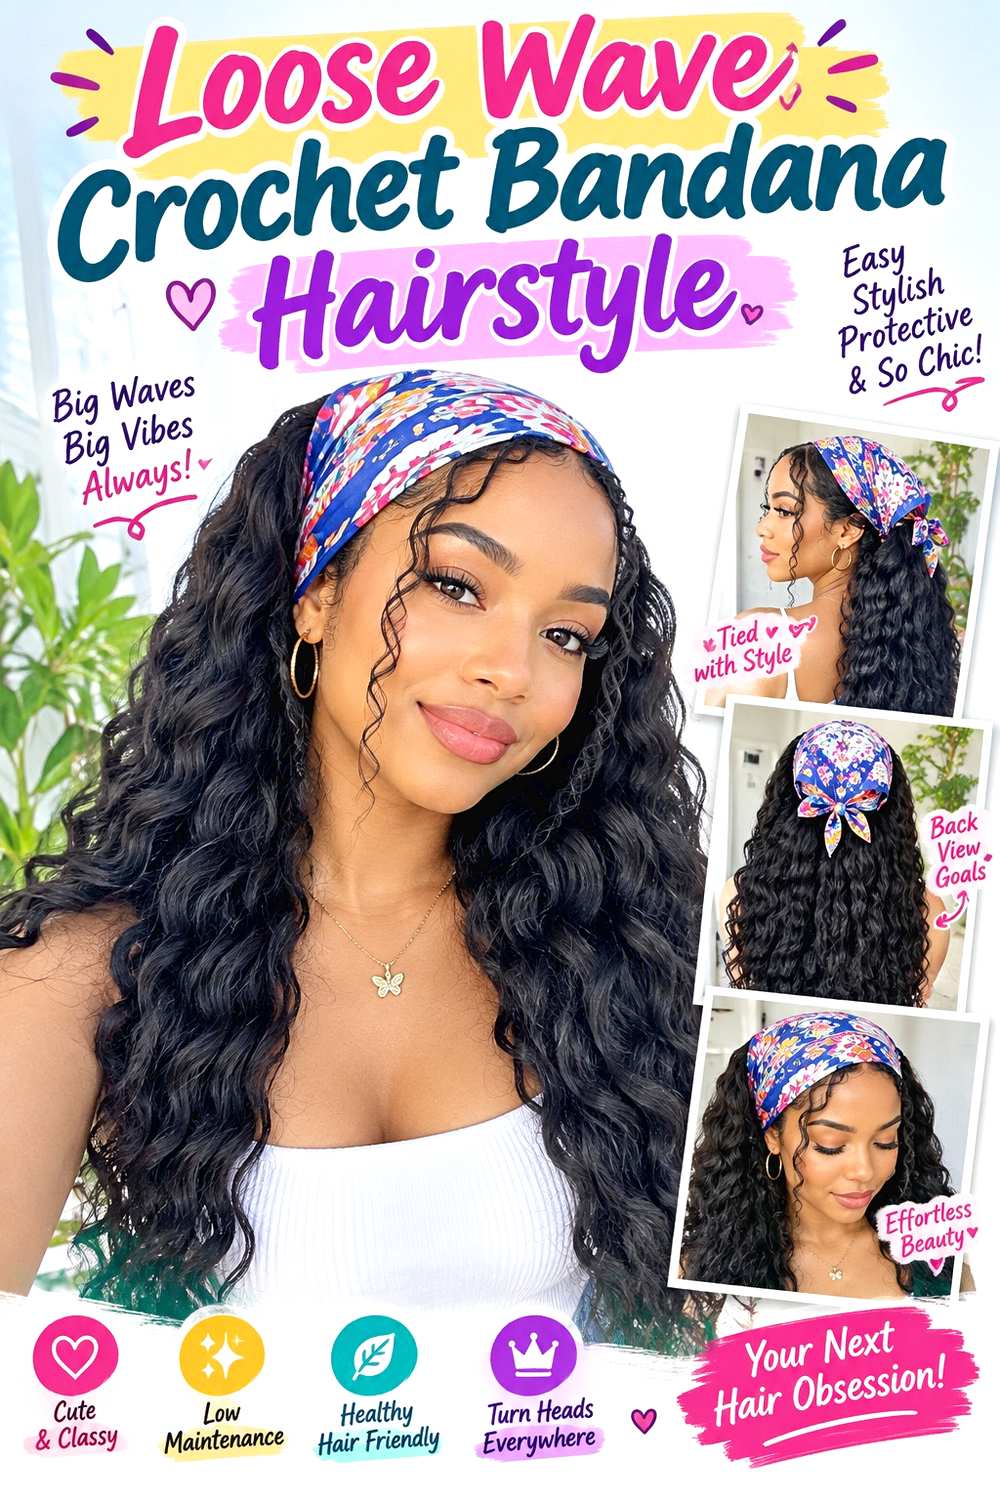
Broad waves below the cheekbones give this design movement while the crochet bandana adds texture across the crown. Keep the roots relatively relaxed, use a center or soft side part in front, and let longer face-framing sections blend into wide bends through the mid-lengths. Straighter tips keep the finish casual rather than overly curled. Medium and long hair work particularly well because enough length remains visible below the bandana, although shoulder-length hair can carry the same shape with smaller bends.
For a complete styling session, apply heat protectant before shaping large sections with a curling iron, then mist flexible hairspray lightly after the waves cool. Those three supplies help create definition without making the movement rigid. A between-wash refresh should be shorter: reshape only flattened front sections or bends that have dropped instead of repeating the full set. If frizz develops, smooth individual areas rather than coating every wave with more product.
For salon or event styling, show exactly how far behind the hairline you want the bandana and how much parting should remain visible. Also explain whether you prefer crown lift or a flatter top. Reposition the bandana when it begins to slide instead of tightening it until the temples feel pressured.
Pro tip:
Let every heated section cool before loosening it, then place the crochet bandana so its edge does not flatten the first visible bend near the face.
Make It Work for You:
For fine or lower-density hair, keep the waves broad and preserve fullness through the ends rather than separating them heavily, which helps the loose length look more substantial.
Watch Out For:
Avoid pushing the bandana repeatedly toward the hairline when it slips. Reset it farther back on a stable section so the front waves stay undisturbed.
Natural Curl Crochet Bandana Hairstyle
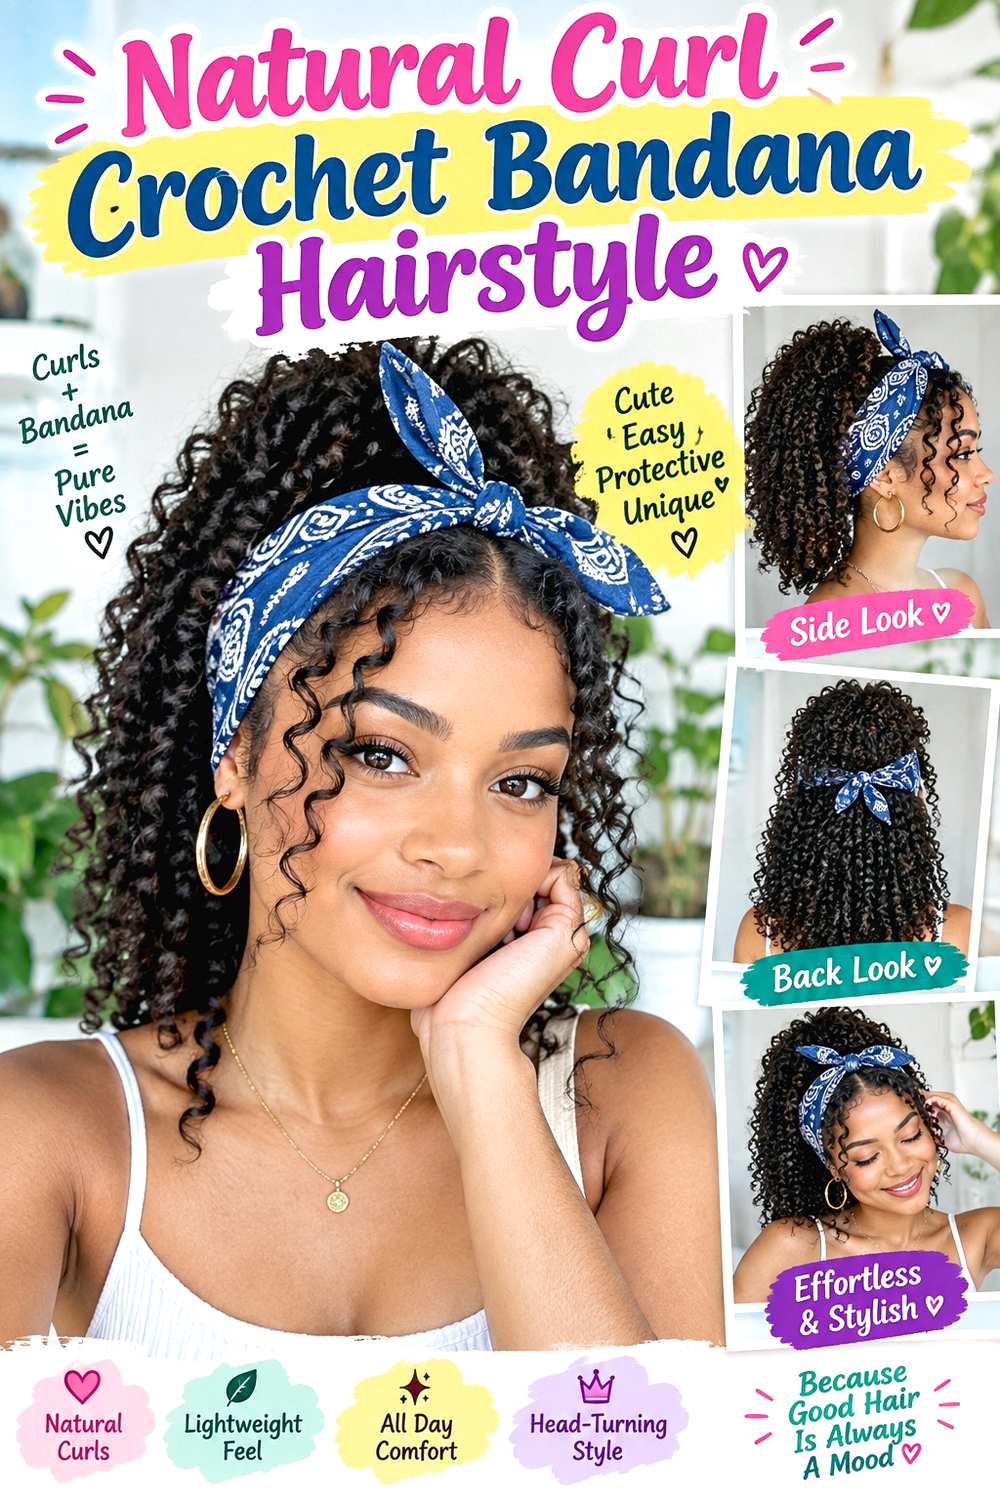
Natural curls can spill from the back and sides of a crochet bandana while a few shorter pieces remain visible around the forehead or temples. Instead of forcing a precise part, let the curl pattern decide where the front separates naturally. The bandana can cover more of the crown than a narrow headband, creating a clear frame around a rounded curl shape. This approach suits curly and coily textures particularly well because it keeps their movement visible rather than asking the hair to mimic a straighter finish.
On wash day, work lightweight leave-in conditioner through damp hair for slip, apply curl gel for definition, and use a diffuser if you want controlled drying with less disturbance. Those three supplies cover moisture, hold, and drying without overloading the roots. A quick refresh between washes may only involve dampening flattened curls and guiding them back into their groups with your fingers.
If shrinkage pulls the front pieces shorter than expected, move the bandana slightly back rather than stretching those curls forward. For professional styling, describe how much curl you want visible around the front edge and whether the bandana should cover the ears. Upkeep mainly involves reshaping compressed curls and checking that the crochet texture is not catching repeatedly on one section.
Pro tip:
Wait until the roots are mostly dry before positioning the bandana, especially near the temples, so the accessory does not stretch or flatten freshly formed curl groups.
Make It Work for You:
If your curls shrink strongly, leave more natural length visible in front and position the bandana behind that area rather than pulling the hair forward for symmetry.
Watch Out For:
Do not rely on heavy gel at the hairline to prevent slipping. Excess product can flatten the curl pattern; adjust placement and preserve natural root movement.
Low Bun Crochet Bandana Hairstyle

A low bun concentrates the hairstyle near the nape and leaves the crochet bandana clearly visible across the crown. Keep a center or side part in front if you want a softer frame, or sweep all the front hair underneath for a cleaner outline. The bun can be compact and smooth or slightly loosened, but it should remain balanced with the scale of the bandana. Medium to long hair usually provides enough length to wrap comfortably without forcing the base too tight.
Use a fabric-covered elastic to establish the bun, bobby pins to secure the tucked ends, and flexible hairspray to control small flyaways. These three supplies create the structure; the bandana should not be responsible for holding the bun together. A full style after washing may take longer if the hair also needs drying or smoothing, while a next-day refresh can be limited to replacing loose pins and resetting the front.
For professional styling, specify the exact height of the bun and how much hair you want left over the ears. Comfortable tension is more important than making every surface perfectly flat. If the bun begins to sag, rebuild its anchor rather than tightening the bandana. Maintenance is straightforward: loosen any pin that presses uncomfortably, smooth only visible frizz, and redo the base once it stops feeling stable.
Pro tip:
Secure the bun completely before adding the bandana, then turn your head gently from side to side to check that the base stays centered and comfortable.
Make It Work for You:
For shorter medium-length hair, create a smaller tucked bun and leave fewer loose pieces around the nape; the low placement still gives the crochet bandana a balanced base.
Watch Out For:
Do not tighten the bandana to compensate for a loose bun. A slipping base needs to be rebuilt at the nape rather than squeezed from above.
High Puff Crochet Bandana Hairstyle

A high puff creates most of the volume above the crown while the crochet bandana frames the front and sides. The contrast works best when the puff stays rounded rather than narrow, with the bandana positioned below its fullest point. You can sweep the front back completely or leave a few soft curls near the temples. Curly and coily textures are especially suited to the shape, provided the gathered base feels secure without pulling painfully along the hairline.
A soft elastic can form the puff, a wide-tooth comb can help organize the front without breaking up the ends, and a small amount of edge gel can control only the areas where extra smoothness is wanted. A full wash-day puff takes longer when curls need defining and drying first; a quick morning refresh usually means fluffing the top, smoothing one or two sections, and repositioning the bandana.
For salon or event styling, explain the puff height you prefer and where you want the crochet edge to sit in relation to the ears. If the puff starts leaning backward, reset the elastic rather than pulling the bandana tighter. Maintenance should prioritize comfort at the base, since repeated high tension can make the front feel strained even when the accessory itself is soft.
Pro tip:
After securing the puff, lift the outer curls gently with your fingers before adding the bandana so the shape keeps width as well as height.
Make It Work for You:
For very dense hair, allow the puff to spread slightly wider and position the bandana lower on the crown so it frames the volume without compressing it.
Watch Out For:
Avoid making both the puff base and bandana extremely tight. If the hairline feels strained, loosen the gathered base first and reassess the placement.
Side Braid Crochet Bandana Hairstyle
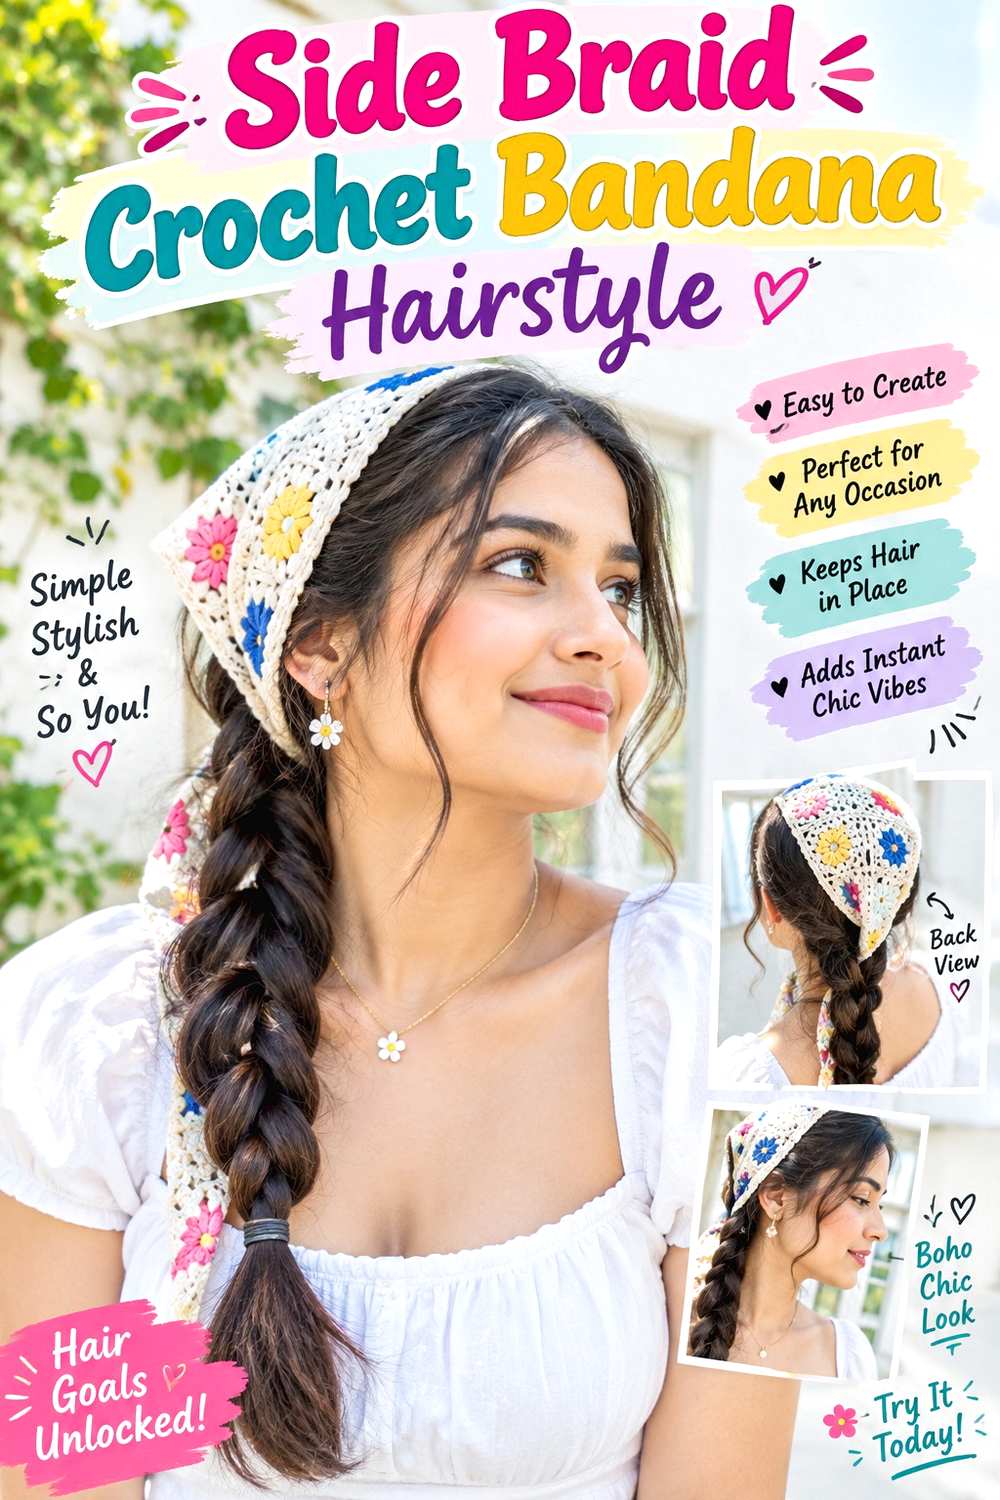
A single braid over one shoulder gives the crochet bandana an intentionally uneven balance that works well with relaxed styling. Keep the crown softly shaped under the bandana, then guide all the length toward one side before beginning the braid near the nape. A visible side part can echo the direction of the braid, while a center part creates contrast. Medium to long hair gives enough length for the braid to remain noticeable below the shoulder.
Apply light texturizing spray through slippery lengths for grip, use a fabric-covered elastic to secure the end, and add a few bobby pins only if shorter pieces escape near the opposite nape. These supplies help the braid hold without requiring excessive tension. A fresh style takes longer if the hair needs detangling or defining first, whereas a next-day refresh may only involve tightening the final braid sections and smoothing the crown.
For professional styling, specify which shoulder the braid should fall over and whether you want it broad and loose or narrower and more controlled. If the braid drifts backward, correct its starting direction instead of repeatedly pulling it forward. Maintenance involves resetting escaped pieces and checking that the bandana remains centered even though the length sits mainly on one side.
Pro tip:
Angle the first few braid crossings toward the chosen shoulder before tightening them gently; this encourages the whole braid to fall sideways without twisting at the nape.
Make It Work for You:
For very smooth straight hair, keep the upper braid slightly firmer and loosen only the outer edges afterward, giving visible width without sacrificing the secure base.
Watch Out For:
Do not pull one side excessively loose just to create volume. If the braid twists, undo a few crossings and redistribute the sections more evenly.
Half-Up Crochet Bandana Hairstyle

A half-up base lets the crochet bandana frame the top while plenty of loose length remains visible underneath. Gather only the upper section from around the temples or above the ears, leaving the lower hair straight, wavy, curly, or softly bent. The bandana should sit independently from the half-up anchor so both details remain visible. A center part creates symmetry in front, while an off-center part shifts more volume toward one side. The idea works best on medium or long hair with enough length to show movement below the shoulders.
Use lightweight mousse to support natural body, secure the half-up section with a small claw clip, and smooth the exposed ends with a wide-tooth comb if needed. A full wash-day style takes longer because the loose texture needs to be set first. A quick refresh is simpler: reshape flattened sections, reset the clip, and check that the bandana has not drifted backward.
For professional styling, point out how high the gathered section should begin and how much hair you want covering the ears. If the crown feels bulky, gather less hair rather than forcing the bandana over a thick anchor. Maintenance centers on keeping the two securing points separate and comfortable while preserving movement through the loose lengths.
Pro tip:
Leave a small gap between the half-up anchor and the back edge of the bandana so the two pieces do not push against each other during movement.
Make It Work for You:
For dense hair, gather only the top layer rather than everything above the ears; this keeps the half-up shape light while leaving the bandana comfortably positioned.
Watch Out For:
Avoid trapping the claw clip directly beneath the crochet fabric. The overlap can create pressure and make both the clip and bandana shift during wear.
Bob-Length Crochet Bandana Hairstyle
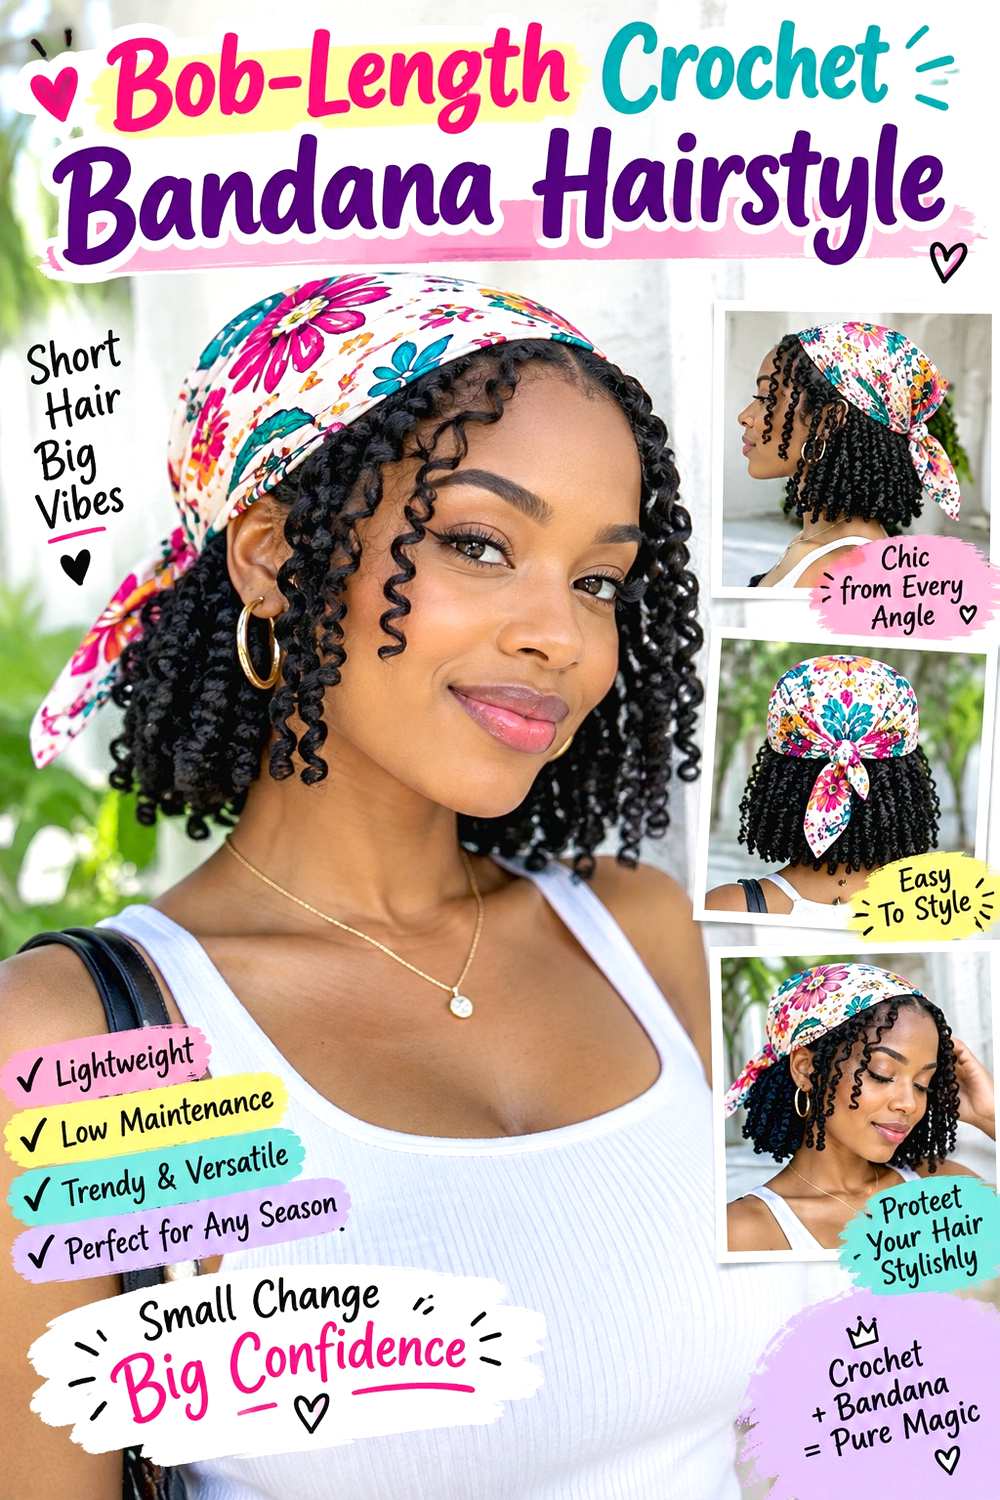
A bob keeps the overall silhouette compact, which makes the crochet bandana a strong visual feature rather than a small accent. Position it so some of the part or front hair remains visible, then let the ends finish naturally around the jaw, neck, or shoulders. Straight bobs can look clean and graphic, while softly wavy or curly versions create more movement around the sides. Because the length is shorter, even a small change in bandana angle can noticeably change the balance.
Use a wide-tooth comb to arrange the part, apply a small amount of smoothing cream through the mid-lengths and ends, and use a light texturizing spray near slippery roots if extra grip is needed. A full wash-day style may involve drying and reshaping the entire bob, while a morning refresh usually means resetting the front, taming a few ends, and repositioning the bandana.
For professional styling, explain whether you want the ears exposed or partly covered and how much volume should remain at the crown. There is no need to change the haircut simply to wear the accessory. If the ends begin flipping unevenly, refresh the base hairstyle rather than hiding them under the crochet piece. Maintenance is mostly about preserving the bob’s outline and preventing excess product from making the bandana slide.
Pro tip:
Check the bandana from both side views before leaving; a small tilt is more obvious against the short, compact outline of a bob than on long hair.
Make It Work for You:
For a curly bob, let the natural curl groups determine how much hair remains visible in front, then position the bandana behind them instead of flattening them.
Watch Out For:
Too much smoothing cream near the roots can reduce grip. Keep most of it on the ends and use only what the exposed surface actually needs.
Long Straight Crochet Bandana Hairstyle

Long straight hair gives a crochet bandana a simple, uninterrupted background, making placement and parting the most noticeable details. Keep the roots smooth without pressing them completely flat, then let the lengths fall behind the shoulders or divide them evenly in front. A center part gives a balanced finish, while a side part adds more visible weight to one side. The ends can remain straight or curve slightly inward for movement without turning the style into a wave set.
If heat is needed, apply heat protectant before using a flat iron only on sections that require smoothing, then add a small amount of lightweight serum to the ends for slip. Those supplies support a polished finish without asking the bandana to hide uneven texture. A complete straightening routine can be lengthy on long or dense hair, while a quick refresh should focus only on bends that developed overnight.
For professional styling, specify how much root volume you want to preserve beneath the bandana and whether the part should remain fully visible. If the crochet piece slips on very smooth hair, move it slightly farther back instead of pulling it tighter. Maintenance involves avoiding unnecessary heat passes, smoothing only visible frizz, and resetting the accessory when the long lengths shift its position.
Pro tip:
Allow heat-styled hair to cool fully before putting on the bandana so the crochet edge is less likely to leave an immediate dent near the crown.
Make It Work for You:
If you prefer less heat, smooth only the front and top sections while leaving the lower lengths closer to their natural texture; the bandana still defines the frame.
Watch Out For:
Do not repeat flat-iron passes every time a small bend appears. Refresh only noticeable sections, with protection, rather than chasing a perfectly rigid finish.
Low Ponytail Crochet Bandana Hairstyle
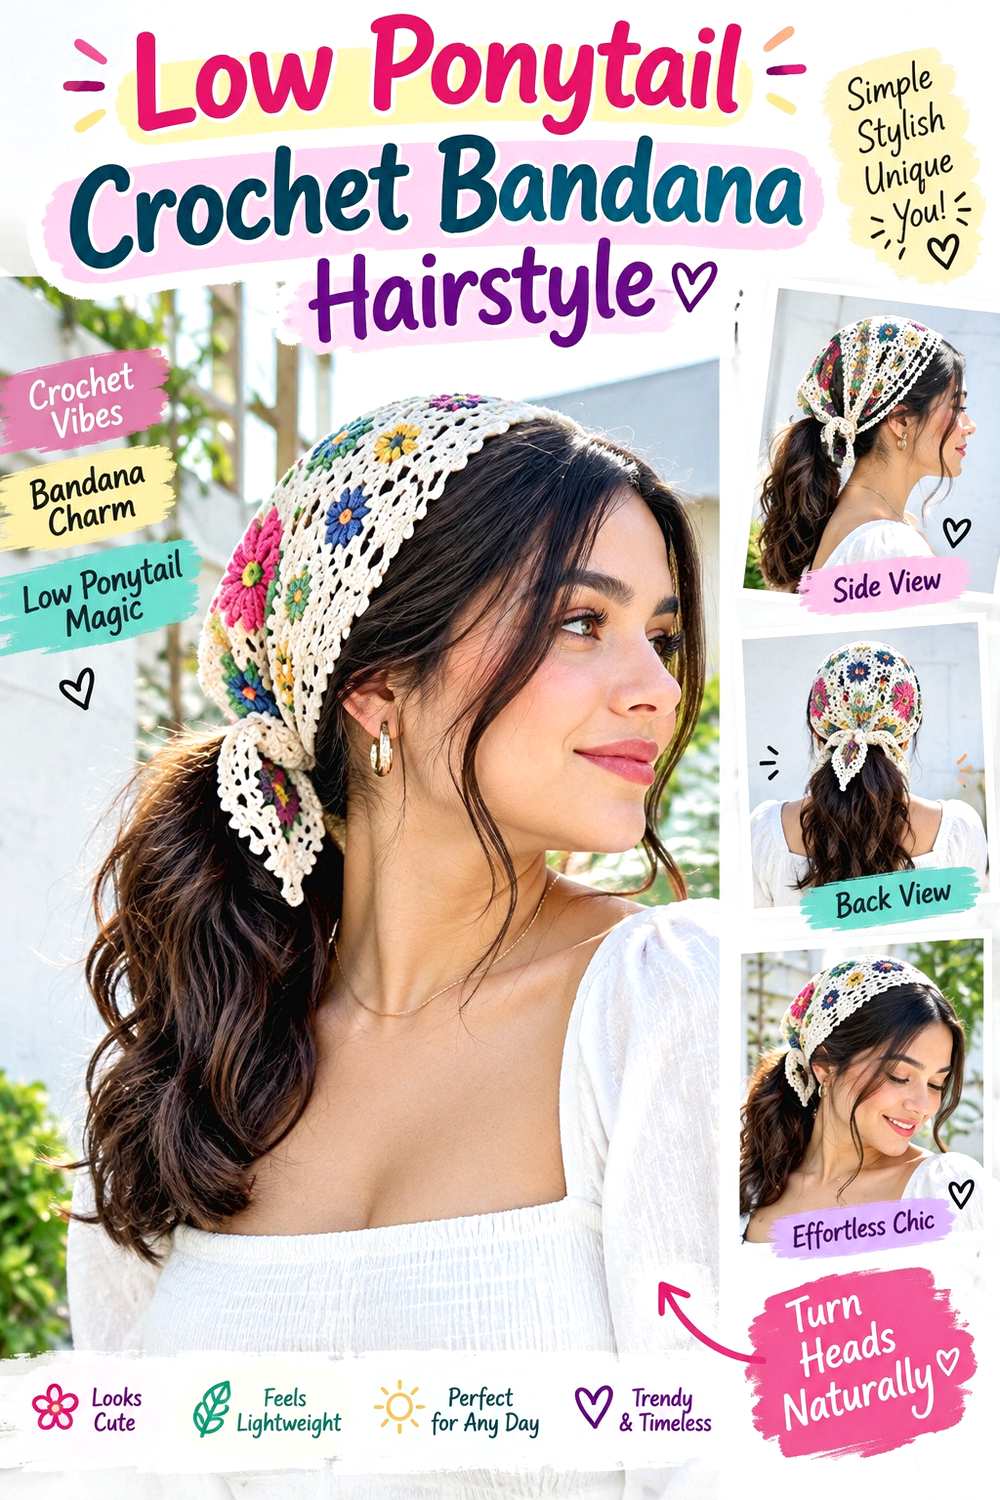
A low ponytail keeps the length controlled while allowing the crochet bandana to remain the dominant feature across the crown. Place the pony directly at the nape or a little higher, depending on where you want the visible weight. A center part gives a neat division in front, while an off-center part adds softness. The ponytail itself can stay straight, wavy, or naturally curly, making this one of the most adaptable options for medium and long hair.
Apply lightweight serum over visible flyaways, gather the hair with a fabric-covered elastic, and use a wide-tooth comb to organize the lengths without over-smoothing them. A complete wash-day pony takes longer when the hair also needs curl definition or a polished blow-dry, while a daily refresh is usually limited to resetting the elastic and smoothing the front.
For professional styling, specify the exact ponytail height and whether you want loose pieces around the temples. The bandana should sit securely without replacing the ponytail’s own anchor. If it shifts forward, reset its position rather than making the pony tighter. Maintenance is simple: rebuild the base when it sags, refresh the exposed ends as needed, and loosen the style if pressure begins to develop around the front or nape.
Pro tip:
After securing the ponytail, lift the crown very slightly with your fingers before adding the bandana so the top keeps some softness instead of appearing pulled flat.
Make It Work for You:
For curly or coily hair, leave the ponytail texture natural and smooth only the visible surface where needed, preserving fullness behind the structured crochet bandana.
Watch Out For:
A tight ponytail combined with a tight bandana can become uncomfortable quickly. Ease one anchor rather than increasing tension every time the style loosens.
Double Braid Crochet Bandana Hairstyle

Two low braids create a symmetrical base beneath the crochet bandana and keep long hair controlled for active days or casual wear. Divide the hair evenly with a center part, position the bandana over the crown, and let each braid begin near the lower sides or nape. The braids can fall in front of the shoulders for visibility or behind them for a cleaner front. Straight, wavy, curly, and coily textures can all use the layout, though the amount of grip and braid expansion will vary.
Mist light texturizing spray through slippery lengths, secure each braid with a small fabric-covered elastic, and use a wide-tooth comb only where sections need organizing before braiding. A full style is longer if detangling or definition is needed first; a refresh usually involves reworking fuzzy braid sections and resetting the bandana.
For professional styling, explain the braid width you want and where each braid should begin in relation to the ears. If one side looks noticeably fuller, redistribute the sections rather than pulling the smaller braid tighter. Upkeep is mainly about maintaining balanced tension, replacing stretched elastics, and avoiding repeated pressure where the crochet fabric meets the sides of the head. The bandana should frame the braids, not be used to force uneven sections into place.
Pro tip:
Compare the width of both braids after the first few crossings, when corrections are easy, instead of waiting until you have reached the ends.
Make It Work for You:
For very long hair, keep the braid sections moderately firm below the shoulders so the lower lengths stay controlled while the upper portions retain comfortable softness.
Watch Out For:
Do not pull the two braids outward to make them appear even. Re-section the fuller side instead, which preserves balance without increasing tension at the nape.
Short Curl Crochet Bandana Hairstyle
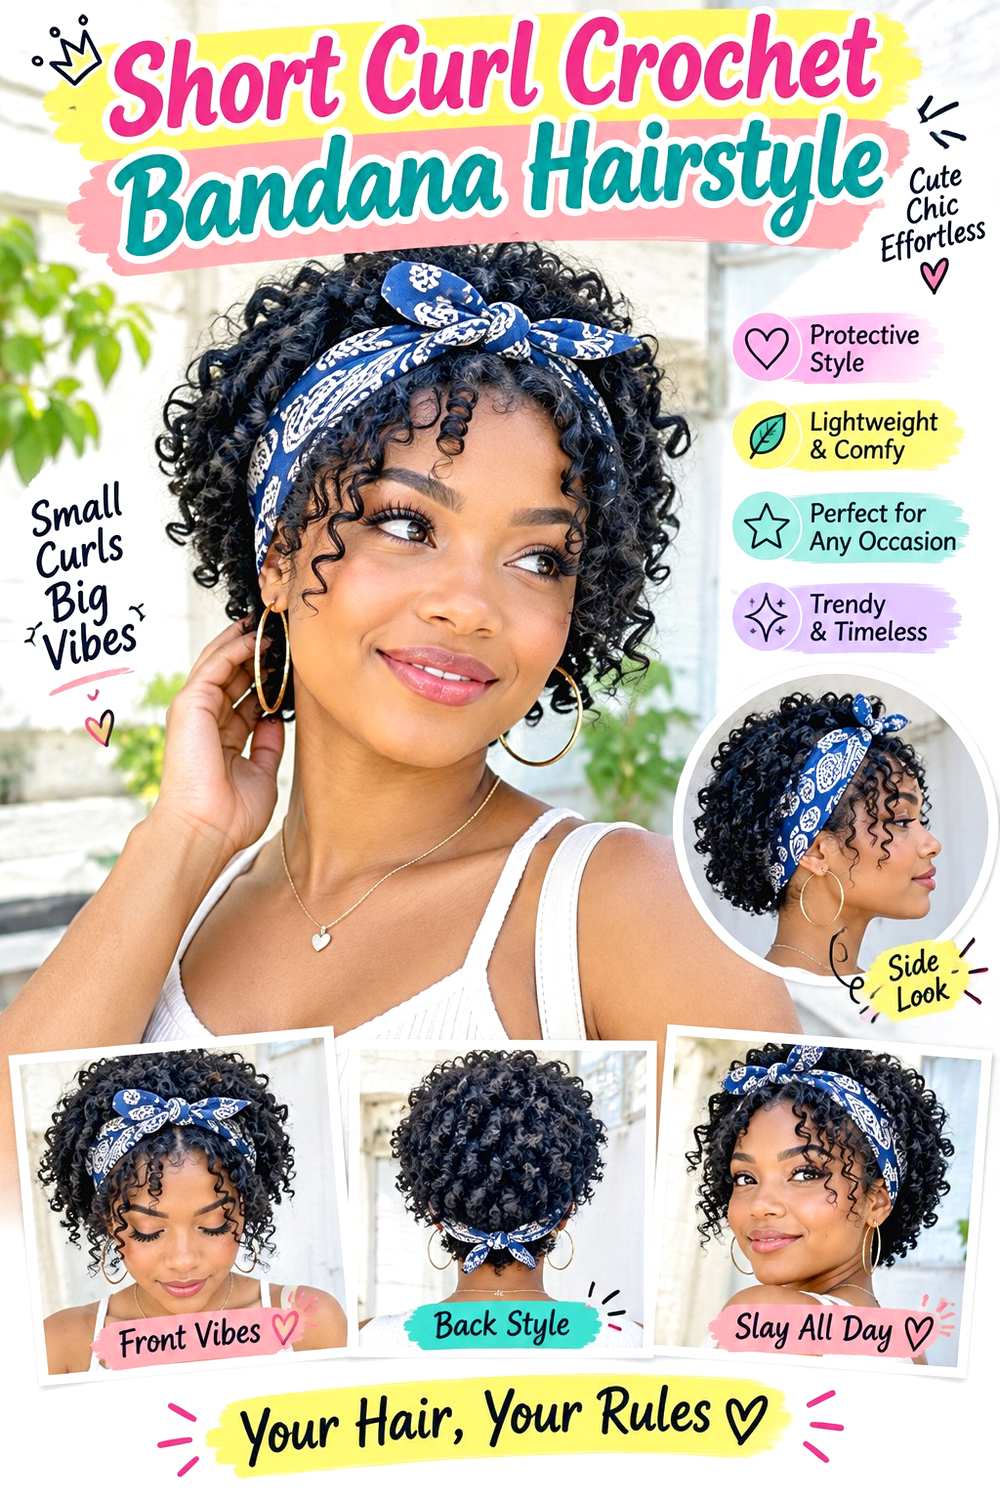
Short curls let more of the crochet bandana remain visible, so its width and placement strongly influence the overall shape. Position it behind the first row of curls or cover more of the crown for a bolder frame. The remaining texture can stay rounded around the sides, with shorter pieces directed toward the forehead or temples if you prefer extra face framing. Because the length is compact, preserving curl grouping matters more than adding unnecessary volume.
Apply curl cream to support softness and definition, use a small amount of curl gel where extra hold is needed, and dry with a diffuser if controlled airflow suits your routine. A full wash-day set takes longer because the entire curl pattern must be refreshed, while a morning reset can focus on areas flattened during sleep. Avoid soaking every section when only the top needs attention.
For professional styling, specify how much curl should remain visible in front of the bandana and whether the ears should be exposed. If the sides look compressed, move the crochet piece slightly back rather than pulling curls outward aggressively. Maintenance consists of reshaping crushed sections, controlling local frizz, and checking that the accessory remains comfortable. There is no need to straighten the front for a polished result; the natural pattern can provide the finish.
Pro tip:
Position the bandana after the curls have mostly set, then lift only the sections it compressed instead of fluffing the entire shape and creating unnecessary frizz.
Make It Work for You:
For lower-density short curls, choose a narrower crochet bandana and leave more texture visible around its edges so the accessory does not dominate the compact silhouette.
Watch Out For:
Avoid forcing the bandana too close to the hairline when curls naturally spring forward. Move it back slightly and let the front texture settle freely.
Twisted Updo Crochet Bandana Hairstyle

A low twisted updo gives the crochet bandana a more structured base while keeping the crown softly shaped. Gather the lengths toward the nape, roll or twist them inward, and secure the ends so the updo sits horizontally rather than projecting far from the head. The front can remain smooth with a visible part or include a couple of narrow pieces near the temples. Medium to long hair is most practical because enough length is needed to tuck securely without excessive tension.
Use bobby pins to build the internal anchor, flexible hairspray to control small flyaways, and a fine mist of texturizing spray if smooth hair needs extra grip before twisting. A complete updo takes more time than a ponytail because sections must be positioned and checked. A quick refresh before an event may involve only replacing a loose pin and smoothing the front.
For professional styling, specify the twist height and whether the bandana should sit in front of the crown volume or overlap its upper edge. If the updo starts dropping, reinforce its pins rather than tightening the accessory. Maintenance means checking comfort as the style settles, especially around the nape. Any pin that begins pressing should be redirected instead of pushed deeper simply to preserve the shape.
Pro tip:
Build and test the twist before adding the bandana; a stable internal anchor lets the crochet piece sit lightly instead of becoming part of the updo’s support.
Make It Work for You:
For fine hair, keep the twist compact and slightly textured rather than oversized; the bandana supplies visual detail without requiring heavy teasing or extra padding.
Watch Out For:
If a pin becomes uncomfortable, change its angle instead of pushing it farther into the twist. A secure updo should not depend on painful pressure.
Messy Top Knot Crochet Bandana Hairstyle

A top knot shifts the volume high above the crown, leaving the crochet bandana to frame the lower front of the hairstyle. Keep the knot slightly relaxed rather than perfectly circular, with a few controlled ends or short face-framing pieces adding movement. The bandana can cover much of the crown beneath the knot or sit farther forward with more root volume visible behind it. Medium and long hair work best, although layered lengths may create more loose ends around the base.
Use a soft elastic to create the initial ponytail, bobby pins to secure loose sections of the knot, and flexible hairspray to control flyaways without making the finish stiff. A complete style is relatively quick once the hair is dry, but wash-day preparation can add time if curls or waves need defining first. A morning refresh usually means rebuilding the knot only if its base has sagged.
For professional styling, explain how high you want the knot and whether you prefer intentional loose pieces or a cleaner perimeter. The bandana should stay separate from the knot’s anchor so it can be repositioned without collapsing the updo. Maintenance involves checking the elastic, re-tucking escaped ends, and loosening the base if the scalp begins to feel pulled during extended wear.
Pro tip:
Build the knot slightly behind the highest point of the head so the bandana has room to sit across the crown without pushing directly against the base.
Make It Work for You:
For dense hair, divide the gathered length into two loose twists before pinning them together; this controls bulk while preserving the intentionally relaxed top-knot shape.
Watch Out For:
Do not tighten the knot every time a few ends escape. Re-pin those pieces individually, because repeated tightening can create unnecessary pulling around the hairline.
Bubble Ponytail Crochet Bandana Hairstyle

A bubble ponytail adds repeated rounded sections through the length, giving the crochet bandana a playful but organized partner. Start with a ponytail at the nape or mid-back of the head, then create evenly spaced sections along the tail and gently expand each one. Keep the crown relatively smooth so the texture does not become visually crowded. This layout works best on medium to long hair, with longer lengths allowing more bubbles to remain visible.
Use fabric-covered elastics to create each section, light texturizing spray to improve grip, and a wide-tooth comb to organize the ponytail before dividing it. A full style requires more time than a standard pony because the spacing needs to be checked, though a refresh can be brief if only one or two sections have flattened. Avoid rebuilding the whole tail unnecessarily.
For professional styling, specify the ponytail height, bubble size, and whether you want the sections compact or softly expanded. The crochet bandana should sit separately at the crown and should not pull against the first elastic. If one bubble looks smaller, loosen that section gradually rather than tugging from the ends. Maintenance involves checking the elastics, restoring uneven sections, and making sure the ponytail base remains comfortable as the weight shifts during the day.
Pro tip:
Expand each bubble from its outer edges a little at a time, working from the top downward, so the sections stay balanced instead of becoming uneven.
Make It Work for You:
For finer or lower-density hair, keep the bubbles smaller and slightly closer together; this preserves the repeated shape without stretching each section until it looks sparse.
Watch Out For:
Avoid spacing the elastics too far apart on shorter hair. Oversized gaps can collapse the bubble shape, so reduce the distance and keep each section controlled.
Braided Crown Crochet Bandana Hairstyle
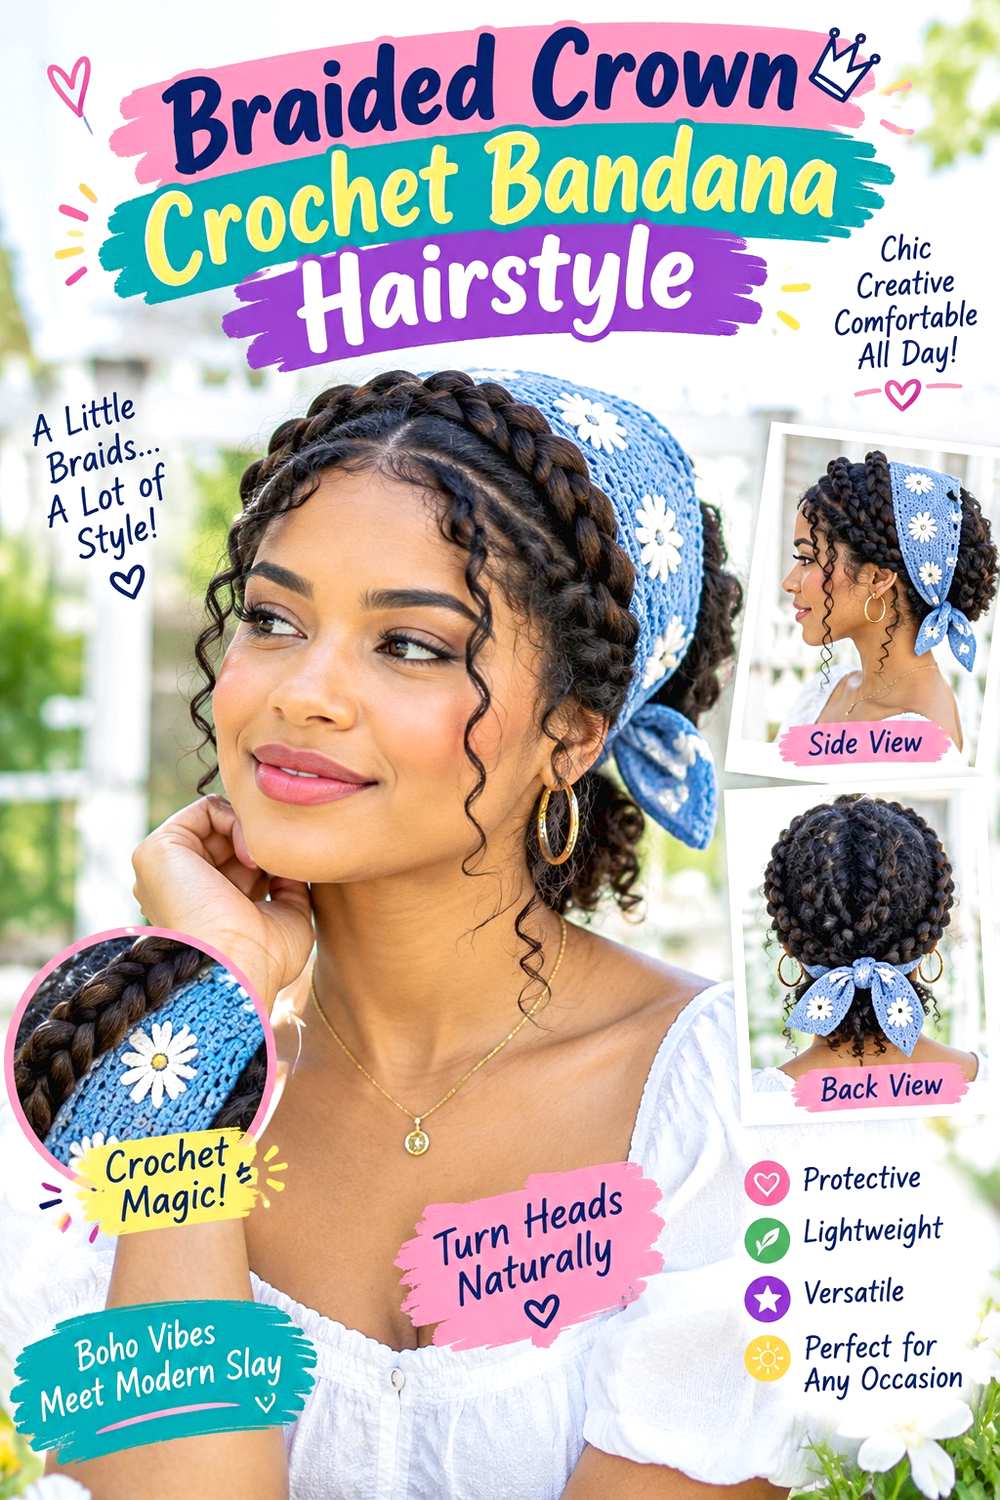
A braided crown creates texture around the sides while the crochet bandana covers or frames the top, producing a layered effect without leaving much loose length. Build one or two braids around the head and keep them low enough that their edges remain visible beneath the crochet piece. A few narrow temple sections can stay free for softer framing, while the rest of the outline remains secure. Medium to long hair is easiest to wrap, though the exact braid route depends on usable length.
Apply texturizing spray for grip, secure the braid ends with small clear elastics, and use bobby pins to anchor the wrapped sections without excessive tension. A full style takes longer because braid placement must be balanced before the bandana goes on. A quick refresh may involve replacing a visible pin or smoothing one loose section rather than dismantling the crown.
For professional styling, specify the braid width and whether you want the braided edge visible in front of, below, or partly under the crochet bandana. If the crown begins to loosen, reinforce the braid anchor rather than tightening the accessory. Maintenance focuses on comfortable pin placement and keeping the woven sections neat enough to remain distinct beside the open crochet texture. Remove and rebuild the braid if tension becomes uneven.
Pro tip:
Finish anchoring the entire braided crown before positioning the bandana, then adjust the crochet edge so it reveals a consistent strip of braid on both sides.
Make It Work for You:
If your hair is shorter, create two smaller side braids that meet near the back instead of forcing one continuous wrap; the crown effect remains recognizable.
Watch Out For:
Do not hide an uneven braid by pulling the bandana lower on one side. Correct the braid placement first so the accessory can sit level and comfortably.
Claw Clip Crochet Bandana Hairstyle

A claw clip twist keeps the back compact while the crochet bandana provides most of the detail at the crown. Gather the hair low, twist it upward, and secure the center with the clip so some ends can fan out above it or tuck neatly inward. The front can remain center-parted, swept back, or softly framed with short pieces. Medium and long hair work well, but the clip size should match the amount of hair being held rather than relying on extra pressure.
Use a sturdy claw clip as the main anchor, lightweight texturizing spray for grip on slippery hair, and a small amount of smoothing cream only on visible frizz. A complete style is usually quick once the hair is dry, and a refresh can be even shorter because the twist can simply be rebuilt if it loosens. Dense or very long hair may require more deliberate section placement.
For professional styling, explain whether you want the twist vertical or slightly angled and how much of the clip should remain visible beneath the bandana. Keep the accessory and clip from overlapping directly, since that can create pressure and instability. Maintenance involves rebuilding the twist when it sags rather than forcing the clip tighter, then resetting the bandana so both pieces stay independent.
Pro tip:
Leave a small gap between the back edge of the bandana and the top of the claw clip so neither accessory pushes the other out of position.
Make It Work for You:
For very thick or long hair, twist only until the length folds comfortably into the clip, then let a controlled section of ends remain visible above it.
Watch Out For:
A clip that pops open repeatedly is usually carrying too much hair. Reduce the gathered amount or use a more suitable base rather than forcing closure.
Conclusion
Crochet bandana hairstyle ideas can range from loose waves and natural curls to tightly organized braids, puffs, ponytails, and pinned updos. Long hair offers more options for wrapping and gathering, while bobs and short curls make the crochet texture more prominent. Density affects how much bulk fits comfortably beneath the bandana, and parting or face-framing pieces change how open the front appears. Straight finishes may need occasional smoothing, while curls usually benefit from preserving their natural grouping and volume. Choose between loose movement and a secured base according to your routine, then position the bandana where it stays stable without pressure. The most practical choice is one that works with your natural texture, preferred finish, and realistic styling effort.
Before Your Salon Visit
Choose one or two favorite references and save views that clearly show the crochet bandana placement as well as the hairstyle underneath. Discuss your natural texture, density, face shape, preferred length, upkeep, and usual styling routine. Point out the exact parting, front pieces, crown volume, braid width, ponytail height, curl finish, or accessory position you want. Because these are temporary styles, focus on comfortable anchoring and practical styling rather than assuming a new haircut is necessary.
FAQs
How Can I Keep a Crochet Bandana From Slipping?
Start with placement rather than extra tightness. Very smooth roots may benefit from a little texture in the base hairstyle, while curls often provide natural grip. Position the bandana where it feels stable and reset it if it moves. Avoid tightening it until the temples or ears become uncomfortable.
Can I Wear a Crochet Bandana With Curly or Coily Hair?
Yes. Crochet bandanas can work with loose curls, short coils, puffs, braids, and updos without straightening the hair first. Leave enough room for the natural volume and shrinkage, especially around the crown. If the bandana compresses curl groups, move it slightly rather than stretching the hair underneath.
Do Crochet Bandana Styles Require Heat Styling?
No. Braids, puffs, buns, claw-clip twists, natural curls, and air-dried texture can all support a crochet bandana without heat. Heat is only relevant when you specifically want straight hair or shaped waves. When you do use hot tools, include heat protectant and avoid unnecessary repeat passes.
How Should I Choose the Right Crochet Bandana Placement?
Decide first how much hairline, parting, and crown volume you want visible. Moving the bandana forward creates more coverage, while placing it farther back exposes more of the front hairstyle. Check the fit around your ears and temples, and make sure the accessory does not interfere with clips, braids, or updo anchors.