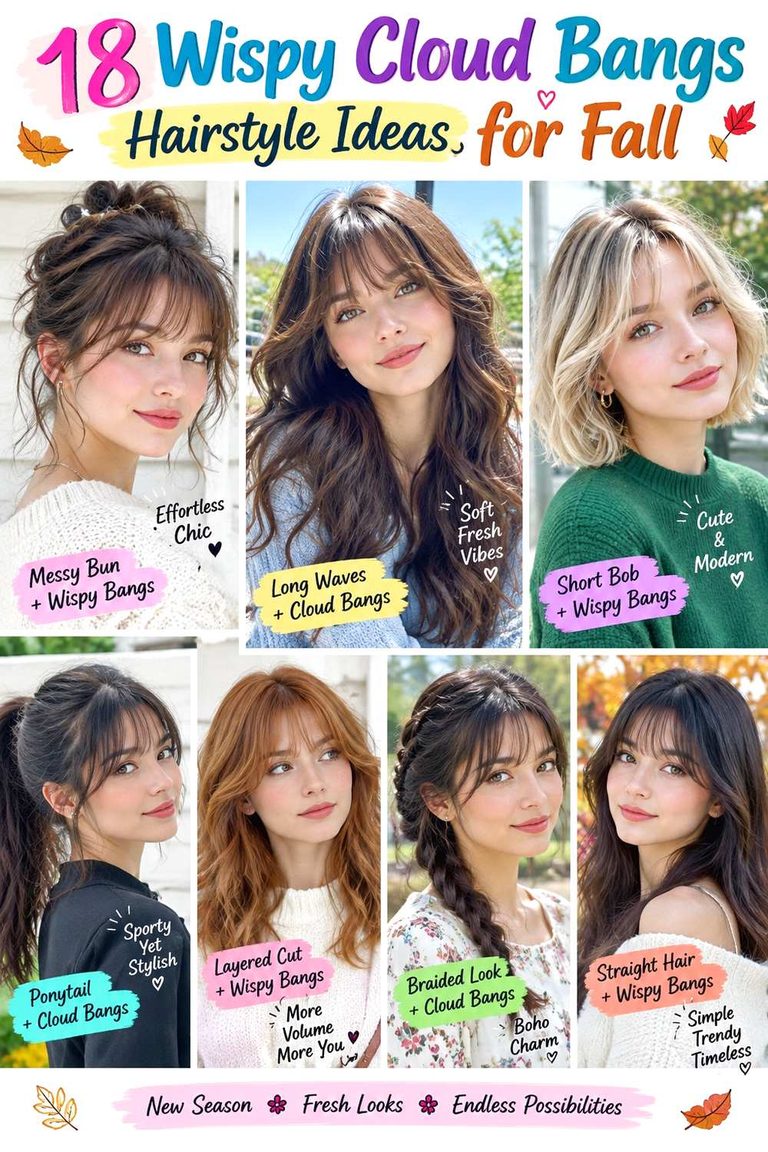
16 Two Fluffy Ponytail Hairstyles

Two fluffy ponytail hairstyles are built around two separate ponytails with visible fullness rather than tight, flat lengths. The defining shape can sit high, low, or through the middle of the head, but both sides should look balanced in placement and weight. Length from around the shoulders downward gives more room for a soft, expanded tail, while shorter hair may need smaller sections or extra pins. Face-framing pieces, a center or side part, and subtle layers can change the outline without changing the twin-tail idea.
Straight, wavy, curly, and coily textures can all work, although the route to volume will differ. Naturally textured hair may already provide the airy movement, while straighter hair often needs bending, root lift, or gentle backcombing. Density also matters: sparse ends usually look better with restrained teasing and fuller tips, while dense hair may need cleaner sectioning so the ponytails do not spread too wide. Front pieces can start near the cheekbones, jaw, or chin depending on the preferred framing.
A quick refresh may only involve re-fluffing the tails and smoothing the part, while a complete wash-day style can take longer because both sides need shaping and secure anchoring. Maintenance is mostly about keeping the elastics comfortable, controlling frizz, and restoring volume without rough handling.
Quick List
- High Fluffy Twin Ponytail Hairstyle
- Low Fluffy Twin Ponytail Hairstyle
- Mid-Height Fluffy Twin Ponytail Hairstyle
- Curly Fluffy Twin Ponytail Hairstyle
- Wavy Fluffy Twin Ponytail Hairstyle
- Coily Fluffy Twin Ponytail Hairstyle
- Bubble Fluffy Twin Ponytail Hairstyle
- Braided-Base Fluffy Twin Ponytail Hairstyle
- Center-Part Fluffy Twin Ponytail Hairstyle
- Side-Part Fluffy Twin Ponytail Hairstyle
- Face-Framing Fluffy Twin Ponytail Hairstyle
- Sleek-Root Fluffy Twin Ponytail Hairstyle
- Ribbon-Tied Fluffy Twin Ponytail Hairstyle
- Scrunchie Fluffy Twin Ponytail Hairstyle
- Twisted-Base Fluffy Twin Ponytail Hairstyle
- Long-Layered Fluffy Twin Ponytail Hairstyle
High Fluffy Twin Ponytail Hairstyle
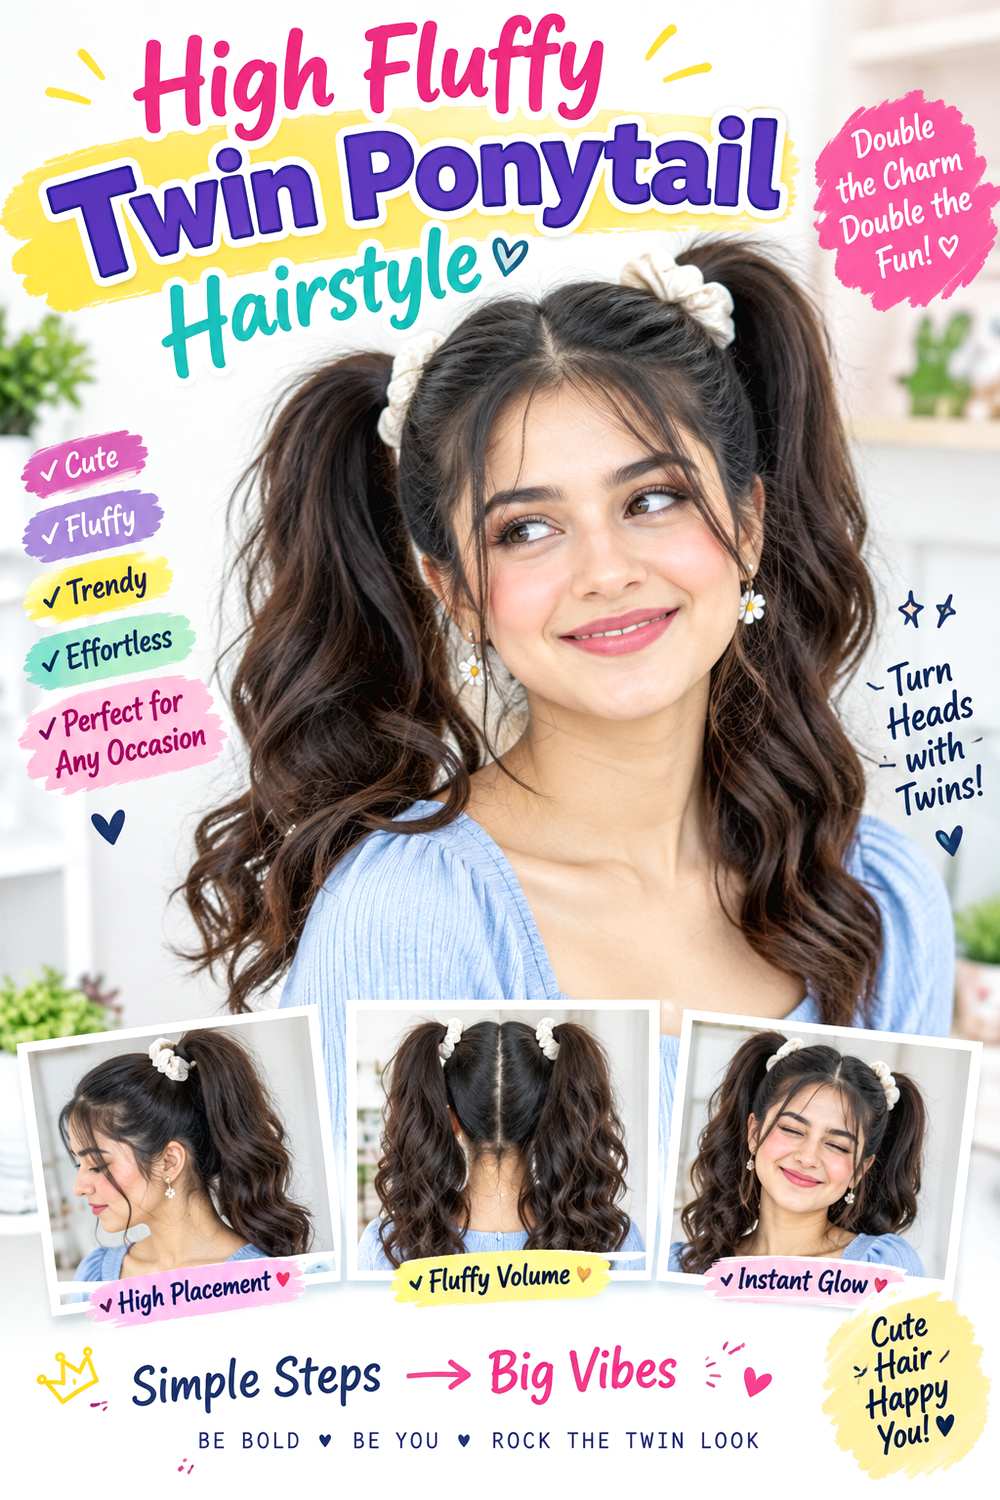
The two anchors sit high above the ears, so the tails fan outward and create lift near the crown. A clean center part keeps the placement symmetrical, while softly separated front pieces prevent the hairline from looking overly rigid. Long lengths show the swing best, but shoulder-length hair can still create a compact version. Keep the ends lightly bent rather than tightly curled so the fullness reads as fluffy instead of ringlet-heavy.
This works especially well for straight or wavy hair that can hold a soft bend, and dense hair can support the high placement without much teasing. Use a volumizing mousse through damp roots for support, two fabric-covered elastics for comfortable anchoring, and a heat protectant before any blow-drying or heat shaping. A full wash-day style takes longer because both tails need equal lift; between washes, a short refresh can mean loosening the crown with fingertips and reshaping only the ends. If a stylist is creating the look, show exactly how high you want each base to sit relative to the top of the ear. Recheck tension once the hair settles, and reset an elastic if one side starts pulling more than the other.
Pro tip: After tying both sides, gently lift a small section directly above each elastic with your fingertips. This adds height at the base without rough teasing through the lengths.
Make It Work for You: If your hair is shorter, place the anchors slightly lower and keep the tails compact. You still get the fluffy twin shape, but fewer short pieces will escape around the nape.
Watch Out For: Do not tighten high ponytails until the scalp feels sore. If the bases pull at the temples, lower them slightly and rebuild the volume from the tails instead.
Low Fluffy Twin Ponytail Hairstyle

Low placement changes the mood by keeping both ponytails near the nape, with fullness concentrated through the lengths instead of the crown. A middle part gives a neat split, and long face-framing pieces can skim the jaw or collarbone without competing with the tails. Loose S-shaped bends make the ponytails look airy, while straighter tips keep the finish relaxed. The outline is especially useful for medium to long hair because there is enough length below the elastics to show movement.
Wavy, curly, or lightly textured hair can reach this shape with minimal manipulation, while very straight hair may need a little added bend. A light texturizing spray can give the tails grip, fabric-covered elastics secure the low bases, and a wide-tooth comb can separate the lengths without flattening them. A quick refresh usually means fluffing the underside and smoothing the part; a full wash-day version takes longer if the texture must be set first. If a stylist is doing the style, specify whether the anchors should sit directly behind the ears or closer to the center of the nape, since that changes how wide the tails appear. Replace stretched elastics as needed rather than tightening the same loose ones repeatedly.
Pro tip: Fluff the underside of each tail first, then touch the top surface last. Volume underneath supports the shape while the visible layer stays smoother and less frizzy.
Make It Work for You: For lower-density hair, keep the bends broad and avoid separating the ends too much. A fuller outer edge will usually read denser than heavily teased, wispy tips.
Watch Out For: Do not place the elastics too close to the center of the nape if you want visible width. Shift them outward slightly so each tail has room to fall.
Mid-Height Fluffy Twin Ponytail Hairstyle

Mid-height anchors sit around the widest part of the back of the head, giving more bounce than low ponytails without the strong upward flare of high ones. The part can stay centered from forehead to crown, and a few shorter pieces around the temples soften the division. Broad bends through the mid-lengths add body, while the ends remain loose and slightly uneven for natural movement. This position is practical on medium or long hair because it keeps the tails off the neck without pulling them sharply upward.
The shape suits many textures, especially hair that already has a loose wave or curl. Apply lightweight mousse to support expansion, use snag-free elastics to keep both bases stable, and work with a paddle brush only where a smoother top is wanted. A morning refresh can be brief: shake out the tails and reposition any flattened sections. Starting from wet hair takes longer because the whole texture must dry before anchoring. If a stylist is setting the look, point to the exact horizontal line where you want both ponytail bases; even a small height difference can make the silhouette feel lopsided. Loosen and reset rather than pulling one elastic tighter if the placement drifts during wear.
Pro tip: Check the bases from the back before fluffing the tails. Matching anchor height first saves you from overworking one side later in an attempt to fake balance.
Make It Work for You: If dense hair feels too wide at this level, keep the roots controlled and concentrate expansion below the elastics. The twin-tail shape stays full without spreading around the crown.
Watch Out For: Avoid pulling one ponytail forward and the other straight down. Different fall directions can make equal bases look uneven, so guide both tails at the same angle.
Curly Fluffy Twin Ponytail Hairstyle

Defined curls give twin ponytails fullness through their entire length, so the goal is to preserve curl groups rather than brush them into a cloud. Place the anchors high or mid-height, split the hair with a clear center part, and leave a few curls free around the temples if you want softer framing. The tails should expand naturally from the bases, with springy ends and visible separation instead of a compact, slick bundle. Finished length depends on shrinkage, so judge the ponytails after the curls are dry.
Curly hair is the obvious starting point, but density determines how much each side can be fluffed without losing definition. Use a lightweight leave-in conditioner for slip, curl gel for flexible grouping, and a diffuser to dry while maintaining shape. A refresh between washes can focus on a few stretched or frizzy curls, whereas full wash-day styling takes longer because both sides need to dry completely. If a stylist is arranging the look, specify how much shrinkage you want accounted for and where the ponytail bases should sit once dry. Avoid repeatedly separating every curl for extra size; that can create frizz and weaken the shape. Re-form only the sections that have lost definition.
Pro tip: Refresh only the curls that look stretched at the outer edge of each tail. Preserving intact curl groups keeps definition while still letting the overall shape stay fluffy.
Make It Work for You: If your curls shrink strongly, choose slightly lower anchors and judge the final silhouette after drying. The twin ponytails stay visible without forcing the coils into extra stretch.
Watch Out For: Do not brush dry curls just to increase size if you want definition. Separate selected curl groups instead, then stop once the ponytails have the fullness you need.
Wavy Fluffy Twin Ponytail Hairstyle
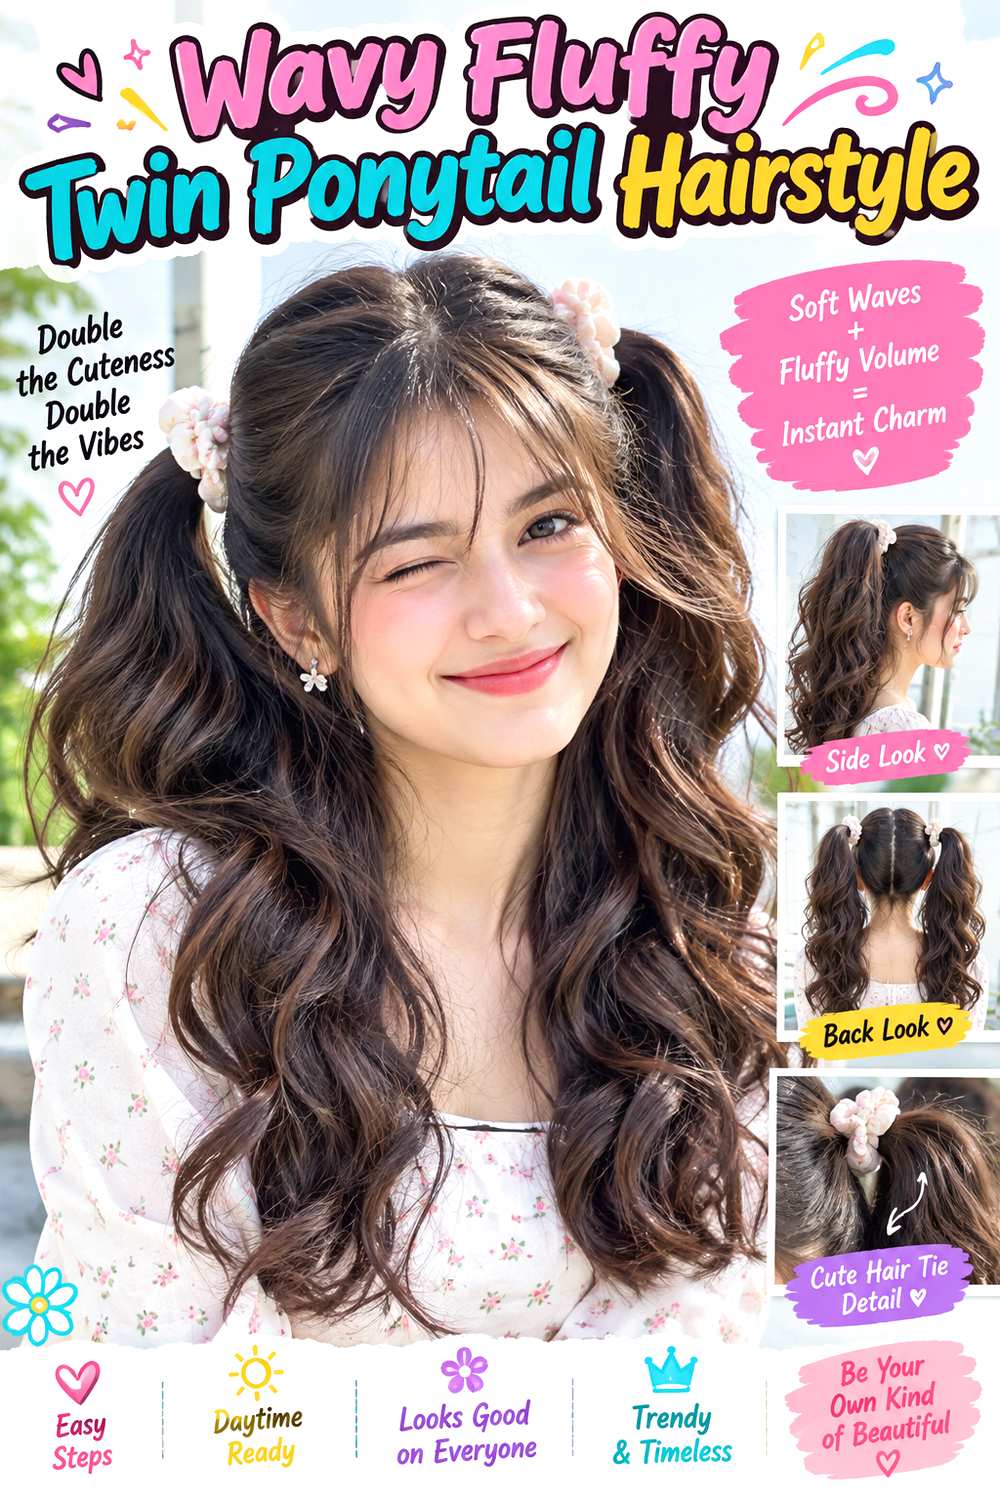
Loose waves make the two ponytails look full without relying on tight curls or heavy teasing. Set the anchors at mid-height, keep the roots relatively smooth, and let broad bends begin below the cheekbones so the tails expand gradually. A soft center part keeps the shape balanced, while longer front pieces can curve away from the face. The ends should stay flexible and slightly separated, which gives movement instead of a dense, curled block.
This option suits straight-to-wavy hair that holds a bend and readers who prefer a polished finish with moderate effort. Use heat protectant before shaping, a large-barrel curling iron to create wide sections, and flexible hairspray to keep the bends from collapsing into straight lengths. A full wash-day set takes longer because each side needs consistent waves; the next-day refresh can be limited to two or three flattened pieces. If a stylist is creating the look, explain where you want the first visible bend to start, because waves beginning too high can make the sides feel wider than intended. Let the shaped sections cool before fluffing them, and avoid brushing repeatedly once the ponytails are tied or the wave pattern may lose definition.
Pro tip: Shape the two front-most tail sections away from the face before tying. Their direction helps the whole ponytail pair look open rather than collapsing inward toward the neck.
Make It Work for You: For naturally wavy hair, skip reshaping sections that already bend well and focus only on flatter pieces. You preserve texture variation while reducing unnecessary heat and styling time.
Watch Out For: Avoid curling every section in the same tight pattern. The result can look rigid, so mix broad bends and softer ends to keep the ponytails airy and mobile.
Coily Fluffy Twin Ponytail Hairstyle

Coily texture can create generous twin ponytails with a rounded, springy outline and plenty of visible movement. A center part gives clear separation, while mid-height anchors allow the coils to expand upward and outward without sitting directly on the neck. Leave a few small coils at the temples only if they release comfortably; the main tails should stay soft and full, with the ends following their natural shrinkage rather than being stretched to match an imagined length.
This design works best when the styling respects the existing coil pattern and avoids unnecessary tension. Use a moisturizing leave-in conditioner to support pliability, a soft hold gel to gather the roots without making them rigid, and fabric-covered elastics to secure each side. A quick refresh may involve reactivating only the outer coils and smoothing loose roots, while wash-day styling takes longer because drying and shrinkage need to settle before final placement. If a stylist is creating the style, ask them to judge the finished tail length and anchor position on dry or fully set hair rather than relying only on stretched length. Check the hairline and nape for pulling; if either area feels tight, loosen the base instead of forcing a cleaner finish.
Pro tip: After the bases are secure, lift coils from underneath rather than pulling the ends outward. This supports fullness close to the anchors while protecting the visible curl pattern.
Make It Work for You: For very dense coils, make each ponytail slightly smaller by moving the parting line outward. The silhouette remains balanced while reducing bulk and tension at each base.
Watch Out For: Do not keep tightening the elastics when the roots begin to loosen. Reset the section instead; repeated tightening can increase discomfort without actually improving the finished shape.
Bubble Fluffy Twin Ponytail Hairstyle
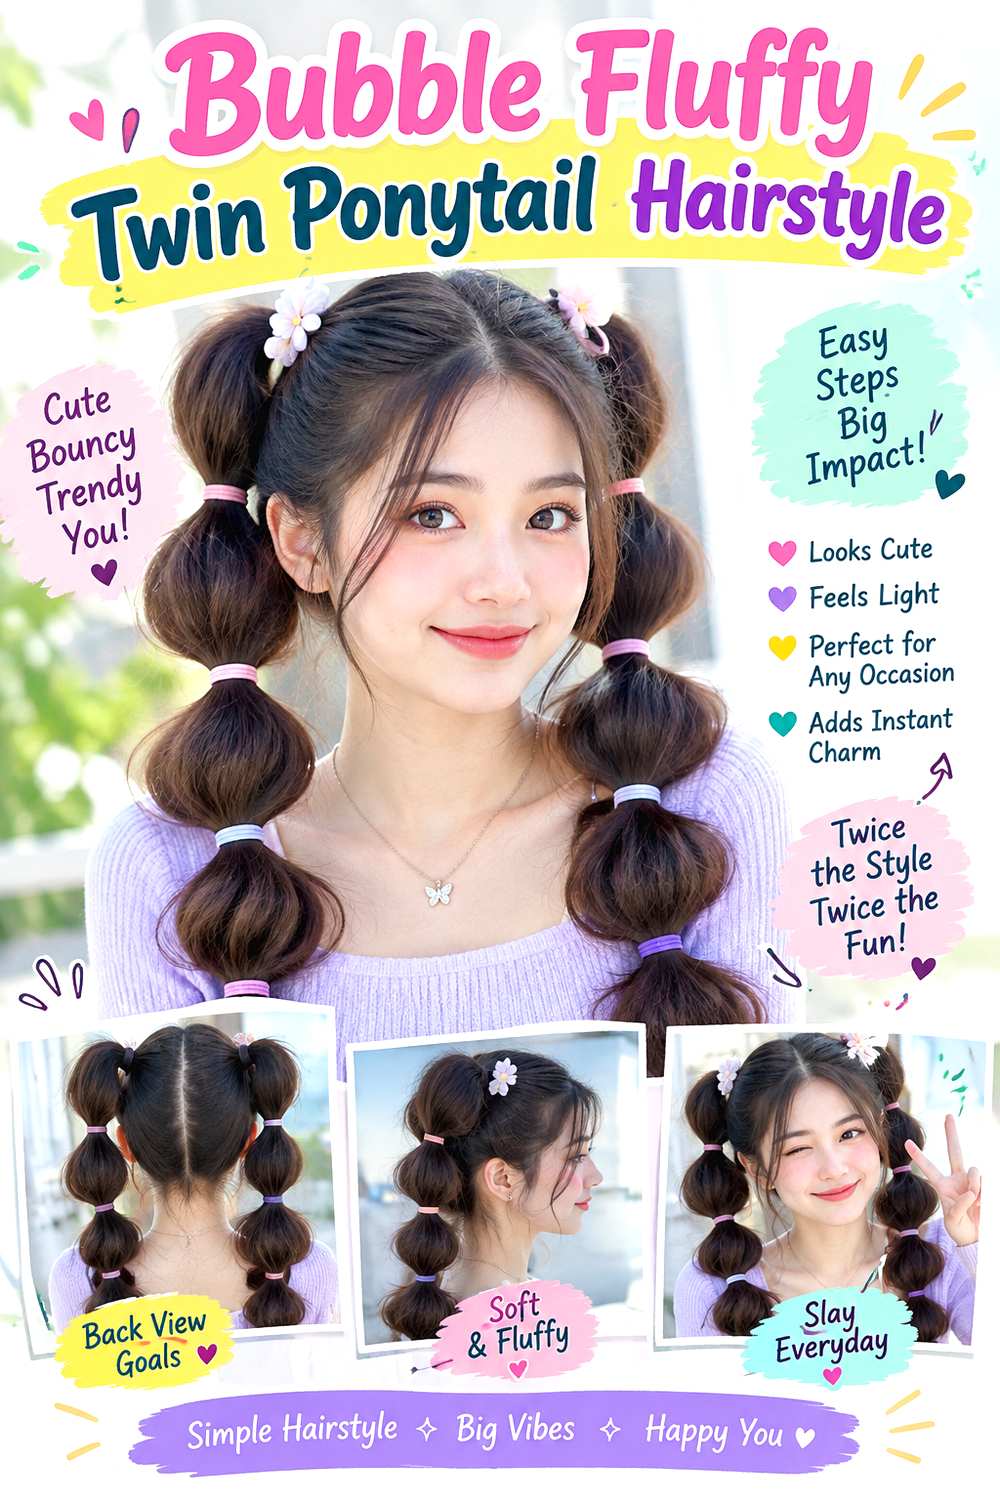
Bubble sections turn two fluffy ponytails into a more structured design while keeping the overall shape soft. Start with two mid- or high-set ponytails, then add evenly spaced ties down each tail and gently expand the hair between them. The first bubble can be the fullest, with the sections becoming slightly smaller toward the ends for a balanced taper. A clean part and smooth roots contrast nicely with the rounded lengths, and a few face-framing pieces can keep the front from feeling severe.
Medium to long hair gives enough space for several bubbles, while dense hair usually creates the roundest sections with less pulling. Use snag-free mini elastics to divide each tail, a light texturizing spray for grip, and a tail comb for clean sectioning at the roots. Creating every bubble from scratch is a longer styling session; a refresh is quicker if you only re-expand flattened sections and replace a loose tie. If a stylist is doing the look, specify bubble spacing and the width you want at the fullest point so both sides match. Do not pull only the outer surface when expanding; loosen small sections around each bubble evenly or the shape can tilt and expose the elastics.
Pro tip: Expand each bubble from several points around its circumference, not just the sides. Working evenly keeps the rounded sections centered and helps both ponytails match from every angle.
Make It Work for You: For shorter hair, use fewer, wider bubbles rather than many tiny sections. The defining segmented shape remains clear, and the ends are less likely to poke out awkwardly.
Watch Out For: Do not space the ties by guesswork on one side at a time. Compare both tails after each new section so the bubbles stay level and visually balanced.
Braided-Base Fluffy Twin Ponytail Hairstyle
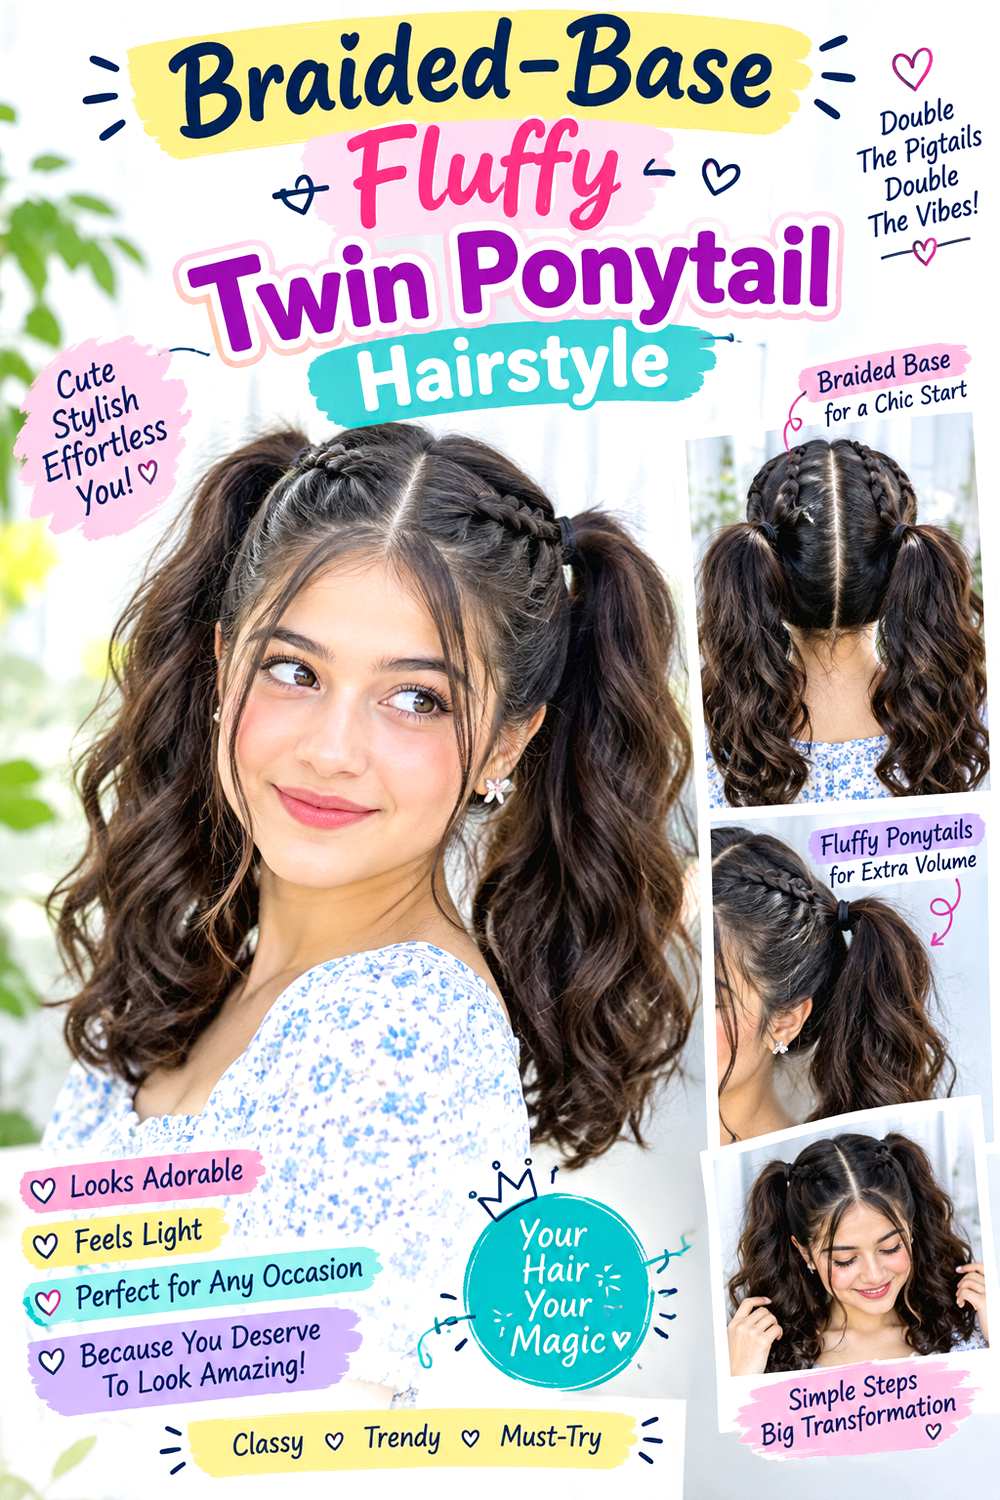
A short braid at each base adds structure before the hair opens into two fluffy ponytails. The braids can start just behind the ears or slightly higher, then stop after a few crossings so most of the length remains loose. A centered part keeps the pair balanced, while the open tails can carry soft waves, curls, or natural texture. The contrast between a neat braided section and expanded lengths makes the style look intentional without turning it into full twin braids.
This approach is useful for hair that tends to slip from ordinary ponytail bases, especially straight or softly wavy textures with enough length to braid comfortably. Use a light texturizing spray to add grip, small snag-free elastics to secure the braid transitions, and flexible hairspray to control flyaways without freezing the tails. The full setup takes longer than standard ponytails because both braids should match, but a next-day refresh can focus on re-fluffing the loose lengths. If a stylist is arranging it, show how wide you want each braided base and where it should end before the fluffy section begins. Keep the tension comfortable around the temples; a tighter braid is not automatically more secure and may make the style unpleasant to wear.
Pro tip: Stop each braid at the same landmark, such as just behind the ear, before opening into the tail. Matching transition points make the fluffy lengths feel intentionally paired.
Make It Work for You: If your hair is slippery, keep the braided section a little wider and flatter. More contact with the head can improve stability without making the braid uncomfortably tight.
Watch Out For: Avoid braiding too far down the lengths, or the fluffy section becomes too short to balance the structured base. End earlier and let most of the hair stay loose.
Center-Part Fluffy Twin Ponytail Hairstyle
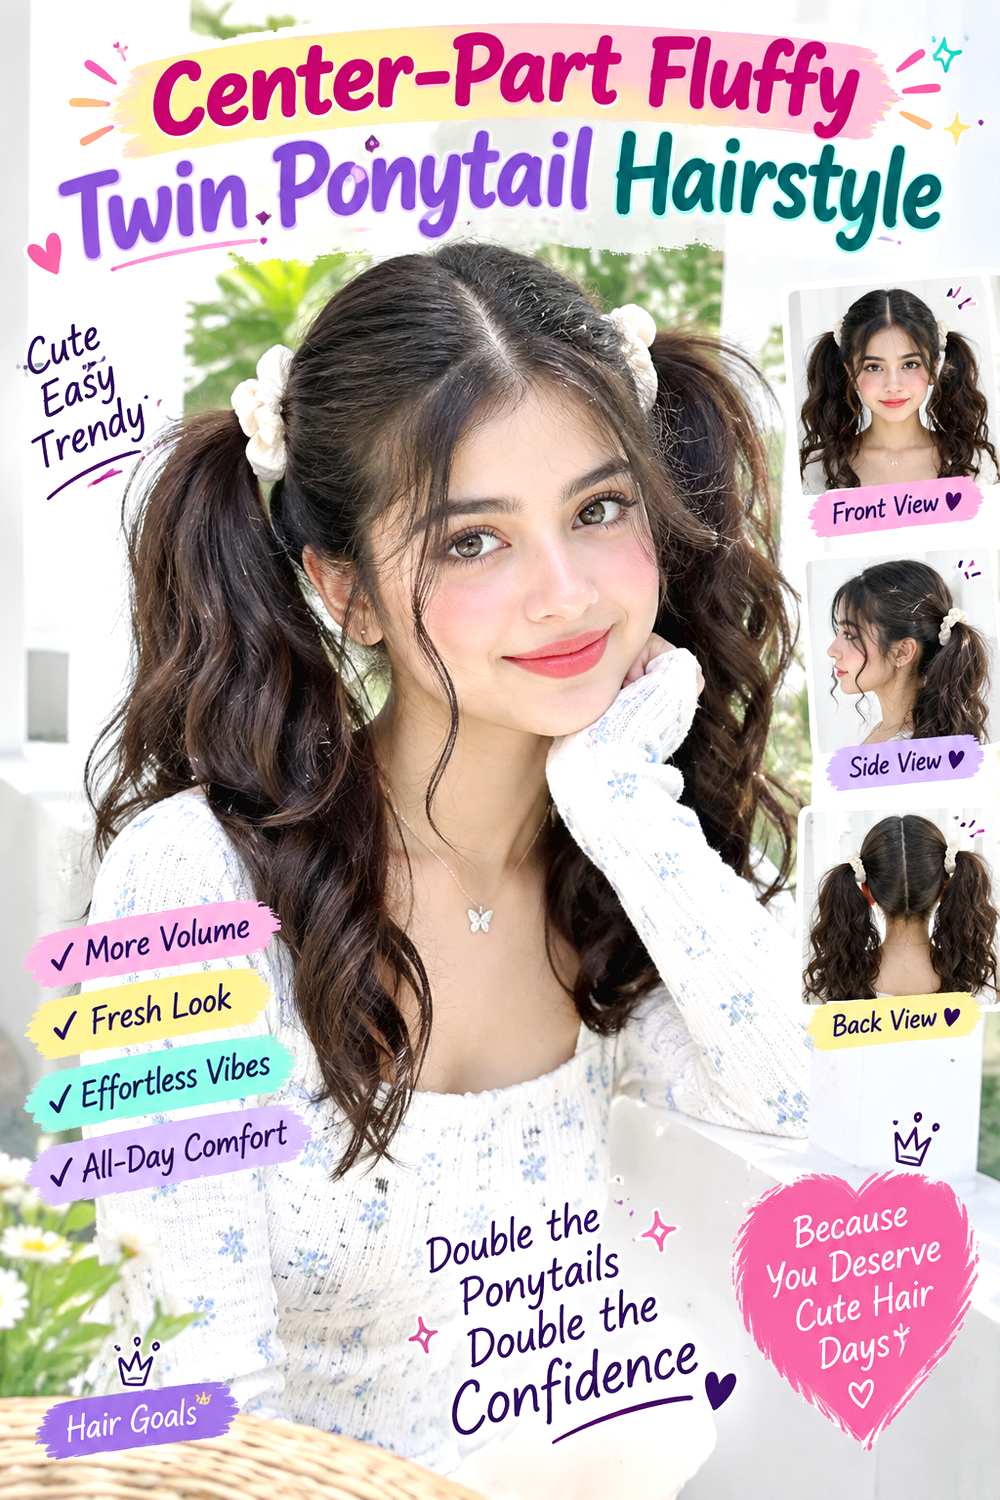
A precise center part makes the symmetry of two fluffy ponytails the main feature. Keep the roots smooth close to the part, then let each tail expand from mid-height anchors into loose, airy lengths. Soft bends through the middle and slightly straighter ends stop the shape from becoming too round. Face-framing pieces can be left out evenly on both sides, but they should connect visually with the rest of the style rather than look like isolated strands.
Straight, wavy, and curly hair can all work with this layout; the main requirement is enough control at the part to keep the split clear. Use a tail comb to draw the center line, lightweight mousse to support the tails, and fabric-covered elastics to hold the bases without sharp creasing. A quick refresh involves redefining the part and lifting flattened sections with your fingers, while a complete wash-day style may include drying and reshaping the full lengths. If a stylist is creating the look, point out whether you want the part to continue all the way to the nape or soften toward the back. Do not chase perfect symmetry by repeatedly retightening one side; reset both anchors if the balance is clearly off.
Pro tip: Create the center line before gathering either side, then leave it alone while you tie. Repeatedly redrawing the part can disturb the roots and create unnecessary flyaways.
Make It Work for You: If your natural part sits slightly off center, follow it through the front and straighten only the back division. You keep comfortable root direction while preserving balanced twin tails.
Watch Out For: Do not flatten both sides heavily just to make the part look sharper. Keep a little root lift away from the line so the ponytails do not appear pasted down.
Side-Part Fluffy Twin Ponytail Hairstyle
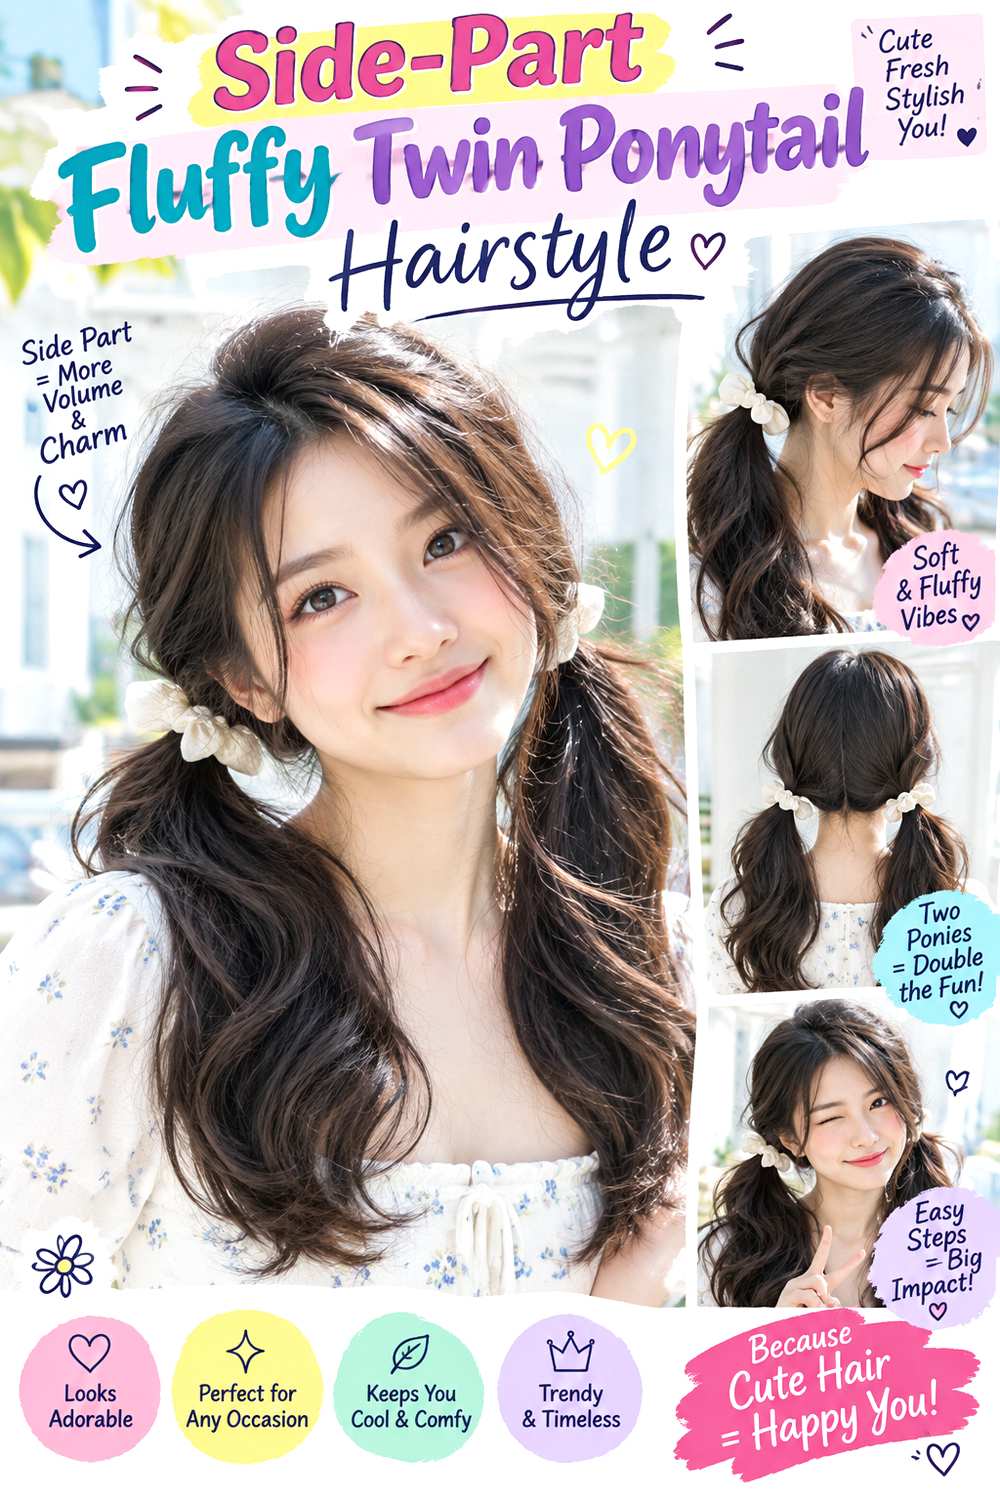
A side part gives two fluffy ponytails an intentionally uneven front while keeping the back anchors balanced. Sweep the fuller front section across the forehead, then place both ponytails at the same mid or low height so the silhouette still feels stable. Loose waves or curls through the tails add width below the ears, and the ends can remain soft rather than sharply finished. A longer front piece on the heavier side can blend into the ponytail instead of hanging separately.
This variation suits readers who prefer asymmetry around the face or whose natural growth direction makes a center part difficult to maintain. Use a tail comb to define the side part, a light texturizing spray to help the roots stay in place, and snag-free elastics for the twin bases. A short refresh usually means restoring the front sweep and refluffing the tails; full styling takes longer if the waves need to be recreated. If a stylist is setting the look, show exactly how deep you want the part and where the heavier section should join the ponytail. Avoid placing one anchor higher simply to follow the part, because that can make the back look unintentionally crooked rather than purposefully asymmetrical.
Pro tip: Direct the heavier front section toward its ponytail before securing the base. This prevents the sweep from ballooning separately and keeps the asymmetry controlled rather than accidental.
Make It Work for You: For curls or coils, let the side part follow the natural grouping at the front instead of forcing a razor-straight line. The ponytail pair can stay balanced without disrupting definition.
Watch Out For: Avoid making the part so deep that one ponytail loses too much hair. Shift the line back slightly if one tail looks noticeably smaller or harder to secure.
Face-Framing Fluffy Twin Ponytail Hairstyle
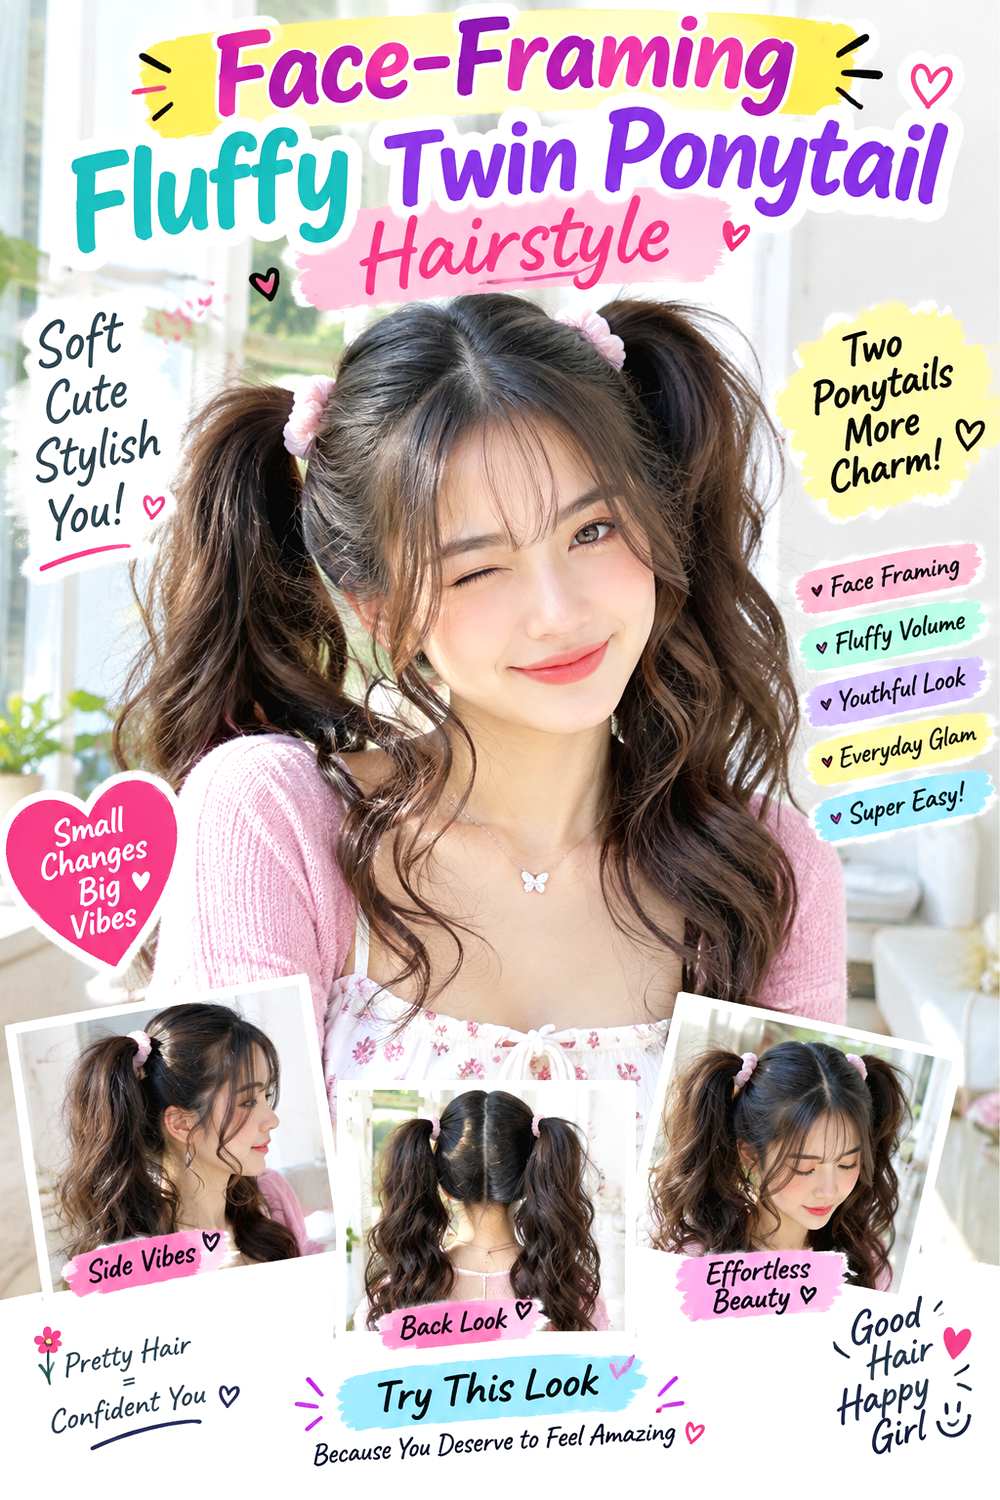
Long face-framing sections make the front of the style as important as the two fluffy tails. Keep both ponytails at mid-height, then leave out pieces that begin around the cheekbones or jaw and taper into the longer hair. The tails can carry broad waves with plenty of movement, while the front pieces curve away from the face rather than hanging straight down. A center or slightly off-center part works, provided the framing feels balanced with the anchor placement.
This option is useful for medium to long hair when you want softness around the front without lowering the ponytails. Use heat protectant before shaping, a round brush to bend the front sections, and flexible hairspray to keep them moving instead of stiff. Full wash-day styling can take longer because the front and tails need separate attention, while a quick refresh may only require reshaping the two framing pieces. If a stylist is creating or cutting the front, point to the exact finished landmark you like—cheekbone, jaw, or chin—rather than asking vaguely for layers. Preserve enough length for those pieces to reach the ponytail when desired. If they keep falling forward during wear, tuck or pin them temporarily instead of cutting them shorter on impulse.
Pro tip: Shape the face-framing pieces after the ponytails are tied. You can then see the final anchor height and choose a bend that connects naturally with the overall silhouette.
Make It Work for You: If you prefer fewer loose pieces, keep only one narrow section near each temple and tuck the rest into the tails. The framing remains visible without constant hair around your face.
Watch Out For: Do not pull out large random sections after tying; that can expose the base and weaken the ponytails. Decide the framing pieces before anchoring, then refine only their finish.
Sleek-Root Fluffy Twin Ponytail Hairstyle
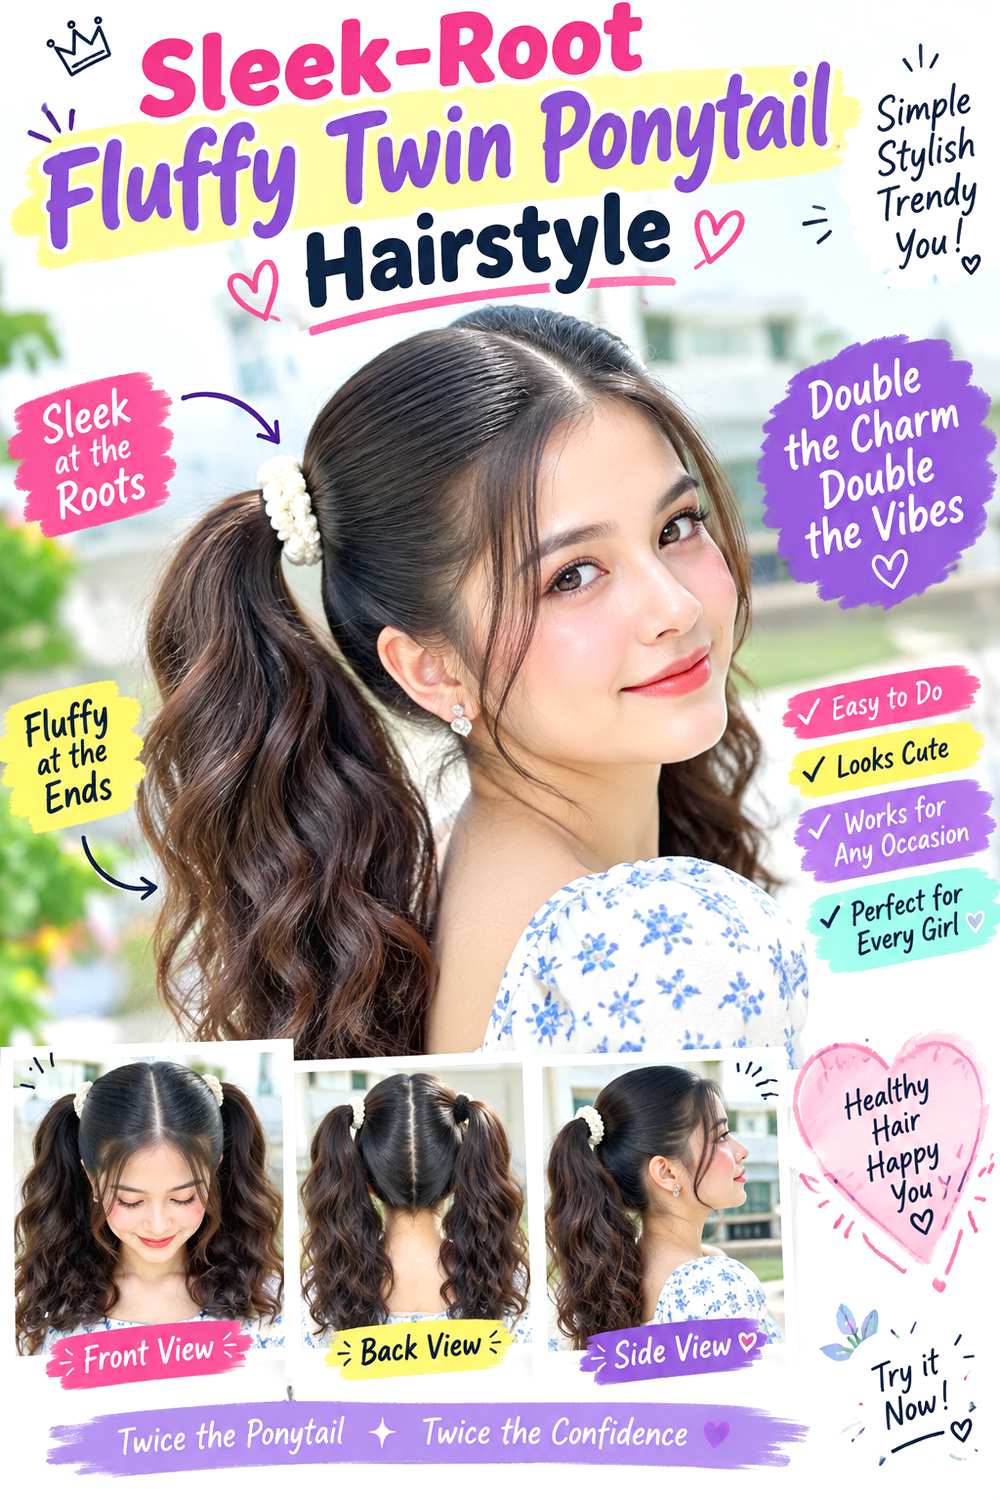
Smooth roots paired with expanded tails create a clear contrast between control and volume. Divide the hair with a center part, keep the surface close to the head through the crown, and place both anchors around mid-height. From each elastic, the lengths should open into fluffy waves or curls with soft ends and visible separation. The polished top makes the ponytail volume look more deliberate, especially when the tails start full immediately below the bases.
Dense, wavy, curly, or coily hair can support the contrast well, though finer or lower-density hair may need gentler smoothing so the roots do not look overly compressed. Use a soft hold gel to control the surface, a boar-style brush to guide the roots, and fabric-covered elastics for comfortable anchoring. A refresh between washes is usually brief if the roots stay neat; the full version takes longer when the tails need complete restyling. If a stylist is creating it, specify how flat you want the crown and how much fullness should remain near the temples, because “sleek” can mean different degrees of compression. Avoid adding more gel each time flyaways appear; lightly reactivate what is already there or the roots can become heavy and stiff.
Pro tip: Smooth the surface in the direction of each anchor rather than straight backward. Following the gathering path reduces ridges and helps both bases look cleaner with less repeated brushing.
Make It Work for You: If you have lower-density hair, keep the crown softly controlled instead of completely flat. A little root lift preserves balance between the polished top and the fluffy lengths.
Watch Out For: Do not overload the roots while chasing every flyaway. Product buildup can remove movement and make the contrast look heavy; accept a few soft hairs or lightly reset the surface.
Ribbon-Tied Fluffy Twin Ponytail Hairstyle

Ribbons make the two ponytail bases visible design points, so placement and scale matter as much as volume. Set the ponytails low or mid-height, keep the part clean, and tie a ribbon around each secured base after the hair is already anchored. Let the tails stay soft and full with loose waves, curls, or natural texture. Matching ribbon lengths create balance, while slightly longer tails can add movement without overwhelming the hair.
This works on many textures as long as the ribbons decorate a stable base rather than hold the entire style themselves. Use fabric-covered elastics to secure the ponytails, narrow grosgrain ribbons for a grippy tie, and a light texturizing spray if the hair is especially slippery. The complete style is moderate effort because both bows or knots need even placement; a refresh is usually limited to retying a loosened ribbon and refluffing the lengths. If a stylist is arranging it, specify whether the ribbon knot should face upward, outward, or sit directly over each elastic, since that changes what is visible from the front. Keep the ribbon comfortably snug and check that no hair is caught in the knot before tightening.
Pro tip: Tie the ribbons only after both ponytail bases feel secure and even. Rotating the decorative knot afterward is easier than using the ribbon itself to correct unstable placement.
Make It Work for You: For short or fine-looking tails, choose narrower ribbons with shorter ends. The accessory still frames each base, but it will not visually outweigh the fluffy hair beneath it.
Watch Out For: Do not knot ribbon around loose hair without an anchored base. It can slip or catch strands, so secure the ponytail first and let the ribbon remain decorative.
Scrunchie Fluffy Twin Ponytail Hairstyle
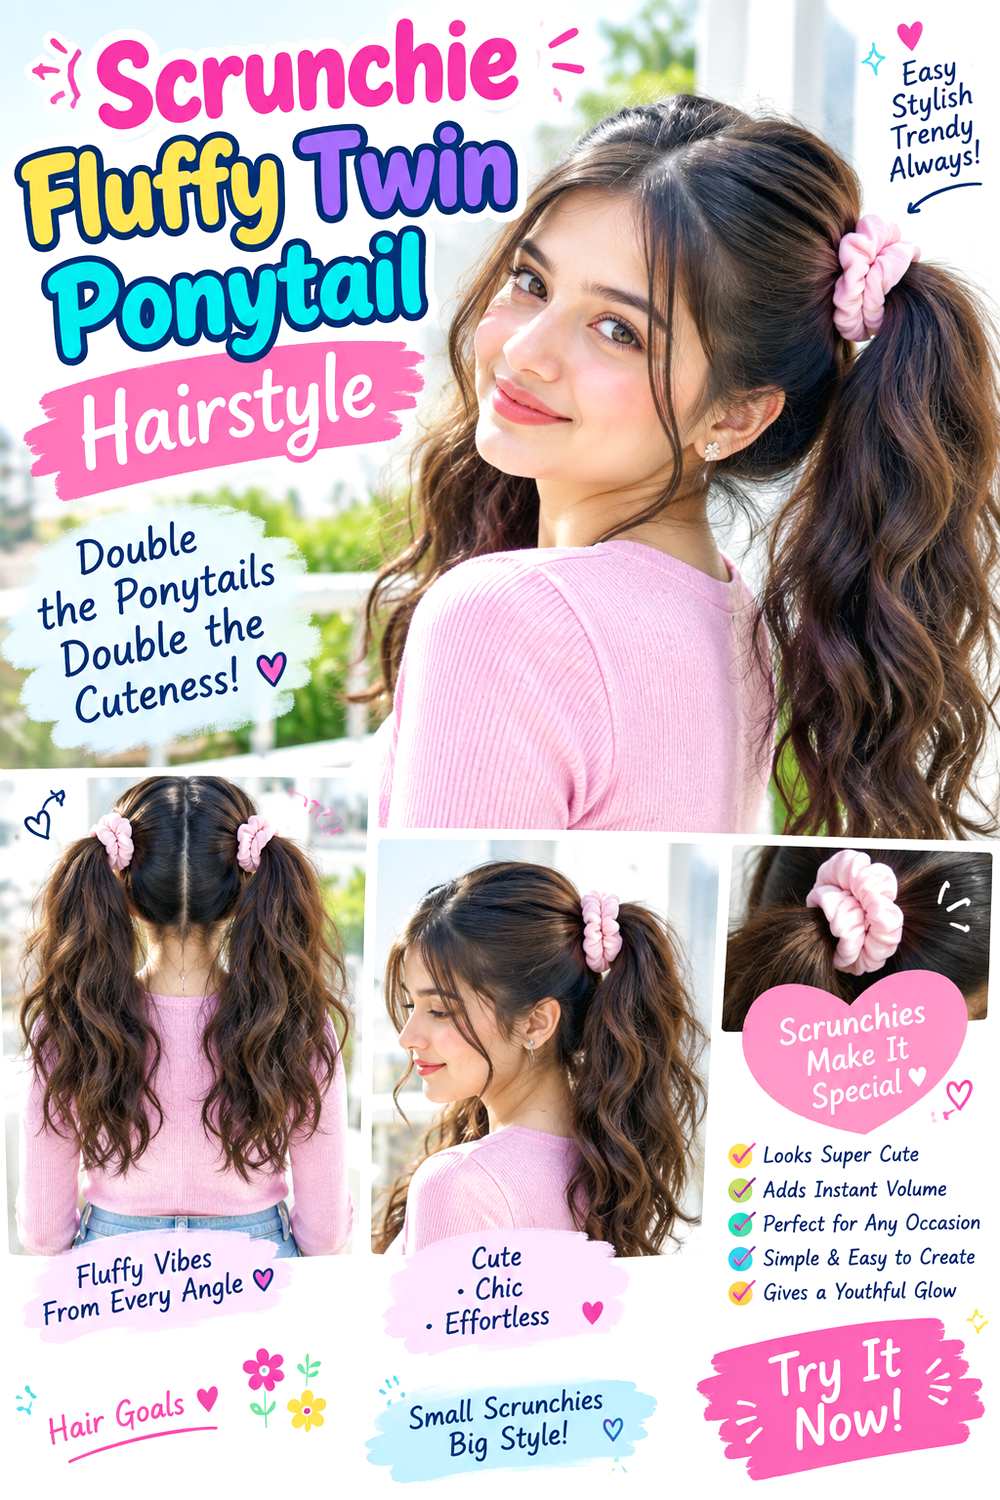
Soft scrunchies add visible volume at the bases of two fluffy ponytails and can make a simple placement feel more intentional. High or mid-height anchors work best when the scrunchies are similar in size, while the tails can spread into waves, curls, or naturally textured fullness. Keep the part clean and the roots only lightly smoothed so the accessory does not compete with an overly polished top. Slightly separated ends help the overall shape stay airy.
This variation is practical for everyday wear, especially when you want a softer anchor than a narrow elastic. Use two medium fabric scrunchies for the visible bases, a wide-tooth comb to separate the tails gently, and lightweight mousse if the lengths need more body. A short refresh can take only a few minutes because the scrunchies are easy to reposition; a full wash-day version takes longer if the hair must be dried or shaped first. If a stylist is creating it, show how much of each scrunchie you want visible around the base and whether the ponytails should sit above or behind the ears. Oversized accessories can swallow shorter or lower-density tails, so scale them down rather than teasing the hair excessively to compensate.
Pro tip: Rotate each scrunchie so its fullest fold sits slightly outward. That small adjustment makes the accessories visible from the front without forcing the ponytails farther apart.
Make It Work for You: If your hair is very dense, choose scrunchies that stretch comfortably without repeated wrapping. The goal is a stable base, not maximum compression around a large section of hair.
Watch Out For: Avoid using two noticeably different scrunchie sizes unless asymmetry is intentional. Unequal bulk at the bases can make balanced ponytails appear mismatched even when their placement is correct.
Twisted-Base Fluffy Twin Ponytail Hairstyle

A small twist leading into each ponytail gives the roots direction without turning the style into a braid. Take a front section on each side, twist it backward toward a mid-height anchor, and combine it with the remaining hair before securing the tail. The twists should stay visible along the sides, while the ponytails open into soft, fluffy lengths with loose bends and relaxed ends. A center part keeps the two details easy to compare and balance.
This option works well on straight, wavy, or curly hair with enough length around the temples to reach the anchors comfortably. Use light texturizing spray to give the twists grip, bobby pins to stabilize them before the ponytails are secured, and fabric-covered elastics for the final bases. Setting the twists from scratch adds time compared with plain twin tails, but a refresh can be quick if you only tuck one loosened section and restore volume. If a stylist is doing the style, specify how thick you want each twist and where it should disappear into the ponytail, because wide twists read softer while narrow ones look more defined. Keep the sections comfortably loose around the hairline; pulling harder can flatten the twist and create unnecessary tension.
Pro tip: Twist each side in the same direction relative to the face before anchoring it. Matching direction helps the root detail read as a pair instead of two unrelated sections.
Make It Work for You: For shorter front layers, make the twist closer to the hairline and stop earlier. You preserve the visible detail while reducing the number of ends that escape before the anchor.
Watch Out For: Do not twist so tightly that the section becomes a thin cord. A slightly relaxed twist shows more texture and is usually easier to blend into a fluffy ponytail.
Long-Layered Fluffy Twin Ponytail Hairstyle

Long layers can make two fluffy ponytails move in tiers, with shorter pieces lifting around the upper tail and longer lengths keeping the ends substantial. Place the anchors at mid-height so the layers fan naturally, and use a center or soft off-center part depending on how the front falls. Broad bends help the different lengths blend, while the bottom remains full enough that the ponytails do not taper into thin points. Face-framing layers can join the tails or stay loose for a softer outline.
This approach suits medium to long hair with existing layers, especially when the cut still carries weight through the perimeter. Use heat protectant before shaping, a large round brush to encourage broad movement, and lightweight mousse for support through the roots and upper lengths. A complete wash-day blow-dry takes longer than a simple tie-up, while a quick refresh can focus on the shortest layers that have flattened. If a stylist is cutting or styling the look, point to where you want the shortest ponytail-visible layer to begin and ask to preserve enough density at the ends. If the layers are over-shortened, the tails may look wispy instead of fluffy, so keep the movement concentrated above a fuller lower edge.
Pro tip: After tying, lift the shortest visible layers with your fingers and leave the longest ends mostly untouched. This puts volume where the tiers show without thinning the lower outline.
Make It Work for You: If your ends are sparse, keep the longest layer fuller and concentrate movement around the face and upper tail. The ponytails can still look layered without losing their base density.
Watch Out For: Avoid over-separating every layer for maximum fluff. Too much expansion can make shorter pieces stick out independently, so refine only the sections that need more visible movement.
Conclusion
Two fluffy ponytail hairstyles can range from high, bouncy pairs to low, relaxed tails, so placement should come before decoration. Dense hair may support more expansion, while lower-density lengths often benefit from softer fluffing and fuller ends. Layers can add movement, but they should not remove the weight that makes each tail look substantial. Curly and coily textures can rely more on natural volume; straighter hair may need bends or root support. Center parts create symmetry, side parts change the front balance, and accessories shift attention to the bases. Choose the finish by considering your natural texture, preferred face framing, comfort, upkeep, and how much time you want to spend on full styling versus quick refreshes.
Before Your Salon Visit
Choose one or two favorites and save clear references that show the ponytail height, parting, volume, front pieces, and finish you like. When discussing the style, mention your natural texture, density, face shape preferences, usable length, and how much upkeep or styling time fits your routine. Because these are temporary styles, focus on anchor placement, comfortable tension, tail fullness, accessory position, and face-framing rather than assuming you need a haircut to recreate the effect.
FAQs
Can Two Fluffy Ponytails Work on Fine or Lower-Density Hair?
Yes, but the best approach is usually controlled volume rather than aggressive teasing. Keep the ends looking full, use smaller ponytail sections if needed, and avoid oversized accessories that overwhelm the hair. Soft bends and strategic fluffing near the bases can create presence without making the tips look sparse.
How Do I Keep Fluffy Twin Ponytails From Going Flat?
Start with stable anchors and add volume where the tails actually collapse, usually close to the bases or through the middle lengths. Refresh only those areas instead of rebuilding the whole style. Very heavy product can pull the shape down, so use light support and stop once the fullness holds.
Do I Need Heat to Create Two Fluffy Ponytails?
No. Naturally wavy, curly, or coily hair can provide plenty of movement without heat, and straight hair can also be shaped with air-drying methods or overnight sets. If you choose hot tools for a specific finish, use heat protectant and avoid reheating every section during small refreshes.
How Can I Make Twin Ponytails Comfortable for All-Day Wear?
Comfort depends on anchor height, section weight, and tension. If you feel pulling at the temples or nape, loosen or reposition the bases instead of tightening them further. Fabric-covered elastics and balanced section sizes can help, but the style should never need to feel painful to stay secure.