12 Christmas Half Up Hairstyle Ideas

Christmas half up hairstyles keep some hair away from the face while leaving enough length visible for waves, curls, coils, or a straighter finish. The defining feature is the upper section: it can be gathered into a ponytail, twisted from both temples, braided across the crown, or secured beneath a festive bow, ribbon, barrette, or jeweled pin. The lower hair provides movement, while the crown can stay smooth or softly lifted.
Medium and long hair gives the widest range of options, but bobs can support smaller half-up sections when the front reaches the back comfortably. Fine or lower-density hair often looks fuller when only narrow side sections are gathered, while dense hair may need a broader, stronger anchor. Curly and coily textures should be assessed at their settled length because shrinkage changes how much hair reaches the gathering point.
Styling effort varies from resetting a second-day bow or clip to creating a complete curl set, braid, or polished party finish. Decorative accessories work best when an elastic, twist, braid, or hidden pin supplies the real support. That keeps the style comfortable and makes slipping easier to correct without repeatedly tightening the hair.
Quick List
- Velvet Bow Half-Up Waves Hairstyle
- Pearl Twist Half-Up Curls Hairstyle
- Braided Crown Half-Up Hairstyle
- Crystal Clip Half-Up Ponytail Hairstyle
- Satin Ribbon Half-Up Ringlets Hairstyle
- Emerald Bow Half-Up Coils Hairstyle
- Side-Braid Half-Up Waves Hairstyle
- Jeweled Barrette Half-Up Bob Hairstyle
- Twisted Rope Half-Up Hairstyle
- Gold Ribbon Half-Up Ponytail Hairstyle
- Snowflake Pin Half-Up Curls Hairstyle
- Soft Volume Holiday Half-Up Hairstyle
Velvet Bow Half-Up Waves Hairstyle

A velvet bow gives broad half-up waves a clear Christmas focal point without hiding the movement through the lower lengths. Create a center or soft side part, leave two narrow pieces around the face, and gather hair from the temples toward the back crown. Let the waves begin around the cheekbones or shoulders, with looser bends through the ends. The bow should sit directly over the gathered section so its loops remain level rather than tipping backward.
Medium and long straight or wavy hair works easily with this shape, while loose curls can keep more of their natural texture. Apply heat protectant before forming broad bends with a curling iron, then secure the half-up section with a fabric-covered elastic. A quick refresh between parties may involve reshaping only the front waves and resetting the bow; a full wash-day finish takes longer because the entire length needs drying and styling.
For salon styling, specify how wide the gathered section should be and where you want the shortest face-framing piece to finish. Gathering too much hair can leave the lower perimeter looking sparse. Attach the velvet bow only after the base is secure. If it slips, correct its connection to the elastic rather than pulling additional hair into the half-up section.
Pro tip:
Let the waves cool fully before fastening the velvet bow, then lift a small section at the crown so the accessory does not flatten the upper profile.
Make It Work for You:
For lower-density hair, gather narrow temple sections and leave most of the length loose. The bow still covers the anchor while the waves retain more fullness below.
Watch Out For:
Avoid tying heavy velvet directly around loose hair. Without a stable base, the bow can pull downward; secure the half-up section independently first.
Pearl Twist Half-Up Curls Hairstyle

Two soft side twists give pearl accents a natural place to sit while defined curls remain loose through the back. Start with a center or gentle off-center part, take a section from each temple, twist both backward, and join them near the back crown. Keep a little lift above the join and allow curls to fall freely through the shoulders. Small pearl details can sit directly above the meeting point without covering the twist pattern.
Naturally curly hair can keep its existing texture, while straighter hair can be shaped when the extra styling fits your routine. Use curl cream to encourage grouped definition, a small snag-free elastic to secure both twists, and pearl hair pins as the decorative finish. A next-day refresh may require only redefining a few front curls and rebuilding the twists; a complete wash-day style takes longer because all the curls need setting and drying.
If a stylist is arranging the look, show how high the twists should travel and how much crown volume you want to keep. For curly hair, judge face-framing length after shrinkage rather than while the strands are stretched. Pearl pins should decorate a stable twist, not act as the main fastener. If one side loosens, redo the hidden elastic before moving the pearls.
Pro tip:
Place the pearl pins after both twists feel secure, concentrating them near the center join so the detail looks intentional rather than scattered across the whole crown.
Make It Work for You:
For dense curls, take moderately narrow twist sections and leave more texture loose underneath. This prevents the upper section from becoming bulky while preserving the half-up shape.
Watch Out For:
Do not push pearl pins through several thick curl groups at once. Choose a smaller anchored section so insertion and removal do not snag surrounding curls.
Braided Crown Half-Up Hairstyle
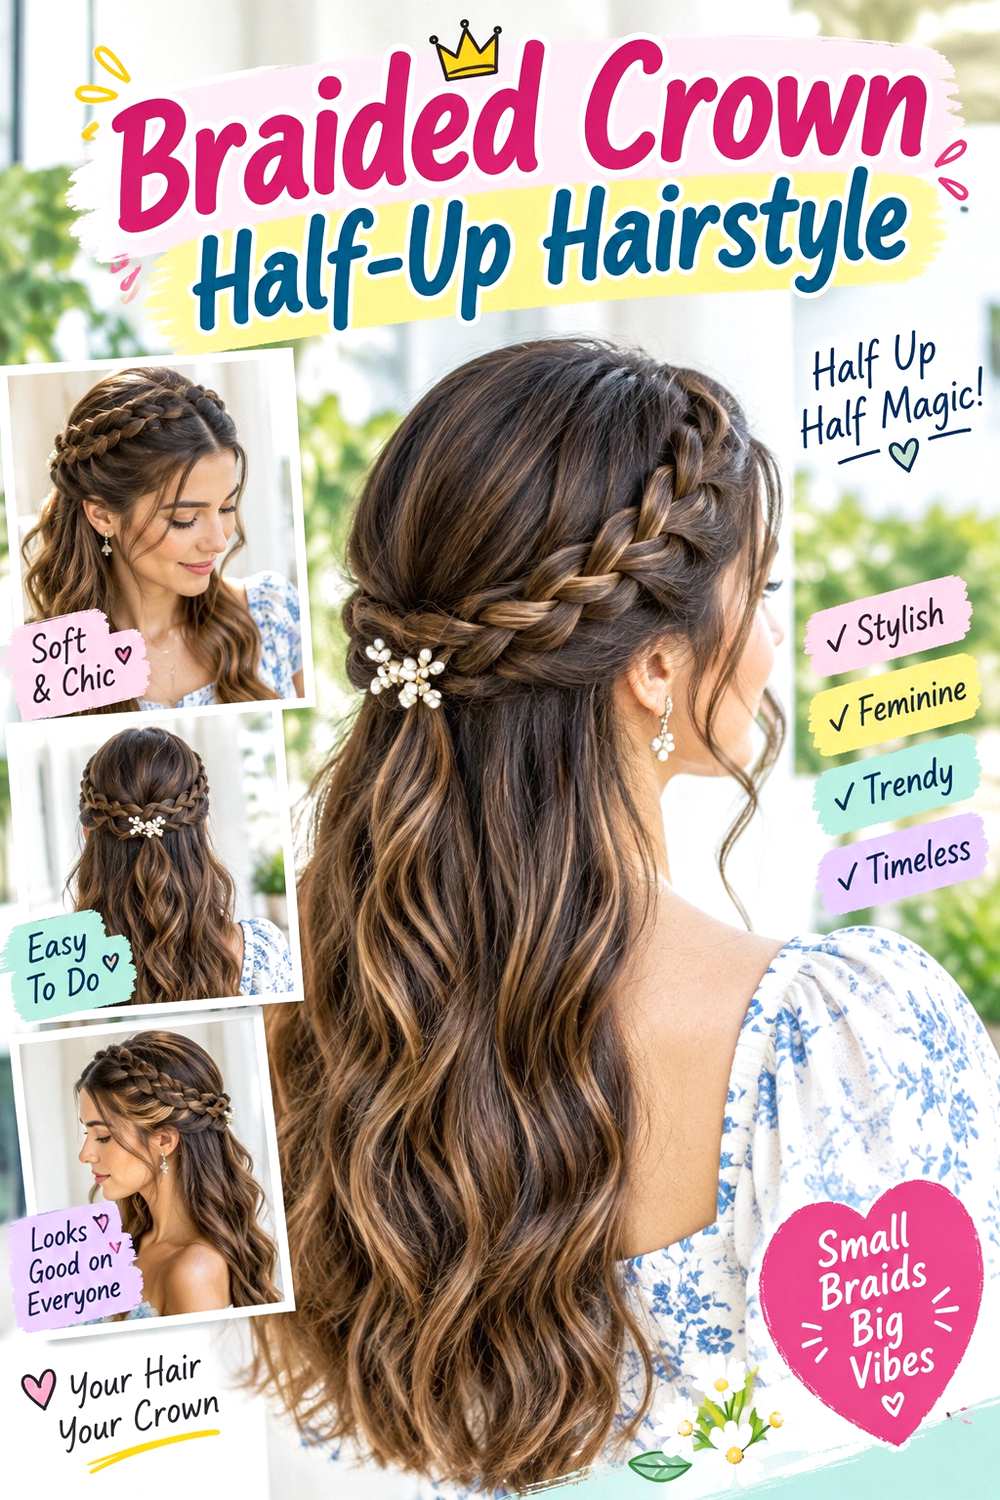
A half-up braided crown uses visible woven sections instead of a plain gathered top, making it useful when you want festive detail without an added bow. Begin one braid above each ear and direct both toward the back, leaving the lower hair loose. Join the braids at the back crown and let the remaining length fall in waves, curls, or its natural texture. Keep the braid width consistent so the crown reads as one connected feature.
Medium and long hair works best because the side sections need enough length to reach the back comfortably. Use a tail comb to create clean braid sections, small snag-free elastics to secure the ends, and bobby pins to anchor the overlap. Rebuilding the braids on dry hair takes moderate effort, while a full wash-day version is longer because detangling, drying, and preparing the lower lengths happen first.
At a salon appointment, point to the braid width you want and the exact height where both sides should meet. Comfortable tension around the temples matters more than an extremely tight braid. If shorter layers begin escaping, reinforce only those sections instead of tightening the entire crown. The lower length should remain free enough to create contrast with the structured upper section.
Pro tip:
Pin the braid ends underneath the opposite braid at the center back. Hiding the overlap keeps the crown continuous while allowing the loose length to stay unobstructed.
Make It Work for You:
For layered hair, make each braid slightly wider so short pieces have more support. The half-up crown remains visible without requiring every front layer to reach the back.
Watch Out For:
Avoid loosening the braid excessively near the temples for volume. Expand only well-secured sections so the crown keeps its shape and stays comfortable.
Crystal Clip Half-Up Ponytail Hairstyle
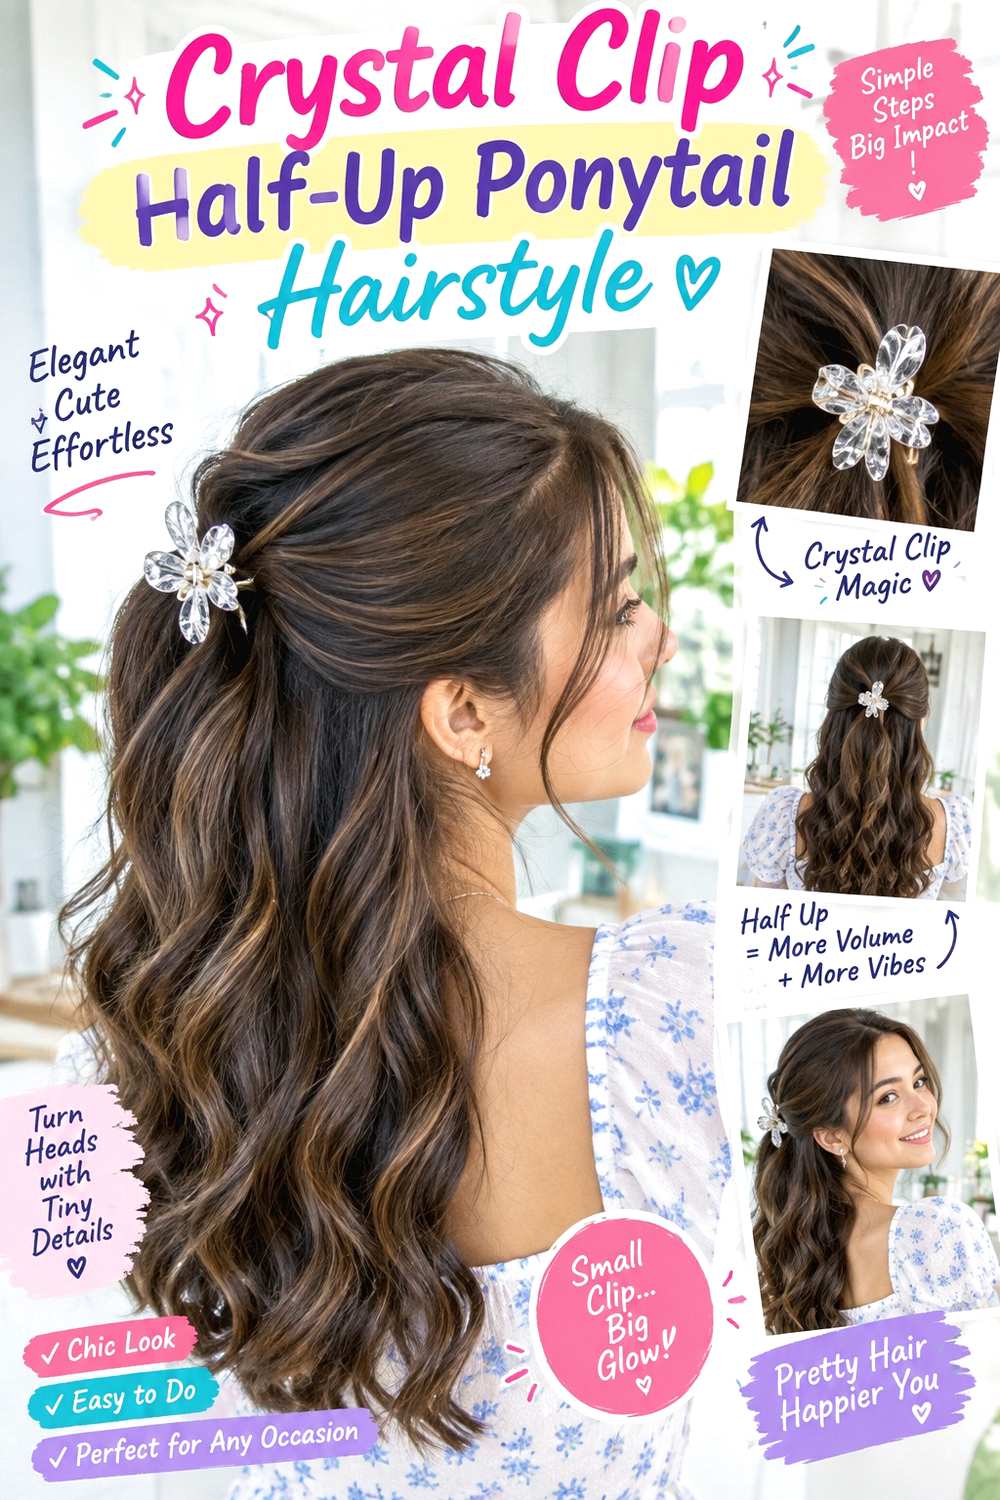
A crystal clip can turn a simple half-up ponytail into a party style without adding complicated braiding or twisting. Gather the upper section from around the temples to the back crown, leaving the lower hair loose through the shoulders or back. Keep the ponytail softly lifted rather than pulled flat, and let the lower lengths remain straight, waved, or naturally textured. The crystal clip should sit over the base where it catches light without disappearing beneath the ponytail.
Medium and long hair is easiest to gather, though a longer bob can use a narrower section. Use a small fabric-covered elastic for the actual ponytail hold, light texturizing spray to give slippery hair grip, and the crystal clip as the decorative layer. A quick refresh may involve tightening the elastic and smoothing the crown; a complete wash-day style takes longer when the lower hair also needs drying or shaping.
For professional styling, specify the ponytail height and how much side hair should remain loose above the ears. Gathering a section that is too wide can remove too much fullness from the lower silhouette. The crystal clip should not replace the elastic. If it tilts, adjust its attachment to the secured base rather than clamping a thicker section of hair underneath.
Pro tip:
Fasten the crystal clip slightly above the elastic instead of directly through it. This hides the base while allowing the decorative piece to sit flatter against the crown.
Make It Work for You:
For fine hair, gather only a narrow upper section and keep the ponytail softly expanded. More hair stays loose below, which helps preserve a fuller overall outline.
Watch Out For:
Do not force the crystal clip closed around too much hair. A crowded clasp can pull or spring open; reduce the section and keep the hidden elastic.
Satin Ribbon Half-Up Ringlets Hairstyle
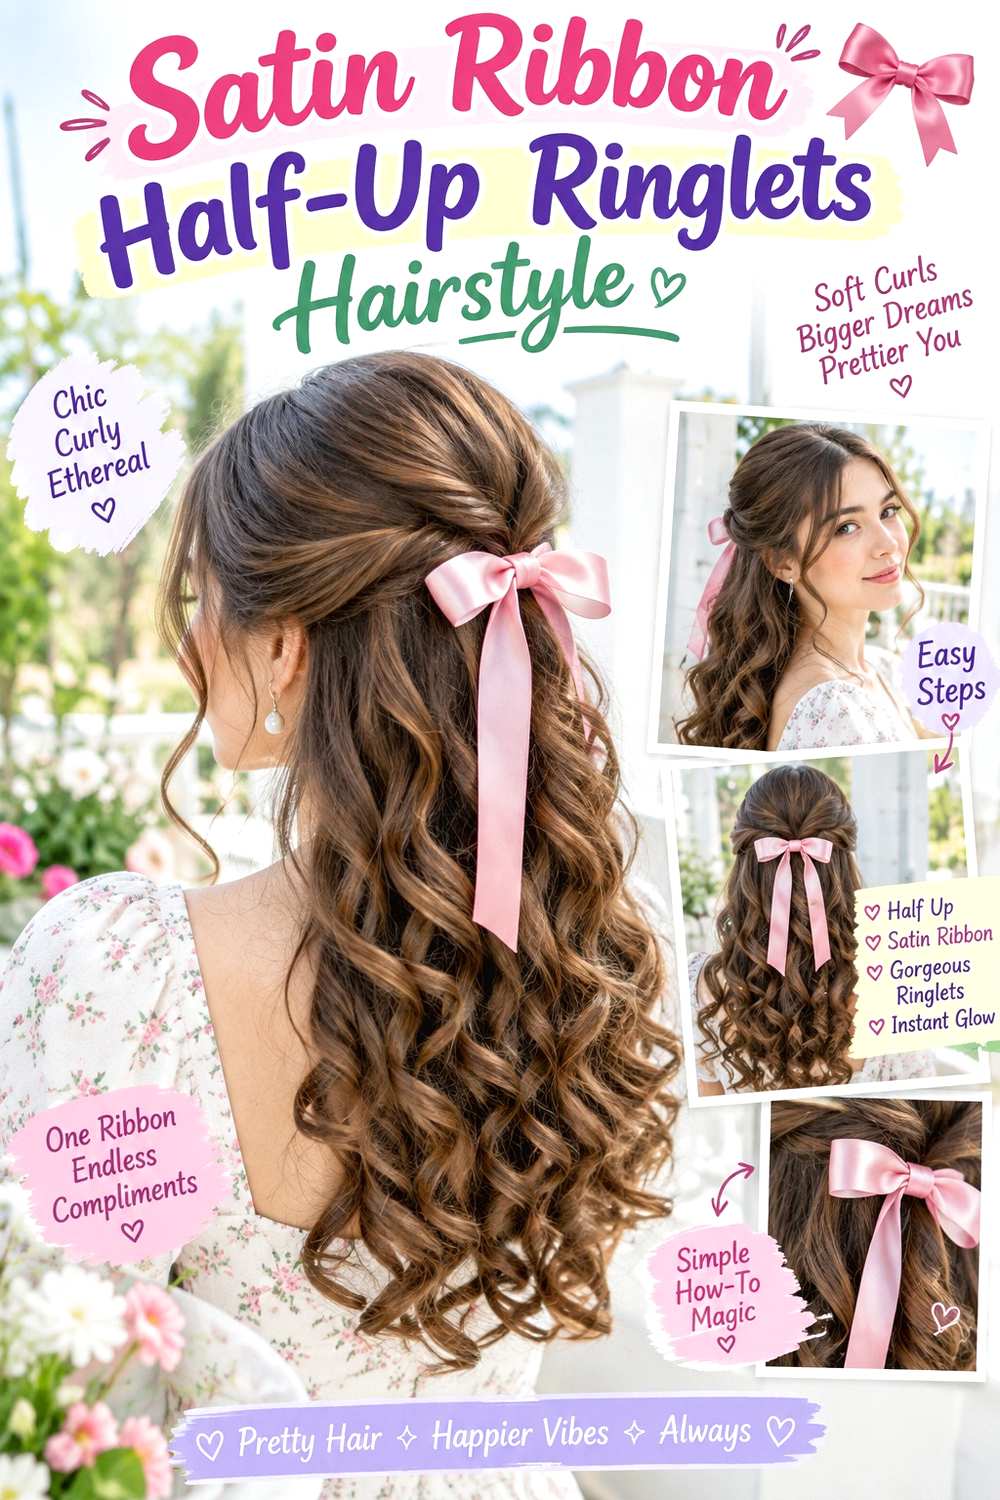
A satin ribbon looks especially clear against defined ringlets because the smooth fabric contrasts with the rounded curl pattern. Gather a modest upper section at the back crown and secure it before tying the ribbon into a bow. Keep several ringlets free near the temples, while the lower hair falls in defined spirals through the shoulders. The ribbon tails can rest over the upper curls without wrapping tightly around individual sections.
This design suits naturally curly hair as well as hair styled into ringlets. Use heat protectant before a curling wand when creating the pattern with heat, then secure the half-up base with a snag-free elastic before adding the satin ribbon. A short refresh may mean redefining only the front and outer ringlets; a complete wash-day curl set takes longer because the full length needs drying and shaping.
If a stylist is creating the look, specify how high the half-up section should sit and the finished dry length of any curls left around the face. For natural curls, shrinkage should guide placement rather than stretched measurements. The ribbon should decorate the base, not hold it together. If satin loosens during the party, retie it over the stable elastic rather than gathering the hair more tightly.
Pro tip:
Tie the satin ribbon after the ringlets are completely cool or dry, then arrange the tails so they fall between curl groups instead of wrapping around them.
Make It Work for You:
For tighter curls, use a narrower gathered section and a slightly shorter ribbon. The bow remains visible without covering much of the natural curl pattern underneath.
Watch Out For:
Avoid knotting satin directly around unsecured curls. The ribbon can slide and tangle into ringlets; keep a separate elastic beneath it for reliable support.
Emerald Bow Half-Up Coils Hairstyle
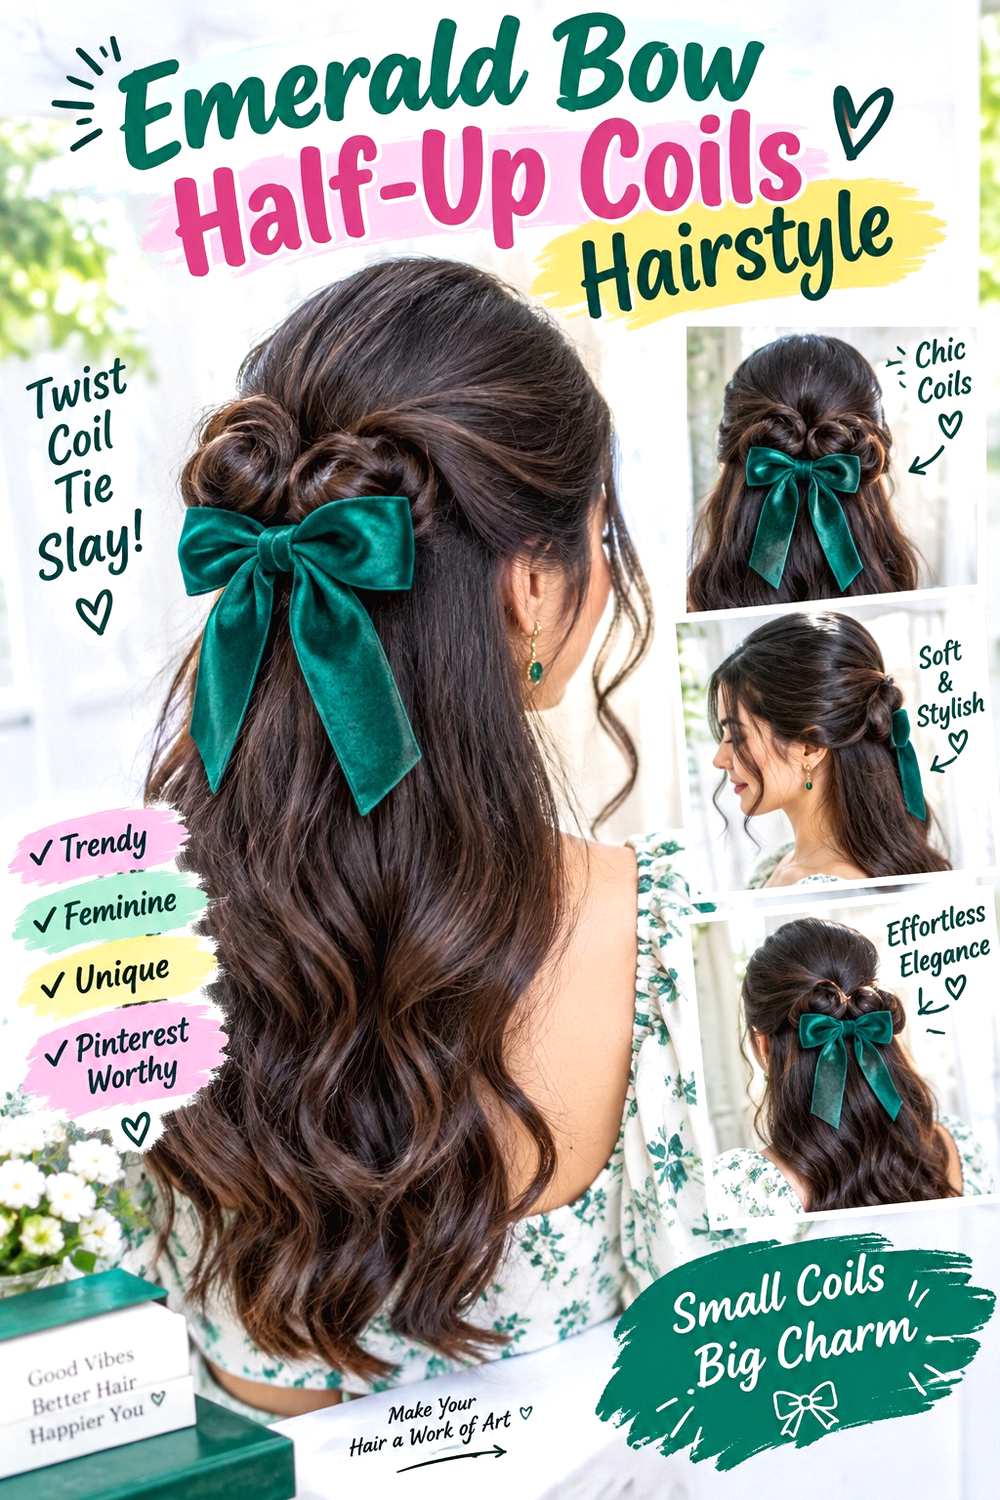
An emerald bow gives a half-up coil style a strong seasonal accent while allowing most of the natural texture to remain visible. Gather only the upper crown section, keeping the sides full and leaving short coils around the hairline free if desired. Position the bow at the back of the gathered area, with the lower coils expanding underneath it rather than being pressed flat. The shape should feel rounded and textured, not stretched into a sleek ponytail.
Coily hair with enough length to gather part of the crown works naturally with this design. Apply lightweight leave-in conditioner to keep the coils flexible, use a soft hair tie to establish the half-up base, and attach the emerald bow only after the section feels comfortable. A morning refresh may focus on flattened crown coils and the accessory placement; full wash-day styling takes longer because detangling, setting, and drying occur before gathering.
If a stylist is arranging the look, explain how much upper hair should be included and where you want the widest volume to remain. Finished placement should be judged after shrinkage settles. The bow should anchor at the stable gathered section instead of delicate hairline pieces. If it begins to slip, strengthen the base rather than pulling the upper coils tighter.
Pro tip:
Attach the emerald bow before the final fluffing step, then lift the coils directly beneath it so the accessory remains visible without creating a flat spot.
Make It Work for You:
For shorter coils, gather a smaller section closer to the top crown and use a lightweight bow. More texture stays loose while the half-up placement remains obvious.
Watch Out For:
Do not use the bow clip to grab a thick mass of coils. Reduce the anchor section so the accessory can be inserted and removed comfortably.
Side-Braid Half-Up Waves Hairstyle
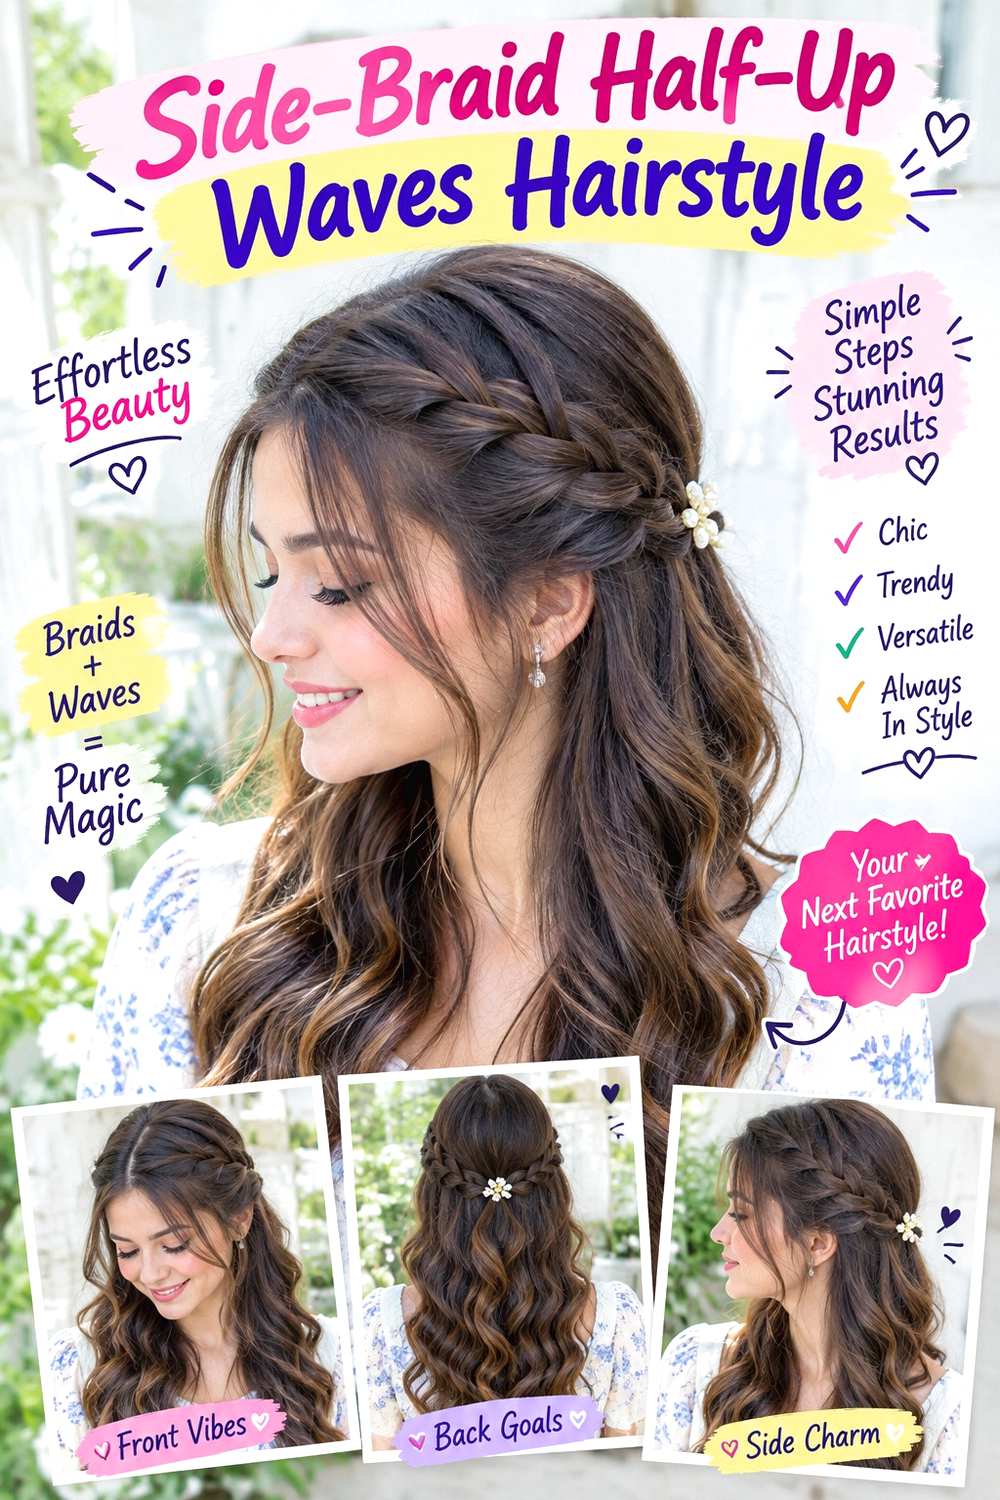
A single side braid adds asymmetry to a half-up wave style while keeping most of the length loose. Begin the braid near one temple, follow the side of the head toward the back crown, and join it with a small section from the opposite side. Leave broad waves through the lower hair and allow a narrow piece near the unbraided temple to frame the face. The braid should be visible from the side instead of disappearing beneath the top layer.
Medium and long hair works best because the braided section needs enough length to reach the back. Apply heat protectant before shaping waves with a curling iron, use a small snag-free elastic to secure the half-up join, and keep the braid itself as the main decorative detail. A quick refresh may involve reshaping the front waves and tightening the join; rebuilding the complete style after washing takes longer because drying and waving the lower hair add time.
For salon styling, specify the braid width and exactly where you want it to end at the back. A narrow braid looks delicate, while a broader section creates a stronger side detail. If layers begin escaping, tuck them into the braid where possible instead of pulling the whole section tighter. The opposite side should remain soft enough to balance the asymmetry.
Pro tip:
Direct the side braid slightly upward as it travels back, then secure it near the crown rather than the nape so the half-up shape keeps visible lift.
Make It Work for You:
For fine hair, make the braid moderately narrow and preserve more loose hair underneath. The side detail remains distinct without removing too much volume from the waves.
Watch Out For:
Avoid starting the braid too low behind the ear. It can read like a separate side braid instead of connecting clearly to the half-up crown.
Jeweled Barrette Half-Up Bob Hairstyle
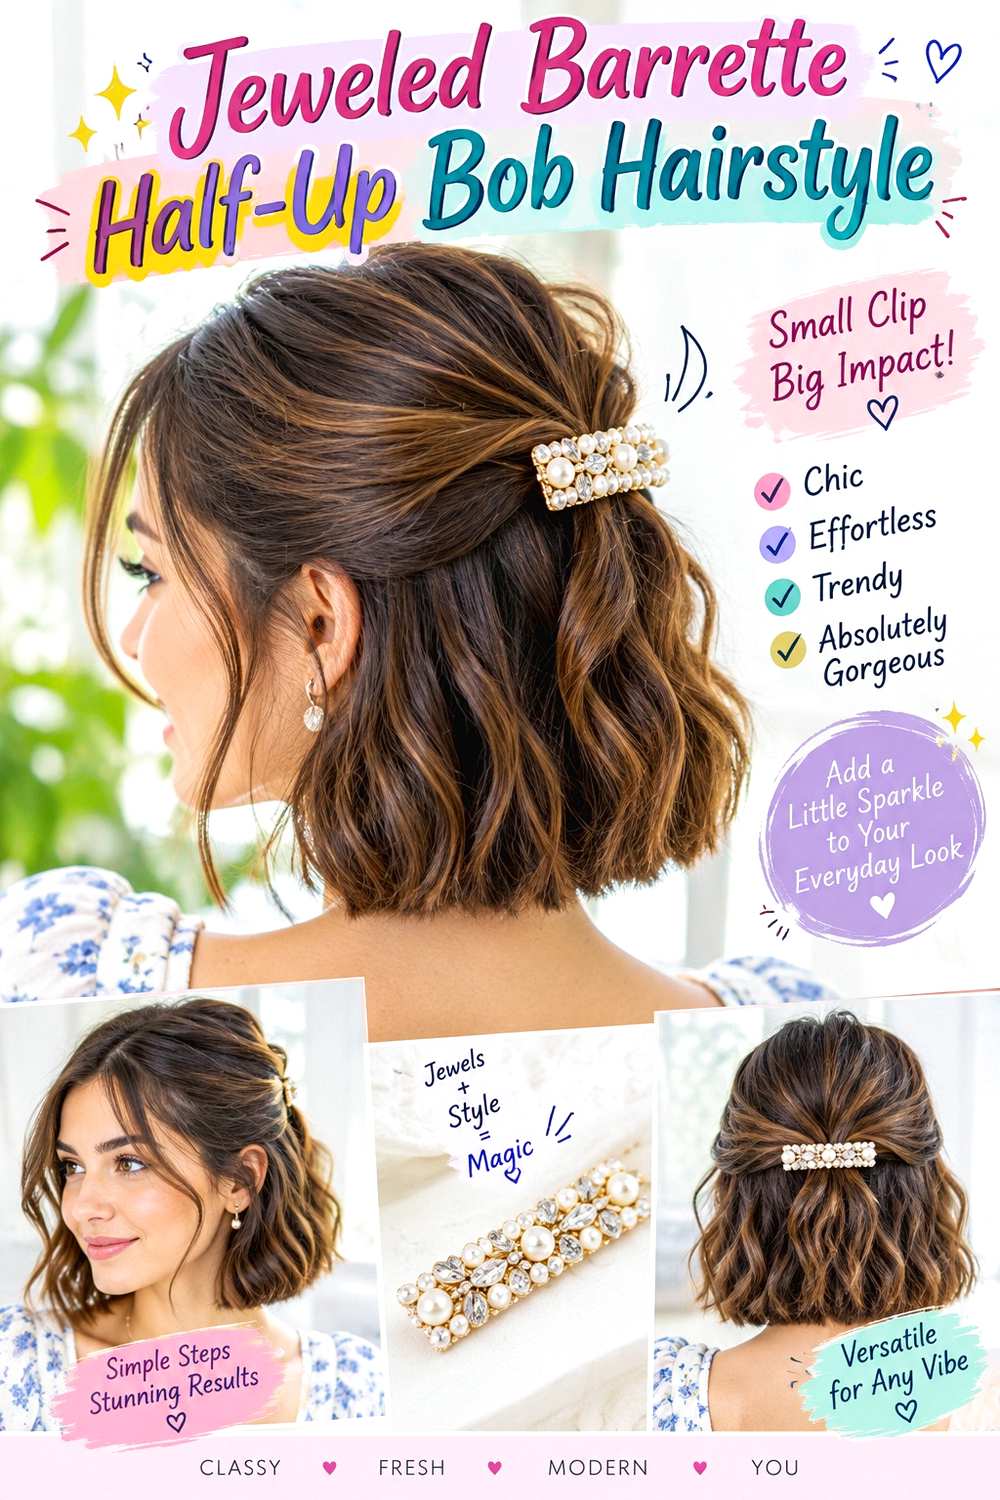
A jeweled barrette can make a bob feel party-ready without requiring enough length for a full ponytail or bun. Take small sections from above each ear and bring them toward the back, leaving the crown softly lifted. Secure them where they naturally meet, then place the barrette across that join. The bob can stay straight, softly waved, or curly, with the lower perimeter remaining visible around the jaw, neck, or shoulders.
This works best when the front sections are long enough to reach the back comfortably. Use light texturizing spray to add grip, a small hidden elastic to secure the gathered section, and the jeweled barrette as the decorative finish. A next-day refresh can be quick because only the front and accessory area need resetting; a full wash-day version takes longer if the bob requires complete drying or reshaping.
If a stylist is preparing the look, specify how much hair should move away from the face and where the barrette should sit vertically. Taking a wide upper section can make a short bob look too thin underneath. Keep the accessory proportional to the available length and anchor it over a secure base. If it slips, improve the hidden support rather than clamping a larger section that changes the cut’s silhouette.
Pro tip:
Place the barrette over the hidden elastic rather than relying on its clasp alone. This lets the jewel sit neatly without asking it to carry all the tension.
Make It Work for You:
For a curly bob, gather only the longest front curls and leave shorter pieces free. The half-up effect remains clear while natural volume stays around the sides.
Watch Out For:
Do not force short sections to reach the back under strong tension. Use a narrower gathering point so the style stays comfortable and the bob keeps movement.
Twisted Rope Half-Up Hairstyle
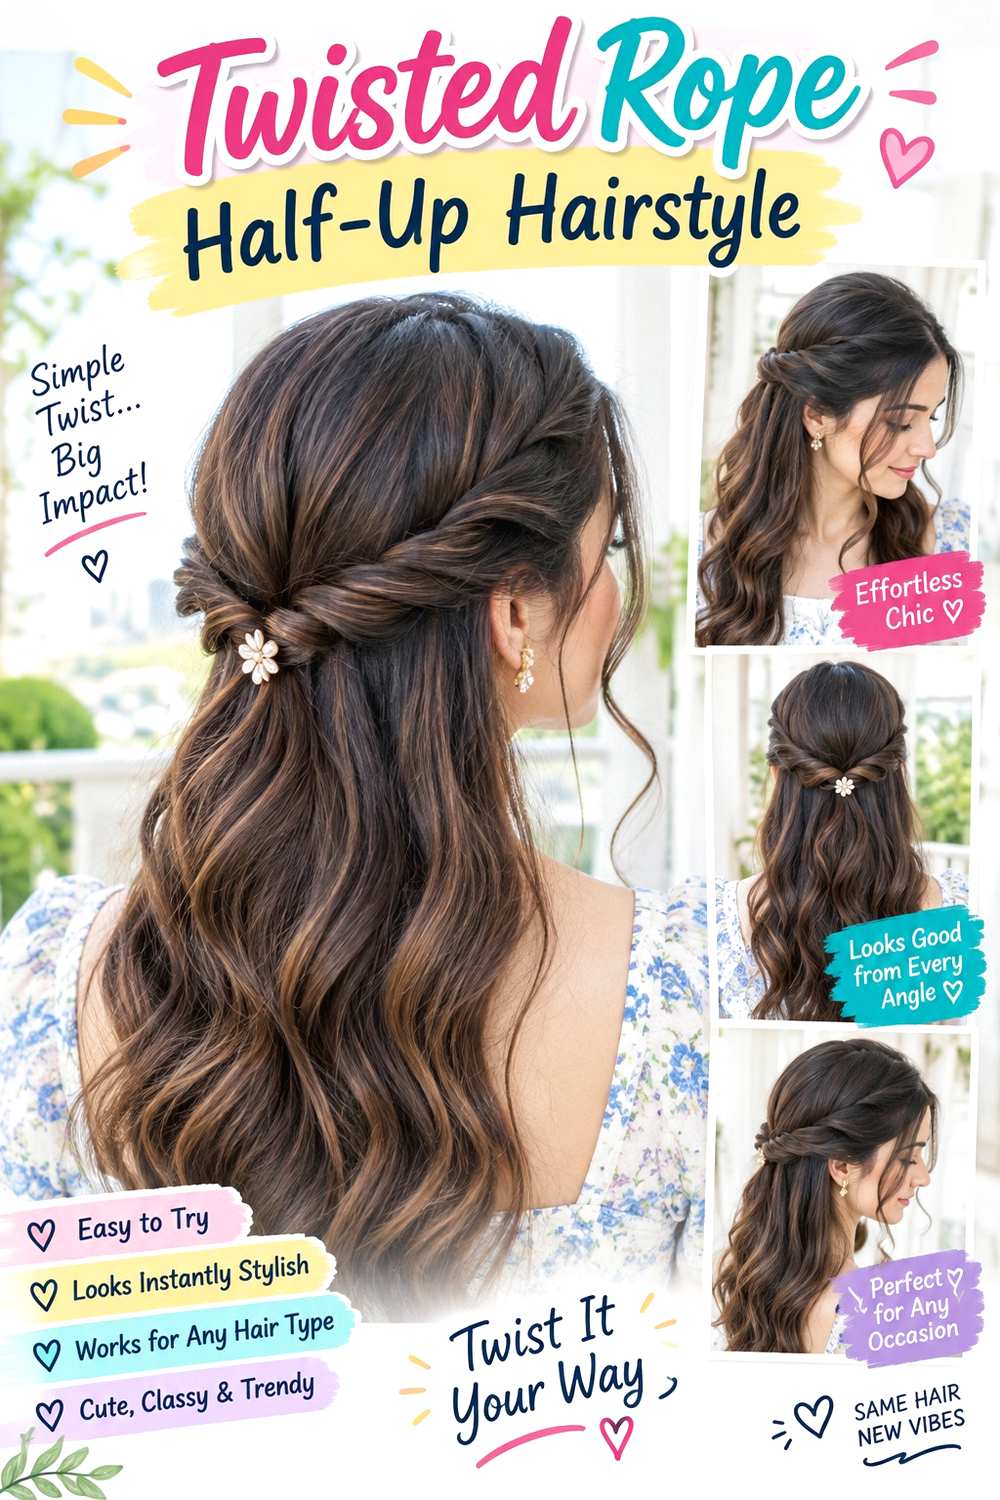
A rope-twist half-up style creates visible structure across the back without needing an accessory to define the shape. Take one section from each temple, divide each into two smaller pieces, and twist them into ropes before bringing both toward the back crown. Join the ropes at the center while leaving the remaining hair loose. Straight lengths show the twist clearly, while waves or curls add softer movement beneath it.
Medium and long hair is easiest to work with because the side sections need enough length to twist without becoming tight. Use light styling cream to keep flyaways controlled, a small snag-free elastic to join both ropes, and bobby pins only where a twist needs extra support. A dry-hair refresh takes moderate effort because both ropes need rebuilding; full wash-day styling is longer when the loose lengths also need drying or definition.
For professional styling, show how thick you want each rope and how high the center join should sit. Wider twists feel softer, while narrow ropes create more visible definition. The side sections should stay comfortable around the temples. If one rope begins unraveling, remake that section rather than tightening the center elastic. A clean twist pattern depends on even sectioning more than strong tension.
Pro tip:
Twist each side in the same direction before bringing them backward, then check their thickness at the center so the finished join looks balanced.
Make It Work for You:
For dense hair, use moderately sized side sections rather than gathering the entire upper half. More hair stays loose underneath, preventing the back from becoming bulky.
Watch Out For:
Do not overtwist until the side ropes become rigid. Stop once the pattern is clear so they can lie comfortably against the head without pulling.
Gold Ribbon Half-Up Ponytail Hairstyle
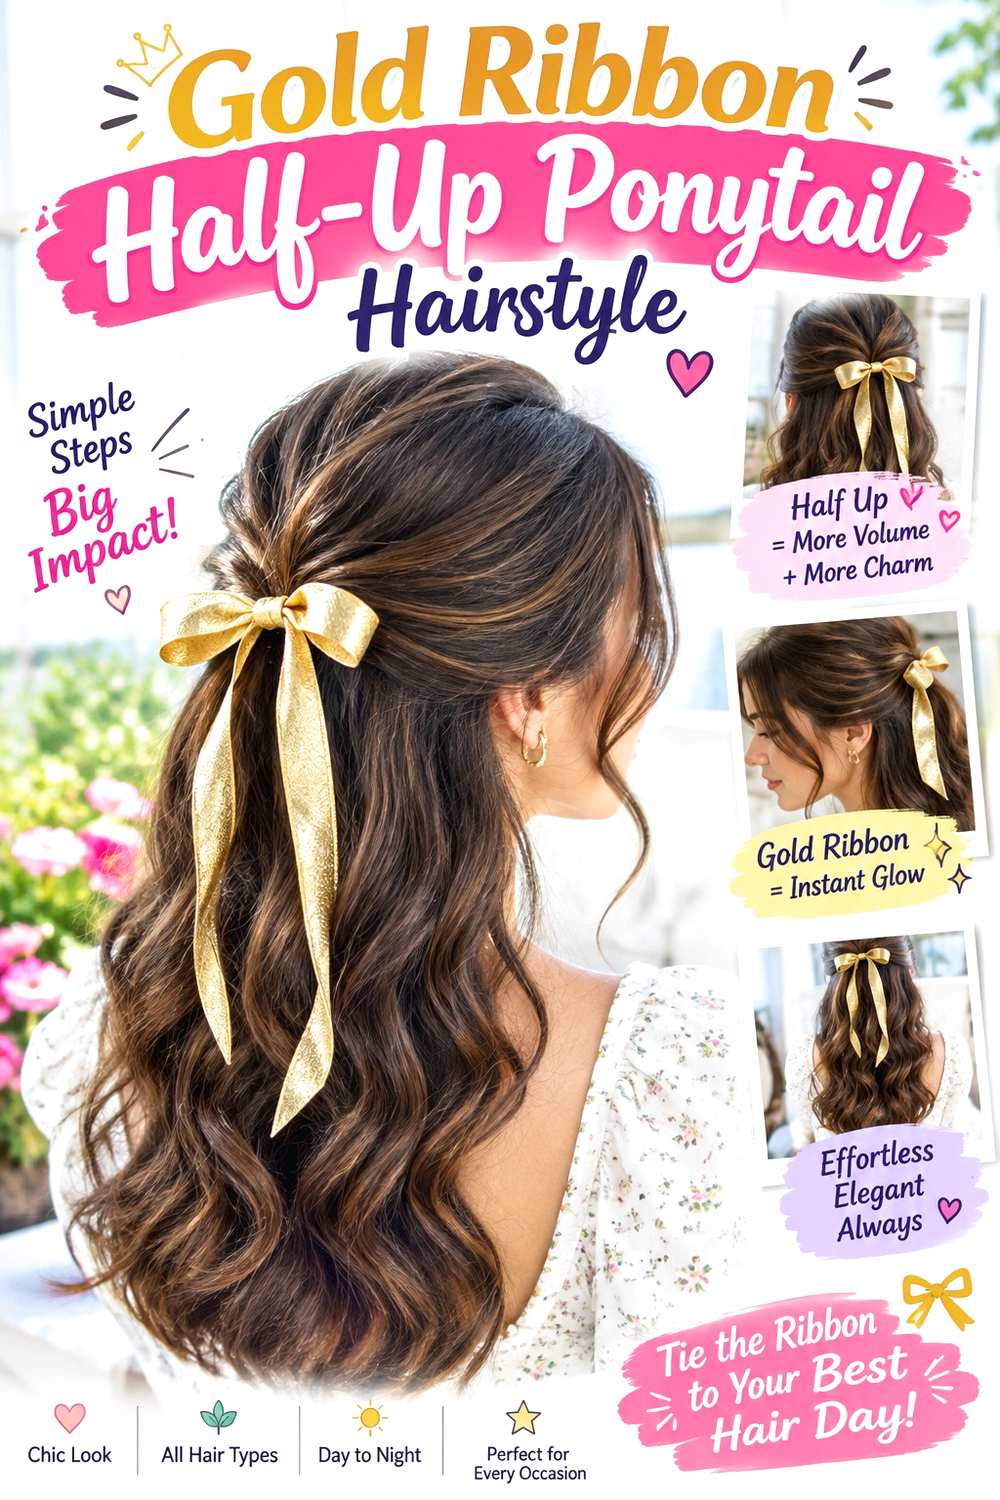
A gold ribbon makes a simple half-up ponytail feel festive while leaving the hairstyle light enough for a casual Christmas gathering. Gather the top section at the back crown, keeping the front softly parted and the sides controlled without flattening them. Tie the ribbon over the secured base so the bow sits horizontally, then let the tails fall over the loose lengths. Straight hair gives a clean finish, while soft waves add more movement beneath the ribbon.
Medium and long hair across several textures can use this arrangement. A fabric-covered elastic should provide the real ponytail hold, lightweight mousse can add subtle lift through the crown, and the gold ribbon supplies the visible detail. A quick refresh between events may involve tightening the base and smoothing the ribbon; a full wash-day version takes longer when drying and styling the lower lengths are included.
If a stylist is creating the look, specify the half-up ponytail height and how much crown volume you want above the ribbon. Also show the preferred ribbon tail length so it does not overwhelm the hair. The decorative knot should remain easy to untie. If the ribbon slips, retie it over the elastic instead of increasing scalp tension or gathering extra hair unnecessarily.
Pro tip:
Wrap the ribbon once around the secured elastic before forming the bow. This gives the fabric a stable path and helps the loops remain centered.
Make It Work for You:
For shorter medium-length hair, keep the ribbon tails compact and gather a smaller upper section. The gold detail stays proportionate while more length remains visible underneath.
Watch Out For:
Avoid using ribbon alone as the ponytail fastener. If its knot loosens, the half-up section should still remain secure on the hidden elastic.
Snowflake Pin Half-Up Curls Hairstyle
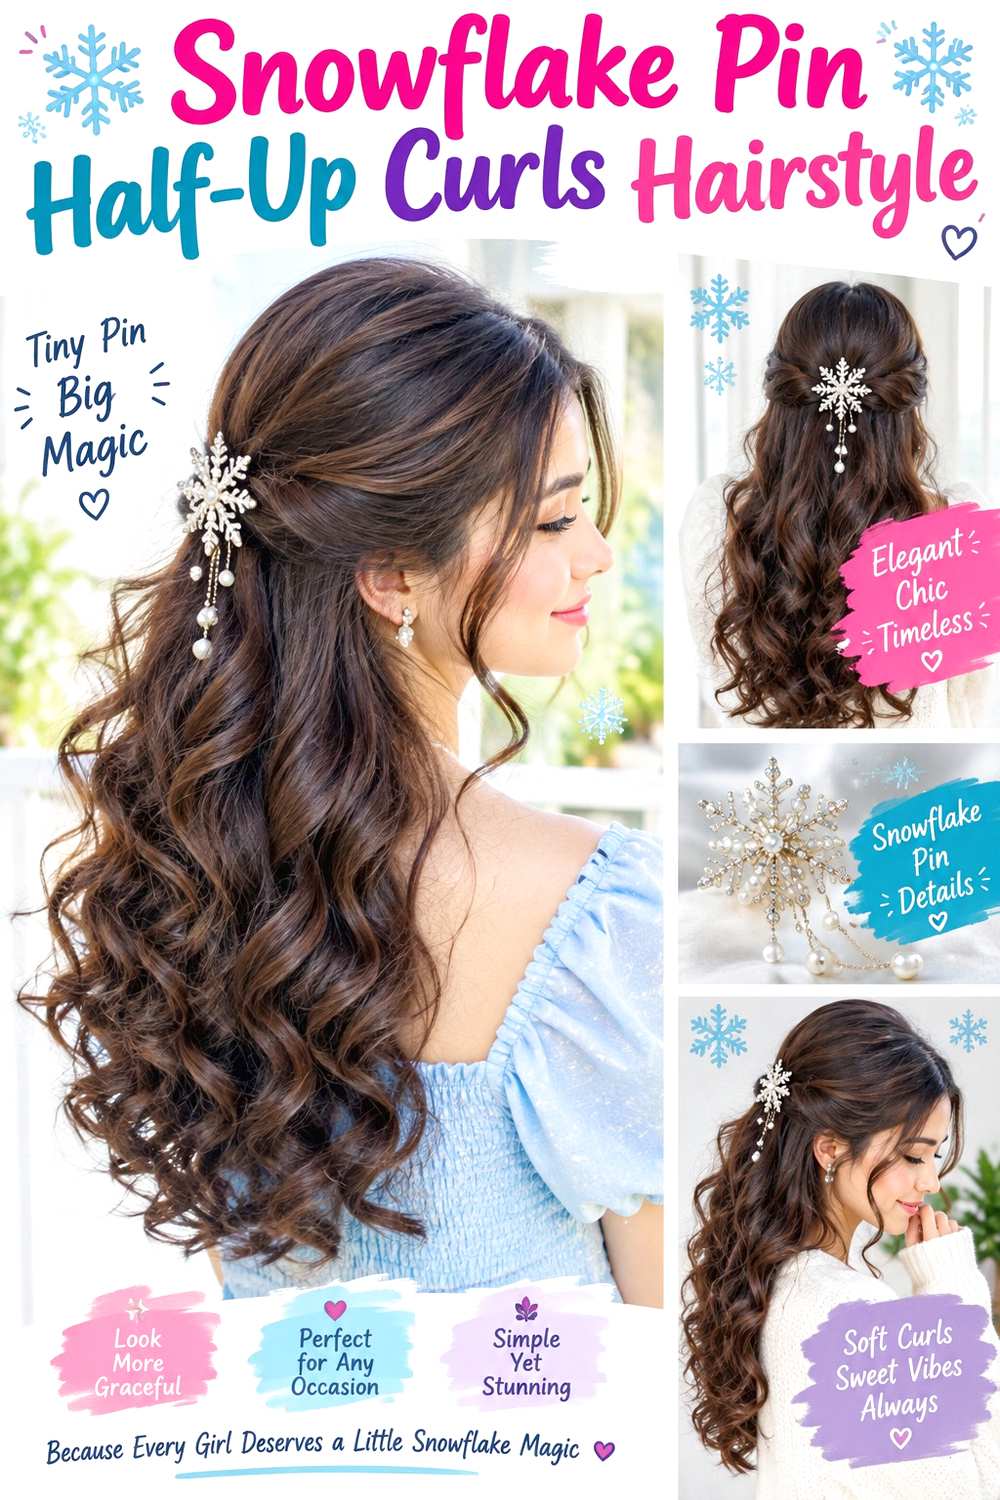
A snowflake pin adds a small seasonal detail to half-up curls without covering the entire back of the hairstyle. Gather two modest side sections toward the back crown, secure them together, and position the pin slightly above or beside the join. Leave the lower curls full through the shoulders, with several shorter pieces around the face. The accessory should sit on a relatively flat section so its shape stays visible rather than getting buried in curl volume.
Naturally curly hair can keep its own pattern, while straight or wavy hair can be curled when desired. Use curl cream to maintain definition, a small fabric-covered elastic for the half-up base, and the snowflake pin as the final decoration. A next-day refresh may involve dampening only the front and outer curls; a complete wash-day style takes longer because the entire pattern needs setting and drying.
At an appointment, show how much hair should be gathered and whether you want the snowflake visible from the side or directly from behind. For curls with strong shrinkage, assess the finished silhouette when dry. The pin should attach to a stable base rather than clamp a large bundle. If it tilts or catches, remove it fully before repositioning instead of dragging decorative points through curls.
Pro tip:
Place the snowflake just above the half-up anchor where the surface is relatively flat. This keeps its outline visible while avoiding the fullest curl clusters.
Make It Work for You:
For dense curls, gather narrower temple sections and leave more volume underneath. The snowflake remains readable without compressing the lower curl shape or crown.
Watch Out For:
Do not slide pointed decorative edges through finished curls when adjusting placement. Lift the pin away completely first to reduce snagging and broken curl groups.
Soft Volume Holiday Half-Up Hairstyle

Soft crown volume gives a half-up style an event-ready shape without requiring a visible bow or jeweled accessory. Direct the front away from the face, maintain gentle lift through the upper crown, and gather a moderate section at the back without pulling the roots flat. Let the lower lengths fall in broad bends or a smooth natural texture, with ends that stay soft rather than tightly curled. A center or loose side part can both work.
Straight, wavy, and loosely curly hair adapts well to this shape. Use lightweight mousse to support root lift, a round brush to guide the crown during drying, and a small fabric-covered elastic to secure the half-up section. A quick refresh may involve lifting the crown and resetting the elastic; full wash-day styling takes longer because the root direction and overall volume are created during drying.
For salon styling, point to where you want the crown lift to begin and how much height should remain once the upper section is secured. Too much volume directly above the elastic can make the profile look disconnected. If the crown settles during the party, gently loosen the surface near the roots instead of pulling the half-up base tighter. The shape should rely on controlled lift rather than a rigid, heavily teased foundation.
Pro tip:
Create the crown lift before gathering the upper section, then secure the elastic without pulling downward. This preserves volume instead of flattening the work you just created.
Make It Work for You:
For fine hair, keep the lift concentrated through the upper crown and avoid gathering too much from the sides. More loose hair remains to support a fuller silhouette.
Watch Out For:
Avoid excessive teasing directly above the anchor. A dense bump can look disconnected from the loose lengths; use softer root direction for a smoother transition.
Conclusion
Christmas half up hairstyles can move from simple and relaxed to noticeably festive depending on the upper section, texture, and accessory. Waves and ringlets create movement below the anchor, while braids and rope twists add structure across the crown. Bows, ribbons, pearls, crystal clips, and seasonal pins provide decoration without needing to change the haircut. A narrow gathering point often preserves fullness in finer hair, while dense curls or coils may need a broader, stronger base. Center parts feel balanced, side details create asymmetry, and soft crown volume changes the profile without adding another accessory. Choose the finish according to your natural texture, available length, upkeep, and how much styling time fits your Christmas plans.
Before Your Salon Visit
Choose one or two favorite references and point to the exact half-up details you want: gathering height, braid or twist width, crown volume, parting, loose curls, face-framing pieces, and accessory placement. Discuss your natural texture, density, finished length, shrinkage, and normal styling routine. If you are adding a bow, ribbon, barrette, or pin, explain its size and where you want it anchored. For a temporary Christmas style, focus on comfortable support and finish rather than requesting an unnecessary haircut.
FAQs
Can short hair work with a Christmas half up style?
Yes, provided the front or side sections can reach a secure meeting point without strong tension. A bob may work best with a narrow half-up section or jeweled barrette. Leave shorter pieces loose instead of forcing them backward, and keep the accessory proportional to the available length.
How do I stop a half-up hairstyle from slipping during a party?
Use an elastic, twist, braid, or hidden pin as the real structural anchor before adding decorative bows or clips. If the style loosens, reset that foundation rather than tightening the accessory. A little grip at the gathering point can also help smooth hair stay in place.
Can curly or coily hair wear Christmas half up hairstyles?
Yes. Half-up styles can preserve natural curls or coils while opening the face and crown. Gather only as much hair as reaches comfortably, allow room for shrinkage and volume, and judge the finished shape when the texture has settled rather than stretching sections to match a reference.
Do Christmas half up hairstyles need heat styling?
No. Natural curls, coils, waves, braids, twists, and straight textures can all work without heat. Hot tools are only needed when you want a finish different from your starting texture. If you use them, apply heat protectant and refresh individual sections instead of repeatedly reheating the entire hairstyle.