15 Diffused Layer Hairstyle Ideas
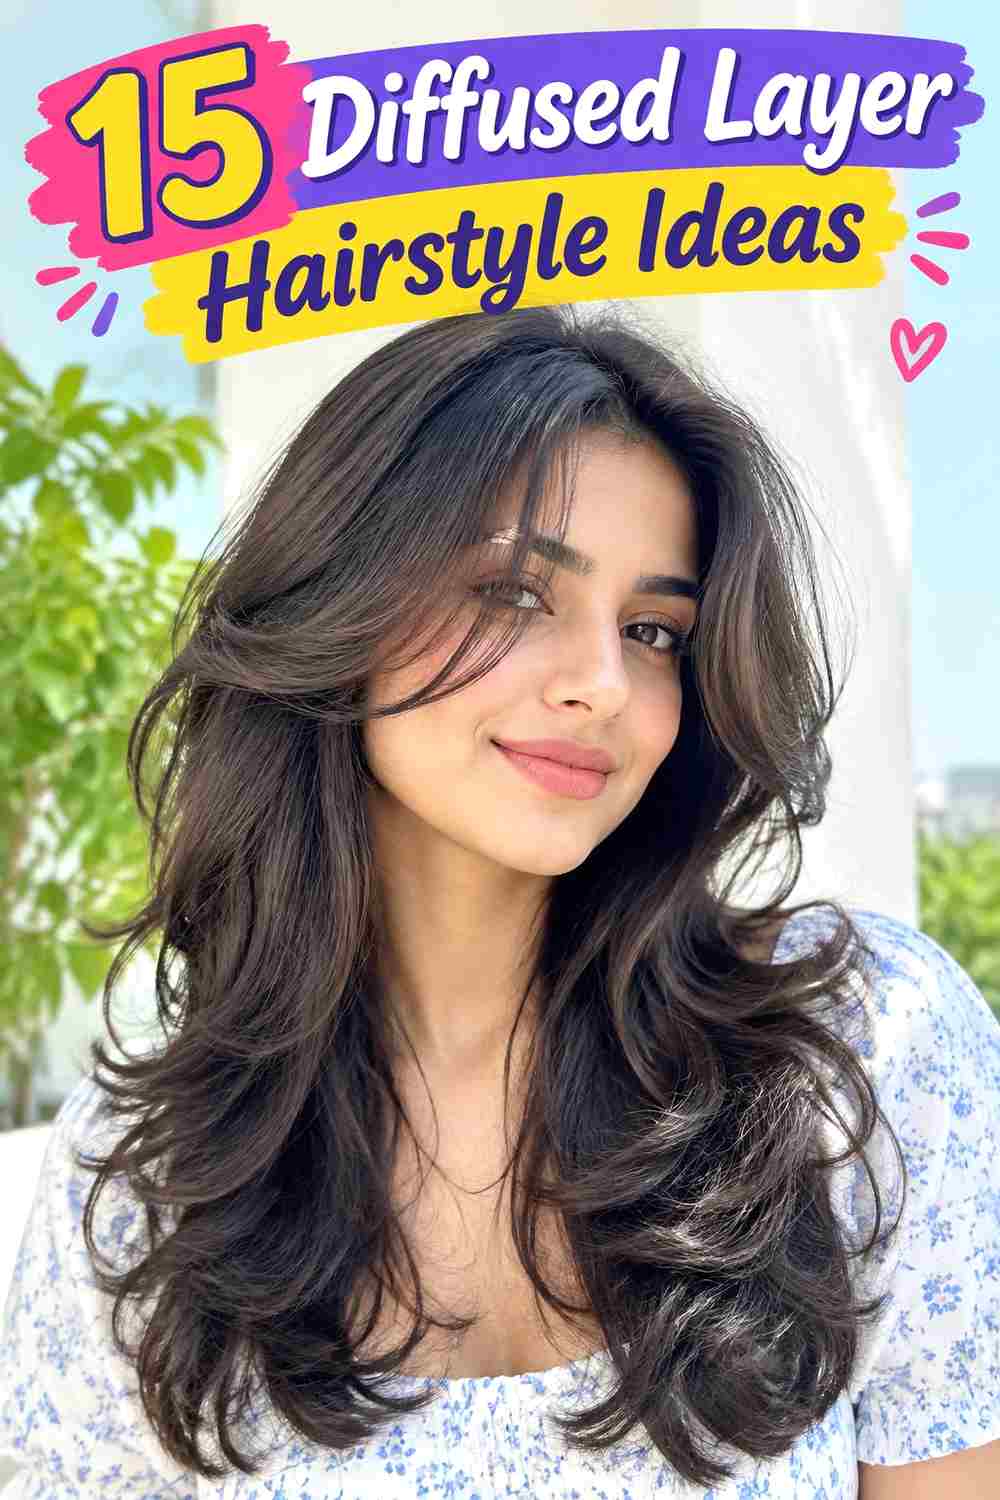
A diffused layer hairstyle combines a layered haircut with drying that supports waves, curls, or coils instead of stretching them smooth. Layers can begin around the cheekbones, jaw, shoulders, or lower lengths, depending on how much volume and movement you want. A diffuser helps preserve natural bends and curl groups while the haircut controls where fullness sits. Fringe can be curly, curtain-shaped, or absent, and the perimeter may be rounded, shoulder length, or deliberately elongated.
Texture, density, and shrinkage matter when choosing the layer pattern. Dense curls may benefit from thoughtful bulk placement so volume does not collect only at the bottom. Lower-density hair often needs fewer short layers and more perimeter weight. The dry position is especially important for curls and coils because wet or stretched hair can appear considerably longer.
Diffused layer hairstyle ideas also vary in effort. A small refresh may involve dampening several flattened sections and diffusing briefly, while a full wash-day routine includes product application and complete drying. Cut upkeep is separate: reshaping becomes useful when layers lose their intended placement or volume shifts downward.
Quick List
- Cheekbone Diffused Layer Hairstyle
- Rounded Curl Diffused Layer Hairstyle
- Long Wavy Diffused Layer Hairstyle
- Curtain Fringe Diffused Layer Hairstyle
- Shoulder-Length Diffused Layer Hairstyle
- Coily Diffused Layer Hairstyle
- Center-Parted Diffused Layer Hairstyle
- Side-Parted Diffused Layer Hairstyle
- Voluminous Crown Diffused Layer Hairstyle
- Soft Shag Diffused Layer Hairstyle
- Low-Density Diffused Layer Hairstyle
- Dense Curl Diffused Layer Hairstyle
- Collarbone Diffused Layer Hairstyle
- Face-Framing Diffused Layer Hairstyle
- Elongated Diffused Layer Hairstyle
Cheekbone Diffused Layer Hairstyle

Shorter curls or waves beginning around the cheekbones create a high face frame before flowing into jaw, shoulder, and longer sections. A center or relaxed off-center part keeps those upper layers visible, while the back retains more length. Diffusing allows the shorter pieces to spring into their natural pattern, giving the sides movement without requiring a polished blowout or uniform curl shape.
This design can work well for wavy and curly hair that has enough length for several visible layer levels. Curl cream helps encourage flexible grouping, gel adds hold where definition is needed, and a diffuser dries the shape with less direct disturbance. Refreshing only the cheekbone pieces may take several minutes, depending on how wet they become. A complete wash-day diffuse takes considerably longer and varies with length, density, and airflow.
At the salon, identify where the shortest front layer should settle when completely dry. That is more useful than choosing the layer from stretched length, especially with strong shrinkage. As the haircut grows, cheekbone sections drop toward the jaw and the high frame becomes less obvious. Reshaping those specific layers can restore the placement while leaving the longer perimeter comparatively untouched.
Pro tip:
Diffuse the cheekbone sections in their intended resting position before moving them around for extra volume. Setting the front first can keep those shorter curls visible instead of letting them disappear underneath longer sections.
Make It Work for You:
For strong shrinkage, begin the face frame longer and assess it fully dry. You can still create cheekbone emphasis while reducing the risk of unexpectedly short curls around the upper face.
Watch Out For:
Avoid continually separating the short layers while they dry. Excess handling can create frizz and weaken curl grouping, making a well-placed cheekbone layer look less defined than it actually is.
Rounded Curl Diffused Layer Hairstyle
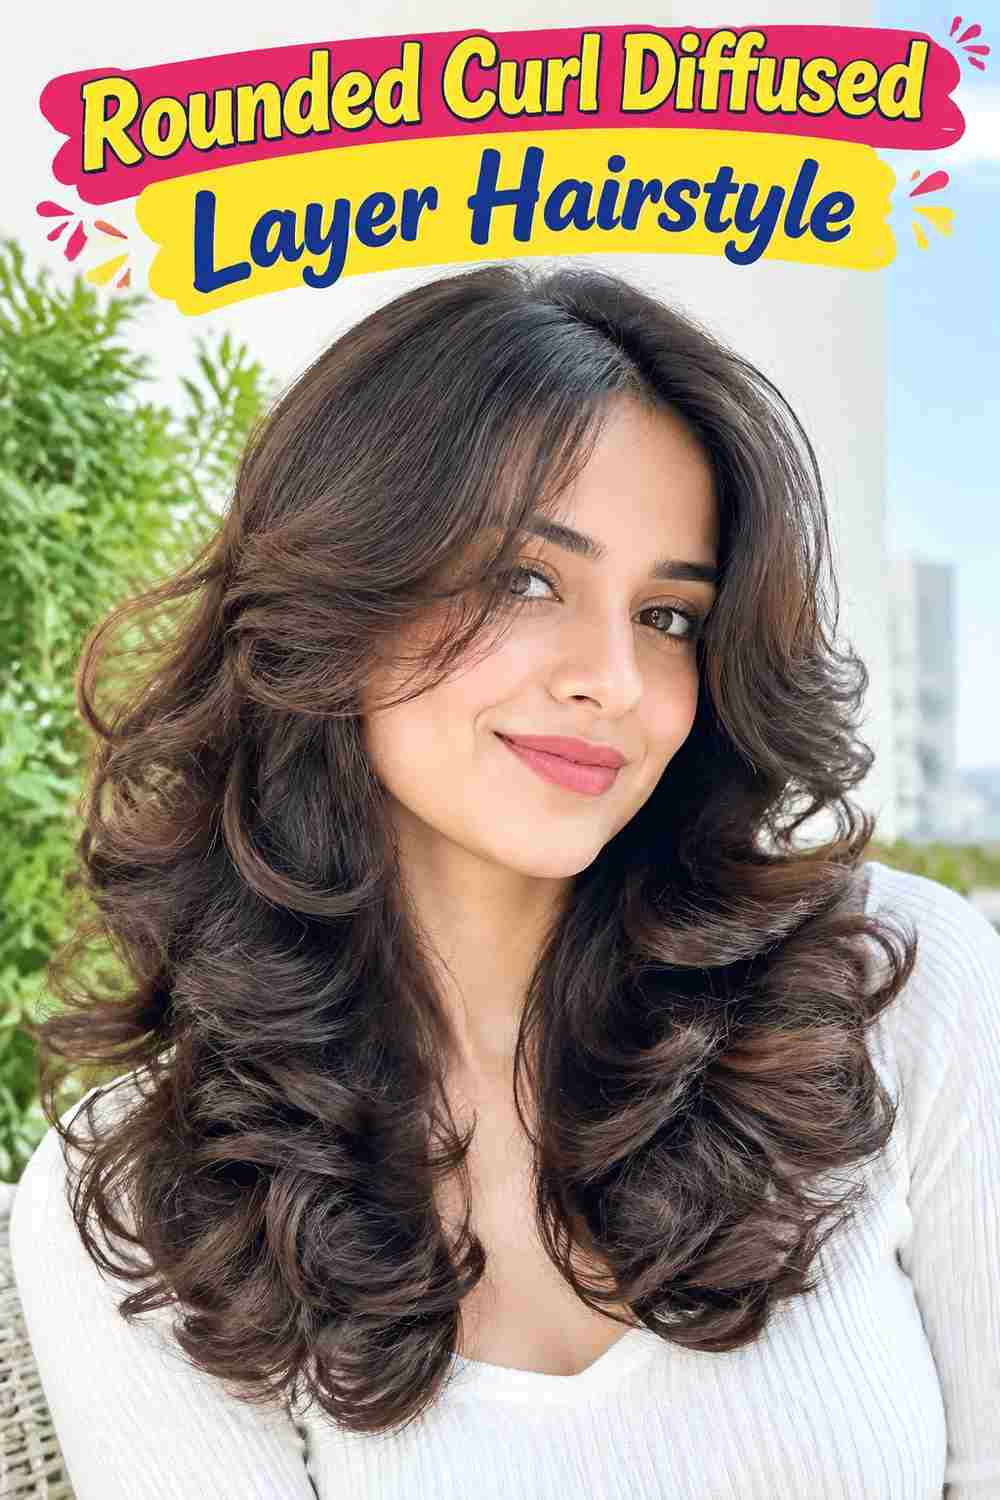
A rounded silhouette uses layers to distribute curls around the upper and middle sides rather than letting all the volume collect near the ends. Shorter sections can sit around the cheekbones and jaw, followed by gradually longer curls through the lower perimeter. Moderate crown lift connects the upper shape, while the sides create a soft curve instead of a triangular outline.
Curly hair with medium or high density can support this structure particularly well, though layer amount should still be individualized. Lightweight leave-in conditioner provides slip, curl gel supports grouping, and a diffuser helps dry the rounded outline. A refresh may involve resetting flattened crown and front curls. A complete wash, product application, and diffuse requires more time because the overall silhouette matters as much as individual definition.
At the salon, describe where you want the widest part of the rounded shape to sit when dry. Dense hair may need careful bulk management, but removing weight indiscriminately can disturb curl groups. As the layers grow, fullness can migrate downward and the rounded outline becomes longer or heavier at the bottom. That change is a useful signal for reshaping rather than relying on a fixed maintenance calendar.
Pro tip:
Diffuse the upper sides with gentle lift while allowing the lowest curls to hang closer to their natural position. Concentrating expansion higher helps create curvature without making the entire haircut equally wide.
Make It Work for You:
For lower-density curls, use fewer short layers and keep a fuller perimeter. Root lift and careful diffuser placement can create a rounded impression without removing substantial weight from the lower shape.
Watch Out For:
Do not separate every curl to create more volume. Build fullness at the roots first, then separate only selected dry groups where additional width is needed without sacrificing overall definition.
Long Wavy Diffused Layer Hairstyle
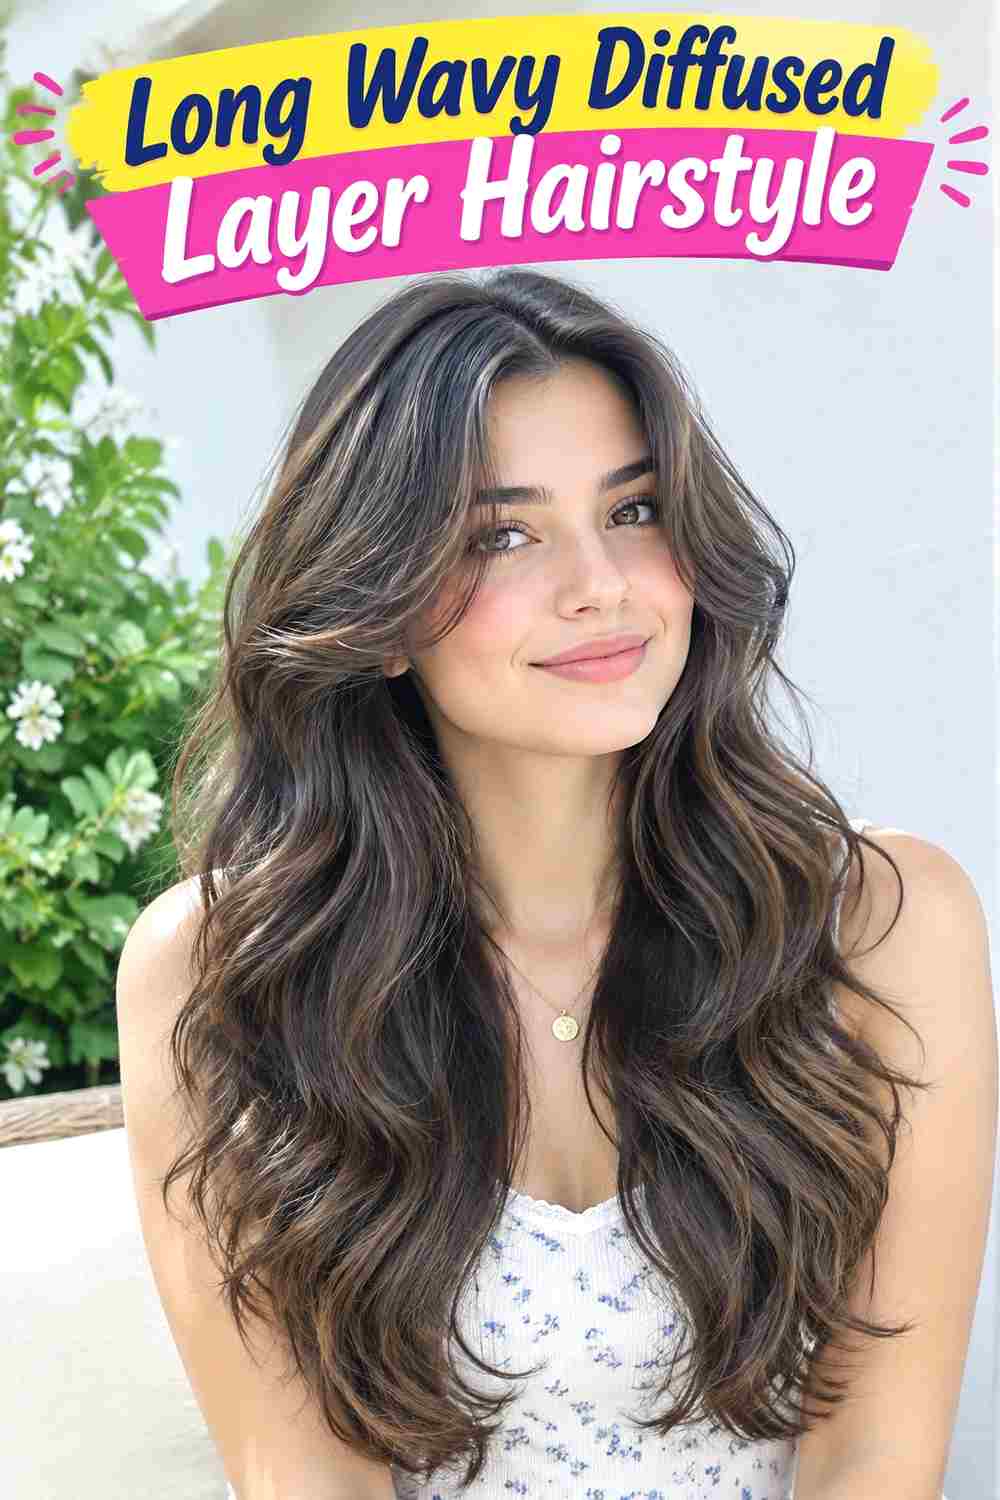
Long waves benefit from widely spaced layers that create movement without sacrificing an elongated perimeter. The first substantial layer can begin near the jaw or collarbone, with additional lengths falling through the chest and below. A center or soft side part works well, while diffusing preserves natural bends that might become stretched if the hair is brushed smooth during drying.
This option suits naturally wavy hair when keeping length is a priority. Lightweight mousse gives the pattern support, curl cream helps manage frizz, and a diffuser dries the waves without requiring direct brushing. A quick refresh can focus on several flattened upper sections and may be relatively brief. A full wash-day diffuse takes longer, particularly on long or dense hair where the interior remains damp after the surface feels dry.
At the salon, specify how much length you want to preserve and where the first visible dry layer should begin. Keeping the upper layers relatively long helps prevent the shape from becoming overly wide. As the cut grows, wave movement can shift lower and the layers may appear to merge. Reshaping the upper sections can restore separation without requiring significant loss from the longest perimeter.
Pro tip:
Diffuse long waves in manageable sections and check the interior before stopping. Surface hair can dry first, while damp underneath sections may stretch or frizz if disturbed before they have set.
Make It Work for You:
If your waves are easily weighed down, choose fewer, longer layers and use styling product sparingly. The cut can create movement without requiring very short pieces or heavy product support.
Watch Out For:
Avoid piling very long hair tightly into the diffuser bowl for extended periods. Excess compression can alter the wave pattern; support the lengths gently and allow bends to form with room.
Curtain Fringe Diffused Layer Hairstyle
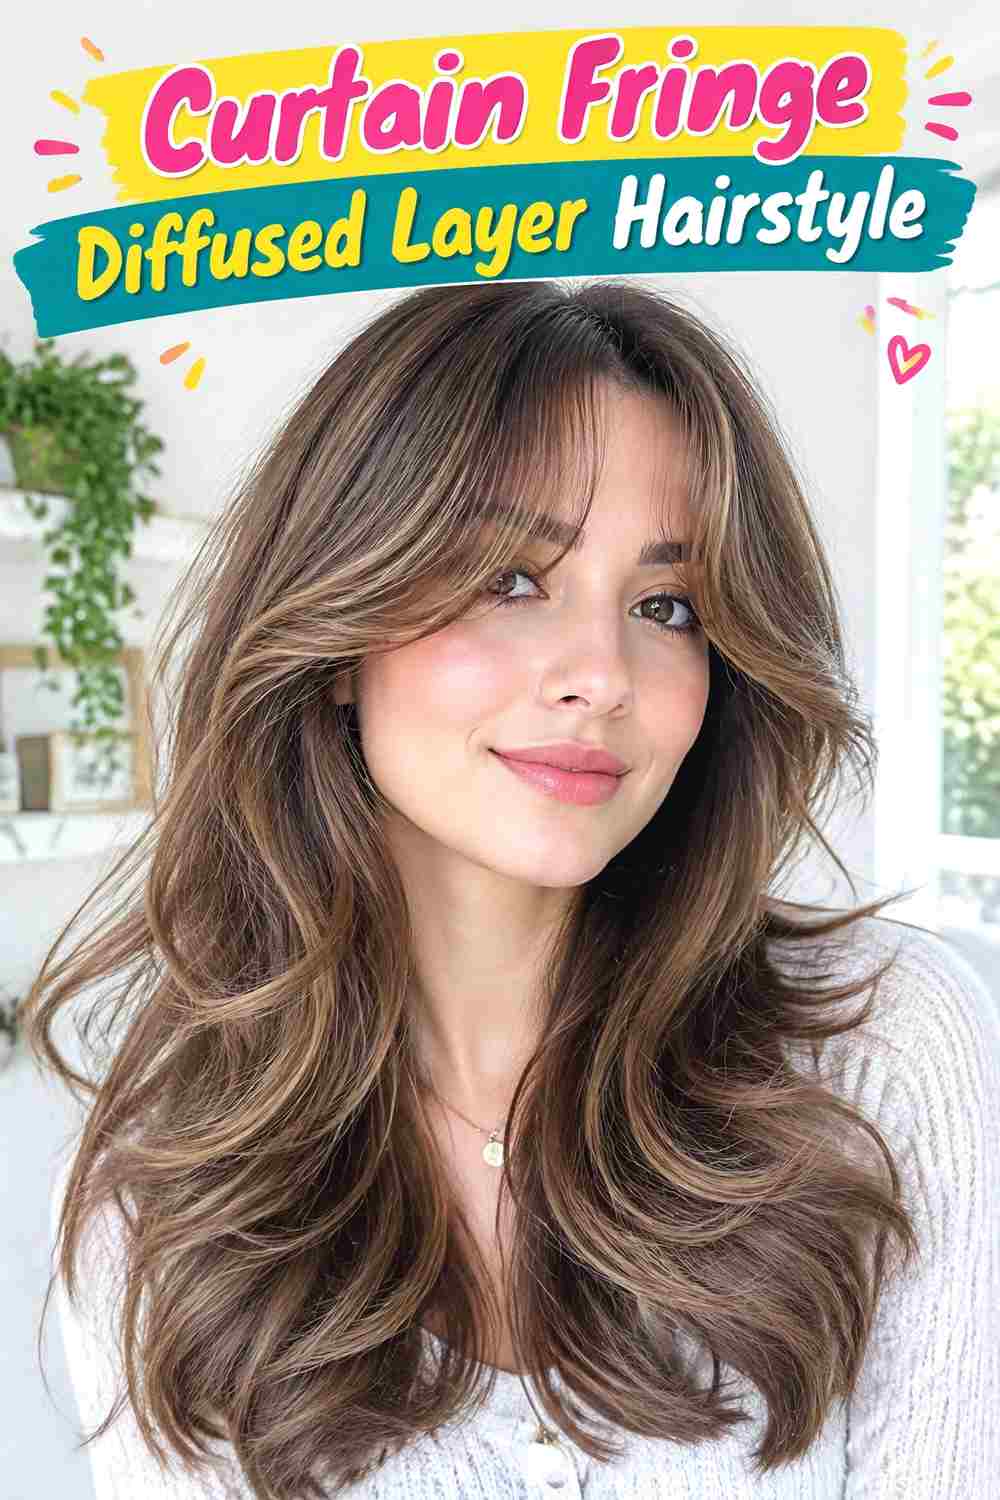
A curly or wavy curtain fringe provides the shortest level of this layered shape. Center pieces can settle near the brows or upper cheeks, while longer outer curls reach toward the cheekbones and connect with jaw and shoulder layers. Diffusing preserves the natural texture through the fringe, so the center opening looks soft rather than brushed into a smooth, rigid split.
Wavy and curly textures can use this approach when the fringe is planned around dry shrinkage. Curl cream supports flexible definition, gel helps the front hold its grouping, and a diffuser sets the fringe without flattening its bends. Refreshing only the bangs can be fairly quick. A complete wash-day routine takes longer because the fringe should be positioned early and the longer layers must also dry fully.
At the salon, discuss the dry center fringe length and the point where its outer corners connect with the first layer. Growth direction around the hairline also matters. The center usually needs maintenance before the longer haircut because it can begin entering the eyes while the outer curls still sit well. Preserving those longer corners keeps the transition smooth during fringe reshaping.
Pro tip:
Arrange the curtain opening before diffusing and dry the roots in that position first. Once the root direction has set elsewhere, repeatedly moving the fringe can introduce frizz and weaken the split.
Make It Work for You:
If your curls shrink strongly, choose a longer center and let the outer corners reach below the cheekbones. Extra length gives the curtain fringe room to contract while preserving its soft progression.
Watch Out For:
Do not judge fringe length while the curls are stretched by water. Allow them to dry into their normal pattern before deciding whether the center or outer sections need additional shortening.
Shoulder-Length Diffused Layer Hairstyle
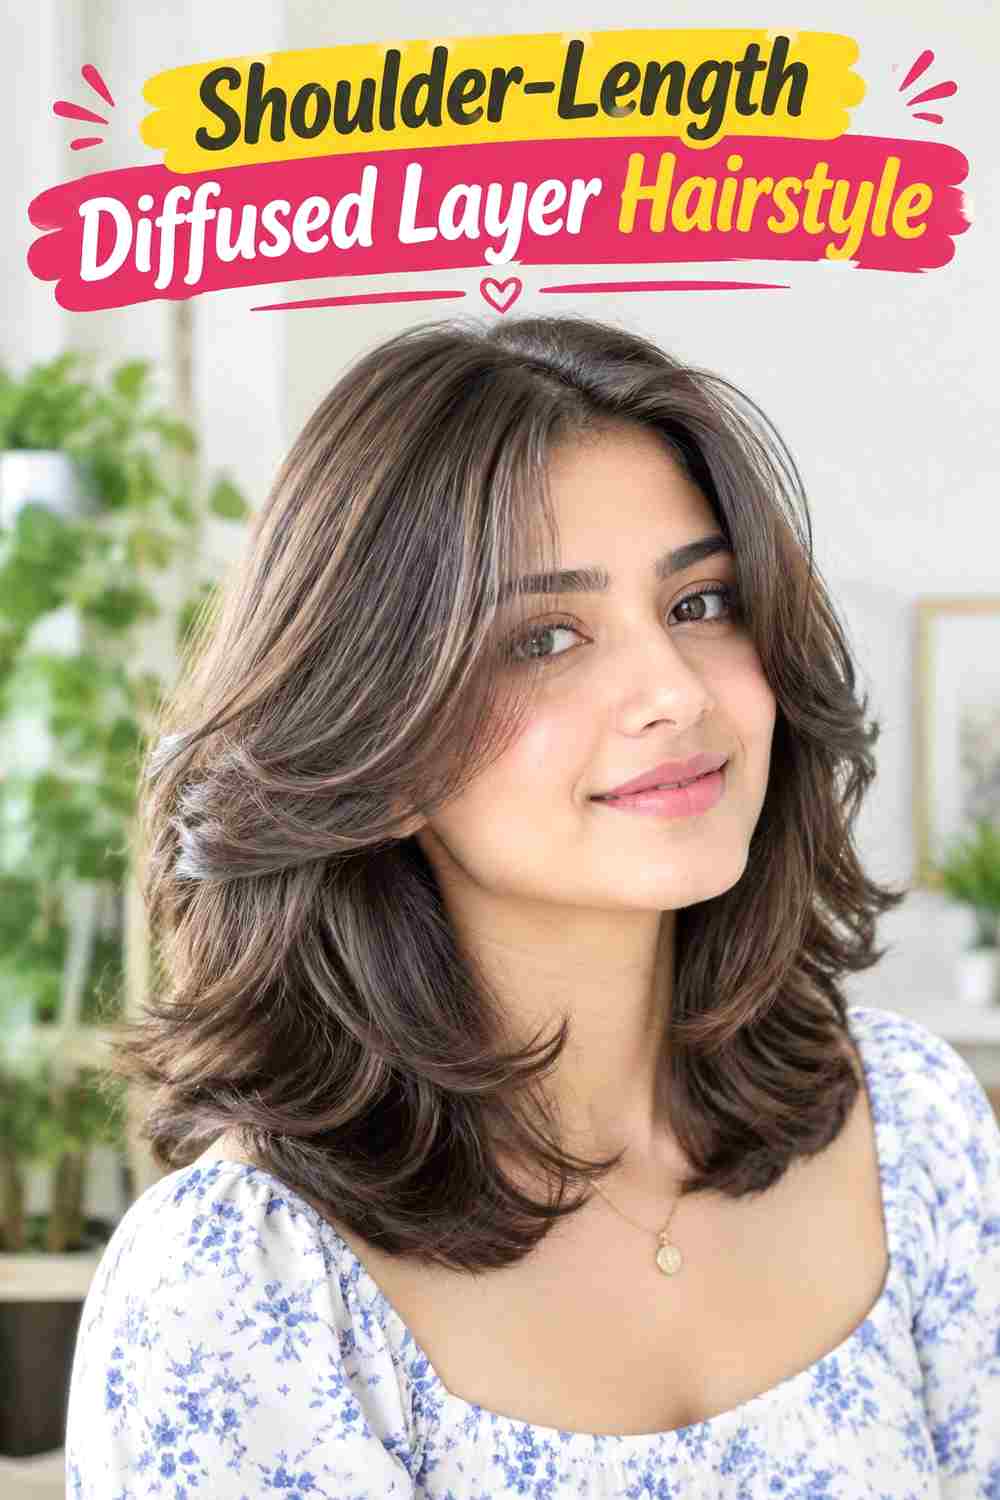
Shoulder length gives waves and curls enough room for visible layering without the drying demands of very long hair. Shorter sections can begin around the cheekbones or jaw, then progress into a fuller perimeter near the shoulders. Diffusing encourages those layers to move independently, while maintaining enough lower weight prevents the haircut from becoming excessively tapered.
Wavy and loosely curly textures can make this compact layered shape particularly practical. Lightweight mousse supports root and wave movement, gel reinforces curl groups, and a diffuser provides controlled drying. Refreshing the front and upper sides may take only a short session. A full wash-day diffuse takes longer, but overall length can make drying more manageable than on hair extending far below the shoulders.
At the salon, discuss the finished dry shoulder perimeter separately from the shortest layer. If shrinkage is substantial, both landmarks may sit higher than expected from wet hair. Keeping adequate weight through the bottom is especially useful for lower-density hair. As the haircut grows below the shoulders, its proportions become more elongated and upper layers settle lower. Reshaping can restore the compact movement without necessarily returning every section to its original length.
Pro tip:
Diffuse the shoulder perimeter without forcing all the ends upward toward the roots. Letting the lowest sections hang more naturally can preserve length while the upper layers receive more lift.
Make It Work for You:
For finer strands, start the shortest substantial layer closer to the jaw and retain a fuller shoulder edge. Diffuser lift can provide movement without relying on numerous short layers.
Watch Out For:
Removing too much weight near the shoulder line can leave the lower silhouette narrow. Preserve enough perimeter density to balance the volume created by shorter diffused layers above it.
Coily Diffused Layer Hairstyle

Compact coils can form a clear layered silhouette when shorter sections are distributed deliberately around the face, crown, and upper sides. The first layers may settle near the cheekbones or jaw, followed by longer coils through the lower shape. A rounded or slightly elongated perimeter can work, depending on whether you prefer width through the sides or more visible downward length.
Shrinkage is central to planning layers in coily hair. Lightweight leave-in conditioner provides slip, curl gel supports grouping, and a diffuser can help dry the pattern without direct high-speed airflow. Refreshing several compressed front or crown coils may be relatively quick, while a complete wash, detangle, product application, and drying routine can require considerably more time.
At the salon, show the dry silhouette and layer landmarks you want rather than relying only on stretched measurements. Dense coils may need careful bulk placement, but removing weight everywhere can change the outer shape and coil grouping. As the haircut grows, shorter sections lengthen and volume can move lower. Reshaping should respond to that shift while preserving enough weight wherever fullness supports the intended silhouette.
Pro tip:
Hold the diffuser near a section before repeatedly moving it around. More stable airflow can help coils set with less disturbance, particularly around the visible face-framing and crown areas.
Make It Work for You:
If shrinkage differs across your head, allow layer lengths to vary in their stretched state. The useful goal is a balanced dry silhouette rather than identical measurements on every coil section.
Watch Out For:
Avoid aggressive bulk removal simply because coily hair appears full. Decide where volume is unwanted first; reducing density in the wrong area can weaken the intended layered outline.
Center-Parted Diffused Layer Hairstyle
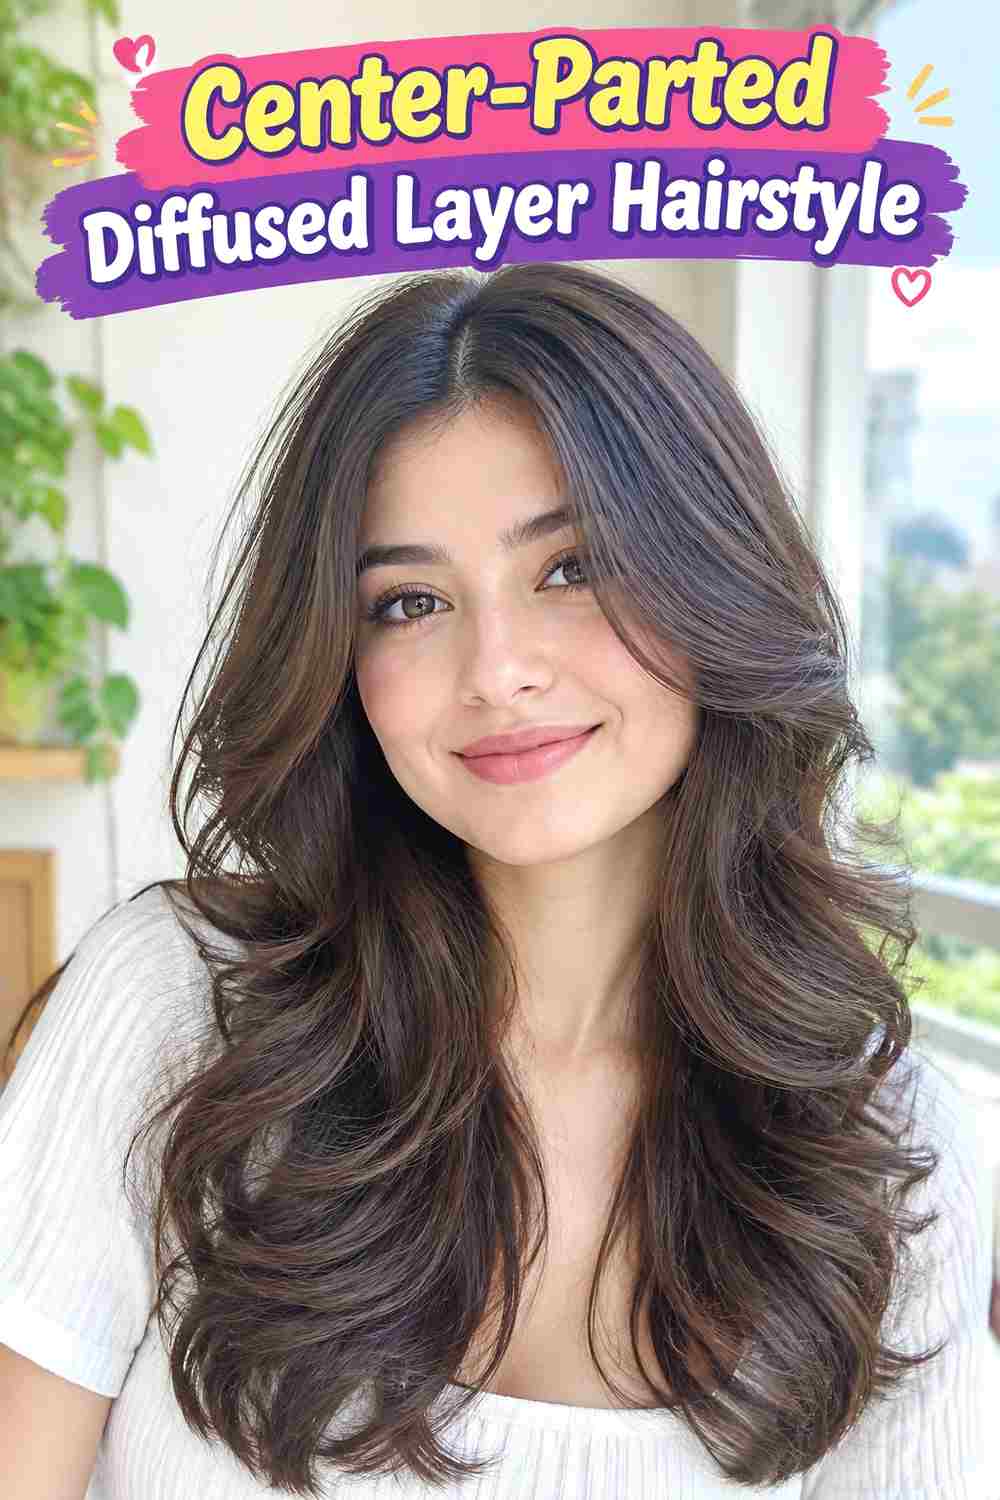
A center part distributes diffused layers across both sides of the face, making the overall balance easy to see. Shorter waves or curls can begin near the cheekbones or jaw and descend toward shoulder or longer sections. The forehead stays open, and root volume can remain moderate so the texture rather than a fringe establishes the front shape.
Wavy and curly hair that naturally separates near the middle can make this relatively low effort. Curl cream supports grouping, gel adds hold, and a diffuser dries the pattern while maintaining the chosen part. A small refresh can target flattened front sections. Full wash-day styling takes longer because all layers need to dry before their final placement can be judged, especially on dense hair.
At the salon, wear your normal center part and identify the dry landmark for the shortest layer on each side. Exact symmetry is less important than overall balance because individual curls or waves can contract differently. As the haircut grows, the front layers drop and become less distinct from the longer sections. Targeted reshaping can restore their position without altering the central part or substantially shortening the perimeter.
Pro tip:
Create the center part before applying the final hold product near the roots. Repeatedly reparting coated, partially set curls can create frizz and make the front less cleanly divided.
Make It Work for You:
If your natural part is slightly off center, follow it and balance the visible layers around that position. The open-front effect can remain without forcing the roots into an unfamiliar direction.
Watch Out For:
Avoid repeatedly stretching one side while comparing layer lengths. Different wave or curl groups can dry differently, so judge the finished balance after the hair has fully settled.
Side-Parted Diffused Layer Hairstyle

A side part shifts more texture and volume to one side, giving diffused layers an intentionally uneven distribution. The heavier side can sweep from the temple into cheekbone or jaw-level curls, while the lighter side remains closer to the head. Longer layers continue toward the shoulders or below, preventing the front sweep from feeling separate from the haircut.
This shape works particularly well when waves or curls already favor a side part. Lightweight curl cream supports flexible definition, gel adds hold to the heavier front section, and a diffuser sets the root direction. A quick refresh can focus on the part and several visible curls. A complete wash-day diffuse takes longer if the roots naturally want to return to another position.
At the salon, wear your preferred part so the stylist can assess how density distributes. Ask where the shortest dry layer should sit on the heavier side and how it should connect to lower lengths. As the cut grows, that side may become flatter and heavier around the jaw. Targeted reshaping or a small change in part depth can restore movement without requiring extensive changes elsewhere.
Pro tip:
Diffuse the heavier side near its roots before working through the ends. Establishing root direction first helps maintain the side part without repeatedly pulling finished curls across the head afterward.
Make It Work for You:
For very dense hair, use a slightly shallower part to reduce excess weight on one side. You can retain the directional shape while making the overall volume easier to manage.
Watch Out For:
Do not keep shortening the heavier side because it appears lower. Extra density can change how that section sits, so assess root placement and dry curl behavior before removing more length.
Voluminous Crown Diffused Layer Hairstyle
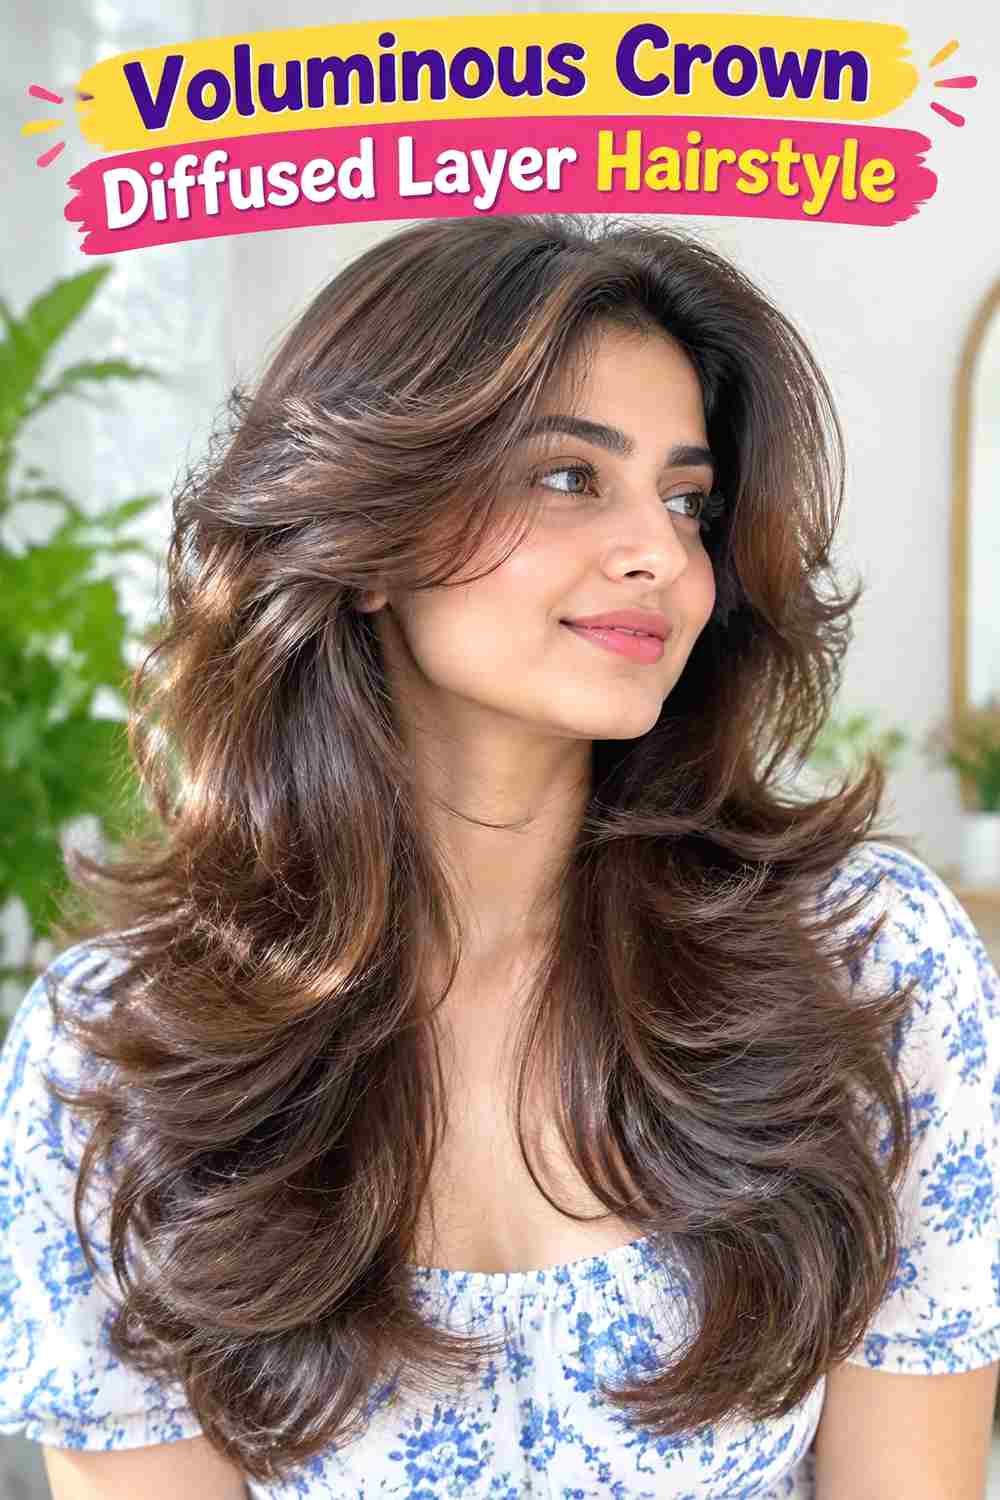
Shorter upper layers combined with diffuser lift can create noticeable crown volume while longer sections maintain movement below. The face frame may start near the cheekbones or jaw, but the defining feature is fullness through the top rather than only the sides. Lower curls or waves remain longer and somewhat calmer so the silhouette does not become equally wide from roots to ends.
Wavy and curly textures can use this structure when the crown tends to lie flatter than the lower lengths. Lightweight mousse provides root support, curl gel helps maintain definition, and a diffuser builds lift while drying. A quick refresh can target only flattened crown sections. Full wash-day styling takes longer because the roots need drying in lifted positions while the remaining hair also sets.
At the salon, discuss how short the crown layers can be without creating unwanted width or losing styling flexibility. The shortest layer should be chosen according to density, texture, and shrinkage rather than a fixed measurement. As the cut grows, crown lift naturally becomes less pronounced and weight shifts lower. Reshaping the upper layers can restore volume without necessarily shortening the face frame or perimeter.
Pro tip:
Diffuse crown sections from more than one root direction, then let them settle into the final part. This can create flexible lift without locking all the volume onto only one side.
Make It Work for You:
For lower-density hair, keep crown layers longer and rely more on gentle root lift. Preserving weight can create a fuller appearance while still preventing the top from sitting completely flat.
Watch Out For:
Very short crown layers plus aggressive diffuser lift can create a top-heavy silhouette. Keep enough length for the upper sections to connect visually with the layers through the sides.
Soft Shag Diffused Layer Hairstyle
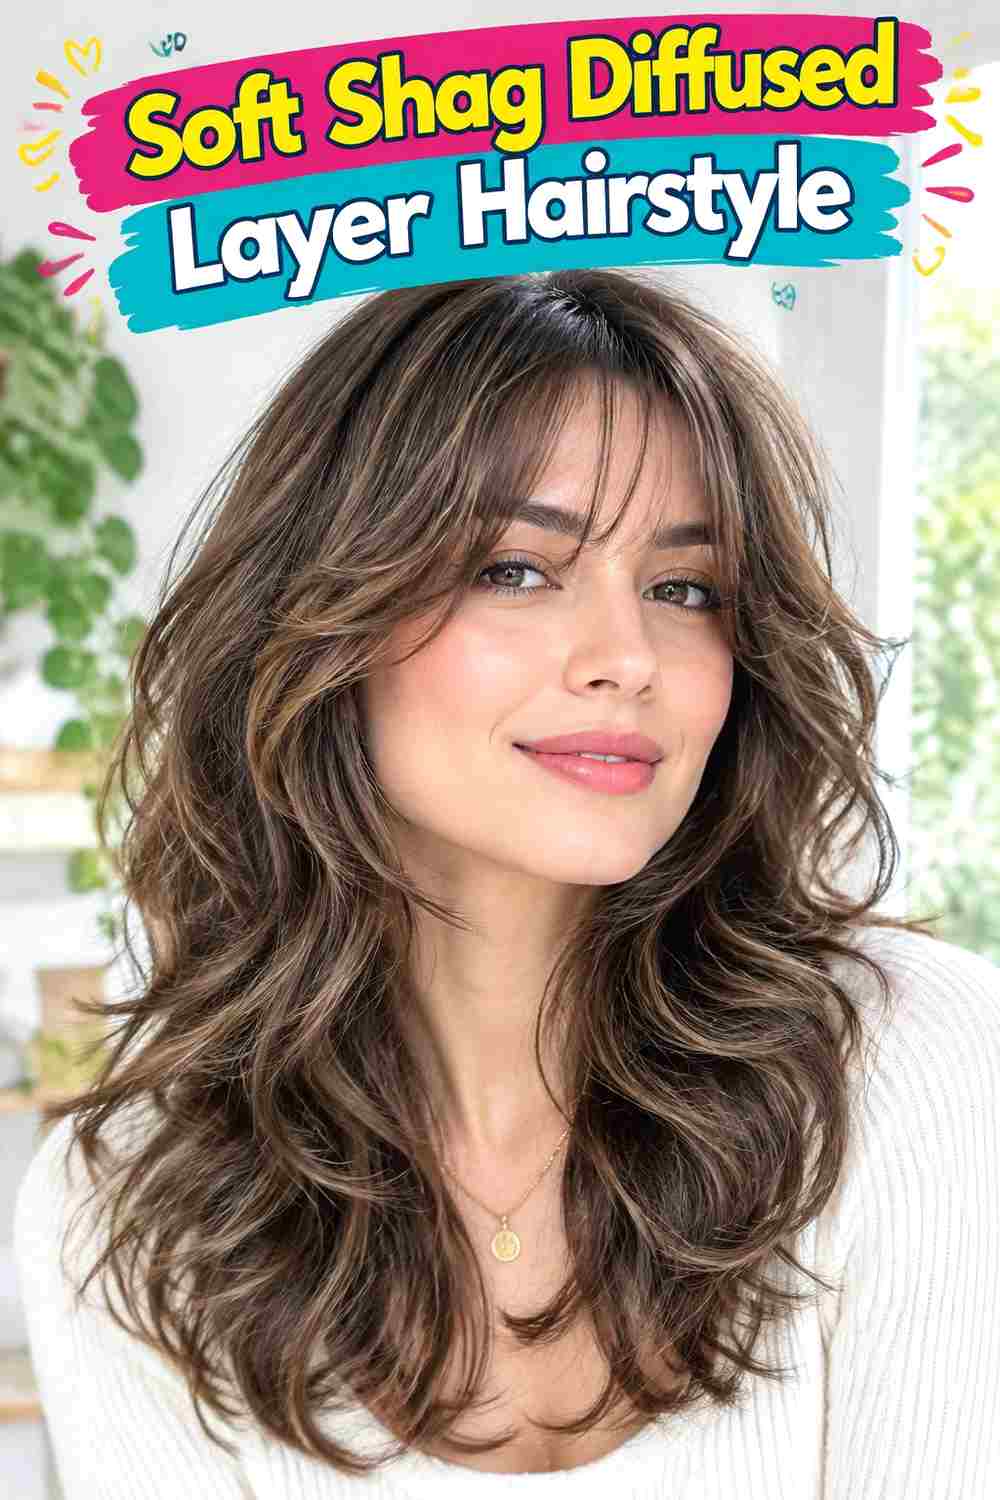
A soft shag combines shorter crown and face-framing layers with longer sections through the perimeter, and diffusing brings out the separation naturally. The front can include a loose fringe or remain open, while cheekbone and jaw-level pieces lead into shoulder or longer lengths. The silhouette has movement throughout but retains more softness than a highly disconnected shag.
Wavy and curly textures suit the design because their bends reveal the changing layer lengths. Curl cream encourages flexible grouping, lightweight mousse supports the crown, and a diffuser helps dry the layered shape with controlled volume. A refresh can concentrate on the fringe, crown, and front. Full wash-day styling takes longer because several layer levels need definition and balanced lift.
At the salon, identify where the shortest substantial crown layer should begin and how much perimeter density you want to keep. Asking simply for many short layers can remove more weight than intended. As the shag grows, the crown flattens and upper layers merge with the lower sections. Reshaping those areas restores movement while the perimeter can remain comparatively long and full.
Pro tip:
Give the crown more diffuser lift than the lower lengths and let some wave groups remain softer. Uneven intensity between levels helps the shag feel relaxed rather than uniformly expanded.
Make It Work for You:
For low-density hair, use longer crown layers and a narrower face frame. You can retain the shag’s movement while preserving more weight through the sides and lower perimeter.
Watch Out For:
Avoid excessive thinning to create shaggy texture. Separation can come from layer placement and styling; removing too much density can leave the lower sections sparse or disturb natural curl grouping.
Low-Density Diffused Layer Hairstyle

Lower-density hair can still use diffused layers when the haircut preserves a strong perimeter and limits very short sections. Layers may begin around the jaw or collarbone, with only a few gradual levels before the ends. Diffusing provides lift and texture without requiring extensive cutting, while a center or soft side part can change where the available volume is concentrated.
Wavy or curly hair with lower density often benefits from lightweight styling that does not pull the pattern downward. Lightweight mousse provides support, a small amount of gel reinforces definition, and a diffuser dries the hair without brushing away its texture. Refreshing several front sections may take only minutes. A full wash-day diffuse requires more time but usually benefits from restrained product application rather than heavy layering of formulas.
At the salon, make perimeter fullness a clear priority and distinguish density from individual strand thickness. Ask where the shortest layer can begin without reducing the lower shape more than desired. As the cut grows, the limited layers blend gradually into the perimeter. Reshaping should restore movement rather than automatically introducing additional short sections each time.
Pro tip:
Focus diffuser lift near the roots and upper sides while letting the perimeter dry with less compression. This can create visible fullness above without repeatedly separating the lower ends.
Make It Work for You:
If your strands are also fine, use smaller amounts of styling product and avoid coating every section heavily. Lightweight support can reveal the pattern while helping the roots retain movement.
Watch Out For:
Adding many short layers does not guarantee more volume. On lower-density hair, excessive removal can make the ends look sparse, so preserve weight and use diffuser placement strategically.
Dense Curl Diffused Layer Hairstyle
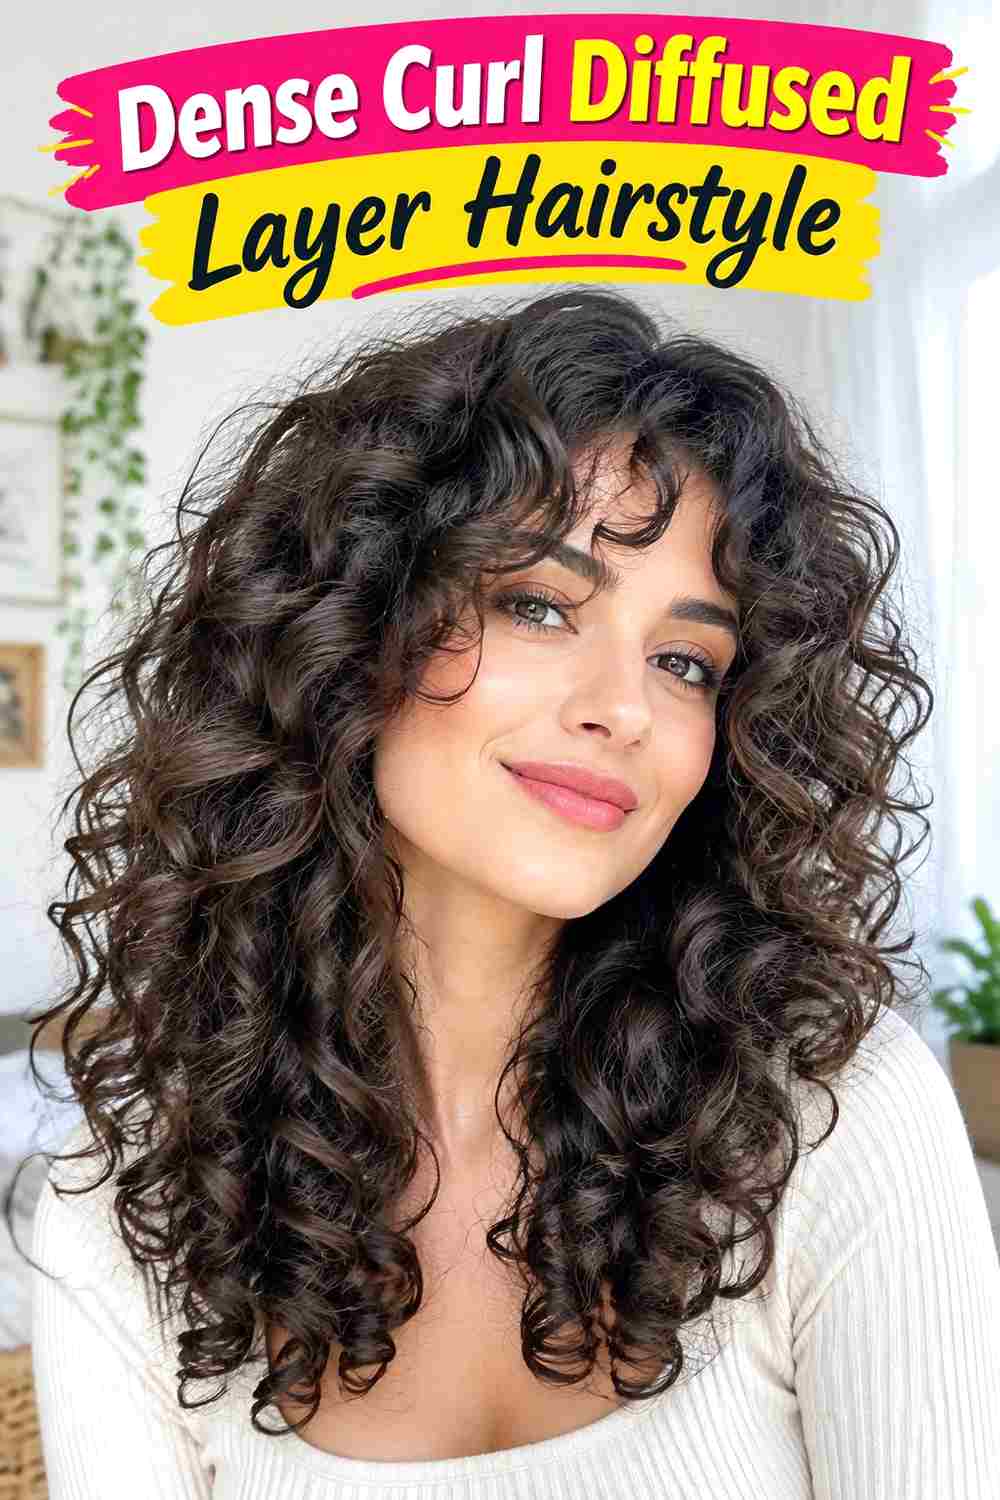
Dense curls can support multiple layer levels, but their placement should control bulk rather than simply create more volume everywhere. Shorter curls may begin around the cheekbones or jaw, with additional layers through the shoulders and lower perimeter. The silhouette can be rounded or elongated, depending on whether you want width through the sides or more downward movement.
A full head of dense curls usually requires careful product distribution and thorough drying. Lightweight leave-in conditioner provides slip, curl gel supports groups, and a diffuser helps reach sections without brushing out the pattern. Refreshing only the visible surface can be relatively quick. A complete wash-day diffuse takes considerably longer because interior sections need enough airflow to dry rather than remaining damp beneath the outer curls.
At the salon, identify where bulk tends to collect and where you want the widest part of the finished shape. Thoughtful internal weight adjustment may help, but indiscriminate thinning can alter curl groups. As layers grow, weight shifts lower and upper movement decreases. Reshaping should restore the intended distribution while preserving density where it supports the silhouette.
Pro tip:
Work in manageable sections while diffusing dense curls and check underneath the surface. Dry outer curls can hide damp interior sections that still need airflow before the hairstyle is fully set.
Make It Work for You:
If you prefer maximum fullness, keep the upper layers somewhat longer and address only specific bulky areas. The haircut can gain movement without significantly reducing the overall density you enjoy.
Watch Out For:
Do not use aggressive thinning as a general solution for dense curls. Removing weight from the wrong location can create uneven expansion, weak ends, or disrupted curl groups instead of balanced movement.
Collarbone Diffused Layer Hairstyle

A collarbone perimeter provides enough length for waves and curls to move while keeping the shape relatively easy to manage. Layers can begin near the jaw and progress toward the collarbones, with the shortest front pieces framing the lower face. Diffusing encourages the upper sections to lift while the perimeter remains substantial enough to anchor the shape.
Wavy and loosely curly textures can make this length particularly versatile. Curl cream helps organize the pattern, gel provides flexible hold, and a diffuser supports definition while drying. A quick refresh can focus on the front and upper sides. Full wash-day styling takes longer, but collarbone length generally requires less drying than a much longer cut with similar density.
At the salon, identify the finished dry collarbone perimeter and jaw-level layer separately, especially if your pattern shrinks noticeably. Ask to preserve enough weight at the bottom to avoid a narrow outline. As the haircut grows below the collarbones, the layer progression becomes more elongated and upper movement may reduce. Reshaping can return the compact proportions, or the haircut can transition naturally into a longer layered form.
Pro tip:
Give the jaw-level layers more lift while diffusing and allow the collarbone ends to hang slightly lower. That difference makes the layered structure visible without creating maximum volume throughout the entire shape.
Make It Work for You:
For looser waves, keep the layer progression gradual so there is enough length for each bend to form. Very short sections may spring outward instead of joining the collarbone silhouette.
Watch Out For:
Collarbone ends can change direction against clothing. Avoid removing excessive weight there, because very light ends may flip unpredictably instead of settling into the intended diffused shape.
Face-Framing Diffused Layer Hairstyle
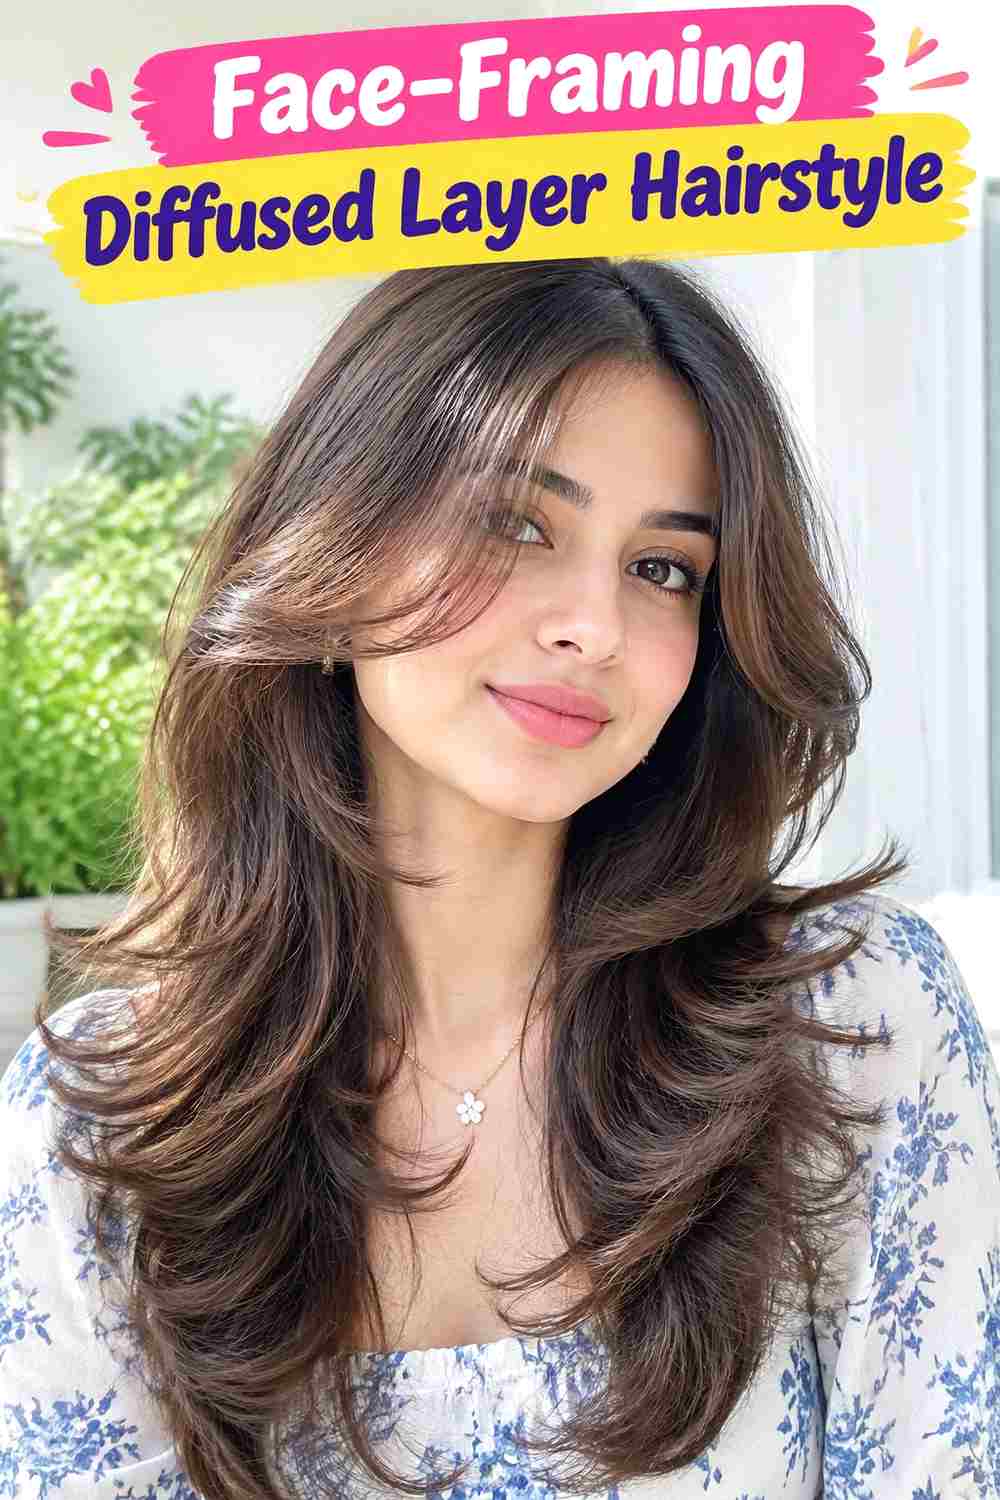
Concentrating the shortest layers around the face creates movement without heavily layering the entire haircut. Front sections can begin around the cheekbones, progress through the jaw, and then join shoulder or longer lengths. The back retains more weight, while diffusing encourages the front curls or waves to spring into view instead of disappearing beneath the longer sections.
This option works across wavy and curly textures and can be useful when preserving overall density matters. Curl cream encourages flexible grouping, gel supports the most visible front pieces, and a diffuser sets the shape. Refreshing only the frame can be relatively quick. A complete wash-day diffuse takes longer according to overall length and density, even though the back has fewer short layers.
At the salon, specify how far around the head the short face-framing layers should extend. Keeping them concentrated near the front protects more perimeter density. Dry shrinkage should determine the final cheekbone or jaw placement. As the frame grows, the shortest curls drop and begin blending into surrounding lengths. Targeted front reshaping can restore definition without changing the heavier back.
Pro tip:
Diffuse the face frame before the longer side sections and keep those short curls slightly forward as they set. Early placement prevents them from becoming hidden underneath the surrounding length.
Make It Work for You:
For lower-density hair, keep the shortest layers mostly in front of the ears. This preserves more weight through the sides and back while still creating visible diffused movement around the face.
Watch Out For:
Avoid carrying cheekbone layers too far around the head unless you want extensive layering. Concentrating short pieces near the front helps maintain the distinction between framing movement and overall density.
Elongated Diffused Layer Hairstyle

An elongated diffused shape keeps the upper layers relatively long so waves or curls move downward rather than expanding strongly through the sides. The first substantial layer can begin around the jaw or collarbone, with longer sections descending well below the shoulders. Crown lift remains controlled, and the perimeter carries enough length to make vertical movement the dominant impression.
This design can suit long wavy or curly hair when you prefer less width. Lightweight curl cream supports definition, gel provides hold through longer sections, and a diffuser dries the pattern without requiring a smooth blowout. A quick refresh may focus on the face frame and surface curls. Full wash-day diffusing takes considerably longer on long or dense hair, especially when interior sections retain moisture.
At the salon, explain that preserving vertical length and limiting excessive upper width are priorities. Keep crown layers long enough to fall into the sides rather than expanding separately. As the haircut grows, the upper sections become heavier and movement may collect toward the bottom. Reshaping the long layers can restore flow without converting the haircut into a rounded or heavily layered silhouette.
Pro tip:
Hold the diffuser near longer sections without repeatedly pushing them tightly toward the scalp. Supporting the curl pattern with less compression helps preserve the elongated direction instead of creating extra side width.
Make It Work for You:
If your curls naturally expand strongly, keep the upper layers longer and use controlled root lift. The pattern can retain its fullness while the overall silhouette remains more vertical than rounded.
Watch Out For:
Very short crown layers can work against an elongated shape by creating width high on the head. Preserve enough upper length for the curls to connect smoothly with the lower sections.
Conclusion
Diffused layer hairstyle ideas can emphasize cheekbone framing, rounded curl volume, crown lift, or longer downward movement depending on layer placement. Shoulder and collarbone cuts create compact shapes, while long layers give waves and curls more vertical flow. Center parts distribute volume evenly; side parts concentrate it. Curly and coily patterns also require realistic allowance for shrinkage when choosing finished lengths.
Density should guide how much hair is removed. Lower-density hair often benefits from fewer layers and a stronger perimeter, while dense curls may need carefully considered bulk placement. Diffusing can enhance definition and volume, but it does not replace a well-planned cut. Choose a layer pattern that works with your natural texture, dry shape, upkeep preferences, and realistic wash-day routine.
Before Your Salon Visit
Choose one or two favorites and save clear references showing the dry shape you want. Discuss your texture, density, face shape, shrinkage, preferred length, upkeep, and usual wash-day routine. Identify the exact first layer, face-framing position, fringe length, perimeter shape, and areas where you want more or less volume. Explain whether you normally diffuse completely, partly air-dry, or avoid heat so the haircut can be planned around the way you actually style it.
FAQs
What makes diffused layers different from ordinary layers?
The haircut can use familiar layering principles; “diffused” mainly describes how waves, curls, or coils are dried and displayed. A diffuser supports the natural pattern and can reveal layer placement through definition and volume. The haircut itself should still be planned for your dry length, density, shrinkage, and preferred silhouette.
Do I need a diffuser for a layered curly haircut?
No. You can air-dry a layered curly haircut if that suits your texture and routine. A diffuser can speed drying and influence root volume or definition, but it is a styling tool rather than a haircut requirement. Your layers should still make sense when worn in your normal everyday finish.
How can I diffuse layers without creating too much frizz?
Apply styling product evenly, arrange important sections while damp, and avoid constantly touching or rearranging them as they dry. Use controlled airflow and allow curl or wave groups to set before separating them. Once fully dry, make only the adjustments needed for your preferred volume and placement.
When should diffused layers be reshaped?
Look for changes in the haircut rather than following one universal schedule. Reshaping may help when upper layers drop below their intended landmarks, crown movement decreases, the perimeter becomes disproportionately heavy, or face-framing sections disappear into longer hair. Styling issues alone do not always mean the cut needs shortening.