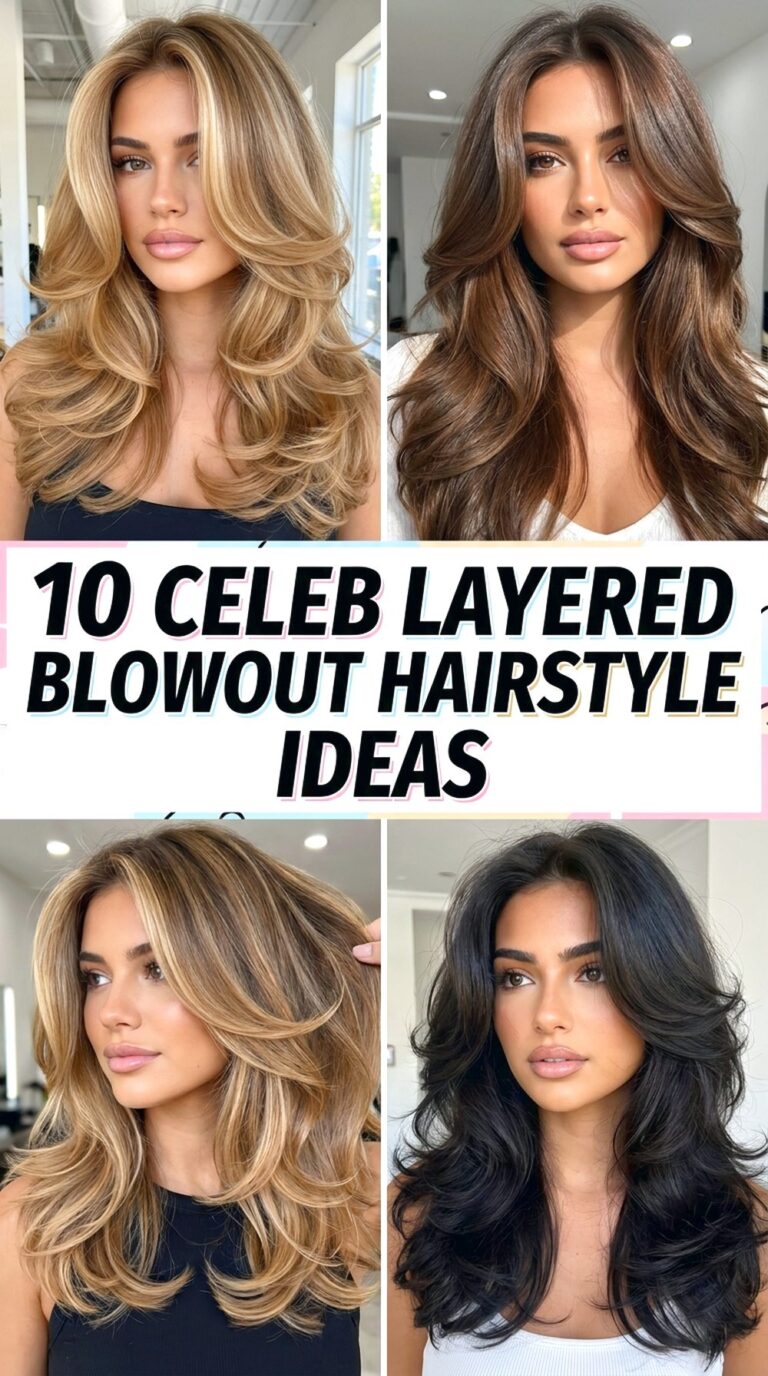
18 Cascading Layer Hairstyle Ideas

Cascading layers create a visible progression from shorter upper or front sections into increasingly longer lengths. Instead of one strong step, each layer falls into the next, producing movement through the sides, mid-lengths, and ends. The shortest point might begin near the cheekbones, jaw, collarbone, or upper back depending on the haircut. Fringe is optional: curtain bangs can connect directly with the layers, while an open forehead keeps attention on the longer flowing shape.
Straight hair makes the layer sequence especially easy to see, while waves and curls add bends, spirals, and more volume between levels. Density matters too. Lower-density hair often benefits from longer layers and a stronger perimeter, whereas dense hair can sometimes use carefully placed internal weight adjustment without sacrificing the outer shape. Curly hair also needs shrinkage considered before choosing layer landmarks.
Cascading layer hairstyle ideas can range from relatively low-effort air-dried finishes to polished blowouts. Quick refreshes usually focus on the front and upper layers, while complete wash-day styling takes longer. Reshaping becomes useful when the layers lose their progression or excess growth shifts volume downward.
Quick List
- Cheekbone Cascading Layer Hairstyle
- Long Flowing Cascading Layer Hairstyle
- Curtain Fringe Cascading Layer Hairstyle
- Wavy Cascading Layer Hairstyle
- Curly Cascading Layer Hairstyle
- Center-Parted Cascading Layer Hairstyle
- Side-Parted Cascading Layer Hairstyle
- Shoulder-Length Cascading Layer Hairstyle
- Feathered Cascading Layer Hairstyle
- Voluminous Cascading Layer Hairstyle
- Soft Straight Cascading Layer Hairstyle
- Face-Framing Cascading Layer Hairstyle
- U-Shaped Cascading Layer Hairstyle
- Deep-Wave Cascading Layer Hairstyle
- Low-Density Cascading Layer Hairstyle
- Dense Hair Cascading Layer Hairstyle
- Collarbone Cascading Layer Hairstyle
- Rounded-End Cascading Layer Hairstyle
Cheekbone Cascading Layer Hairstyle

Starting the shortest visible layers near the cheekbones creates movement high around the face before the haircut flows into longer jaw, collarbone, and chest-level sections. A center or slightly off-center part keeps both sides of the frame visible, while the back can remain substantially longer. The ends should still carry enough weight to anchor the progressively shorter pieces above them rather than creating a heavily tapered outline.
Straight and wavy textures can show the cheekbone-to-length transition particularly clearly. Apply heat protectant before heat styling, use a round brush to sweep the front away from the face, and finish with flexible hairspray when additional hold is useful. Refreshing the first two layer levels can take only a few minutes; a complete long-hair blowout takes considerably longer depending on length and density.
At the salon, identify the exact dry cheekbone landmark where you want the shortest substantial layer to begin. Ask how that section will connect into the longer perimeter without excessive removal. As the cut grows, the shortest layer drops toward the jaw and the cascade becomes less obvious around the upper face. Targeted reshaping can restore that starting point without sacrificing much overall length.
Pro tip:
Direct the cheekbone layer away from the face first, then let the next layer fall slightly lower and softer. Changing the strength of each bend makes the descending lengths easier to see.
Make It Work for You:
For lower-density hair, limit the shortest cheekbone pieces to the front and keep longer layers elsewhere. You can retain the high face frame without removing unnecessary weight through the back.
Watch Out For:
Avoid extending cheekbone-length sections too far around the head unless you want significant upper layering. Keeping the shortest pieces concentrated near the front protects more density through the sides and perimeter.
Long Flowing Cascading Layer Hairstyle
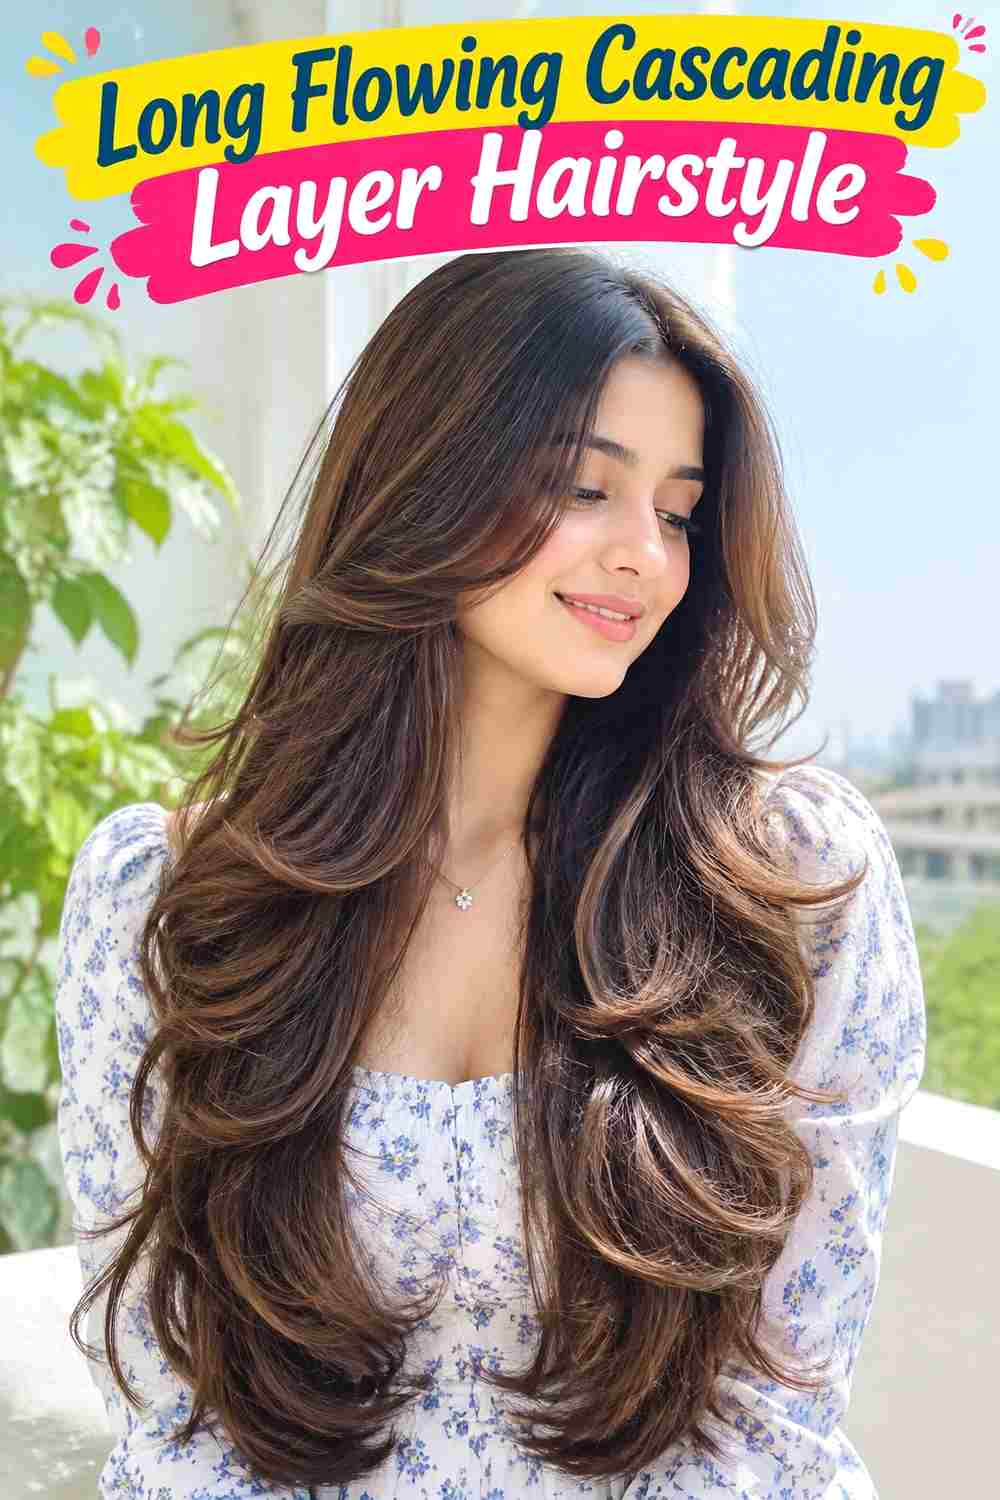
Long lengths give cascading layers enough space to form several gradual levels without sacrificing an elongated silhouette. The first substantial layer can begin below the jaw, followed by collarbone, chest, and longer sections that merge into the perimeter. An open center or relaxed off-center part suits the flowing design, while soft bends make each layer move independently without looking disconnected.
This version works particularly well when maintaining length is a priority. Straight and wavy hair display the progression easily, while curls can use longer spacing between levels to account for shrinkage. Heat protectant prepares the hair for heated styling, a large round brush creates broad movement, and lightweight serum can smooth the ends. A front-layer refresh may be quick, but a full blowout on long hair requires more time.
At the salon, explain how much overall length you want to preserve and where the first obvious layer should begin. That prevents a request for “lots of layers” from becoming shorter than expected. As the haircut grows, the individual levels begin merging and the upper sections can feel heavier. Reshaping can re-establish the progression while leaving the longest perimeter relatively stable.
Pro tip:
Style each major layer level in slightly different-sized sections. Broader sections lower down and smaller sections near the front help reveal the cascade without producing identical curls throughout the length.
Make It Work for You:
If you rarely heat style, keep the layers longer and spaced farther apart. Natural movement can still reveal the descending shape while reducing dependence on a polished blowout for definition.
Watch Out For:
Too many short layers can undermine the long, flowing effect. Preserve substantial distance between the first layer and perimeter so the haircut retains both movement and visible overall length.
Curtain Fringe Cascading Layer Hairstyle

Curtain fringe creates the first step in this cascading shape. Shorter center pieces can skim the brows or upper cheeks, then lengthen toward the cheekbones before joining jaw, collarbone, and longer layers. The center opening keeps the forehead visible, while each outer section extends farther down, producing a continuous transition from fringe to the longest lengths.
Straight and wavy textures can show this sequence clearly. Apply heat protectant before styling, use a round brush to open the fringe and upper layers away from the face, and add flexible hairspray for light support. A quick refresh can focus entirely on the fringe and first layer. Full wash-day styling takes longer because the longer cascade needs drying and shaping as well.
The salon conversation should establish the finished center fringe length and where its outer corners join the first face-framing layer. That connection matters more than making every layer equally spaced. Fringe upkeep is usually needed sooner than overall haircut maintenance because the center can enter the eyes while the longer layers remain balanced. Preserve the longer corners when refining the fringe so the cascade does not become disconnected.
Pro tip:
Style the curtain fringe first and make each following face-framing layer slightly less curved. The gradual reduction in bend helps the eye follow the haircut naturally from short front pieces into length.
Make It Work for You:
For fine strands, keep the fringe section relatively narrow and preserve fuller layers below the cheekbones. This creates the cascading front without borrowing excessive hair from the longer perimeter.
Watch Out For:
Do not shorten every face-framing layer when only the fringe has grown out. Maintaining different lengths is essential; trim or reshape the specific level that has lost its intended placement.
Wavy Cascading Layer Hairstyle

Natural waves make cascading layers visible through changing bends and movement rather than a polished stepped outline. The shortest layers can begin around the jaw, with longer sections flowing through the collarbones and below. A center or off-center part works well, while the perimeter stays substantial enough to prevent the wave pattern from becoming overly tapered near the ends.
This approach can suit naturally wavy hair that benefits from movement but does not need extensive short layering. Lightweight mousse supports the wave pattern, curl cream controls frizz, and a diffuser dries the shape without brushing away the bends. A quick refresh may involve dampening only flattened upper waves. Full wash-day styling takes longer because the entire pattern must dry before the layer balance is fully visible.
At the salon, discuss where the first layer should settle with your usual dry wave pattern. Wet or stretched length can disguise how much a wave rises after drying. Ask to retain enough weight through the lower perimeter for your density. As the layers grow, waves can start stacking lower and making the shape feel heavier around the ends. Reshaping the upper levels restores movement without necessarily shortening the perimeter.
Pro tip:
Encourage the existing wave direction rather than making every layer bend identically. Natural variation between sections gives the cascade dimension while the haircut’s descending lengths provide the underlying structure.
Make It Work for You:
If your waves are easily stretched, choose fewer and longer layers. This preserves enough weight for the pattern to form while still creating visible movement from the jaw through the lower lengths.
Watch Out For:
Heavy creams can pull shallow waves downward and hide the layer progression. Start with less product, particularly near the upper sections, and add control only where frizz needs it.
Curly Cascading Layer Hairstyle

Curls create a cascading effect when shorter groups sit above progressively longer curl levels instead of collecting at one heavy perimeter. The first visible layer can begin around the cheekbones or jaw, with subsequent curls falling near the shoulders and farther down. A center or soft side part changes the distribution, while rounded movement through the sides keeps the layers connected.
Curly and coily textures need the cascade planned according to dry shrinkage. Lightweight leave-in conditioner provides slip, curl gel supports grouping, and a diffuser can set the shape with controlled airflow. Refreshing a few upper curls may be relatively quick, while a complete wash, product application, and drying routine takes much longer depending on length and density.
At the salon, identify where you want each major layer zone to settle when dry rather than relying on stretched measurements. Dense curls may need thoughtful bulk placement, but indiscriminate thinning can disturb curl groups and perimeter fullness. As the haircut grows, upper curls become longer and volume can migrate downward. Reshaping is useful when the intended stacked progression becomes less visible or the silhouette develops unwanted lower heaviness.
Pro tip:
Define the shortest curls in groups that match your natural pattern and let lower sections form their own shapes. Clear placement matters more than forcing identical curl size at every layer.
Make It Work for You:
For strong shrinkage, leave more length between planned layer levels and assess them dry. Extra allowance can preserve the cascading sequence without creating unexpectedly short sections around the upper face.
Watch Out For:
Avoid comparing stretched lengths alone when checking balance. Two equally long sections can shrink differently, so judge the cascade by its dry silhouette, volume placement, and visible curl progression.
Center-Parted Cascading Layer Hairstyle
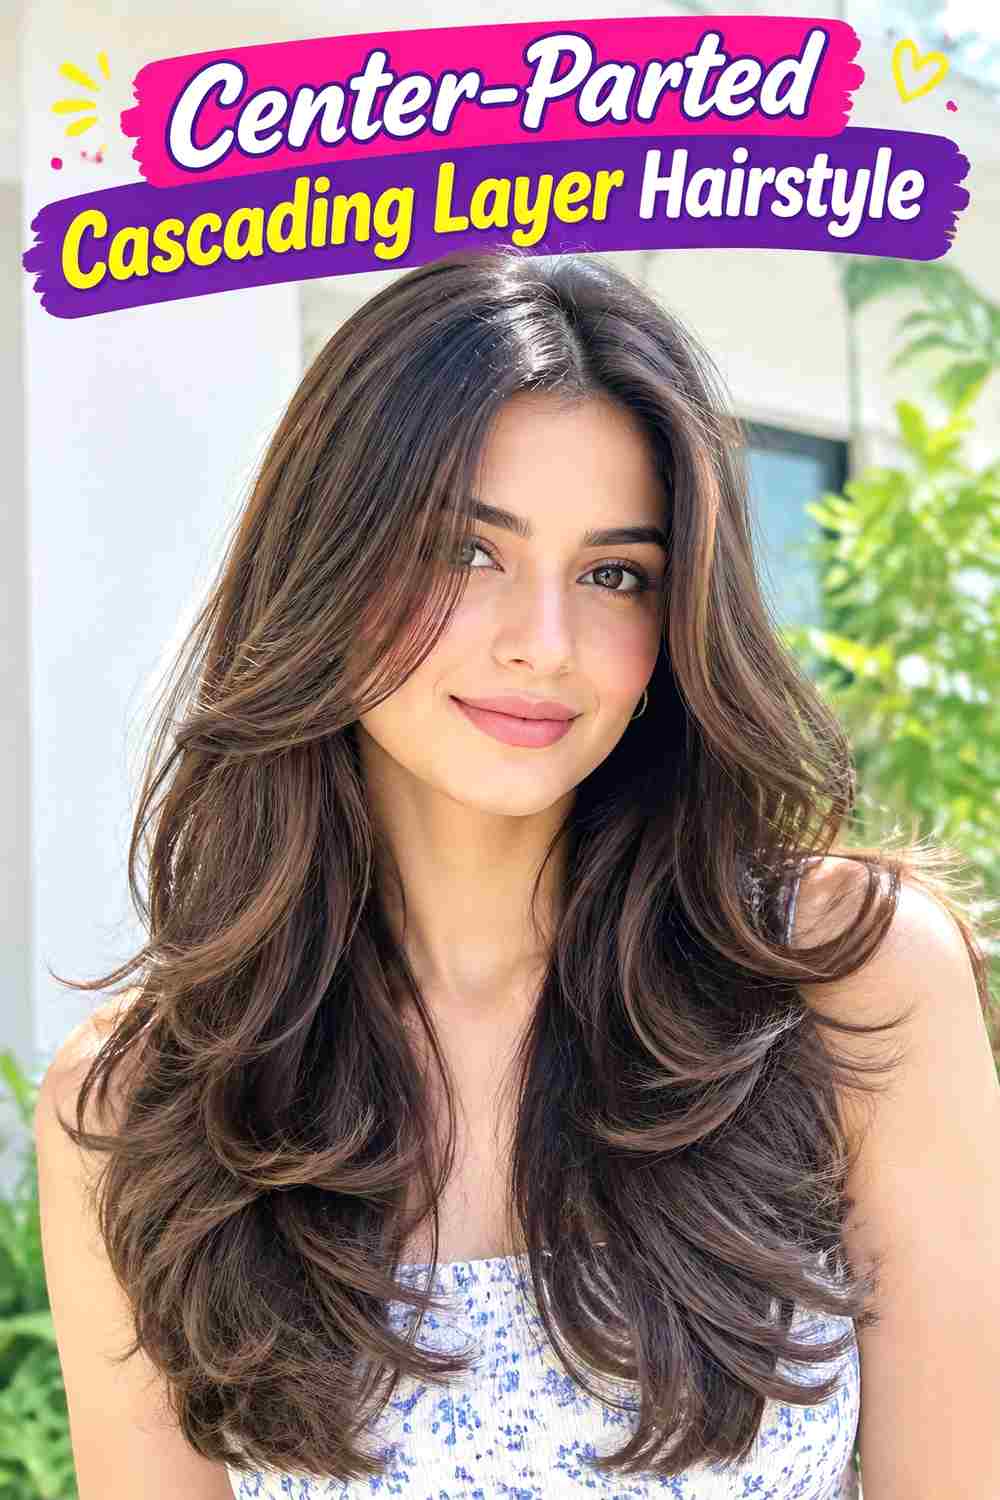
A center part places cascading layers evenly on both sides of the face, making the descending lengths particularly easy to see. The first layer can start near the cheekbones or jaw, followed by collarbone and longer sections. The back remains longer, while the front opens symmetrically enough to frame the face without requiring a separate fringe.
Straight and softly wavy textures can emphasize the balanced shape, although perfect symmetry is unnecessary. Heat protectant should be applied before heat styling, a round brush can direct both front sections outward, and lightweight serum smooths the longer ends. A quick refresh may involve only the first two layers. A complete blowout requires more time because the full length needs drying and movement.
Wear your preferred center part at the salon so the stylist can see how density distributes on each side. Identify the shortest dry layer landmark rather than requesting generic face framing. As the haircut grows, the upper layers gradually merge into the lower ones and the central frame becomes less defined. Refining those front levels can restore the cascade while keeping the overall length.
Pro tip:
Set the center part while the roots are damp, then style each side away from it. Establishing the part early prevents repeated repositioning from disturbing the smooth upper-layer direction.
Make It Work for You:
If your natural part sits slightly off center, follow it rather than forcing exact symmetry. Balanced layer placement can still create a center-framed appearance without fighting a strong growth pattern.
Watch Out For:
Do not keep trimming one side simply because its layers appear shorter. Wave pattern, root direction, and density can alter visual length, so compare both sides in their normal styled position.
Side-Parted Cascading Layer Hairstyle

A side part changes the cascade by concentrating more layers and volume on one side. The heavier front can sweep from the temple toward the cheekbone and jaw, while the lighter side remains closer to the head. Longer layers then descend through the collarbones and lower lengths, preserving a continuous flow rather than creating an isolated side fringe.
Straight, wavy, and loosely curly textures can adapt well, especially when the hair already prefers a side part. Styling cream provides flexible control, while heat protectant and a round brush can redirect the heavier front when heat styling. A quick refresh focuses on the part and upper sweep. Full wash-day styling takes longer if the roots naturally grow in another direction.
At the salon, establish the part before discussing the layer starting point. Moving the part later changes where shorter sections fall and can alter the apparent balance. Ask how the heavier side will connect into the lower layers without becoming bulky. As growth continues, that side can begin dropping flatter and feeling heavier around the jaw. Targeted reshaping can restore movement without changing the entire cascade.
Pro tip:
Style the heavier side in smaller sections than the lighter side. More controlled placement near the part helps distribute volume gradually instead of allowing one large section to fall as a solid block.
Make It Work for You:
For dense hair, use a slightly shallower part if the heavier side becomes overly wide. The cascading direction remains visible while the volume distribution becomes easier to manage.
Watch Out For:
Avoid cutting both sides as though they will always be worn in a center part. Layer placement should account for your normal distribution so the heavier side does not develop awkward short sections.
Shoulder-Length Cascading Layer Hairstyle
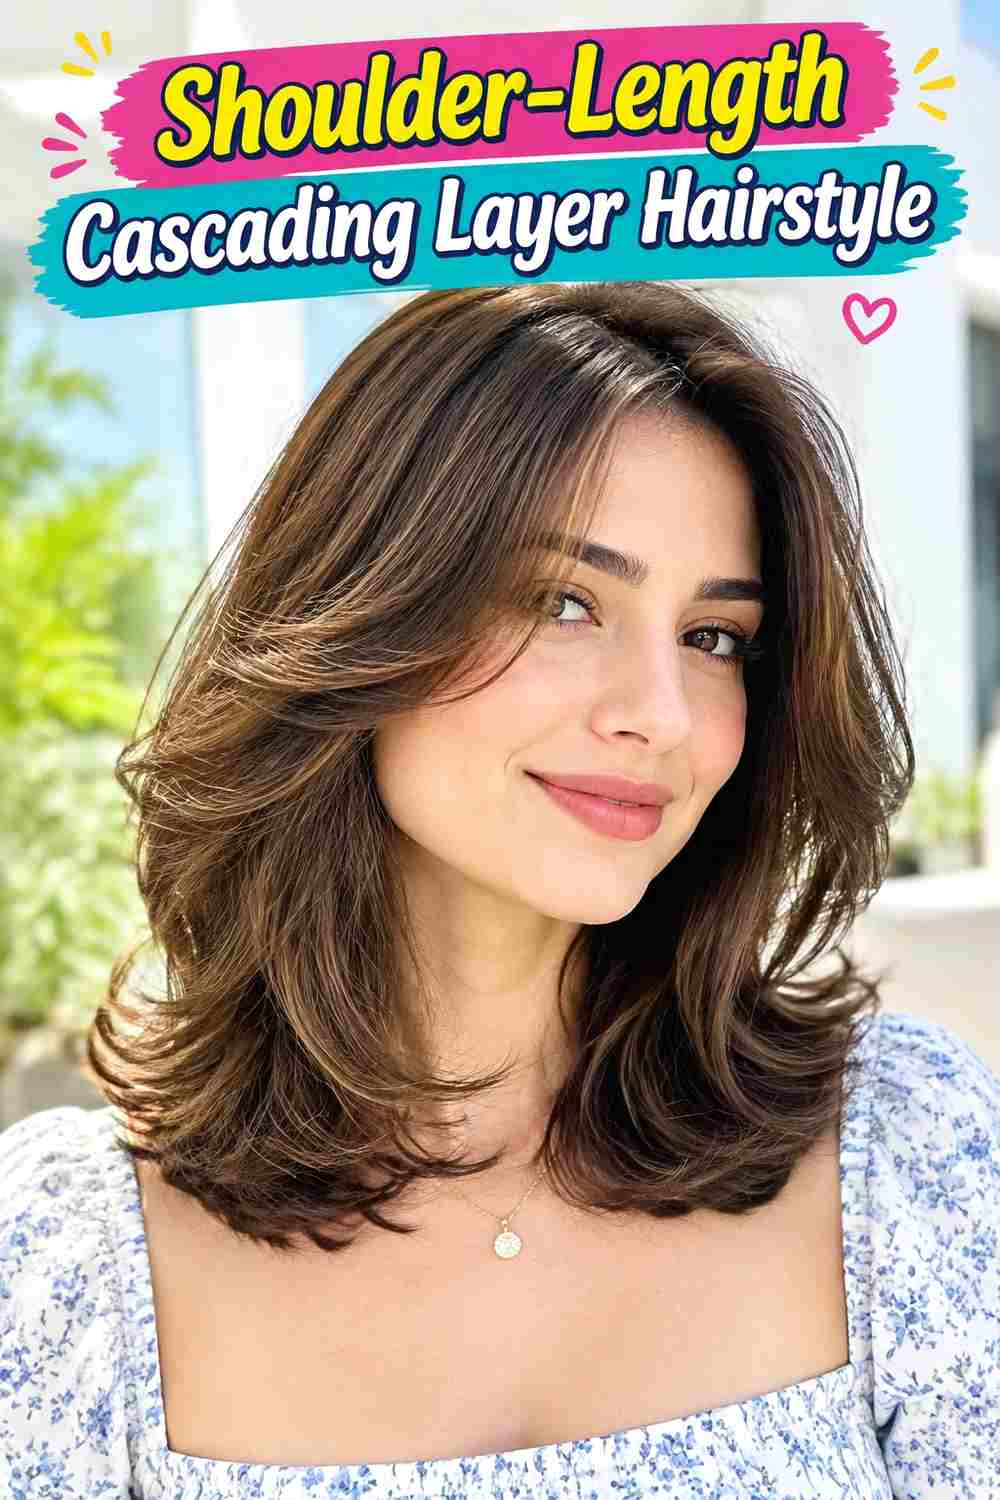
A shoulder-length cut compresses the cascading idea into a shorter space. The first layer can begin around the cheekbones or jaw, followed by sections near the chin and collarbone before reaching the shoulder-level perimeter. Because the overall length is limited, each step should remain gradual enough to avoid turning the haircut into disconnected tiers.
Straight, wavy, and loosely curly textures can all use this shape. Apply heat protectant before heat styling, use a medium round brush to create soft movement, and add styling cream to smooth the ends. Refreshing the front and upper layers can be relatively quick. A full wash-day blowout takes longer but usually requires less drying time than a long cascading cut of similar density.
At the salon, discuss the dry shoulder perimeter and shortest layer as two separate landmarks. Keeping enough lower weight is important, especially for lower-density hair. As the haircut grows beyond the shoulders, the cascade becomes longer and less compact, while the upper layers gradually lose their original placement. Reshaping can restore the shoulder-level proportions without automatically shortening every section to its previous measurement.
Pro tip:
Give the shortest front layer the strongest outward bend and keep lower sections progressively softer. This makes the cascade visible within the limited shoulder-length space without creating stacked-looking flips.
Make It Work for You:
For fine hair, start the shortest layer closer to the jaw and maintain a fuller shoulder perimeter. Fewer short sections can preserve density while still giving the haircut noticeable movement.
Watch Out For:
Too many short layers can leave shoulder-length ends looking thin. Preserve enough weight below the jaw so the cascade feels gradual instead of becoming a heavily tapered silhouette.
Feathered Cascading Layer Hairstyle
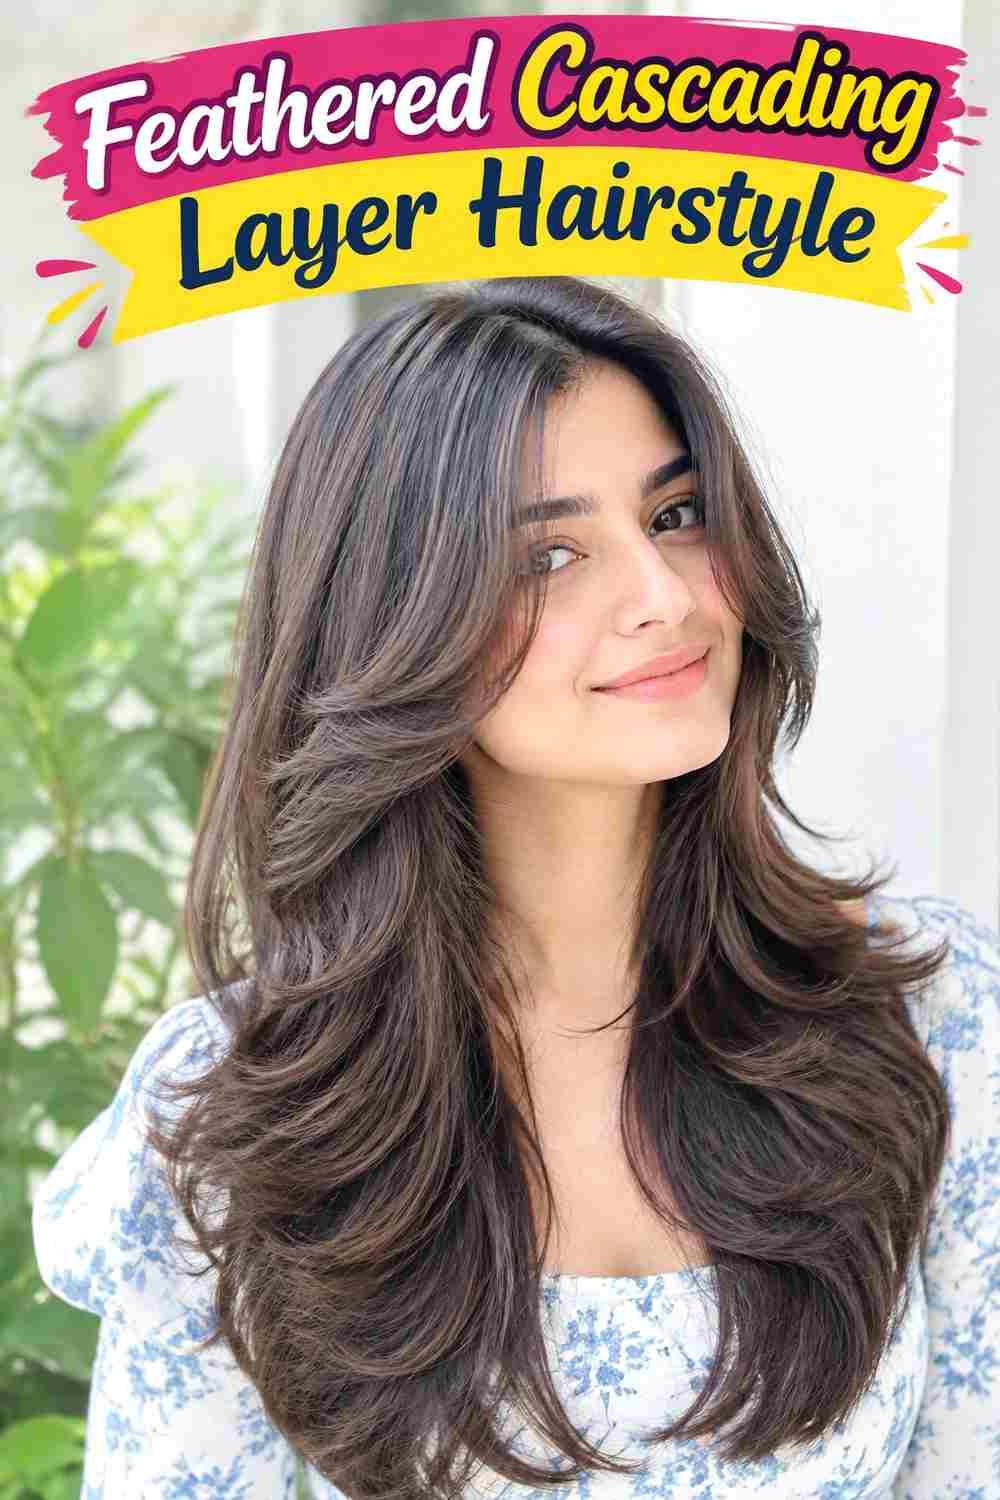
Feathered movement emphasizes the edges of each cascading layer. Shorter front sections can begin near the cheekbones, then sweep outward into jaw, collarbone, and longer levels. The ends of each layer bend away lightly rather than curling tightly, creating visible separation while maintaining a soft, flowing connection through the entire haircut.
Straight and wavy hair can show feathering particularly clearly. Apply heat protectant before using a round brush to direct each level outward, then use flexible hairspray for light support. A quick refresh can concentrate on the face frame and uppermost layers. A complete blowout takes longer because several lengths need coordinated direction rather than one uniform bend.
At the salon, identify where the first feathered layer should start and how much perimeter weight you want retained. The desired movement does not automatically require extensive thinning. As the cut grows, the shorter sections lose their outward placement and begin merging with the lower lengths. Reshaping the upper and front layers can restore the feathered cascade while allowing the longest hair to remain comparatively stable.
Pro tip:
Reduce the amount of outward bend as you move toward the longest layers. Stronger movement near the face and softer movement below keeps the feathering from looking repetitive or overly flipped.
Make It Work for You:
For finer strands, preserve fuller ends and create most of the feathered effect with styling direction. Movement does not require removing large amounts of weight from each layer edge.
Watch Out For:
Rolling every section strongly away from the face can produce stacked flips rather than a cascade. Keep the bends shallow and vary their strength according to each layer’s position.
Voluminous Cascading Layer Hairstyle
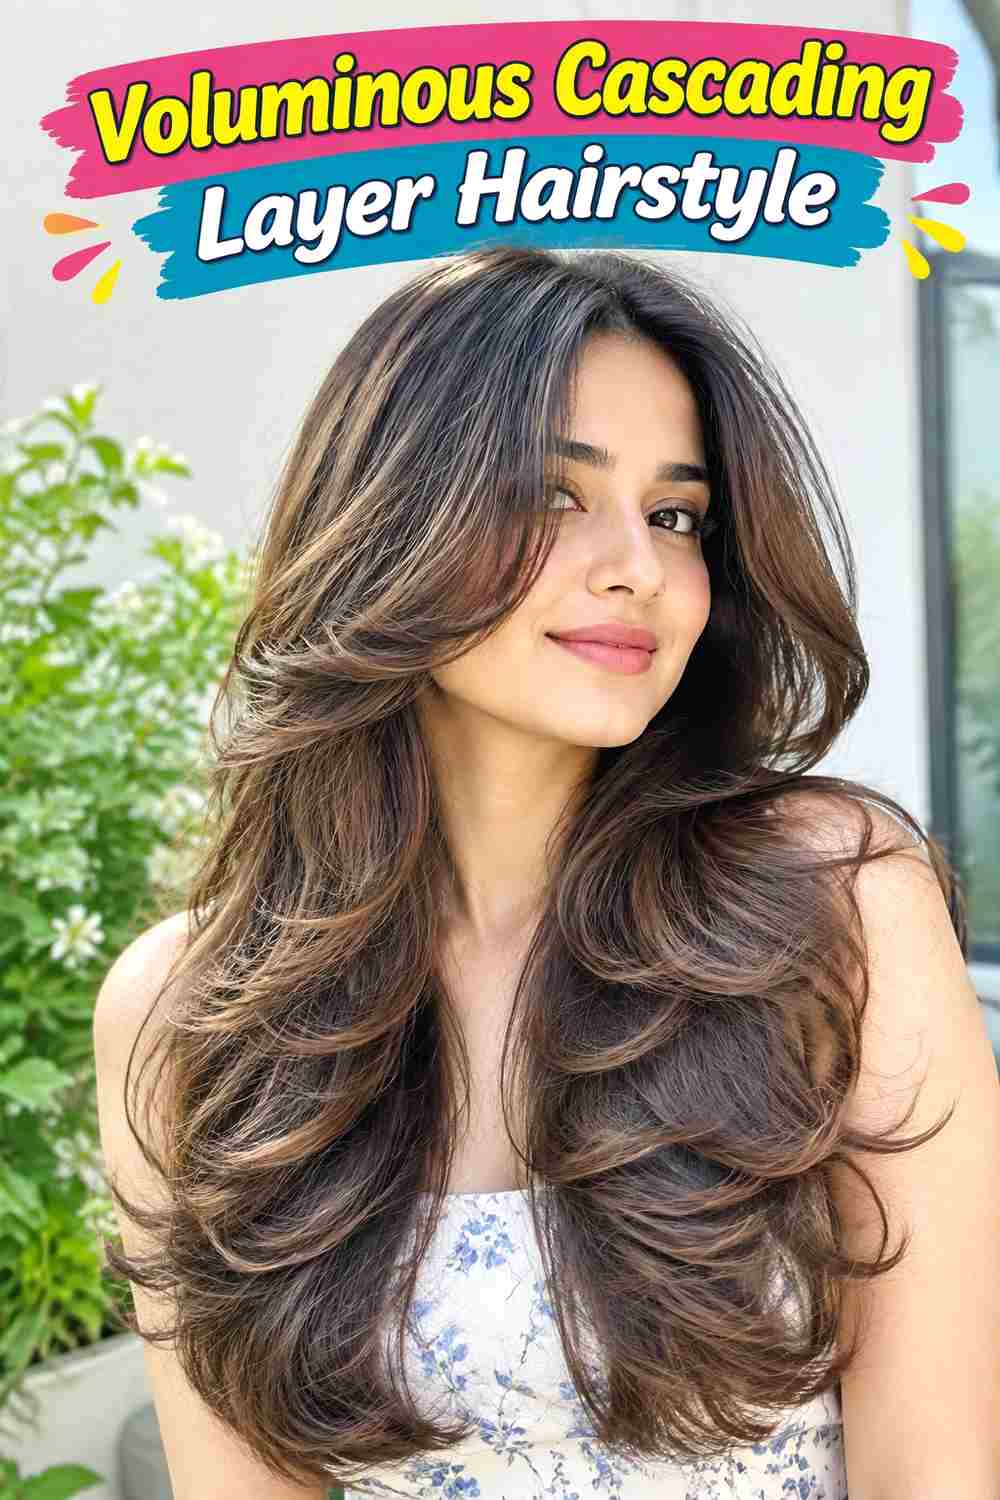
Volume through the crown and upper sides makes cascading layers feel fuller while the lengths gradually narrow toward the ends. The first visible layers can begin around the cheekbones or jaw, with additional sections falling through the shoulders and chest. The crown should have lift without becoming a separate short cap, and the lower perimeter should retain enough weight to balance the upper movement.
Medium to high-density hair can support this shape naturally, while finer hair may rely more on styling than extensive layering. Heat protectant prepares the hair for heated airflow, a large round brush builds root lift, and lightweight mousse adds support. A quick refresh may focus on the crown and first layer. A complete blowout requires more time because root volume and descending movement both need attention.
At the salon, explain where you want the silhouette to appear fullest and where the layers should begin dropping closer to the body. Dense hair may need thoughtful bulk management, but the outer shape should remain clear. As the cut grows, volume can migrate downward and the crown may flatten. Reshaping or adjusting styling direction can restore balance without automatically shortening the entire haircut.
Pro tip:
Create the most lift at the crown and upper sides, then reduce root elevation through the lower sections. Concentrated volume helps the descending layers remain visible instead of producing equal width everywhere.
Make It Work for You:
For lower-density hair, use longer layers and build fullness with root styling. Preserving a stronger perimeter can create a more substantial finish while still allowing upper movement.
Watch Out For:
Do not combine very short layers with maximum root lift everywhere. Too much upper expansion can disconnect the crown from the flowing lengths and weaken the intended cascading silhouette.
Soft Straight Cascading Layer Hairstyle
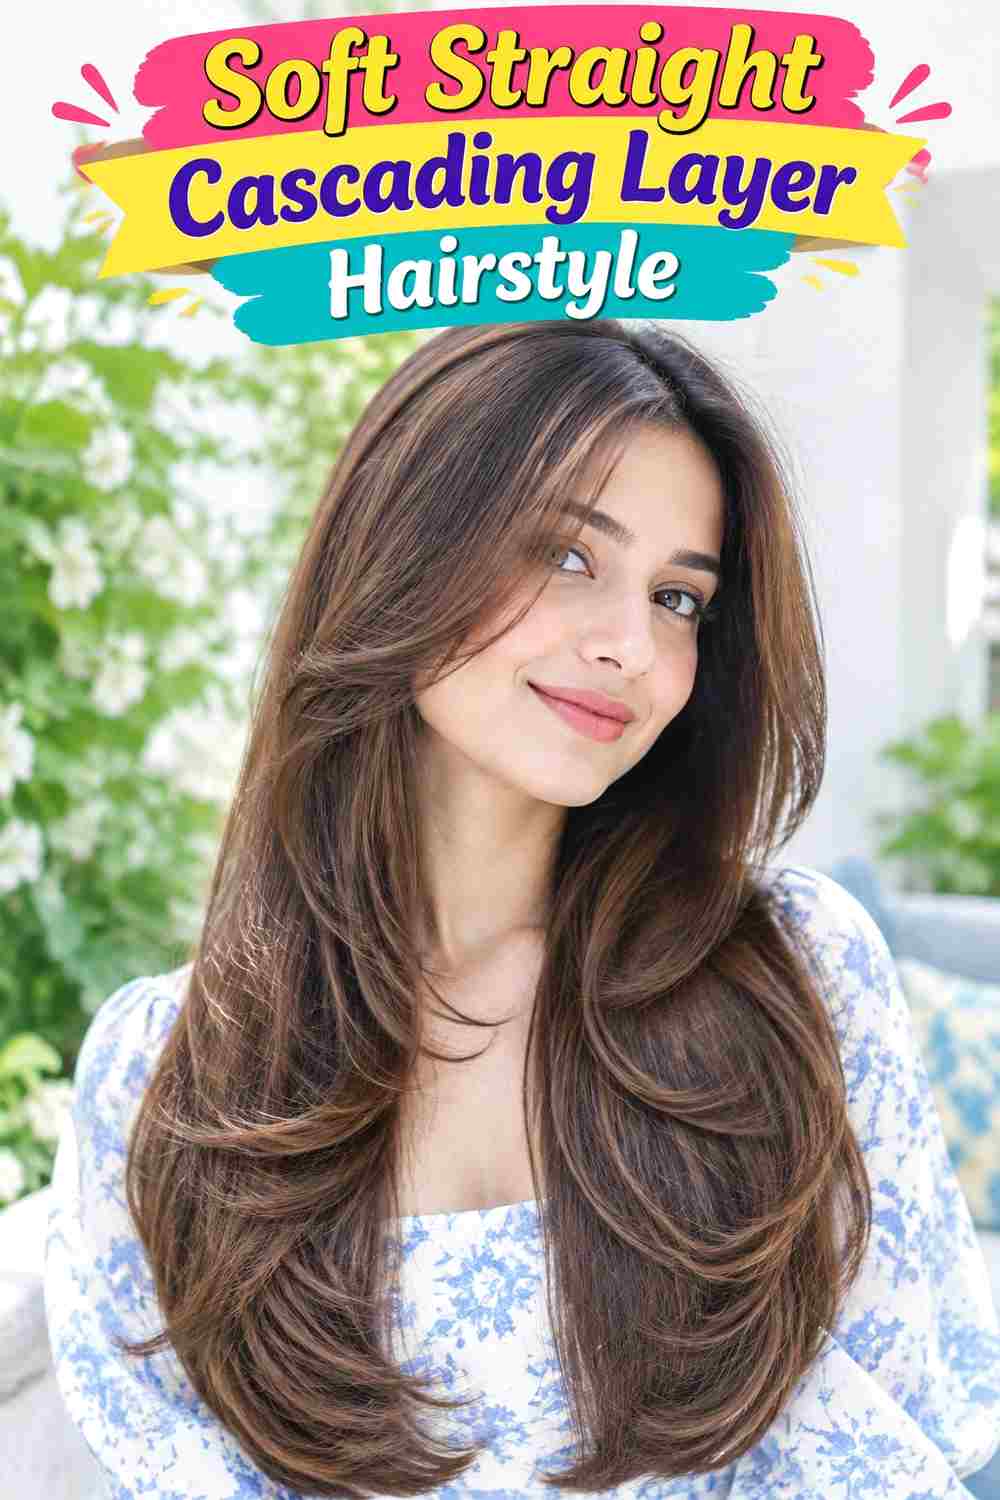
A straighter finish makes the actual cut lines of cascading layers easy to appreciate. The upper layers can begin around the jaw, then progress through the collarbone and chest before meeting the longest perimeter. Ends remain softly finished rather than sharply stepped, while an open center or off-center part allows the front layers to fall cleanly along the face.
Straight hair can wear this naturally, while wavy or curly hair would require heat if a straight finish is desired. Apply heat protectant before using a blow-dryer with a paddle brush, then smooth a small amount of lightweight serum over the ends. A quick refresh can focus on the front and surface. A complete straight blow-dry takes longer, particularly on dense or highly textured hair.
At the salon, ask for visible layer progression while preserving enough weight at the longest edge. The exact cutting method can be chosen by the stylist according to your hair. As layers grow, their differences become subtler and the haircut can start appearing closer to one length. Reshaping the upper sections restores movement even if you prefer keeping the perimeter largely unchanged.
Pro tip:
Direct the front layers slightly away from the face instead of pressing everything pin-straight downward. A small directional change makes the cascade visible while maintaining the overall smooth finish.
Make It Work for You:
If your hair naturally waves, straighten only when you want this particular finish. The same longer layers can also be worn with natural movement rather than requiring heat every wash day.
Watch Out For:
Overusing serum can join the layers into heavy sections and hide their movement. Apply a small amount mainly through the ends and keep richer product away from the roots.
Face-Framing Cascading Layer Hairstyle
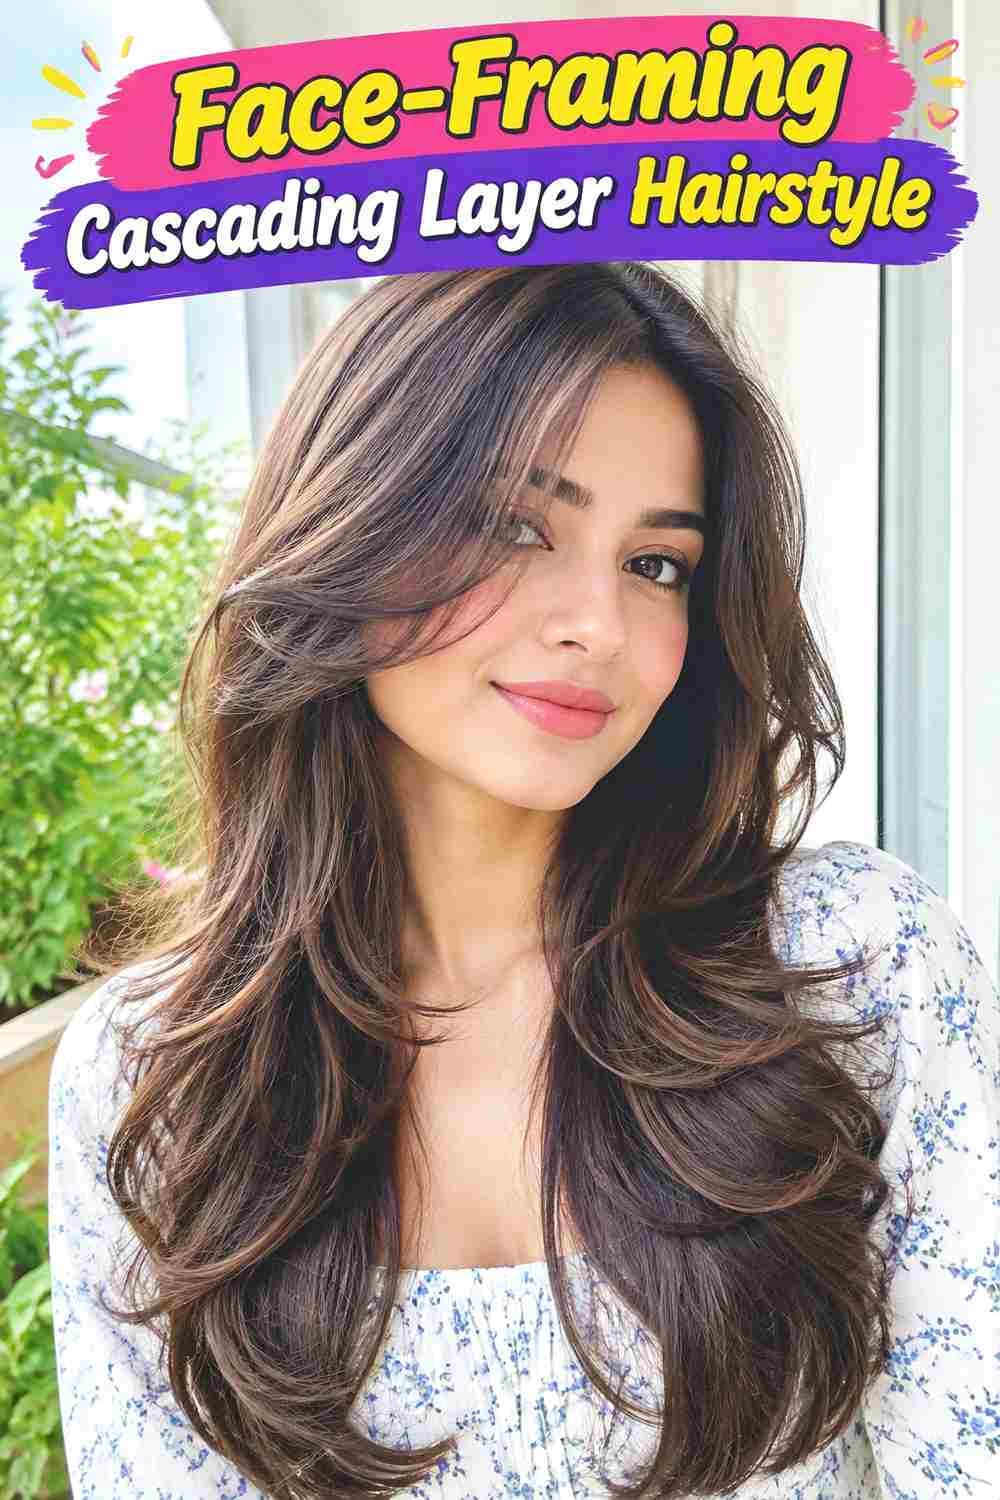
This design concentrates the strongest cascade around the face while keeping the back comparatively long and full. Cheekbone pieces move into jaw-level sections, then collarbone layers and longer lengths. A center or slightly off-center part reveals the progression clearly, while the back can retain a substantial perimeter instead of repeating every short layer throughout the head.
It works well when you want noticeable front movement but do not want extensive layering everywhere. Apply heat protectant before heat styling, use a round brush to direct the frame outward, and add flexible hairspray when extra hold is needed. A quick refresh may involve only the front cascade. Full wash-day styling takes longer according to overall length and density.
At the salon, specify how far around the head you want the shorter face-framing layers to extend. That boundary matters because taking them too far backward changes the entire haircut. As the front grows, the cheekbone layer drops toward the jaw and each step becomes less distinct. Targeted reshaping can restore the frame without removing substantial length from the back or lower perimeter.
Pro tip:
Style the shortest front piece first, then use each finished section as a visual guide for the next longer one. This keeps the descending frame organized without making every layer identical.
Make It Work for You:
For lower-density hair, keep the cascading layers mostly in front of the ears. Preserving longer side and back sections maintains more perimeter fullness while still creating a clear face frame.
Watch Out For:
Avoid carrying cheekbone layers too far into the back unless you want an extensively layered haircut. Concentrating the shortest lengths near the face protects the distinction between frame and perimeter.
U-Shaped Cascading Layer Hairstyle

A U-shaped perimeter complements cascading layers by keeping the back longest through the center and gradually shortening toward the sides. Interior layers can begin around the jaw or collarbones and descend toward that curved lower edge. Viewed from the back, the perimeter itself continues the sense of flow rather than ending in a straight horizontal line.
Long, medium-to-dense hair can display the U shape particularly clearly, although the depth of the curve should suit available density. Heat protectant supports safer heated styling, a large round brush adds broad movement, and lightweight serum smooths the long perimeter. Refreshing the front can be brief, while a full blowout on long hair takes considerably more time.
At the salon, discuss how deep you want the U-shaped perimeter as well as where the first interior layer should begin. A very deep U removes more side length, so the curve should match your priorities. As the haircut grows, the perimeter can remain recognizable while upper layers become less distinct. Refining the interior progression may therefore be needed before substantially altering the longest center-back section.
Pro tip:
Keep the lowest layers relatively broad and flowing so they visually follow the U-shaped perimeter. Very tight bends at the bottom can obscure the curved outline you want to emphasize.
Make It Work for You:
For lower-density ends, choose a shallow U rather than a dramatic curve. You can retain the cascading back shape while preserving more length and visible weight along the sides.
Watch Out For:
Do not request an extremely deep U without considering side length. A pronounced curve can leave the front perimeter much shorter than expected even when the center back stays long.
Deep-Wave Cascading Layer Hairstyle

Broad, deeper waves exaggerate the separation between cascading layers because each bend creates alternating areas of volume and narrowing. The first layer can begin near the jaw, with longer sections moving through the collarbones and chest. A center or side part can work, while the ends remain softly waved rather than forming tight, uniform curls.
Naturally wavy hair may need definition rather than complete restyling. Straighter hair usually needs heat to create the deeper pattern. Apply heat protectant before using a large-barrel curling iron, then finish with flexible hairspray for movable hold. Refreshing several visible waves can be relatively quick. Creating a complete heat-styled set after washing takes longer and varies with length and density.
At the salon, retain enough length in each layer for a broad wave to form rather than shortening upper sections excessively. Explain where you want the first strong layer to begin. As the cut grows, the wave pattern may still look attractive, but the layer levels become less obvious. Reshaping restores their separation without requiring the wave styling itself to change.
Pro tip:
Place the strongest wave bends at slightly different heights on neighboring layers. Variation prevents the lengths from stacking into one horizontal ridge and keeps the cascade visually fluid.
Make It Work for You:
If you naturally have deep waves, follow their existing bends and define mainly the face frame. The haircut can provide the descending structure without requiring every section to be recreated with heat.
Watch Out For:
Curling all layers from exactly the same height can create repetitive bands of volume. Vary the starting points so the waves reinforce movement instead of hiding the haircut underneath uniform styling.
Low-Density Cascading Layer Hairstyle
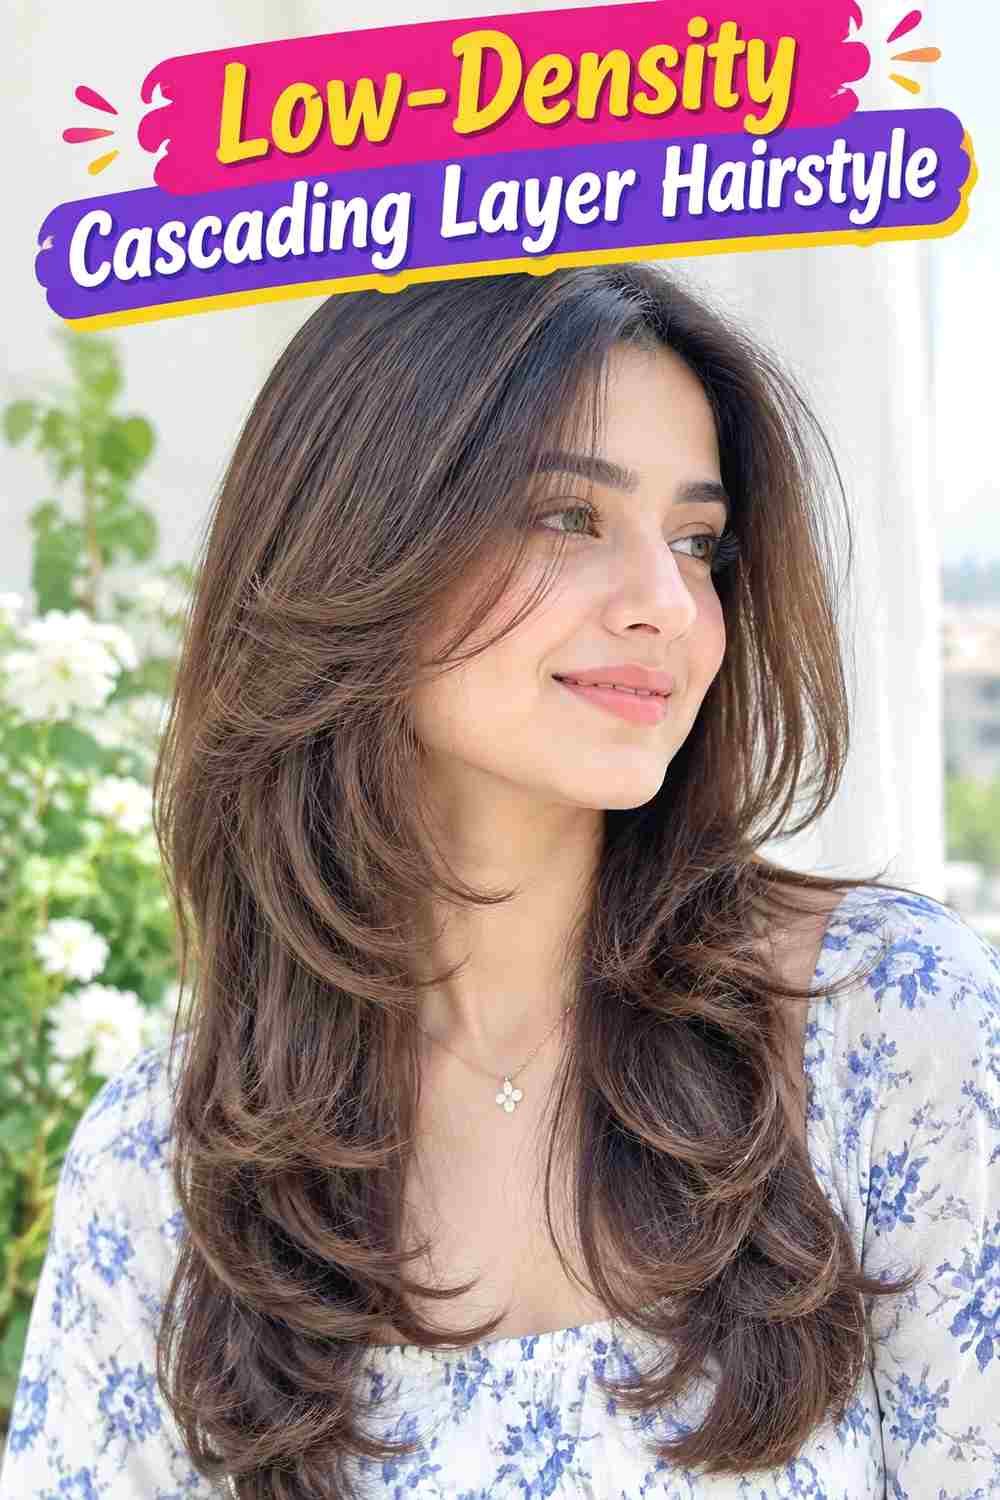
Cascading layers can work with lower-density hair when the number of short sections is deliberately limited. The first layer can begin near the jaw or collarbone rather than high at the cheekbones, with only a few gradual levels leading into a stronger perimeter. Keeping the ends relatively full prevents the layered movement from coming at the expense of visible lower density.
Straight and softly wavy textures can make this restrained cascade easy to see. Lightweight mousse provides support, a round brush creates movement, and heat protectant should be applied whenever heated airflow is used. A quick refresh can focus on the front and root area. A full blowout takes longer but does not require heavily manipulating every layer.
At the salon, explain that preserving perimeter weight is a priority and identify the lowest acceptable starting point for the shortest layer. Fine strands and low density are not the same thing, so discuss both separately. As the cut grows, the limited layers merge softly into the perimeter. Reshaping can focus on restoring movement rather than automatically adding more layers to make the haircut appear different.
Pro tip:
Concentrate the strongest bend around the first two layers and leave the bottom edge smoother. This creates visible movement higher up while allowing the perimeter to maintain a fuller visual line.
Make It Work for You:
If you also have fine strands, use less styling product and moderate root lift. Lightweight support can reveal the layers without making the hair collapse under unnecessary product weight.
Watch Out For:
More layers do not automatically create more volume. Removing too much from lower-density hair can reduce perimeter fullness, so preserve weight and use styling direction to provide additional movement.
Dense Hair Cascading Layer Hairstyle

Dense hair can support several cascading levels while still maintaining a substantial perimeter. The first layers may begin around the cheekbones or jaw, with additional sections moving through the shoulders and longer lengths. The challenge is controlling bulk so each level moves rather than stacking into a wide triangular shape, especially through the middle and lower sections.
Straight, wavy, curly, and coily dense hair can all use cascading layers, though the exact shape should respect texture and shrinkage. Lightweight styling cream controls surface frizz, a wide-tooth comb helps distribute product, and a diffuser works well when preserving natural waves or curls. A small refresh may be quick, but a complete wash and dry can take considerable time because density affects sectioning and drying.
At the salon, discuss where bulk tends to collect and where you want movement without simply requesting aggressive thinning. Strategic internal weight adjustment may help, but the outer perimeter should reflect your preferred fullness. As layers grow, weight can shift downward and reduce upper movement. Reshaping the distribution can restore the cascade while preserving the density that gives the haircut its substantial finish.
Pro tip:
Style dense hair in manageable sections so product and airflow reach the interior as well as the surface. Even distribution helps each layer move instead of leaving a defined exterior over damp bulk.
Make It Work for You:
If you prefer maximum fullness, keep the upper layers longer and reduce only problem bulk areas. The cascade can remain visible through length progression without dramatically decreasing overall density.
Watch Out For:
Avoid indiscriminate thinning throughout the haircut. Removing weight where it is not causing bulk can create uneven ends or disrupt curl and wave grouping rather than improving the cascading shape.
Collarbone Cascading Layer Hairstyle
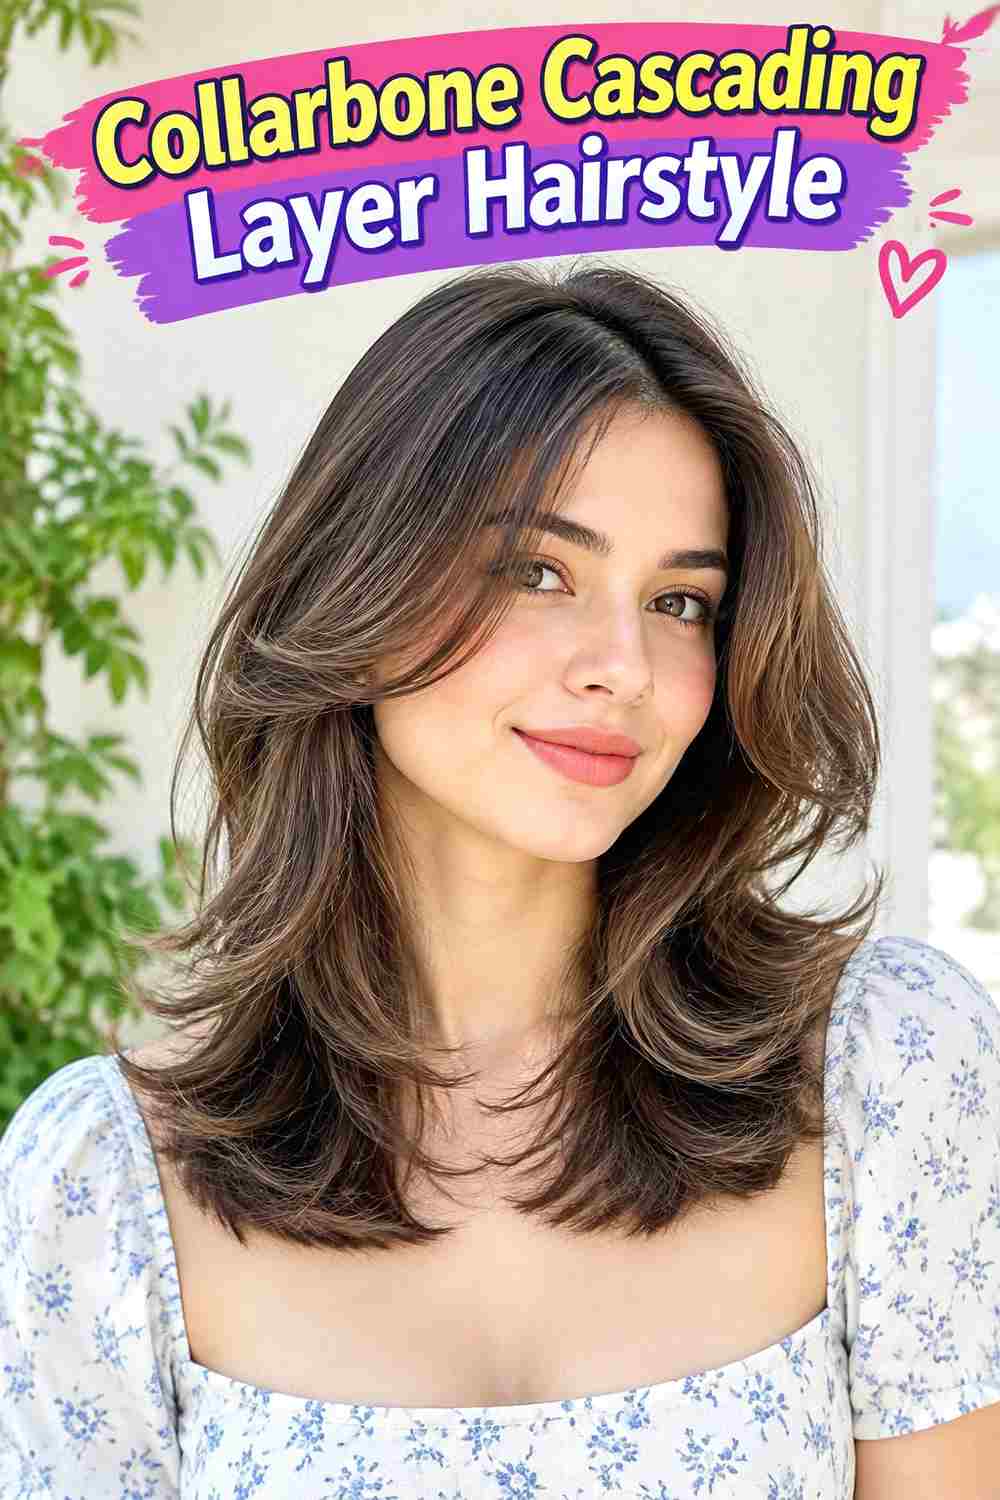
Collarbone length gives cascading layers more room than a shoulder cut while remaining manageable for everyday styling. Shorter sections can start around the jaw, move into chin-to-collarbone face framing, and then meet a perimeter resting at or just below the collarbones. The resulting movement is noticeable without the many layer levels possible in very long hair.
Straight, wavy, and loosely curly textures can wear this length effectively. Apply heat protectant before heated styling, use a medium round brush to shape the layers, and finish with lightweight styling cream through the ends. A quick refresh may involve only the front sections. A full wash-day style takes longer but remains relatively manageable because the perimeter is not exceptionally long.
At the salon, identify the dry collarbone perimeter and jaw-level starting point separately. Ask to retain enough weight through the bottom so the descending sections do not create thin ends. As the cut grows below the collarbones, the cascade becomes more elongated and less compact. Reshaping can restore the original proportions, or the layers can simply be allowed to transition into a longer version.
Pro tip:
Curve the jaw layer away from the face, then use a softer bend at collarbone level. Different degrees of movement keep the short cascade visible without making the ends kick outward excessively.
Make It Work for You:
For naturally wavy hair, allow the collarbone sections to follow their existing bends. Define the front more deliberately and keep the lower movement relaxed for an easier styling routine.
Watch Out For:
Be careful with aggressive layering around the collarbone, where hair can already change direction against clothing. Preserve enough weight so the ends do not become overly flicked or difficult to control.
Rounded-End Cascading Layer Hairstyle
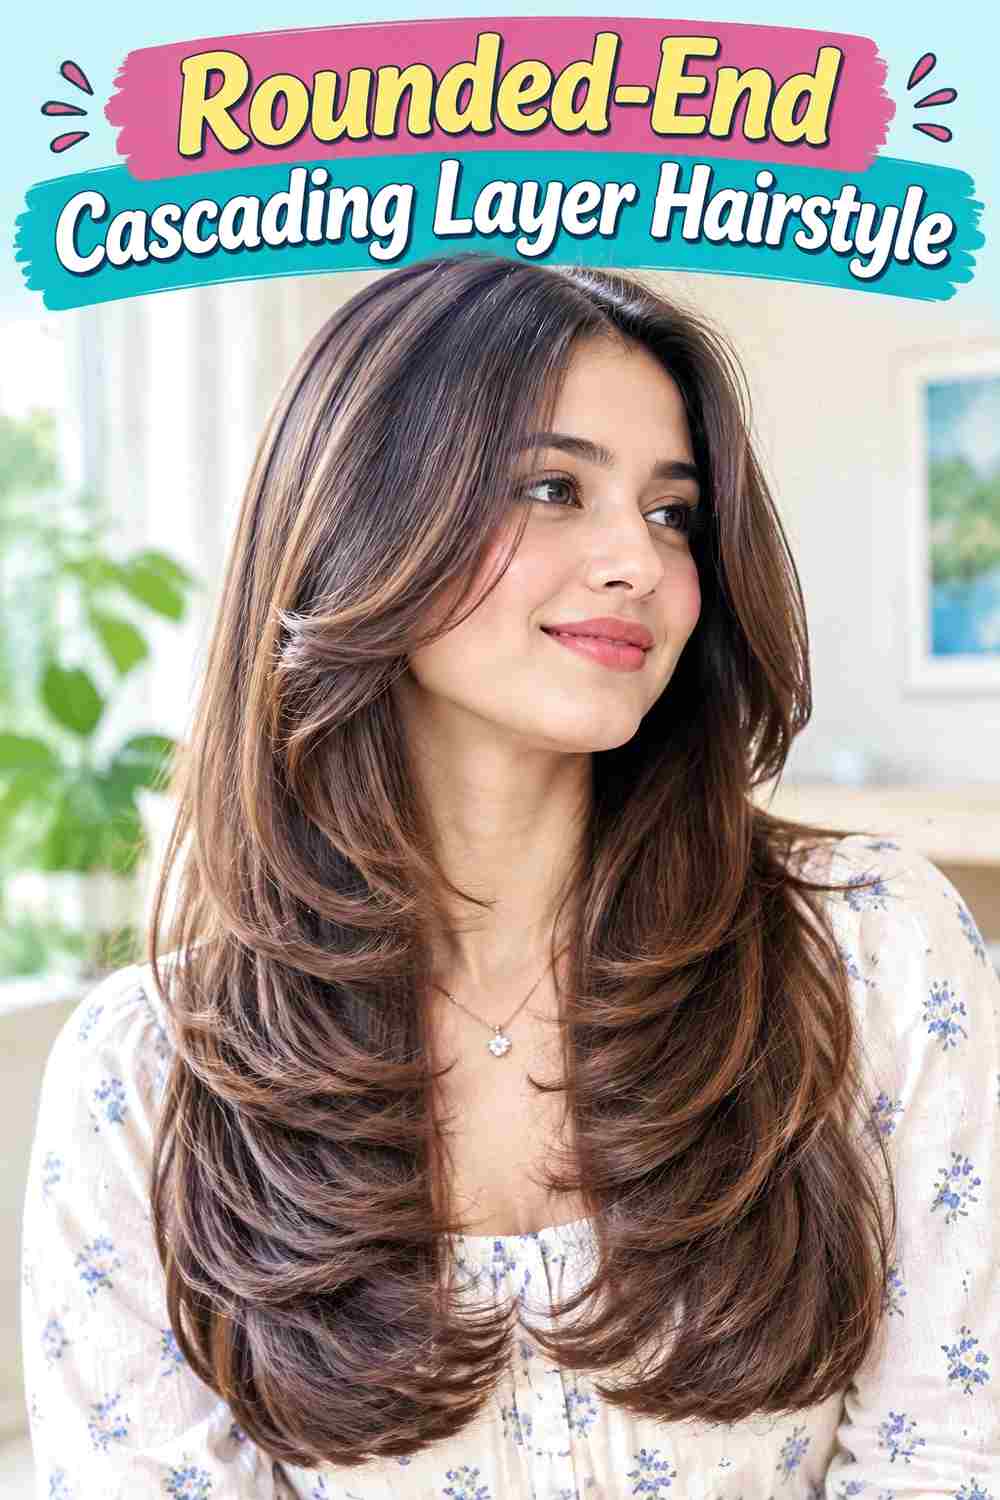
Softly rounded ends give cascading layers a polished shape without turning each level into a strong curl. The first layer can begin around the jaw, with subsequent lengths falling through the collarbones and chest. Each section curves gently under or away at its edge, while the overall silhouette stays flowing rather than forming obvious horizontal tiers.
Straight and softly wavy hair can show the rounded finish clearly. Apply heat protectant before styling, use a large round brush to create broad curvature, and finish with lightweight serum for smooth ends. A quick refresh may involve only the front and visible surface layers. A complete blowout takes longer because the rounded shape needs to be repeated gradually through several lengths.
At the salon, explain that you want visible cascading layers with enough weight left at each edge to support a soft rounded finish. Extremely thinned ends will behave differently. As the haircut grows, the upper levels drop and their curved edges begin merging into lower sections. Reshaping can restore separation while keeping the longest perimeter and overall softness intact.
Pro tip:
Use less brush tension on the longest layers than on the front. This produces a gradual change from more defined upper curvature to softer lower ends, reinforcing the cascading progression.
Make It Work for You:
If your hair has a natural bend, use that movement instead of forcing every end into the same curve. Consistent softness matters more than making each layer perfectly uniform.
Watch Out For:
Avoid rolling each layer into a tight under-curl. Strong identical curves can make the haircut look stacked; use broad, shallow bends so one length continues visually into the next.
Conclusion
Cascading layer hairstyle ideas can begin as high as the cheekbones or as low as the collarbones, and that starting point strongly affects movement, volume, and maintenance. Long layers preserve more perimeter weight, while shorter face-framing levels create a more obvious progression. Waves and curls add natural dimension; straight finishes reveal the layer sequence more clearly. Center parts distribute the cascade evenly, while side parts shift fullness.
Density should influence how much layering is added. Lower-density hair may benefit from fewer long layers, while dense hair can support more movement with carefully considered bulk placement. Choose the length, texture, parting, and finish that fit your natural hair and realistic styling routine rather than relying on a blowout to make the cut work.
Before Your Salon Visit
Choose one or two favorites and save references that clearly show the layer progression you like. Discuss your natural texture, density, face shape, preferred overall length, upkeep, and usual styling routine. Point out exactly where the shortest layer should begin, how quickly it should cascade downward, how much perimeter weight you want, and where volume should sit. If your hair curls or waves, discuss shrinkage and show how the layers normally settle when fully dry.
FAQs
Do cascading layers work on fine or low-density hair?
They can, but fine strands and low density should be considered separately. Lower-density hair often benefits from fewer, longer layers and a stronger perimeter. Movement can then come from strategic front layering and styling rather than removing large amounts of hair throughout the entire cut.
Are cascading layers suitable for curly hair?
Yes. Curly cascading layers can create visible levels of movement and help distribute volume, but dry shrinkage and bulk placement matter. The stylist should consider where each curl section settles in its normal finished state instead of relying only on stretched or wet length when planning the layer progression.
Do cascading layers require heat styling?
No. Waves, curls, and some straight textures can reveal the layers through their natural movement. Heat can create a more polished feathered, rounded, or blown-out finish, but it is optional. If you use heated tools or hot airflow, apply heat protectant and avoid repeatedly restyling sections that already sit correctly.
How do I know when cascading layers need reshaping?
Watch where the volume and shortest layers settle. Reshaping may help when upper layers merge into lower lengths, face framing drops well below its intended landmark, or excess weight collects near the bottom. Those changes are more useful maintenance signals than assuming every cascading haircut needs the same trimming schedule.