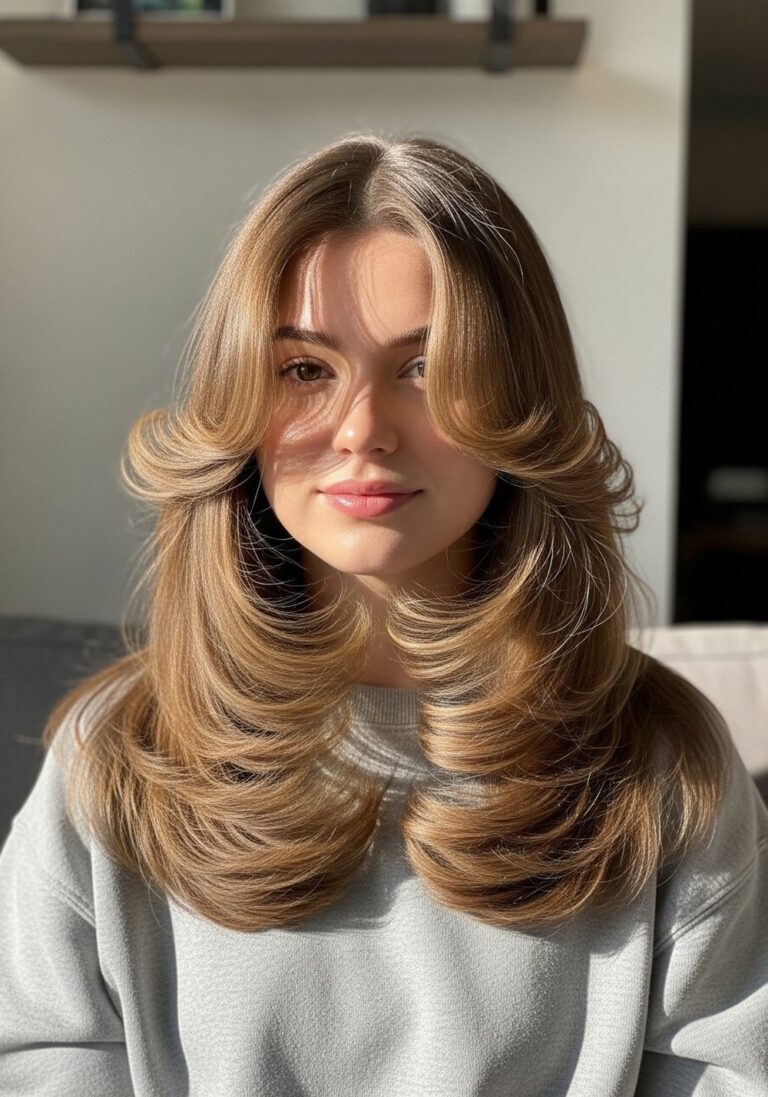
18 Fall Date Night Hairstyles for a Soft Romantic Look

Fall date night hairstyles often look softest when the shape has movement without appearing overworked. Loose waves, curls, low buns, braids, half-up styles, and smooth lengths all fit the mood, but the details matter. Medium and long hair give plenty of space for bends and gathered styles, while bobs and lobs can use textured ends or a deep part. Face-framing layers, curtain fringe, and softly released pieces can keep the front open while adding movement around the cheekbones or jaw.
Straight, wavy, curly, and coily textures can all support a romantic finish. Fine strands may benefit from lighter products and less aggressive layering, while dense hair can use carefully placed volume or internal bulk reduction when needed. Curly and coily hair should be judged at its finished dry length because shrinkage changes where framing pieces and gathered sections sit.
The styling commitment varies considerably. A claw-clip twist or low ponytail may take only a short refresh, while a polished blowout, wave set, or pinned chignon needs more preparation. Fall weather also makes flexible hold, frizz control, secure accessories, and comfortable tension useful. The best option is one that still feels natural after dinner, walking, coats, and changing indoor temperatures.
Quick List
- Soft Side-Part Waves Hairstyle
- Velvet Bow Half-Up Hairstyle
- Low Twisted Chignon Hairstyle
- Loose Curls With Curtain Fringe Hairstyle
- Braided Low Ponytail Hairstyle
- Natural Curls With Side Sweep Hairstyle
- Textured Lob With Bent Ends Hairstyle
- Half-Up Pearl Clip Hairstyle
- Romantic Fishtail Braid Hairstyle
- Sleek Low Bun With Soft Tendrils Hairstyle
- Deep Side-Part Glam Waves Hairstyle
- Curly Half-Up Puff Hairstyle
- Long Straight Hair With Face-Framing Bend Hairstyle
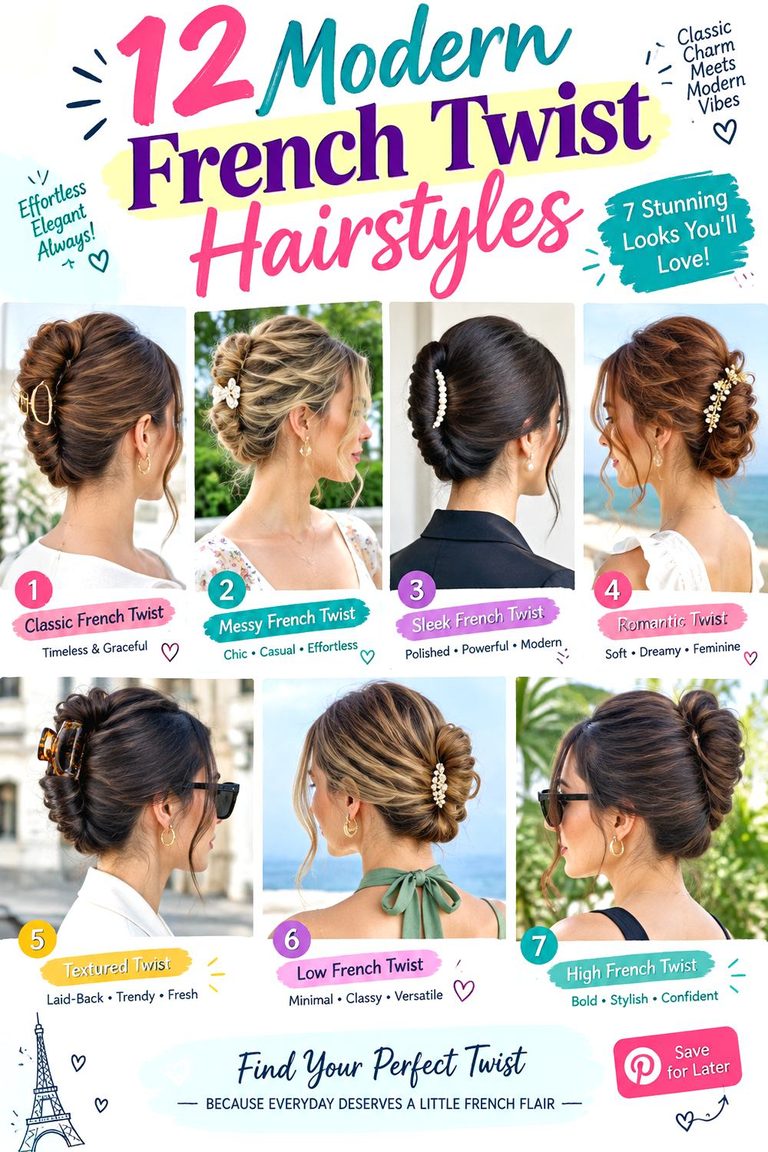
- Soft French Twist Hairstyle
- Loose Dutch Braid With Ribbon Hairstyle
- Claw Clip Twist With Wispy Front Hairstyle
- Voluminous Blowout With Long Layers Hairstyle
- Shoulder-Length Soft Curls Hairstyle
Soft Side-Part Waves Hairstyle
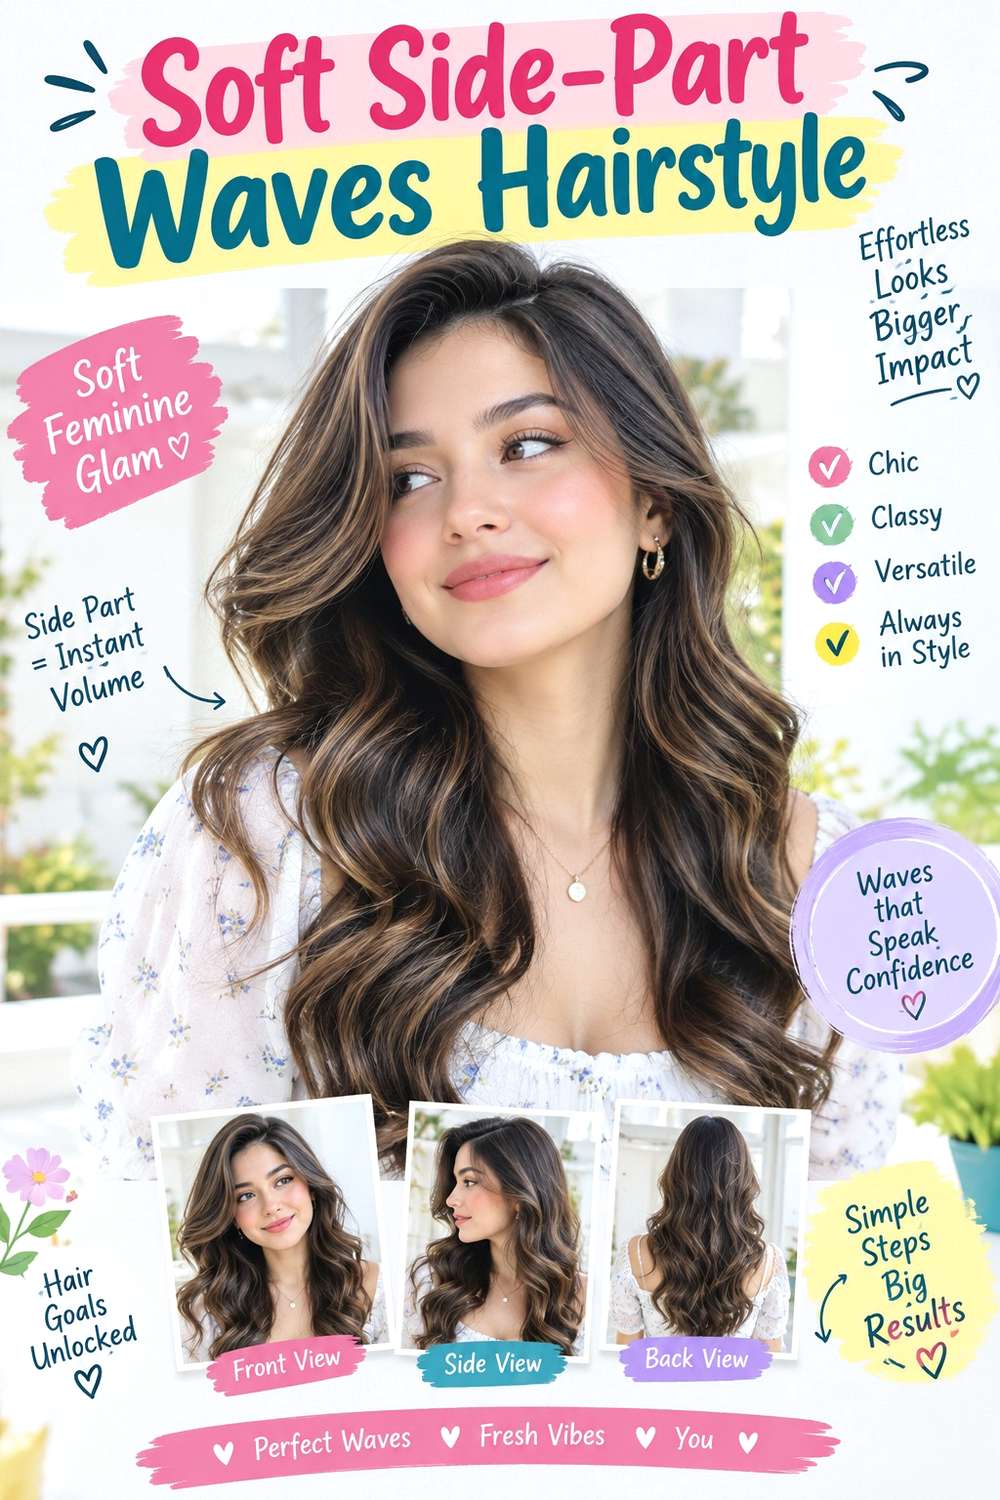
A soft side part makes loose waves fall unevenly around the face, giving one side extra movement without creating an overly formal finish. On medium to long hair, begin broad bends near the cheekbones or jaw and keep the roots smoother so the volume stays through the mid-lengths. Longer face-framing pieces can blend into the first wave, while relaxed ends keep the silhouette fluid rather than tightly curled.
Apply heat protectant before working with a large-barrel curling iron, then use flexible hairspray once the waves have cooled. Straight and wavy textures usually need a moderate styling session, while naturally curly hair can keep more of its existing pattern instead of being completely restyled. A full wash-day set takes longer; the next-day refresh may only require reshaping the front and two or three flattened sections.
At the salon, explain how deep you want the side part and where you prefer the shortest face-framing layer to finish. Those details control how much hair falls across either side. Maintain the style by separating tangles gently and refreshing only loose bends rather than reheating the whole head whenever the shape softens.
Pro tip:
Let the front section cool while directed away from your face. That helps the heavier side stay open around the eye and makes the side-parted shape look deliberate for longer.
Make It Work for You:
If your ends are fine or lower-density, place most of the wave through the middle lengths and keep the bottom softer. This preserves a fuller-looking perimeter while maintaining romantic movement.
Watch Out For:
Avoid creating tight curls all the way to the roots. Too much volume near the part can make one side feel heavy; keep the crown controlled and emphasize movement lower down.
Velvet Bow Half-Up Hairstyle
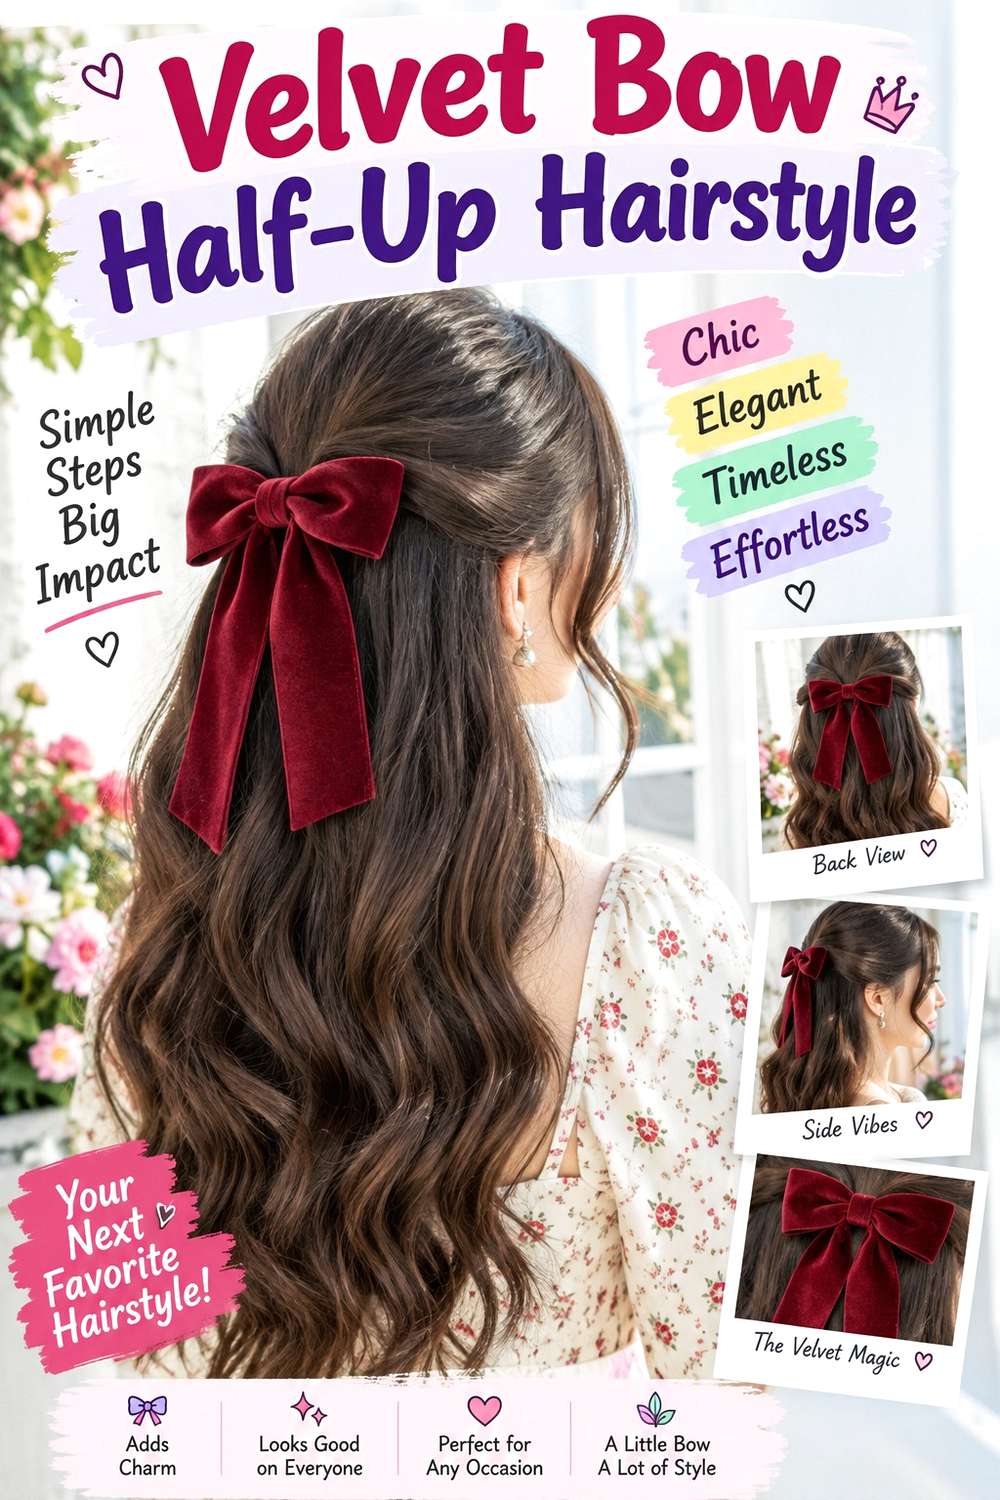
A velvet bow adds a clear fall detail to a half-up shape without requiring a complicated updo. Gather sections from both temples and secure them around the upper back of the head, leaving the remaining length loose and softly waved, curled, or naturally textured. Keep a little lift at the crown and allow one or two controlled pieces to frame the face. Medium and long hair give the bow tails enough space to sit visibly against the loose lengths.
Use a small snag-free elastic to create the hidden half-up base, light texturizing spray for grip, and the velvet bow as the decorative finish. On second-day hair, the style can be assembled fairly quickly. A full wash-day version takes longer when you also want to create waves or define curls through the lower half.
If a stylist is preparing the look, specify how high you want the half-up section and how wide the gathered area should be. The bow should attach to the secured base rather than hold the hairstyle by itself. Refresh by tightening the hidden anchor if it loosens and gently reshaping the front. Avoid pulling the temple sections tighter simply because the decorative bow begins to shift.
Pro tip:
Secure the half-up section first and move your head gently before adding the bow. A stable hidden base allows the velvet accessory to remain decorative rather than carrying the style’s weight.
Make It Work for You:
For shorter or layered hair, gather narrower temple sections and choose a smaller bow. This keeps short pieces from slipping while preserving the recognizable half-up silhouette.
Watch Out For:
A heavy bow clipped directly to loose hair may drag downward. Attach it over an elastic or secured twist so the accessory stays level without pulling at the scalp.
Low Twisted Chignon Hairstyle

A low twisted chignon creates a soft, polished outline that works especially well with dresses, high necklines, or a tailored fall coat. Gather medium or long hair at the nape, twist the lengths inward, and pin them into a compact bun with gentle width rather than a tight knot. A center or slightly off-center part can remain visible, and a few longer pieces near the temples can soften the front without making the shape messy.
Build the base with a fabric-covered elastic, secure the twist with bobby pins, and finish with flexible hairspray for light control. Wavy hair can retain some natural texture through the bun, while straight hair creates a smoother surface. The full updo needs more time than a ponytail, but a quick refresh later may mean replacing one loose pin and smoothing the front.
If a stylist is creating it, explain whether you want the chignon flat across the nape or slightly rounded and how much softness should remain around the ears. Comfortable tension matters. If the bun begins sagging, strengthen the lower anchor rather than tightening the entire style. Check that the placement clears scarves and collars before heading out.
Pro tip:
Anchor the bottom edge of the chignon before pinning the sides. Supporting the weight from underneath helps the twist resist dropping as you walk, sit, or put on outerwear.
Make It Work for You:
If your hair is very dense, divide the lengths into two twists before pinning them together. Spreading the weight can produce a balanced chignon without excessive tension at one anchor.
Watch Out For:
Do not keep adding pins wherever the bun feels loose. Too many random pins can create pressure; identify the section that has shifted and reinforce that specific anchor instead.
Loose Curls With Curtain Fringe Hairstyle

Loose curls paired with curtain fringe create a romantic front shape without covering the whole forehead. The fringe should be shorter through the center and longer toward the outer corners, opening around the brows and blending into cheekbone or jaw-length framing. Through the rest of medium or long hair, use broad curls that begin below the roots and soften toward the ends. A center part naturally supports the split fringe.
Apply heat protectant before using a curling wand, then mist flexible hairspray after the curls cool. A complete wash-day set takes more time, particularly if the fringe also needs blow-drying into place. Between washes, a short refresh should concentrate on the fringe and the visible front curls rather than reheating every section. Naturally wavy hair may need only selective shaping.
At the salon, discuss the curtain fringe at its finished dry length and show where you want the outer corners to blend. Growth direction can change how the center separates, so a rigid measurement is less useful than the finished shape. Fringe upkeep becomes necessary when the center falls into the eyes or the outer pieces stop blending smoothly with the face frame.
Pro tip:
Dry the fringe from side to side before shaping the ends away from the face. Redirecting the roots first helps the center separate naturally instead of forming a stubborn straight split.
Make It Work for You:
If your hair is curly, let the stylist assess the fringe dry so shrinkage is visible. Keep the outer pieces longer if you want easier blending with the surrounding curl pattern.
Watch Out For:
Avoid making the curtain fringe too round with a brush. An exaggerated bend can spring toward the eyes; aim for root direction first and a softer curve through the ends.
Braided Low Ponytail Hairstyle
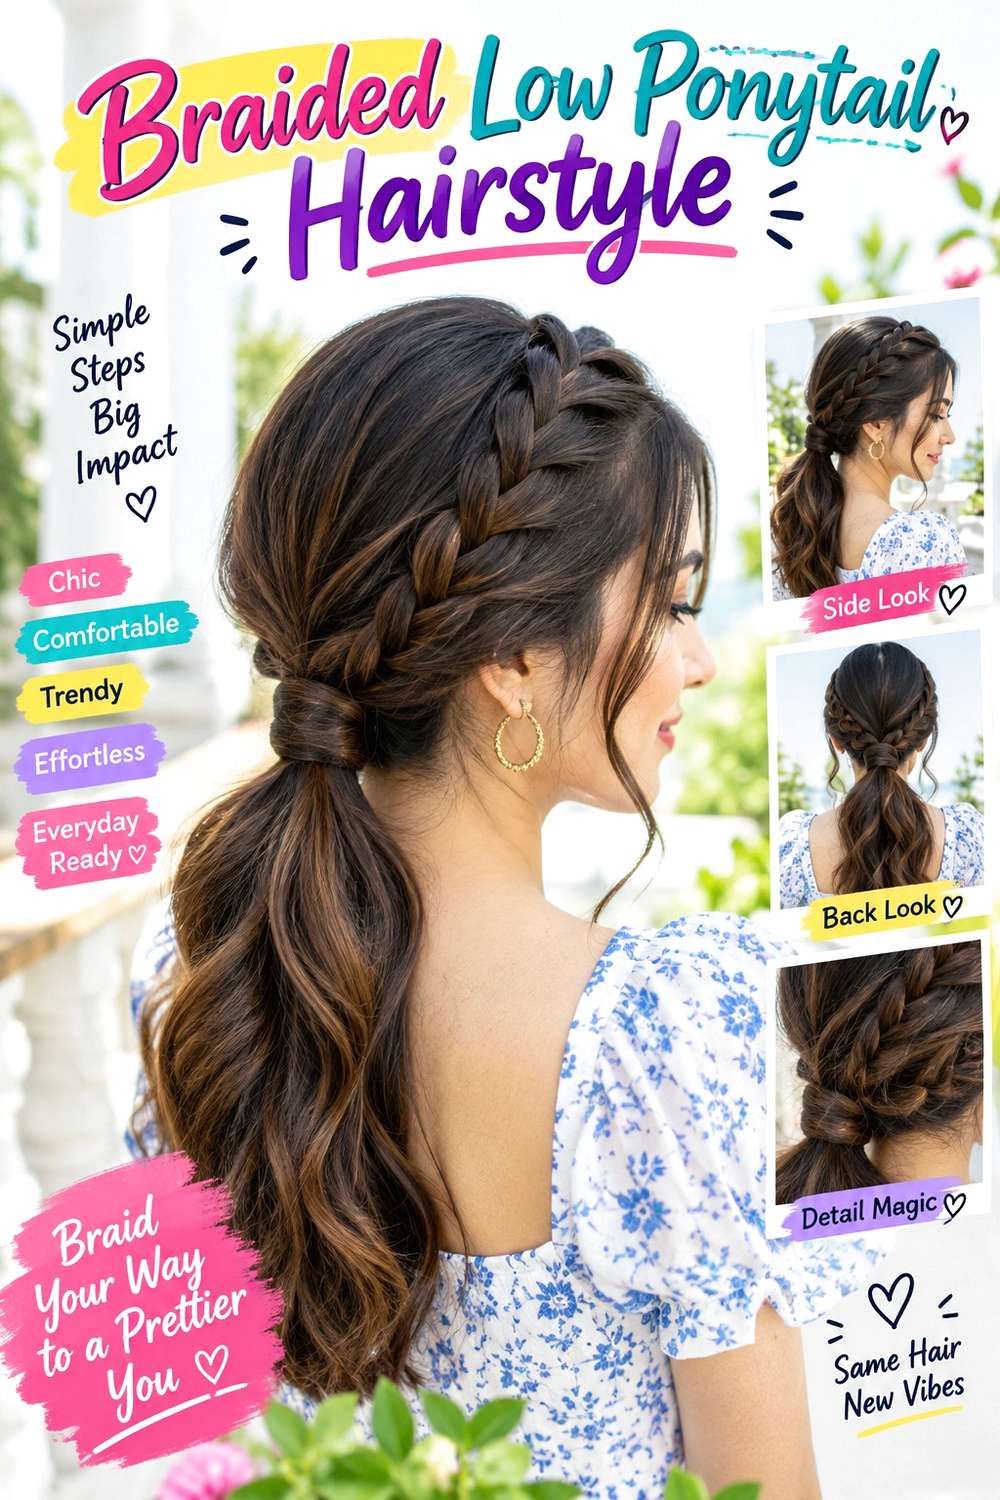
A braided low ponytail combines a clean nape placement with enough detail to make a simple date-night style feel intentional. Start with a center or soft side part, braid small sections from one or both temples, and guide them into a ponytail secured low at the back. The loose tail can remain softly waved, curly, or naturally textured, while longer face-framing sections keep the front relaxed.
Use small clear elastics to secure the accent braids, a fabric-covered elastic for the ponytail, and light texturizing spray for grip. The style takes a little longer than a standard low ponytail but is still manageable on dry second-day hair. A complete wash-day version only becomes lengthy if the loose tail also needs curling, smoothing, or curl definition.
If a stylist is creating it, specify braid width and exactly where the braids should join the ponytail. Comfortable tension around the temples matters more than pulling the sections extremely tight. Refresh by tightening a hidden braid anchor or smoothing the ponytail base rather than rebuilding everything. If the tail rubs against a coat collar, move the ponytail slightly higher instead of repeatedly tugging the elastic.
Pro tip:
Secure each accent braid separately before joining it to the ponytail. Independent anchors stop the decorative sections from loosening whenever the tail moves against clothing.
Make It Work for You:
For lower-density hair, use one narrow side braid rather than two large braids. Leaving more hair in the ponytail preserves fullness while still providing a visible woven detail.
Watch Out For:
Do not pull the braid backward at a sharp angle from the temple. Redirect it gradually toward the nape so the front remains comfortable and does not look overly stretched.
Natural Curls With Side Sweep Hairstyle
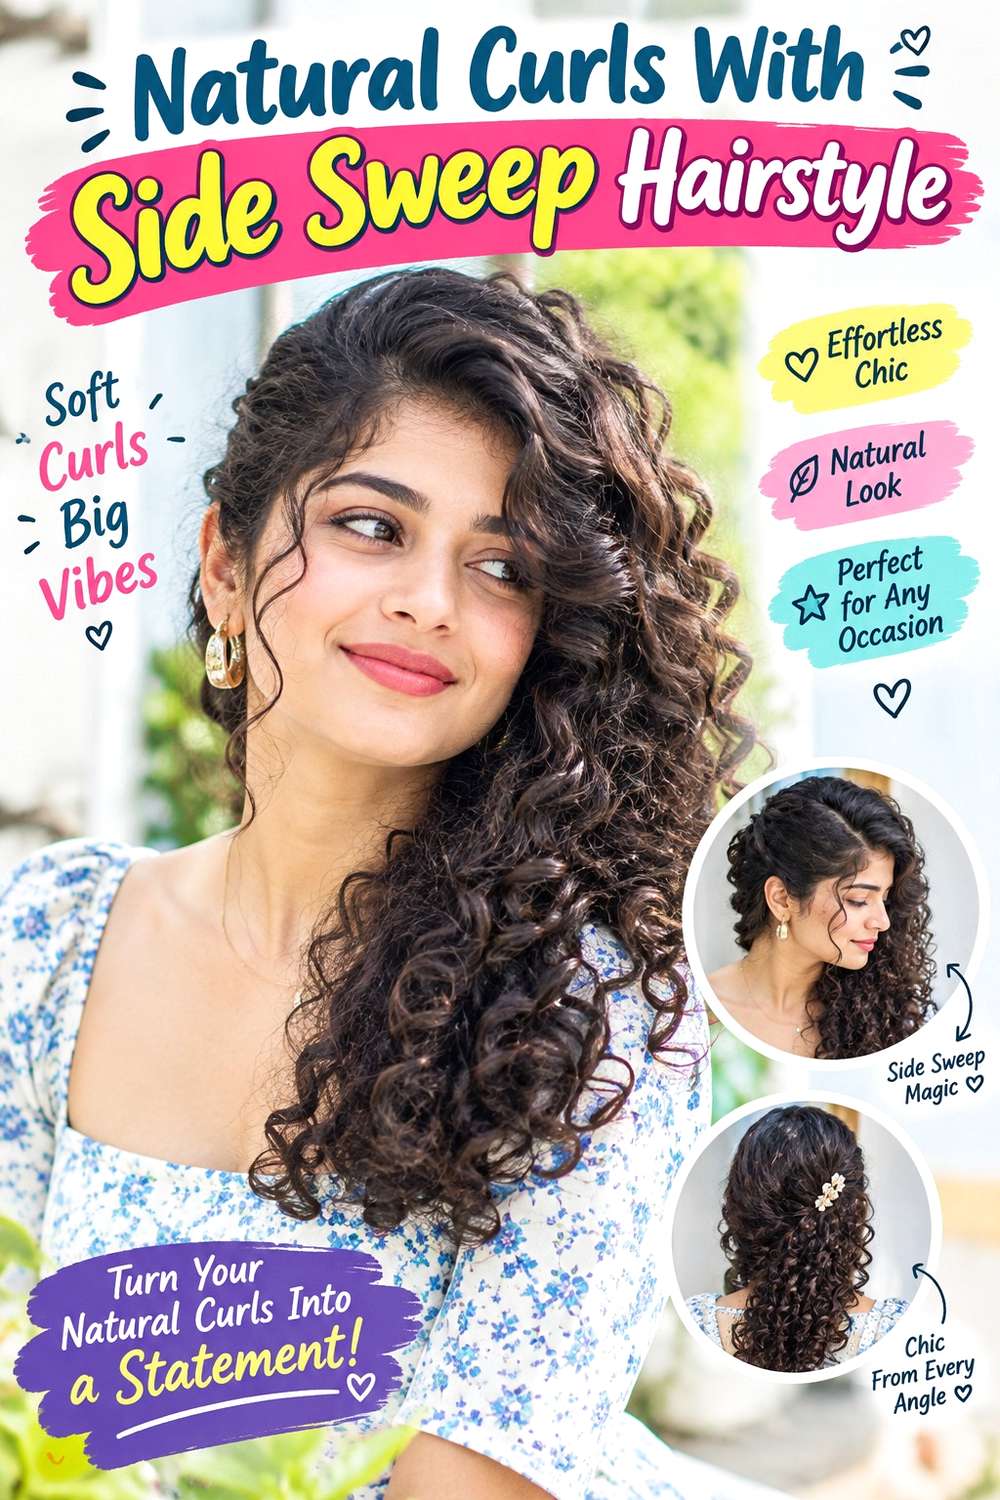
A side sweep lets natural curls create the romance through shape rather than added heat styling. Allow the curls to reach their finished dry pattern, then move the front gently toward one side while keeping the opposite side slightly closer to the head. The fuller side can frame the cheek and shoulder, with individual curls positioned so they do not constantly fall across the eyes. Medium and longer curls show the asymmetry clearly.
Use lightweight leave-in conditioner for softness, curl gel for definition, and a diffuser if you need controlled drying. A full wash-day routine can take considerably longer than a date-night refresh, especially with dense hair. On the day, revive only flattened or fuzzy sections rather than soaking the entire style. Curl density and shrinkage should guide how much hair you move to one side.
At a salon, discuss the finished dry silhouette and where the shortest front curls should land. If you wear the side sweep regularly, ask how the existing shape can support it without thinning away necessary fullness. Maintenance involves protecting curl groups and resetting the sweep when needed. Avoid excessive touching outdoors or indoors, since repeated separation can turn defined movement into surface frizz.
Pro tip:
Choose the final sweep after the curls are completely dry. Finished volume and shrinkage can change the balance significantly, so dry placement gives a more accurate view of each side.
Make It Work for You:
If your curls are very dense, move only the front and upper sections to one side. Leaving the lower volume balanced can create the swept effect without making one side overly heavy.
Watch Out For:
Avoid repeatedly separating curl groups to increase volume before your date. Too much handling can create frizz; lift gently at the roots while leaving well-defined curls largely intact.
Textured Lob With Bent Ends Hairstyle
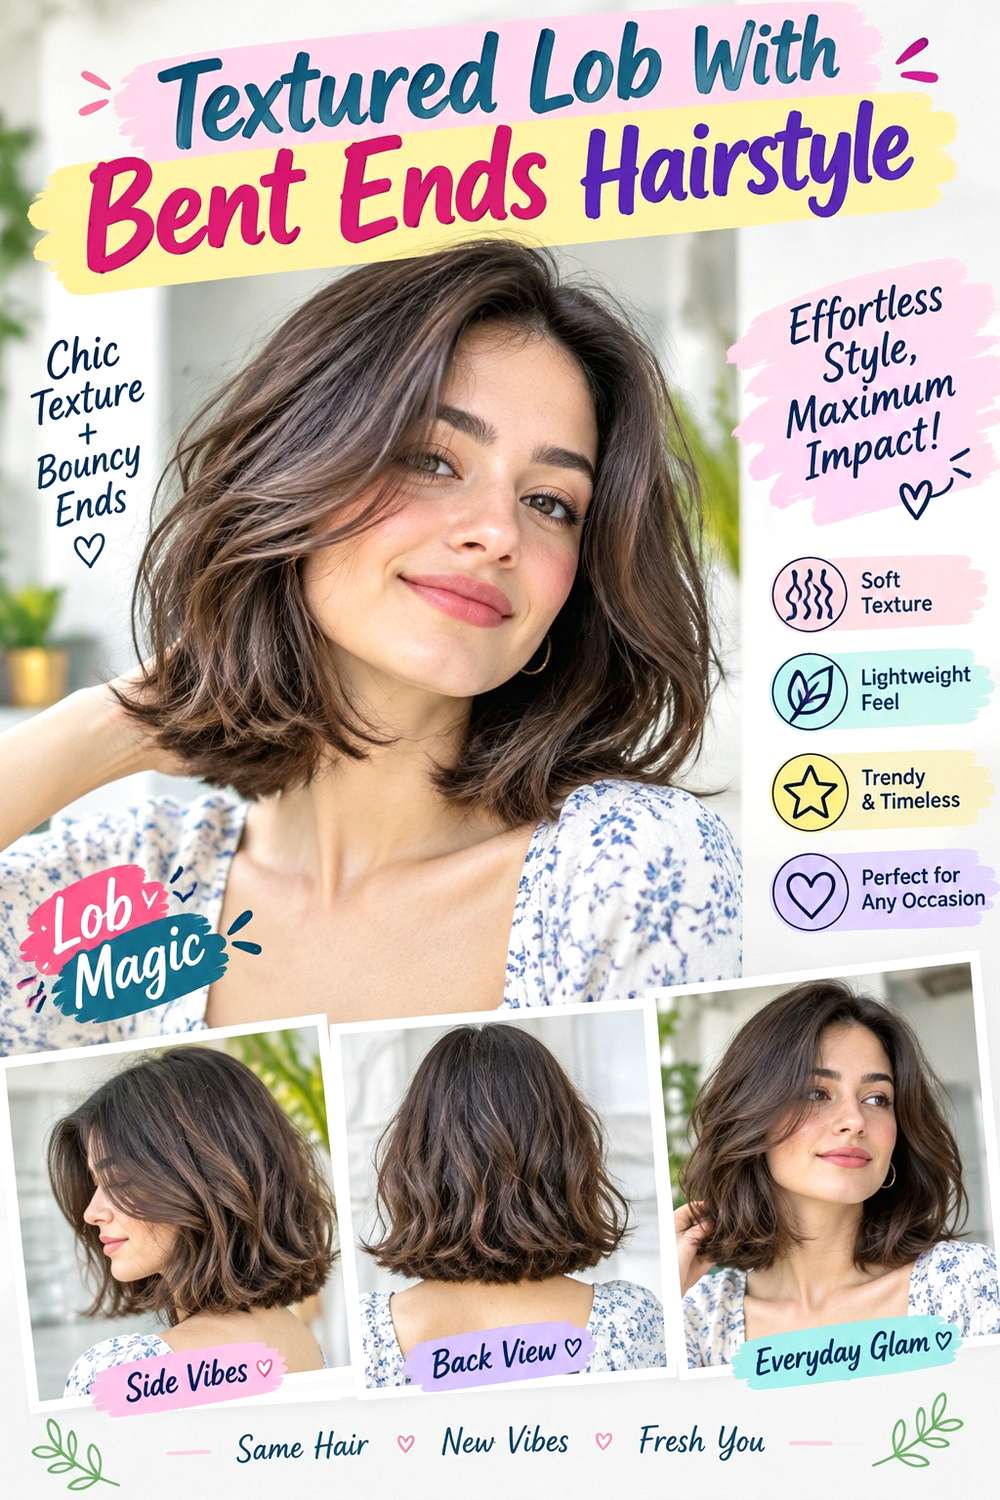
A textured lob keeps the silhouette modern and soft without relying on long curls. Let the cut finish around the shoulders or collarbones, keep a clear bottom edge, and add irregular bends through the mid-lengths with straighter tips. A center part gives the shape symmetry, while an off-center part provides extra lift on one side. Jaw-length face framing can add movement without removing too much weight from the perimeter.
Use heat protectant before creating bends with a flat iron, then apply light texture spray through the middle sections. Straight and wavy hair usually need a moderate styling session, while naturally curly hair can keep more of its pattern instead of being smoothed into bends. A full wash-day style takes longer; the quick refresh focuses on the front and any pieces that flattened overnight.
At the salon, point to the exact finished lob length and discuss how full you want the bottom edge to remain. Fine or lower-density ends often benefit from preserving more perimeter weight, while dense hair may need carefully assessed internal bulk reduction. Reshape the cut when the length drops beyond your preferred collarbone area or the outline no longer sits cleanly.
Pro tip:
Leave the last inch or two of the hair relatively straight when forming bends. Calmer ends keep the lob’s bottom line visible and prevent the shape from becoming too round.
Make It Work for You:
If your hair is dense, ask the stylist to assess where the lob widens rather than thinning everywhere. Removing bulk only where needed can preserve both movement and perimeter strength.
Watch Out For:
Too much texture spray can make shorter ends separate and look dry. Start lightly through the middle lengths and add more only where the style needs extra grip.
Half-Up Pearl Clip Hairstyle

A pearl clip gives a half-up hairstyle a more polished accessory detail while leaving the lower lengths free to move. Gather small sections from each temple and bring them together at the back, either directly or after a gentle twist. Place the pearl clip over a stable anchor and leave the remaining hair softly waved, straight, or naturally curly. A small amount of crown volume keeps the accessory from flattening the entire upper shape.
Use light texturizing spray for grip, a small clear elastic for the hidden base, and the pearl clip as the visible finish. On second-day hair, the style is relatively quick. A full wash-day version takes longer when you also need to create waves or define the lower curls. Fine hair may need a lighter clip, while dense hair can support a larger accessory if the anchor is strong enough.
If a stylist is preparing it, explain how high you want the half-up section and whether the clip should sit horizontally or follow a slight curve. If it begins slipping, tighten the hidden base instead of pressing the accessory harder against the scalp. Remove the clip carefully so decorative edges do not catch loose strands.
Pro tip:
Anchor the half-up section with an elastic before attaching the pearl clip. A concealed base gives smooth hair something stable to hold and prevents the accessory from carrying all the tension.
Make It Work for You:
For curls or coils, keep the gathered section smaller so more natural volume remains visible around the clip. The accessory can still stand out without compressing the crown.
Watch Out For:
Do not slide the pearl clip repeatedly through finished hair while adjusting it. Decorative settings can catch strands; open the accessory fully, reposition it, and secure it once.
Romantic Fishtail Braid Hairstyle
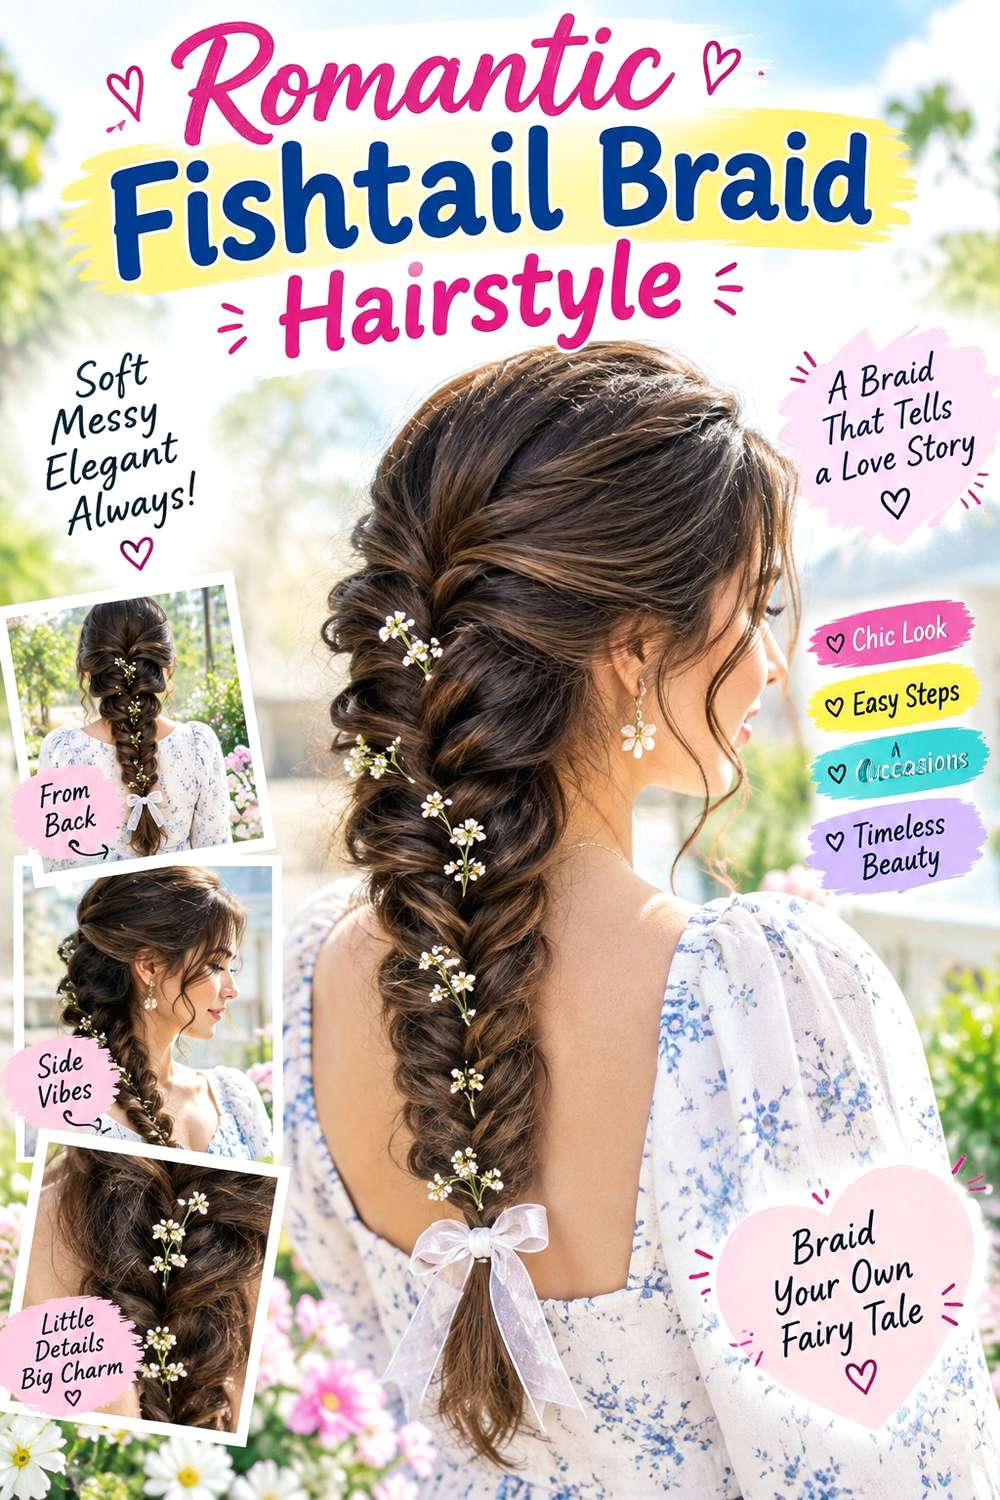
A fishtail braid creates delicate woven texture while keeping long hair controlled for dinner, a walk, or an outdoor date. Sweep the lengths over one shoulder or keep the braid centered down the back, then build the weave below the ear or nape for a softer starting point. A few longer pieces can remain around the face, while gentle crown volume stops the braid from looking too tight.
Use light texturizing spray to give slippery strands grip, a small clear elastic at the end, and flexible hairspray for short layers that tend to escape. Fishtailing takes longer than a regular three-strand braid, particularly on dense or very long hair, but the later refresh is simple. Tighten the end, smooth visible flyaways, and reshape only the sections that have flattened.
If a stylist is braiding it, discuss the finished width and how low you want the weave to begin. Comfortable tension at the scalp is important because the detail should come from the braid pattern, not tight pulling. After securing the end, the braid can be widened gradually for softness. If pieces start slipping, tuck them discreetly rather than tightening the entire structure.
Pro tip:
Build the fishtail with consistent sections first, then widen it only after the end is secure. This protects the internal structure while letting you soften the finished braid gradually.
Make It Work for You:
For thick hair, use slightly larger crossover sections to shorten styling time. The fishtail pattern remains visible without requiring tiny pieces throughout the entire length.
Watch Out For:
Pulling the finished braid extremely wide can expose gaps, especially on layered hair. Loosen each section a little at a time and stop while the weave still looks connected.
Sleek Low Bun With Soft Tendrils Hairstyle
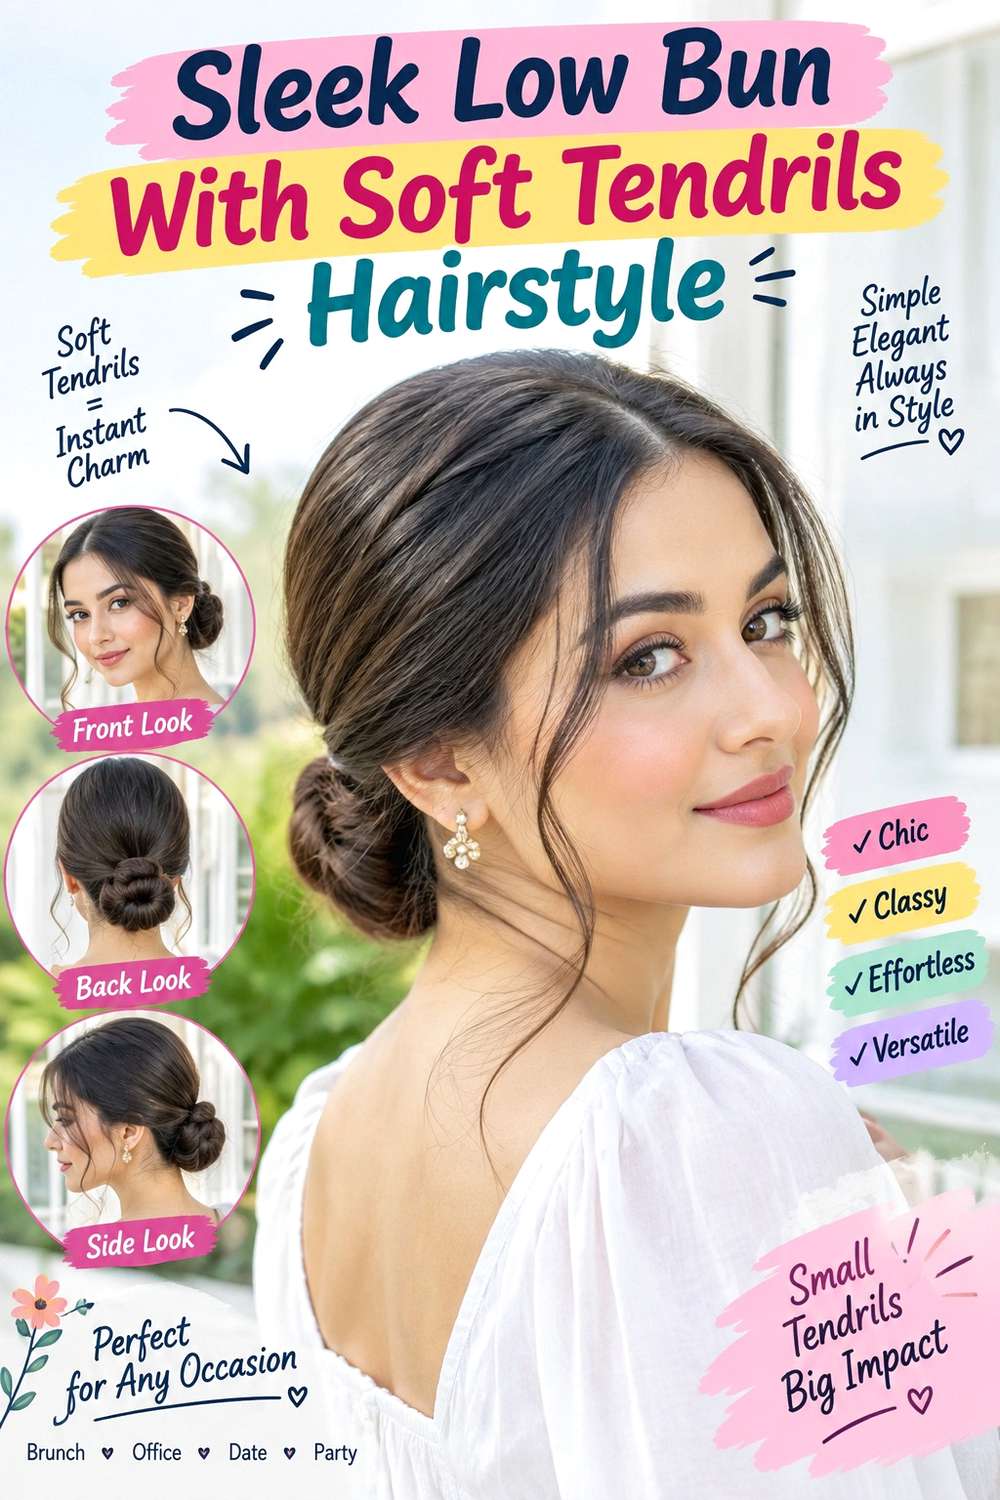
A sleek low bun gains a softer romantic edge when a small number of tendrils are left around the face. Use a center or precise side part, smooth the rest toward the nape, and form a compact bun that sits low enough to keep the silhouette elegant. The loose pieces can fall around the cheekbones, jaw, or slightly below, depending on their existing length and natural movement.
Create the base with a fabric-covered elastic, secure the bun using bobby pins, and apply light smoothing cream only where flyaways need control. The style can be fairly quick on dry hair, although curling or shaping the tendrils adds extra time. A full wash-day version takes longer if naturally textured hair is being changed substantially from its usual finish.
For salon styling, specify how sleek you want the crown and how many pieces should remain loose before the bun is built. Comfortable tension is important around the hairline. Refresh the style by smoothing the surface and replacing shifted pins rather than repeatedly tightening the base. If the tendrils lose their shape, reshape only those pieces instead of reheating the entire hairstyle.
Pro tip:
Separate the tendrils before gathering the bun. Selecting them first keeps their width intentional and prevents you from pulling random strands out of an already secured style.
Make It Work for You:
For curly or coily hair, keep natural texture in the bun and tendrils while defining the part. The low placement remains polished without requiring the whole style to become straight.
Watch Out For:
Too many loose pieces can quickly change the sleek bun into a messy shape. Keep the tendrils deliberate and pin back any extra strands that repeatedly fall forward.
Deep Side-Part Glam Waves Hairstyle
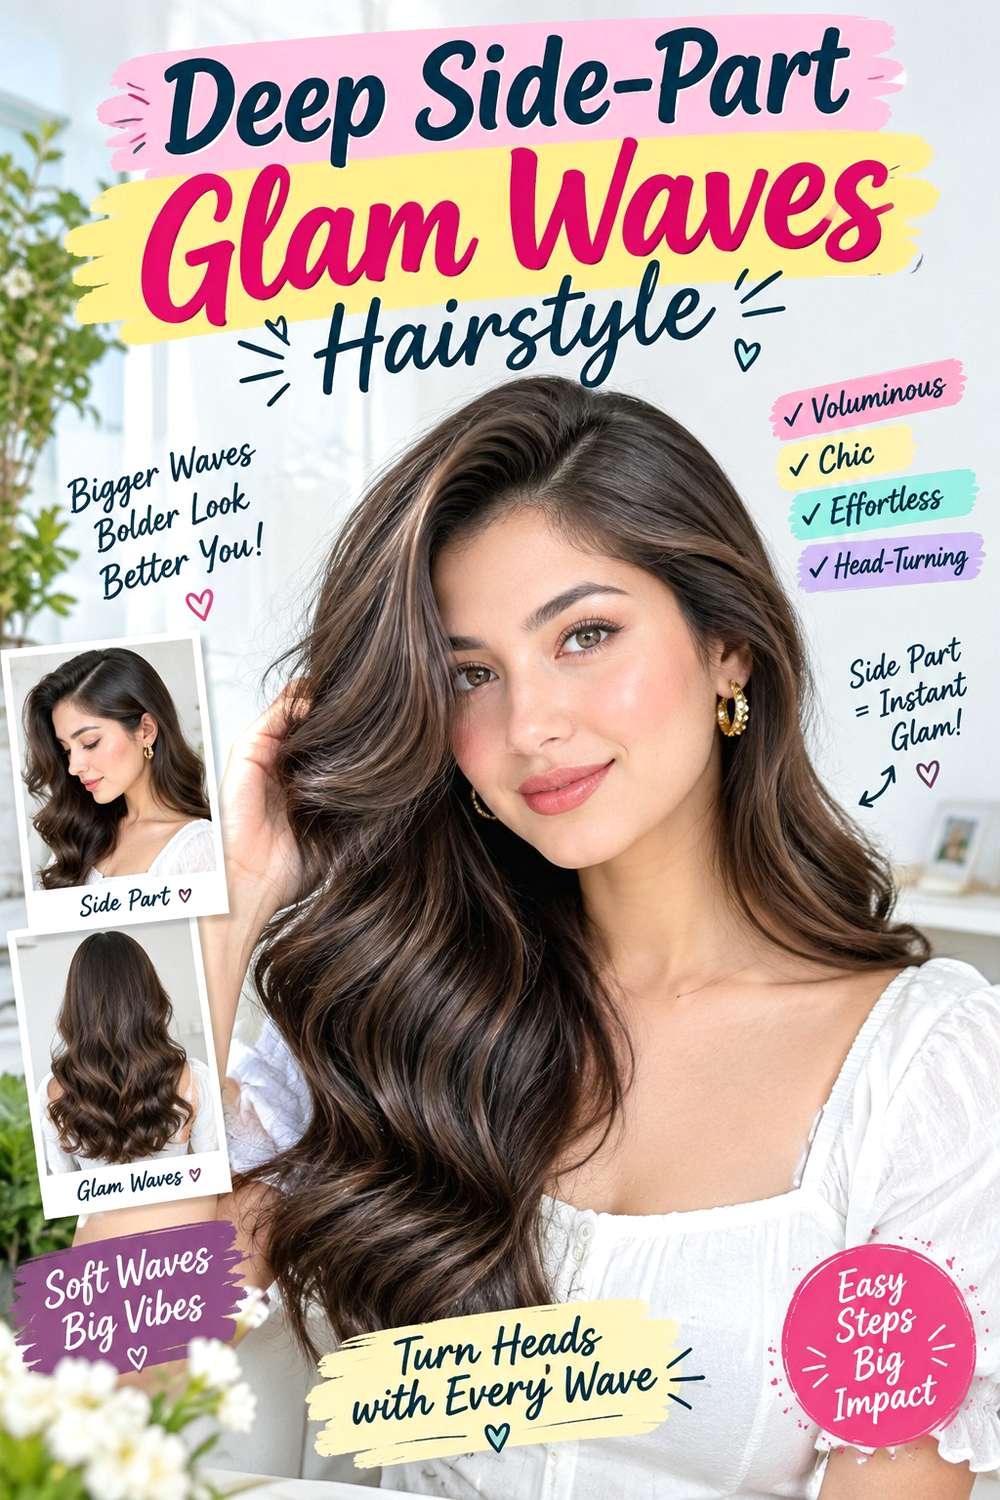
Deep side-part waves create a more dramatic silhouette while keeping the finish soft enough for a romantic evening. Place the part farther to one side than usual, direct the front section away from the face, and form broad connected waves through the mid-lengths. The heavier side carries most of the movement, while the opposite side can stay flatter or tuck behind the ear. Medium and long lengths show the pattern most clearly.
Apply heat protectant before using a large-barrel curling iron, then finish with flexible hairspray once the waves have cooled and been arranged. This requires more full-session styling than casual loose waves because the bends should flow together. A quick next-day refresh can focus on the front sweep and any sections that have lost definition.
If a stylist is creating the look, show the desired depth of the part and where you want the first front wave to curve. Keep root lift controlled so the heavier side does not become too wide. Maintenance involves protecting the established pattern rather than brushing frequently. If the surface becomes slightly frizzy, smooth individual sections gently instead of combing through the entire wave set.
Pro tip:
Let the front wave cool in its final curved direction before loosening it. That visible section establishes the whole side-swept pattern, so giving it time to set improves continuity.
Make It Work for You:
For fine hair, create fewer, larger waves and keep modest lift near the part. Too many small curls can separate the lengths instead of producing the fuller flowing shape.
Watch Out For:
Avoid spraying heavy hold before the waves are arranged. Stiff sections become difficult to connect smoothly; shape the pattern first, then use a light finishing mist.
Curly Half-Up Puff Hairstyle
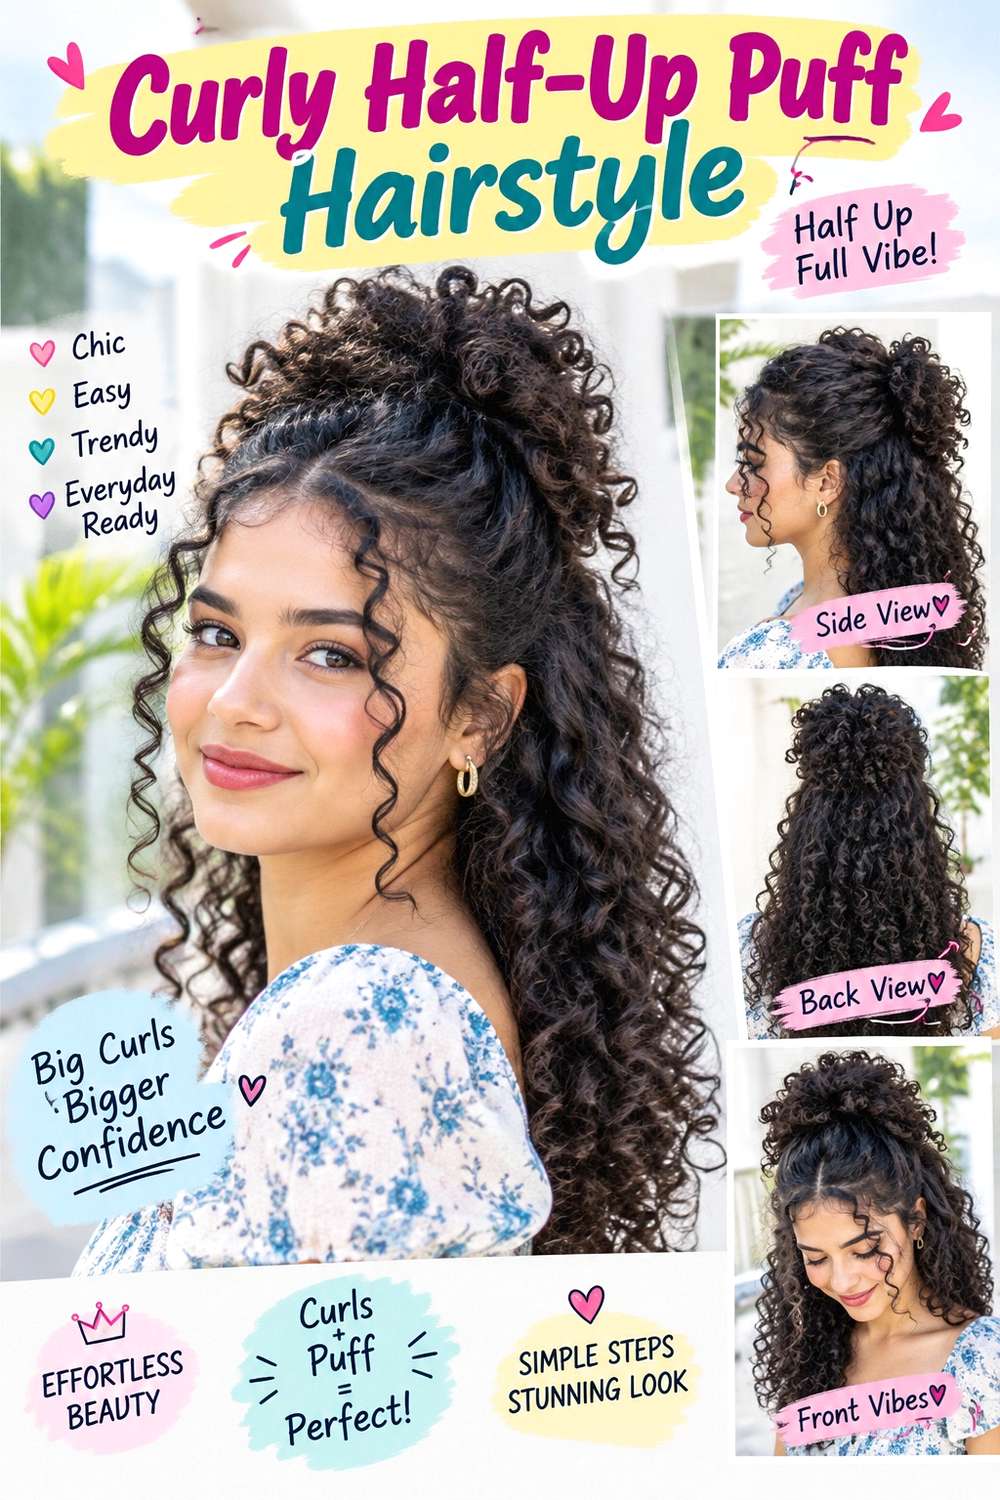
A half-up puff brings curls upward at the crown while leaving the lower texture loose, making it both romantic and practical for a date. Gather the top section from around the temples and secure it toward the upper back of the head without flattening the sides. Leave curls free through the back and shoulders, with selected front pieces around the cheekbones or jaw if they suit your usual shape.
Use lightweight leave-in conditioner for softness, curl gel to support definition, and a soft elastic to secure the puff. A full wash-day set may take significant time because the curls need to dry in their finished pattern. The date-night refresh is much faster: revive a few flattened curls, reset the elastic if needed, and leave sections that still hold their definition untouched.
If a stylist is preparing the look, explain how high you want the puff and how much hair should remain loose. Judge placement after the curls are dry because shrinkage changes the final proportions. If the base starts feeling tight, loosen it rather than adding tension for more height. Volume should come from arranging the curls, not pulling harder at the scalp.
Pro tip:
Build the half-up section after the curls are fully dry. You can judge the true height and balance more accurately, especially when shrinkage changes the crown considerably.
Make It Work for You:
For very dense curls, gather a smaller top section and leave more volume loose around the sides. The puff remains defined without concentrating too much weight at the crown.
Watch Out For:
Do not keep tightening the elastic to make the puff taller. Extra tension can flatten or distort front curls; lift and arrange the gathered texture instead.
Long Straight Hair With Face-Framing Bend Hairstyle

Long straight hair can look soft rather than severe when the movement is concentrated around the face and lower lengths. Keep the roots smooth with a center or subtle side part, allow the main length to fall straight, and curve the front sections away from the cheekbones or jaw. A slight bend near the ends prevents the silhouette from looking rigid while preserving the clean vertical line.
Apply heat protectant before smoothing or bending sections with a flat iron, then use lightweight serum only through the mid-lengths and ends for frizz control. Naturally straight hair may need a very short refresh, while wavy or curly hair requires a longer full styling session if you choose this finish. Rework only visible bends rather than repeatedly passing heat through the whole length.
At the salon, explain where you want the shortest face-framing piece to finish and whether you prefer a strong, full perimeter through the ends. That matters particularly for fine or lower-density hair. As the framing grows past the intended point, it may stop holding the same curve. Maintain the style by brushing gently and keeping heavier finishing products away from the roots.
Pro tip:
Curve the front sections away from the face only through their lower half. Leaving the roots relatively straight makes the bend look softer and easier to blend into the lengths.
Make It Work for You:
If your ends are sparse, keep the face frame limited and preserve more weight through the bottom. You can create front movement without layering heavily throughout the entire length.
Watch Out For:
Avoid repeated flat-iron passes whenever a small bend develops during the evening. Smooth it by hand first and use more heat only when the overall shape genuinely needs correction.
Soft French Twist Hairstyle

A soft French twist gives a classic pinned-up shape without needing a perfectly lacquered surface. Sweep medium or long hair toward the back, roll the lengths vertically, and secure the fold so a little fullness remains at the crown. The front can use a side sweep, center part, or a few longer pieces around the temples. The vertical shape keeps the neck clear while maintaining a softer outline than a tightly compressed twist.
Use bobby pins for the internal anchor, light styling cream to control flyaways, and flexible hairspray for gentle hold. The full style takes more time than a simple bun because the roll needs balanced tension and secure pinning. Later maintenance is quicker: replace a loose pin and smooth the visible surface without dismantling the whole twist.
At the salon, describe the height and width you want through the roll and emphasize comfortable tension at the nape. Dense hair may need a broader shape to distribute its weight. If the twist begins leaning, reinforce the loose anchor rather than tightening every section. Allow slight texture to remain if that suits your hair; the style does not need a perfectly glassy surface to read as polished.
Pro tip:
Turn your head gently before the final pins go in. If one area pulls, redistribute the tension immediately so the finished twist remains comfortable through a longer dinner or evening.
Make It Work for You:
For shorter hair, create a smaller roll and allow some ends to tuck softly rather than forcing a tall twist. The vertical pinned shape can still remain recognizable.
Watch Out For:
Do not compensate for a loose roll by pushing pins randomly through the surface. Rebuild the weak internal anchor so the twist stays secure without visible pin clutter.
Loose Dutch Braid With Ribbon Hairstyle

A loose Dutch braid paired with a narrow ribbon creates visible texture and a seasonal accent without turning the hairstyle into a formal updo. Begin the braid near the upper back of the head and continue toward the nape, keeping the woven sections broad and comfortable. Secure the end, then tie the ribbon around the elastic or weave it through only if that can be done without snagging. Leave a small amount of softness around the face.
Use light texturizing spray for grip, a small elastic to secure the braid, and the ribbon as the finishing accessory. The braid takes longer than a ponytail but can hold well once completed. A later refresh usually means smoothing flyaways or retying the ribbon rather than rebuilding the entire weave. Straight, wavy, and curly hair can all support the design with adjusted section sizes.
If a stylist is creating it, discuss braid width, ribbon placement, and comfortable scalp tension. A wider braid appears soft without needing aggressive loosening. Secure the ribbon to the stable braid rather than allowing it to hold structural tension. If the accessory shifts, retie it separately instead of pulling the braid tighter around the scalp.
Pro tip:
Complete and secure the braid before adding the ribbon. Keeping the accessory separate from the structural anchor makes it easier to reposition without loosening the entire hairstyle.
Make It Work for You:
For lower-density hair, keep the Dutch braid moderately narrow and use a slim ribbon. This preserves visible hair through the weave instead of letting the accessory overpower the braid.
Watch Out For:
Do not pull every braid loop dramatically wider. Excessive loosening can expose gaps and release layers; expand each section gradually until the shape looks soft but still connected.
Claw Clip Twist With Wispy Front Hairstyle

A claw clip twist works well for a relaxed date when you want the hair up without committing to a structured bun. Gather medium or long hair at the back, twist it upward, and secure the center with a clip. Allow the upper ends to tuck in or fan slightly, then leave two controlled front pieces around the cheeks or jaw. A little crown softness keeps the style from looking tightly pulled.
Use a sturdy claw clip as the main anchor, light texturizing spray for grip, and a small amount of styling cream to define the front pieces. On second-day hair, this is one of the quicker options. A full wash-day version takes longer only if you plan to curl the wispy sections or reshape your natural texture first.
If a stylist is helping, specify how high you want the clip and how much of the ends should remain visible above it. Clip size should match your density instead of forcing thick hair into a small accessory. If the twist loosens, rebuild the base rather than squeezing the clip harder. For a coat or scarf, check that the accessory sits above the collar so movement does not repeatedly knock it out of place.
Pro tip:
Put on your coat before finalizing the clip height. Moving the twist slightly higher can prevent the accessory from hitting a collar and gradually loosening as you walk.
Make It Work for You:
For short or heavily layered hair, twist the central section and let side pieces overlap naturally into the clip. You do not need every strand contained to preserve the shape.
Watch Out For:
Avoid using a clip that barely closes around your hair. Excess pressure can feel uncomfortable and cause slipping; choose a larger accessory that holds the twist securely.
Voluminous Blowout With Long Layers Hairstyle

A voluminous blowout gives long layers enough movement to create a soft, flowing date-night shape without defined curls. Keep lift concentrated near the crown and front, then let broad curves move through layers beginning around the jaw or below. The ends can turn slightly inward or outward rather than forming a uniform curl. A center part produces balanced volume, while an off-center part creates a fuller sweep on one side.
Apply heat protectant before blow-drying and use a round brush to shape the layers, with root-lift spray focused near the crown. This is a longer full wash-day style, particularly on dense or very long hair. The next-day refresh is much quicker and may only require reshaping the front layers and restoring some root lift.
At the salon, show exactly where you want the shortest long layer to begin and how much density you want preserved at the perimeter. More layering can create movement, but excessive removal may make some ends look sparse. Maintain the cut when the layers stop flowing together or the face frame drops below your preferred point. Between styling sessions, avoid coating the roots heavily, since excess product can collapse the volume that defines the blowout.
Pro tip:
Let each front section cool in its curved position before releasing it fully. Cooling helps the broad bend stay visible without requiring a tighter curl or excessive finishing spray.
Make It Work for You:
If your hair is fine, keep the lower layers longer and concentrate lift at the crown. Preserving more weight through the ends can maintain fullness while still creating movement.
Watch Out For:
Too much root-lift product can make the crown stiff or separated. Apply lightly near the roots and let drying direction provide most of the volume instead of relying on product alone.
Shoulder-Length Soft Curls Hairstyle

Shoulder-length curls create a compact romantic shape with enough movement to frame the face without the weight of very long hair. Keep the part centered or slightly to one side, begin curls around the cheekbones or jaw, and allow the ends to stay softly defined instead of forming tight ringlets. Face-framing pieces can follow the curl pattern so they blend naturally rather than sitting as separate, heavily styled strands.
Apply heat protectant before using a medium-barrel curling iron when creating curls with heat, then finish with flexible hairspray for movable hold. Naturally curly or wavy hair can use its existing pattern and may need only selective definition. A full heat-styled or wash-day curl set takes longer, while the quick refresh involves reshaping a few front pieces and any sections flattened during the day.
At the salon, discuss the finished shoulder length and where any face-framing layer should begin. On naturally curly hair, judge that position dry because shrinkage affects the final result. Cut upkeep becomes useful when the perimeter drops well beyond the intended shoulder line or the front stops blending. Outdoors, separate tangles with your fingers and resist repeatedly brushing through the curls.
Pro tip:
Keep the curls around the shoulders slightly looser than those near the face. This prevents the ends from bunching against clothing while preserving clear movement through the upper shape.
Make It Work for You:
If your hair is dense, use broader curl sections through the lower half. Larger bends can control excessive width while allowing the shoulder-length silhouette to stay soft and mobile.
Watch Out For:
Avoid forming identical tight curls around the entire head. A uniform pattern can create too much roundness; vary the bends slightly and keep the lower sections more relaxed.
Conclusion
Fall date night hairstyles can feel romantic without relying on one specific texture or length. Loose waves and blowouts give medium and long hair flowing movement, while lobs and shoulder-length curls keep the shape more compact. Braids, chignons, French twists, and low buns provide extra control, and half-up styles balance loose texture with secure placement. Curtain fringe, longer face framing, and side parts can change where attention falls around the face, while density determines how much volume and anchoring feels practical. Natural curls can stay defined rather than being straightened for polish. When choosing among these ideas, compare the finish you like with the effort you are comfortable maintaining throughout an evening.
Before Your Salon Visit
Choose one or two favorites and save references that clearly show the details you want to recreate. Discuss your natural texture, density, face shape, preferred length, usual upkeep, and realistic styling routine. Point out the exact fringe length, layer starting point, braid width, bun or ponytail placement, crown volume, accessory position, or finish that appeals to you. For temporary date-night styles, focus on comfortable styling and secure placement rather than changing your haircut unless you already want a new shape.
FAQs
What is an easy fall date night hairstyle if I have little styling time?
A claw clip twist, low ponytail, or simple half-up style can be refreshed quickly on dry hair. Choose the option closest to your natural texture so you do not need a full heat-styling session. Secure the base first, then spend your remaining time refining only the visible front sections.
Can curly hair create a soft romantic date-night look without heat?
Yes. Defined natural curls, a half-up puff, side sweep, or textured low bun can all create softness without heat styling. Work with your normal curl pattern, consider shrinkage when choosing placement, and refresh only flattened sections instead of changing the entire texture for the occasion.
How can I keep soft waves from falling flat during a date?
Let heat-styled waves cool before loosening them, use flexible hold rather than heavy product, and avoid repeatedly brushing the lengths. If a few sections relax, refresh only those visible pieces. The required hold will vary with your natural texture, hair density, weather, and how long you plan to wear the style.
How often should curtain fringe or face-framing layers be reshaped?
Use the finished shape rather than a fixed calendar as your guide. Curtain fringe may need attention when the center falls into the eyes or the outer corners stop blending, while face-framing layers can be reshaped when they grow below the placement you prefer.