18 Glamoratti Blowout Hairstyle Ideas
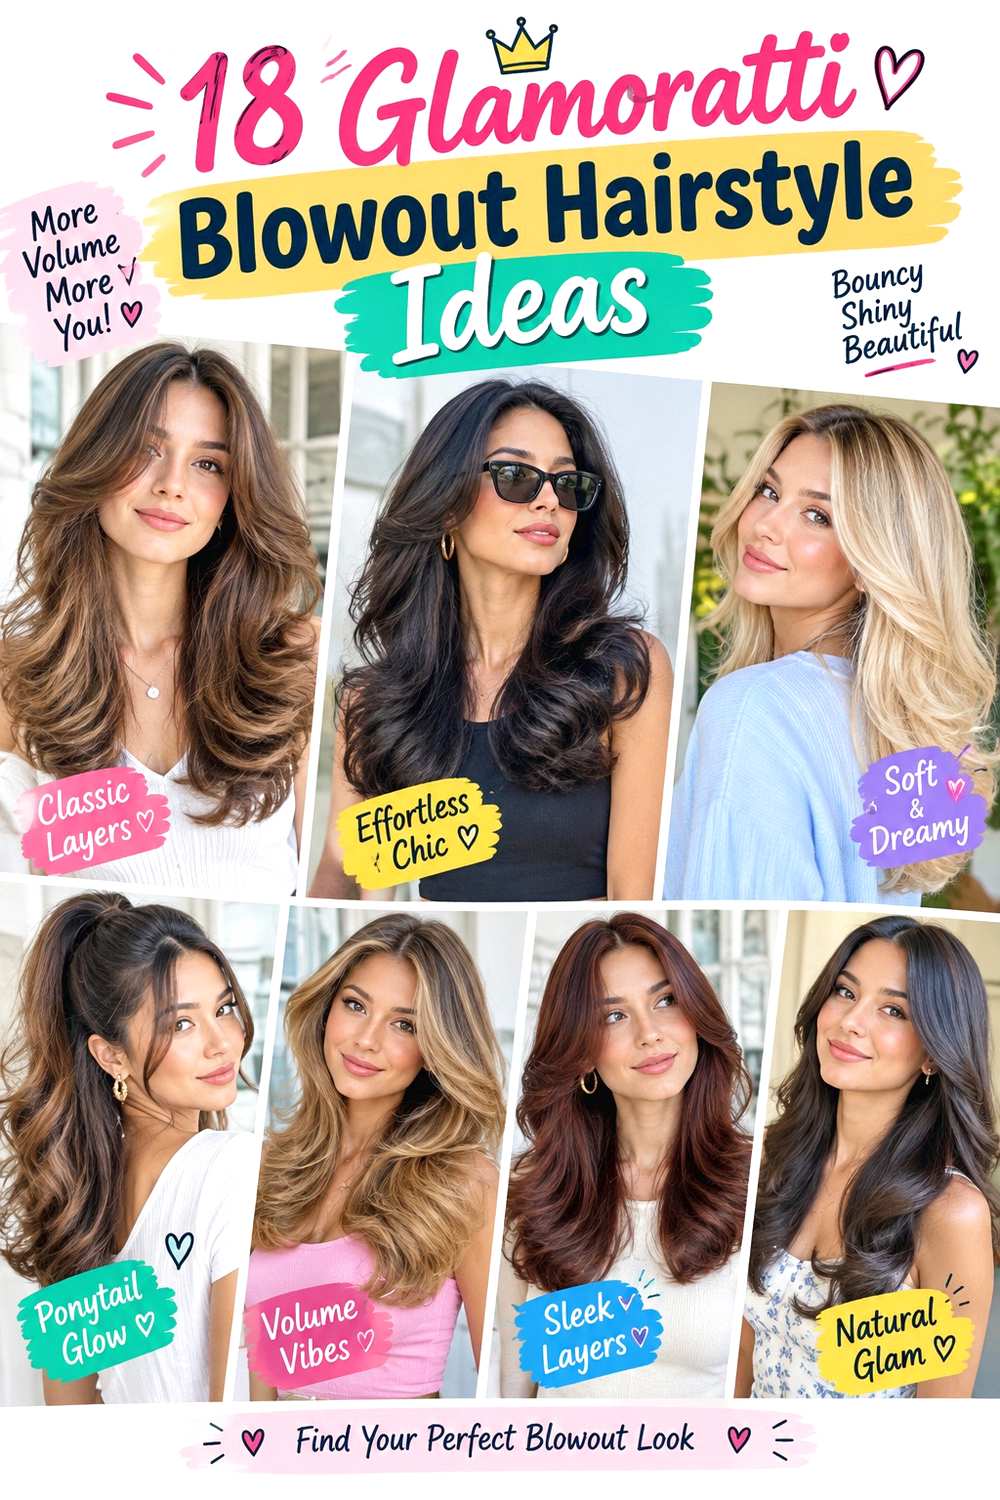
Glamoratti blowout hairstyle ideas center on a polished, high-volume blowout with visible root lift, rounded movement, and a deliberately full silhouette. Here, “Glamoratti blowout” describes the visual family rather than one fixed cutting method: some versions use center parts, others use swept fronts, curtain fringe, broad bends, feathered layers, or strong end flips. The defining features are controlled volume, smooth movement through the mid-lengths, and ends that look shaped rather than flat.
Medium and long hair give the most room for large bends and layered movement, though collarbone cuts and lobs can create a compact version. Fine strands often benefit from lighter product and restrained separation, while dense hair may need more controlled internal weight so the sides do not expand too widely. Straight and wavy textures may reach the finish with less reshaping than curly or coily hair, but natural texture does not need to be erased for every variation.
A complete blowout is a longer styling process than a dry-hair refresh. Washing, drying, lifting roots, shaping layers, cooling bends, and setting the finish all take time. Between washes, it is usually more practical to restore the crown, front pieces, and flattened ends rather than restyle everything.
Quick List
- Classic Center-Part Glamoratti Blowout Hairstyle
- Deep Side-Part Glamoratti Blowout Hairstyle
- High Crown Glamoratti Blowout Hairstyle
- Curtain Fringe Glamoratti Blowout Hairstyle
- Face-Framing Glamoratti Blowout Hairstyle
- Long Layered Glamoratti Blowout Hairstyle
- Collarbone Glamoratti Blowout Hairstyle
- Blunt Lob Glamoratti Blowout Hairstyle
- Feathered-End Glamoratti Blowout Hairstyle
- Flipped-End Glamoratti Blowout Hairstyle
- Soft Wave Glamoratti Blowout Hairstyle
- Wide Bend Glamoratti Blowout Hairstyle
- Sleek Root Glamoratti Blowout Hairstyle
- Airy Fine Hair Glamoratti Blowout Hairstyle
- Dense Hair Controlled Glamoratti Blowout Hairstyle
- Curly Blend Glamoratti Blowout Hairstyle
- Half-Up Glamoratti Blowout Hairstyle
- Extra-Long Glamoratti Blowout Hairstyle
Classic Center-Part Glamoratti Blowout Hairstyle
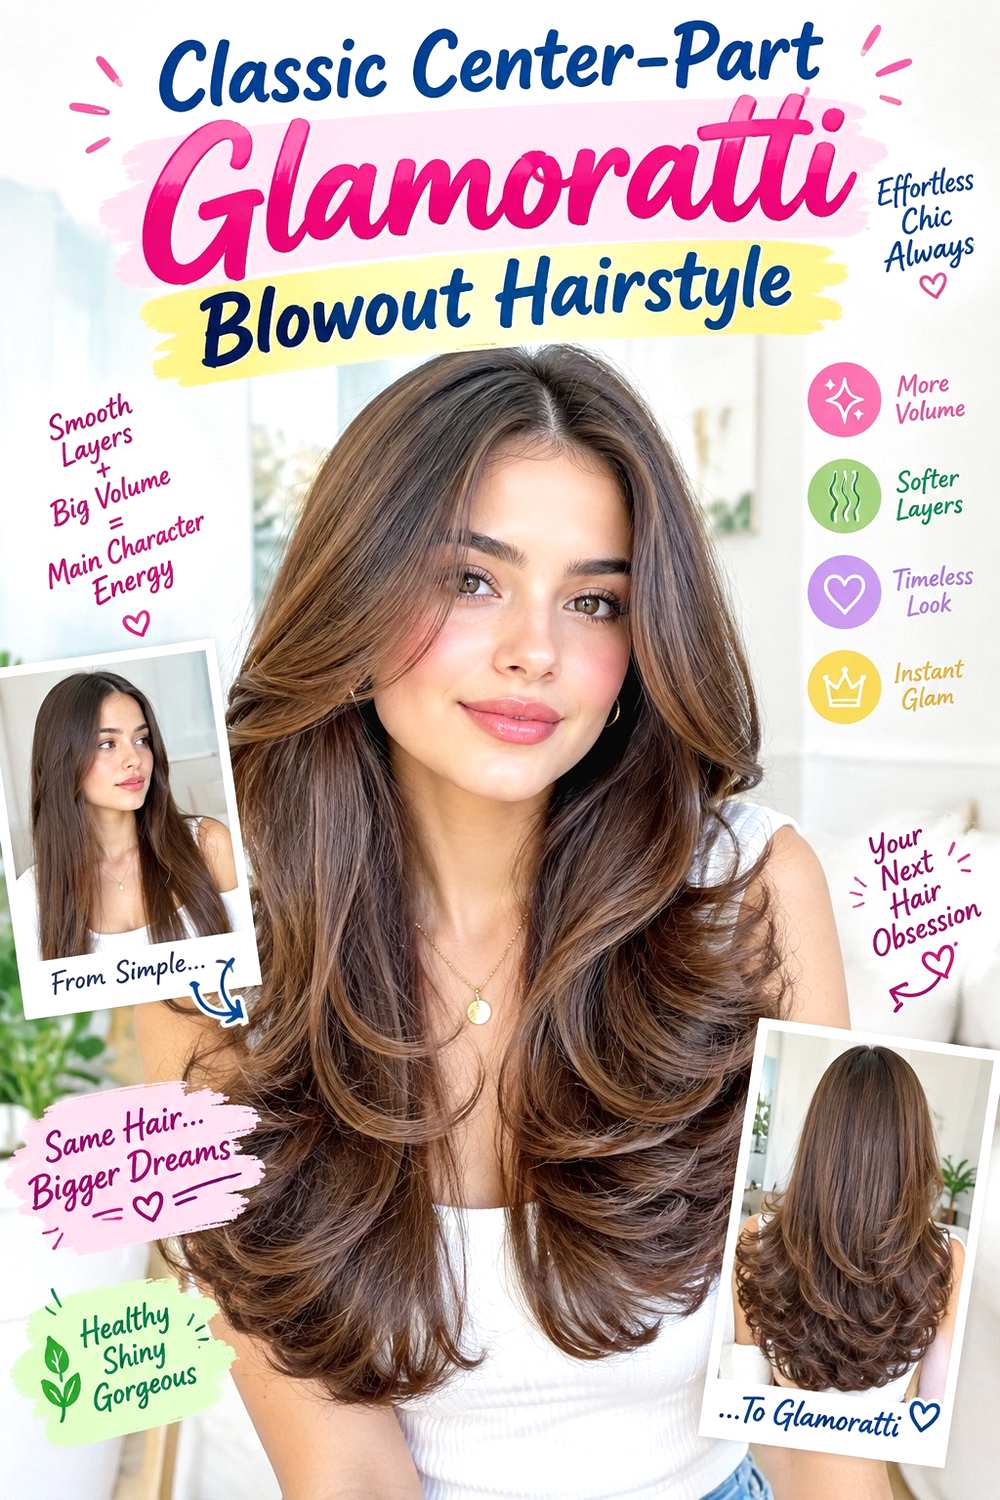
A clean center part gives the blowout a balanced frame, with rounded root lift rising gently on both sides before the lengths move away from the face. Keep the strongest volume behind the front hairline rather than directly at the temples, then shape broad curves through the mid-lengths. Cheekbone- or jaw-length face-framing layers can sweep backward, while the longest ends stay full and softly rounded instead of separating into thin wisps.
Use heat protectant before styling, a large round brush to create root lift and bend the layers, and flexible hairspray for hold that does not freeze the movement. Medium and long hair show this symmetry clearly. Fine or lower-density hair usually benefits from keeping the perimeter fuller, while dense hair can support broader curves if side volume is controlled. A quick refresh between washes may focus on the two front panels and crown; a complete wash-day set takes longer because the root direction and all lower bends need rebuilding.
At a salon appointment, point to exactly where you want the shortest face-frame to finish and ask to preserve enough weight through the longest edge. That balance helps the blowout stay full after the front layers are swept away from the face.
Pro tip:
Let the two front sections cool away from the face before releasing them. Cooling in the intended direction helps the center opening stay lifted instead of falling inward.
Make It Work for You:
For lower-density hair, keep the shortest framing layer nearer the jaw than the cheekbone and preserve more bottom weight so the blowout remains full through the ends.
Watch Out For:
Avoid directing too much volume toward both temples. Shift the strongest lift slightly upward and back so the center-part shape stays balanced rather than overly wide.
Deep Side-Part Glamoratti Blowout Hairstyle
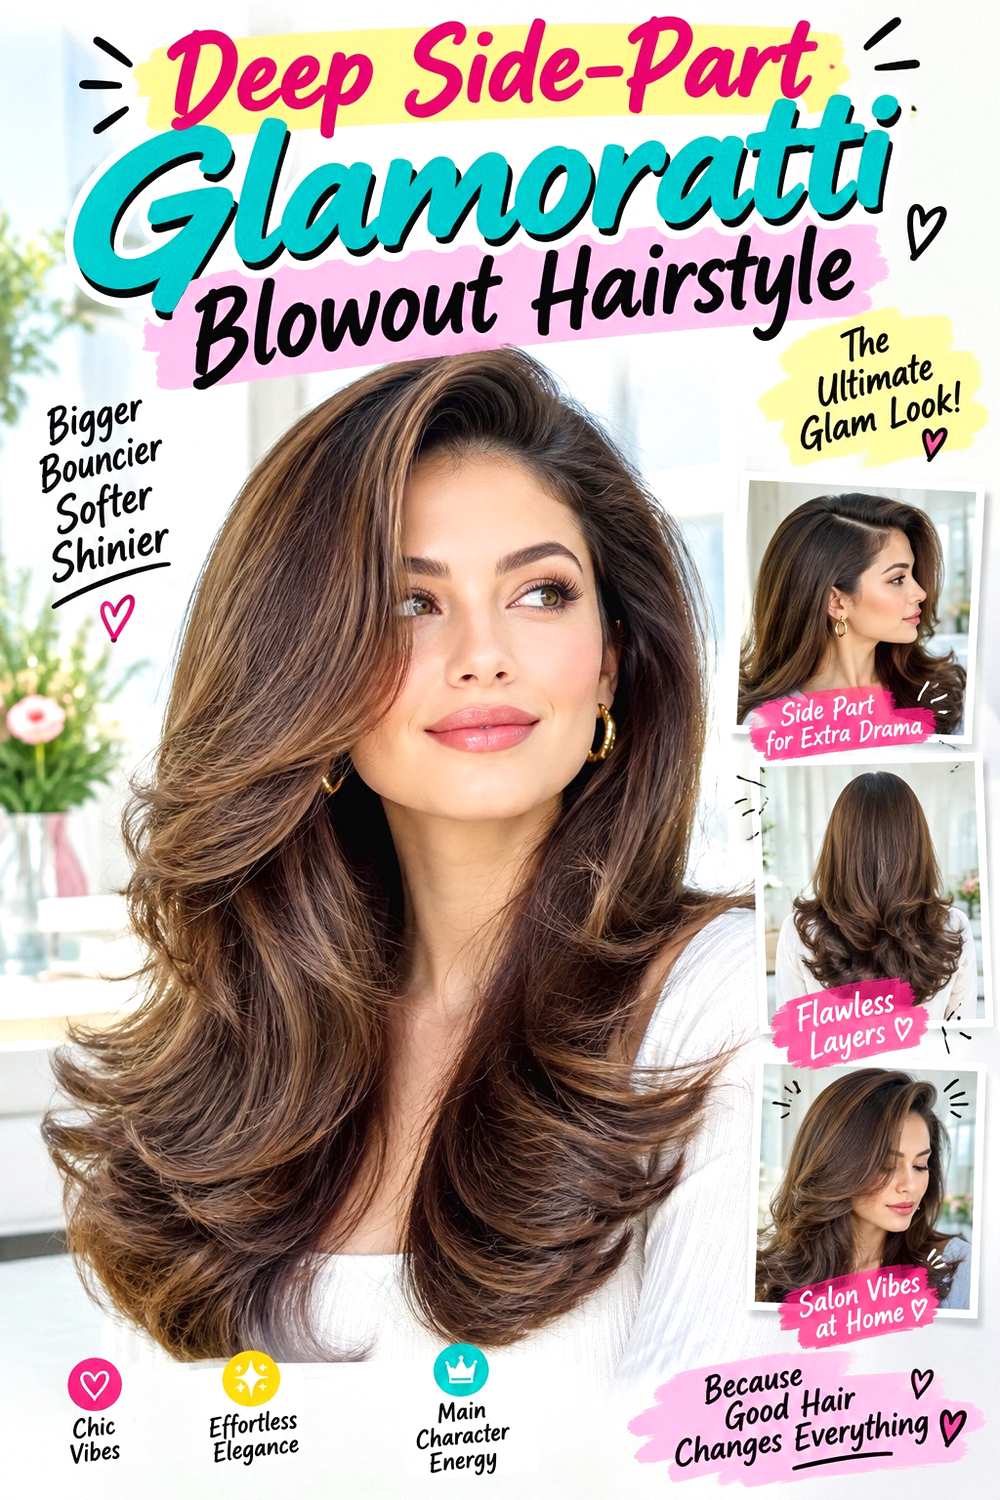
A deep side part creates a heavier front sweep and places most of the visible root lift on one side. Shape the fuller section upward and backward so it curves over the forehead without lying flat, while the lighter side stays closer to the head. Broad bends can begin below the cheekbone and flow into rounded ends, giving the silhouette movement without making both sides equally wide.
Use heat protectant before the blowout, a round brush to build the sweeping front curve, and flexible hairspray to support the asymmetric shape. Medium and long hair provide enough length for the heavier side to move naturally toward the shoulder. Dense hair may need less expansion on the fuller side, while fine strands often benefit from restrained brushing so the ends retain substance. A short refresh between washes can focus on the root sweep and one or two front bends; a full wash-day style takes longer because the part and drying direction must be reset from the roots.
At a salon appointment, show how deep you want the part and where the first face-framing layer should turn away. Keeping the opposite side slightly calmer preserves the intentional asymmetry instead of turning the style into equal volume around the entire head.
Pro tip:
Dry the fuller front section in its final side direction from the beginning. Reversing it after the roots set can make the sweep collapse or split.
Make It Work for You:
If your hair is dense, keep the lighter side relatively smooth and concentrate the biggest bend on the heavier side. This controls width without losing the side-swept effect.
Watch Out For:
Do not flatten the lighter side tightly just to exaggerate contrast. A softer close-to-head finish looks more balanced and avoids unnecessary tension near the temple.
High Crown Glamoratti Blowout Hairstyle
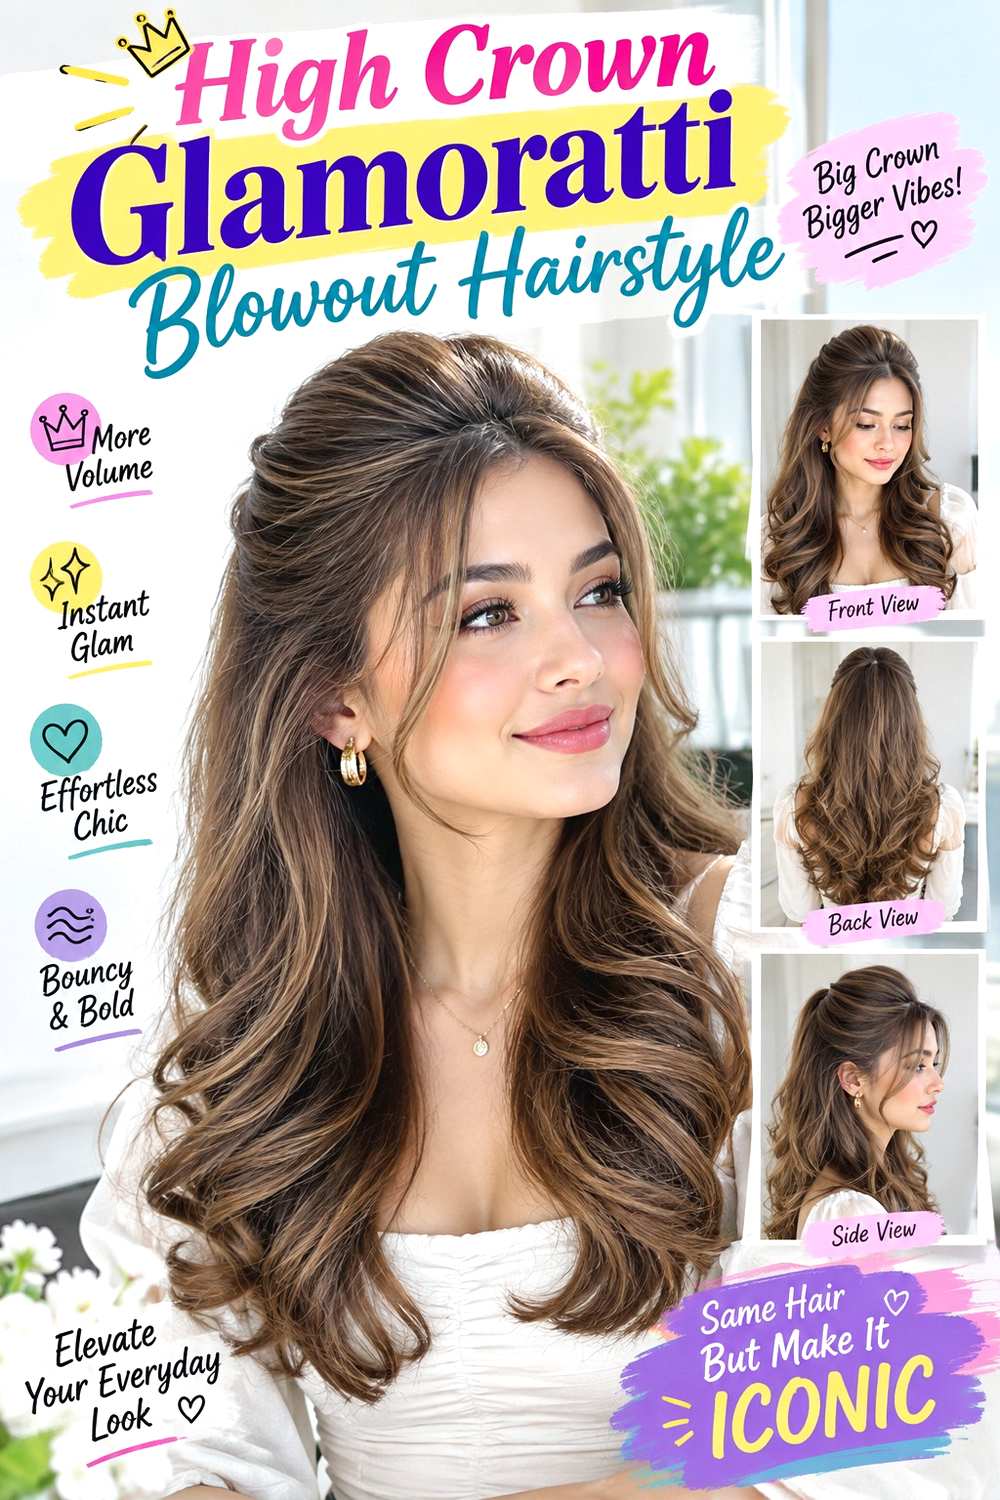
Crown height is the main feature here, with the strongest lift placed behind the top of the head rather than beside the face. The front can sweep back softly or open around a subtle part, while upper layers rise at the crown before falling into large rounded curves. Keep the ends full and controlled so the silhouette feels vertically lifted instead of equally expanded through the sides.
Use root-lift spray at the upper crown, heat protectant before drying, and a large round brush to direct sections upward and back. Medium and long hair make the vertical profile easiest to see. Fine hair can benefit from moderate crown lift, but excessive height may make the lower lengths appear comparatively sparse. Dense hair often needs less root product because the blowout itself can create substantial fullness. A quick refresh may involve lifting only the crown and reshaping the top layer; a complete wash-day set takes longer because root direction must be rebuilt before the lengths are styled.
At a salon appointment, identify where you want the crown height to peak and where the shortest upper layer should end. Those landmarks help create lift through the back of the head without requiring excessive short layering or unnecessary width near the temples.
Pro tip:
Direct crown sections upward while they cool instead of pressing them immediately backward. The set gains height first, then settles into a softer rounded profile.
Make It Work for You:
For fine hair, choose moderate crown lift and longer upper layers. This keeps the top airy without creating a large contrast against a lighter-looking perimeter.
Watch Out For:
Avoid adding root product across the entire scalp. Concentrating support at the crown helps maintain vertical lift instead of creating broad, uncontrolled side volume.
Curtain Fringe Glamoratti Blowout Hairstyle
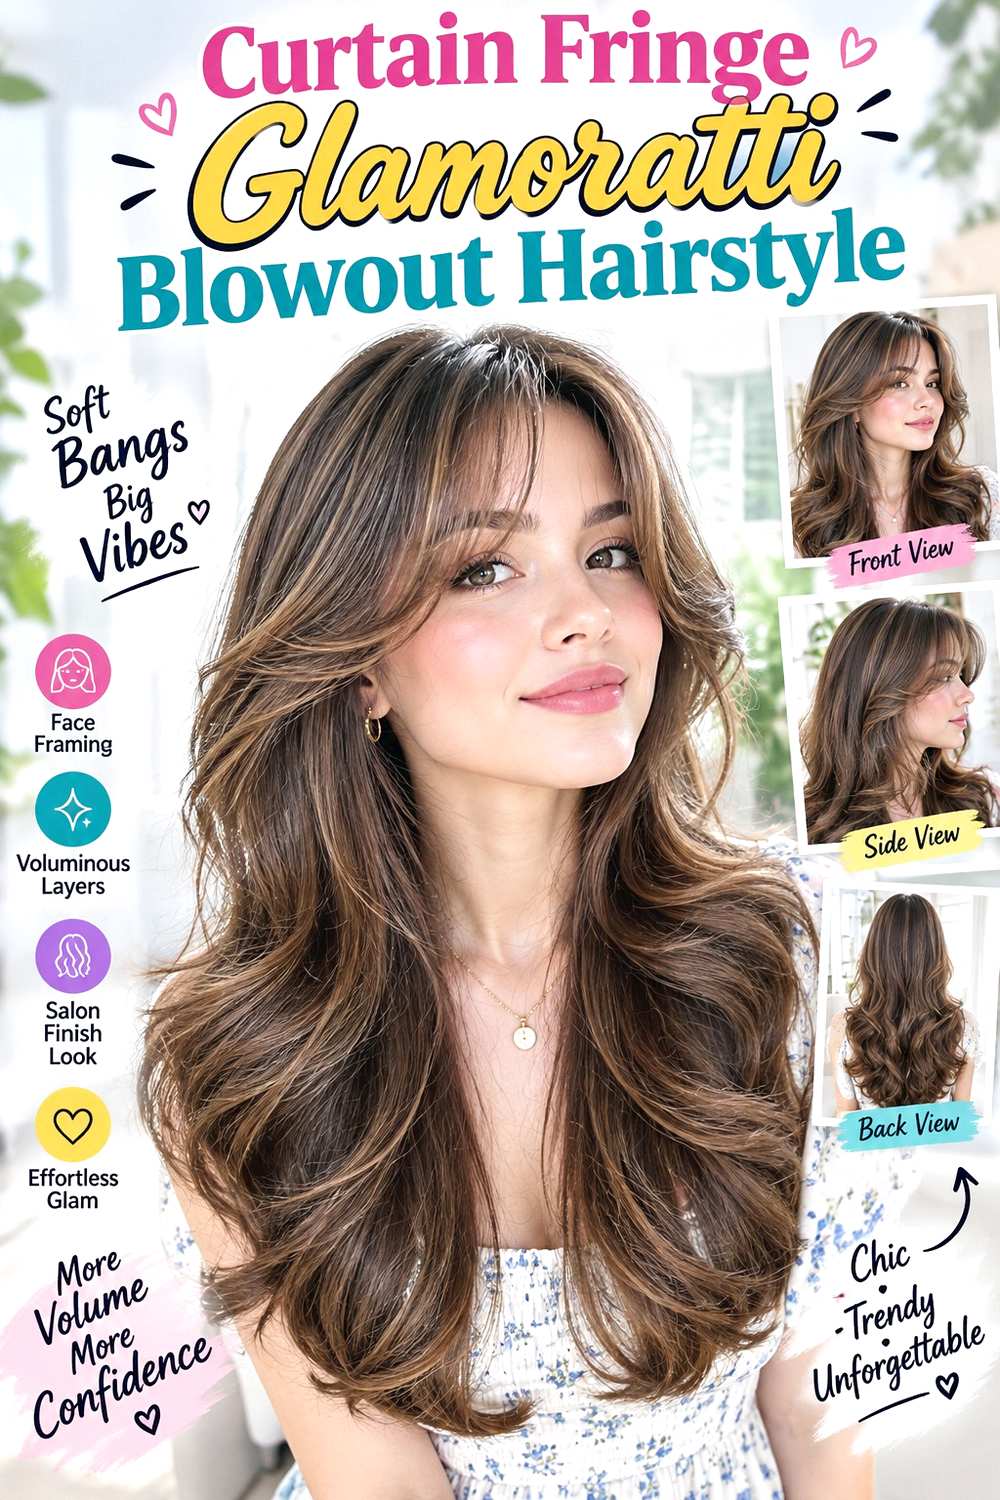
Curtain fringe creates a defined opening through the front while the rest of the blowout stays full and rounded. The center can skim the brows or sit lower depending on the existing fringe, while the outer corners lengthen toward the cheekbones. Shape those outer sections away from the face so they connect with the first side layers rather than stopping abruptly. The crown can stay softly lifted, with broad bends continuing through the mid-lengths and full ends.
Use heat protectant before styling, a round brush to shape the curtain fringe and outer layers, and flexible hairspray to keep the curved front from collapsing. Medium and long hair give the fringe enough length to blend smoothly into the fuller body. A quick morning refresh may focus only on the fringe because it can lose direction before the rest of the blowout; full wash-day styling takes longer because the front and lengths require separate attention.
At a salon appointment, discuss the finished dry fringe length, width, and the point where the outer corners merge into the face-frame. Fringe entering the eyes or losing its center opening is a more useful reshaping signal than a rigid calendar. Curly or wavy fringe should be assessed with its natural shrinkage in mind.
Pro tip:
Style the curtain fringe before the longer layers, then let it cool away from the face. This keeps its center opening distinct from the larger blowout bends.
Make It Work for You:
For wavy or curly fringe, work with the natural bend and keep the outer corners longer. The curtain effect stays visible without forcing a completely straight front.
Watch Out For:
Do not make the outer fringe corners too short if you want a flowing blowout. Longer edges usually connect more smoothly with cheekbone or jaw-level layers.
Face-Framing Glamoratti Blowout Hairstyle
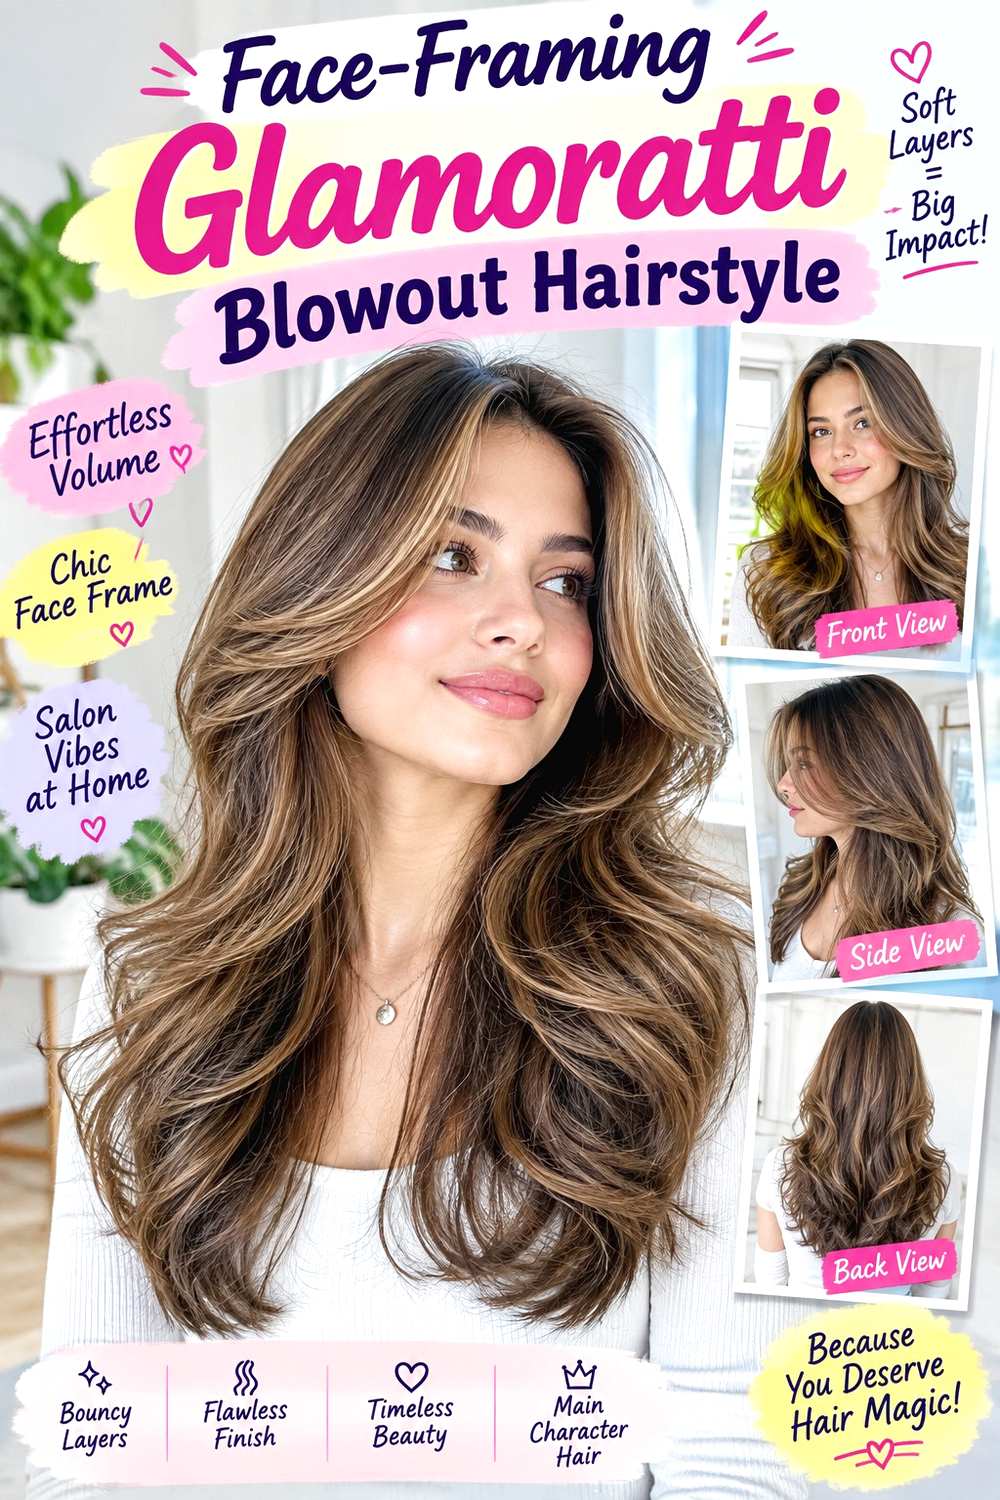
Face-framing movement carries this version, with shorter layers curving away from the cheeks before blending into longer, fuller lengths. Keep the crown lifted but not exaggerated, then direct the first visible bend outward around the cheekbones or jaw. The lower hair can fall in broad C-shaped curves, with ends that remain dense enough to support the layered movement. A center or soft side part can work depending on which side you want to emphasize.
Use heat protectant before styling, a round brush to shape the front layers, and flexible hairspray to keep the bends moving without stiffness. Medium and long hair show the graduated frame most clearly. Fine or sparse ends benefit from fewer dramatic short layers, while dense hair can support more visible separation if the overall width remains controlled. A quick refresh usually means resetting only the front two or three sections; full wash-day styling takes longer because the layers need to be dried in sequence.
At a salon appointment, point to the exact landmark where the shortest face-frame should finish—cheekbone, jaw, chin, or collarbone—and ask how that position will blend with the length you want to keep. A precise starting point matters more than simply asking for “lots of layers.”
Pro tip:
Shape the shortest face-framing section first, then use it as the direction guide for the longer layers behind it. This creates a cleaner graduated sweep.
Make It Work for You:
If your ends are sparse, begin the strongest face framing lower and preserve more long hair at the perimeter. You keep movement without sacrificing bottom fullness.
Watch Out For:
Avoid over-separating the front layers after styling. Too much brushing can turn defined curves into frizz and make the frame look thinner than intended.
Long Layered Glamoratti Blowout Hairstyle
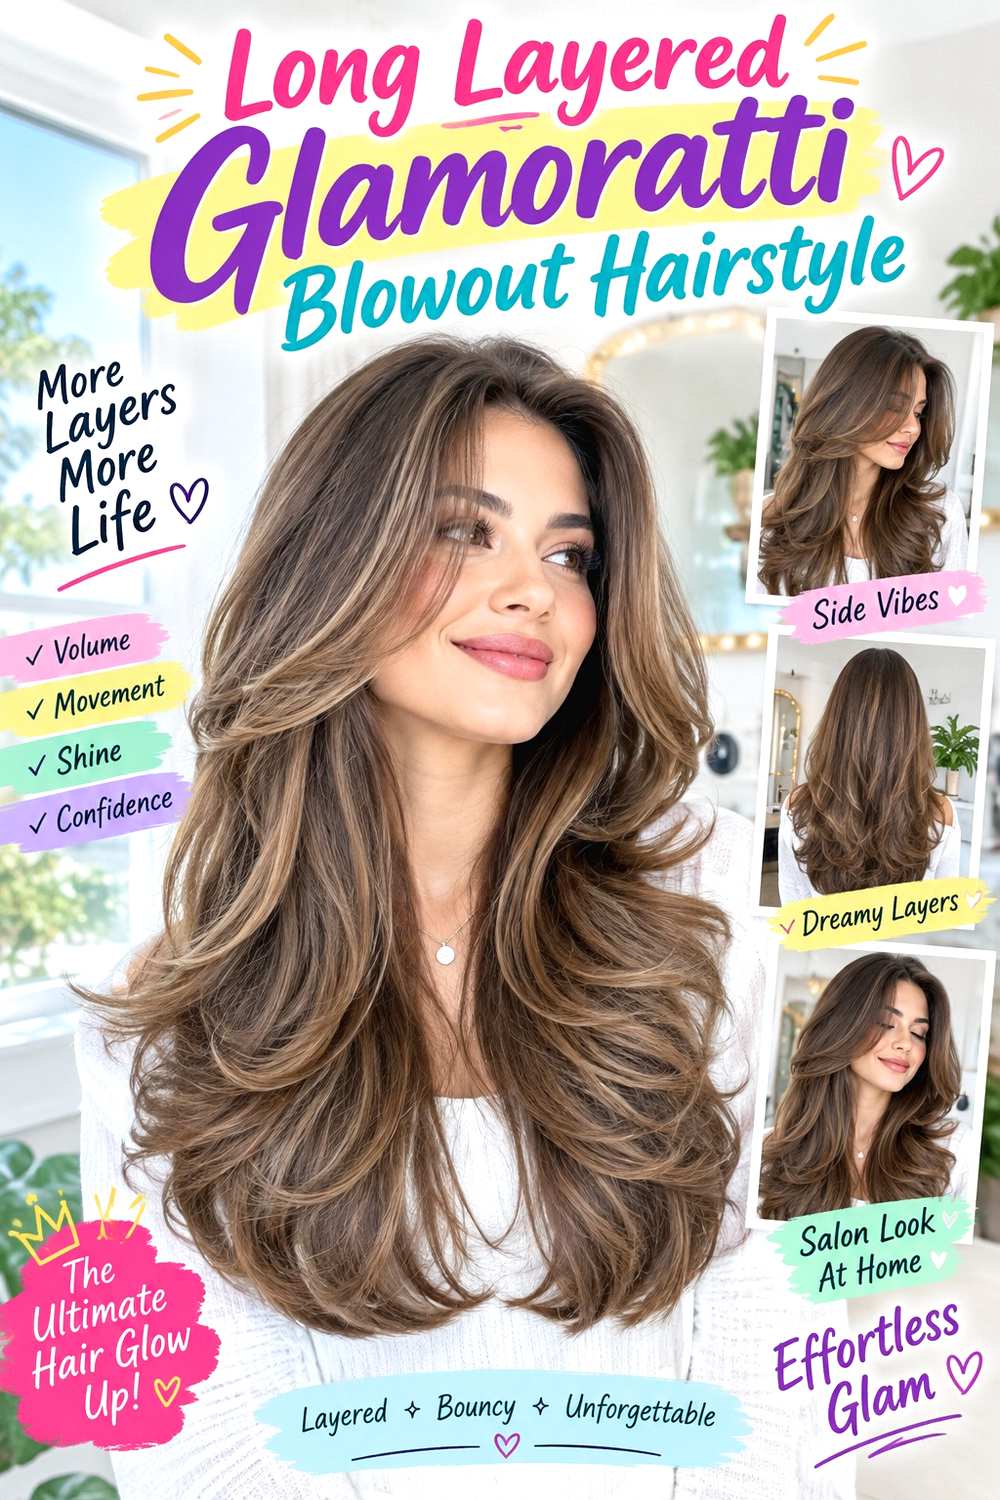
Long layers create the most cascading version of the blowout, with movement appearing at several heights rather than only around the face. Keep upper layers starting no higher than needed for crown lift, allow mid-length sections to form broad bends, and leave the longest perimeter substantial. The ends can curve outward or inward in alternating sections, giving the back visible motion without making every layer flip in the same direction.
Use heat protectant before styling, a large round brush to shape longer sections, and flexible hairspray to support the finished movement. Long hair offers enough distance for several bends to develop, but the full styling process can be time-consuming, especially with high density. A quick refresh should target flattened top layers and the front rather than reheating the entire length. Fine or lower-density hair often benefits from preserving more weight at the bottom, while dense hair may need the stylist to assess where internal bulk makes the shape spread too widely.
At a salon appointment, show where you want the shortest layer to begin and how much perimeter weight you want to keep. The goal is movement through the upper and middle lengths without leaving the longest edge thin once the blowout expands.
Pro tip:
Work from the longest layers upward when refreshing. The bottom shape sets the overall width, making it easier to judge how much lift the upper sections actually need.
Make It Work for You:
For very long fine hair, use fewer upper layers and keep the longest sections fuller. The blowout still moves without breaking the perimeter into wispy pieces.
Watch Out For:
Do not assume extra layering always creates extra volume. Too much removal can reduce the substantial bottom edge that helps a long blowout look balanced.
Collarbone Glamoratti Blowout Hairstyle
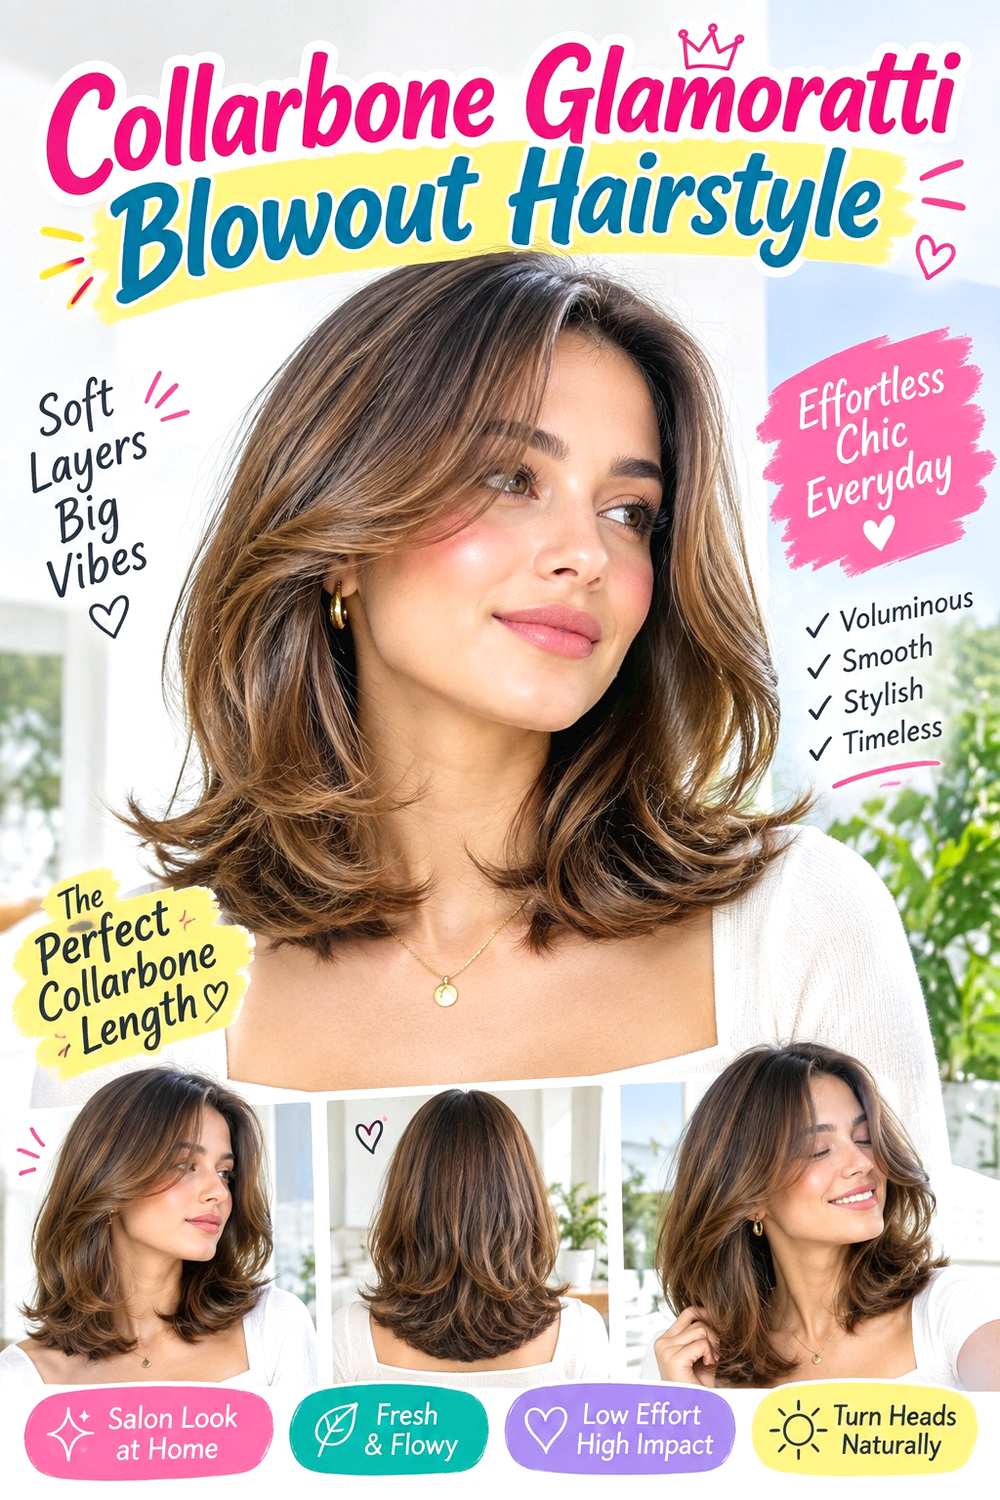
Collarbone length creates a compact blowout with enough room for visible movement but less weight than long hair. Keep the crown softly lifted, start face-framing around the jaw or lower, and let the ends skim the shoulders with a rounded or slightly outward curve. Because the perimeter sits near clothing and shoulders, the lowest sections may naturally kick outward, which can become part of the finished shape instead of something to fight.
Use heat protectant before styling, a medium round brush to shape the roots and ends, and flexible hairspray for light hold. Fine hair often benefits from keeping the bottom edge relatively full at this length, while dense hair can support more internal movement if the sides become too bulky. A quick refresh may involve reshaping only the ends and front layers; a complete wash-day blowout takes longer because the crown and perimeter need directional drying from the start.
At a salon appointment, show exactly where you want the longest edge to meet the collarbone and where the shortest front layer should begin. Those two points determine whether the style feels full and rounded or more heavily layered. If the ends constantly flip from shoulder contact, consider incorporating that movement into the blowout rather than forcing a perfectly tucked-under finish.
Pro tip:
Shape the perimeter with your normal shoulder position in mind. Hair that rests on the collarbone may turn outward naturally, so use that movement deliberately.
Make It Work for You:
For fine hair, keep the layers longer and concentrate most movement around the face. A fuller bottom edge helps the collarbone shape stay substantial.
Watch Out For:
Avoid cutting too many short layers around the shoulders. The blowout can become overly wide through the middle while the bottom loses the weight needed for balance.
Blunt Lob Glamoratti Blowout Hairstyle
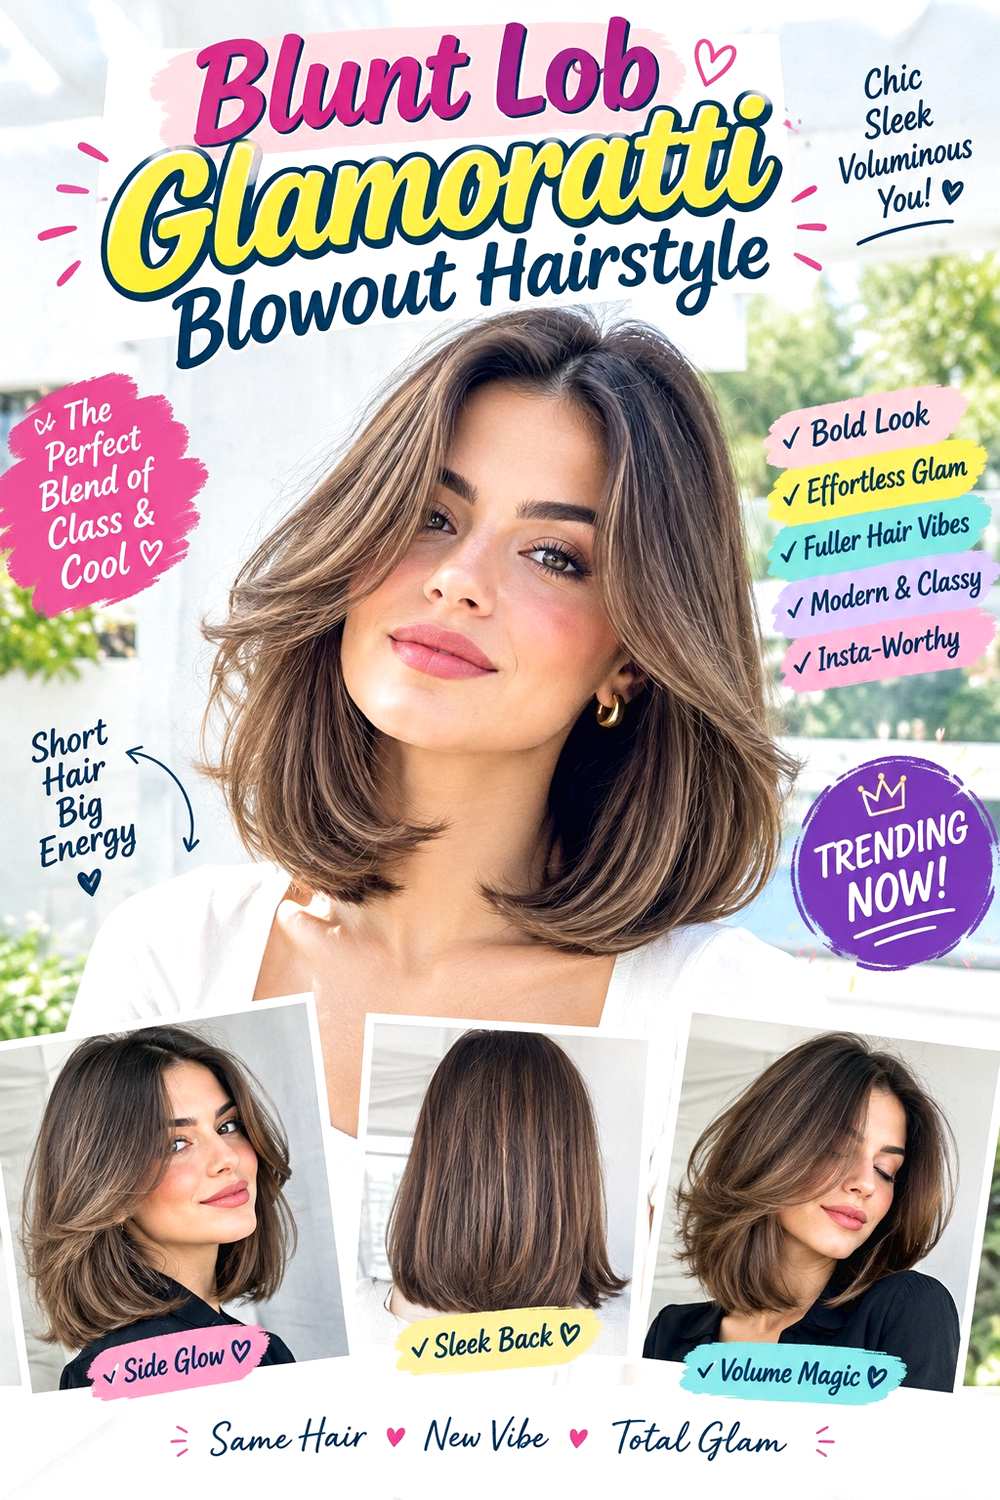
A blunt lob gives the blowout a strong lower edge, creating contrast between a clean perimeter and rounded upper movement. Keep the roots softly lifted, shape broad curves through the middle, and let the ends bend under or turn slightly outward without breaking the blunt outline. A center part emphasizes symmetry, while a side part shifts the volume toward one side. The bottom edge should remain easy to see even after the blowout expands.
Use heat protectant before styling, a medium round brush to shape the lob, and flexible hairspray for controlled hold. Fine or lower-density hair often benefits from the stronger bottom line because it preserves visual fullness. Dense hair can support the same outline, though the stylist may need to assess internal bulk if the sides become too triangular. A quick refresh can focus on one flattened side and the perimeter; a full wash-day style takes longer because the bob shape must be dried deliberately from roots to ends.
At a salon appointment, ask to preserve the strength of the bottom edge and point out how much rounded movement you want above it. Avoid assuming heavy thinning is necessary just because the blowout expands; targeted bulk adjustment is different from reducing the entire perimeter.
Pro tip:
Keep the final inch quieter than the mid-lengths. A calmer end section lets the blunt edge remain visible even when the upper hair is full.
Make It Work for You:
If your lob is dense, use broader bends and less separation through the sides. The blowout stays rounded without widening into a pronounced triangular shape.
Watch Out For:
Do not overbrush a lower-density lob after styling. Too much separation can weaken the visual strength of the blunt edge and make the ends look thinner.
Feathered-End Glamoratti Blowout Hairstyle
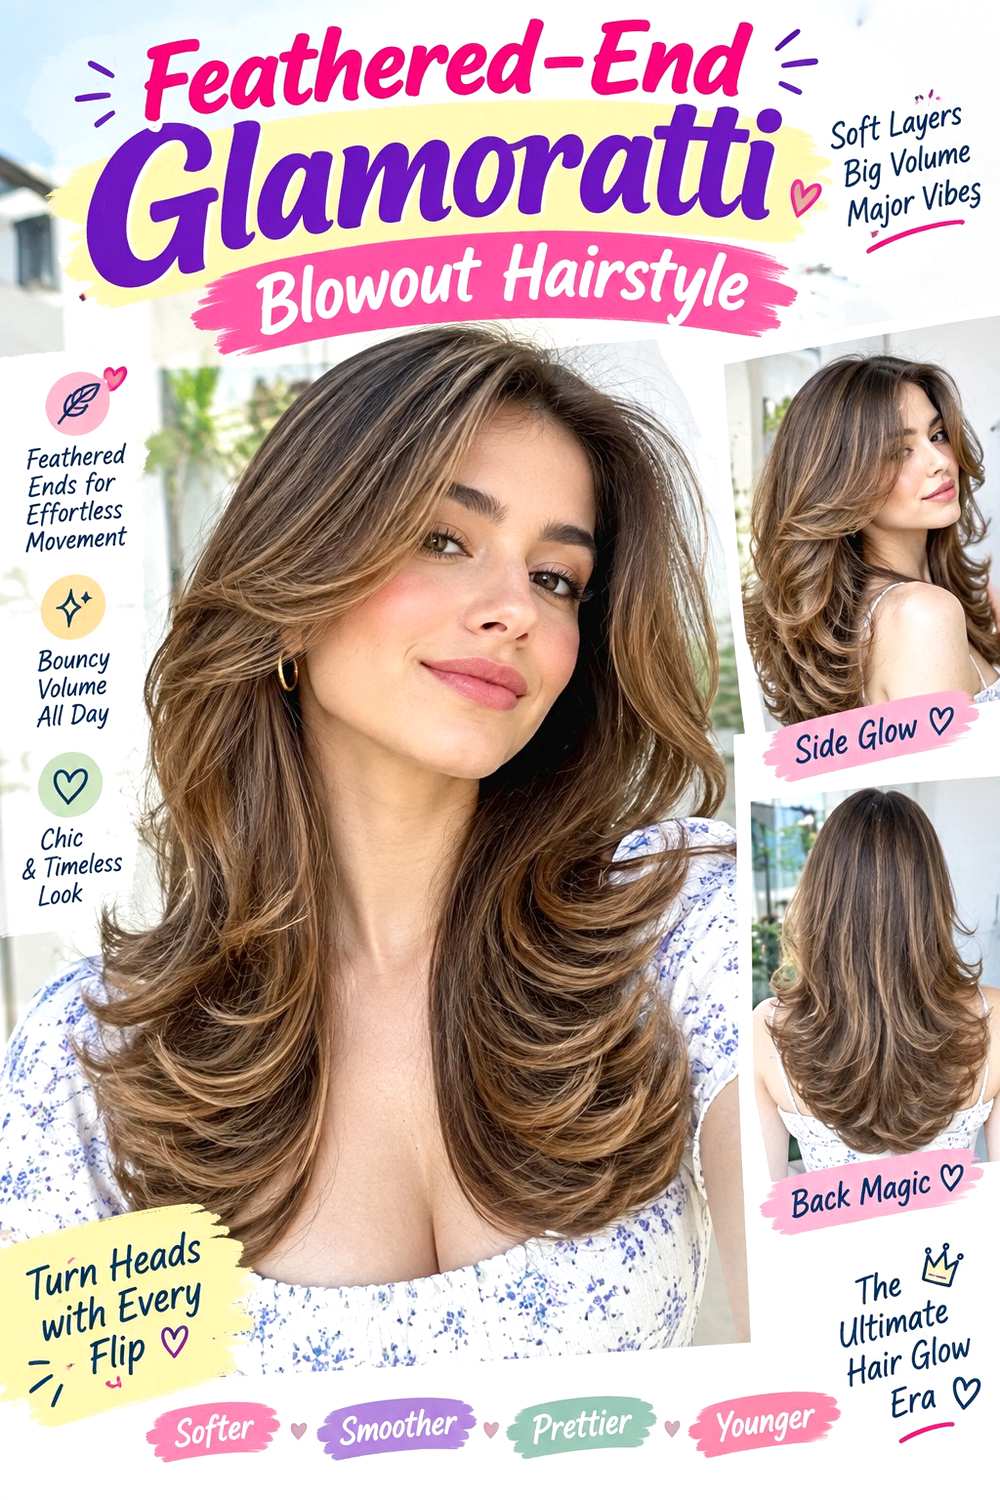
Feathered ends create separated outward movement through the lower layers, while the crown and mid-lengths stay smooth and full. Begin the blowout with rounded root lift, then direct the final several inches away from the face in staggered sections. Face-framing pieces can start around the cheekbones or jaw, but the longest perimeter should still carry enough weight to prevent the feathering from looking thin.
Use heat protectant before styling, a round brush to turn the ends outward, and flexible hairspray to keep the feathered sections distinct without making them stiff. Medium and long layered hair show the detail most clearly. Fine or sparse ends should be feathered selectively, especially through upper layers, while dense hair can support stronger separation. A quick refresh usually focuses on the ends because they may lose direction before the crown does; a full wash-day style takes longer because each layer needs individual shaping.
At a salon appointment, specify where the feathering should begin and ask how much weight can remain through the longest edge. The goal is visible movement through the tips without turning the perimeter into a series of thin disconnected pieces. The blowout effort is separate from haircut upkeep; even a well-shaped layer pattern still needs styling to recreate the feathered finish.
Pro tip:
Let each outward-curved end cool before separating it. This keeps the feathering crisp enough to read while avoiding the stiffness of heavy finishing product.
Make It Work for You:
For sparse ends, feather only the upper and front layers while leaving the longest sections fuller. The movement stays visible without reducing the bottom line.
Watch Out For:
Avoid flipping every layer at exactly the same level. Staggered ends create depth, while one uniform outward line can make the finish look rigid.
Flipped-End Glamoratti Blowout Hairstyle
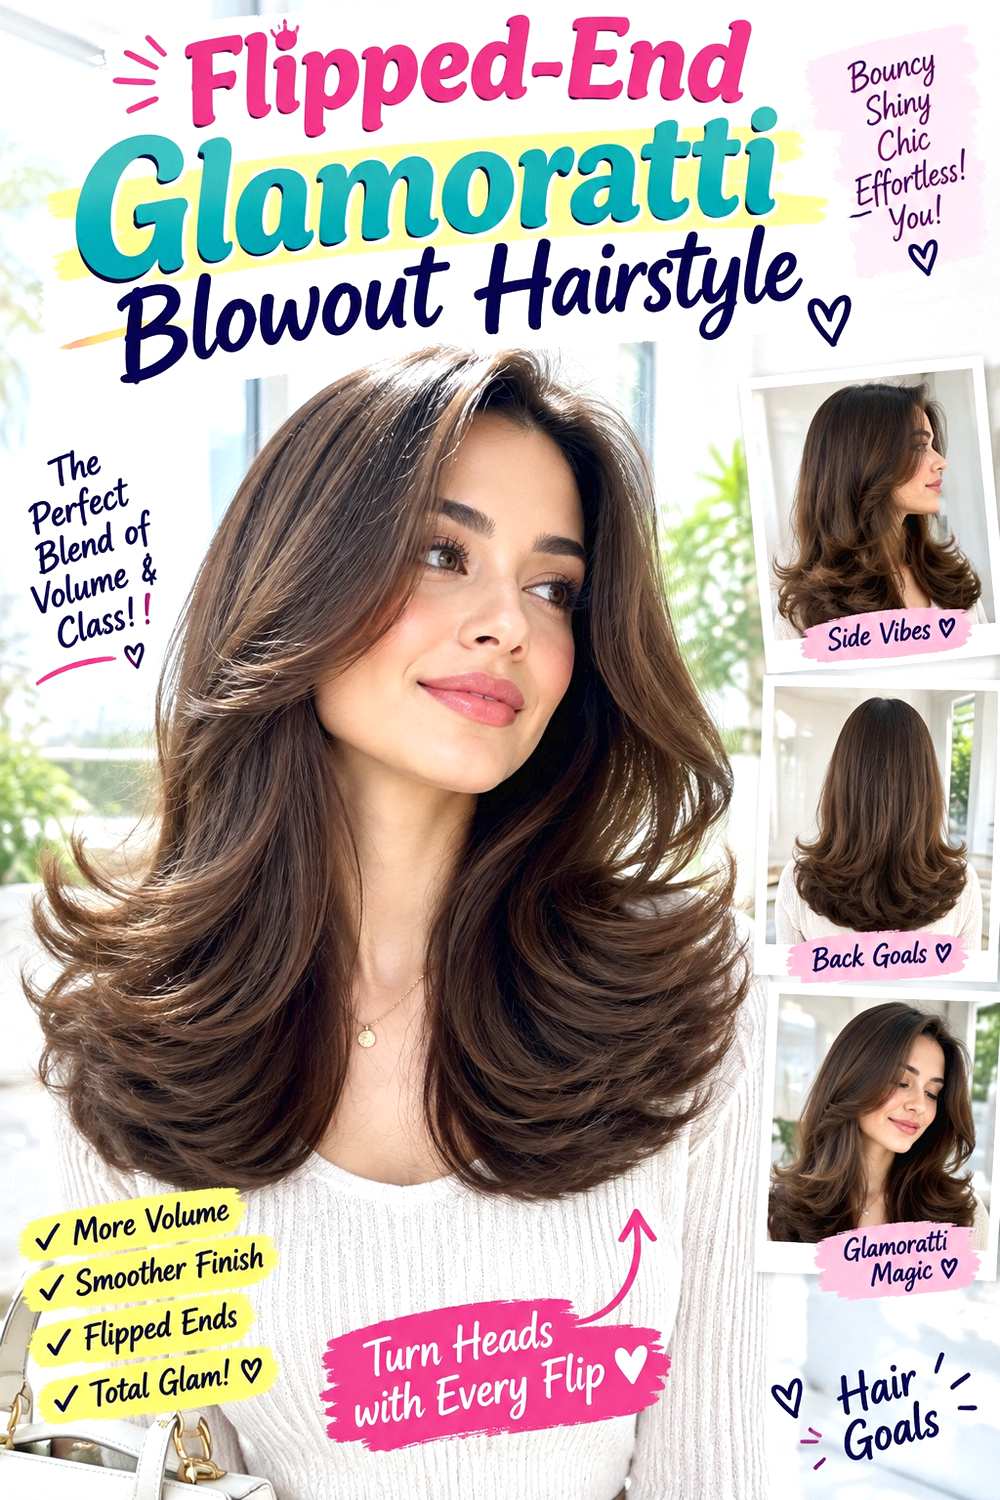
A stronger end flip gives the blowout a clear outward finish while keeping the roots and mid-lengths smooth. Build moderate crown lift, let the middle fall in broad rounded sections, then turn the final inches away from the neck and shoulders. The flip can run around the entire perimeter or concentrate mainly through the side and front sections. Collarbone and longer cuts work especially well because the ends have enough space to curve outward.
Use heat protectant before styling, a round brush to create the flip, and flexible hairspray to support the lower shape. Fine hair benefits from keeping the flip compact so the perimeter remains substantial, while dense hair can handle a wider curve if the mid-lengths are controlled. A quick refresh usually targets the tips and front because they lose direction first; full wash-day styling takes longer since the roots, middle, and ends each need different handling.
At a salon appointment, specify whether you want a strong all-around flip or a softer outward curve only around the face. Also point out how much bottom weight you want retained. A full, clean perimeter gives the flip a stronger visual line than heavily thinned ends, especially once the hair moves against the shoulders.
Pro tip:
Shape the outward flip only after the roots and mid-lengths are almost finished. Working on the tips last keeps their direction clean and easy to control.
Make It Work for You:
For lower-density hair, make the flip smaller and concentrate it around the front. The ends keep more visual weight while the style still has directional movement.
Watch Out For:
Do not over-separate the flipped tips after styling. Too much handling can create frizz and weaken the smooth outward curve that defines the perimeter.
Soft Wave Glamoratti Blowout Hairstyle
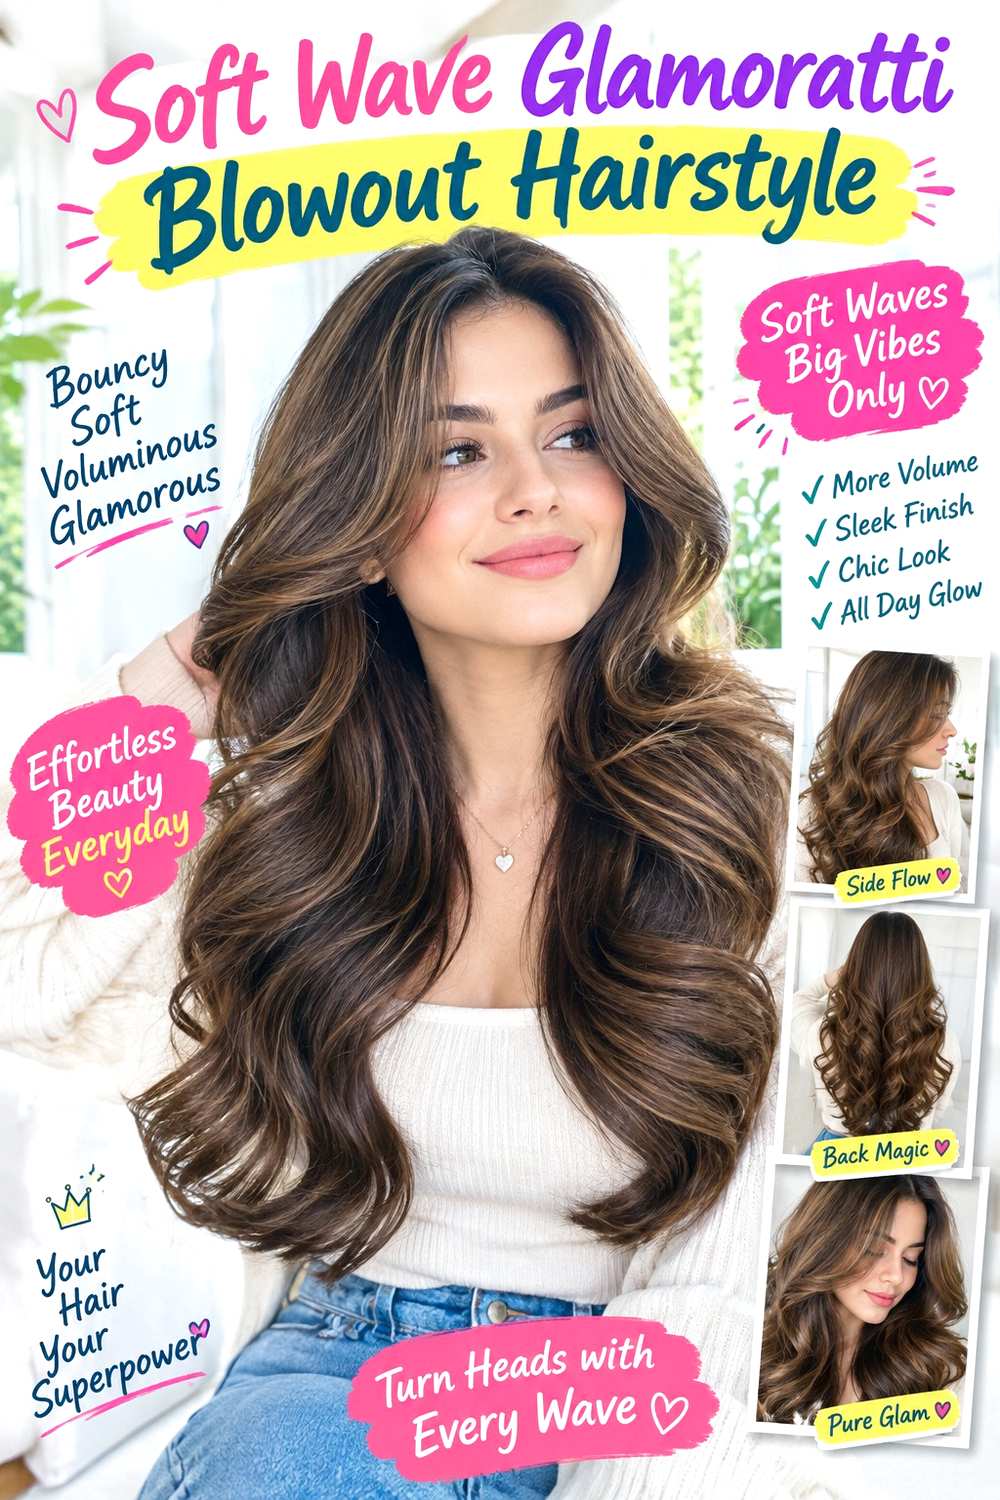
Soft waves make the blowout feel less uniformly rounded by adding broad S-shaped movement through the middle. Keep the roots lifted but smooth, then begin visible bends below the cheekbones or jaw. The ends can stay softly curved rather than tightly curled, creating a blend between a traditional blowout and a large wave set. A center or side part works, depending on how much directional movement you want through the front.
Use heat protectant before styling, a curling iron to form broad bends after the initial drying, and flexible hairspray to preserve movement. Medium and long hair give the wave pattern enough room to develop. Naturally wavy hair may need less heat if its existing bends can be refined, while fine or lower-density hair should avoid excessive brushing that separates the ends. A short refresh can target only flattened front waves; a full wash-day set takes longer because the hair must be dried, shaped, cooled, and then softened.
At a salon appointment, point out where you want the first visible bend to begin and whether you prefer fuller ends or more layered movement. Those choices affect whether the result reads as a blowout with waves or a wave set with lifted roots.
Pro tip:
Let each wave cool in its broad curve before loosening it. The bend will hold more naturally and require less product to maintain movement.
Make It Work for You:
If your hair is naturally wavy, keep the existing pattern through the lengths and concentrate styling effort on root lift and the face-framing sections.
Watch Out For:
Avoid using tight curls and then brushing aggressively to create softness. Start with broader bends so the final texture stays smoother and requires less manipulation.
Wide Bend Glamoratti Blowout Hairstyle
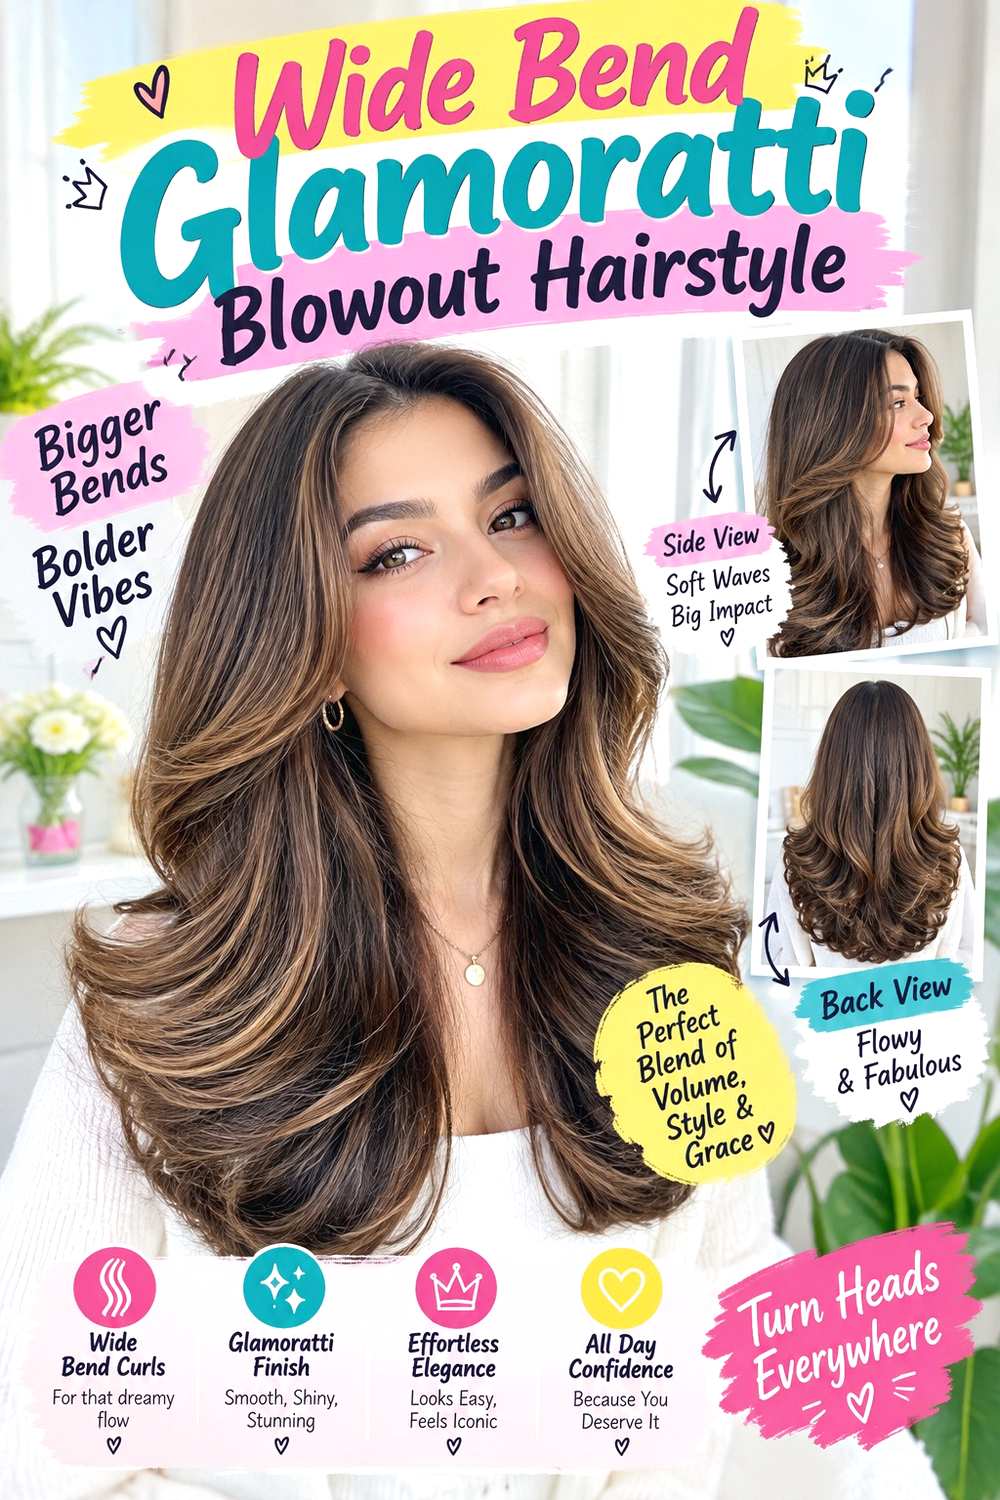
Wide bends create slower, more sculptural movement than a typical layered blowout. Keep the roots smooth with moderate lift, then form large C- and S-shaped curves through the mid-lengths so only a few strong changes in direction appear from top to bottom. The ends can remain rounded and full. This version works best on medium and long hair where the bend has enough distance to develop without crowding.
Use heat protectant before styling, a large round brush to create the initial blown-out shape, and flexible hairspray to support the broad curves. Fine strands can benefit from the larger pattern because it adds shape without over-separating the hair. Dense hair should be sectioned carefully so the interior bends match the surface. A quick refresh may involve reshaping one or two flattened panels; a full wash-day style takes longer because the curves need consistent direction across the head.
At a salon appointment, explain where you want the first major bend—around the cheekbone, jaw, or lower—and how much length you want preserved through the perimeter. Fewer broad curves rely on smooth transitions, so a heavily fragmented layer pattern may change the intended shape.
Pro tip:
Align neighboring sections in the same broad direction before alternating the next bend. Consistent panels help the large curves read clearly instead of looking randomly bent.
Make It Work for You:
For fine hair, keep the bends broad and the ends full rather than highly separated. The pattern adds movement without making the perimeter look airy.
Watch Out For:
Do not add too many direction changes through one short section. The defining feature is a slower, wider bend pattern rather than several small waves.
Sleek Root Glamoratti Blowout Hairstyle
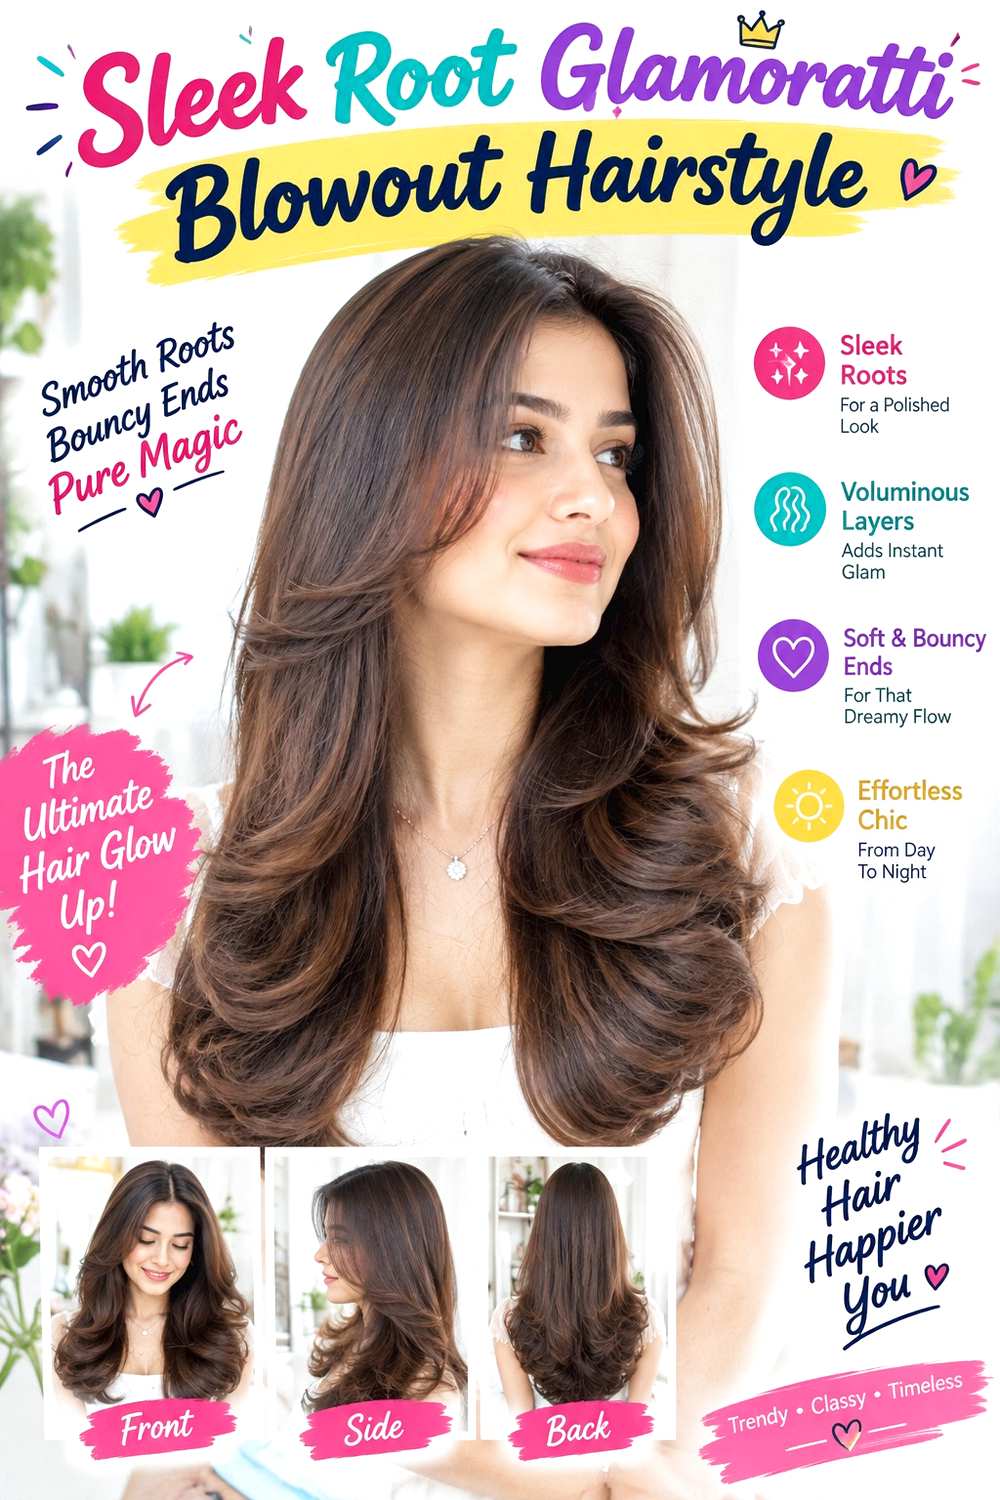
A sleek-root version controls the first several inches before volume begins through the middle and ends. Keep the part precise or softly defined, smooth the crown close to the head, and introduce rounded movement around ear or jaw level. This creates a narrower upper silhouette with fuller lower sections, which can be useful for dense hair or anyone who prefers less width near the temples.
Use heat protectant before styling, a paddle brush to create the smooth upper section, and a large round brush to shape the lower blowout. Medium and long hair show the contrast most clearly. Fine hair may prefer a shorter sleek zone so body begins earlier, while dense hair can use the controlled roots to prevent the overall silhouette from expanding too broadly. A quick refresh may require smoothing only the crown and reshaping one lower bend; full wash-day styling takes longer because the roots and lengths need different drying directions.
At a salon appointment, identify where you want the fuller movement to begin and whether the face-frame should start within the sleek zone or below it. Keeping the upper section smooth should not automatically lead to heavy product or excessive flattening; the visual effect comes mainly from placement of volume.
Pro tip:
Finish the sleek root area before shaping the lower sections. Keeping the zones separate helps maintain a clean transition without flattening the first rounded bend.
Make It Work for You:
For fine hair, shorten the smooth root zone and begin the blowout movement closer to the cheekbones. Earlier body can preserve a fuller overall silhouette.
Watch Out For:
Avoid coating the roots heavily to create sleekness. Excess product can reduce lift, create slip, and make the upper section look heavy rather than polished.
Airy Fine Hair Glamoratti Blowout Hairstyle
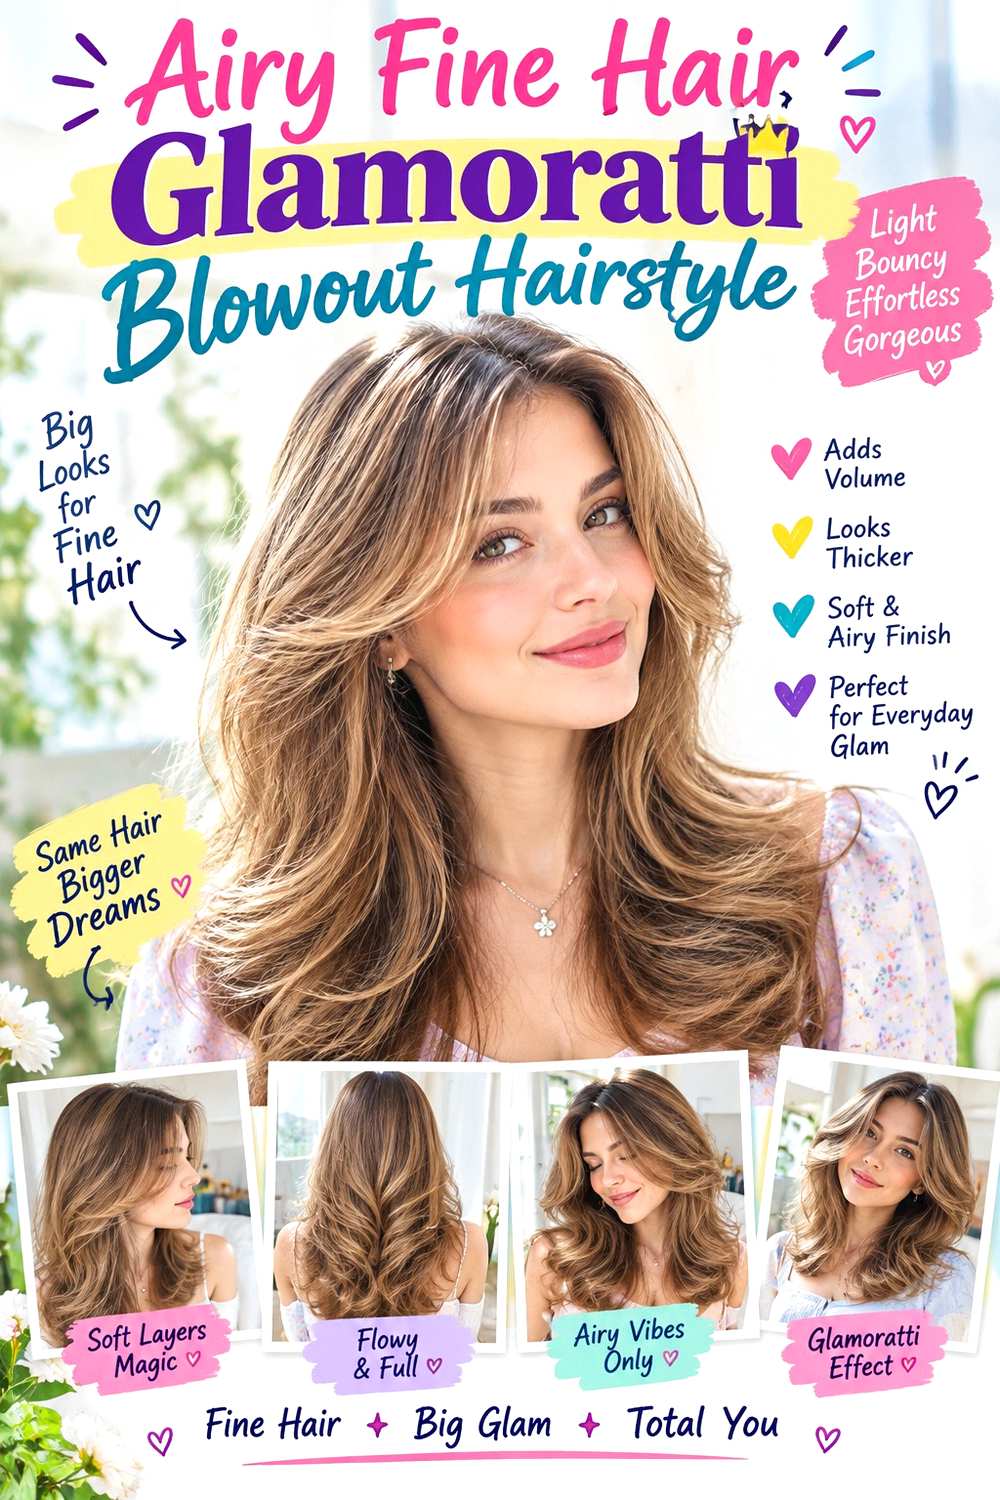
Fine strands need controlled airiness so the blowout gains movement without losing visual density at the ends. Keep the crown lightly raised, use face-framing sections that start no shorter than necessary, and build rounded bends through the middle while leaving the lower perimeter comparatively full. The ends should move as a cohesive edge instead of separating into many wispy pieces. Fine hair can still be dense, so the final scale should reflect both strand thickness and overall density.
Use lightweight mousse for root support, heat protectant before drying, and a round brush to shape the bends. A quick refresh between washes should focus on collapsed root sections and the front rather than repeated restyling through the entire length. Full wash-day styling takes longer because volume needs to be built deliberately without overloading the roots. If the style drops quickly, lighter product placement may help more than adding extra layers.
At a salon appointment, ask to preserve a substantial bottom edge and show where you want the shortest front layer to finish. Discuss density separately from strand fineness so the layer plan responds to the actual amount of hair present rather than treating all fine hair as sparse.
Pro tip:
Concentrate lift through the crown and upper mid-lengths while leaving the lowest ends less separated. This creates airiness without sacrificing the visual weight of the perimeter.
Make It Work for You:
If your fine hair is also lower density, use fewer face-framing layers and keep them longer. The blowout gains movement while preserving more hair through the sides.
Watch Out For:
Do not keep adding product when the crown falls. Too much weight can worsen collapse, so reset root direction before increasing the amount you apply.
Dense Hair Controlled Glamoratti Blowout Hairstyle
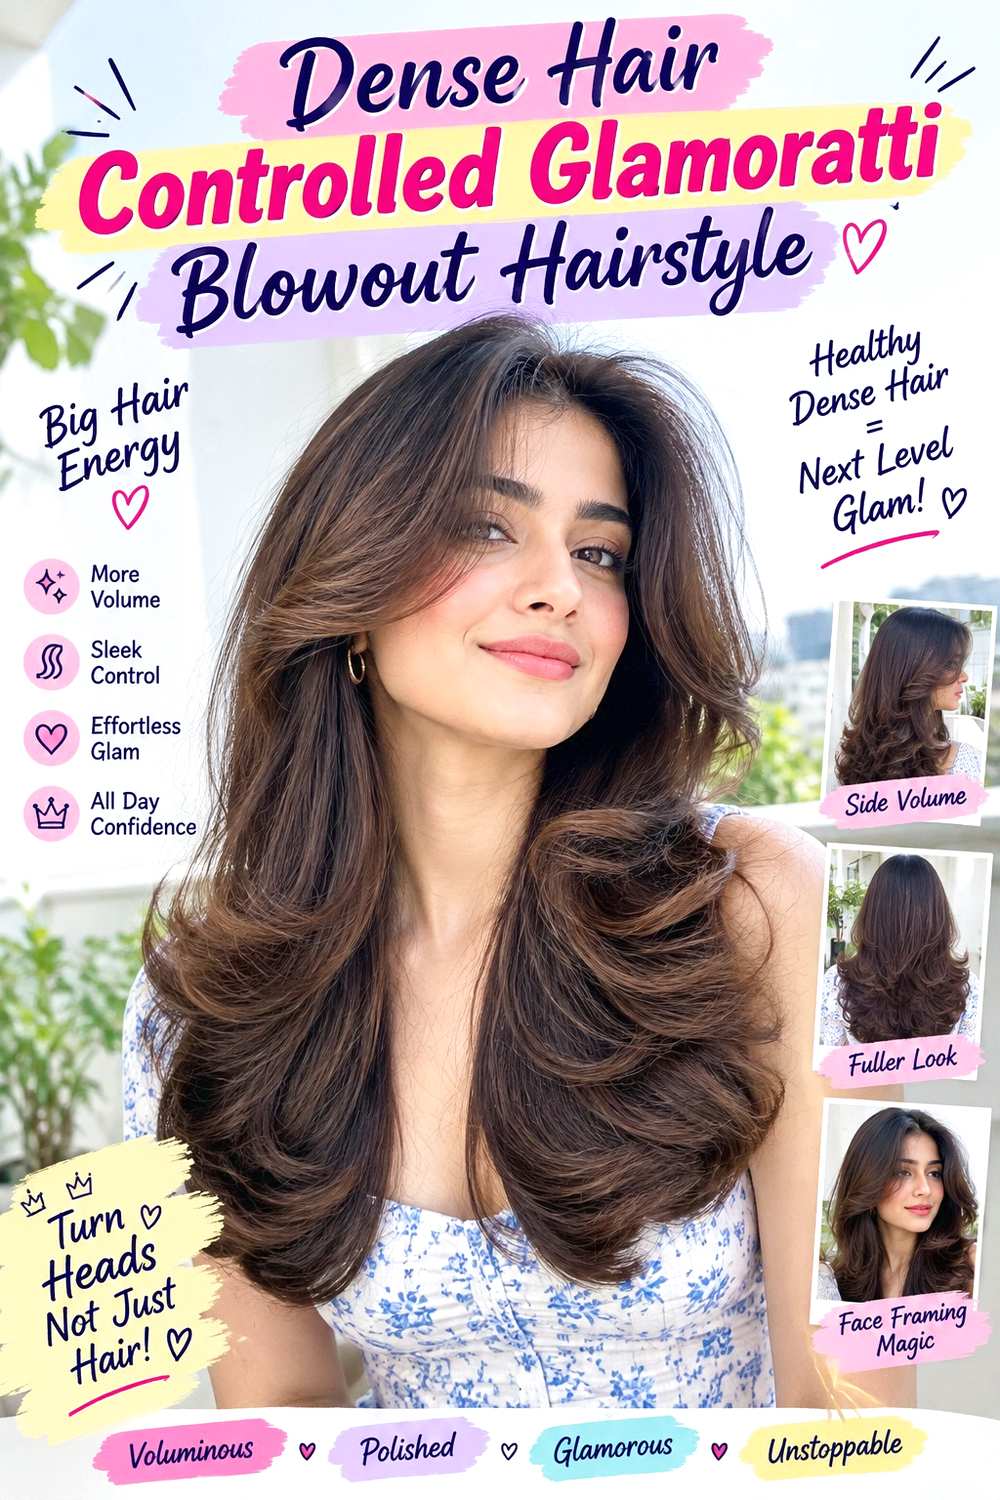
Dense hair can create substantial volume, so this version focuses on where that fullness sits rather than maximizing it everywhere. Keep the crown moderately lifted, use broad bends through the mid-lengths, and preserve a clean outer perimeter. If the sides naturally become wide, start the strongest movement below the jaw and let longer layers distribute bulk through the back. The ends should remain full enough to balance the density above.
Use heat protectant before styling, a paddle brush to control the upper surface, and a large round brush to shape the lower bends. The full wash-day process can be time-intensive because drying dense hair and then directing each section are separate steps. A quick refresh should target flattened surface panels instead of restyling the entire interior. If the shape feels heavy, more heat is not necessarily the answer; placement of bulk and layer length may matter more.
At a salon appointment, explain where the blowout becomes widest and ask whether controlled internal weight removal could help while preserving the outside edge. Avoid treating aggressive thinning as the default solution. The goal is a full, moving silhouette with enough internal space for the bends to sit together cleanly.
Pro tip:
Work in sections small enough for the brush to control evenly. Oversized sections can dry inconsistently, leaving the surface smooth while the interior stays bulky or irregular.
Make It Work for You:
If your dense hair expands strongly near the temples, keep the upper sections smoother and begin larger bends lower down. The style stays full without excessive side width.
Watch Out For:
Do not ask for indiscriminate thinning solely to make blowouts easier. Discuss where bulk actually collects so the perimeter and long-term shape remain balanced.
Curly Blend Glamoratti Blowout Hairstyle
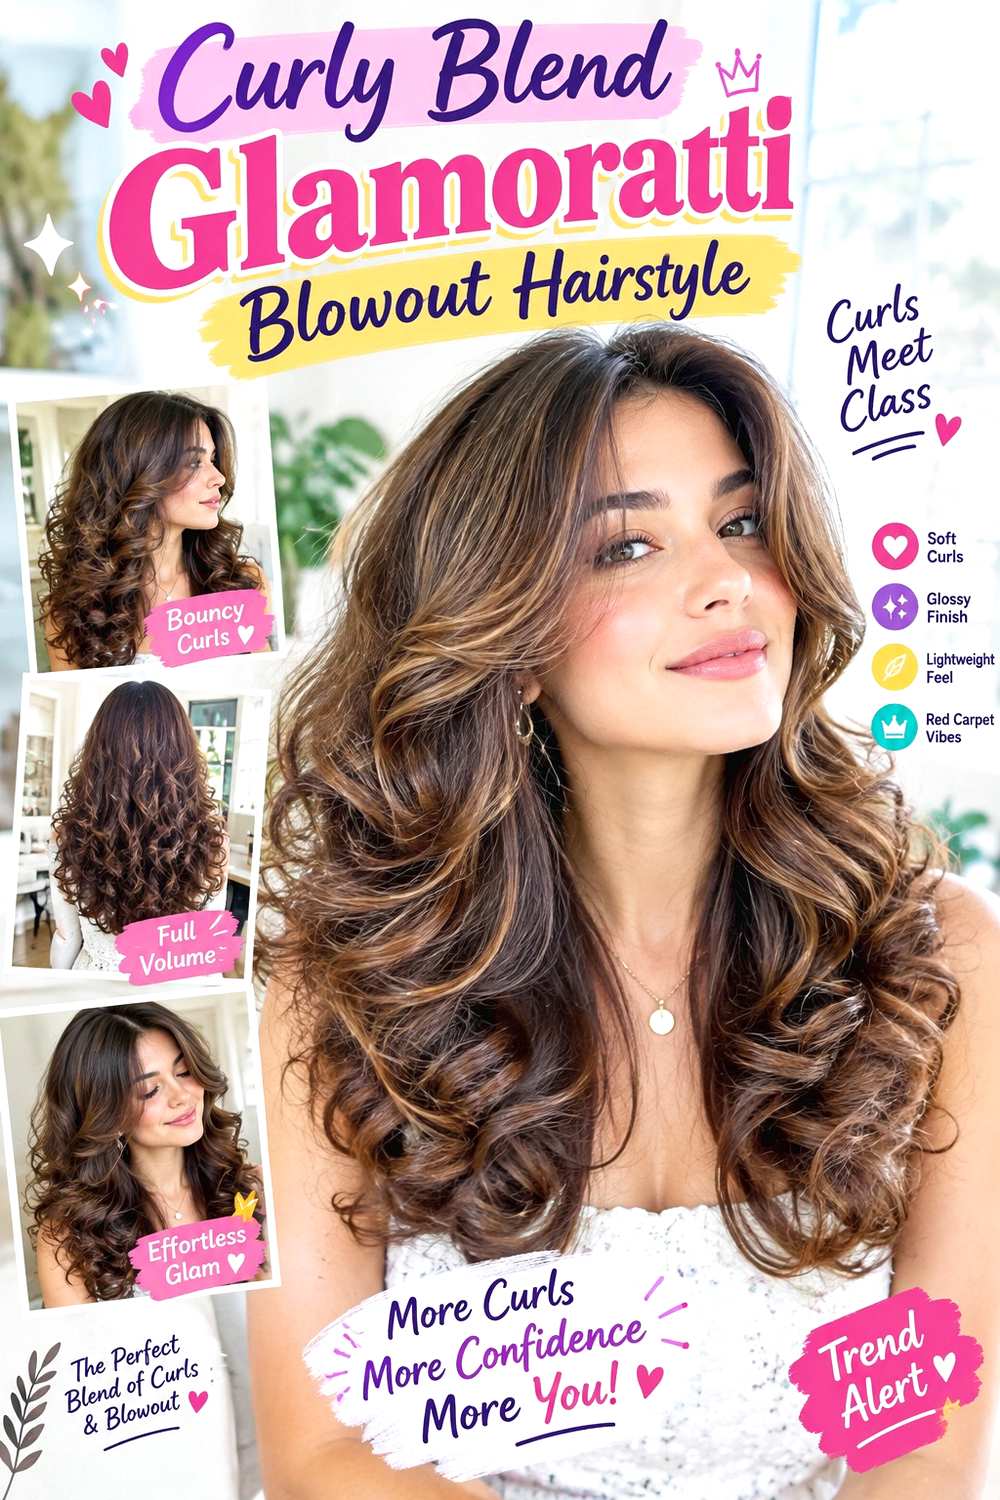
A curly blend keeps part of the natural curl pattern while adding a blown-out crown and larger bends through selected sections. Smooth or stretch only the areas where you want the polished blowout shape, then let untouched curls remain visible through the back or lower lengths. The face frame can carry a broad blown-out curve while the rest keeps more texture, creating contrast instead of forcing complete uniformity.
Use heat protectant on sections receiving heat, curl gel to define the natural texture you are preserving, and a diffuser to dry those curls with controlled volume. This approach can reduce the amount of heat compared with reshaping the entire head, although the two textures will intentionally behave differently. A quick refresh may involve redefining curls and reshaping only one blown-out panel; full wash-day styling takes longer because each texture needs separate handling. Shrinkage should be considered when comparing the lengths and volume of the natural and stretched sections.
At a salon appointment, explain which areas you prefer to wear naturally and which you want to blow out more often. If face-framing layers are part of the plan, assess their finished position with the curl pattern as well as the stretched state so one section is not unexpectedly short.
Pro tip:
Decide where the natural and blown-out textures will meet before styling. A planned transition looks smoother than changing texture randomly from section to section.
Make It Work for You:
For tighter curls, keep most of the back natural and blow out only the crown and face frame. The Glamoratti shape remains visible with less heat exposure.
Watch Out For:
Do not brush through the natural curls simply because the blown-out sections need smoothing. Treat each texture zone according to the finish you want there.
Half-Up Glamoratti Blowout Hairstyle
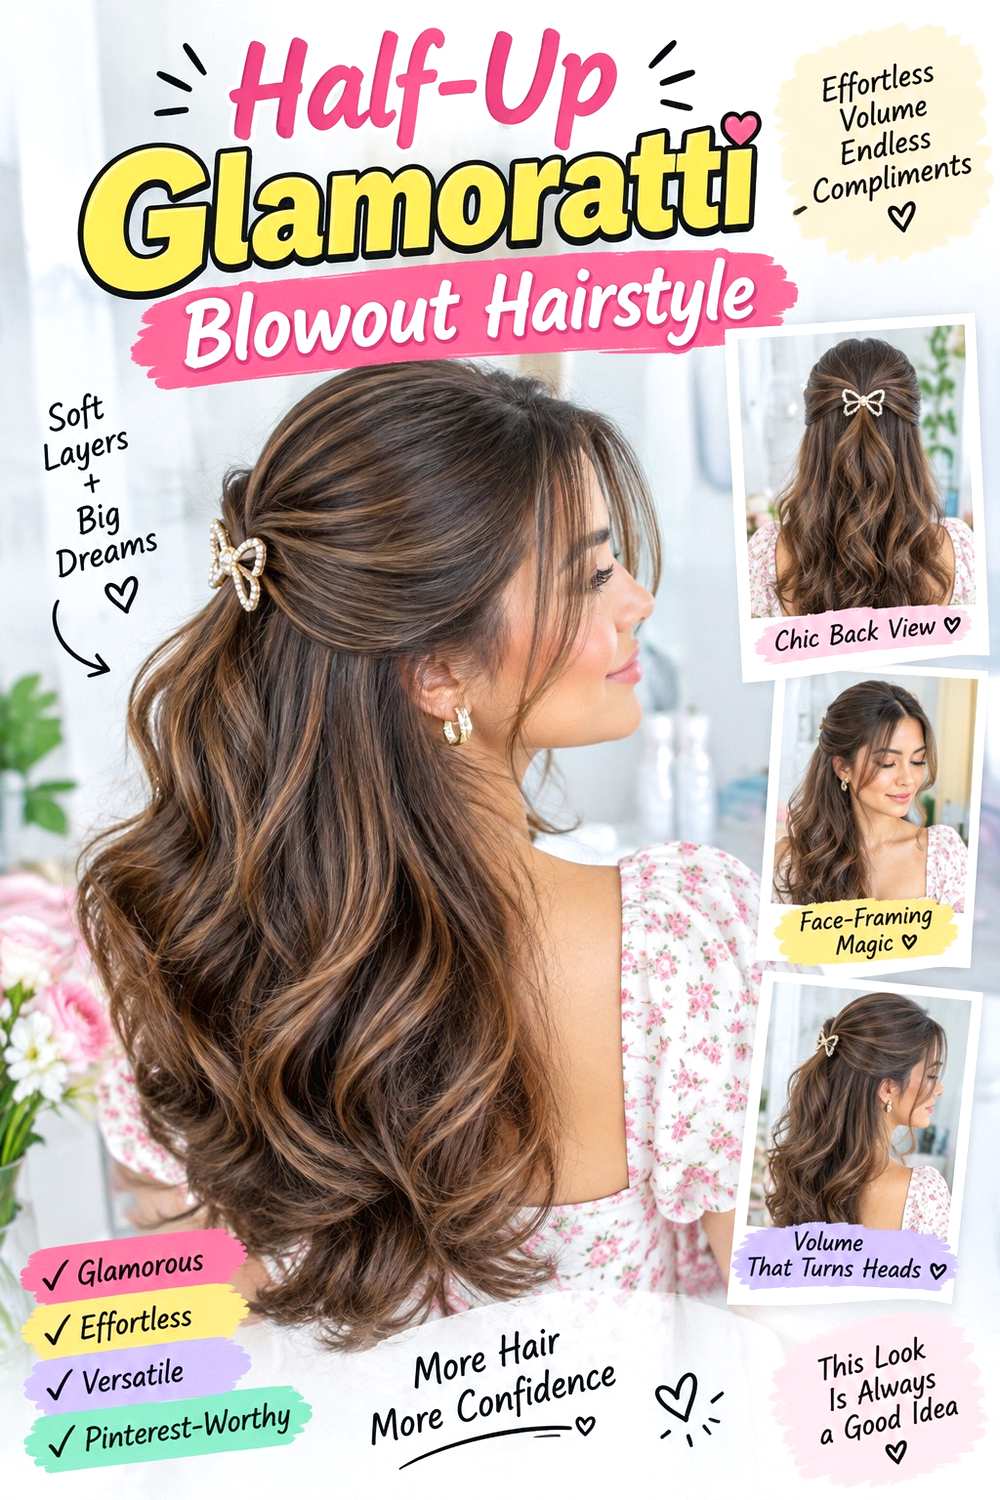
A half-up shape keeps the blowout visible while controlling some crown volume at the back. Complete the rounded blowout first, then gather shallow sections from above the ears toward the rear crown. Keep the front lifted and leave cheekbone- or jaw-length layers loose, while the lower hair falls in broad bends with full ends. The half-up anchor should sit high enough to create lift without pulling the blowout flat.
Use heat protectant before styling, a round brush to shape the full blowout, and a fabric-covered elastic to secure the upper section. Medium and long hair provide enough loose length for the lower volume to remain visible. Fine or lower-density hair should gather less so the lower section keeps body, while dense hair can use a slightly broader half-up section to control side width. A quick refresh may involve resetting the anchor and reshaping the front pieces; full wash-day styling takes longer because the blowout should be completed before gathering.
At a styling appointment, specify where the half-up section should begin above the ears and how much crown height you want preserved. This is a temporary styling choice, so the cut should still make sense when the hair is worn completely down.
Pro tip:
Finish the blowout before creating the half-up anchor. Gathering first can flatten the upper sections and make it harder to judge the final crown volume accurately.
Make It Work for You:
For lower-density hair, gather narrow temple sections only and leave most lengths loose. The half-up detail stays visible without removing too much fullness from below.
Watch Out For:
Do not secure the upper section tightly against the scalp. A flat anchor can interrupt the rounded crown shape that gives the blowout its polished volume.
Extra-Long Glamoratti Blowout Hairstyle
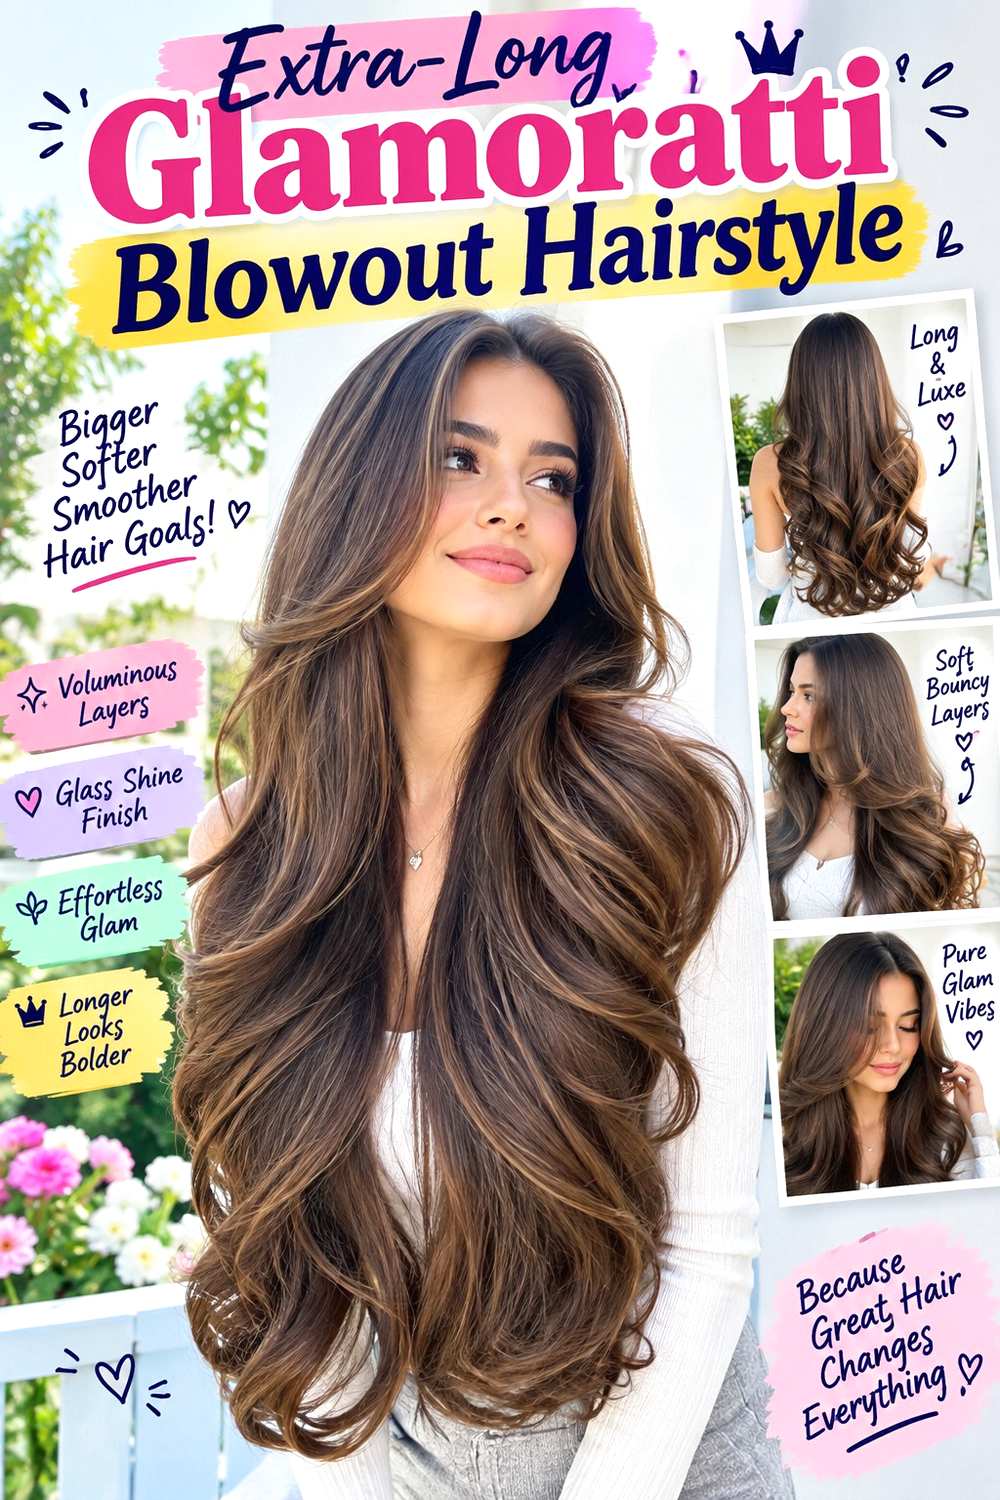
Extra-long hair gives the blowout dramatic movement but also adds weight that can pull down root lift. Keep the crown elevated in a controlled way, use long face-framing sections rather than many short layers, and form broad bends through the mid-lengths so the shape does not become overly busy. The lowest several inches should remain full and softly curved, helping the perimeter balance the height and movement above.
Use heat protectant before styling, a large round brush to shape long sections, and flexible hairspray for light support. A complete wash-day blowout can be a significant styling task because the hair needs thorough drying before the longest sections are shaped. Between washes, refresh the crown, face frame, and a few visible surface bends rather than repeating heat across the entire length. Dense extra-long hair may need controlled internal weight placement, while fine long hair often benefits from fewer layers and a stronger bottom edge.
At a salon appointment, show where you want the shortest long layer to begin and how much perimeter weight you want preserved. Extra length makes over-layering more noticeable once the hair is blown out, so the relationship between upper movement and lower density is especially important.
Pro tip:
Refresh only the visible surface layers when the style starts to fall. The underneath sections often retain enough shape and do not need to be reheated.
Make It Work for You:
For extra-long fine hair, keep the face frame longer and limit short crown layers. This preserves density while still allowing the blowout to move around the front.
Watch Out For:
Avoid stacking too many short layers through very long hair. The top may become overly full while the lower perimeter loses the weight needed for balance.
Conclusion
Glamoratti blowout hairstyle ideas can range from symmetrical center parts and high crowns to curtain fringe, broad waves, feathered ends, sleek roots, and layered long shapes. Collarbone cuts and lobs create a more compact silhouette, while extra-long hair gives large bends room to develop. Fine strands usually need lighter products and preserved perimeter weight, whereas dense hair often benefits from controlled volume placement rather than maximum expansion. Natural curls can also be blended into the finish instead of being completely reshaped. When narrowing the options, compare where the volume begins, how much layering supports it, the part or fringe you prefer, and how much full wash-day styling your routine realistically allows.
Before Your Salon Visit
Choose one or two favorite references and point out the exact crown height, parting, fringe, face-framing start point, bend size, layer placement, and end finish you like. Discuss your natural texture, density, face shape, preferred length, upkeep, and normal heat-styling routine so the shape can be adapted realistically. You may prefer the crown from one reference and the perimeter from another, so say that clearly. Ask how the layers will behave both in a full blowout and on days when you wear your natural texture.
FAQs
What Defines a Glamoratti Blowout?
In this article, the term describes a polished, full-bodied blowout with noticeable crown lift, shaped mid-length movement, and deliberately curved ends. It is not one required cutting method. Parting, fringe, layers, bend size, and volume placement can all change while the overall finish stays rounded and controlled.
Can Fine Hair Wear a Glamoratti Blowout?
Yes. Fine strands can carry the style, but the layer plan and product weight should match the actual density. Keeping a stronger bottom edge, limiting over-separation, and using lightweight root support can help preserve fullness. Fine hair is not automatically sparse, so strand thickness and density should be considered separately.
Does a Glamoratti Blowout Require Heat Styling?
The classic polished finish usually involves blow-drying, and some versions add further heat shaping. Heat protectant should be used when hot styling is involved, but it does not eliminate heat exposure. Natural waves or curls can also be incorporated so less of the hair needs to be reshaped.
How Do I Refresh the Blowout Without Restyling Everything?
Start with the areas that visibly lose shape first: the crown, face frame, fringe, or outer bends. Reset those sections and leave the lengths that still hold movement alone. This is usually more practical than repeating a full wash-day blowout and reduces unnecessary restyling of already-shaped hair.