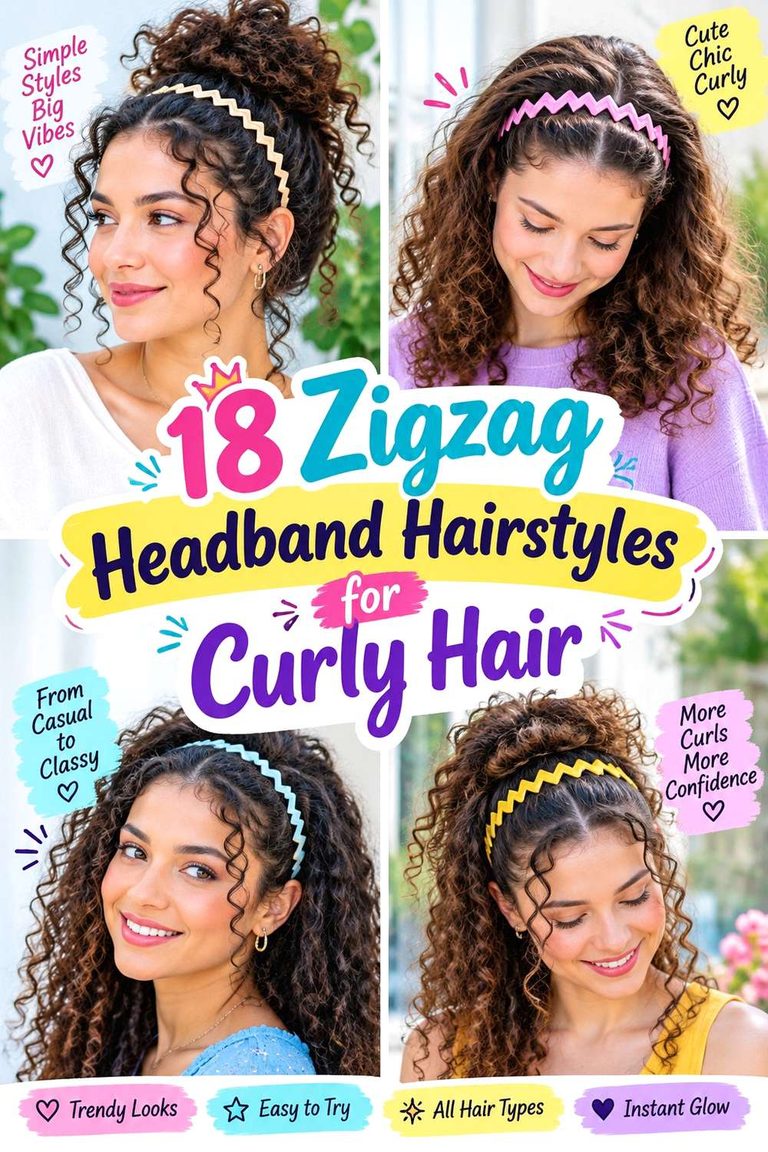
20 Headband Hairstyles for Curly Hair

Headband hairstyles for curly hair work best when the accessory supports the curl shape instead of pressing it flat. A headband can expose the hairline, sit behind a center or side part, push curls upward into a puff, or add structure to loose shoulder-length hair. Width matters too: a slim band leaves more texture visible, while a padded, scarf, or knotted band creates a stronger shape around the crown.
Different curl patterns and densities need different placement. Loose curls may fall naturally around a narrow band, while dense coils often need more room beside or behind a wider accessory. Short curls can frame the ears, longer curls can move into ponytails or updos, and face-framing pieces can remain outside the band. Shrinkage also changes finished length, so placement should be judged on dry or mostly settled curls rather than assumed from stretched hair.
Styling effort ranges from a quick next-day headband reset to a full wash-and-go, puff, defined curl set, or formal updo. Grip matters, but tighter is not always more secure. A stable base, comfortable pressure, and careful placement usually work better than forcing the band down. Refresh flattened curls selectively and move the accessory when it causes dents rather than repeatedly reshaping the entire head.
Quick List
- Wide Padded Headband Defined Curls Hairstyle
- Slim Headband Center-Part Curls Hairstyle
- Velvet Headband High Puff Hairstyle
- Knotted Headband Low Puff Hairstyle
- Pearl Headband Side-Part Curls Hairstyle
- Scarf Headband Pineapple Curls Hairstyle
- Double Headband Curly Bob Hairstyle
- Braided Headband Half-Up Curls Hairstyle
- Satin Headband Wash-And-Go Hairstyle
- Wide Headband Voluminous Afro Curls Hairstyle
- Elastic Headband Low Bun Curls Hairstyle
- Metallic Headband Side-Swept Curls Hairstyle
- Printed Headband Curly Ponytail Hairstyle
- Beaded Headband Shoulder-Length Curls Hairstyle
- Thin Headband Face-Framing Ringlets Hairstyle
- Twisted Headband Short Curly Crop Hairstyle
- Jeweled Headband Curly Updo Hairstyle
- Sporty Headband Defined Coils Hairstyle
- Bow Headband Loose Curly Lob Hairstyle
- Minimal Headband Tucked Curls Hairstyle
Wide Padded Headband Defined Curls Hairstyle
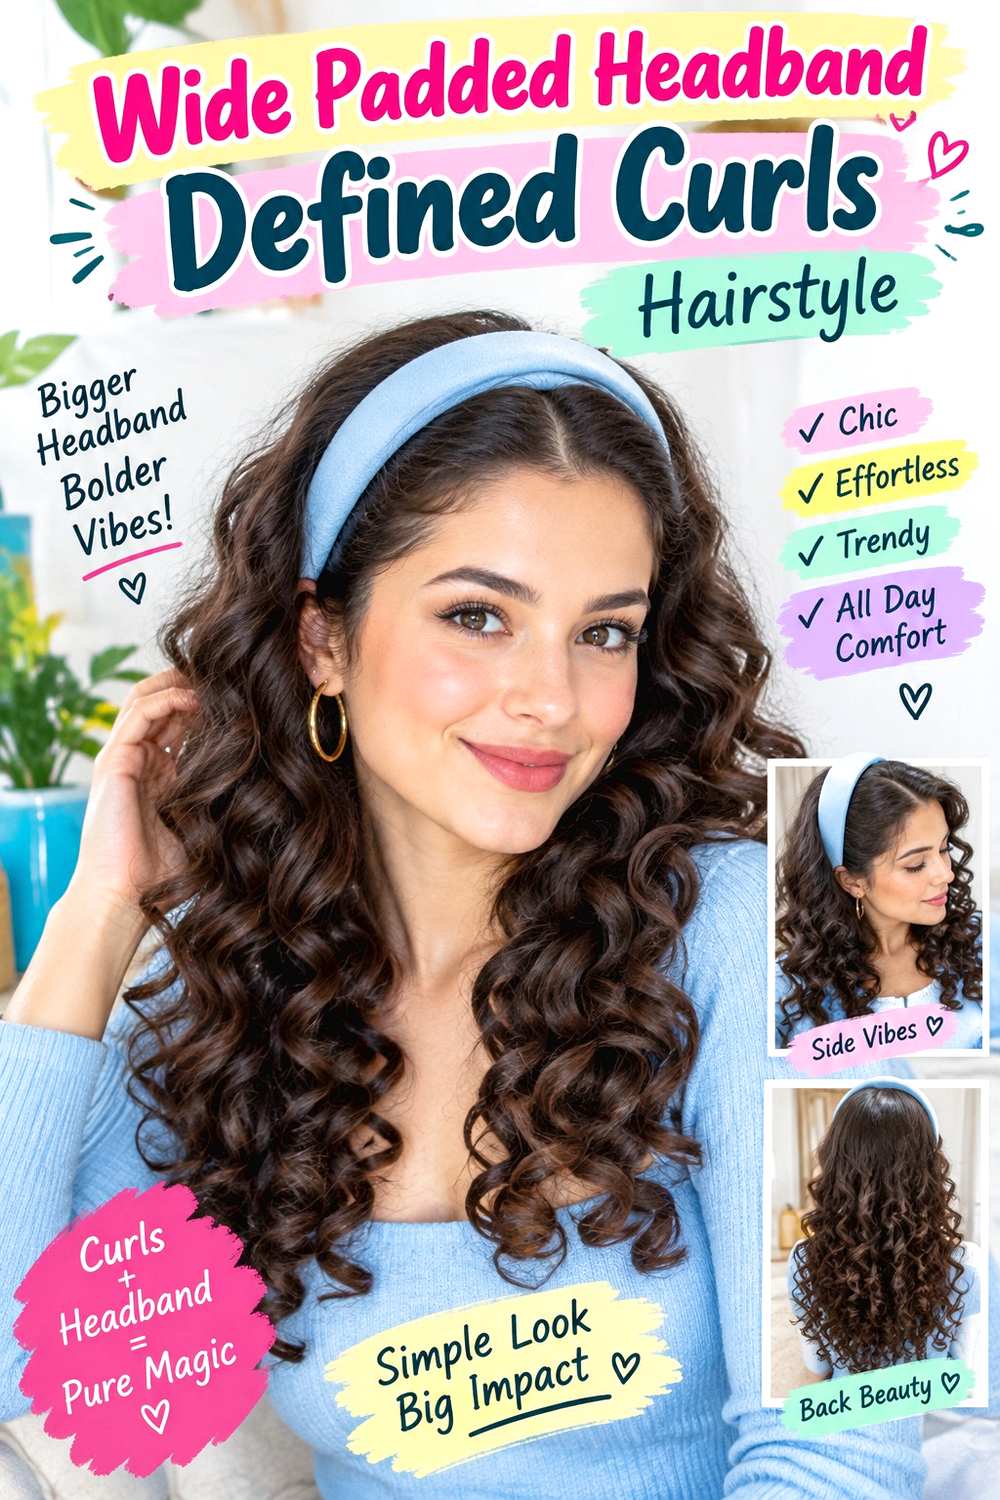
A wide padded headband creates a strong frame while allowing defined curls to stay visible from the temples downward. Position it just behind the hairline rather than deep over the crown, then let medium or long curls fall freely around the shoulders. Keep a few narrow curl groups outside the band near the temples if you want softer face framing. The shape works best when the crown is controlled but not completely flattened, with most volume sitting beside and behind the accessory.
Naturally curly hair with moderate or dense volume can support the wider scale particularly well, although finer curls can wear it with less crown compression. Use lightweight leave-in conditioner to keep curls flexible, curl gel to reinforce definition, and a diffuser for controlled drying. A next-day refresh may only require dampening several curls around the band edge; a complete wash-day set is longer because definition and drying happen across the entire head. At a styling appointment, explain exactly how far behind the hairline the band should sit and how much front texture should remain visible. If curls become dented, reshape those sections before replacing the headband instead of tightening it.
Pro tip:
Let the crown dry fully before adding the padded band. Placing it over damp roots can create a deeper indentation that is harder to refresh later.
Make It Work for You:
If your curls are fine or lower density, move the band slightly farther back and leave more side volume exposed. The padded shape remains visible without overpowering the hair.
Watch Out For:
Avoid choosing a band that presses painfully behind the ears. Secure styling should feel stable, not tight; switch to a softer or more flexible base.
Slim Headband Center-Part Curls Hairstyle
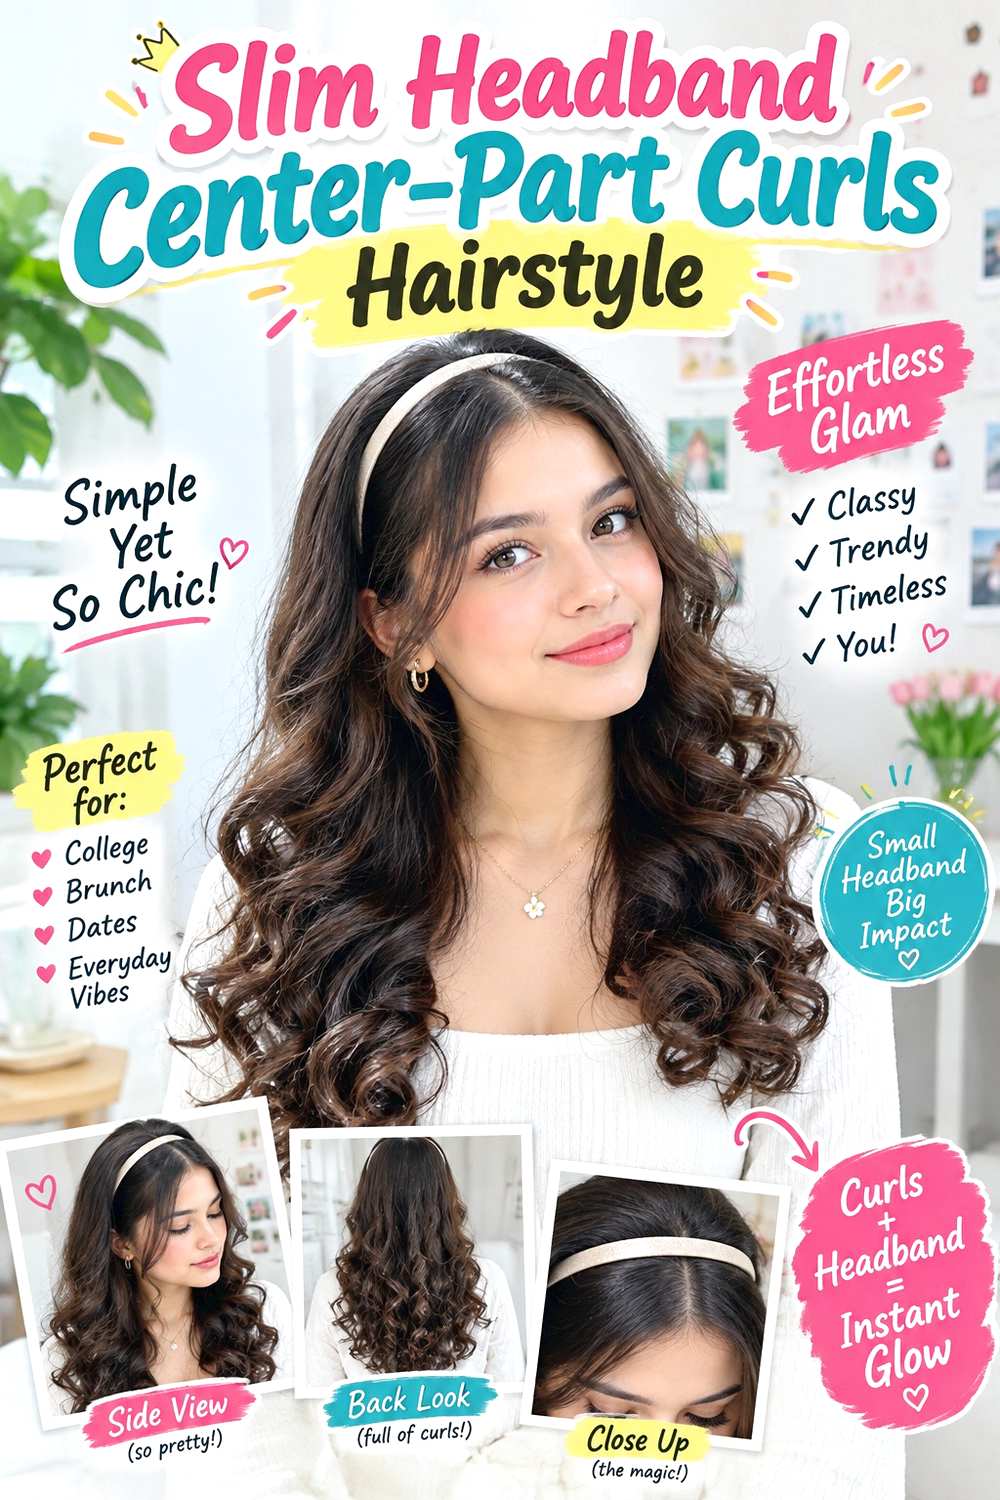
A slim headband keeps the focus on the curl pattern and makes a center part easy to see. Define the part from the hairline toward the crown, place the band a short distance behind it, and allow curls to fall evenly on both sides. Longer pieces can skim the cheekbones or jaw, while the lower lengths stay rounded rather than brushed into one solid mass. The narrow accessory adds structure without covering much texture.
This arrangement suits loose curls, springy ringlets, and coils that naturally separate around a center part. A curl cream can encourage grouped definition, a fine mist spray bottle helps reactivate flattened front pieces, and a flexible slim headband provides the actual hold. Refreshing the style between washes is usually brief because only the part and visible curls need attention; full wash-day styling takes longer according to density, shrinkage, and drying time. If you are having the look professionally styled, specify how wide you want the center opening and whether the shortest front curl should finish around the cheekbone, jaw, or below it. Recheck the part after putting the band on because pressure can shift small front sections. When the curls lose definition, refresh individual groups instead of wetting the entire head unnecessarily.
Pro tip:
Place the slim band after the center part is settled, then gently lift the curls immediately behind it so the crown keeps some height.
Make It Work for You:
For strong shrinkage, judge the face-framing length after the curls have settled. Leave extra front length outside the band rather than stretching pieces to match each other.
Watch Out For:
Do not force perfect symmetry between curl groups. Natural shrinkage varies; balance the overall volume instead of repeatedly pulling individual curls into identical positions.
Velvet Headband High Puff Hairstyle

A velvet headband pairs well with a high puff because its soft surface visually separates the sleek front from the full texture above. Gather the curls toward the upper crown, leaving the puff rounded rather than stretched into a narrow shape. Set the headband behind the hairline and in front of the puff base, with short curls around the temples left out only if you want softer framing.
Curly and coily hair that can gather comfortably high is well suited to this shape, especially when you want the length off the neck. Use a soft hair tie to establish the puff, lightweight edge gel to control only the areas you want smoother, and the velvet headband as the finishing frame. A next-day refresh can be quick if the puff base is still secure; full wash-day styling takes longer because detangling, drying, and gathering are separate stages. At a salon or styling appointment, specify the puff height and ask for comfortable tension around the perimeter. The headband should not act as the main anchor. If the puff leans or loosens, rebuild the hair tie first rather than pulling the velvet band backward until it feels tight.
Pro tip:
Set the puff base before sliding on the velvet band, then fluff the upper curls last. This prevents the accessory from trapping sections you want visible.
Make It Work for You:
For shorter coils, shift the puff slightly forward and make it wider rather than taller. The headband still frames the hairline while the available length forms a fuller shape.
Watch Out For:
Avoid tightening the puff until the hairline feels strained. If the base slips, reset the tie with less hair stretched at once rather than adding tension.
Knotted Headband Low Puff Hairstyle
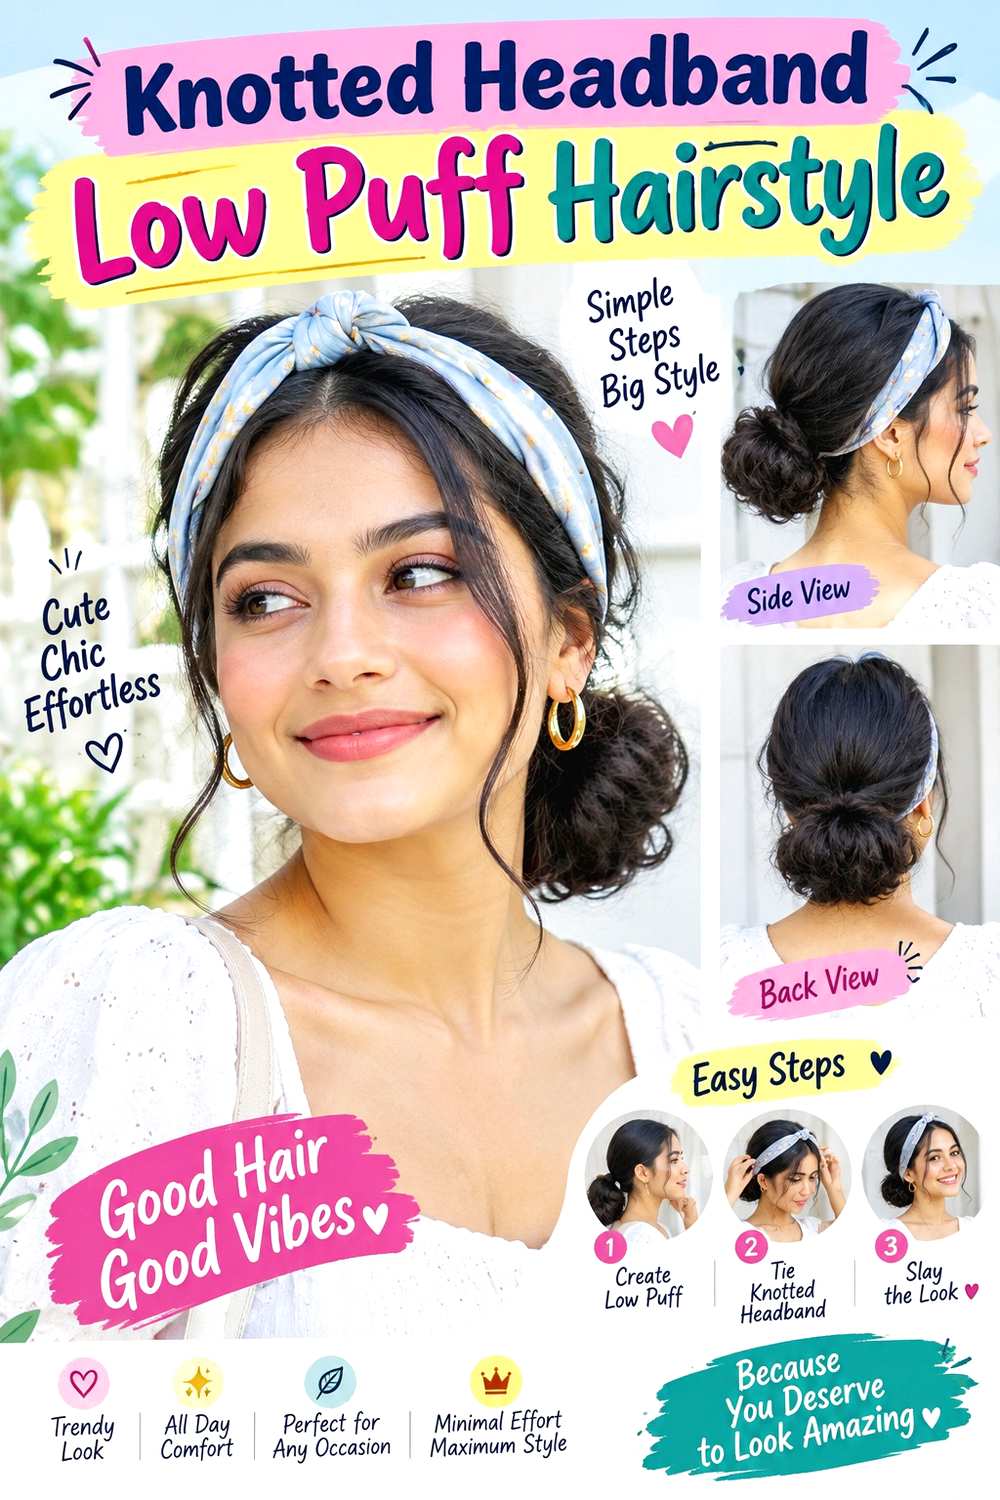
A knotted headband brings attention to the front of a low puff, especially when the knot sits slightly above the forehead rather than directly on top of the crown. Gather curls toward the nape, keeping the sides softly controlled, and allow the puff to expand behind the ears. Face-framing curls can stay outside the headband, while the rest of the front remains neat enough for the knot to read clearly.
The low placement works on medium and longer curly or coily hair and can be more comfortable than a high puff for readers who dislike tension at the crown. Use a fabric-covered elastic for the puff base, styling cream to smooth flyaways without hardening the curls, and a flexible knotted headband for the front. Rebuilding the low puff between washes is usually a short task; a full wash, detangle, dry, and restyle takes longer. If someone else is styling it, explain exactly how low you want the puff and whether the knot should sit centered or slightly off-center. Refresh the perimeter when it becomes fuzzy rather than smoothing every curl repeatedly. If the headband creeps backward, reset its position instead of tightening the puff.
Pro tip:
Place the knot slightly forward of the crown’s highest point. That keeps it visible from the front and reduces the chance of the band sliding backward.
Make It Work for You:
If your hair is very dense, make the low puff broader across the nape rather than forcing it into a small circle. The shape stays balanced and comfortable.
Watch Out For:
Do not trap the puff base beneath the headband’s back edge. Separate the two anchors so one can be adjusted without pulling or distorting the other.
Pearl Headband Side-Part Curls Hairstyle
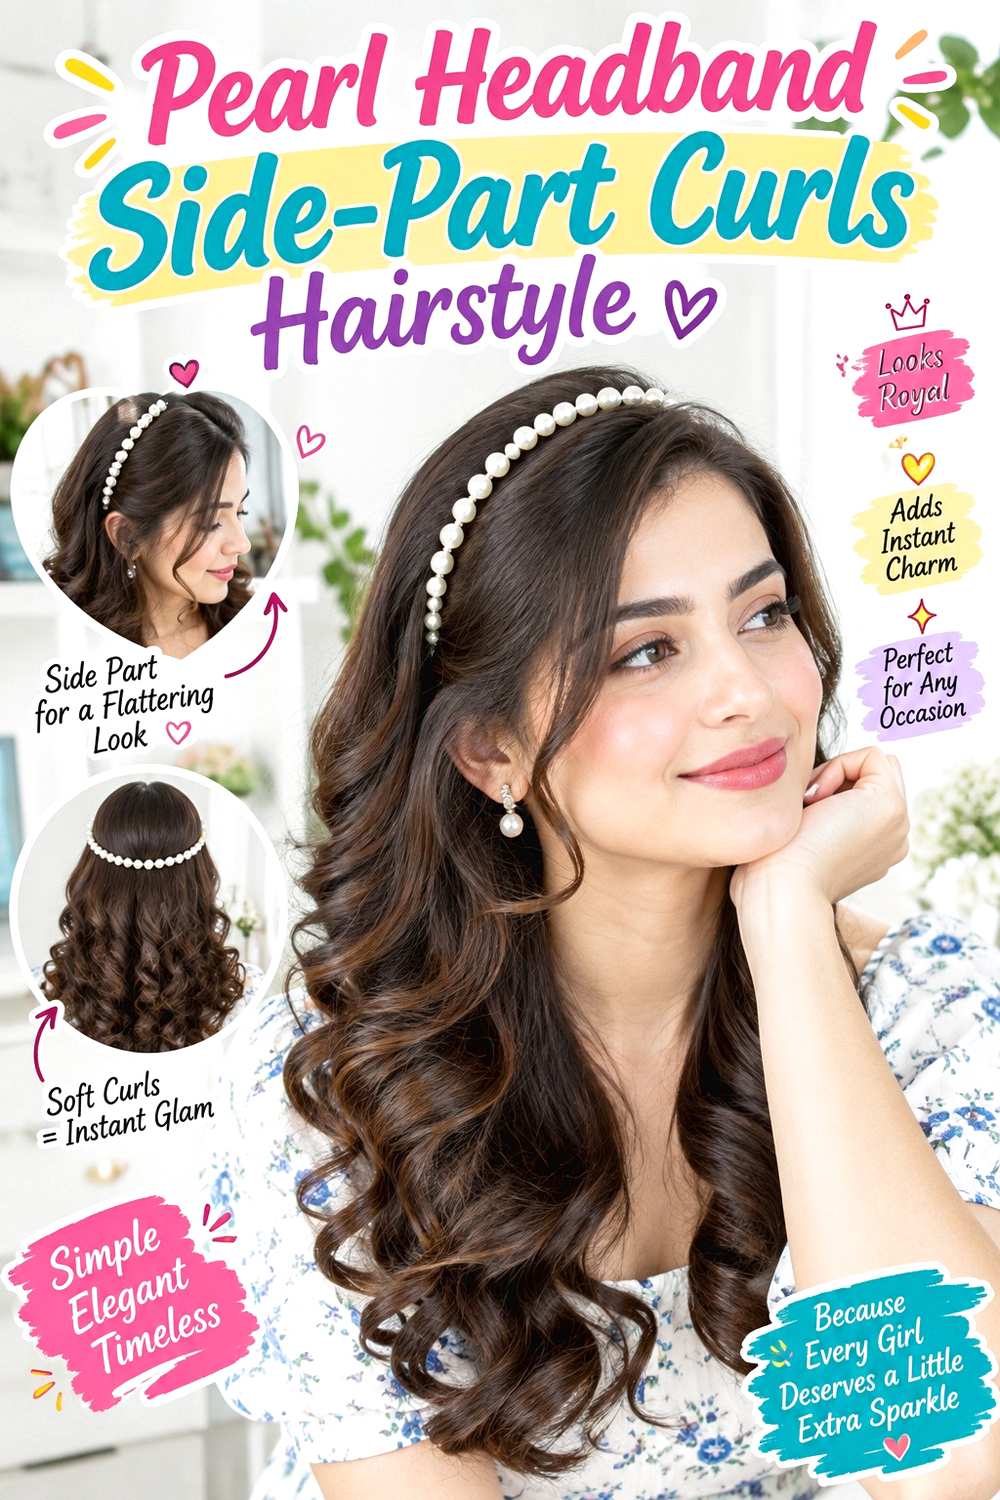
A pearl headband adds a defined line above side-parted curls without covering their movement. Start with a soft side part, let the heavier section sweep across the forehead, and place the headband behind that front curve. Keep the lighter side closer to the head or tuck a small section behind the ear. The curls can remain loose through the shoulders, with more volume on the heavier side for intentional asymmetry.
Loose curls and medium ringlets suit this arrangement particularly well, although tighter textures can use the same placement with more volume. Apply lightweight curl mousse for flexible support, use a diffuser to set the pattern, and add the pearl headband only after the roots are dry. A morning refresh can focus on the front sweep and any curls flattened overnight; a full wash-day routine takes longer because all sections need definition and drying. For professional styling, point out exactly where the side part should begin and how much forehead coverage you want before the curls turn away from the face. The decorative band should rest on the finished shape rather than force the part into place. If pearls catch on curls, lift the band vertically when removing it instead of dragging it through the hair.
Pro tip:
Set the front sweep completely before adding the pearl band. Once the curl direction is established, the accessory can frame it without disrupting the root pattern.
Make It Work for You:
For dense curls, keep the lighter side tucked closer to the ear while leaving the heavier side fuller. This preserves the side-part effect without reducing overall volume.
Watch Out For:
Avoid sliding a beaded or pearl band repeatedly through finished curls. Decorative details can snag; lift and reposition the accessory instead of scraping it backward.
Scarf Headband Pineapple Curls Hairstyle

A scarf headband works naturally with pineapple curls because both elements gather attention toward the top of the head. Collect long curls loosely near the crown, allowing the ends to spill forward and sideways rather than forming a tight bun. Fold the scarf into a comfortable band and position it behind the hairline, with its knot or tie kept away from the main puff of curls.
This style is especially useful for long curly and coily hair when you want an easy up style without fully pinning the lengths. A soft scrunchie creates the loose pineapple base, lightweight leave-in conditioner refreshes exposed ends, and the scarf headband adds coverage and structure. A next-morning reset can be quick if the curls held their shape overnight, while full wash-day styling takes longer because the lengths need complete definition and drying. If a stylist is arranging the look, specify how high the pineapple should sit and where the scarf knot should fall so it does not press against the curl mass. Refresh only the flattened front or outer curls instead of soaking the entire pineapple. The scarf should support the look visually, not tighten the base.
Pro tip:
Secure the pineapple first, then tie the scarf with enough room to slide one finger underneath. This helps preserve comfort while keeping the front controlled.
Make It Work for You:
If your curls are shorter, gather only the upper half into a pineapple and leave the lower curls loose. The scarf still frames the lifted shape effectively.
Watch Out For:
Do not tie the scarf directly over the scrunchie. Stacking both anchors can create a bulky pressure point; keep the scarf slightly forward of the base.
Double Headband Curly Bob Hairstyle
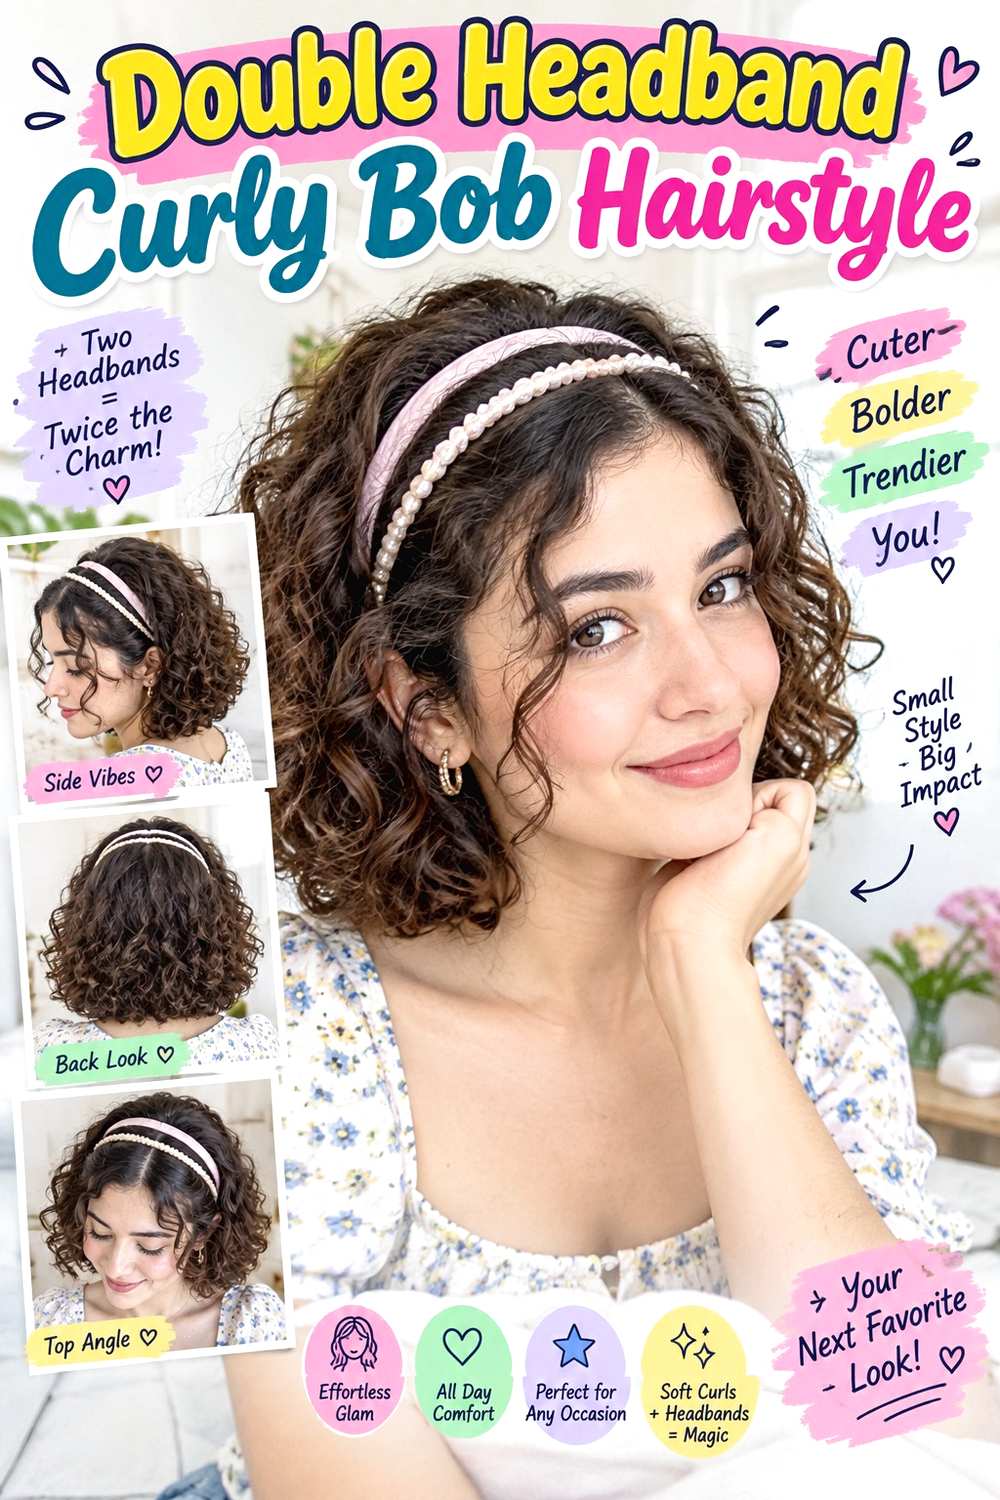
Two slim headbands create a more graphic finish on a curly bob while leaving plenty of texture visible. Position the first band behind the hairline and the second a short distance behind it, keeping the gap consistent across the crown. Let curls sit around jaw to neck level, with a few pieces at the temples left forward if you prefer a softer outline. The ends should retain their natural spring rather than being stretched to look even.
This works well on short to medium curly hair because the doubled bands add detail without requiring extra length. Use curl gel to encourage defined groups, a diffuser for controlled drying, and two flexible slim headbands with similar tension. Once the bob is dry, daily maintenance can be limited to refreshing curls that were compressed by the bands; full wash-day styling takes longer because short curls still need careful setting and drying. At a styling appointment, explain the spacing between the two bands and whether you want more volume at the sides or crown. If the bob shrinks above the jaw, let the finished length guide placement instead of stretching it downward. Move both bands together when adjusting them so the spacing remains deliberate.
Pro tip:
Set the rear band first and the front band second. This makes it easier to keep an even gap without repeatedly disturbing curls near the hairline.
Make It Work for You:
For finer curls, increase the space slightly between the bands so more hair remains visible. The double-band detail stays clear without covering too much of the bob.
Watch Out For:
Avoid stacking the two bands directly together. They can behave like one thick accessory and flatten the crown; leave visible curl space between them.
Braided Headband Half-Up Curls Hairstyle
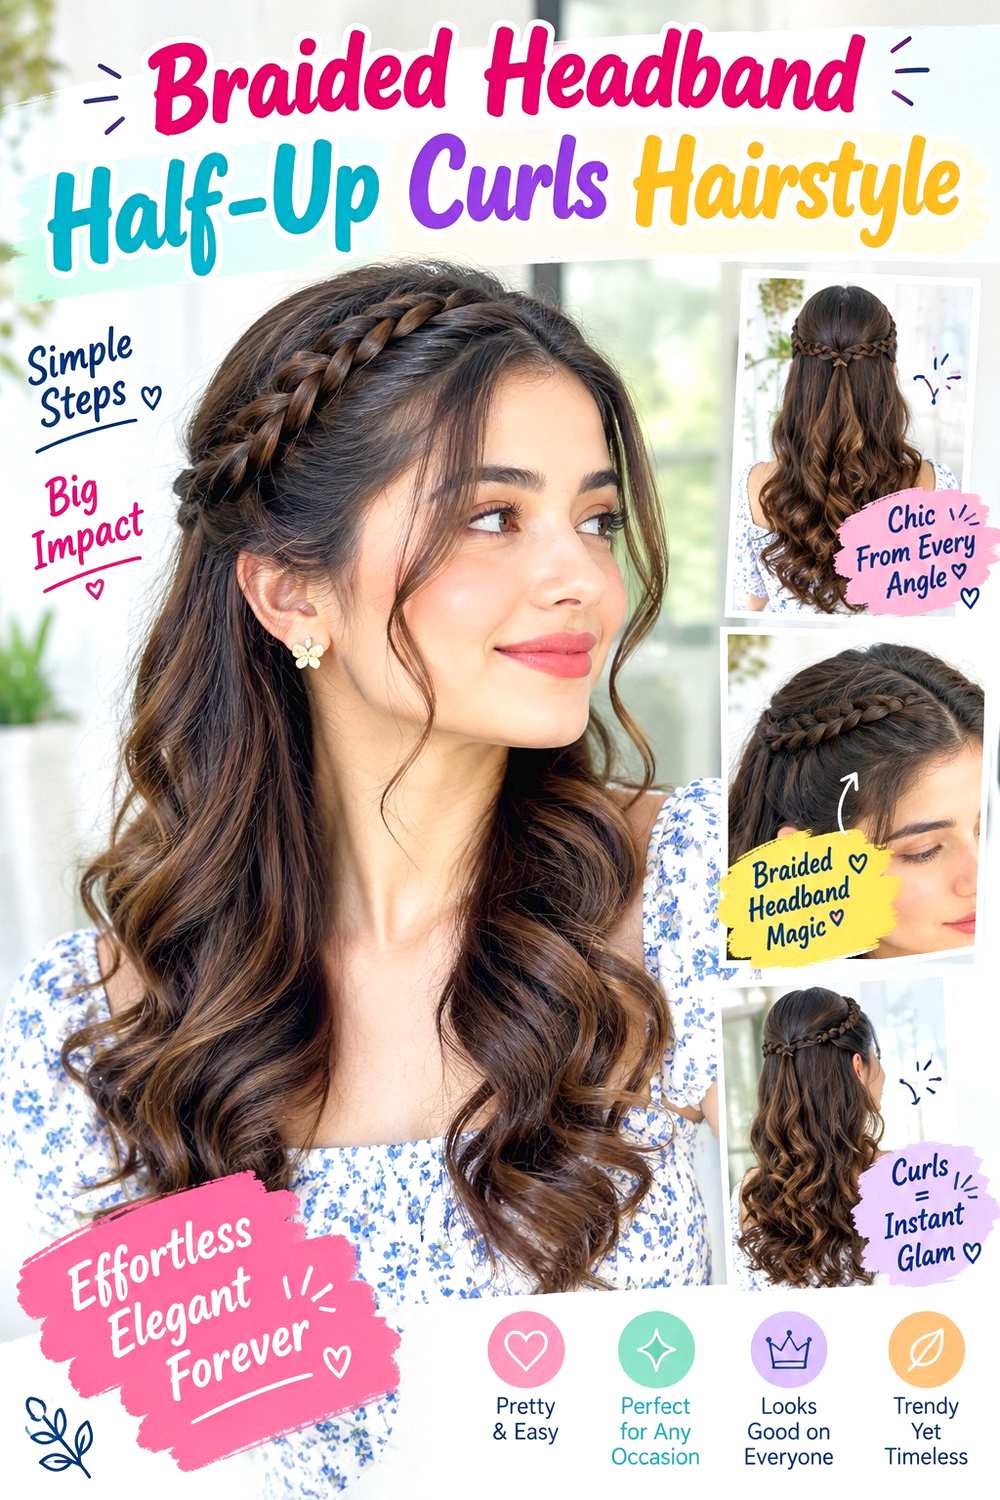
A braided headband adds texture across the crown while a half-up section keeps curls lifted at the back. Gather a modest section from the temples toward the upper back of the head, leaving most curls loose through the shoulders. Position the braided band just behind the hairline, then let a few defined curls fall in front of it around the cheekbones or jaw.
The style works on medium and long curly hair, especially when you want some control without hiding the full length. Use a small fabric-covered elastic to secure the half-up section, curl cream to reshape visible curls, and the braided headband as the main accessory. A quick refresh between washes usually means tightening the half-up base and redefining several front pieces; a full wash-day style takes longer because the loose lengths require complete drying. If a stylist is preparing the look, specify how wide the gathered section should be and where the band should sit relative to the temples. Taking too much hair into the half-up section can leave the lower lengths looking sparse. When the crown loses lift, loosen the gathered hair slightly before moving the band rather than pushing the accessory higher.
Pro tip:
Secure the half-up section before adding the braided band, then lift a small amount of crown hair between them to prevent a flattened transition.
Make It Work for You:
For lower-density curls, gather only a narrow strip from the upper sides. This leaves more hair loose below while preserving the lifted half-up shape.
Watch Out For:
Do not use the braided band to hold the half-up section itself. Give the gathered hair its own secure base so the accessory remains comfortable.
Satin Headband Wash-And-Go Hairstyle
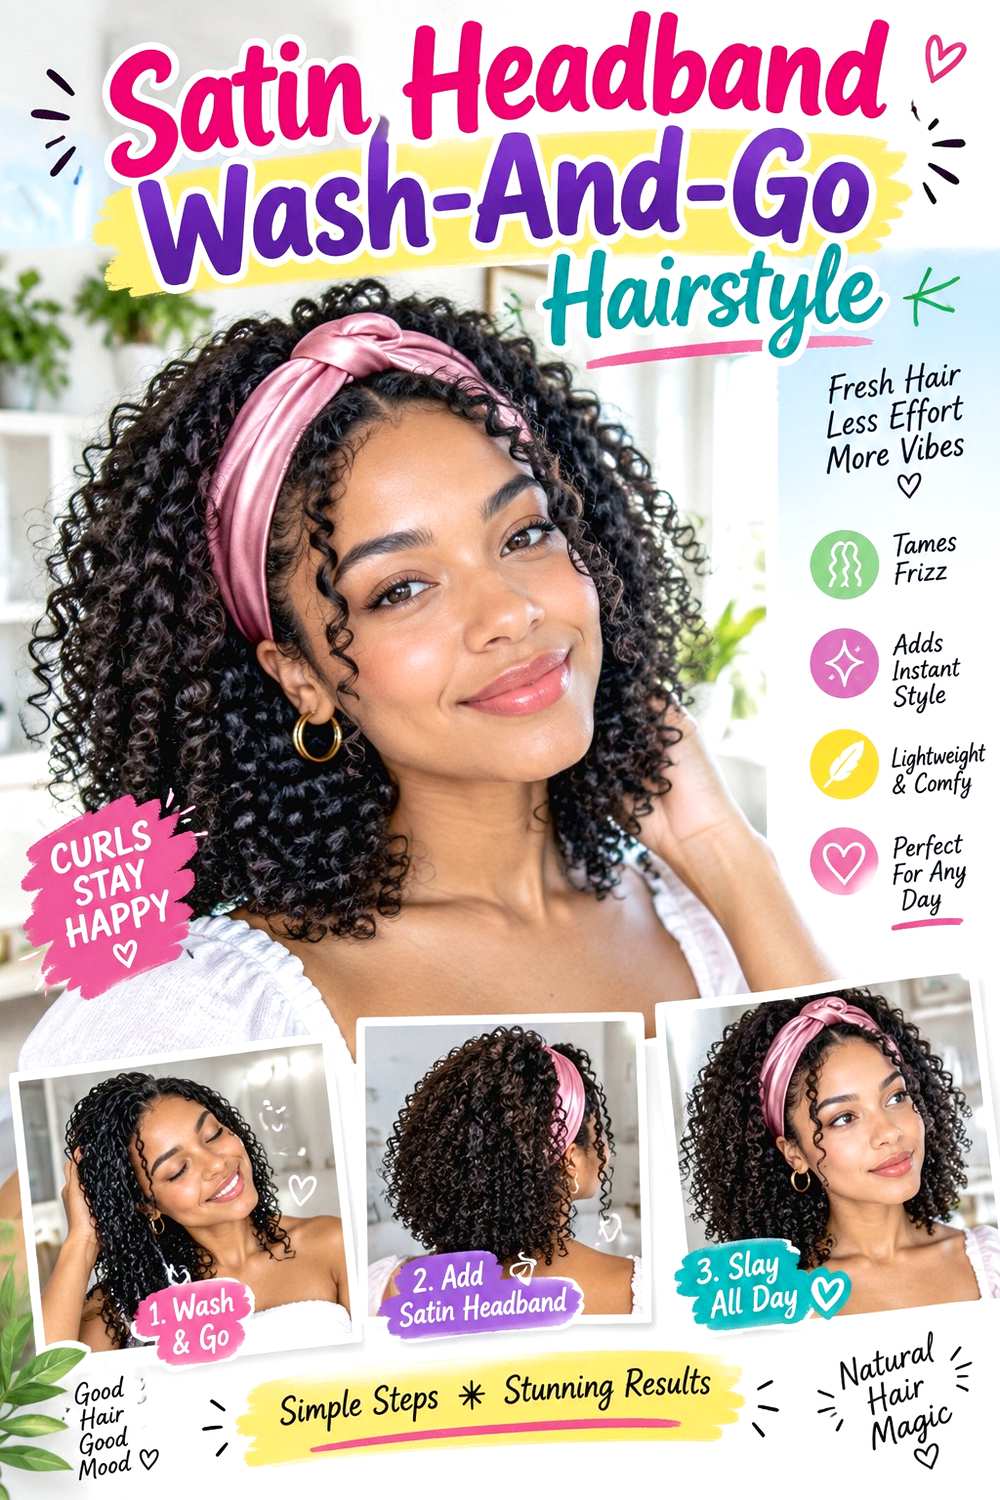
A satin headband can frame a wash-and-go without disturbing too much of the finished curl pattern. Let the curls dry in their natural overall shape, then place the band just behind the hairline so the front remains open. Shorter curls can sit above the ears, while longer sections fall around the shoulders. Keep the crown lightly lifted so the headband looks integrated rather than pressed into a flat strip of hair.
This option suits curls and coils that are already worn in a wash-and-go routine, from soft ringlets to tighter patterns. Use a lightweight leave-in conditioner for moisture and slip, curl gel for definition and hold, and a satin-covered headband to reduce rough friction at the contact point. A next-day refresh may require only water on a few crushed curls and a band reset; the full wash-day version naturally takes longer because cleansing, product application, setting, and drying all happen first. If a stylist is shaping the finished look, show how much forehead you want exposed and how much volume should remain near the temples. Because shrinkage varies, judge the final placement after the curls have settled. Remove the band gently rather than dragging it backward through textured hair.
Pro tip:
Wait until the roots are mostly dry before adding the satin band. Damp roots can dry compressed and leave a visible line when the accessory comes off.
Make It Work for You:
If your wash-and-go expands significantly as it dries, position the band only after the final volume appears. That prevents a too-tight fit as the curls widen.
Watch Out For:
Avoid using the headband to flatten frizz across the whole crown. Refresh only the sections that need definition so natural volume remains part of the shape.
Wide Headband Voluminous Afro Curls Hairstyle
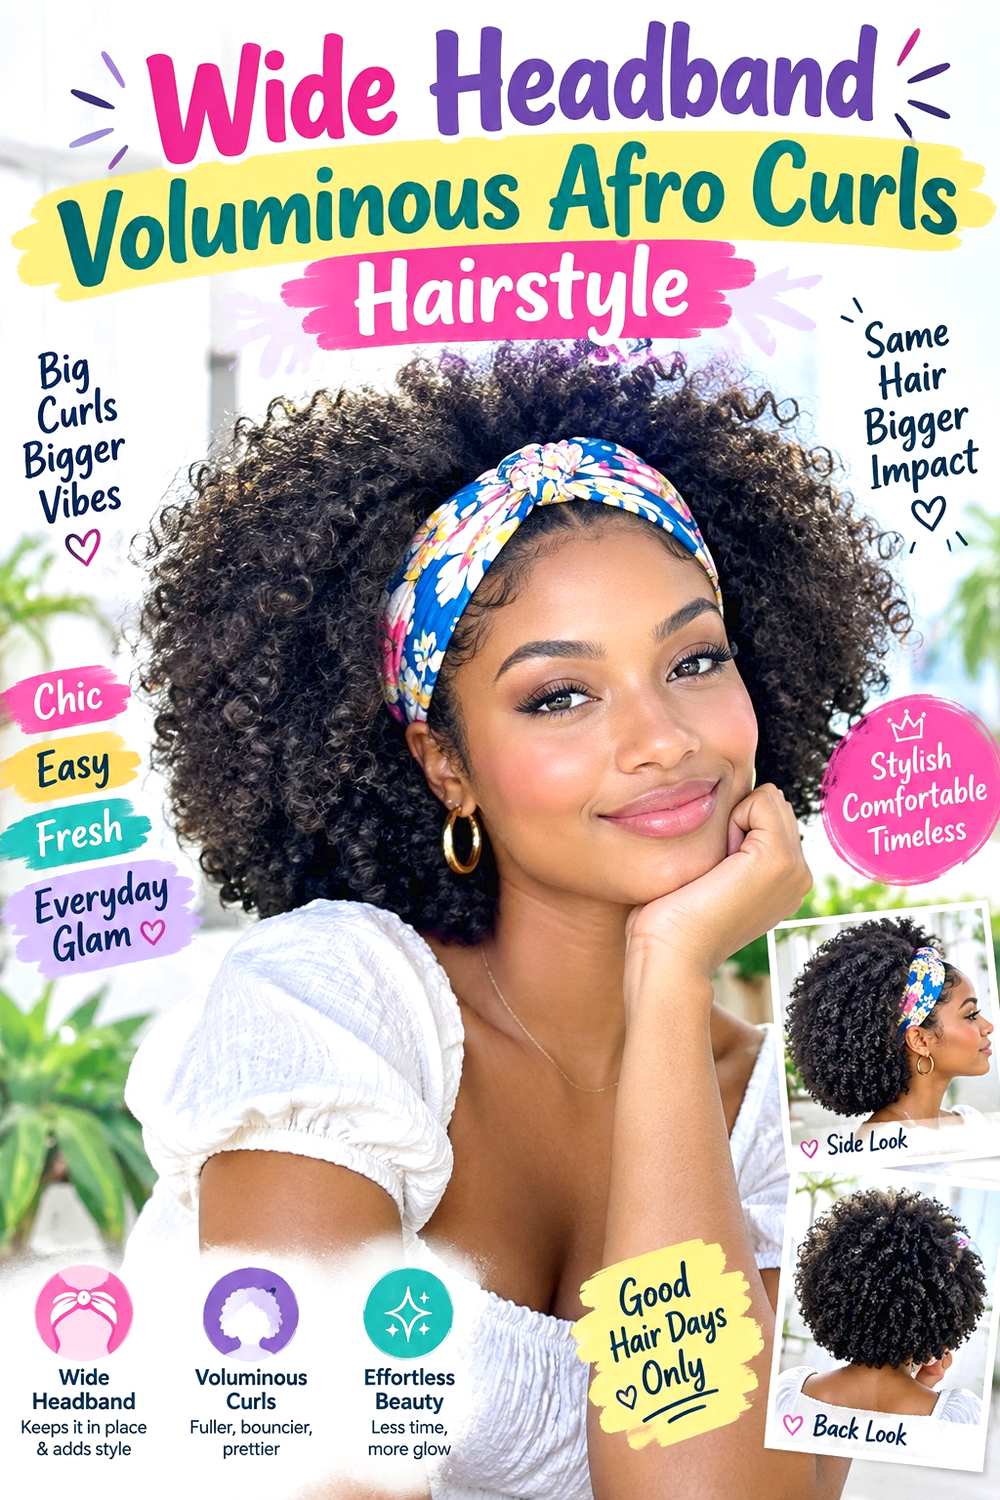
A wide headband creates a clear front border against voluminous Afro curls, allowing the rounded texture behind it to stay expansive. Set the band slightly behind the hairline, then lift the curls around the sides and upper crown so the accessory looks intentional rather than restrictive. Shorter coils can create a compact halo, while longer hair can form a broader silhouette with more height.
This style suits dense curls and coils especially well because the volume can visually balance a wider band. Use leave-in conditioner to keep the texture pliable, a curl pick to lift only the roots once the hair is dry, and a soft wide headband that does not squeeze the sides. A quick refresh can involve lifting flattened root areas and reshaping a few outer coils; a complete wash-day routine takes longer because detangling, setting, and drying affect the final volume. At a salon or styling appointment, specify where you want the widest part of the silhouette—above the ears, at the crown, or evenly around the head. That placement matters more than forcing perfect symmetry. If the band begins sliding, reposition it closer to the stable hairline area instead of pulling it tighter across the head.
Pro tip:
Lift roots only after the headband is positioned. Concentrate the pick behind and beside the accessory so you can see exactly where more volume is needed.
Make It Work for You:
For less dense curls, choose a slightly narrower wide band and keep more texture visible at the sides. The bold framing effect remains without covering the available volume.
Watch Out For:
Do not compress the crown to make the band feel secure. A flatter crown changes the intended silhouette; adjust the band fit rather than sacrificing the curl shape.
Elastic Headband Low Bun Curls Hairstyle
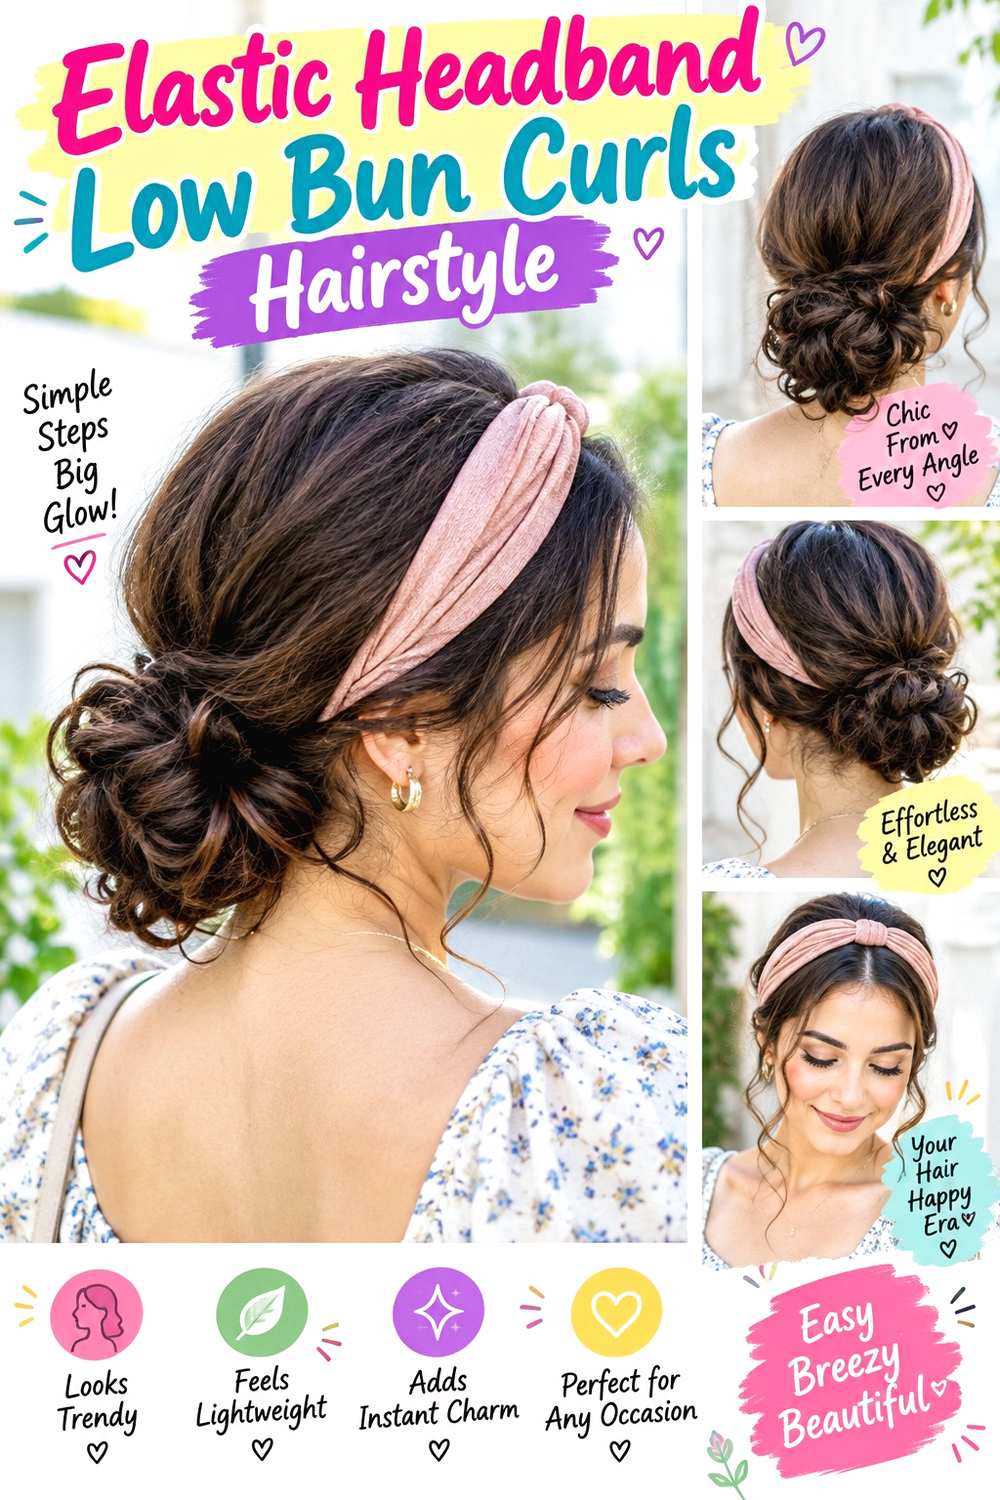
An elastic headband and low curly bun create a practical shape with a clean front and textured detail at the nape. Place the band just behind the hairline, direct the curls backward without stretching them completely flat, and gather the length into a loose bun. Leave a few curls near the ears if you prefer movement, while the main bun stays wide enough to show texture.
Medium and long curls are easiest to gather this way, and the style works across loose curls and coils when the base remains comfortable. Use a fabric-covered elastic for the bun, bobby pins to secure loose sections, and a flexible elastic headband for the front. A between-wash reset can be relatively quick because the curl pattern does not need to be fully redefined; a fresh wash-day bun takes longer when drying and detangling are included. If a stylist is building the look, specify the bun height at the nape and how smooth you want the crown. The headband should sit independently from the bun base. If short sections begin escaping, pin them where needed instead of stretching the entire style tighter, which can reduce comfort without improving the bun shape.
Pro tip:
Create the low bun before adding the headband, then pull out any face-framing curls last. This keeps the accessory from trapping sections you want loose.
Make It Work for You:
If your curls are very dense, build a wider, flatter bun at the nape instead of a tight knot. The shape remains secure while distributing the hair more comfortably.
Watch Out For:
Avoid positioning the headband’s back edge directly over the bun anchor. Stacked pressure can make both elements shift; leave a small gap between them.
Metallic Headband Side-Swept Curls Hairstyle

A metallic headband looks especially clear against side-swept curls because the accessory forms a clean line while the hair moves strongly in one direction. Create a side part, guide most curls over one shoulder, and keep the lighter side close to the head. The band should sit behind the front sweep rather than crossing over it, allowing the face-framing curl pattern to remain visible.
Medium and long curls are easiest to sweep while maintaining enough length on the heavier side. Use lightweight mousse to support the curl pattern, a diffuser to set the shape, and the metallic headband as the finishing accent. A next-day refresh may involve redefining only the front sweep and several curls over the shoulder; a complete wash-day set takes longer because all the hair needs drying in the intended direction. For professional styling, specify which side should carry the volume and whether you want the lighter side tucked behind the ear. The headband should reinforce that asymmetry rather than center the hair again. If the heavy side starts drifting backward, reset the curl direction instead of tilting the band to compensate.
Pro tip:
Dry the heavier side in its intended direction before adding the band. Once the roots settle, the side sweep holds more naturally without relying on accessory pressure.
Make It Work for You:
For shorter curls, sweep only the front and upper side sections rather than forcing all the hair over one shoulder. The directional effect still remains clear.
Watch Out For:
Do not angle the headband sharply to mimic the side sweep. Keep the accessory stable and let the curl placement create the asymmetry instead.
Printed Headband Curly Ponytail Hairstyle
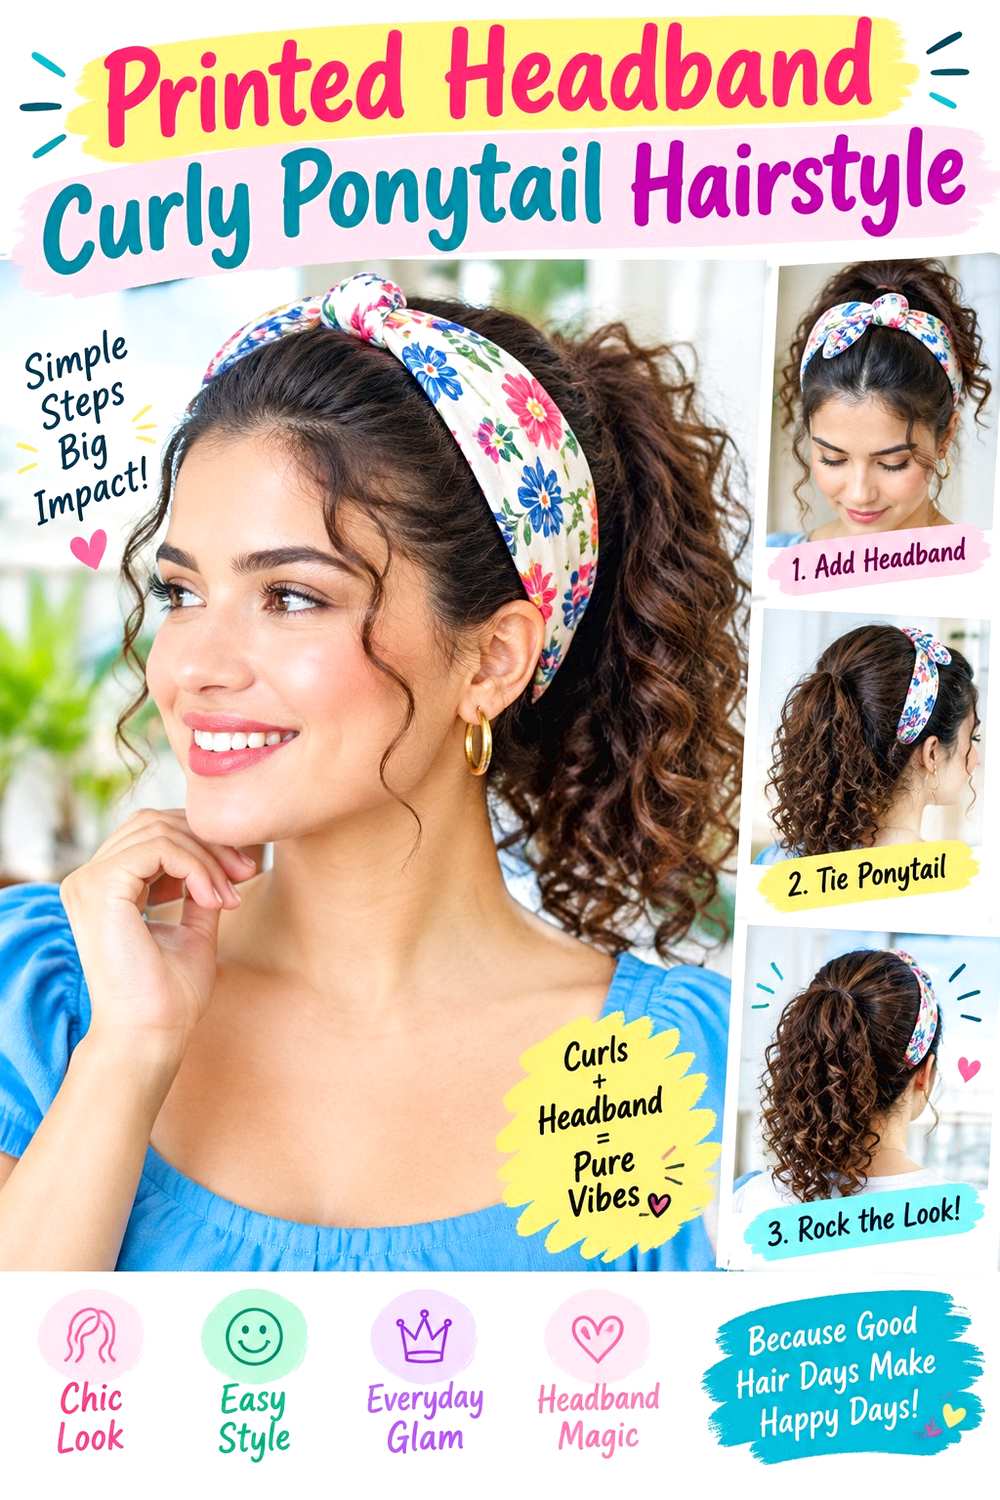
A printed headband gives a curly ponytail a clear focal point at the front while the length provides movement at the back. Gather the hair at mid-height rather than directly on the crown, allowing the ponytail curls to spread naturally. Place the band behind the hairline and leave selected curls near the temples free if you want a softer edge.
The shape works well on medium and long curly or coily hair that can reach a comfortable ponytail base. Use a fabric-covered elastic for the ponytail, light curl cream to redefine visible ends, and the printed headband as the finishing accessory. A quick refresh can be as simple as rebuilding the base and reshaping several outer curls, while a full wash-day ponytail takes longer because the texture should be prepared before gathering. If a stylist is arranging it, specify the ponytail height and how much crown volume should remain between the band and elastic. A base placed too high can compete with the headband, while one too low changes the silhouette. When the ponytail loosens, reset the elastic independently. Pulling the headband backward will not strengthen the base and may create unwanted pressure near the ears.
Pro tip:
Fluff the ponytail only after the headband is secure. That lets you balance the curl volume against the print without repeatedly disturbing the front.
Make It Work for You:
For finer curls, keep the ponytail base slightly lower and avoid over-separating the ends. Larger curl groups can preserve a fuller-looking outline behind the headband.
Watch Out For:
Avoid making the headband responsible for smoothing every flyaway. Excess pressure can flatten the crown; use the accessory for framing rather than compression.
Beaded Headband Shoulder-Length Curls Hairstyle
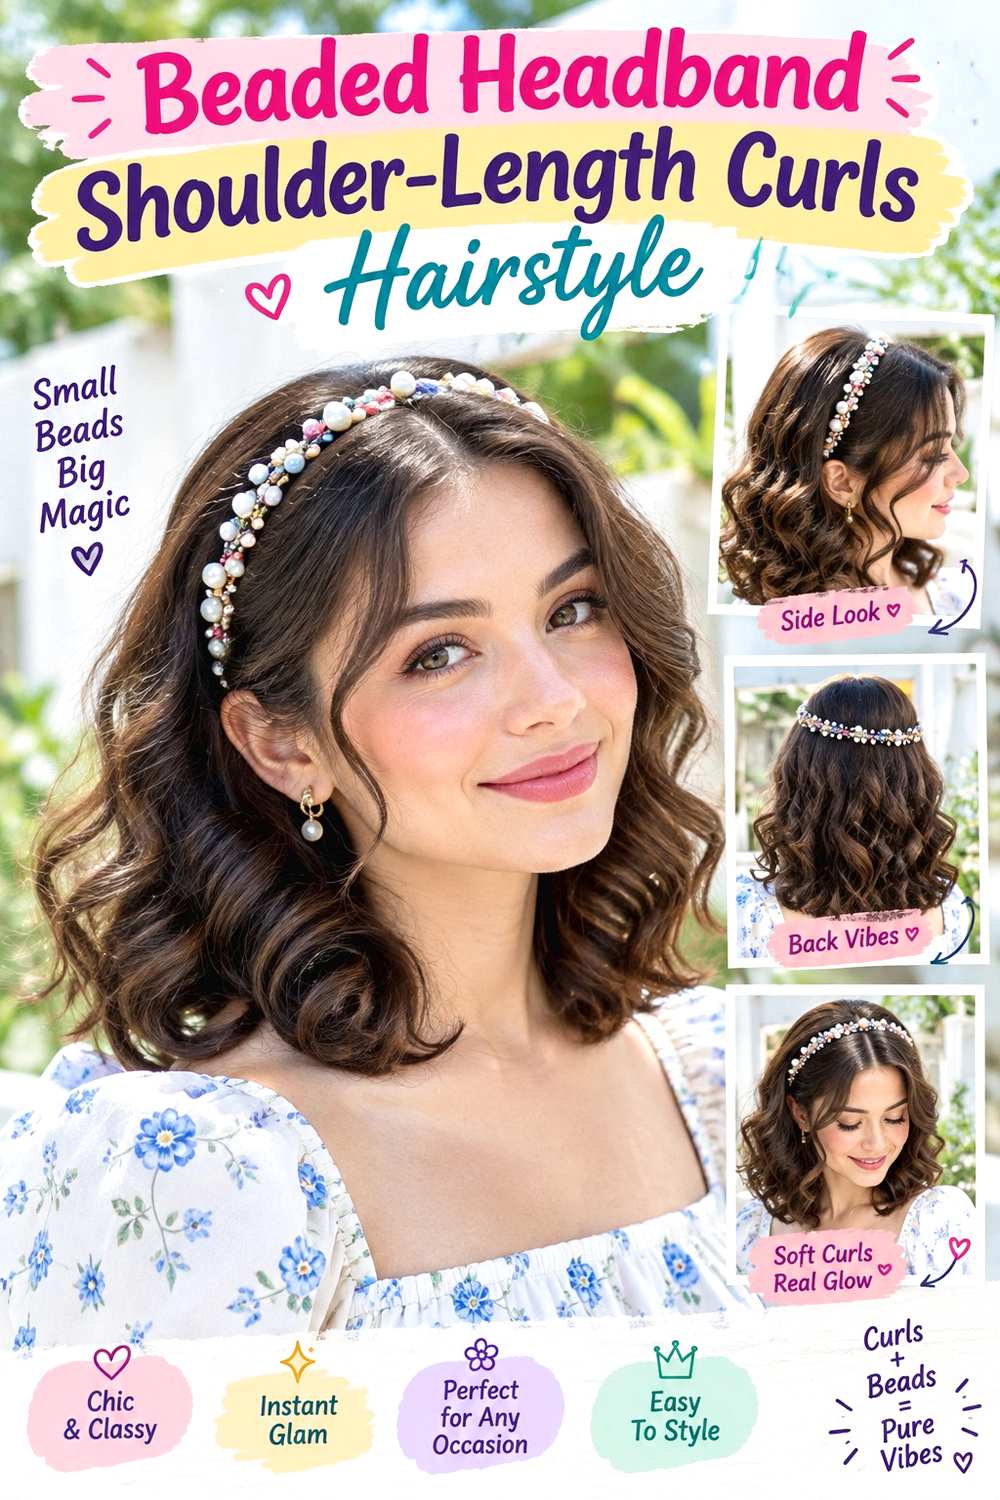
Shoulder-length curls give a beaded headband enough movement below the accessory while keeping the total shape balanced. Place the band behind a center or soft side part, then let curls fall naturally around the shoulders with the ends springing inward and outward. A few shorter front curls can sit outside the band, especially if they finish around the cheekbones or jaw.
This is a useful option for medium-length curls that are too short for some elaborate updos but long enough to show a flowing outline. Apply curl cream for grouped definition, diffuse the hair until the roots are dry, and place the beaded headband without sliding it through the finished curls. A daily refresh may only involve dampening flattened areas around the temples; a complete wash-day style takes longer because the entire shoulder-length shape needs to dry. At a styling appointment, explain the finished length you want visible around the shoulders and whether the band should expose a part or push everything backward. If shrinkage lifts the curls higher than expected, adjust the accessory placement rather than stretching the hair. Decorative beads can snag, so remove the band upward with both hands.
Pro tip:
Hold the beaded band open as you lift it into position from above. Avoid dragging decorative details over the curl surface after definition is finished.
Make It Work for You:
For dense shoulder-length curls, leave more volume below the ears and keep the crown slightly calmer. This balances the decorative band without reducing the natural fullness.
Watch Out For:
Do not repeatedly slide a beaded band backward to correct placement. Lift and reset it instead, reducing the chance of snagging or breaking apart curl groups.
Thin Headband Face-Framing Ringlets Hairstyle
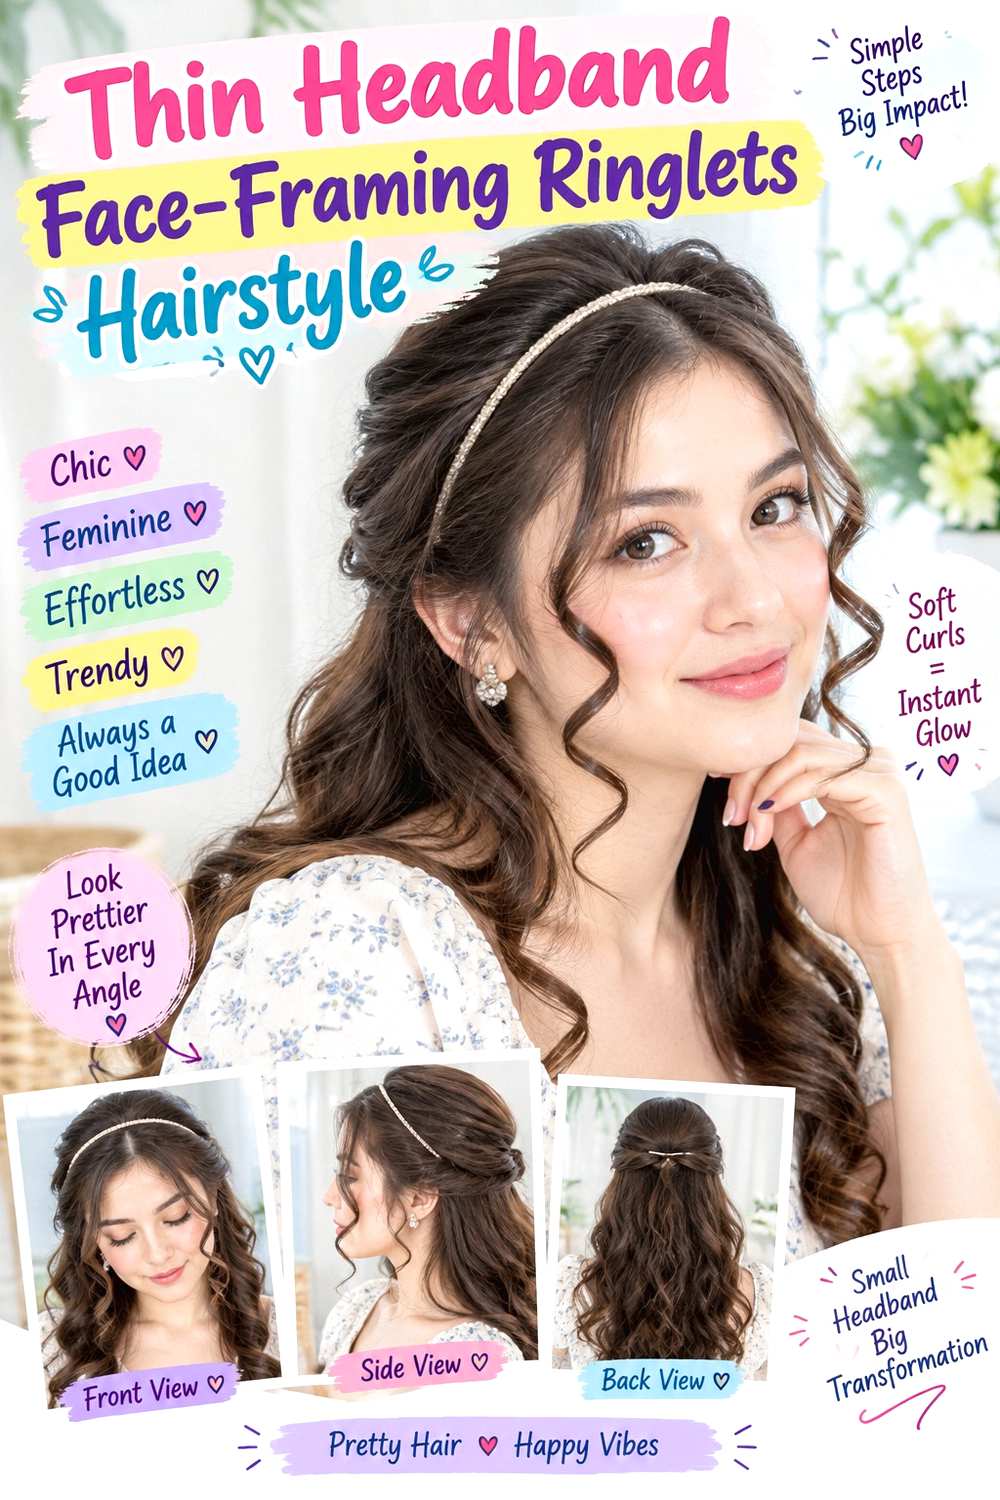
A thin headband almost disappears into the hairstyle, which makes carefully placed face-framing ringlets the main feature. Set the band a little behind the hairline, then pull one or two defined curls forward on each side. The rest of the curls can fall freely through the shoulders or upper back, with the crown kept softly lifted and the outer ends springy.
This works particularly well when your curl pattern forms visible ringlets, although tighter coils can use the same placement with smaller face-framing groups. Use curl gel to set the front ringlets, a spray bottle for targeted refreshes, and a flexible thin headband to keep the crown open. Between washes, refreshing only the curls beside the face can take a few minutes; full wash-day styling takes longer because every section needs definition and drying. If a stylist is arranging the look, point to the finished dry length you want around the cheekbones or jaw rather than asking for identical stretched pieces. Curl shrinkage can make matching wet lengths misleading. When the front loses shape, reform those groups individually before replacing the headband instead of wetting all the lengths.
Pro tip:
Choose the face-framing curls before putting on the headband and keep them completely outside it. This prevents accidental flattening near the roots.
Make It Work for You:
If your front curls shrink very tightly, use slightly longer sections from behind the hairline as framing pieces. The ringlet effect remains while finished length becomes easier to control.
Watch Out For:
Avoid pulling the front curls downward to make them match. Stretching can distort the pattern; compare where they naturally settle after the refresh dries.
Twisted Headband Short Curly Crop Hairstyle
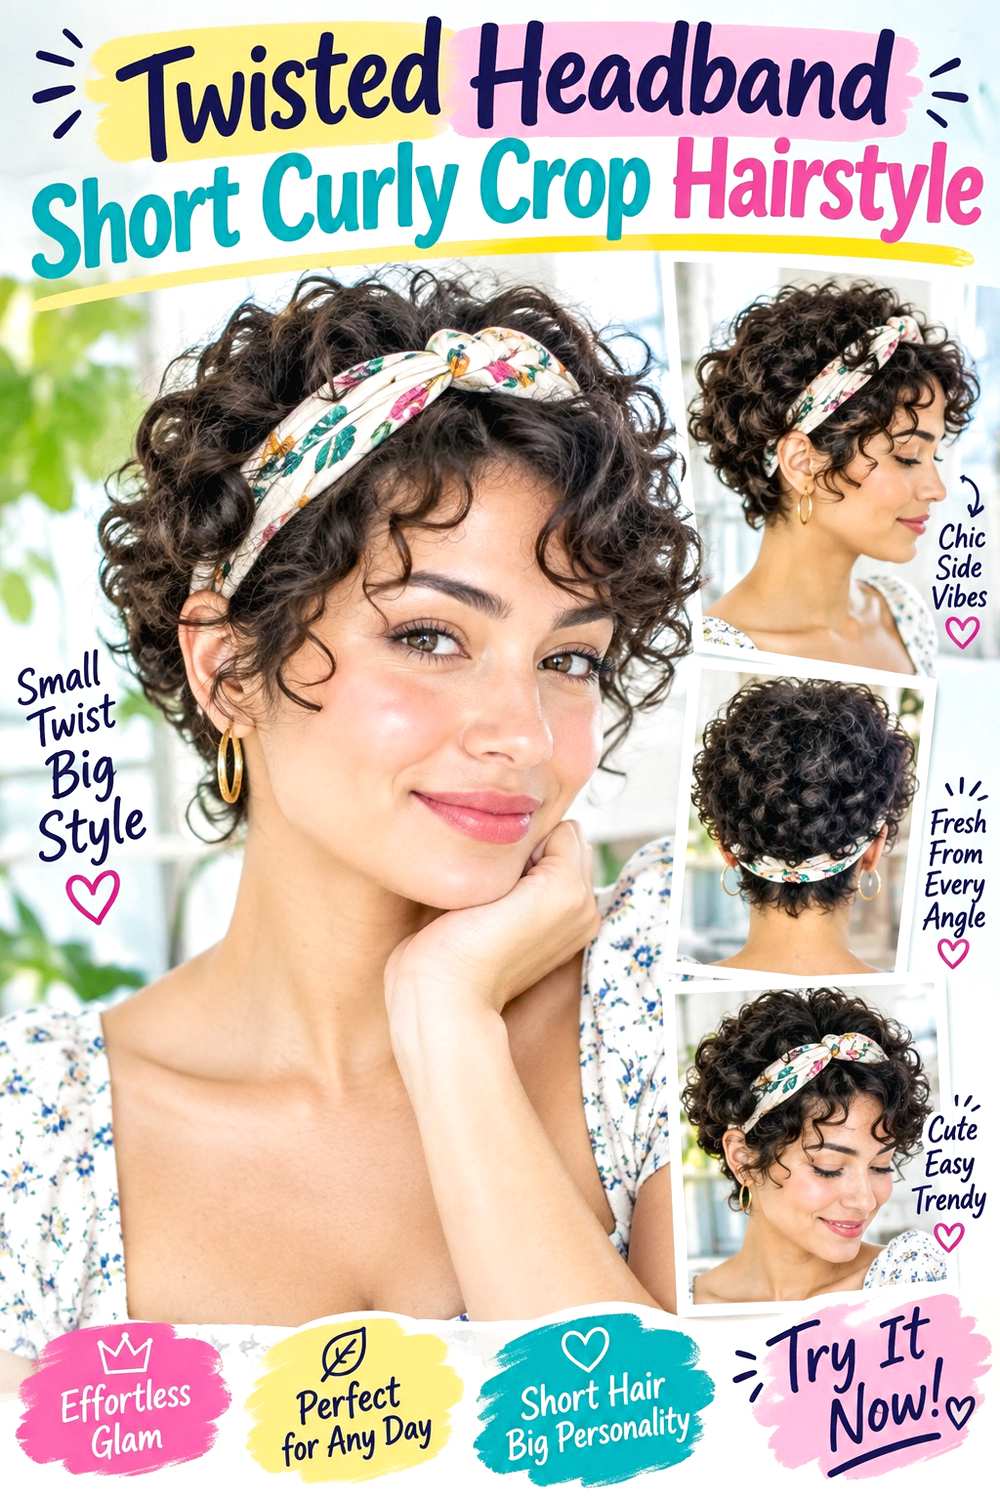
A twisted headband gives a short curly crop a clear focal point without requiring enough length for a ponytail or bun. Place the twist near the center or slightly to one side, then allow the short curls to remain visible above the forehead, around the ears, and behind the band. Keep the crown rounded rather than pressed flat so the accessory sits within the shape.
Short curls and coils are particularly suited to this option because the band supplies structure while the haircut provides the silhouette. Use lightweight curl foam for soft definition, a diffuser for drying and root control, and a flexible twisted headband that does not pinch behind the ears. A morning refresh is often brief because only flattened top curls need attention; full wash-day styling still takes longer because even short texture must be set and dried. If discussing the look with a stylist, specify how much curl you want visible in front of the band and whether the crop should feel fuller at the crown or sides. Do not request shorter layers only to make the accessory fit. Reposition the band instead if it crowds the existing shape.
Pro tip:
Set the twisted detail where the crop already has a natural opening or lower-volume spot. The accessory will sit more securely without crushing the fullest curls.
Make It Work for You:
If your crop is very short, move the band closer to the hairline and expose more crown texture behind it. The twist remains visible without overwhelming the length.
Watch Out For:
Do not force a wide twisted band onto a very small curl shape. If the accessory dominates, choose a narrower version rather than flattening more hair.
Jeweled Headband Curly Updo Hairstyle
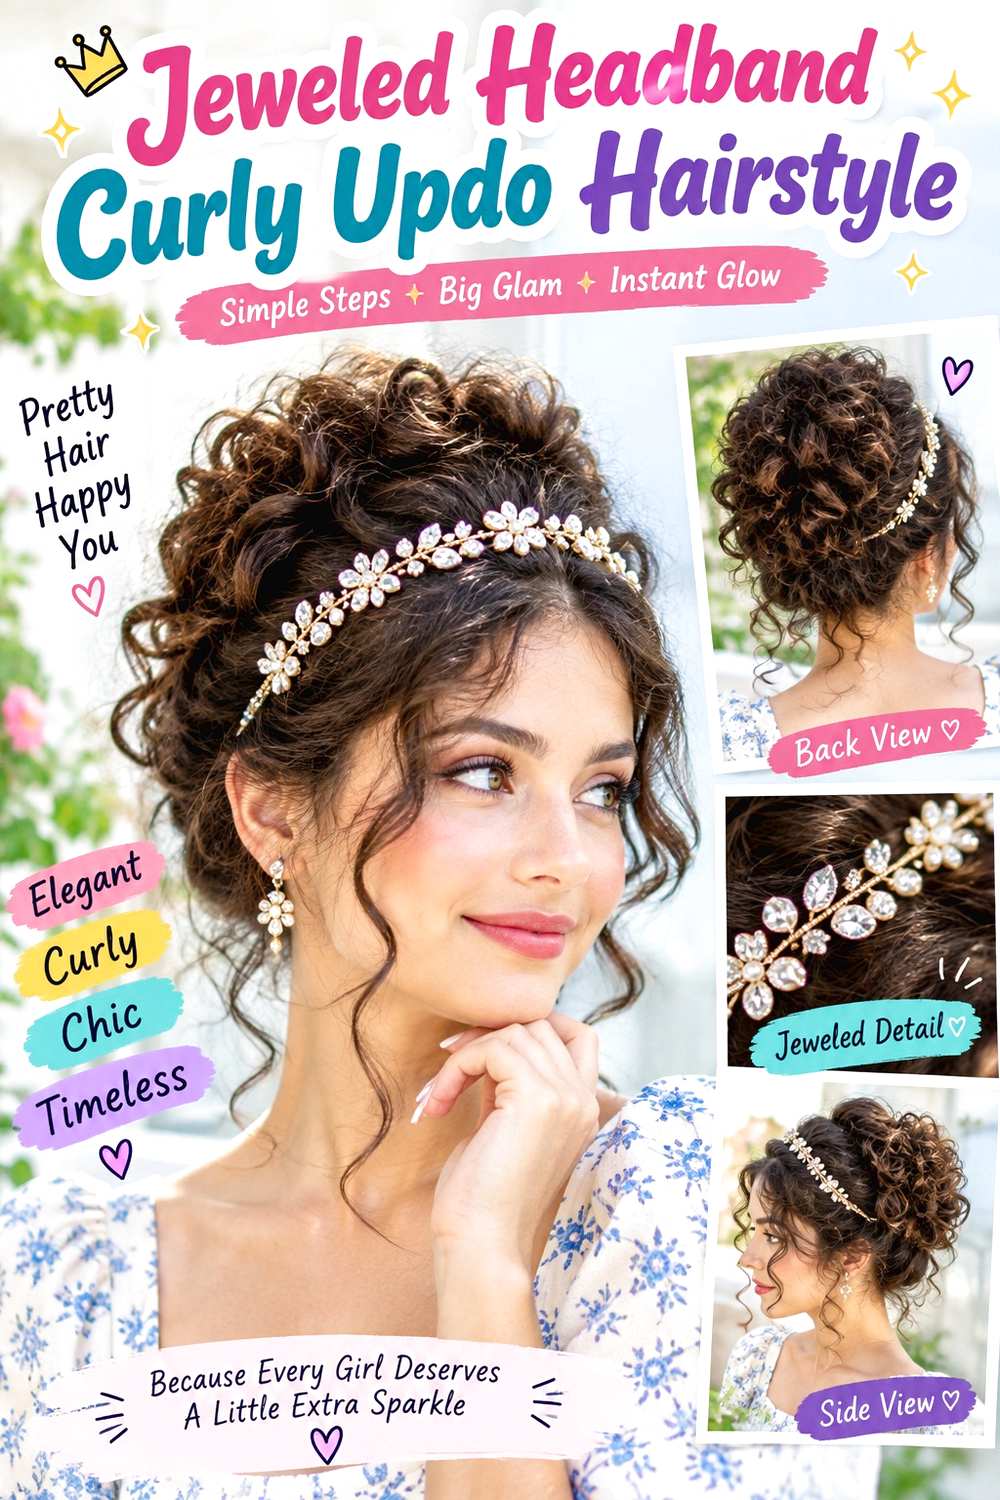
A jeweled headband works best with a curly updo when the accessory frames the front instead of competing with the pinned texture. Gather curls toward the back crown or upper nape, keeping the updo rounded and allowing several defined pieces to curve near the temples. Place the headband behind those front curls and ahead of the main pinned section so each element has its own space.
Medium and long curls can support this formal arrangement, especially when enough length is available to pin securely without excessive tension. Use bobby pins to build the updo, flexible hairspray for light hold, and the jeweled headband as the decorative finish. Small touch-ups before an event may be quick, while creating the full updo from freshly washed hair is a longer process because curls need preparation, drying, and pinning. At a salon appointment, explain the updo height, the amount of loose texture you want, and exactly where the headband should stop before the pinned section. Comfort is important around the ears and temples. If the updo loosens, reinforce its pins rather than using the headband as a brace.
Pro tip:
Finish and secure the updo before placing the jeweled band, then release front curls afterward. This keeps decorative details from catching during the pinning process.
Make It Work for You:
For shorter curly lengths, build a lower pinned shape at the nape rather than forcing height. The jeweled headband still provides the formal focal point.
Watch Out For:
Avoid wedging the headband beneath pinned curls for extra security. Decorative edges can snag; let the updo and accessory maintain separate, stable anchor points.
Sporty Headband Defined Coils Hairstyle
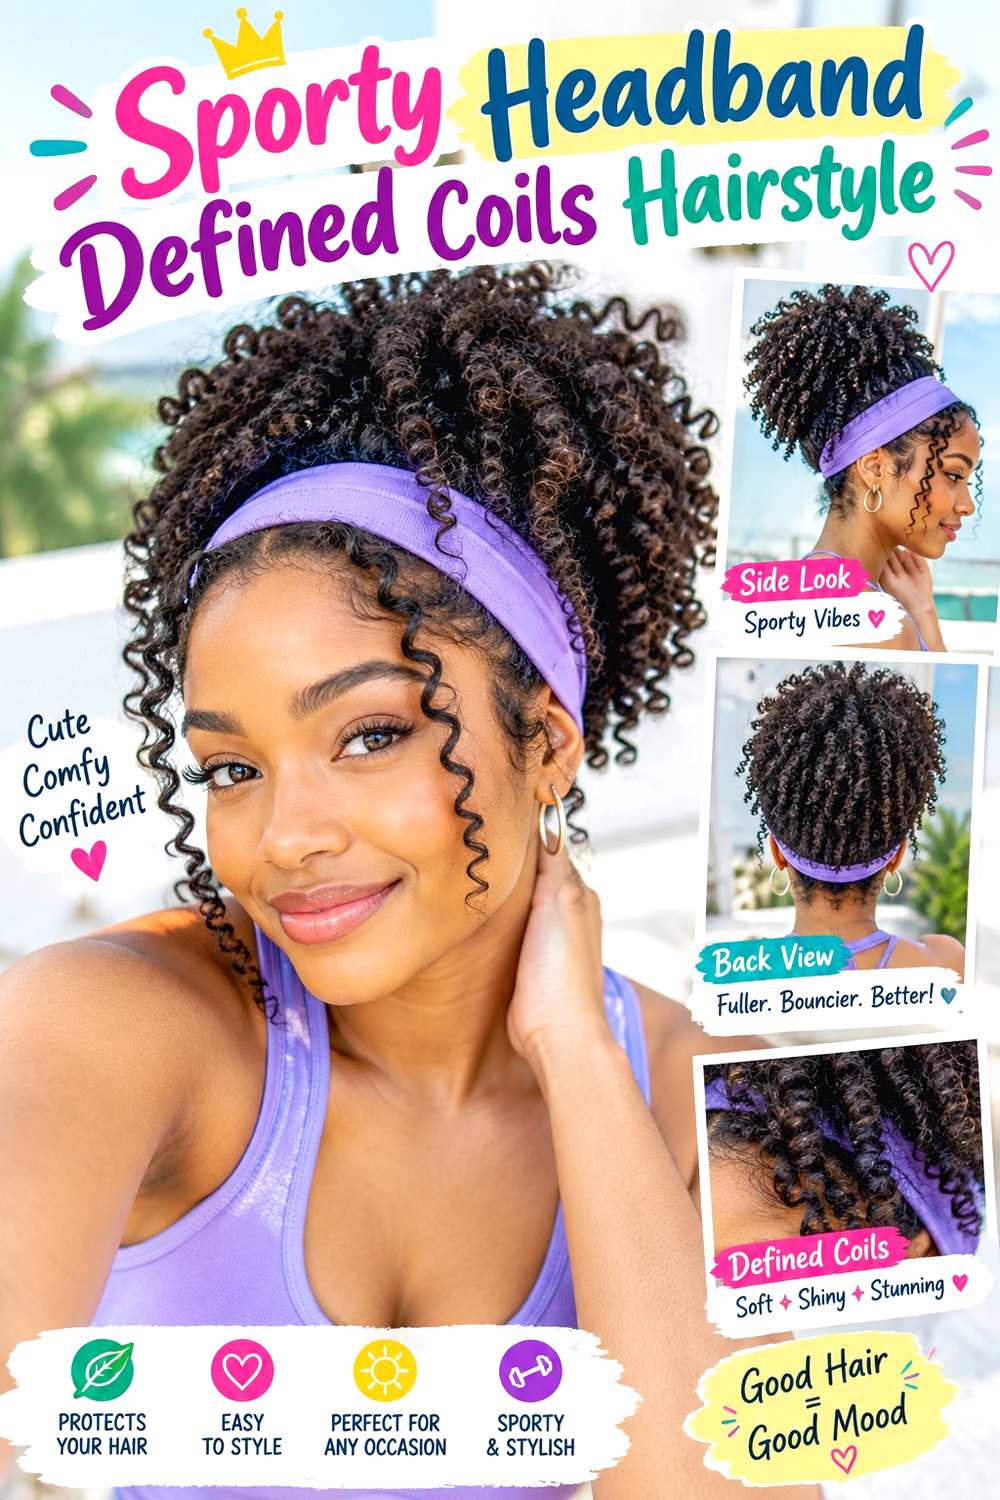
A sporty headband can keep the front controlled while defined coils remain visible across the crown, sides, and back. Position the band along the hairline or just behind it, depending on how much forehead you want exposed. Let the coils expand naturally above and behind the band, keeping the ends springy and avoiding an overly flattened top.
This option suits short to medium coily hair and routines where comfort and reliable hold matter more than decorative detail. Use lightweight leave-in conditioner to refresh dry sections, curl gel to redefine coils that have separated, and a soft moisture-wicking headband for practical grip. A quick refresh can focus on compressed front coils after activity or sleep, while a full wash-day set takes longer because the entire pattern needs definition and drying. If you are having the style prepared professionally, specify whether you want the band directly at the hairline or set farther back with visible front coils. That small placement change affects the whole silhouette. After wear, remove the headband and lift flattened roots before replacing it rather than stacking pressure in the same spot repeatedly.
Pro tip:
Shift the headband a small distance after extended wear if comfortable to do so. Alternating the contact point can reduce one persistent compression line across the coils.
Make It Work for You:
If your coils are longer, push the band slightly farther back and let more height develop above it. The sporty frame remains while the texture gets room to expand.
Watch Out For:
Do not choose grip by tightness alone. A painfully snug band can flatten coils and irritate the hairline; use a softer fit with stable placement.
Bow Headband Loose Curly Lob Hairstyle
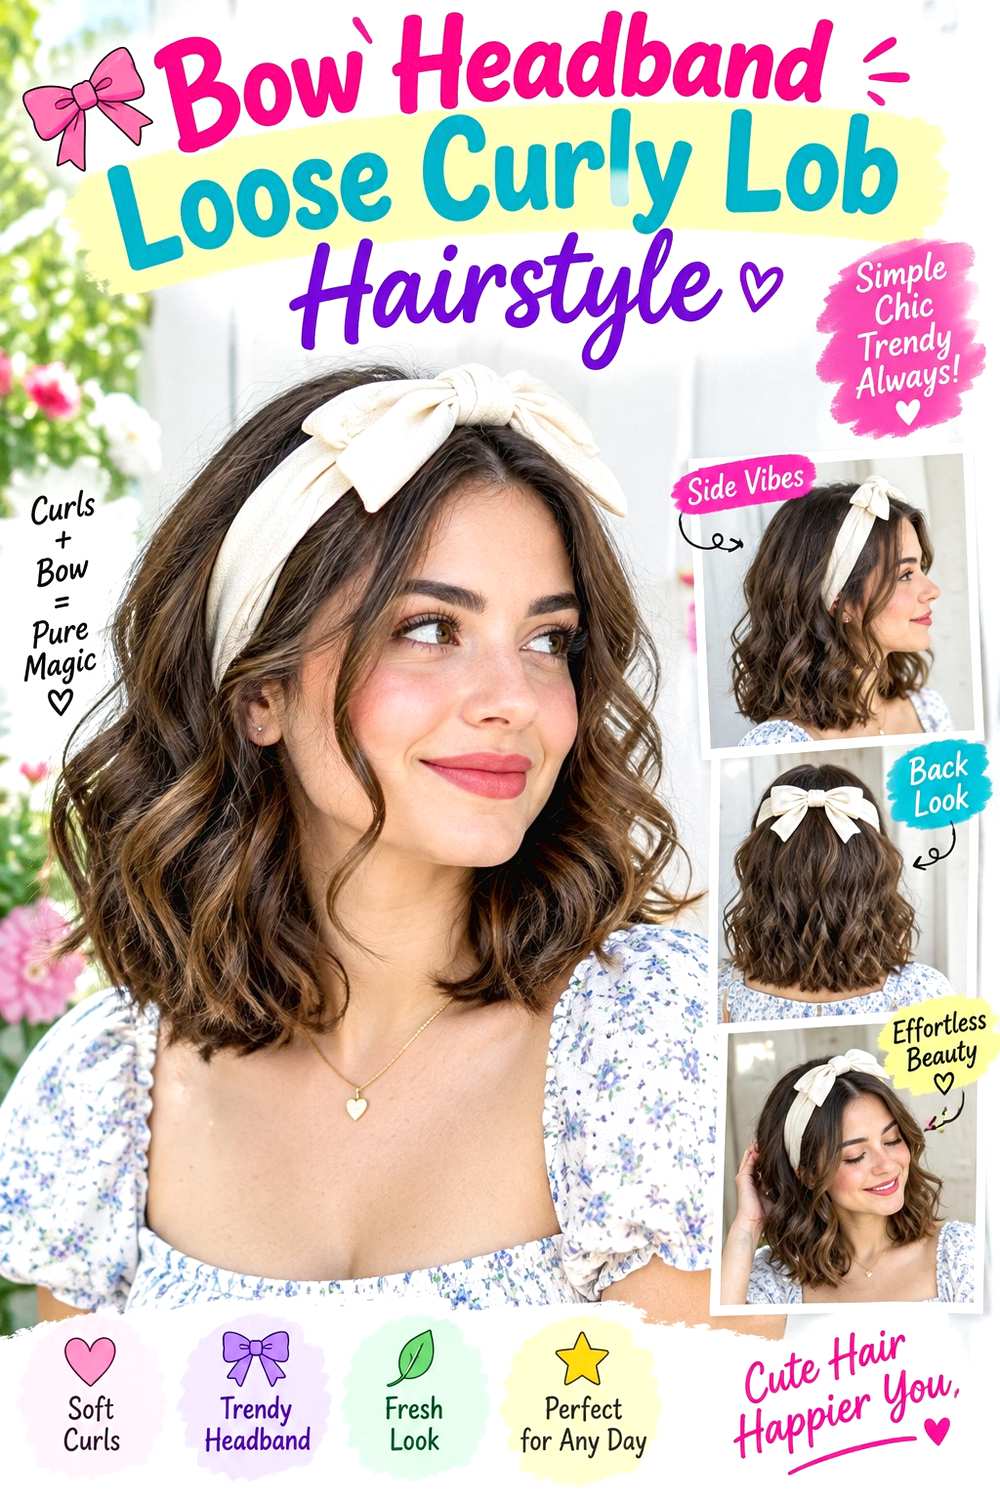
A bow headband adds a clear focal point to a curly lob that sits around the shoulders or collarbone. Keep the bow centered for symmetry or shift it slightly to one side, then allow loose curls to move around the accessory. A center or gentle side part can remain visible, while the ends stay full enough to preserve the lob’s compact outline.
Loose curls and medium ringlets work especially well because the bow contrasts with visible movement without requiring an updo. Use lightweight curl mousse for flexible support, a diffuser to preserve the curl pattern, and the bow headband as the decorative finish. A short refresh between washes can focus on the crown and several face-framing curls; a full wash-day style takes longer because the entire lob needs shaping and drying. If discussing the finish with a stylist, specify where the lob should visually sit when dry and whether you prefer fuller ends or more movement around the face. The headband should complement the existing cut rather than require new layers. If the bow begins tilting, adjust the band itself instead of pulling curls underneath it for support.
Pro tip:
Place an off-center bow on the side with slightly less curl volume. The decoration fills that visual space without covering the fullest side of the hairstyle.
Make It Work for You:
For tighter curls, choose a smaller bow so the accessory does not compete with the compact curl pattern. Keep the lob’s natural volume as the dominant feature.
Watch Out For:
Avoid using loose curls as an anchor for the bow. The band should fit independently; trapped curl groups can stretch or tangle when the accessory shifts.
Minimal Headband Tucked Curls Hairstyle

A minimal headband with tucked curls creates one of the cleanest shapes in this group. Place a slim, simple band behind the hairline, then guide the curls near the temples behind the ears while leaving the lower lengths free. A center or soft side part can remain visible, and the ends should keep their natural movement rather than being stretched straight for a smoother outline.
This works best on short-to-medium curls that can sit comfortably behind the ears without constant tension. Use lightweight curl cream to control and define the front, small bobby pins if a discreet anchor is needed behind the ears, and a slim headband to frame the crown. A next-day refresh is usually quick because only the tucked sections and visible top curls need reshaping; a full wash-day finish takes longer because all the curls need drying. If a stylist is arranging the look, explain how much hair should stay tucked and how much volume you want around the lower sides. The accessory should not cover the ears heavily. When curls spring forward again, reset the tuck rather than pushing the headband lower to hold them.
Pro tip:
Tuck the curls only after the headband is in place. You can then see exactly how much texture needs to move behind the ears for balance.
Make It Work for You:
If shorter curls will not stay tucked, pin only the hidden section directly behind each ear. Keep the visible ends free so the overall finish still looks soft.
Watch Out For:
Do not flatten the entire side just to maintain the tuck. Secure the small problem area instead, preserving volume through the lower curls and back.
Conclusion
Headband hairstyles for curly hair can range from loose wash-and-go shapes to high puffs, low buns, ponytails, short crops, and formal updos. Slim bands expose more curl definition, while padded, knotted, scarf, or jeweled versions create a stronger focal point. Center parts give balanced framing, side parts add direction, and tucked or gathered styles reduce volume around the face. Your natural texture, density, shrinkage, and finished length should guide placement more than a fixed rule. Consider effort too: defined loose curls may require more wash-day setting, while a puff or bun can offer a quicker refresh. Whatever shape you choose, comfortable grip and enough room for the curls usually matter more than extra tightness.
Before Your Salon Visit
Choose one or two favorite references before your salon or styling appointment and point to the exact details you want: headband width, placement, parting, face-framing curls, puff or bun height, and where the volume sits. Discuss your natural curl pattern, density, shrinkage, finished length, upkeep, and normal styling routine. Because most headband looks are temporary, focus on comfortable anchoring and curl placement rather than asking for a new haircut unless a cut was already part of your plan.
FAQs
Do headbands flatten curly hair?
They can flatten curls where the band presses, especially if it is tight or placed over damp hair. Let curls dry in their intended shape first, choose comfortable pressure, and refresh only the compressed sections afterward. Wider bands generally cover more root area, while slim bands leave more texture exposed.
What type of headband stays best on curly hair?
A secure choice depends on your curl density, head shape, and hairstyle underneath. Soft fabric, satin-covered, elastic, or textured bands can all work. Stable placement matters more than maximum tightness, so choose a band that stays put without pinching behind the ears or pulling at the hairline.
Can I wear a headband with very short curly hair?
Yes. Short curls can pair especially well with slim, twisted, sporty, or padded bands because the accessory provides structure without requiring a ponytail or bun. Keep enough curl visible around the crown or sides, and choose the headband scale according to how much hair you want exposed.
Should I put a headband on wet or dry curls?
Mostly dry or fully dry curls are usually easier to preserve because their final shape and shrinkage are already visible. A band placed over wet roots may leave a compressed line as the hair dries. If you refresh with water, dampen selected curls rather than soaking the whole area beneath the accessory.