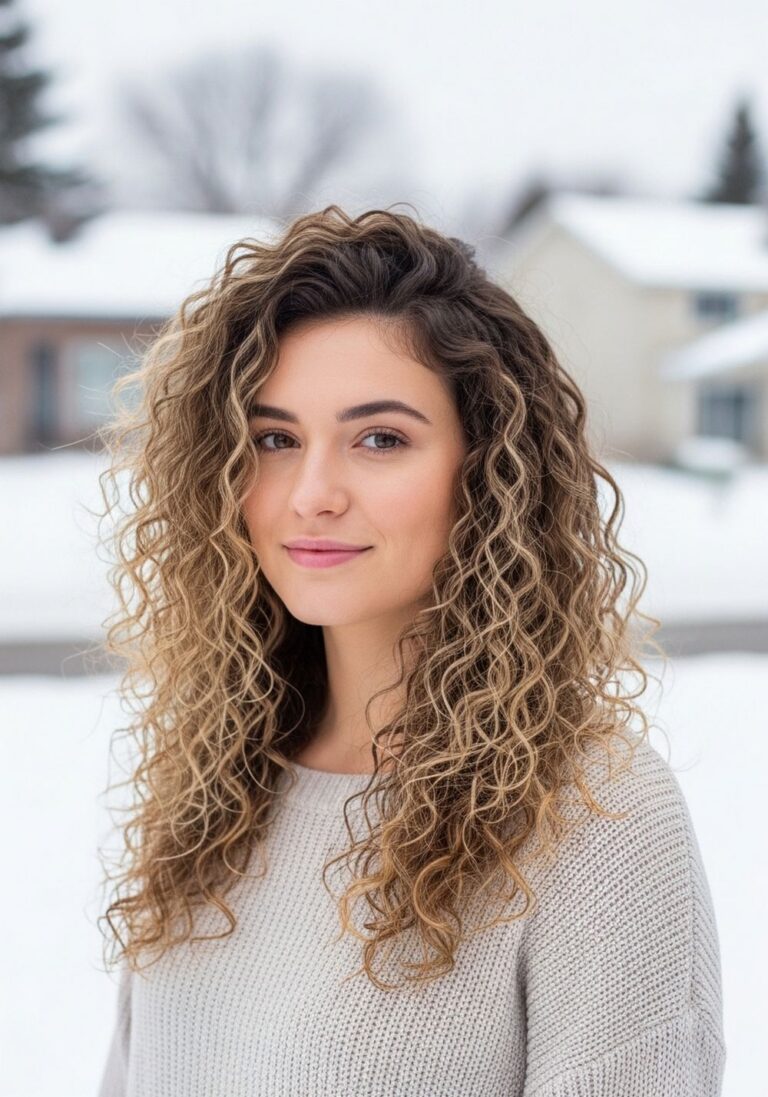
12 Cropped Curly Hairstyle Ideas

Cropped curly hairstyle ideas can range from close, tapered shapes to fuller cuts that leave enough length for curls to bend, coil, and move around the face. What connects them is a short overall length combined with deliberate curl placement. Some keep a solid rounded outline, while others use short layers, a fringe, an open forehead, or extra crown height. The finished effect depends as much on shrinkage and curl pattern as the cutting shape itself.
Natural curls, waves, and coils can all work at cropped lengths, but density changes how the silhouette behaves. Dense hair may need carefully placed bulk reduction, while lower-density hair can benefit from keeping more weight through selected areas. Face framing is equally flexible: curls can skim the brows, expose the forehead, sit close beside the temples, or extend farther through the front.
Styling effort varies considerably. A naturally cooperative crop may need only a short damp refresh, while a highly defined finish can require a full wash-day routine. Regular reshaping also matters because a small amount of growth can noticeably change a short silhouette. The ideas below compare these practical differences.
Quick List
- Soft Curly Pixie Hairstyle
- Rounded Curly Crop Hairstyle
- Side-Parted Curly Crop Hairstyle
- Curly Crop With Wispy Fringe Hairstyle
- Tapered Curly Crop Hairstyle
- Full-Fringe Curly Crop Hairstyle
- Layered Curly Shag Crop Hairstyle
- Sculpted Coily Crop Hairstyle
- Asymmetrical Curly Crop Hairstyle
- Curly Crop With Long Front Hairstyle
- Airy Crown Curly Crop Hairstyle
- Defined Wet-Look Curly Crop Hairstyle
Soft Curly Pixie Hairstyle

A little extra length across the top gives a curly pixie room to show its pattern without losing the neat proportions of a crop. The sides and back sit closer to the head, while short curls through the crown create gentle lift. Keeping the front slightly longer allows a few pieces to fall toward the forehead instead of forming a rigid fringe. The ends should look separated and mobile rather than carved into one heavy line.
This shape is useful for wavy to curly textures that can form visible bends at short lengths. Dense hair may need controlled weight reduction inside the fullest areas, while lower density can benefit from retaining more coverage near the temples. For styling, a lightweight leave-in conditioner helps maintain softness, curl gel supports grouping, and a diffuser can dry the top without flattening it. A damp morning refresh can be brief; a complete wash, application, and dry takes longer depending on density and curl pattern.
At the salon, explain how much visible curl you want left on top after shrinkage rather than requesting only a generic pixie length. Reshaping becomes useful when the sides lose their close outline or the crown begins falling differently.
Pro tip:
Refresh only the curls that have flattened overnight. Dampen those sections lightly, reshape them with your fingers, and leave curls that are still defined alone so the overall crop does not become unnecessarily wet.
Make It Work for You:
If your curls shrink considerably, keep additional length through the crown and front. The crop can still read as short while allowing enough finished length for the curl pattern to remain visible.
Watch Out For:
Avoid loading the short roots with heavy product. Too much can collapse the crown and make separated curls join into larger sections; begin with a small amount and add only where needed.
Rounded Curly Crop Hairstyle

The defining feature here is an even, curved silhouette that follows the head while keeping enough fullness around the sides. Curls sit in a compact halo, with the front blending naturally into the overall outline instead of becoming a separate heavy fringe. Layers can support the rounded shape, but their placement should preserve enough length at the outer edge to prevent a choppy finish. Balanced volume matters more than a perfectly symmetrical curl pattern.
Medium to dense curls can support this fuller outline particularly well. If hair expands strongly at the sides, the stylist can assess whether some internal bulk should be reduced without thinning away the visible perimeter. A lightweight curl cream encourages curl grouping, a wide-tooth comb can distribute product on wet hair, and a diffuser helps dry the shape with less disruption. Between washes, refreshing several flattened sections is much quicker than completely rewetting and drying the crop.
Ask your stylist where the widest part of the finished silhouette should sit and how the cut will change after shrinkage. As it grows, watch for excess width or an uneven bottom edge rather than relying on a fixed trimming calendar. A controlled reshape can restore the intended curve while retaining useful length.
Pro tip:
While drying, move your head gently rather than repeatedly pulling apart the curls. Allowing groups to set in slightly different directions helps the rounded outline retain movement instead of looking overly arranged.
Make It Work for You:
For lower-density curls, ask about preserving more weight around the outer shape and using fewer short layers. You can maintain the rounded impression without removing valuable fullness from already lighter areas.
Watch Out For:
Removing too much bulk from the sides can leave the crop narrow at the middle and disconnected at the ends. Discuss controlled internal adjustment rather than assuming extensive thinning will improve the silhouette.
Side-Parted Curly Crop Hairstyle
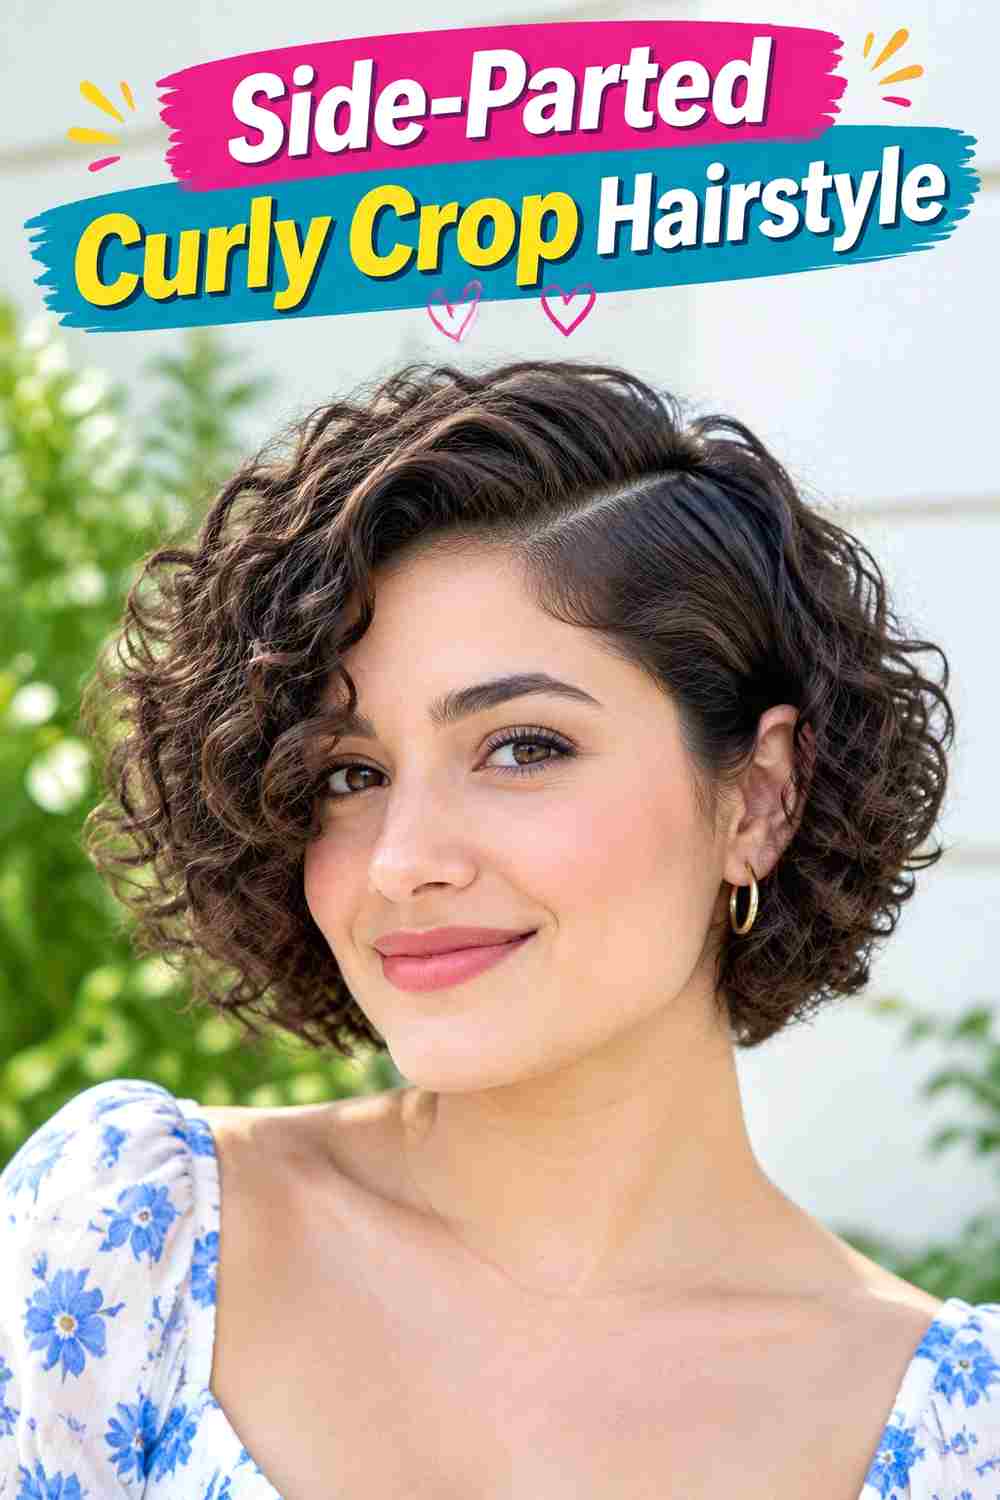
A defined side part shifts the visual weight of a short curly cut, creating a fuller sweep on one side and a closer shape on the other. The longer side can curve toward the brow or temple, while compact layers around the back keep the crop balanced. Instead of forcing every curl into place, the asymmetry should come mainly from the parting and length distribution, leaving individual curls free to move.
This option works well when your natural growth pattern already favors one direction or when you prefer an open section of forehead. Wavy and curly textures can both carry the design, although very springy curls may need more front length to produce the same sweep after shrinkage. Use a curl mousse for light support, a diffuser to dry the roots in their intended direction, and a small amount of flexible gel to reinforce the front. A morning refresh can focus on the part; full wash-day styling takes longer.
Show your stylist exactly where you want the part to sit and where the longest front curl should finish when dry. That detail helps determine the balance of the cut. Refresh the shape when growth makes the heavier side drop or causes the part to lose its deliberate contrast.
Pro tip:
Set the part while the roots are still damp, then avoid moving it repeatedly as the hair dries. Establishing the direction early makes the fuller side easier to maintain without excessive manipulation.
Make It Work for You:
If you prefer less asymmetry, move the part only slightly off center and keep the two sides closer in length. You will retain directional movement while making the overall silhouette more balanced.
Watch Out For:
Do not force a sharp part against a strong natural growth pattern every morning. If the roots constantly spring back, adjust the part location slightly so styling works with their direction rather than against it.
Curly Crop With Wispy Fringe Hairstyle

A narrow, separated fringe makes a cropped curly cut feel lighter across the forehead. Instead of creating a solid band of curls, a small front section falls in individual pieces around brow level, with longer outer curls blending toward the temples. Short layers elsewhere can keep the crown buoyant while the sides remain compact. The visible gaps in the fringe are part of the design, so perfect coverage is unnecessary.
This works especially well for readers who want face framing without committing to a dense curly fringe. Curl pattern and shrinkage are important because a front section that looks long while wet may spring considerably higher when dry. A lightweight leave-in conditioner adds slip, curl gel gives the fringe definition, and a diffuser can dry it with minimal disturbance. Between washes, rewetting only two or three fringe curls is often a quick job compared with resetting the entire crop.
At the salon, discuss the fringe at its dry, finished position and point out how narrow you want the fringe section to be. Its upkeep may be more frequent than the rest of the cut because small changes in length alter where those curls sit. Trim when they stop falling at your preferred landmark rather than following an inflexible schedule.
Pro tip:
Shape the fringe in small curl groups while it is damp, then let it dry before deciding whether it needs further separation. Breaking up wet curls too early can make the front appear fuzzier.
Make It Work for You:
For a stronger curl pattern, leave the fringe slightly longer so shrinkage can occur without exposing much more forehead than intended. Keep the separated, narrow arrangement to preserve the wispy effect.
Watch Out For:
Avoid judging fringe length by pulling a curl straight. Its stretched length does not show where it naturally rests; assess the dry curl instead before deciding whether additional trimming is actually needed.
Tapered Curly Crop Hairstyle

Closer sides and a fuller top give this crop its clear tapered structure. The neckline and area around the ears stay compact, while curls gain gradually more length toward the crown. The top can remain softly irregular rather than perfectly rounded, and a short front section can sit upward or angle toward the forehead. This contrast concentrates most of the movement above the temples.
The shape suits curls and coils that hold visible definition at short lengths, particularly when you enjoy a clean lower outline. Higher density can create substantial top volume, while lower density may call for less dramatic tapering so the transition does not expose more scalp than desired. A moisturizing curl lotion keeps short sections pliable, curl gel helps definition last, and a diffuser can dry the longer top without crushing it. Refreshing the top is relatively quick, although a complete wash and dry still depends on density.
Tell your stylist how close you want the sides to appear and where you want the increase in length to begin. That transition point strongly affects the silhouette. Because the tapered area changes visibly as it grows, you may want it reshaped whenever the sides stop looking deliberately close, even if the top still feels manageable.
Pro tip:
When refreshing, apply water and product mainly to the longer top instead of coating the already compact sides. This keeps the lower shape neat and prevents unnecessary buildup around the hairline.
Make It Work for You:
If you prefer softer grow-out, request a less dramatic difference between the sides and crown. The tapered structure remains visible, but new growth will create a gentler change in the overall proportions.
Watch Out For:
A taper that rises too high can remove fullness you intended to keep around the temples. Point to the exact transition area before cutting so the compact section does not extend farther upward than expected.
Full-Fringe Curly Crop Hairstyle

A fuller curly fringe puts more texture across the forehead than the wispy version, with several curl groups forming a noticeable front edge. The outer pieces can extend slightly longer so the fringe merges into the sides rather than ending abruptly. Behind it, a cropped rounded shape keeps enough crown volume to balance the stronger front. Movement comes from individual curls, while the overall outline remains compact.
Curly and coily textures can both support the idea, provided the finished fringe length accounts for shrinkage and growth direction. Dense hair can create a particularly substantial front, although the fringe section should not automatically be made wider just to remove bulk elsewhere. A curl cream helps encourage cohesive groups, a styling gel adds hold, and a diffuser supports controlled drying. A fringe-only refresh may be short; washing, defining, and fully drying every curl requires more time.
At your appointment, discuss both the width and dry resting length of the fringe. Ask where the outer corners will blend because that detail affects how separate the fringe appears from the crop. Upkeep is driven mainly by the front: once curls consistently sit above or below your preferred position, a careful fringe reshape may be useful before the whole cut needs attention.
Pro tip:
Dry the fringe close to its normal resting position instead of stretching it downward for extra length. Letting the curl pattern contract naturally gives you a more realistic view of the finished front.
Make It Work for You:
If your density is lower, use a slightly narrower fringe section and keep the surrounding sides fuller. You can retain the strong curly front without borrowing so much hair that other areas appear sparse.
Watch Out For:
Do not keep trimming individual curls whenever one springs higher than its neighbors. Natural variation adds texture; repeated correction can gradually create an unexpectedly short or uneven fringe when the pattern shifts.
Layered Curly Shag Crop Hairstyle

Short layers and an intentionally broken outline distinguish this crop from the smoother rounded options. The crown carries noticeable lift, curls around the temples sit at varied lengths, and a loose fringe can merge into cheekbone-level pieces. The perimeter is less solid, allowing individual ends to flick outward or contract into separate curl groups. That irregular movement creates the shag influence without requiring long hair.
The design can work for wavy, curly, and some coily patterns, but the amount of layering should respond to density. Removing too much weight from sparse ends can weaken the shape, while dense curls may benefit from carefully distributed layers that prevent all the fullness from collecting at one level. Use lightweight mousse for airy support, a diffuser for controlled volume, and flexible gel on selected curl groups that need extra definition. A quick refresh can revive the crown; recreating the full layered texture after washing takes longer.
At the salon, identify where you want the shortest crown layer to finish when dry. That landmark influences both height and how the lower curls connect. As the crop grows, reshaping becomes useful when the layers begin merging into one heavy level or the fringe loses its intended relationship with the sides.
Pro tip:
For extra crown movement, dry the roots in more than one direction before allowing them to settle. Concentrate this technique near the top rather than expanding every side section equally.
Make It Work for You:
If your ends look light easily, keep stronger weight around the lower outline and concentrate shorter layering through the crown and face frame. The cut can retain shaggy movement without sacrificing all perimeter fullness.
Watch Out For:
Too many short layers can make highly springy curls stack outward rather than fall into the intended shape. Discuss shrinkage first and place the shortest sections where additional lift is genuinely wanted.
Sculpted Coily Crop Hairstyle
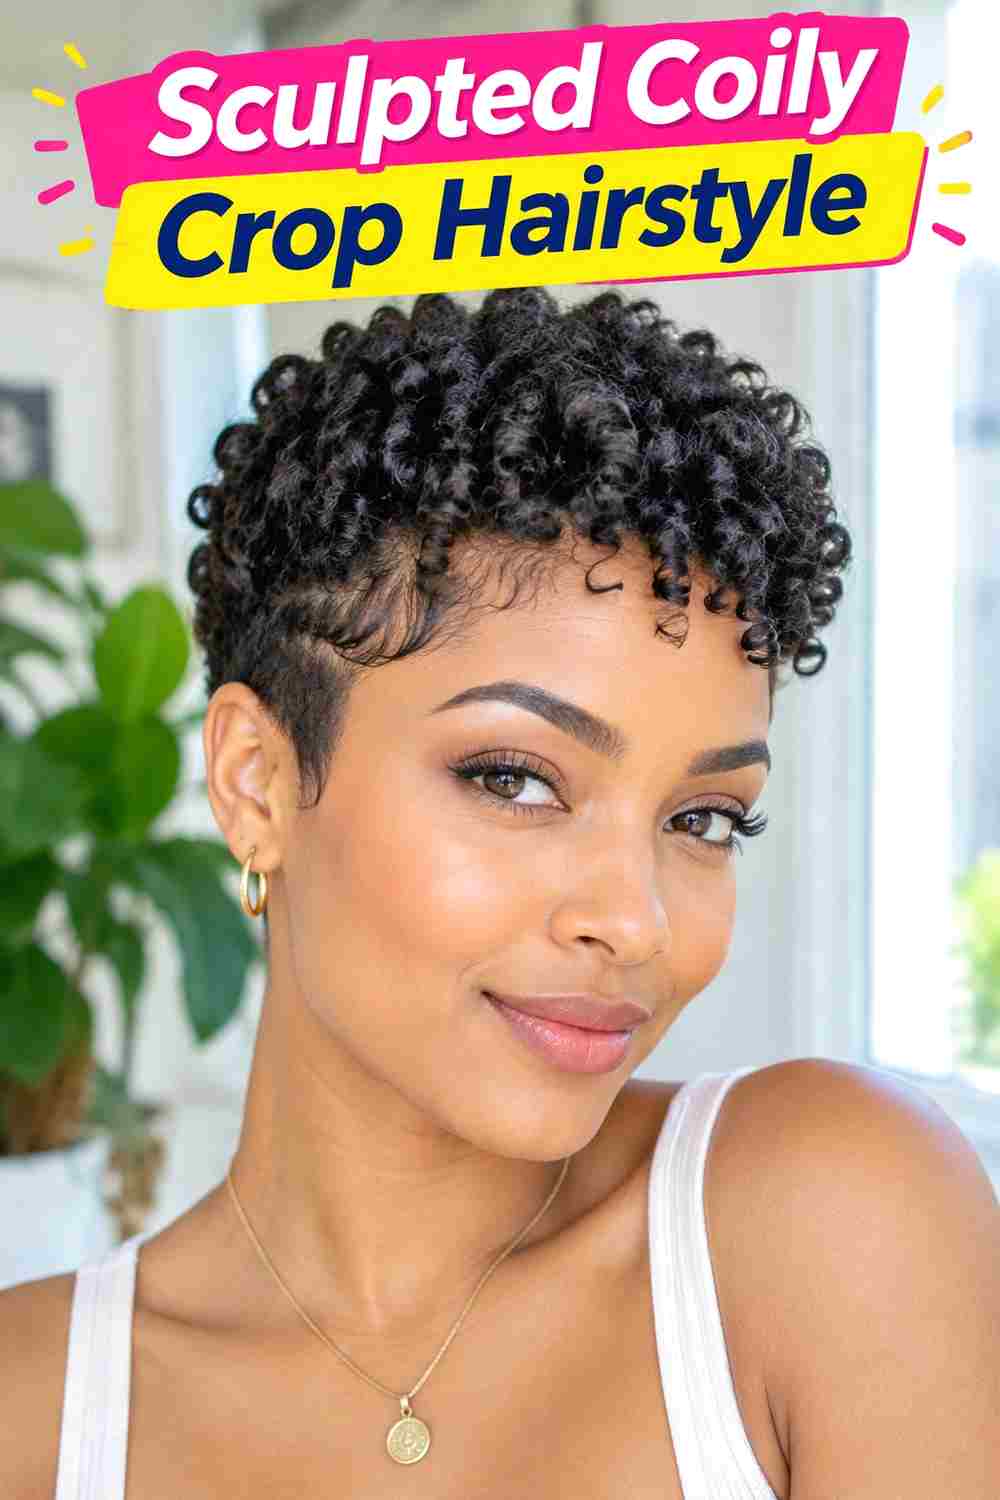
A sculpted crop celebrates compact coils through a deliberate silhouette rather than asking them to mimic loose curls. The sides can sit closer while the crown remains slightly longer, creating controlled height with a softly rounded top. The front may follow the hairline or extend into short coiled pieces, depending on the amount of forehead coverage preferred. Definition and shape work together, but every coil does not need identical placement.
Coily textures with noticeable shrinkage need finished length considered carefully. Dense hair can create a substantial sculpted outline, while lower density may benefit from retaining more length in areas where coverage matters. A moisturizing leave-in conditioner supports pliability, a defining gel encourages coil grouping, and a hood dryer can provide hands-off drying when available. Small sections can be refreshed between washes, whereas a complete detangle, style, and dry naturally requires more time.
When discussing the cut, describe the silhouette you want when the hair is dry and fully contracted. Point out where the crown should peak and how close you want the sides. This is more useful than relying only on stretched measurements. Reassess the shape when growth changes the balance between the crown and sides or when the outer outline stops feeling intentional.
Pro tip:
After applying product, give selected front or crown coils a gentle finger twist only where definition needs help. Leaving already well-formed groups untouched reduces handling and keeps the finished texture varied rather than overly uniform.
Make It Work for You:
If shrinkage is substantial, retain more cutting length than the visible finished shape suggests. Your stylist can assess the dry pattern so the crop stays compact without becoming shorter than you intended.
Watch Out For:
Avoid treating stretched length as the final silhouette. Coils can contract by different amounts across the head, so evaluate how each area sits naturally before deciding where more length should be removed.
Asymmetrical Curly Crop Hairstyle

Unequal length around the front creates the personality of this crop. One side stays relatively compact around the temple, while the opposite side carries longer curls that can fall toward the brow or upper cheek. The back remains short enough to preserve a cropped silhouette, and the crown connects the two sides without needing an abrupt step. A side part can strengthen the imbalance, but the cut itself should still carry some asymmetry.
This design suits readers who enjoy directional movement and do not mind styling one side more deliberately. Wavy or curly hair can show the longer sweep clearly; springier patterns may require additional cutting length to achieve the same visible drop. Use curl mousse to provide flexible support, a diffuser to establish the overall shape, and a light styling gel to hold the longer front pieces. A morning adjustment can focus almost entirely on that side, while wash-day styling requires resetting the full crop.
At the salon, identify exactly where the longest curl should finish when dry and how much shorter you want the opposite temple. Those two landmarks establish the contrast. As hair grows, the difference gradually becomes less obvious, so reshaping is useful when the longer side no longer looks intentionally distinct.
Pro tip:
Direct the longer front section toward its intended side while damp, then let it set before separating individual curls. Establishing direction first makes the asymmetry clearer without requiring stiff product or constant repositioning.
Make It Work for You:
For a subtler version, reduce the length difference between the two sides while retaining the off-center part. You still get directional movement, but the crop will appear more balanced as it grows.
Watch Out For:
Do not create all the contrast by flattening one side with product. The asymmetry should remain visible through length and placement; excessive product can simply make one area look weighed down.
Curly Crop With Long Front Hairstyle

Leaving noticeably more length at the front creates a crop that can change character depending on how those curls are positioned. The back and sides remain short, but the front extends toward the brows or temples and can be worn forward, loosely parted, or swept aside. Layers should connect the longer front to the crown so it moves naturally rather than appearing like a separate section attached to a short cut.
This option is practical for anyone who wants a cropped overall length without giving up flexible face framing. Wavy and curly textures can make the length difference particularly visible, while stronger shrinkage requires careful planning of the front. A curl cream keeps the longer pieces supple, a diffuser helps establish their direction, and flexible hairspray can provide light support once dry. Restyling only the front can be a quick refresh, whereas redefining the entire crop after washing takes more time.
Tell your stylist where the longest front curl should land in its natural dry state and how gradually you want it to connect to the shorter sides. Upkeep can focus on preserving that relationship. If the back becomes bulky before the front reaches an unwanted length, reshaping the shorter areas may maintain the crop without sacrificing the feature you intentionally kept long.
Pro tip:
Change the front direction only after lightly dampening it. Trying to force completely dry curls from forward to side-swept placement can separate their groups and create frizz without actually resetting the roots.
Make It Work for You:
If you dislike hair falling near your eyes, keep the front long enough to show contrast but direct it diagonally toward the temple. The extended front remains the defining feature without requiring straight-down fringe placement.
Watch Out For:
Avoid shortening the front simply because it appears uneven while wet. Curl groups contract differently, so wait until the pattern is dry and settled before judging whether the visible lengths actually need correction.
Airy Crown Curly Crop Hairstyle

Height at the crown gives this short cut its distinctive proportion. The sides remain controlled and relatively close, while curls through the upper section are layered to create visible lift without forming a dense, helmet-like dome. The forehead can stay mostly open with short curls directed upward or slightly to one side. Keeping the ends separated helps the elevated crown feel light and mobile.
The design works particularly well when your texture naturally develops root lift, though both density and curl strength affect the result. Dense curls may require thoughtful bulk placement so height stays concentrated at the top instead of spreading equally through the sides. A lightweight mousse supports the roots, a diffuser helps dry them away from the scalp, and a wide-tooth pick can gently lift selected dry areas. A quick crown refresh is relatively short; a full wash-day set takes longer according to density and drying time.
At the salon, point to where you want the shortest crown layers to begin and how much side fullness you want to retain. Cutting everything uniformly short can remove the contrast that makes the shape work. Plan a reshape once growth causes the crown to collapse into the sides or shifts the widest point lower than intended.
Pro tip:
Once the hair is fully dry, lift only the roots at the crown with the pick and leave the curl ends undisturbed. This increases height while preserving the definition you created during drying.
Make It Work for You:
For lower-density hair, use less layering and rely more on root direction for height. Keeping additional length through the outer sections can preserve coverage while the crown still gains an airy appearance.
Watch Out For:
Adding equal volume everywhere can turn the intended tall silhouette into a wide one. Keep most root lifting above the temples and use less manipulation at the sides so the crown remains the focus.
Defined Wet-Look Curly Crop Hairstyle

Glossy, strongly grouped curls give this crop a sleek wet-look impression while the actual shape stays short and textured. The roots can sit relatively controlled, with definition becoming more obvious through the crown and front. A subtle side or center part adds structure, and the curl ends remain clearly separated rather than brushed into softness. The finish is the main feature, so the underlying cut can be fairly simple.
Curly and coily textures that form distinct groups can adapt well to this approach, although the amount of product should match density and strand thickness. A moisturizing leave-in conditioner provides slip, strong-hold gel creates the defined finish, and a wide-tooth comb helps distribute product before curls are arranged. A small next-day refresh may take only a few minutes, while completely recreating the finish after washing involves wetter hair, careful product distribution, and full drying time.
For the haircut itself, tell your stylist whether you want a rounded perimeter, closer sides, or extra front length beneath the defined finish. Styling cannot compensate indefinitely for a shape you dislike. As the cut grows, watch where bulk collects when the curls are fully defined; that gives a useful clue about when reshaping would restore the intended cropped proportions.
Pro tip:
Apply the defining gel while the hair is evenly damp, then arrange the visible front groups before leaving them to set. Repeatedly touching the curls during drying can break apart the glossy, cohesive finish.
Make It Work for You:
If heavy products quickly flatten your hair, use less gel near the roots and concentrate definition through the mid-sections and ends. You can preserve the grouped finish while keeping more natural crown lift.
Watch Out For:
Do not confuse a wet-look finish with hair that must remain physically wet. Allow the crop to dry properly after styling; continually rewetting it simply to maintain shine can disrupt hold and definition.
Conclusion
Cropped curly hairstyle ideas can look dramatically different depending on where length and volume are kept. A rounded crop preserves balanced fullness, while tapered sides or an airy crown create stronger contrast. Fringe choices range from light, separated curls to fuller forehead coverage, and longer front sections offer more styling flexibility. Curl and coil shrinkage should influence finished length, while density helps determine how much layering or internal weight adjustment is useful. Parting also changes emphasis without requiring a completely different cut. Natural definition usually means less daily manipulation, whereas highly sculpted or glossy finishes can demand more styling attention. The most practical choice is one that works with your natural texture, preferred face framing, maintenance tolerance, and realistic wash-day routine.
Before Your Salon Visit
Choose one or two favorite references and save clear views of the features that matter most. Discuss your natural texture, density, shrinkage, face shape, preferred finished length, usual styling routine, and how much upkeep you want. Point specifically to the fringe length, crown layers, side volume, taper placement, parting, or curl finish you like. If you prefer one idea’s front and another idea’s overall silhouette, explain that clearly so your stylist can assess how those elements could work together.
FAQs
How short can curly hair go while still showing its curl pattern?
There is no single minimum length because curl patterns contract differently. Some curls form clearly at very short lengths, while others need more hair to complete a visible bend or coil. Ask your stylist to consider your pattern in its dry state and the amount of shrinkage you normally experience.
Do cropped curly hairstyles require frequent salon visits?
They can require noticeable reshaping because growth changes short proportions quickly, but the useful interval varies. Watch the silhouette instead of following one schedule. When a taper disappears, the sides become wider than intended, or layers stop sitting together, it may be time to discuss a reshape.
Can low-density hair work with a cropped curly cut?
Yes, but layer and perimeter choices matter. Keeping more weight in areas where you want visible fullness can be more useful than heavily layering the entire crop. Discuss where your density is strongest and where you want coverage so the shape can be adjusted rather than applying one cutting formula everywhere.
Do I need heat to style a cropped curly hairstyle?
Not necessarily. Many cropped curls can air-dry, particularly when the desired finish follows the natural pattern. A diffuser can shorten drying time or help control volume, but it is optional for many routines. If you do use heated drying, choose an appropriate heat protectant and avoid assuming heat is required for polish.