14 Headscarf Hairstyles With Loose Waves
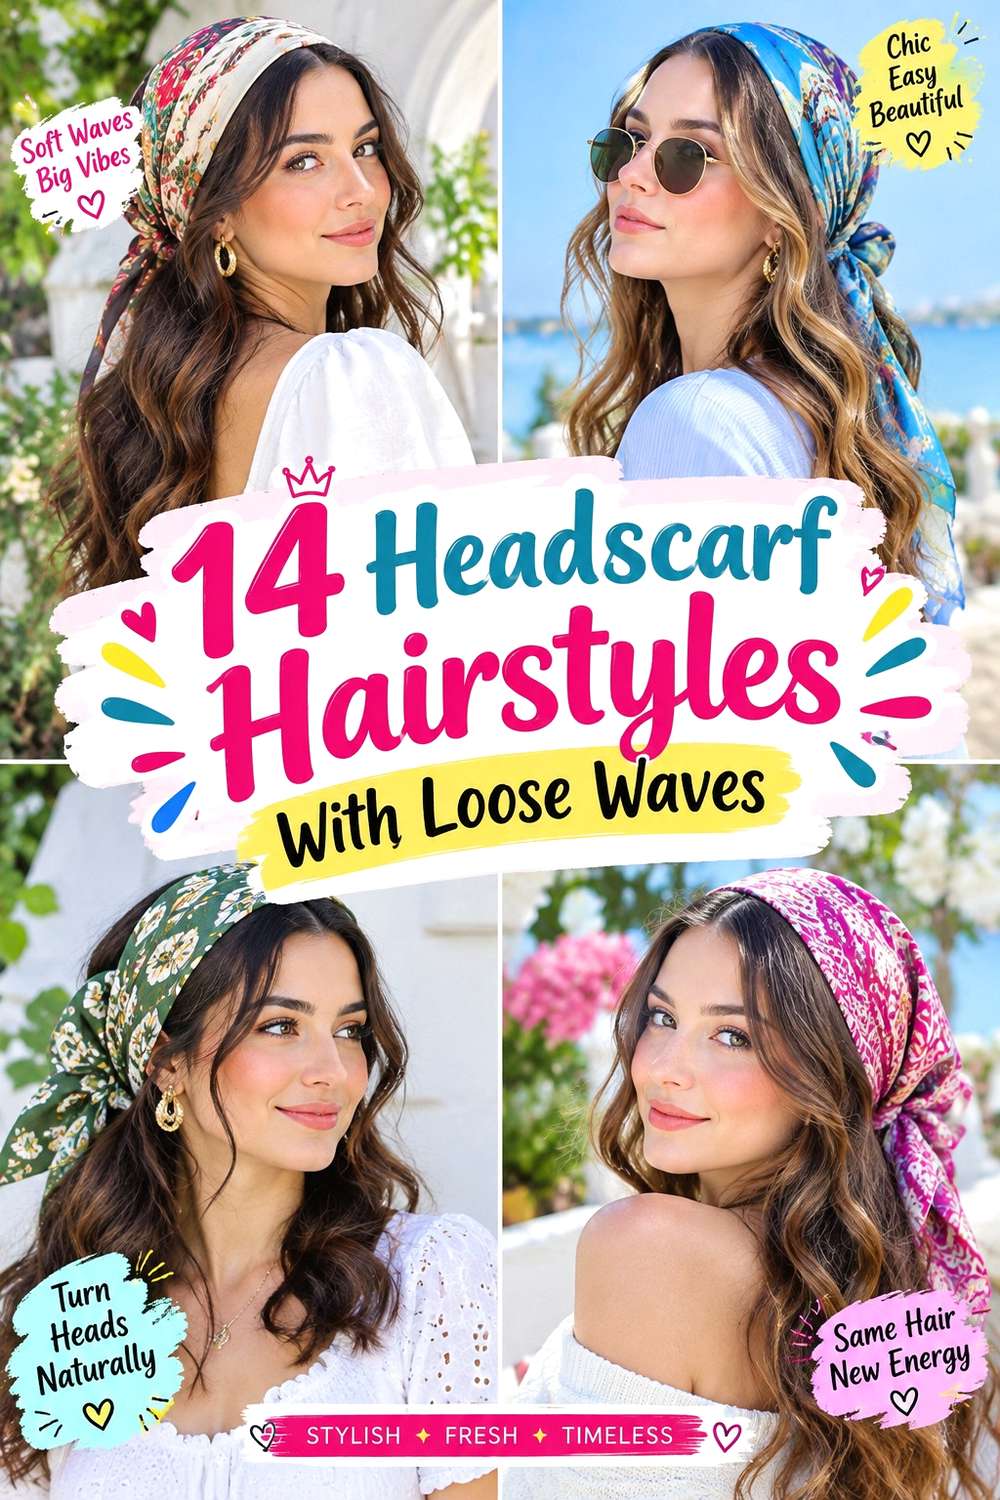
Headscarf hairstyles with loose waves combine flowing texture with a fabric accessory that can sit across the crown, wrap beneath the hair, tie at the nape, or decorate a ponytail. Broad bends through the mid-lengths create movement without the uniform shape of tight curls, while straighter or softly curved ends keep the finish relaxed. Center and side parts change the front balance, and fringe or face-framing layers can remain visible instead of being tucked completely beneath the scarf.
Medium and long hair gives the waves more room to show, but shorter lengths can use narrower scarf placements and smaller bends. Naturally wavy hair may need only selective reshaping, while straighter hair generally needs more styling if a defined wave is desired. Density also matters: wide scarf bands can visually balance dense hair, whereas lower-density hair may suit lighter, narrower fabric that does not flatten the crown.
Styling effort depends on the wave pattern and scarf placement. A quick refresh may involve reshaping one or two bends and resetting the fabric, while a full wash-day style takes longer if every section needs to be waved first. Secure the scarf through good placement rather than excessive tightness, and keep knots away from pressure points behind the ears or at the nape.
Quick List
- Center-Part Headband Loose Wave Headscarf Hairstyle
- Side-Part Nape-Tied Loose Wave Headscarf Hairstyle
- Crown-Knot Loose Wave Headscarf Hairstyle
- Under-Hair Band Loose Wave Headscarf Hairstyle
- Half-Up Loose Wave Headscarf Hairstyle
- Low-Ponytail Loose Wave Headscarf Hairstyle
- Face-Framing Loose Wave Headscarf Hairstyle
- Curtain-Fringe Loose Wave Headscarf Hairstyle
- Wide-Band Loose Wave Headscarf Hairstyle
- Narrow-Band Loose Wave Headscarf Hairstyle
- Side-Knot Loose Wave Headscarf Hairstyle
- Bow-Tied Loose Wave Headscarf Hairstyle
- Long-Tail Loose Wave Headscarf Hairstyle
- Short-Length Loose Wave Headscarf Hairstyle
Center-Part Headband Loose Wave Headscarf Hairstyle
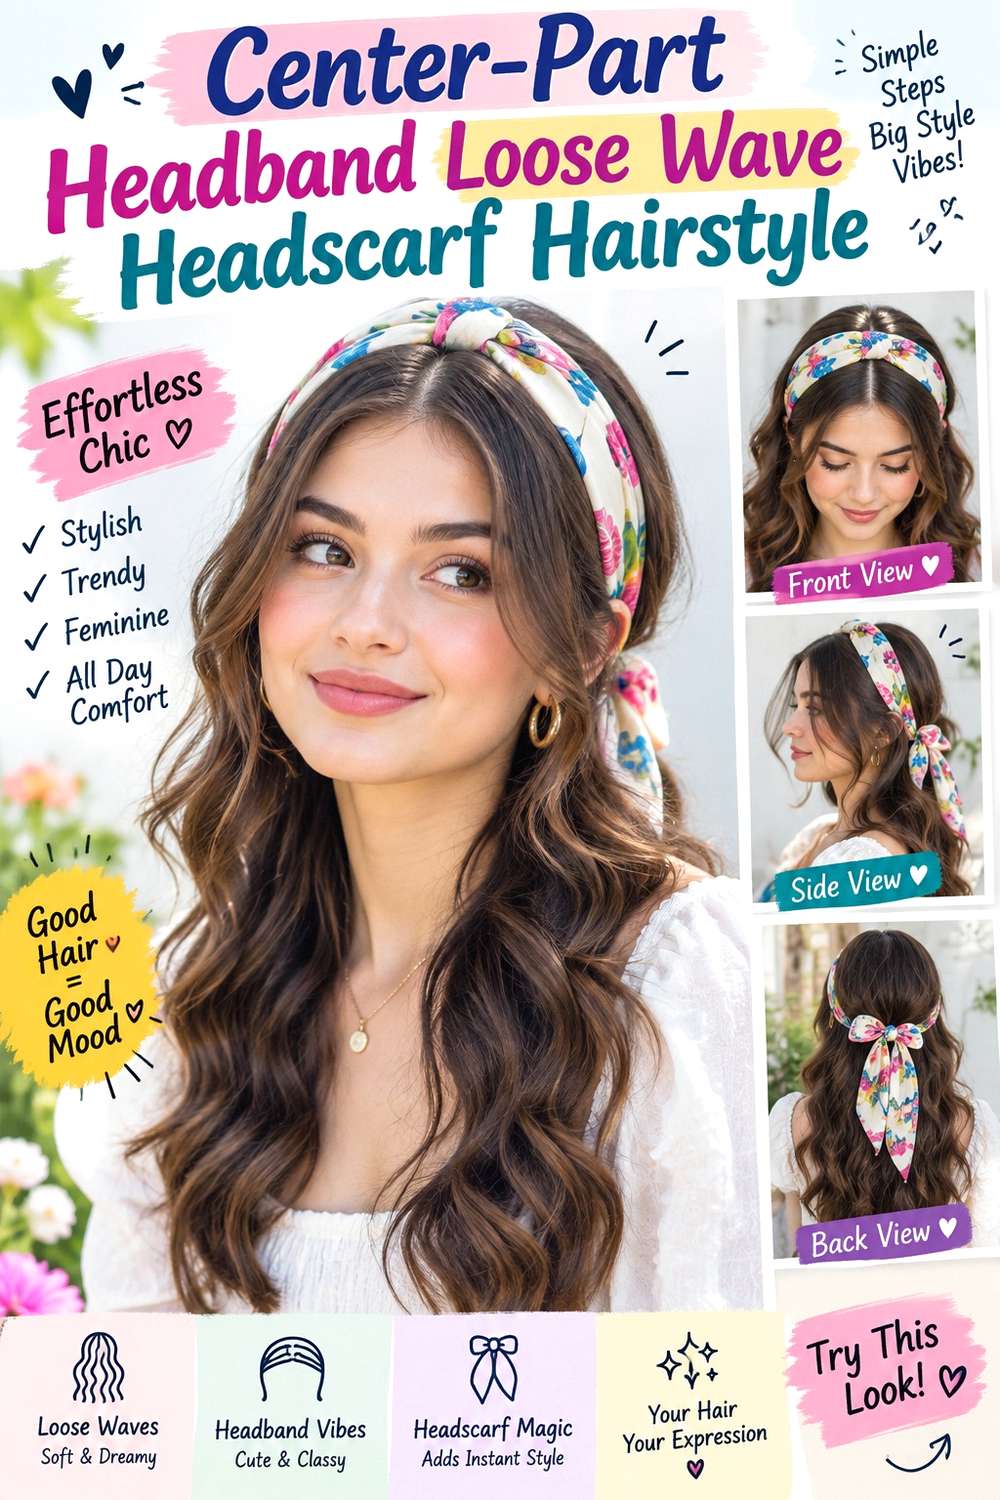
A center part and headband-style scarf create a balanced frame while leaving most of the loose waves visible. Fold the scarf into a medium-width strip, position it a short distance behind the hairline, and let broad bends begin around the cheekbones or lower. Keep the roots softly lifted so the fabric does not press the crown completely flat, and leave the ends less curled for an easy, flowing finish.
Medium and long hair shows the contrast between the straight scarf line and moving lengths particularly well. Naturally wavy hair may need only a few areas reshaped, while straighter hair can use heat styling. Apply heat protectant before using a curling iron for broad bends, then use a lightweight headscarf as the third styling element. A quick refresh usually means correcting flattened front waves and sliding the scarf back into place; a complete wash-day set takes longer because the waves should be finished before the accessory is added.
If a stylist is preparing the look, specify where the first wave should begin and how much crown height you want behind the scarf. The band should sit securely without pressing painfully behind the ears.
Pro tip:
Fold the scarf to its final width before placing it on your head. A consistent band is easier to center and less likely to spread unevenly across the crown.
Make It Work for You:
For lower-density hair, use a narrower scarf and preserve a little root lift behind it. This keeps the fabric from visually flattening the hair while maintaining the loose-wave effect.
Watch Out For:
Avoid tying the scarf tighter every time it slips backward. Reposition the band closer to a stable section of hair instead, because excessive pressure can become uncomfortable behind the ears.
Side-Part Nape-Tied Loose Wave Headscarf Hairstyle

A side part gives loose waves more direction while the scarf knot stays discreet at the nape. Fold the scarf into a narrow or medium band, place it behind the hairline, and guide the ends beneath the loose lengths before tying them low. Let the fuller side of the part fall across the forehead or temple, then begin broad waves below the cheekbones so the front retains natural movement.
This placement works well on medium and long hair because the waves can cover most of the scarf knot. Straight hair may need a full wave set, while naturally wavy hair can focus on reshaping sections that have flattened. Apply heat protectant before a curling iron when using heat, and choose a lightweight headscarf that can knot flatly at the nape. A quick refresh can involve redefining the fuller front wave and retightening the scarf once; full styling takes longer if the whole length needs to be waved again.
When discussing the look with a stylist, specify the depth of the side part and whether you want the scarf knot completely hidden. If the hair has front layers, point to where the shortest visible piece should finish so it blends into the loose waves instead of stopping abruptly.
Pro tip:
Tie the scarf before bringing all the waved length back over your shoulders. Keeping the hair temporarily forward makes it easier to create a flatter, more comfortable knot at the nape.
Make It Work for You:
If your waves naturally fall more strongly on one side, use that side as the fuller part. The scarf placement stays the same while the front works with your existing movement.
Watch Out For:
Do not place a bulky knot exactly at the lowest nape point if you wear high collars. Shift it slightly upward or sideways to reduce rubbing and gradual loosening.
Crown-Knot Loose Wave Headscarf Hairstyle

A scarf knot at the crown turns the accessory into the focal point while the waves stay completely loose down the back. Fold the fabric into a medium-width band, wrap it upward from the nape, and tie a compact knot or short bow slightly off-center on top. Keep the waves broad through the mid-lengths, with flatter roots and softly separated ends so the fabric remains distinct from the hair.
This idea suits short through long hair because it does not depend on a ponytail anchor. Straight hair can be waved first, while naturally wavy hair may need only a little refinement around the front. Use heat protectant before a curling iron if adding waves with heat, and use a lightweight headscarf that can hold a compact crown knot. A quick refresh involves smoothing any flattened bends and re-centering the scarf; the full wash-day version takes longer because the wave pattern should be complete before wrapping.
If a stylist is creating it, explain how far behind the hairline you want the band and whether the knot should be centered or offset. Keep enough height at the crown that the band does not flatten the roots completely. The knot should feel secure without squeezing the head.
Pro tip:
Tie the crown knot slightly off-center if a centered one feels bulky. The small shift keeps the accessory visible while reducing pressure directly on the highest point of the head.
Make It Work for You:
For very dense hair, use a slightly wider scarf band so the fabric remains visible against the volume. Keep the actual knot compact so it does not add unnecessary height.
Watch Out For:
Avoid combining a large crown knot with strong volume directly underneath it. Too much height in one area can make the scarf unstable; distribute root volume behind the band instead.
Under-Hair Band Loose Wave Headscarf Hairstyle
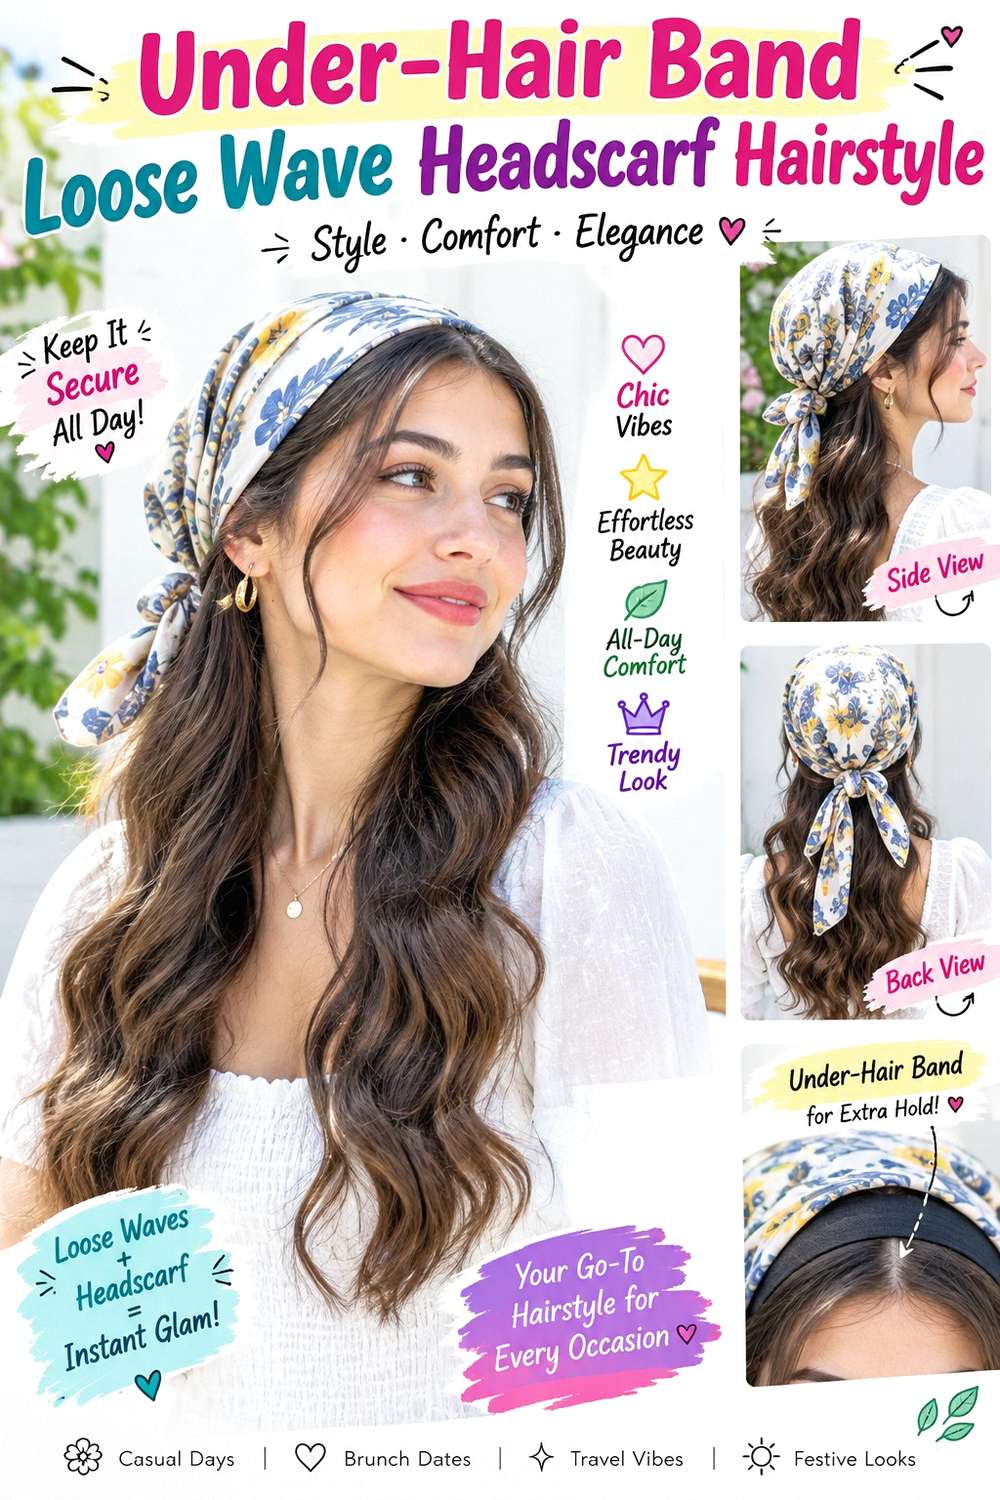
An under-hair scarf placement lets the waves dominate while only a slim band appears near the temples. Position the folded scarf beneath the loose lengths, bring it forward behind the ears, and tie it discreetly beneath the hair at the nape. The crown remains uncovered, so a natural center or side part can stay visible. Broad bends through the lower half create movement without hiding the subtle scarf detail.
Medium and long hair makes the hidden-knot effect easiest because the lengths naturally cover the nape. The style suits readers who want an accessory without a strong band across the crown. Use a lightweight headscarf for the under-hair wrap, heat protectant before hot styling, and a curling iron for loose bends if your natural texture needs reshaping. Between washes, refreshing usually means fixing the front waves and checking whether the scarf has shifted. A full styling session takes longer if all lengths need to be reset.
If a stylist is preparing the waves, show where you want the bend to begin and whether you prefer the ends straight or softly curved. The scarf should pass comfortably behind the ears. If it presses or slides, changing the band width or angle is preferable to tying it tighter.
Pro tip:
Place the scarf underneath the hair before arranging the final waves around the shoulders. This keeps the knot hidden and prevents unnecessary handling of the finished texture.
Make It Work for You:
For fine strands or lower density, keep the scarf narrow and close to the hairline at the sides. More hair remains visible, preventing the accessory from dominating the silhouette.
Watch Out For:
Do not let the scarf knot sit directly beneath a heavy section of waves if it creates a lump. Move the knot slightly sideways and let the hair fall naturally over it.
Half-Up Loose Wave Headscarf Hairstyle
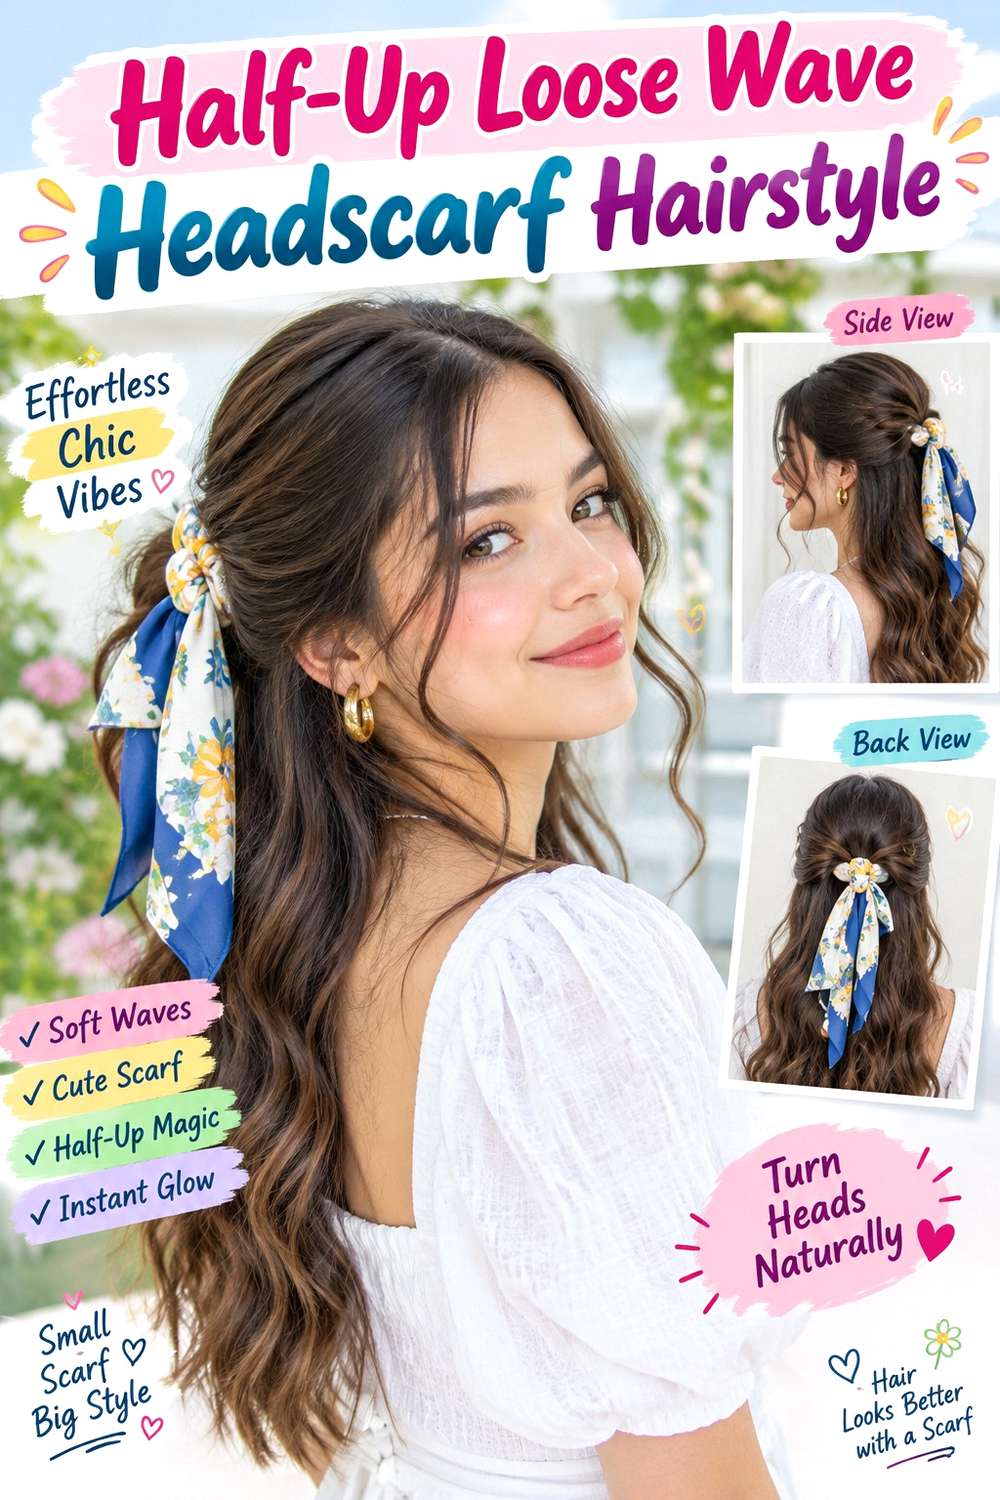
A half-up anchor gives the scarf a stable place to tie while allowing most of the waved length to stay loose. Take sections from above the ears, secure them at the back of the head, and wrap the scarf around that small ponytail. Let the fabric tails fall over the lower waves, keeping them shorter than the hair so the movement remains visible. A soft center or side part can frame the front.
This design works particularly well on medium and long hair and can help keep front sections away from the face without flattening the crown. Use a small snag-free elastic to create the half-up base, a lightweight headscarf for decoration, and heat protectant if warm tools are used to refresh the loose waves. A quick refresh can focus on the front bends and scarf knot; full wash-day styling takes longer because the lower lengths need to be waved or defined before the top section is secured.
If a stylist is creating it, specify how much hair you want gathered from above the ears and how high the half-up base should sit. Too much hair in the upper section can reduce fullness through the loose lengths, so the division should suit your density.
Pro tip:
Build the half-up base before tying the scarf, then pull the lower waves forward and back again gently. This checks that the fabric tails are not trapping or flattening sections.
Make It Work for You:
For lower-density hair, gather a smaller half-up section and choose a narrow scarf. The loose lower lengths retain more fullness while the accessory still has a secure anchor.
Watch Out For:
Avoid using the scarf itself to hold the half-up section. A hidden elastic provides reliable support, so the fabric can stay decorative and comfortable instead of tightly knotted.
Low-Ponytail Loose Wave Headscarf Hairstyle

A low ponytail concentrates the loose waves below the nape while a scarf adds movement around the anchor. Gather the hair softly with a center or side part, leaving a little crown fullness, then secure the base before tying the scarf around it. Let the ponytail carry broad bends through the mid-lengths and softer ends. Short face-framing pieces can remain loose if they already suit the haircut.
Medium and long hair works best because the wave pattern remains visible beneath the scarf. Naturally wavy hair can keep most of its existing texture, while straighter hair may require more preparation. Apply heat protectant before using a curling iron, and secure the base with a fabric-covered elastic before adding the headscarf. A quick refresh usually means reshaping one or two ponytail bends and retightening the fabric; a complete wash-day style takes longer because the waves should be prepared before gathering.
When a stylist is creating the look, specify the anchor height, first wave position, and scarf-tail length. If your hair is dense, the elastic should carry the ponytail’s weight. The scarf should decorate the anchor rather than functioning as the only form of support.
Pro tip:
Wave the hair before making the ponytail so the bends remain consistent through the lower lengths. Touch up only the sections that change shape after the hair is gathered.
Make It Work for You:
For dense hair, use a strong covered elastic beneath the scarf and keep the fabric knot compact. This separates structural support from decoration and helps the base remain comfortable.
Watch Out For:
Do not tie the scarf tighter when the ponytail starts slipping. Reset the elastic anchor instead, because fabric tension alone will not reliably support a heavier waved tail.
Face-Framing Loose Wave Headscarf Hairstyle
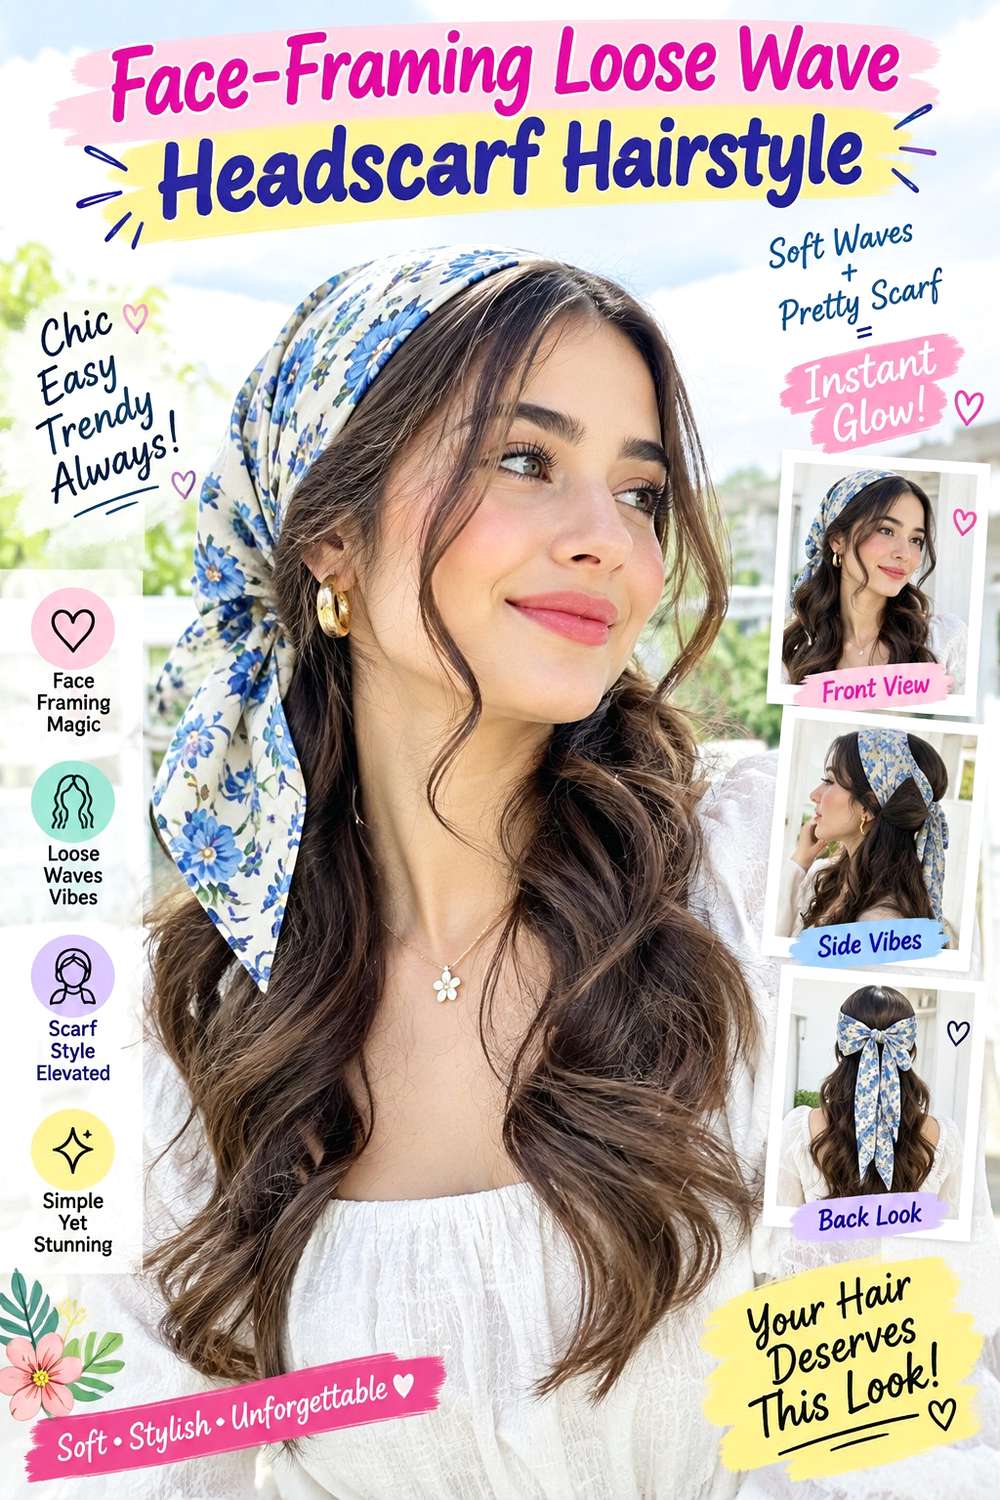
Cheekbone- or jaw-length pieces can sit in front of a scarf band while the rest of the waves flow behind it. Separate the face-framing sections first, then position a folded scarf a little behind the hairline. Let the front pieces curve away from the cheeks and blend into broad waves through the longer hair. Keeping the scarf band relatively narrow gives the framing sections enough room to move naturally.
This variation works especially well when the haircut already includes front layers. Straight hair can use gentle heat shaping, while naturally wavy hair may only need the face frame refined. Apply heat protectant before using a curling iron, and choose a lightweight headscarf that will not press the front pieces flat. A short refresh may involve reshaping just the two loose sections and repositioning the scarf; a complete wash-day style takes longer when all the waves require resetting.
If a stylist is adjusting the cut, point to the exact finished length you want around the cheekbones or jaw and ask how it will blend with the rest of your hair. Lower-density hair usually benefits from narrower front sections so enough fullness remains through the long waved lengths.
Pro tip:
Separate the face-framing sections before placing the scarf. This prevents you from pulling hair forward afterward and accidentally loosening the band or disturbing the surrounding wave pattern.
Make It Work for You:
For lower-density hair, use narrow face-framing sections and a slim scarf. This keeps more hair in the long waves while still creating visible movement around the face.
Watch Out For:
Avoid pulling random extra strands from behind the scarf when you want more softness. Reposition the front sections deliberately so the band stays stable and the shape remains balanced.
Curtain-Fringe Loose Wave Headscarf Hairstyle

Curtain fringe can remain fully visible in front of a headscarf while the longer hair carries loose waves. Position the scarf behind the fringe’s starting point, allowing the center to open softly around the forehead and the outer corners to blend toward the temples. Broad waves beginning below the cheekbones connect the fringe to the longer lengths without creating too much width near the face.
This works best when the fringe already has enough length to split comfortably. Straight or wavy fringe may need a short refresh even when the longer waves still look good. Use a round brush to direct the fringe outward, heat protectant if using warm airflow or a heated tool, and a lightweight headscarf for the band. A quick morning refresh can focus only on the fringe and scarf placement, while a full wash-day set requires more time for the complete wave pattern.
If a stylist is shaping the fringe, specify the finished center length and ask that the outer corners stay long enough to blend with the side pieces. For curly or strongly wavy hair, judge fringe length dry because shrinkage changes where it lands. The scarf should sit behind the fringe rather than compressing its roots.
Pro tip:
Style the fringe before placing the scarf, then let it cool or settle completely. Slide the band behind its natural starting point so the front keeps movement.
Make It Work for You:
For wavy fringe, leave the center slightly longer if shrinkage is noticeable. The curtain shape can remain soft while the scarf stays clearly separated behind it.
Watch Out For:
Do not place the scarf over the fringe roots just to keep it secure. Pressure there can flatten the front and make the outer corners separate awkwardly.
Wide-Band Loose Wave Headscarf Hairstyle
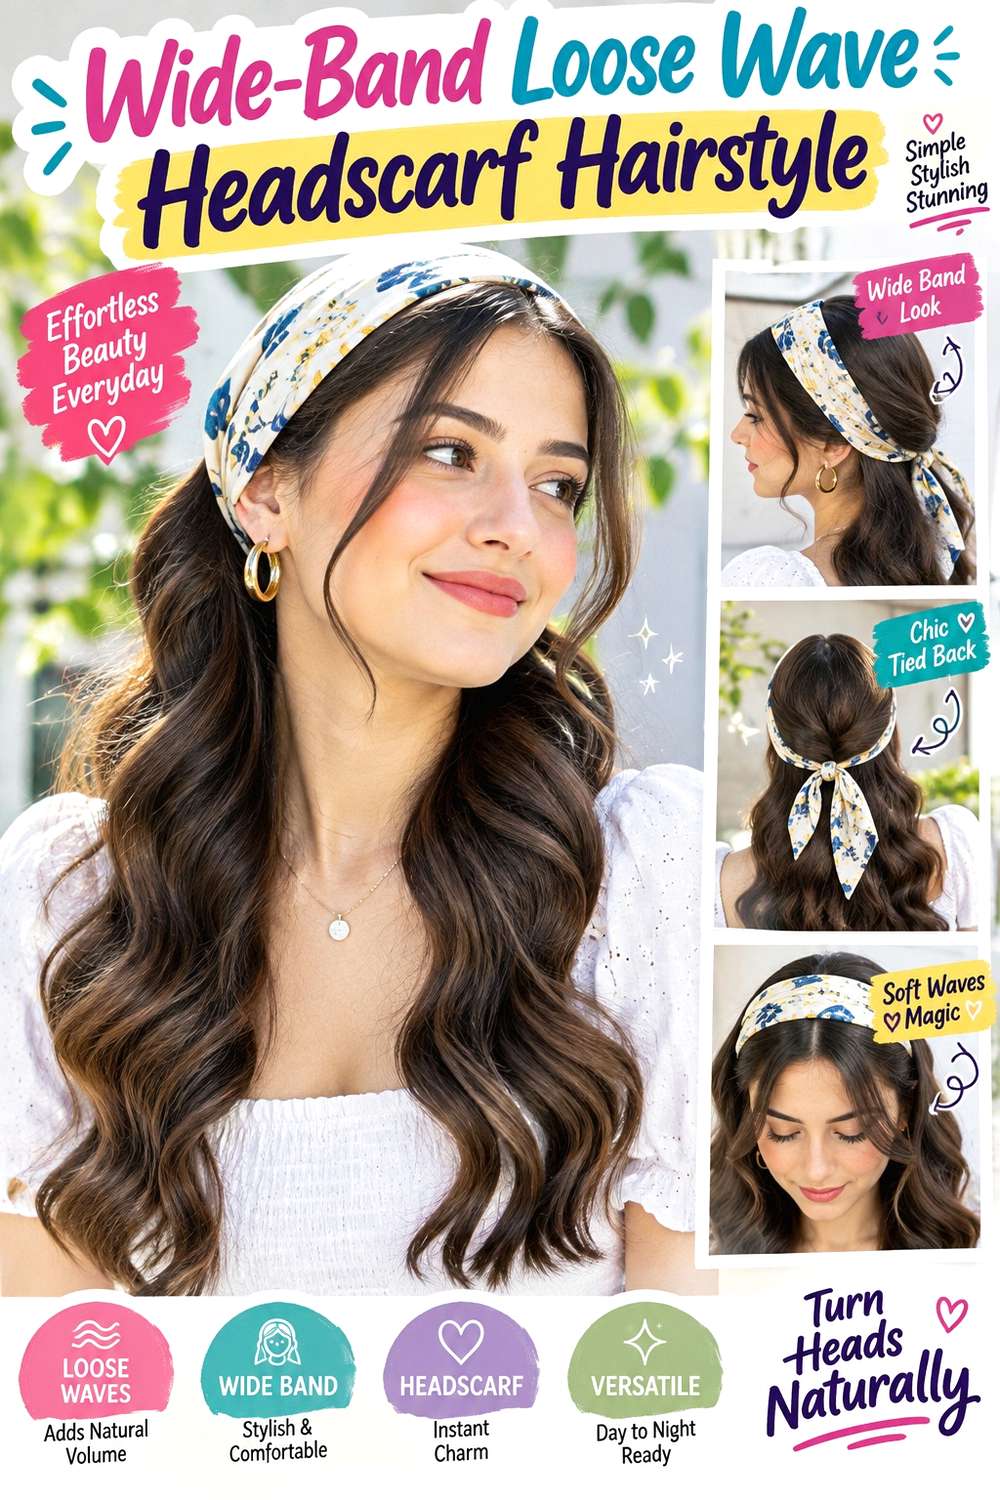
A wide scarf band creates a stronger block of fabric across the crown and works well when you want the accessory to balance fuller waves. Fold the scarf broadly, place it behind the hairline, and let it cover more of the upper head while leaving the lengths completely loose. Keep the root area underneath relatively smooth, then allow large waves to expand from around the jaw downward with soft, separated ends.
This version suits medium and long hair, particularly when density or volume makes a narrow scarf seem visually small. Naturally wavy hair can maintain most of its pattern, while straight hair may need wave styling first. Use a lightweight headscarf for the wide band, heat protectant before hot styling, and a curling iron for broad bends when needed. A quick refresh generally means smoothing any waves flattened where the band ends and repositioning the fabric; full wash-day styling takes longer if the entire length needs resetting.
If a stylist is preparing the hair, explain where you want the waves to start and how much crown volume should remain behind the scarf. A wide band should lie flat enough to feel stable without compressing the head tightly. Keep the nape knot compact so the broad fabric does not create a second bulky area.
Pro tip:
Smooth the scarf into a flat band before tying it, checking both sides in a mirror. Even width helps the accessory sit securely and keeps the loose waves symmetrical around it.
Make It Work for You:
For dense, voluminous hair, let the band stay broad but use a lightweight fabric. You gain visual balance without adding unnecessary weight or pressure around the crown.
Watch Out For:
Avoid stacking folds unevenly near the ears. Extra fabric in those areas can create uncomfortable pressure and cause the wide band to lift elsewhere during wear.
Narrow-Band Loose Wave Headscarf Hairstyle
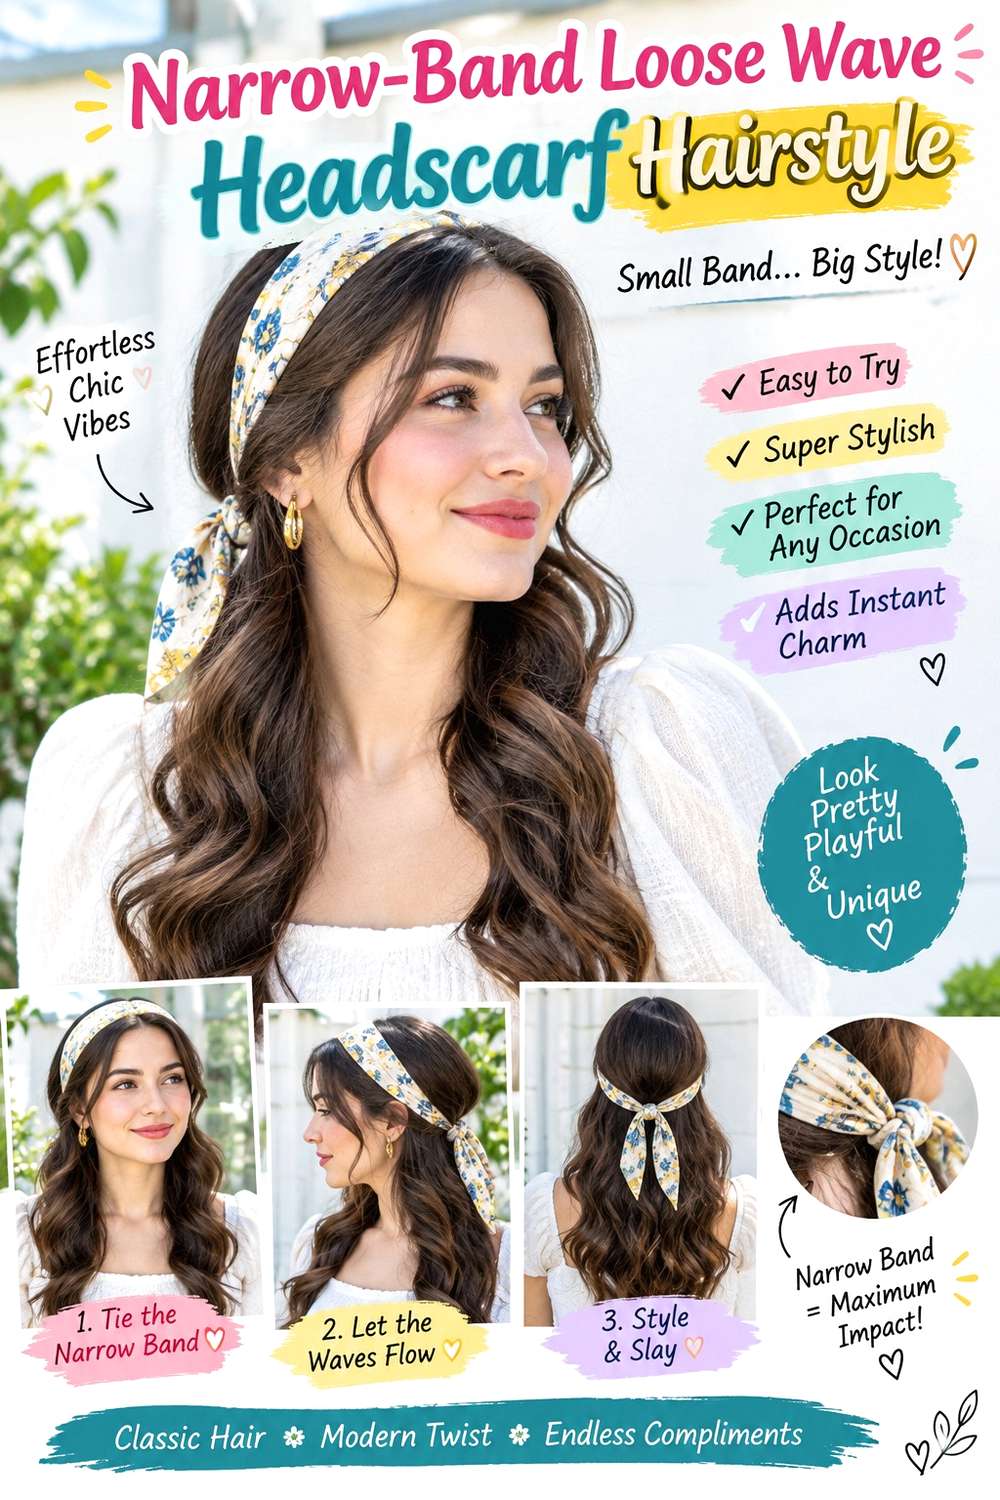
A narrow scarf band adds a fine line of pattern without covering much of the hair. Fold the fabric into a slim strip, place it close behind the hairline or across the upper crown, and keep the knot small. Let the loose waves remain the dominant feature, beginning around the cheekbones or jaw and continuing in broad, irregular bends toward the ends.
This approach is useful for shorter hair, lower-density hair, or anyone who wants only a small accessory accent. Straight hair may require heat styling for deliberate waves, while naturally wavy lengths can stay mostly untouched. Apply heat protectant before using a curling iron and choose a lightweight headscarf that can fold neatly without becoming bulky. A quick refresh may only involve correcting the front wave and sliding the narrow band back into place; full styling takes longer when every section needs to be reshaped.
If a stylist is creating the look, specify how much forehead or hairline you want visible and where the shortest wave around the face should begin. The scarf should grip through placement, not through a painfully tight knot. If it slides on very smooth hair, changing the angle or using discreet anchoring is more practical than increasing tension.
Pro tip:
Fold the scarf on a flat surface before placing it on your head. A clean narrow strip is easier to position and less likely to twist into uneven thickness.
Make It Work for You:
For lower-density hair, keep a little root lift behind the narrow band. The scarf remains delicate while the waves retain enough height and movement to avoid looking flattened.
Watch Out For:
Do not tie a very narrow scarf excessively tight. Concentrated pressure can be uncomfortable, so adjust the band position or grip instead of relying on stronger tension.
Side-Knot Loose Wave Headscarf Hairstyle

Moving the scarf knot to one side makes the accessory visible from the front while keeping the waves loose down the back. Wrap a narrow or medium band around the head, then tie the ends above or just behind one ear. Keep the knot compact and let one short fabric tail follow the direction of the waves. A side part on the opposite side can create balance, while broad bends add movement below the jaw.
Medium and long hair gives the waves enough length to offset the side detail, though shorter hair can use a smaller knot. Use a lightweight headscarf for the accessory, heat protectant before hot styling, and a curling iron for loose waves when needed. A quick refresh usually means correcting the front bend near the knot and retightening the scarf once; full wash-day styling takes longer when the complete wave pattern needs rebuilding.
If a stylist is creating it, specify which side you want the knot visible from and whether it should sit above or behind the ear. The accessory should not press directly on the ear. Keeping the knot slightly behind it often improves comfort while retaining the asymmetrical effect.
Pro tip:
Tie the side knot loosely first, check its position from the front, then tighten only enough for security. This prevents unnecessary pressure and makes placement easier to correct.
Make It Work for You:
If one side of your hair naturally has stronger waves, place the knot on the opposite side. The contrast can distribute visual weight more evenly around the head.
Watch Out For:
Avoid placing a bulky knot directly on top of the ear. Shift it slightly backward or upward so the scarf remains visible without causing pressure during longer wear.
Bow-Tied Loose Wave Headscarf Hairstyle

A compact scarf bow adds a distinct decorative finish while loose waves remain visible below and around it. Fold the scarf into a medium band, position it behind the hairline, and tie a small bow at the nape, crown, or slightly to one side. Keep the bow loops controlled rather than oversized, and let the hair fall in broad bends with softly separated ends.
This style works across medium and long hair, while shorter hair can use a smaller scarf and abbreviated bow. Because the bow already adds volume, the waves look most balanced when they are broad rather than tightly curled. Use a lightweight headscarf for the bow, heat protectant before hot styling, and a curling iron for shaped waves if needed. A quick refresh may involve correcting a flattened bow loop and reshaping the nearest wave; a full styling session takes longer if all the lengths need to be reset.
If a stylist is creating it, specify where the bow should sit and how large you want the loops compared with the head. For a nape bow, consider collars and jackets before choosing the placement. The scarf should be tied around a comfortable path, not pulled tight enough to distort the hair underneath.
Pro tip:
Shape both bow loops after tying the secure center knot rather than pulling them tight from the start. This gives better control over scale and keeps the scarf comfortable.
Make It Work for You:
For shorter or lower-density hair, keep the bow compact with short tails. Smaller fabric proportions let the loose waves stay visible instead of becoming secondary to the accessory.
Watch Out For:
Do not place a large nape bow where a coat collar repeatedly pushes it upward. Move the bow higher, sideways, or to the crown to reduce friction.
Long-Tail Loose Wave Headscarf Hairstyle
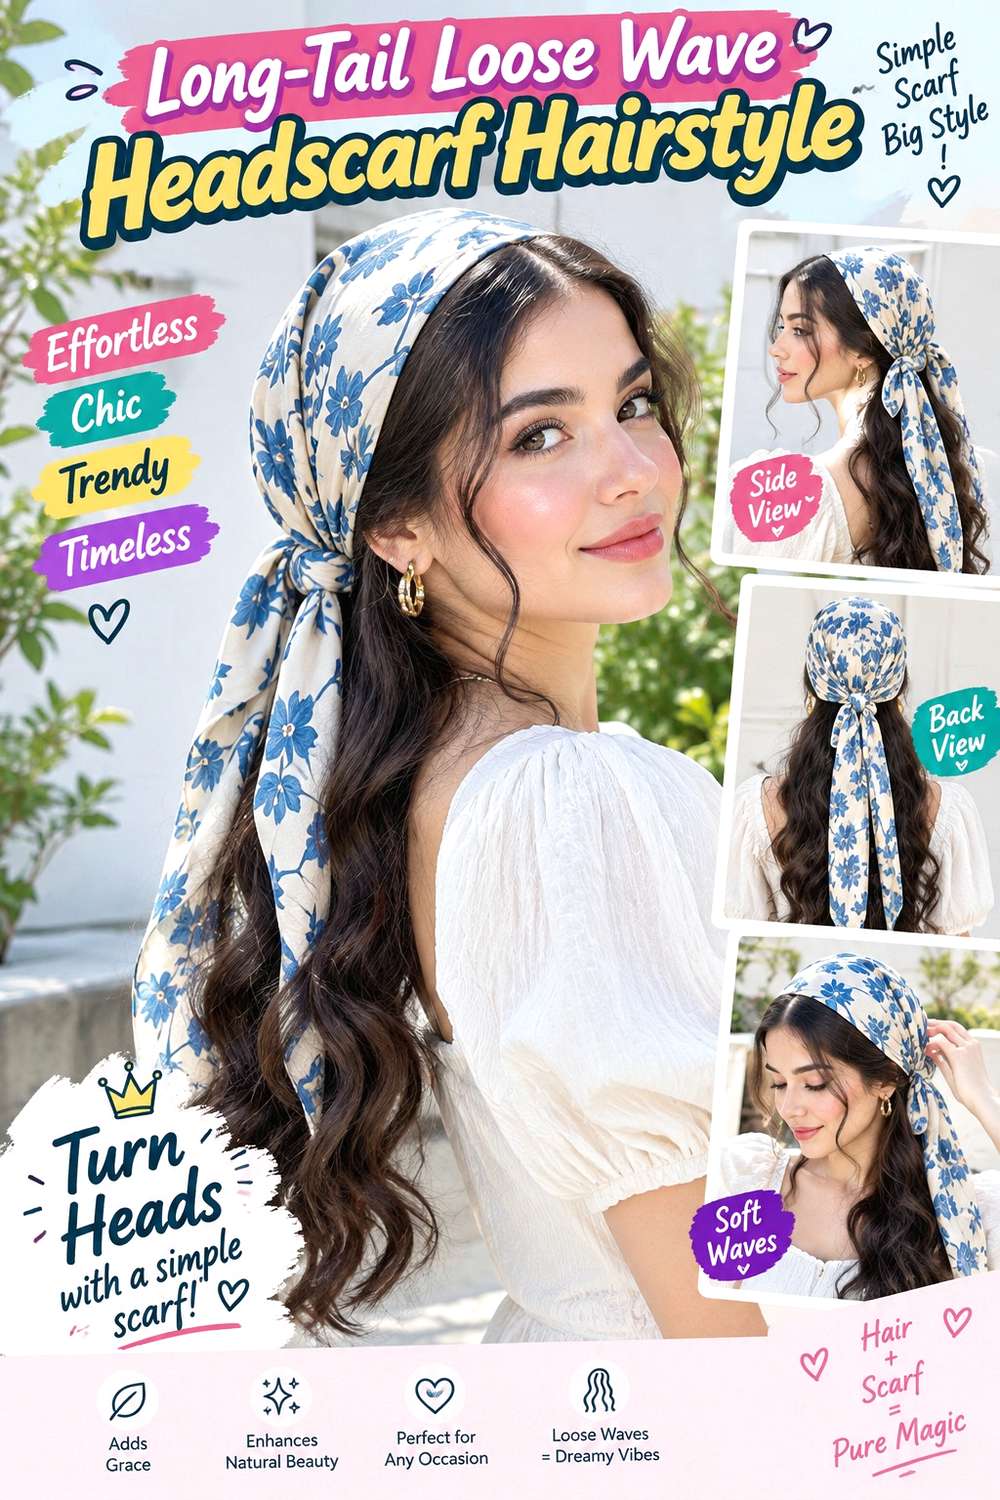
Long scarf tails create vertical movement alongside loose waves, so the fabric and hair travel in the same direction. Wrap the scarf as a narrow band or tie it around a small half-up section, then leave two longer ends falling down the back. Keep the waves broad and irregular, with the strongest bends through the mid-lengths so the scarf tails do not disappear inside overly full curls.
Longer hair balances extended fabric tails most naturally, although medium hair can use a scarf that ends near the hair length. Use a lightweight headscarf to prevent drag, heat protectant before any hot styling, and a curling iron for broad waves if the natural texture needs more definition. A quick refresh generally means separating the scarf tails from tangled wave sections and reshaping one or two bends; a full wash-day style takes longer when the complete texture is rebuilt.
If a stylist is creating the look, specify how long you want the fabric ends relative to the hair and where the scarf should anchor. The knot must stay secure without carrying the weight of the waves. Longer scarf tails can catch on bag straps or outerwear, so practical length matters as much as appearance.
Pro tip:
After tying the scarf, run each fabric tail separately over the finished waves instead of weaving it through them. This reduces tangling and keeps both materials visibly distinct.
Make It Work for You:
For medium-length hair, shorten the scarf tails so they finish close to the ends. Matching the proportions prevents the fabric from visually extending far beyond the hairstyle.
Watch Out For:
Avoid letting long scarf tails become trapped beneath shoulder straps or coats. Repeated pulling on the fabric can tighten the knot unexpectedly and disturb the hair underneath.
Short-Length Loose Wave Headscarf Hairstyle
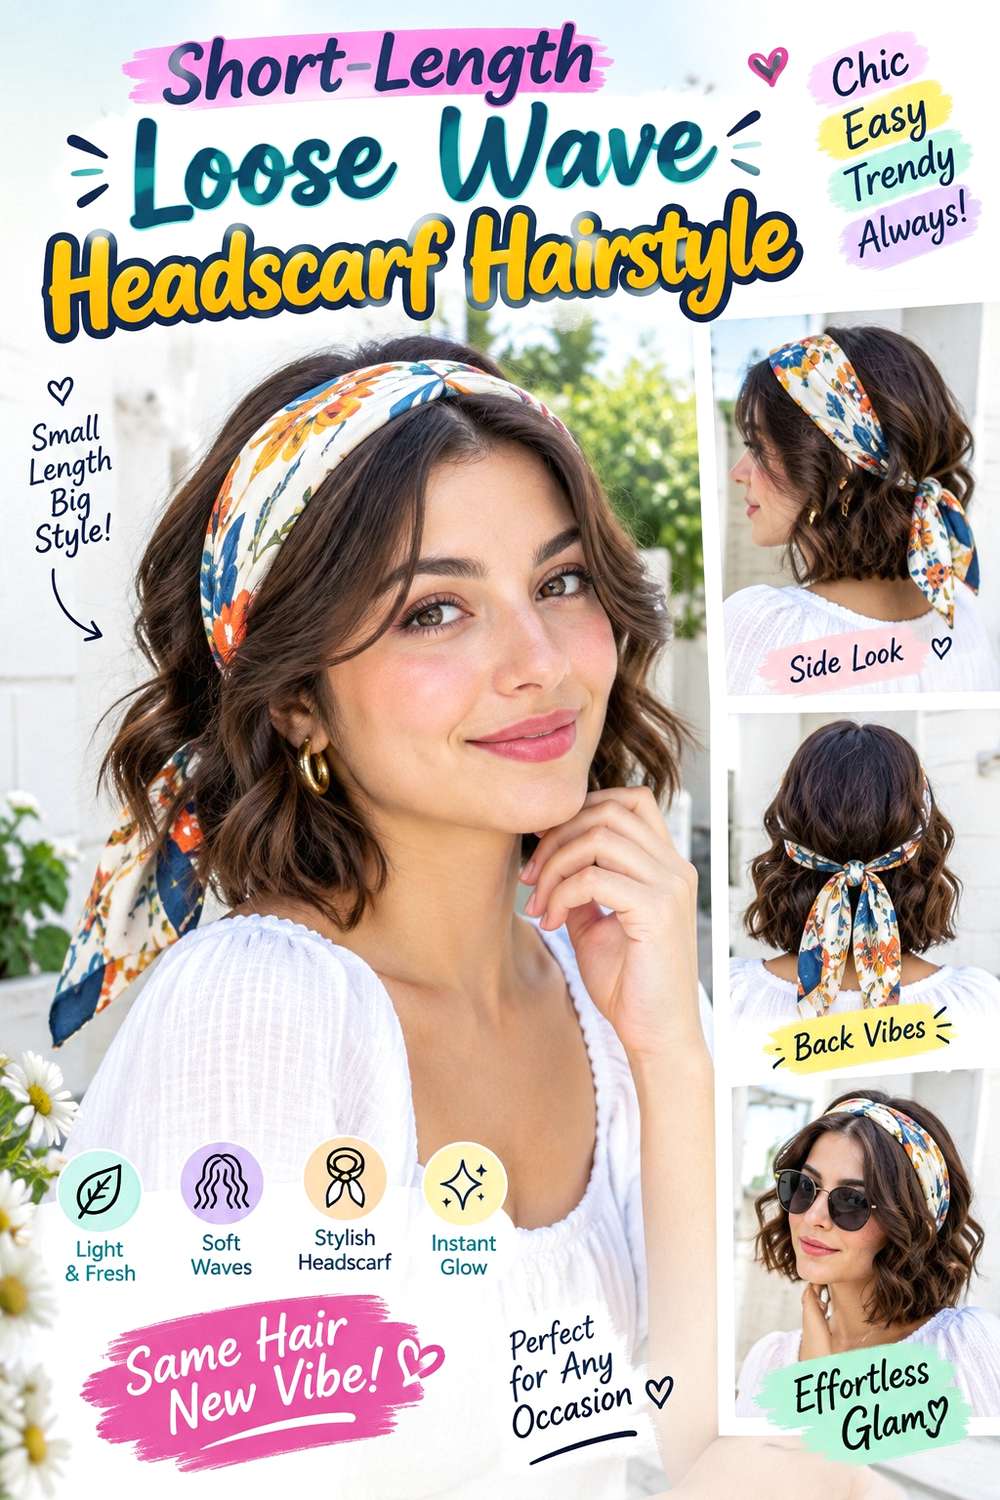
Shorter hair can carry loose waves and a headscarf effectively when the fabric stays proportional to the available length. Fold the scarf into a narrow or medium-width band, position it behind the hairline, and allow chin- to shoulder-length waves to remain fully visible. A center or soft side part can frame the front, while the bends should be broad enough to create movement without making the ends overly wide.
This works well for bobs, lobs, and shorter medium lengths. Naturally wavy hair may need only selective reshaping, while straighter hair can use a hot tool if desired. Apply heat protectant before using a curling iron for broad bends, and choose a lightweight headscarf with a small knot so it does not dominate the shorter silhouette. A quick refresh can mean fixing one front wave and sliding the scarf back into place; full wash-day styling takes longer if every section needs to be waved.
If a stylist is shaping the cut, discuss where you want the perimeter to finish and whether front layers should fall at the cheekbone, jaw, or chin when waved. Preserve enough weight through the ends for your density rather than adding layers solely to create movement beneath the scarf.
Pro tip:
Keep the strongest wave around the mid-length rather than directly at the ends. This creates movement while helping a shorter perimeter retain a fuller, more controlled outline.
Make It Work for You:
For fine strands or lower density, choose a slim scarf and preserve a fuller bottom edge. The waves can stay soft without making the ends look overly separated.
Watch Out For:
Avoid pairing a very wide scarf with extremely short waved lengths unless you want the fabric to dominate. Reduce the band width to keep the proportions more balanced.
Conclusion
Headscarf hairstyles with loose waves can feel very different depending on scarf width, knot placement, parting, face-framing pieces, and how much of the crown remains visible. A wide band creates stronger contrast with dense waves, while a narrow scarf keeps more hair exposed. Longer lengths can support half-up ties, ponytail wraps, bows, and long fabric tails, while shorter hair usually benefits from compact knots and proportional bands. Natural waves need less preparation, whereas heat-shaped bends add more styling time and require heat protection. Center parts create balance, side parts add direction, and fringe can stay visible when the scarf sits behind its roots. Choose the version that suits your density, natural texture, accessory comfort, and everyday routine.
Before Your Salon Visit
Choose one or two favorites and save references that show the scarf placement as clearly as the waves. Discuss your natural texture, density, face shape, preferred length, upkeep, and normal styling routine. Point out the exact wave starting point, face-framing length, fringe shape, crown volume, band width, knot position, or scarf-tail length you like. Because the scarf is a temporary accessory, focus on styling and secure placement rather than requesting new layers unless you already want them when wearing your hair without the scarf.
FAQs
How can I stop a headscarf from slipping over loose waves?
Place the scarf where it can grip stable hair rather than relying on a very tight knot. Folding the fabric evenly and choosing an appropriate band width can help. If it still moves, adjust its angle or use discreet anchoring instead of increasing pressure around the head.
Do I need heat to create loose waves under a headscarf?
No. Naturally wavy hair can often be air-dried and selectively refreshed. Heat is optional when you want more uniform bends or when straight hair needs a defined wave. If you use hot tools, apply heat protectant and style only the sections that actually need reshaping.
Can I wear a headscarf with curtain fringe or face-framing pieces?
Yes. Position the scarf behind the fringe or select the face-framing pieces before tying the band. Keeping those sections outside the scarf lets them move naturally. If the front is cut specifically for framing, judge the finished length according to your normal texture and any shrinkage.
What scarf width works best with shorter loose waves?
A narrow to medium band usually keeps shorter hair visible and avoids overwhelming the silhouette, though the best width depends on density and scarf scale. Keep the knot compact, especially at the nape, and choose broad waves rather than very tight curls if you want the overall shape to remain balanced.