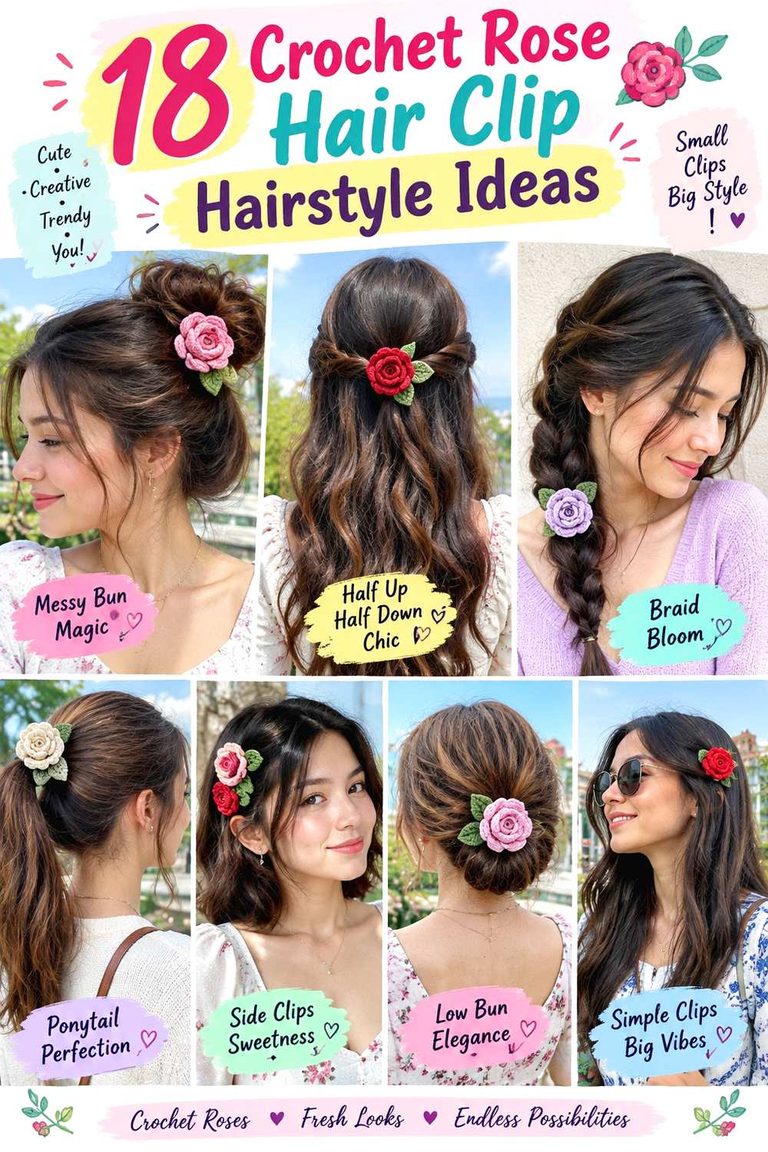
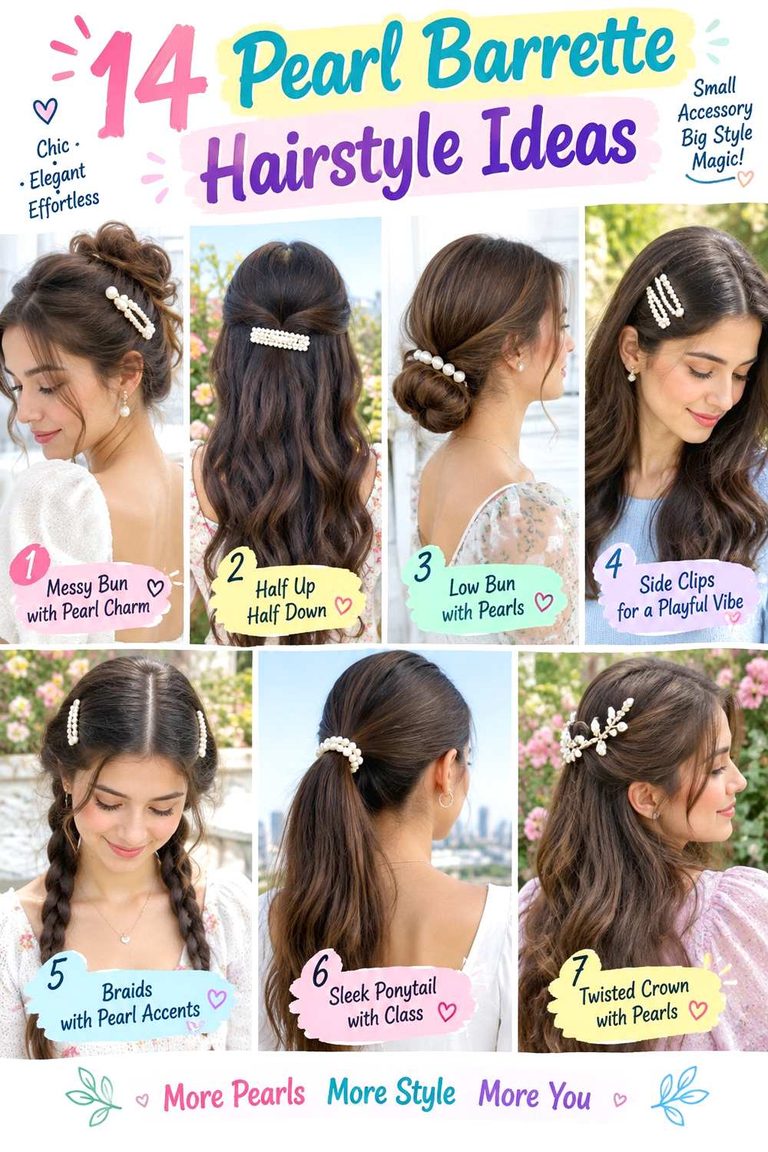
18 Oversized Claw Clip Hairstyles for an Easy Polished Look
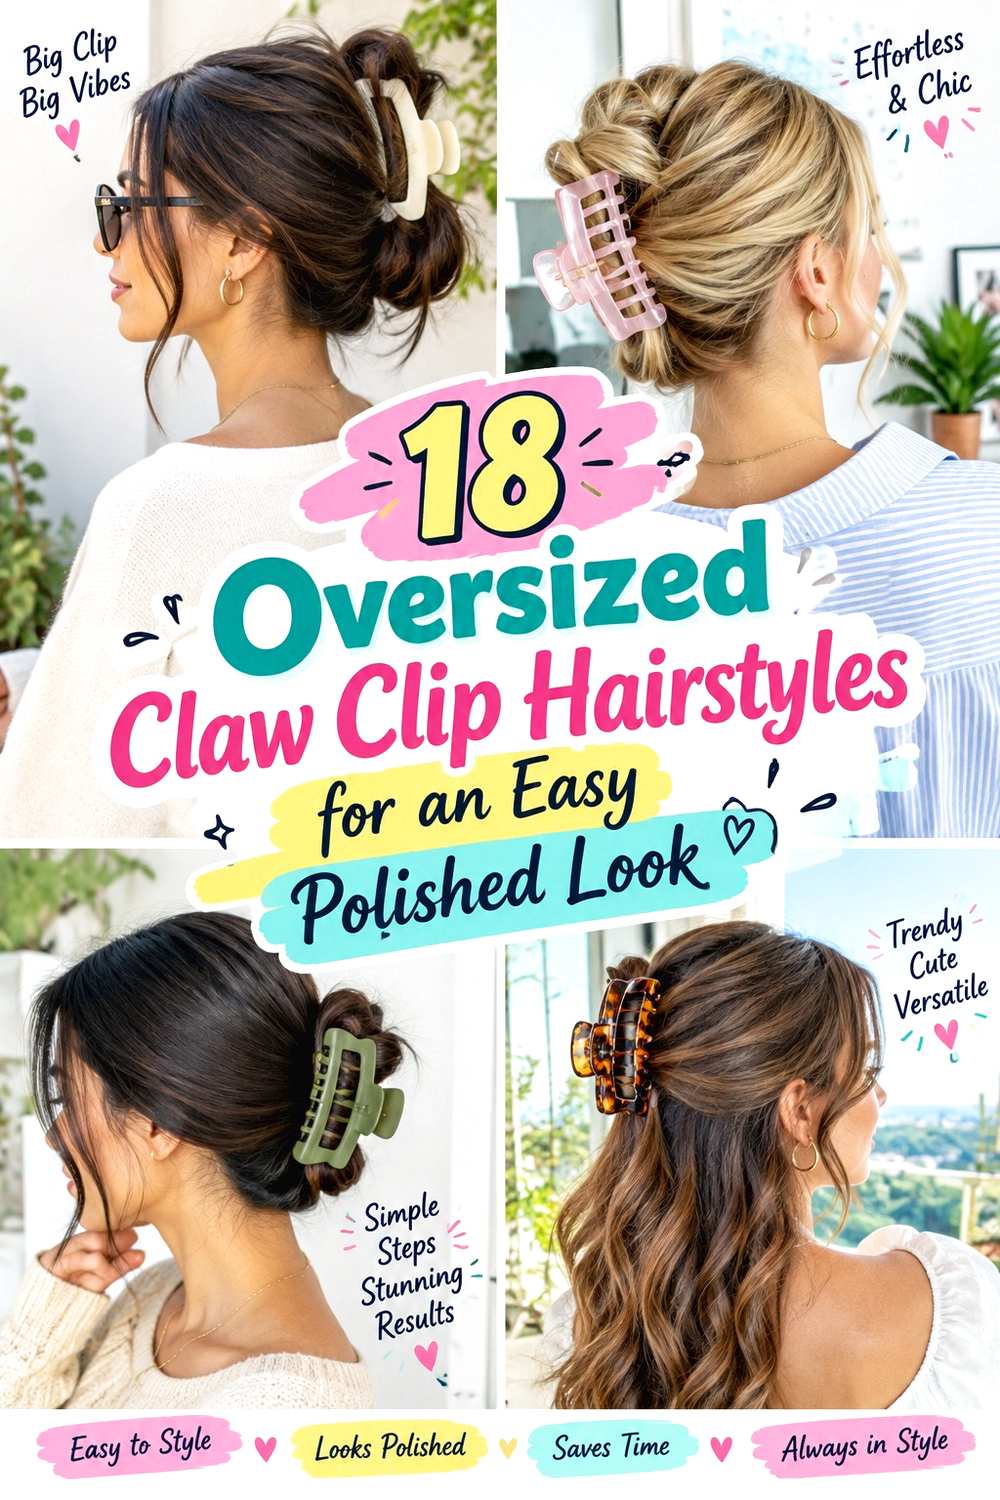
Oversized claw clip hairstyles work by using one large accessory as both the anchor and a visible part of the finish. The most polished versions control where the hair folds, twists, or spills instead of simply trapping a loose bundle. Shoulder-length hair can support compact folds and half-up shapes, while longer hair gives more room for vertical twists, wrapped lengths, and soft cascades. Layers, fringe, and face-framing pieces can stay loose when that is intentional, while the rest of the hair should sit securely without painful tension.
Straight, wavy, curly, and coily textures can all work with an oversized clip, but grip and section size need to match the hair rather than forcing every texture into the same shape. Dense hair may need a wider jaw and a flatter fold, while finer or slippery hair often benefits from a smaller gathered section or extra surface grip. Curl grouping and shrinkage can change how much length reaches the clip, so finished placement matters more than stretched length.
The fastest versions take only a short refresh on dry hair, while a more sculpted twist or polished half-up style takes longer to section and smooth. Maintenance is mostly about resetting slipping anchors, controlling frizz, and avoiding repeated tightening. A stable base should hold the style without the clip pinching the scalp or carrying more hair than its teeth can comfortably contain.
Quick List
- Sleek French Twist Claw Clip Hairstyle
- Low Folded Claw Clip Hairstyle
- High Vertical Twist Claw Clip Hairstyle
- Half-Up Crown Claw Clip Hairstyle
- Looped Pony Claw Clip Hairstyle
- Soft Messy Bun Claw Clip Hairstyle
- Side Twist Claw Clip Hairstyle
- Double Twist Claw Clip Hairstyle
- Low Chignon Claw Clip Hairstyle
- Volume Crown Claw Clip Hairstyle
- Curly Cascade Claw Clip Hairstyle
- Coily Tuck Claw Clip Hairstyle
- Short Bob Claw Clip Hairstyle
- Long Hair Fold Claw Clip Hairstyle
- Braided Claw Clip Updo Hairstyle
- Face-Frame Claw Clip Hairstyle
- Office Sleek Claw Clip Hairstyle
- Loose Waves Claw Clip Hairstyle
Sleek French Twist Claw Clip Hairstyle
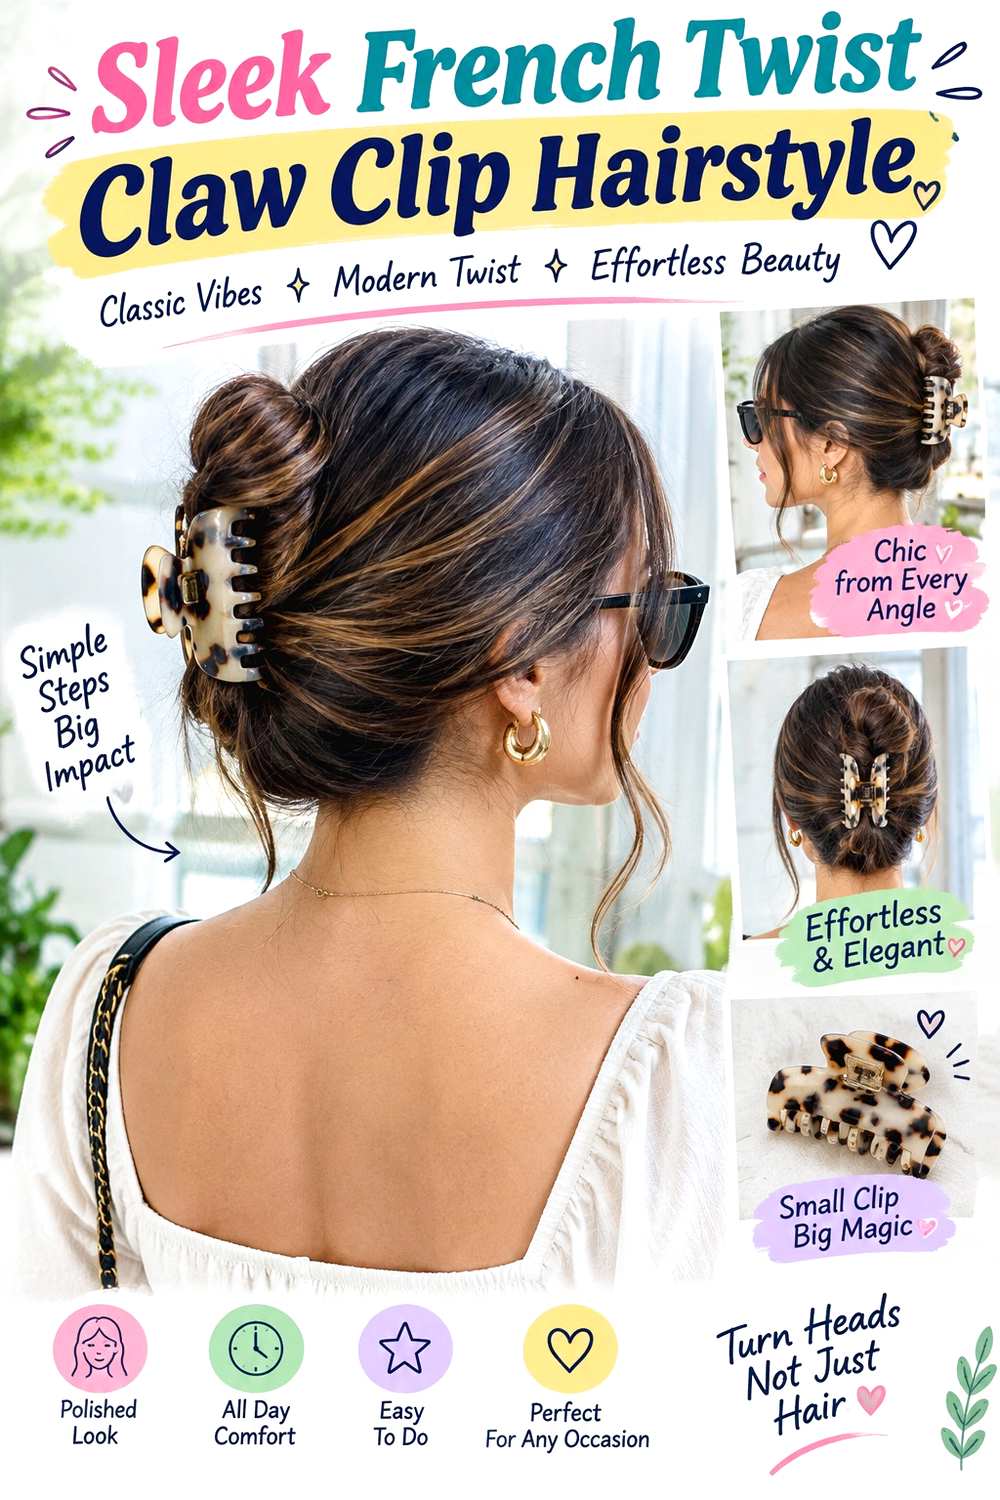
A vertical French-style twist turns an oversized clip into a clean central anchor. Gather the hair at the nape, twist upward, and fold any extra length back down before clamping the roll through its middle. The crown stays smooth, the sides follow the head closely, and the visible ends can be tucked or left as a short fan above the clip. Shoulder-length to long hair works best, while longer lengths usually need a second fold so the twist does not become bulky.
This version suits straight, wavy, or smoothed textured hair when you want a neat work or dinner style without a full pinned updo. Use a large curved claw clip to hold the folded roll, a tail comb to refine the part and surface, and flexible hairspray to control flyaways without making the shape rigid. A quick refresh may take only a few minutes, while a full wash-day polish takes longer if you first smooth the hair.
If the twist slips, rebuild the fold rather than squeezing the clip tighter. When showing the style to a stylist for event finishing, specify the twist height, how much crown volume you want, and whether the ends should disappear or remain visible above the clip.
Pro tip:
Twist upward first, then fold the extra length back down before closing the clip. This keeps the roll narrow and prevents long ends from forming a bulky shelf above the anchor.
Make It Work for You:
If your hair is very dense, make a broader, flatter twist so the clip catches the center without overfilling. The polished vertical shape remains intact even when the roll is wider.
Watch Out For:
Do not clamp only the outer layer of the twist. The teeth need to catch both the folded roll and stable hair underneath, or the entire style can slide downward.
Low Folded Claw Clip Hairstyle

A low folded style keeps nearly all the visual weight at the nape. The hair is gathered like a low ponytail, folded upward once, then secured horizontally with an oversized clip so the ends sit hidden or form a small soft loop. A middle or side part can stay visible, and the crown can remain flat or slightly lifted. The low placement makes this practical for medium to long hair and gives layered ends less distance to travel before they reach the anchor.
The shape works well for straight, wavy, and loosely curly textures, especially when you want a polished result that still feels relaxed. Use an oversized flat-back claw clip for the anchor, light texturizing spray to add grip through slippery lengths, and a smoothing cream to keep the sides controlled. A dry-hair refresh is usually quick; a more polished wash-day version takes longer if the surface needs reshaping first.
The fold should feel supported rather than crushed. If the clip presses into the neck, move it slightly higher or reduce the amount of hair inside the jaws. For professional styling, explain how close to the nape you want the fold and whether you prefer a narrow horizontal shape or a wider, softer loop.
Pro tip:
Build the fold directly above the nape, then slide the clip in from one side so it catches the base. This reduces the need to squeeze the jaws over a thick bundle.
Make It Work for You:
If your ends are layered or shorter, let a small loop remain visible instead of forcing every piece inside. The low placement still looks polished with a controlled soft edge.
Watch Out For:
A clip resting on the neck can become uncomfortable when you turn your head. Move the fold slightly upward rather than tightening it or choosing a heavier accessory.
High Vertical Twist Claw Clip Hairstyle

This high twist moves the anchor above the occipital area so the style reads taller and more energetic than a low French twist. Sweep the hair upward, twist it vertically, then fold the remaining length back toward the crown before securing the center with an oversized clip. The sides stay sleek, the crown can carry a little lift, and the ends may fan lightly at the top. Long hair gives the most room for a controlled double fold, while medium lengths can create a shorter upright roll.
It suits readers who like a lifted silhouette and do not mind the clip sitting higher on the head. Use a strong oversized claw clip to support the weight, a boar-bristle brush to direct the outer surface upward, and flexible hairspray to keep shorter pieces from escaping. Rebuilding the full twist takes longer than simply smoothing the hairline, so treat a morning refresh and a full restyle as separate jobs.
Comfort matters more than maximum height. If the weight pulls backward, lower the anchor slightly rather than tightening the twist. For an event stylist, point to the exact clip height you want and explain whether the top ends should be hidden, curved inward, or left as a small polished fan.
Pro tip:
Before closing the clip, support the twist with one hand and check the profile from the side. A centered high anchor should feel balanced rather than pulling backward from the crown.
Make It Work for You:
For very long hair, create two flatter folds instead of one thick roll. This distributes the length vertically and lets the oversized clip close without crushing the center.
Watch Out For:
Do not raise the anchor so high that the clip catches mostly ends. The strongest hold comes from securing the twisted base, with the folded length supported around it.
Half-Up Crown Claw Clip Hairstyle
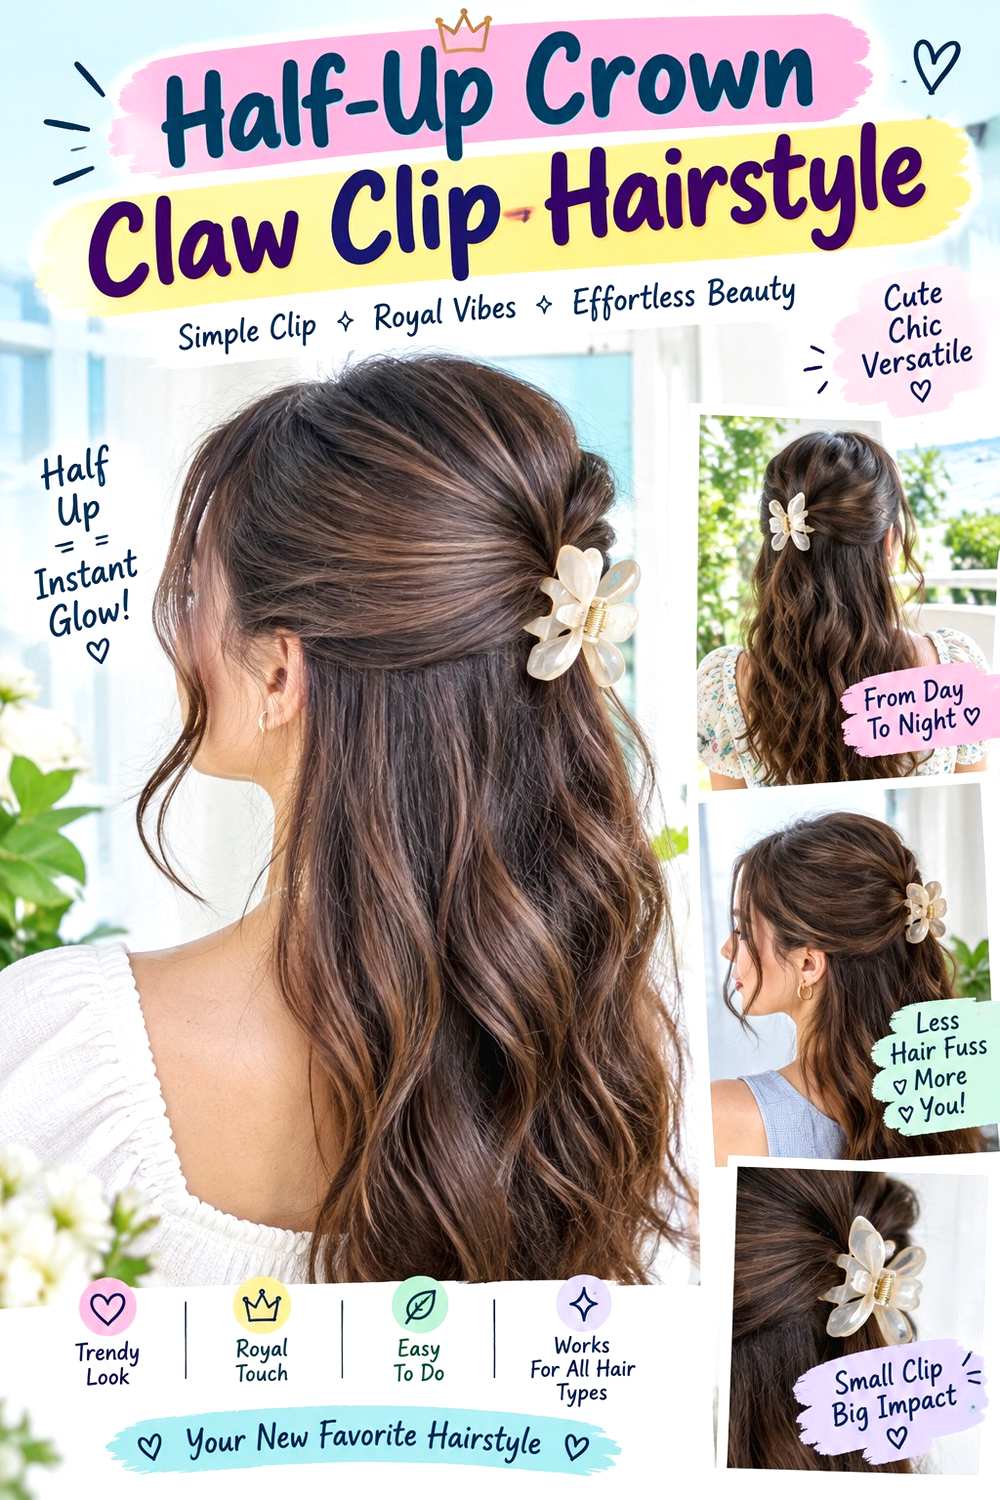
A half-up crown style leaves most of the length loose while using the oversized clip to lift and organize the upper section. Take hair from both temples, bring it toward the back of the crown, twist once, and secure it vertically or diagonally so the lower lengths fall freely. The loose hair can stay straight, wavy, curly, or coily, while soft face-framing pieces remain outside the clip if you want movement around the front.
This option is useful for medium to long hair when you want polish without removing all the volume from the lengths. Use a medium-to-large claw clip for the gathered crown section, light texturizing spray to help slippery hair grip, and a wide-tooth comb to arrange the loose lengths without breaking up natural texture. A quick refresh can be very short because only the upper section needs resetting; full wash-day styling depends on how you finish the hair left down.
Avoid taking so much hair that the lower section looks sparse. For salon or event styling, explain where you want the clip to sit and how much crown lift you prefer. The anchor should support the upper section without pulling the temples or flattening the natural movement below.
Pro tip:
Take the upper section from just above the ears rather than scooping up all the sides. This leaves enough loose hair below to keep the half-up shape balanced and full.
Make It Work for You:
If your hair is fine or slippery, gather a slightly smaller crown section and keep the twist compact. A modest amount of hair often grips better than an oversized bundle.
Watch Out For:
Avoid placing the clip directly on a sensitive crown spot. Shift it a little lower or higher if the teeth press uncomfortably, even when the visual placement looks right.
Looped Pony Claw Clip Hairstyle
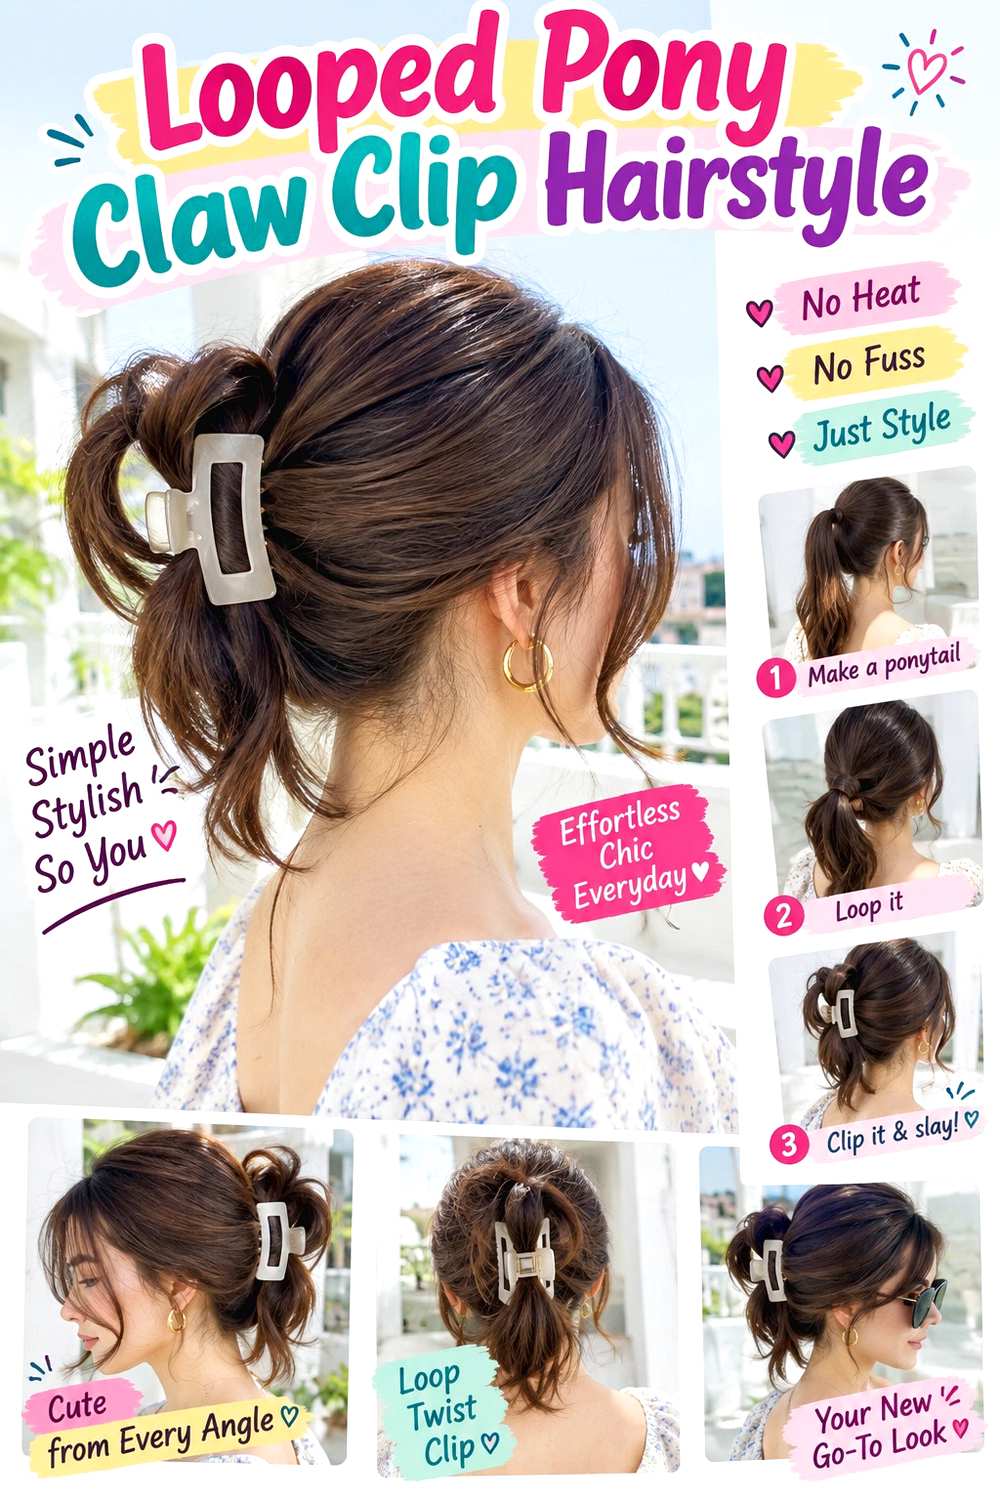
The looped pony keeps the ease of a ponytail but hides the base inside a polished fold. Gather the hair low to mid-back, twist the base once, then fold the length upward so a loose loop sits above the clip and the remaining ends fall below or tuck underneath. The result has more movement than a closed twist because part of the length stays visible. A middle part or swept-back front both work, and longer layers can frame the face rather than being forced into the anchor.
This is practical for medium to long hair when a full bun feels too structured. Use an oversized claw clip to hold the folded base, lightweight mousse to give slippery hair body, and smoothing serum to keep the visible pony section polished. A short refresh means resetting the loop and smoothing the ends; a full wash-day style takes longer if you first create volume or reshape texture.
Keep the loop proportional to the clip so it does not sag over the jaws. If your hair is dense, make a flatter fold instead of stuffing extra length inside. For professional styling, specify how much ponytail should remain visible and whether the loop should sit directly above the clip or lean slightly to one side.
Pro tip:
Form the loop before closing the clip, then tug only the visible pony section to adjust fullness. Pulling on the anchored base afterward can loosen the entire fold.
Make It Work for You:
For thick hair, keep the pony loop longer and flatter so less bulk sits inside the jaws. The visible movement remains while the anchor carries a more manageable section.
Watch Out For:
Do not let the loop completely cover the clip if the accessory is part of the look. Reposition the fold so the clip remains visible and the weight stays centered.
Soft Messy Bun Claw Clip Hairstyle

A soft messy bun uses the oversized clip as a visible support rather than hiding it inside a perfect knot. Gather the hair near the back of the head, twist loosely, fold the length into a rounded loop, and clamp across the base so a few ends and soft pieces remain free. The crown can keep gentle volume, while the sides stay controlled enough that the shape looks intentional. Medium to long hair works best, and layers naturally create loose edges that give the bun movement.
This version suits wavy, curly, and straight hair when you want relaxed polish rather than a tight finish. Use an oversized curved claw clip for the anchor, dry texturizing spray to create grip and airy fullness, and lightweight smoothing cream on surface pieces that tend to frizz. A quick refresh may take a few minutes; a full wash-day version takes longer if you first build texture or dry the hair for volume.
Do not tighten the whole style simply because one section falls. Reset the loose fold and let the clip catch a secure base beneath it. For event styling, explain how much crown fullness you want and whether the loose ends should sit above the clip, around the sides, or mostly tucked away.
Pro tip:
Leave the final few inches outside the fold and place them deliberately around the clip. Controlled loose ends look softer than repeatedly pulling random pieces out after securing the bun.
Make It Work for You:
If your hair is very smooth, keep the bun slightly smaller and let the crown provide softness. A compact anchor is less likely to collapse than an oversized loose loop.
Watch Out For:
Messy should not mean unstable. If the bun shifts as soon as you move, rebuild the base and capture more supporting hair rather than adding more loose texture.
Side Twist Claw Clip Hairstyle

Moving the twist off center changes the entire balance of a claw-clip updo. Sweep most of the hair toward one side, twist the length upward, and secure it diagonally so the oversized clip follows the side of the roll rather than sitting directly down the middle. A deep side part can echo the placement, while one or two controlled pieces near the opposite temple soften the front. Medium to long hair provides enough length for a visible twist without creating too much bulk at one side.
This style suits straight, wavy, or loosely curly hair and works well when you prefer asymmetry. Use a large claw clip with firm teeth to stabilize the side anchor, a tail comb to define the part, and light styling cream to smooth the sweep without flattening it. A dry-hair refresh is short if the base remains intact; a full restyle takes longer because the weight must be balanced before clipping.
If the clip rotates, the twist is probably carrying more weight on one end. Rebuild the fold so hair is distributed along the jaws. For professional styling, specify which side should hold the clip, how low the twist should begin, and whether the visible front section should lie sleek or keep soft volume.
Pro tip:
Angle the clip in the same direction as the side twist instead of placing it vertically. Matching those lines helps the teeth sit across the weight rather than against it.
Make It Work for You:
If your natural part falls opposite the twist, keep the part and move only the back section. You can preserve the asymmetry without forcing the front roots into an unfamiliar direction.
Watch Out For:
Do not load all the hair into the lower end of a diagonal clip. Spread the twist along the jaws so one side does not rotate downward during wear.
Double Twist Claw Clip Hairstyle

Two opposing twists create a centered claw-clip style with more structure than a single roll. Divide the hair vertically into two large sections, twist each one inward toward the center, then overlap their bases before securing them with an oversized clip. The top can stay smooth or slightly lifted, and the lower ends can be tucked beneath the twists or left as a short soft tail. This construction works particularly well on medium to long hair because both sides share the weight.
The balanced shape can suit dense hair or anyone who finds one large twist bulky. Use an oversized wide-jaw claw clip to span both sections, lightweight styling cream to keep each twist neat, and flexible hairspray to control flyaways around the seam. Resetting one side can be a quick refresh; creating both twists from freshly washed hair takes longer because symmetry and tension need more attention.
Keep the two sections similar in size but not painfully tight. If one side bulges, redistribute hair inside that twist instead of adding more pressure. For event styling, show the stylist where the twists should meet and whether the center seam should be visible or mostly covered by the clip. That detail changes how sculpted the finished back looks.
Pro tip:
Create both twists before overlapping them, then compare their height with your fingers. Adjusting the sections before clipping is easier than correcting an uneven center after the anchor closes.
Make It Work for You:
For very dense hair, make each twist broad and shallow. Two narrow ropes can become bulky where they meet, while flatter sections distribute weight across the clip more comfortably.
Watch Out For:
Avoid twisting both sides so tightly that the seam feels rigid. Loosen each section slightly before clipping if the temples pull or the center develops hard ridges.
Low Chignon Claw Clip Hairstyle
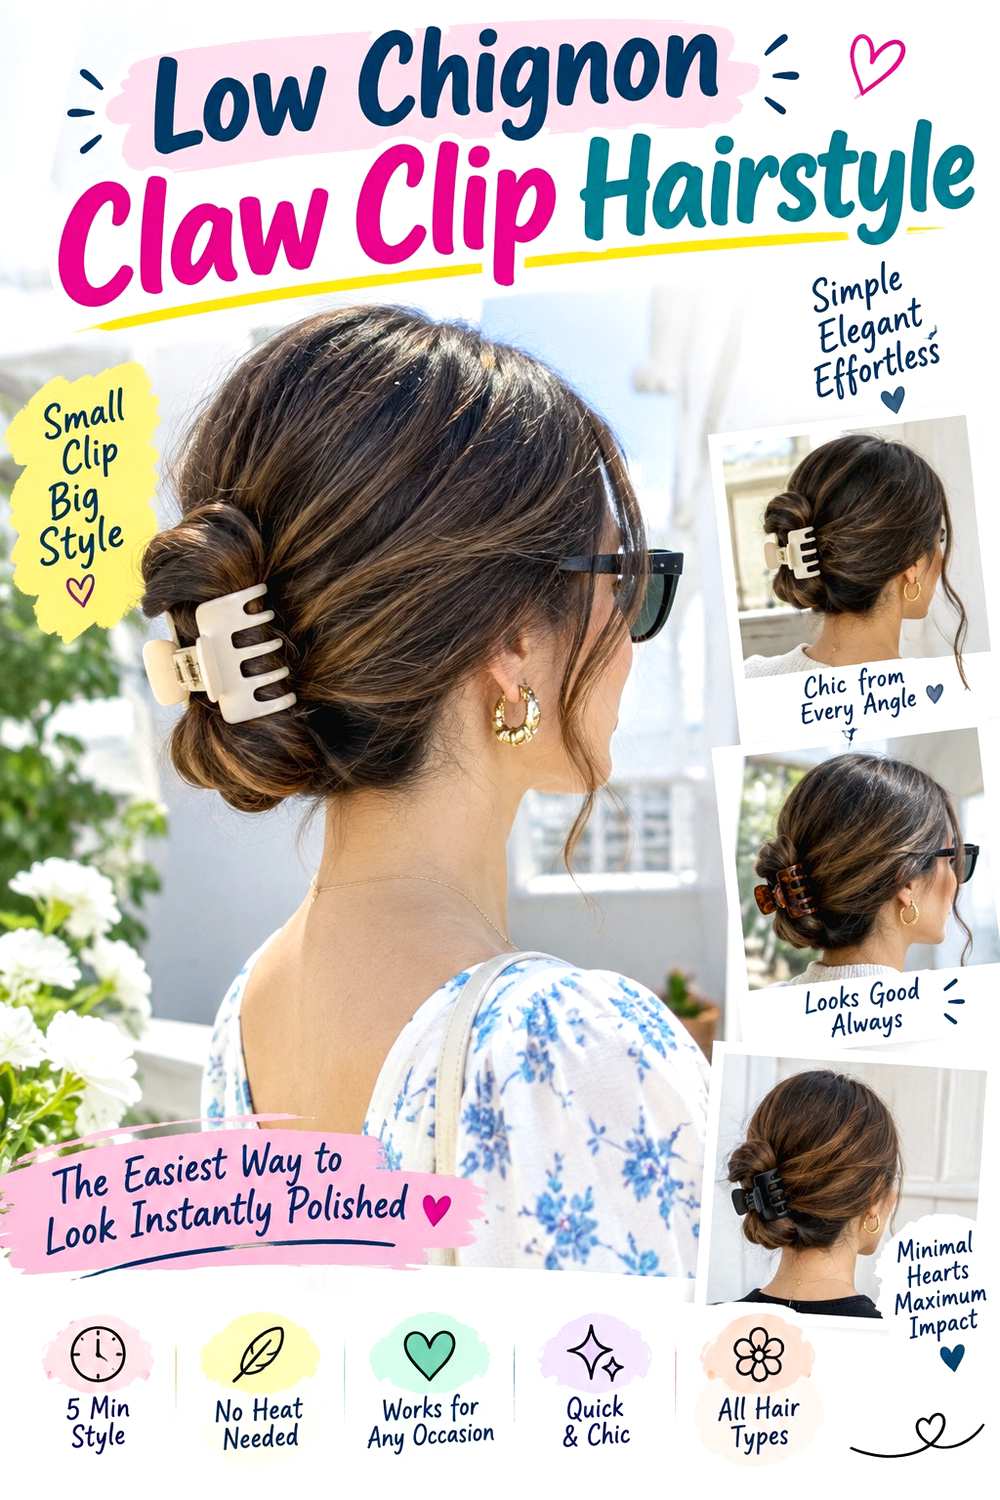
A claw clip can support a low chignon when the hair is folded horizontally rather than twisted straight upward. Gather the length at the nape, coil or fold it into a broad low bun, then place the oversized clip across the upper edge so it grips both the chignon and a stable section of hair beneath. The crown can remain sleek, while the bun itself stays rounded and close to the head. Long hair gives more wrapping room, but medium lengths can create a compact version.
This style suits straight, wavy, curly, and coily textures when you want a low profile that feels more formal than a casual twist. Use a wide oversized claw clip to secure the bun, light-hold gel to smooth the hairline, and a tail comb to refine the part and crown. A quick refresh usually means rebuilding only the outer fold; a full wash-day finish takes longer if you first define or smooth the surface.
The clip should support the chignon rather than sit only on top of it. If the bun drops, capture more of the base inside the jaws. For professional styling, specify the chignon width, exact nape placement, and whether you want the bun fully hidden behind the clip or visible below it.
Pro tip:
Place the clip across the upper third of the chignon so the teeth catch both the bun and hair above the nape. That shared anchor helps prevent downward sagging.
Make It Work for You:
If your hair is long, spread the chignon wider instead of stacking multiple coils vertically. A broader base can sit closer to the head and feel lighter against the clip.
Watch Out For:
Do not attach the clip only to the decorative outer fold. If it misses the underlying base, the chignon may rotate even when the jaws feel tightly closed.
Volume Crown Claw Clip Hairstyle
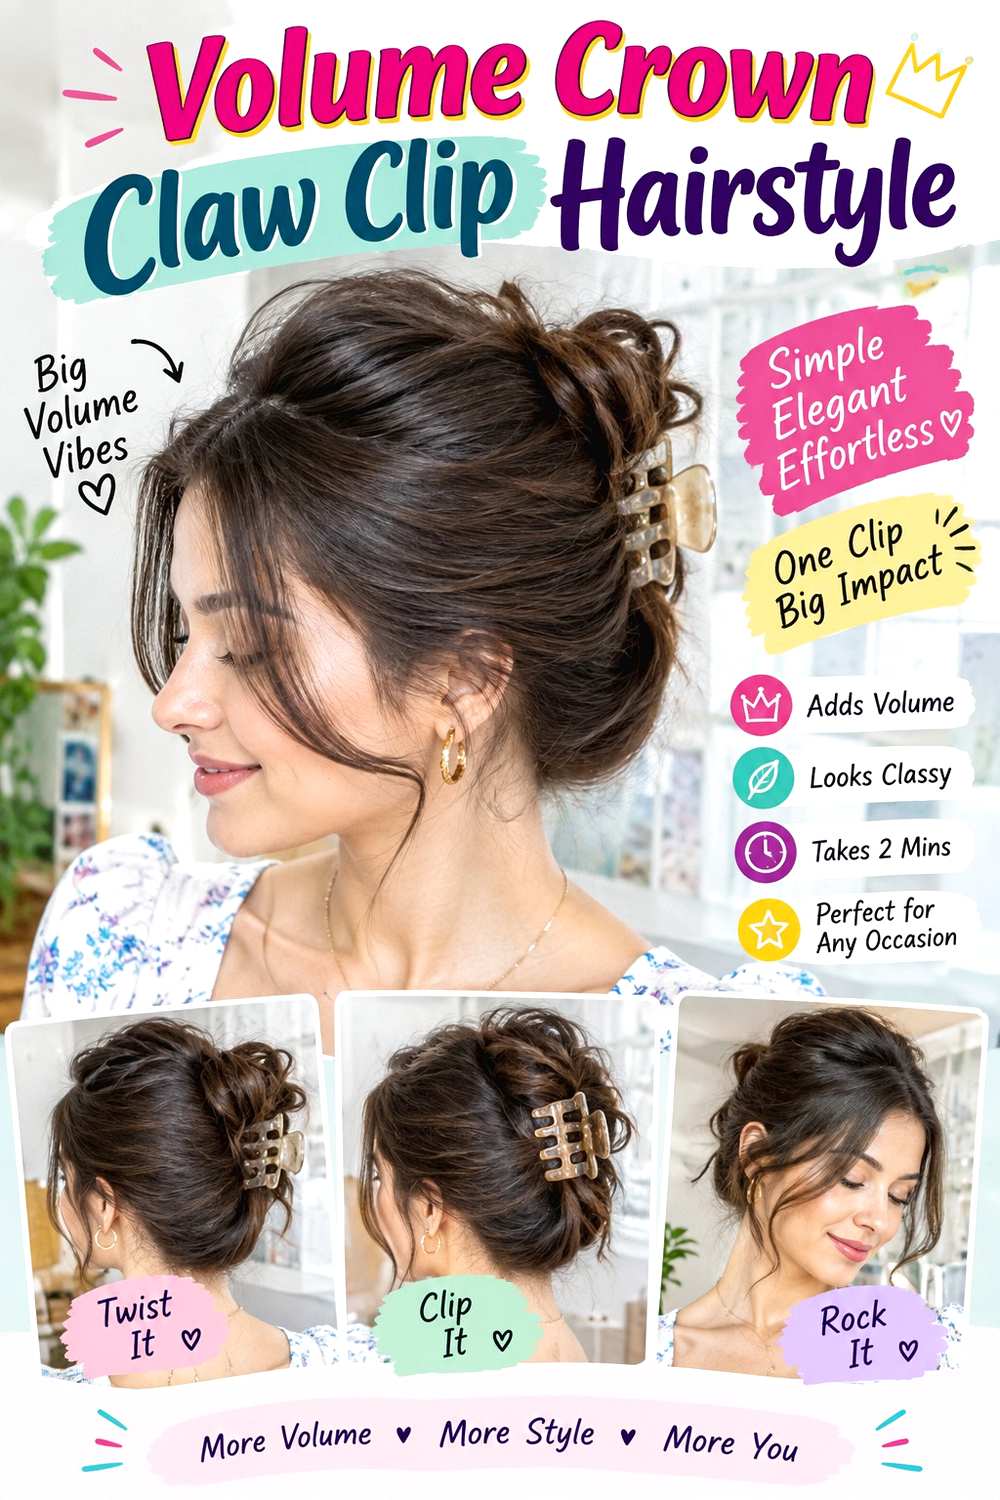
This version places controlled lift at the crown before the hair enters the clip. Gather the sides loosely so the top keeps a gentle raised curve, twist the remaining length once, and secure it at mid-back with an oversized clip. The crown should look supported rather than teased into a high bump, and the ends can fall softly above the clip or tuck into the twist. Medium and long hair work well because there is enough length to balance the extra height with a secure anchor.
The style suits fine, medium, or dense hair when you want more vertical proportion without a tight updo. Use a large claw clip for the anchor, root-lift spray to support the crown, and a tail comb to guide the top section into place without flattening it. A short refresh involves lifting the crown and resetting the clip; a complete wash-day version takes longer if the roots need drying for volume first.
Avoid pulling the side sections backward so firmly that the crown collapses. If the lift disappears, loosen the top before tightening the anchor. For professional styling, specify where the height should peak—near the crown rather than the forehead—and how much loose volume you want behind the part.
Pro tip:
Set the crown height before twisting the back. Once the clip is closed, gently adjusting the top is safer than pulling large sections upward and disturbing the anchor.
Make It Work for You:
For fine hair, keep the crown lift soft and concentrated near the back rather than making a large bump. Small height can create proportion without exposing gaps between strands.
Watch Out For:
Too much product at the roots can collapse the lift you are trying to create. Keep heavier smoothing products away from the crown and use them only where frizz needs control.
Curly Cascade Claw Clip Hairstyle
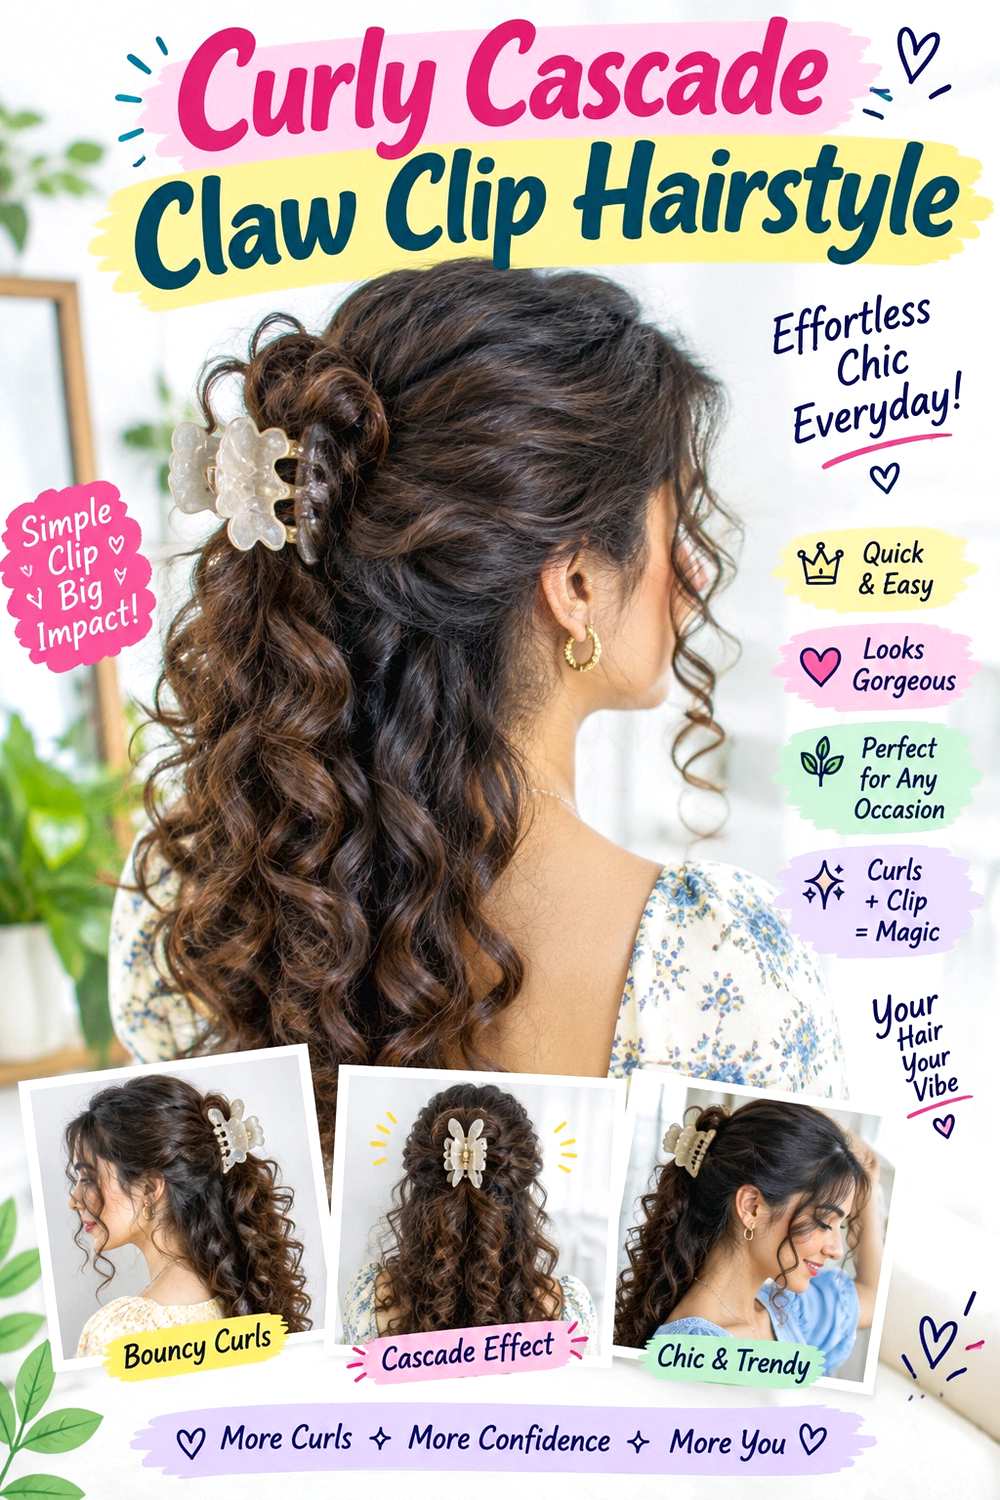
A curly cascade keeps the clip high enough for the lengths to spill downward instead of disappearing into a twist. Gather the upper and middle sections at the back, twist only the base, and secure it with an oversized clip while leaving the curls free above and below. The front can keep a center or side part, and a few shorter curls may stay loose around the face. The defining feature is visible curl movement rather than a completely closed updo.
This works well for naturally curly hair when you want lift without stretching every curl into a sleek shape. Use a large curved claw clip to hold the base, curl cream to support definition, and a lightweight gel to control frizz around the gathered area. A quick refresh can focus on outer curls and clip placement; a full wash-day style takes longer because curl definition and drying happen before the updo is built.
Plan the anchor on the dry shape because shrinkage changes how much length reaches the clip. If the style sags, gather a slightly smaller section instead of pulling harder. For professional styling, specify how much curl should remain loose, where the clip should sit, and whether the cascade should fall centrally or slightly to one side.
Pro tip:
Secure the base first, then arrange only the outer curls around the clip. This preserves curl groups and prevents repeated handling from turning the cascade into a fuzzy halo.
Make It Work for You:
If your curls shrink strongly, position the clip slightly lower than you would on stretched hair. The cascade can still look lifted while leaving enough length to fall naturally.
Watch Out For:
Do not force every curl into the clip when shorter pieces naturally spring free. Capture the stable base and let intentional curls remain outside rather than increasing tension.
Coily Tuck Claw Clip Hairstyle

A coily tuck folds the length inward while allowing the natural texture to stay visible around the clip. Gather the hair at the back, bring the ends upward in one or two broad folds, and secure the center with an oversized clip so the outer coils form a soft rounded shape. The hairline can stay smooth or textured, and small front coils may remain free. The result should look compact and supported rather than stretched into a narrow twist.
This style can suit coily hair when the clip has enough depth to hold the folded section without crushing the pattern. Use a deep-jaw claw clip for the anchor, moisturizing leave-in conditioner to keep the coils flexible, and a soft-hold gel to control the perimeter where needed. A short refresh may involve re-forming only the outer fold; a full wash-day version takes longer because detangling, defining, and drying happen first.
Work with the hair in its usual shrunken or stretched state rather than assuming one measurement fits both. If the clip strains, reduce the amount captured in one fold. For professional styling, explain whether you want the tuck broad and low or compact and higher, and how many face-framing coils should remain outside the anchor.
Pro tip:
Fold the coils in broad sections and check that the clip can close without compressing the center. A secure tuck should hold the base while allowing texture to remain visible.
Make It Work for You:
If your hair is very dense, divide the tuck into two overlapping folds instead of one thick bundle. This spreads the volume and helps a deep-jaw clip sit more comfortably.
Watch Out For:
Do not plan the tuck only on stretched length. Once the hair recoils, the fold may sit higher and fuller, so judge final placement in the state you actually wear.
Short Bob Claw Clip Hairstyle

A shorter bob can still use an oversized clip if the style gathers only the sections that comfortably reach the back. Take hair from the temples and crown, twist it once, and secure it horizontally or vertically while leaving the lower nape pieces free. The result resembles a structured half-up style rather than a forced full updo. A center part creates even framing, while a side part can add softness and make shorter front layers easier to leave out.
This option suits chin- to shoulder-length hair when a full claw-clip twist would release too many short ends. Use a slim oversized claw clip with closely spaced teeth for grip, light texturizing spray to reduce slipping, and smoothing cream to control the pieces around the part. A quick dry-hair refresh can be very short; a full wash-day style takes longer only if you first reshape the bob or add movement.
Do not try to trap every nape piece inside the clip. Letting the shortest sections remain down usually looks cleaner and feels more secure. For salon or event styling, explain which lower pieces should stay loose and how high the half-up anchor should sit so the clip does not overwhelm the shorter silhouette.
Pro tip:
Gather only the sections that naturally reach the back and leave the lowest nape pieces alone. A clean partial anchor usually looks more intentional than repeatedly forcing short hairs upward.
Make It Work for You:
If your bob has many short layers, move the clip slightly higher and reduce the gathered section. The half-up effect remains clear while fewer pieces fight the anchor.
Watch Out For:
A very large, heavy clip can overwhelm a short shape and pull the crown backward. Choose oversized proportions with a lightweight construction and teeth that actually grip your section.
Long Hair Fold Claw Clip Hairstyle

Very long hair needs more folding than twisting if you want an oversized clip to stay stable. Gather the length at the nape, twist the base once, fold the pony upward, then fold the remaining ends back down before clamping across the stacked section. The result creates a long vertical shape with the bulk spread through several layers instead of one oversized knot. A smooth crown keeps the style polished, while a few face-framing pieces can remain loose.
This approach suits long straight, wavy, curly, or coily hair when a single twist feels too heavy. Use an extra-large claw clip with a deep jaw to contain the folds, light styling cream to reduce frizz, and flexible hairspray to keep shorter layers from escaping. A quick refresh can focus on the top fold; a complete restyle takes longer because the full length must be redistributed evenly.
If the clip tilts, the folds are probably stacked unevenly. Rebuild them flatter rather than adding more pressure. For professional styling, specify how much length should remain visible above or below the clip and where the vertical fold should finish. That determines whether the result looks compact, elongated, or intentionally cascading.
Pro tip:
Make each fold roughly the width of the clip before stacking the next one. Matching the fold to the jaws keeps long lengths from spilling unevenly past one side.
Make It Work for You:
If your hair is extremely dense, let some length cascade above the clip instead of containing everything inside. The style stays polished while reducing the thickness at the anchor.
Watch Out For:
Do not twist the entire length into a hard rope before folding. That concentrates bulk in the middle and can make the clip tilt, gape, or press uncomfortably.
Braided Claw Clip Updo Hairstyle

A braid adds structure before the oversized clip is applied. Create one loose braid through the length, fold it upward against the back of the head, and secure the middle with the clip so the braid remains partly visible above or below the jaws. The crown can stay sleek or softly lifted, and a center or side part can frame the front. Medium to long hair works best because the braid needs enough length to fold without becoming too bulky.
This style suits straight, wavy, curly, and coily textures when you want visible detail without using many separate pins. Use an oversized claw clip for the main anchor, light braiding cream to keep the sections neat, and flexible hairspray to control flyaways around the crown. A quick refresh may involve re-securing the folded braid, while a full restyle takes longer because the braid itself needs to be rebuilt.
Keep the braid comfortably firm rather than tight at the scalp. If the fold feels heavy, make the braid flatter or position the clip lower. For professional styling, specify braid width, how much of it should remain visible, and whether the fold should sit vertically or diagonally. Those details affect both comfort and the final pattern.
Pro tip:
Fold the braid so its flattest side rests against the head, then clamp across the middle. This gives the teeth a stable surface and keeps the braid pattern visible.
Make It Work for You:
If your hair is thick, use a wider braid with moderate tension rather than a narrow tight one. The fold will lie flatter and distribute weight more comfortably under the clip.
Watch Out For:
Do not rely on the clip to correct a loose braid at the scalp. Rebuild the braid base if it shifts, because extra clamping pressure will not stabilize an unstable foundation.
Face-Frame Claw Clip Hairstyle

Face-framing pieces become the defining detail in this claw-clip updo. Leave two narrow front sections free, gather the rest into a mid-height twist, and secure it with an oversized clip so the back stays polished while the front remains soft. The loose pieces can finish near the cheekbones, jaw, or below the chin depending on your existing layers. A center part gives balanced framing, while a soft side part creates a less symmetrical effect.
This works well for medium to long hair when you like a finished updo without a completely closed hairline. Use a large claw clip for the anchor, heat protectant to shield the front pieces, and a curling iron to add a controlled bend if you choose heat styling. A quick refresh may involve only reshaping the face frame; a full wash-day style takes longer because the back and front are finished separately.
Separate the front pieces before building the twist so you do not disturb the anchor later. If your natural texture already gives them movement, leave them unheated. For professional styling, specify the finished length and direction of the face frame, plus the exact clip height, so the loose front and structured back feel intentionally balanced.
Pro tip:
Separate the front pieces before gathering the back and keep them completely outside your working section. This prevents accidentally pulling out extra hair after the twist is already secure.
Make It Work for You:
If your natural curls frame the face well, preserve that pattern instead of heat-shaping it. Adjust only the width and placement of the loose sections to suit the updo.
Watch Out For:
Do not release thick front panels all at once. Start with narrow sections, check the balance, and loosen a little more only if the polished back still feels too closed.
Office Sleek Claw Clip Hairstyle
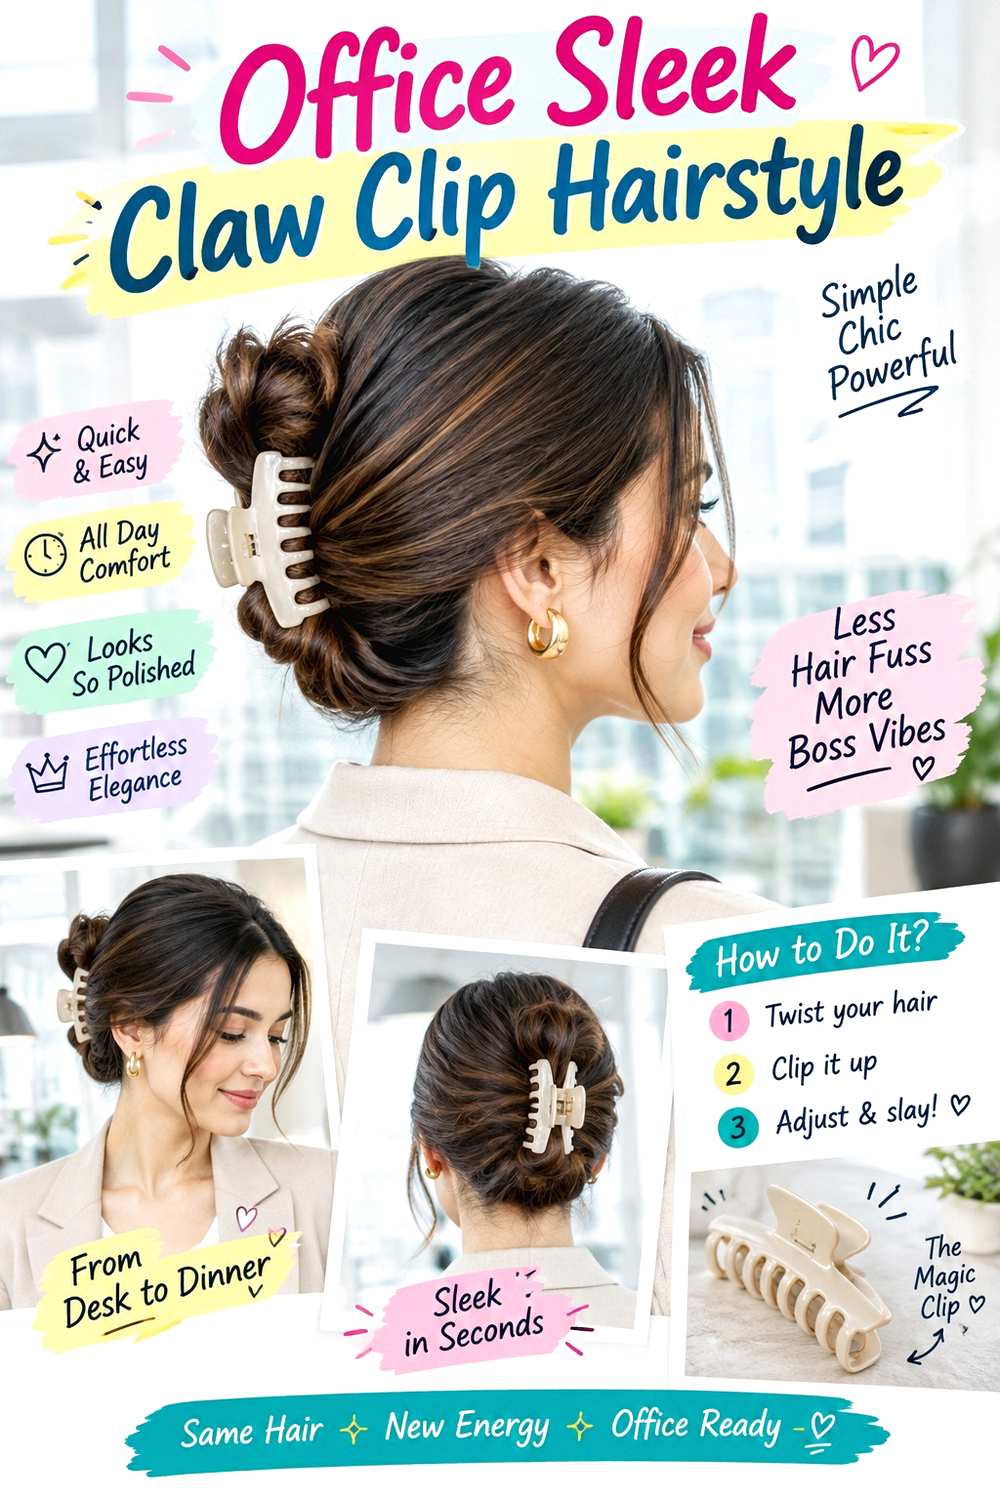
An office-ready claw-clip style keeps the silhouette close to the head, with a clean part, smooth sides, and a compact vertical fold. Gather the hair low, twist upward, fold the ends inward, and secure the center with an oversized clip that sits flat enough for comfortable desk work. A center or side part can stay crisp, while loose pieces are kept minimal. Medium to long hair works best because the ends need enough length to tuck inside the fold.
This option suits straight, wavy, or smoothed textured hair when you want a controlled finish that can be refreshed quickly during the day. Use a flat-back oversized claw clip for the anchor, light-hold gel to smooth the perimeter, and a tail comb to refine the part and crown. A morning setup may take several minutes, while a later refresh should only require smoothing and resetting the clip if it shifts.
Avoid placing the clip so low that it presses against a chair or headrest. Move the anchor slightly higher if needed rather than tightening it. For professional styling, specify how flat you want the crown, where the twist should end, and whether any short front pieces should remain visible.
Pro tip:
Test the clip against your chair or headrest before leaving home. A slightly higher anchor can prevent pressure at the back of the head without changing the polished silhouette.
Make It Work for You:
If your hair is dense, use a flatter vertical fold so the clip sits closer to the head. That can make the style more comfortable for long periods at a desk.
Watch Out For:
Do not over-smooth the roots until the style feels rigid. A polished surface should still allow comfortable movement; reset the fold if tightness develops instead of adding more hold.
Loose Waves Claw Clip Hairstyle
Loose waves pair well with an oversized clip when only the upper half is gathered and the lower bends stay visible. Take sections from the temples, twist them together at the back, and secure the join with the clip so the rest of the hair falls in broad waves. The crown can keep soft lift, and longer face-framing layers can remain loose. The clip should sit high enough that the waves spill beneath it rather than being trapped inside the jaws.
This style suits medium to long hair when you want a polished half-up finish with plenty of movement. Use an oversized claw clip for the anchor, heat protectant to reduce heat exposure, and a large-barrel curling iron to create broad bends if your starting texture needs them. A quick refresh can focus on the top section and a few visible waves; a full wash-day set takes longer depending on length, density, and experience.
Let heated sections cool before arranging them around the clip so the bends keep their shape. If the crown slips, reduce the gathered section rather than clamping harder. For professional styling, specify wave size, clip height, and how much hair should remain loose around the face and shoulders.
Pro tip:
Let freshly shaped waves cool before gathering the crown section. Clipping warm bends too soon can flatten the upper pattern and make the loose lengths look uneven beside the anchor.
Make It Work for You:
If your hair already has natural waves, skip extra heat and gather the half-up section around the existing pattern. Keep the clip placement high enough to preserve movement below.
Watch Out For:
Do not trap the strongest waves inside the jaws. Gather a smaller upper section so the lower bends remain visible and the half-up shape does not look suddenly flat.
Conclusion
Oversized claw clip hairstyles can look sleek, soft, lifted, low, half-up, or fully tucked depending on how much hair enters the anchor and where the clip sits. Straight and wavy hair may need extra grip, while curls and coils often benefit from placement that respects grouping and shrinkage. Dense hair usually feels better when folds are broad and weight is distributed; finer hair may hold more securely with a smaller gathered section. Face-framing pieces and crown volume can soften the outline, while compact twists create a cleaner finish. Choose the version that works with your length, natural texture, usual part, and daily routine. A polished result should come from stable placement and balanced tension, not from forcing the clip tighter.
Before Your Salon Visit
Choose one or two favorite references and show the front, side, and back when possible. Explain your texture, density, usual part, preferred length, and how long you need the clip to stay comfortable. Point to the exact twist height, fold width, crown volume, face-framing pieces, loose ends, and clip angle you like. Because these are temporary styles, focus the conversation on secure anchoring, grip, and practical styling rather than assuming you need a haircut to recreate the shape.
FAQs
How Do I Stop an Oversized Claw Clip From Slipping?
Match the jaw depth to the amount of hair you are gathering and make sure the teeth catch a stable base, not only loose ends. Slippery hair may benefit from light texture before clipping. If the style keeps dropping, rebuild the fold instead of squeezing the clip harder.
Can Oversized Claw Clips Work on Thick or Dense Hair?
Yes, but the clip needs enough width and depth for the folded section. Dense hair often holds better when it is spread into a broad, flatter twist rather than packed into one thick bundle. Distributing the weight can also make the style more comfortable.
What Is the Best Claw Clip Style for Shorter Hair?
Half-up twists and partial folds are often more practical for chin- to shoulder-length hair because the shortest nape sections do not have to reach the anchor. Gather only what comfortably meets at the back and leave intentional shorter pieces loose rather than forcing them upward.
Can Curly or Coily Hair Wear a Polished Claw Clip Style?
Yes. Polished does not require curls or coils to be straightened. Keep natural texture visible while controlling the anchor, part, or perimeter as much as you prefer. Plan placement on the finished dry shape because shrinkage and curl grouping affect how much hair reaches the clip.