12 Pixie Shag Haircut Ideas for Women
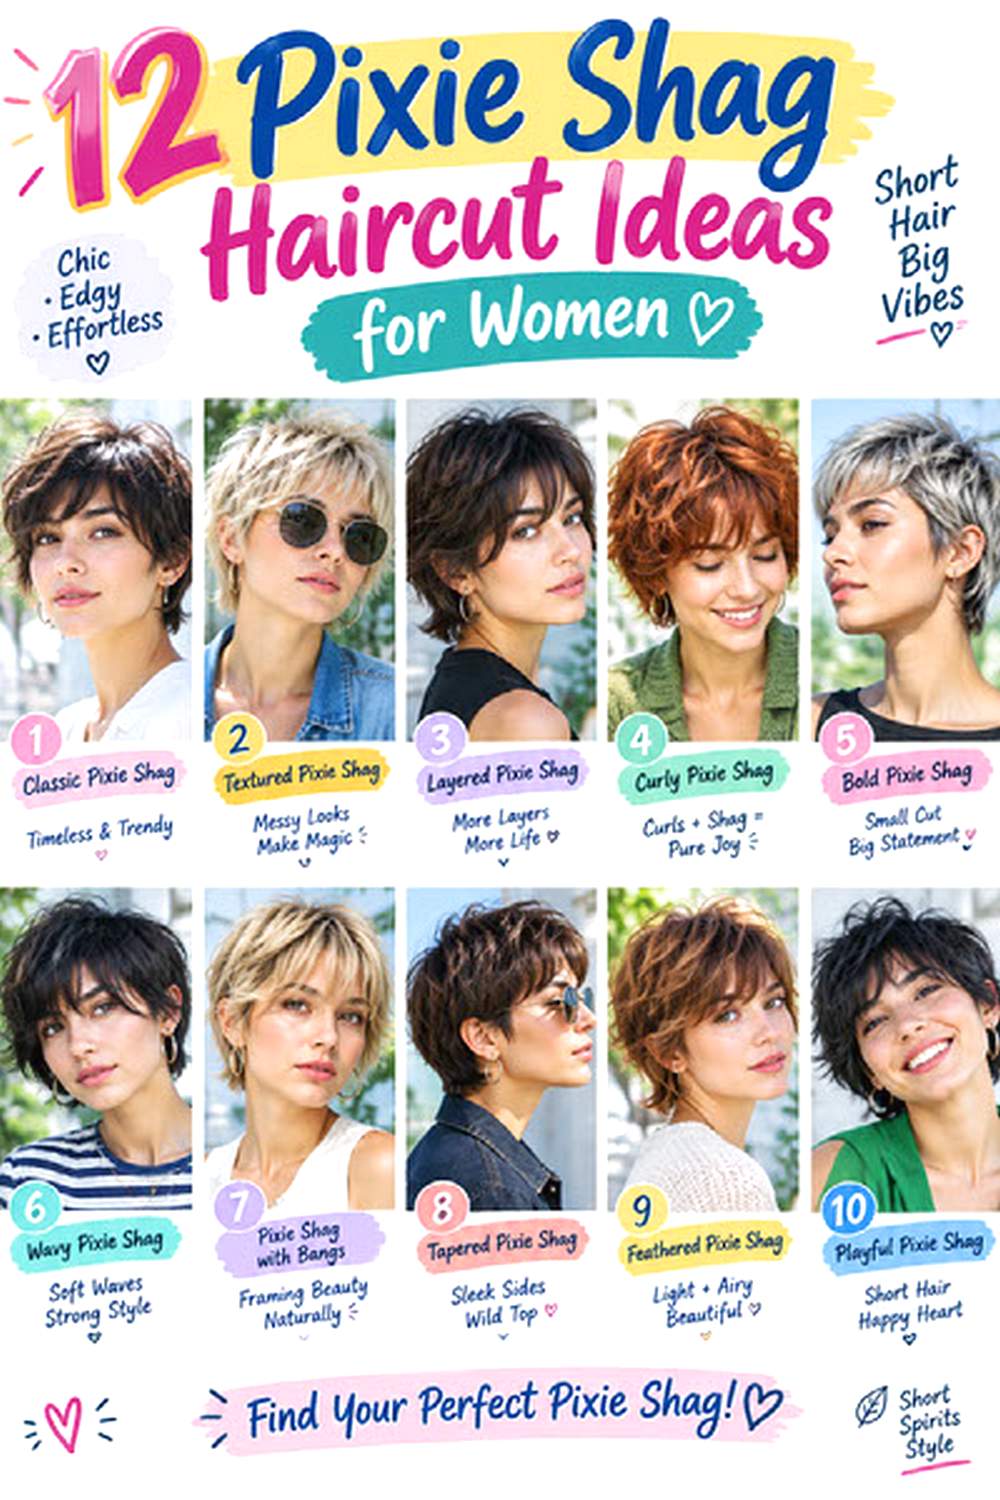
A pixie shag combines the short length of a pixie with the loose layers, fringe, and movement associated with a shag haircut. Instead of sitting close to the head in one neat shape, it usually has more texture through the crown, softer pieces around the ears, and a fringe that can be wispy, curtain-shaped, sweeping, or deliberately choppy. The nape may be closely tapered or left longer for extra movement.
These Pixie Shag Haircut Ideas for Women can be adjusted for very different hair types. Fine hair often looks better with restrained layering and enough weight left through the ends, while thick hair may need hidden bulk removal. Natural waves and curls can provide much of the texture on their own, although shrinkage matters when choosing bang and layer length.
Daily styling ranges from a quick finger-shape to a more polished blow-dry. Short fringe and tapered necklines usually need salon attention sooner, while longer, softer versions grow out more gradually. Before choosing a cut, consider your density, natural texture, cowlicks, preferred fringe length, and how much morning styling fits your routine.
Quick List
- Airy Curtain-Bang Pixie Shag
- Soft Wavy Pixie Shag
- Curly Pixie Shag With Rounded Layers
- Fine-Hair Pixie Shag With Crown Lift
- Thick-Hair Pixie Shag With Tapered Sides
- Pixie Shag With Wispy Fringe
- Side-Parted Pixie Shag With Long Bangs
- Choppy Pixie Shag With Piecey Ends
- Long-Nape Pixie Shag
- Soft Mullet-Inspired Pixie Shag
- Low-Maintenance Air-Dried Pixie Shag
- Sleek Pixie Shag With Feathered Layers
Airy Curtain-Bang Pixie Shag
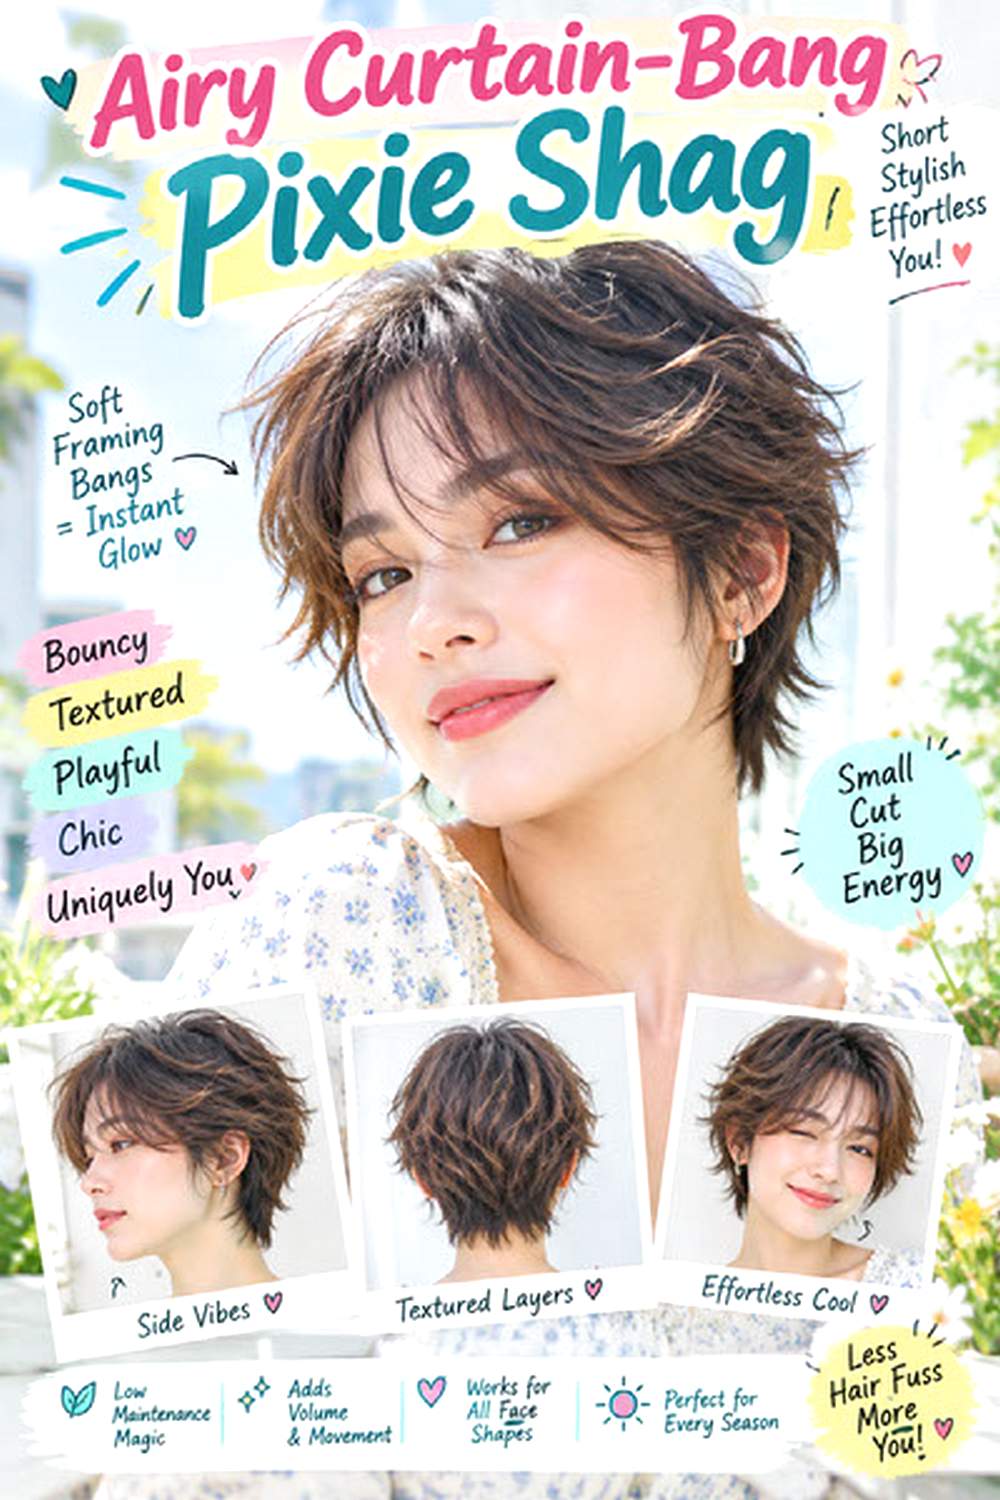
A curtain fringe softens the front of a pixie shag by keeping the center open and allowing longer pieces to sweep toward the temples. The shortest part can sit around the brows, while the outer corners blend into textured side layers around the ears. Light crown layering creates movement without producing extreme height, and a softly tapered nape keeps the cut balanced. Straight, slightly wavy, and medium-density hair are easy matches, while fine hair benefits from a shallow bang section that does not remove too much fullness. Morning styling is quick once the fringe learns its direction. Use lightweight mousse, a small round brush, and flexible hairspray to shape the front and lift the roots. Fringe trims may be needed before the rest of the cut loses its form. At the salon, ask for the curtain bangs to remain visibly longer at the temples and for the crown layers to stay blended rather than sharply disconnected.
Pro tip:
Dry the bangs forward before separating them into two sides. This keeps the center from opening into a wide gap.
Soft Wavy Pixie Shag
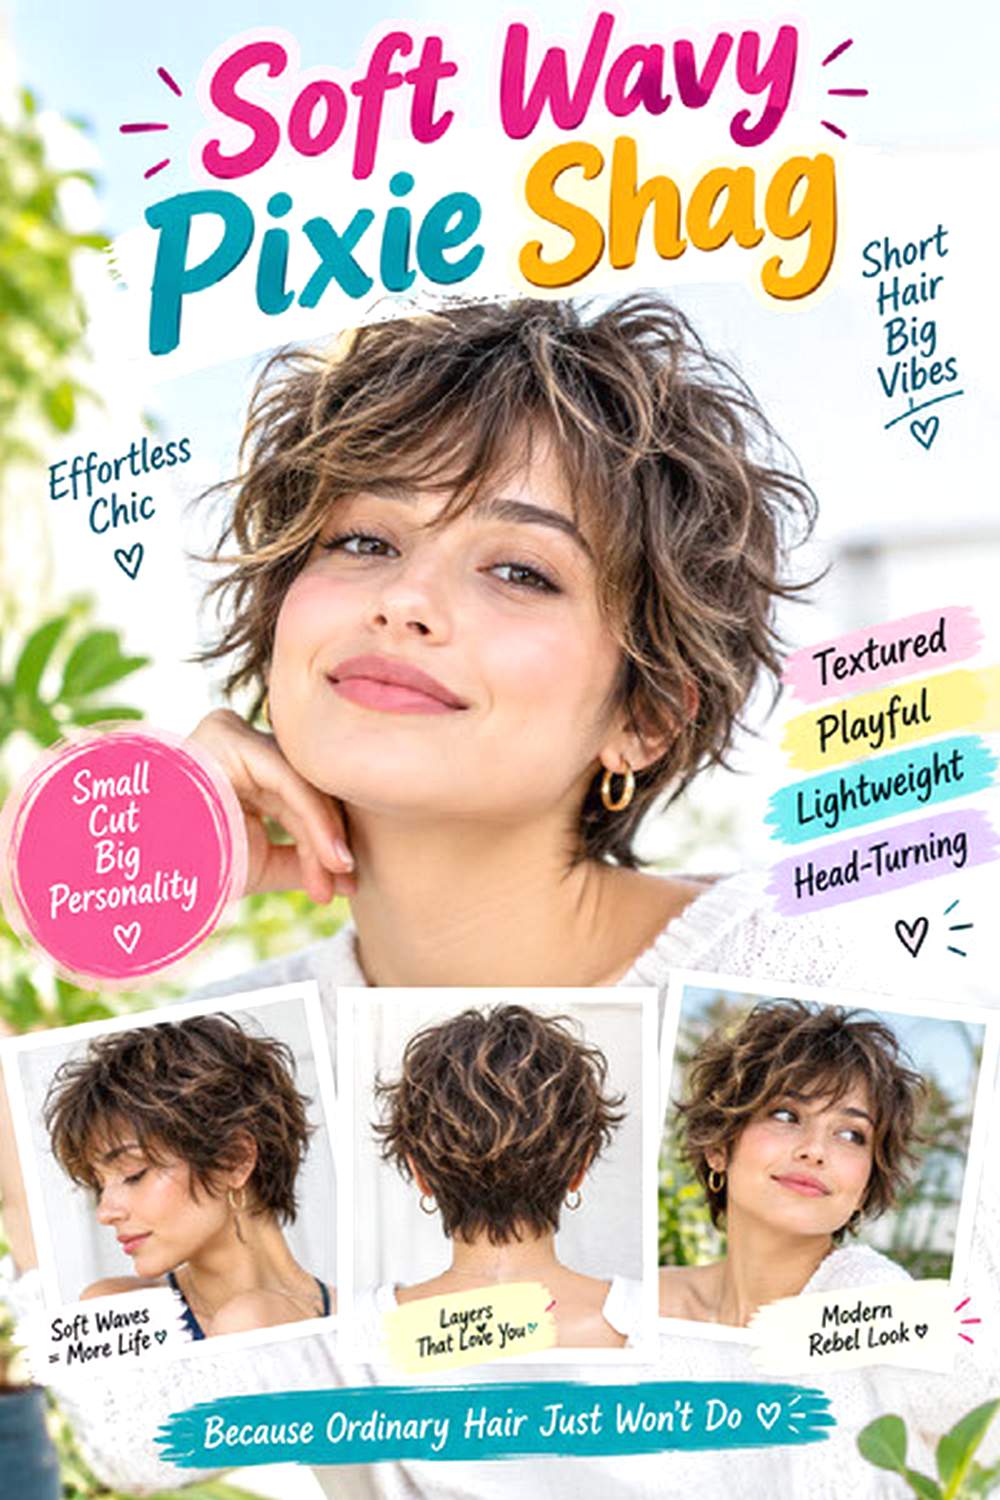
Natural waves give a short shag movement without requiring lots of visible cutting lines. Here, soft layers through the crown and sides allow gentle bends to form around the ears, while the nape stays light enough to prevent the shape from becoming heavy. Medium-density wavy hair handles this cut particularly well because the existing texture creates separation on its own. Fine waves should keep more weight at the lower edges, while dense waves can take additional internal layering. Styling can be minimal when the natural pattern already suits the haircut. Apply leave-in conditioner and a lightweight wave cream, then use a diffuser for extra definition or allow the hair to air-dry. Refreshing is usually quick with a little water on flattened sections. At the salon, ask for the layers to follow your natural bend pattern and keep the side pieces long enough to curl softly around the ears.
Pro tip:
Avoid brushing the haircut once the waves are dry. Finger separation preserves the layer pattern without turning soft texture into unwanted volume.
Curly Pixie Shag With Rounded Layers
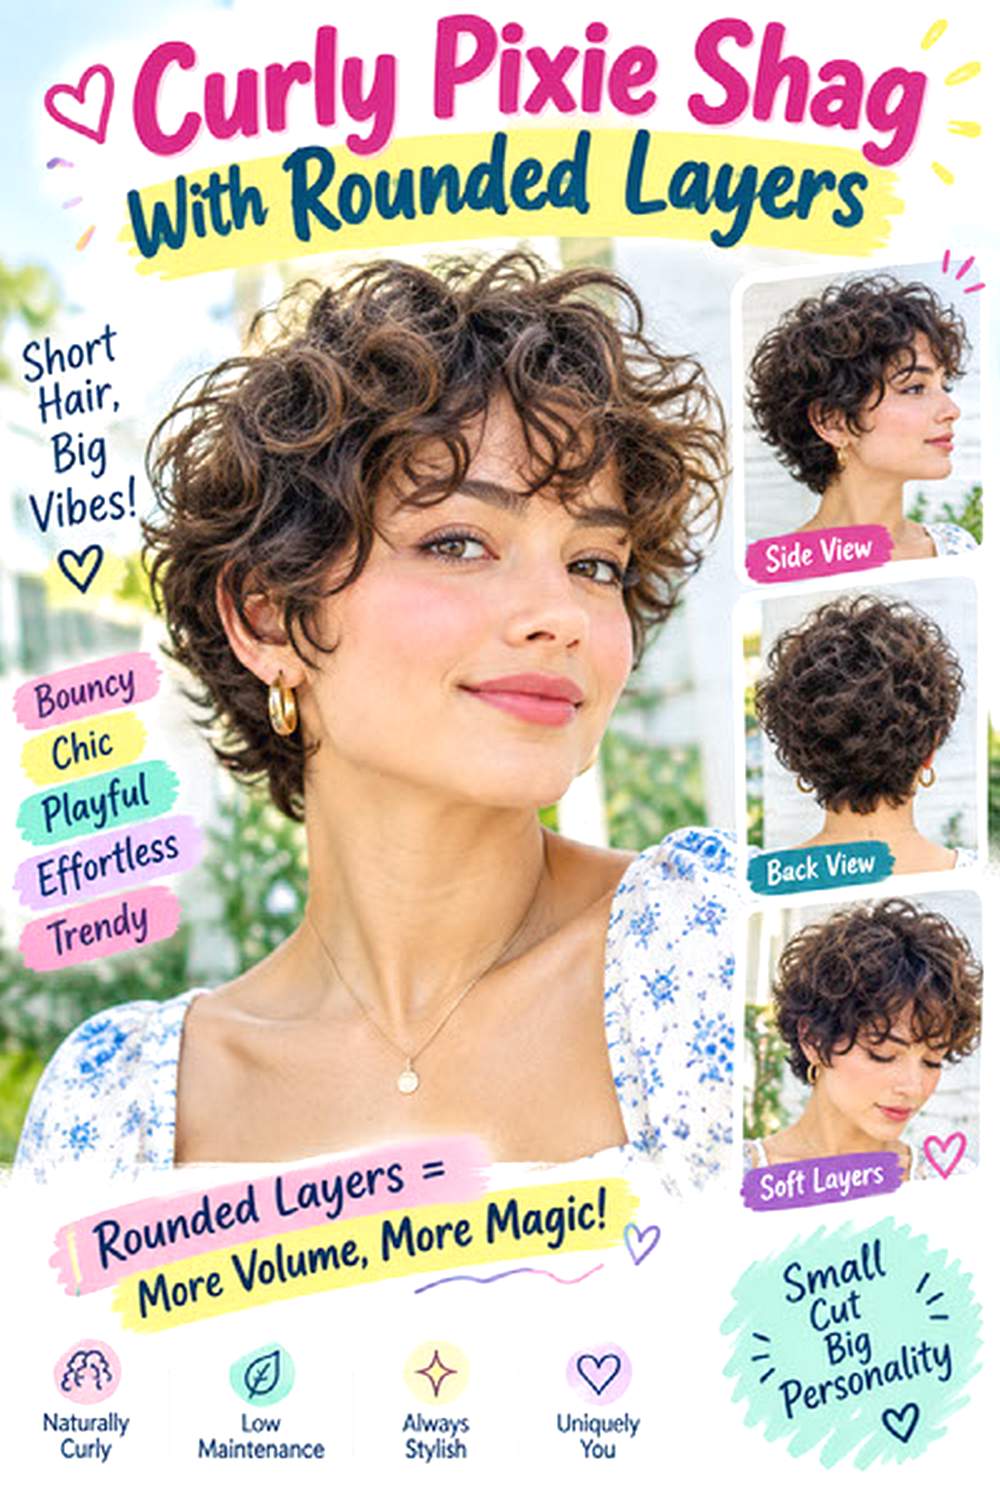
Curly texture gives a pixie shag plenty of movement, but rounded layer placement helps keep the overall silhouette balanced. Shorter curls around the crown can create lift, while slightly longer sections at the temples and nape prevent the cut from becoming too compact. A curly fringe may sit near the brows or open across the forehead depending on the curl pattern and shrinkage. Medium and thick curls often benefit from selective bulk removal, while fine curls usually need more density preserved through the perimeter. Wash-day styling takes more time than a daily refresh. Use leave-in conditioner, curl cream, and a diffuser, allowing the curl pattern to set before separating individual pieces. Salon reshaping should focus on restoring the silhouette rather than cutting every curl to the same length. Ask your stylist to evaluate the fringe and crown after the curls have dried naturally so the finished length accounts for spring.
Pro tip:
Choose your fringe length by looking at the shortest dry curl, not the stretched strand. That gives a much more realistic guide for cutting.
Fine-Hair Pixie Shag With Crown Lift
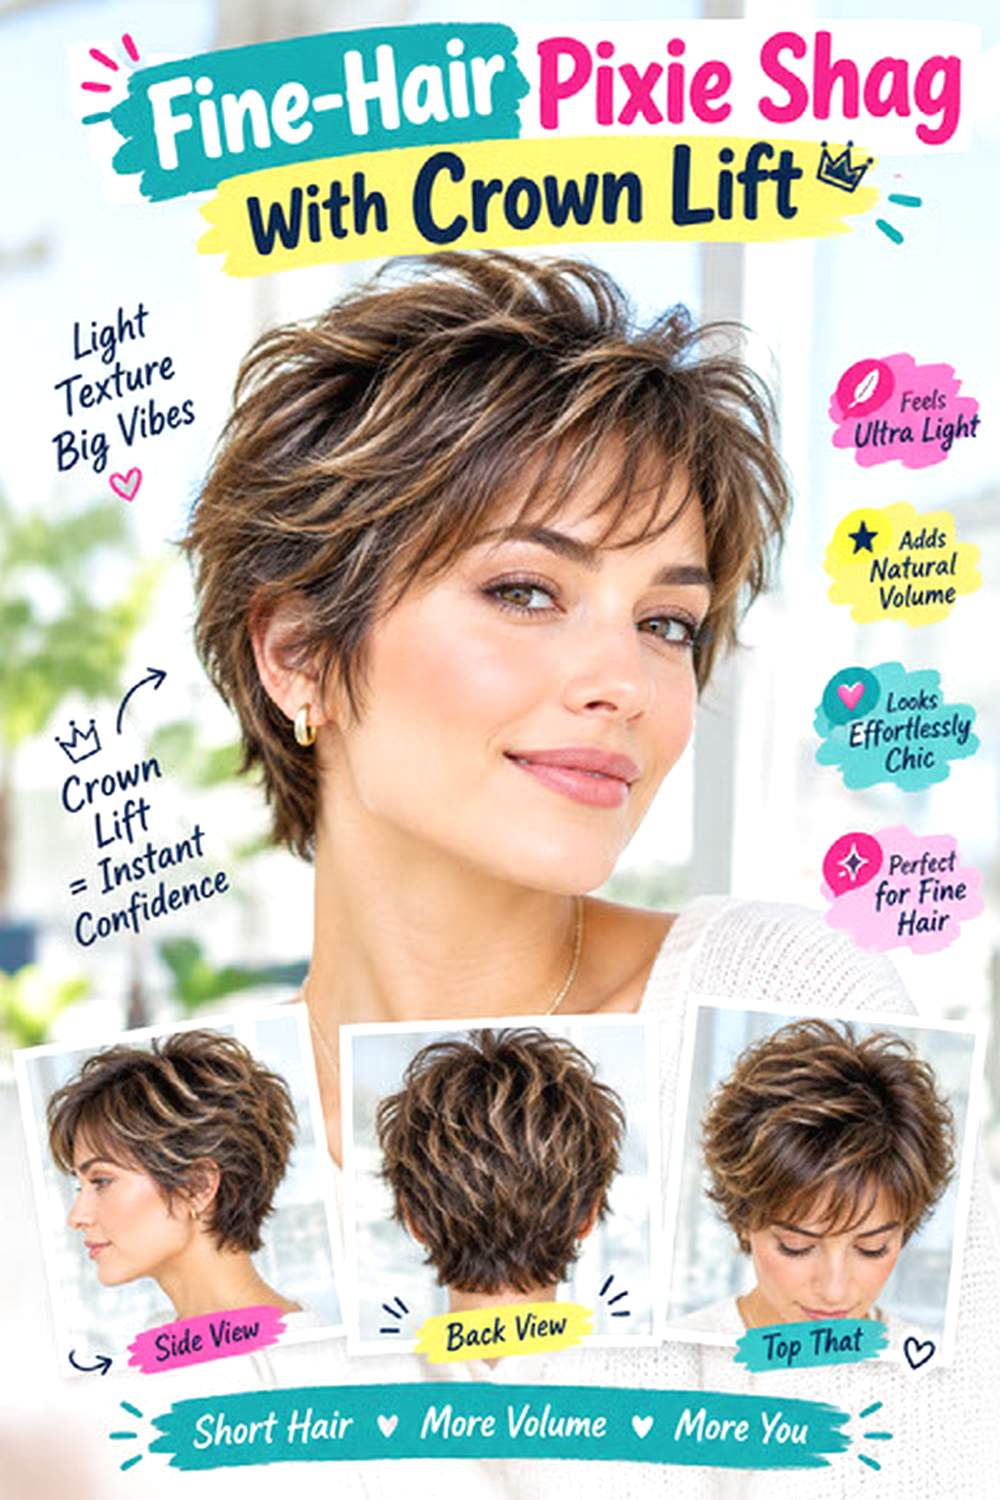
Fine hair can carry a pixie shag when the layering is used strategically rather than everywhere. The key is creating some elevation through the crown while keeping enough density around the sides and lower edge to stop the haircut from looking sparse. A light fringe can add softness without taking a deep section from the hairline. Straight and gently wavy fine textures work especially well, particularly when flat roots are the main concern. Styling is fairly quick: apply root-lifting spray and lightweight mousse, then use a vented brush while directing the crown upward. A small amount of dry texture spray can add separation once the hair is completely dry. Heavy creams and oils can make this shape collapse. At the salon, request restrained crown layers with a fuller perimeter and avoid aggressive razor-thinning through delicate ends. The crown may need reshaping when it begins lying flat, even if the overall length still feels manageable.
Pro tip:
Concentrate volumizing product at the roots instead of dragging it through the ends; the lower sections will stay lighter and appear denser.
Thick-Hair Pixie Shag With Tapered Sides
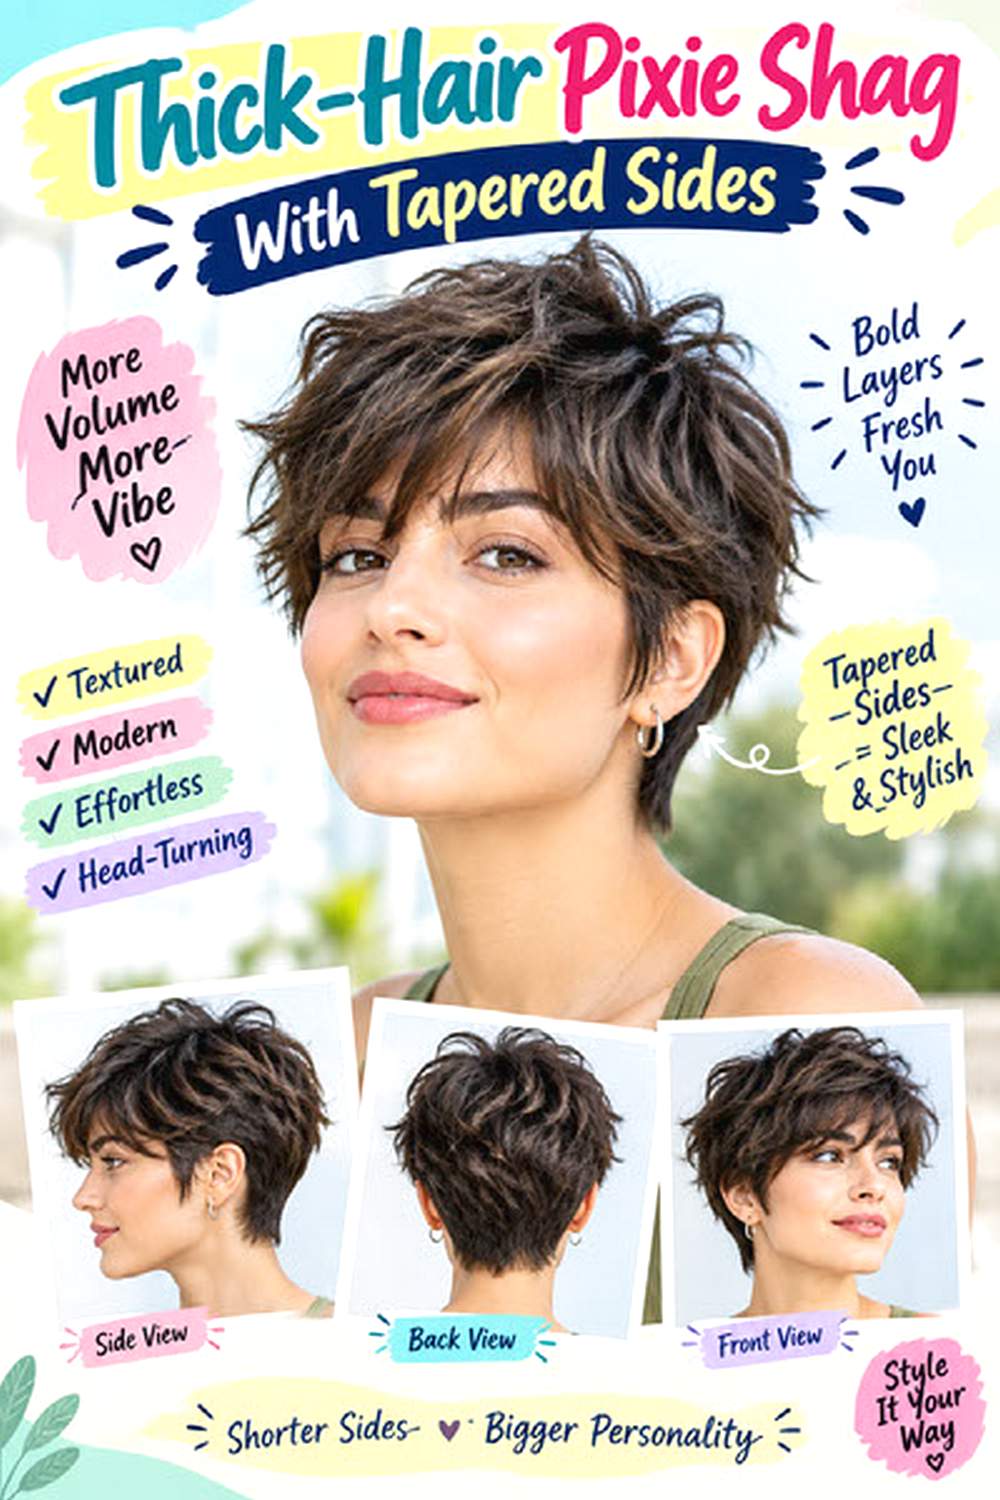
Thick hair needs space inside a short shag so the sides do not become bulky as soon as the haircut dries. Tapering around the ears and lower sides keeps the silhouette compact, while hidden internal layers release weight beneath the fuller crown. Leaving some length on top allows the shag texture to remain visible instead of turning into a conventional close pixie. Straight, coarse, and wavy thick hair can all wear this shape, although natural waves may need less heat to create separation. Use anti-frizz cream, a paddle brush, and a small amount of lightweight styling paste to control the surface and define selected pieces. Wash-day styling is moderate because dense hair takes longer to dry, while later refreshes are quick. The sides usually need reshaping when they begin pushing outward. At the salon, ask for internal bulk removal rather than thinning the visible perimeter, with a soft taper around the ears.
Pro tip:
Keep the top noticeably longer than the tapered sides. That length difference creates shag movement without making the haircut feel heavy around the temples.
Pixie Shag With Wispy Fringe
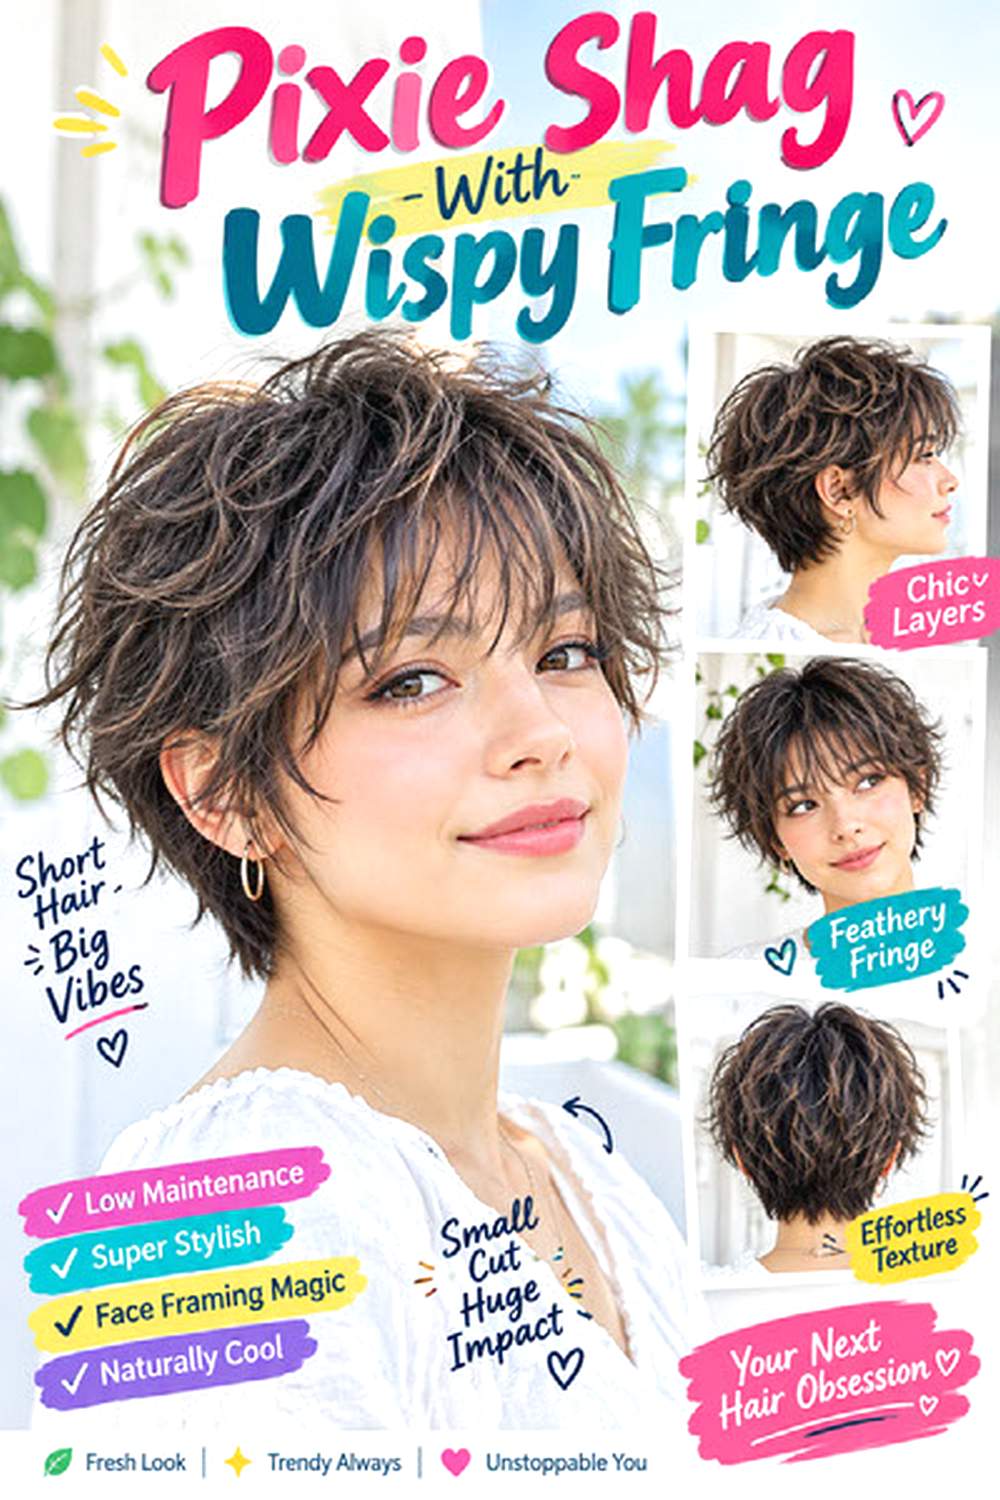
Wispy fringe creates a lighter front than a traditional full bang and fits naturally with the broken texture of a pixie shag. Small sections can fall around the brows with visible space between them, while longer corner pieces connect the fringe to the temples. Short layers through the top add movement, but the ends should still retain enough weight to avoid a thin, feathery appearance. Straight and lightly wavy medium-density hair show the fringe texture most clearly. Fine hair can also wear it when the bang section remains shallow. A small round brush, lightweight styling foam, and flexible hairspray help control the front without making it stiff. Daily styling is quick, though wispy bangs often need dampening and redirection after sleep. At the salon, ask for a soft point-cut fringe rather than heavy thinning and preserve extra density near the temples. The fringe will generally need reshaping sooner than the crown layers.
Pro tip:
Use hairspray on your fingertips and lightly separate a few bang pieces instead of spraying the fringe directly, which can make it clump.
Side-Parted Pixie Shag With Long Bangs
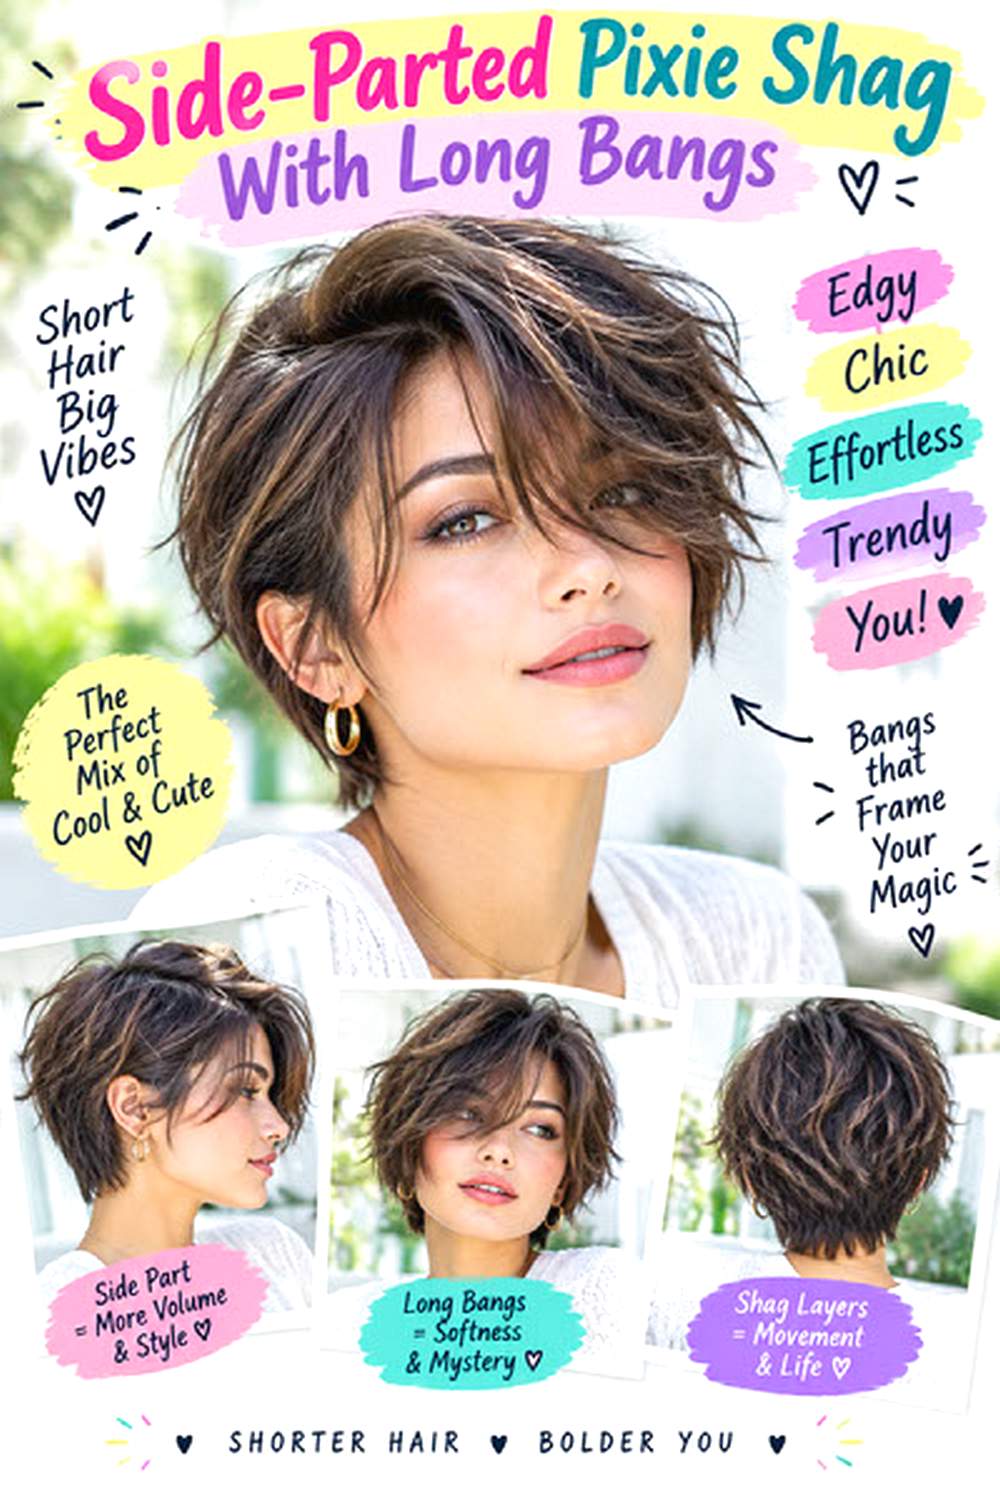
A deep or moderate side part gives a pixie shag stronger direction and allows longer bangs to sweep across the forehead toward the cheekbone. The heavier side can blend into ear-length layers, while the opposite side stays more tucked and compact. This shape works well for straight or wavy medium-density hair and can be especially practical when a cowlick naturally pushes the front away from a center part. Fine hair may also benefit from the extra root lift created by shifting more hair to one side. Use volumizing spray, a medium round brush, and flexible-hold hairspray to shape the front without freezing it. Styling is moderate after washing but usually takes only a few minutes on later days. Long bangs are also easier to grow out than a short fringe. Tell your stylist exactly where your natural part sits and ask for the sweeping fringe to retain enough length to reach the cheekbone.
Pro tip:
Dry the fringe briefly in the opposite direction first, then sweep it back over. The root will lift without needing aggressive teasing.
Choppy Pixie Shag With Piecey Ends
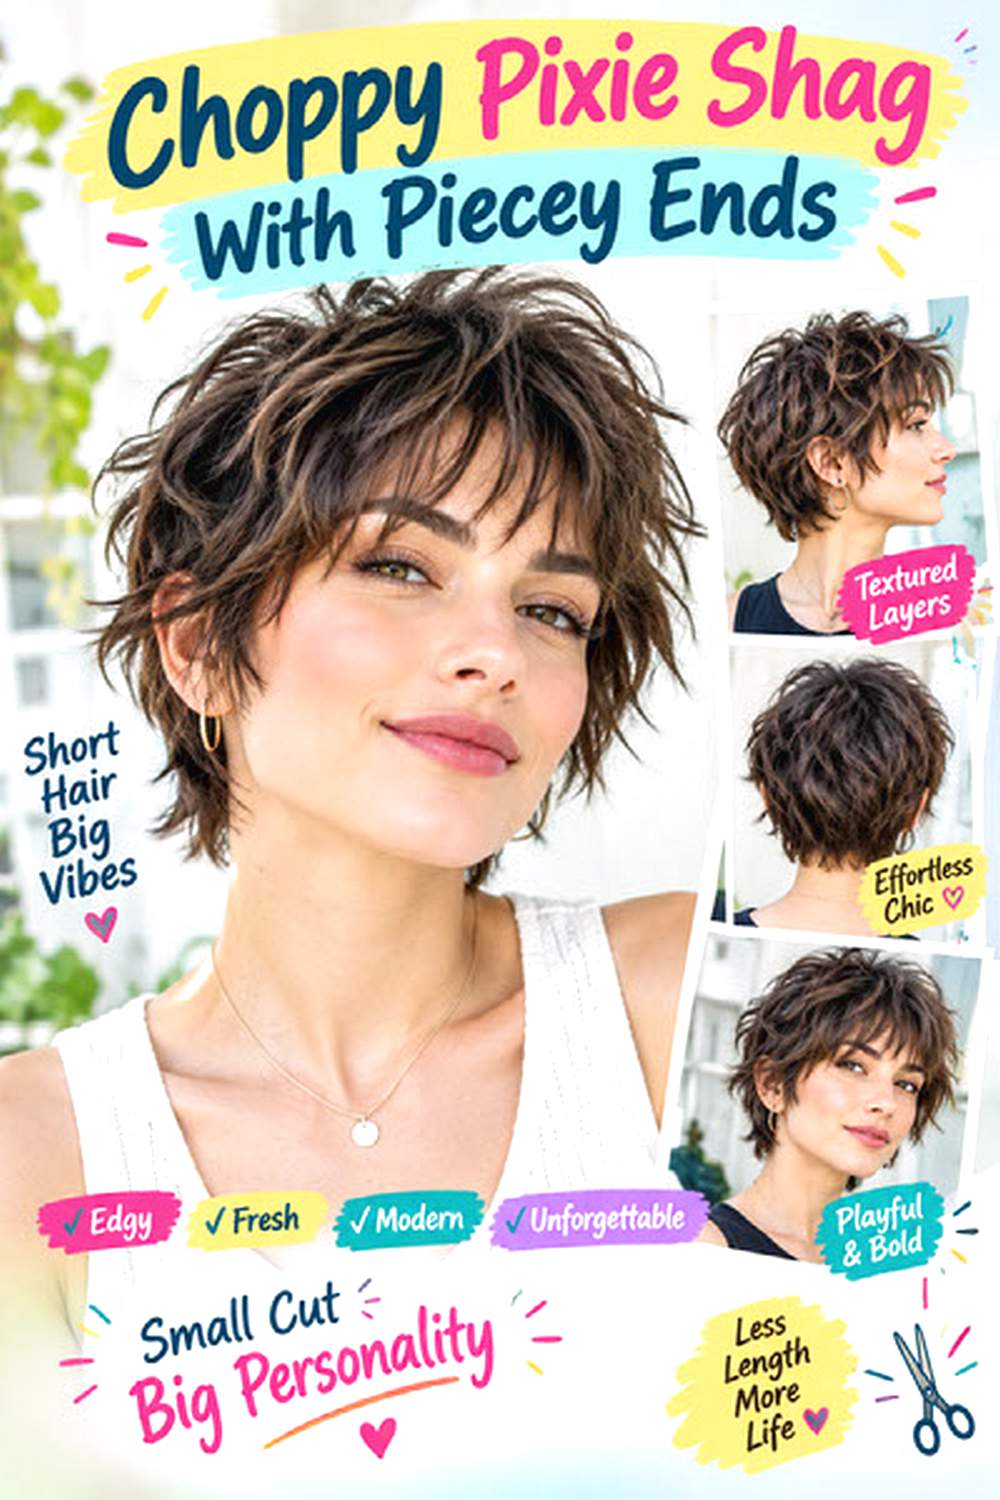
A choppy pixie shag emphasizes visible separation instead of smooth blending. The crown can contain short, irregular layers, while the sides finish in small pointed pieces around the ears and temples. A broken fringe complements the texture without creating a solid horizontal line. Straight and slightly wavy medium-density hair usually show this cutting detail best. Thick hair can carry stronger choppiness after internal weight is reduced, while very fine hair needs a more restrained approach so the edges do not appear overly sparse. Styling is quick because the haircut is not meant to look polished. Use dry texturizing spray, a small amount of matte paste, and your fingers to define selected sections. As the cut grows, the pieces gradually merge into a softer outline. At the salon, request point-cut or softly sliced ends while keeping enough density around the temples and perimeter to avoid an over-thinned finish.
Pro tip:
Pinch styling paste onto only a few ends at a time. Coating every layer removes the airy separation and can make short hair look heavy.
Long-Nape Pixie Shag
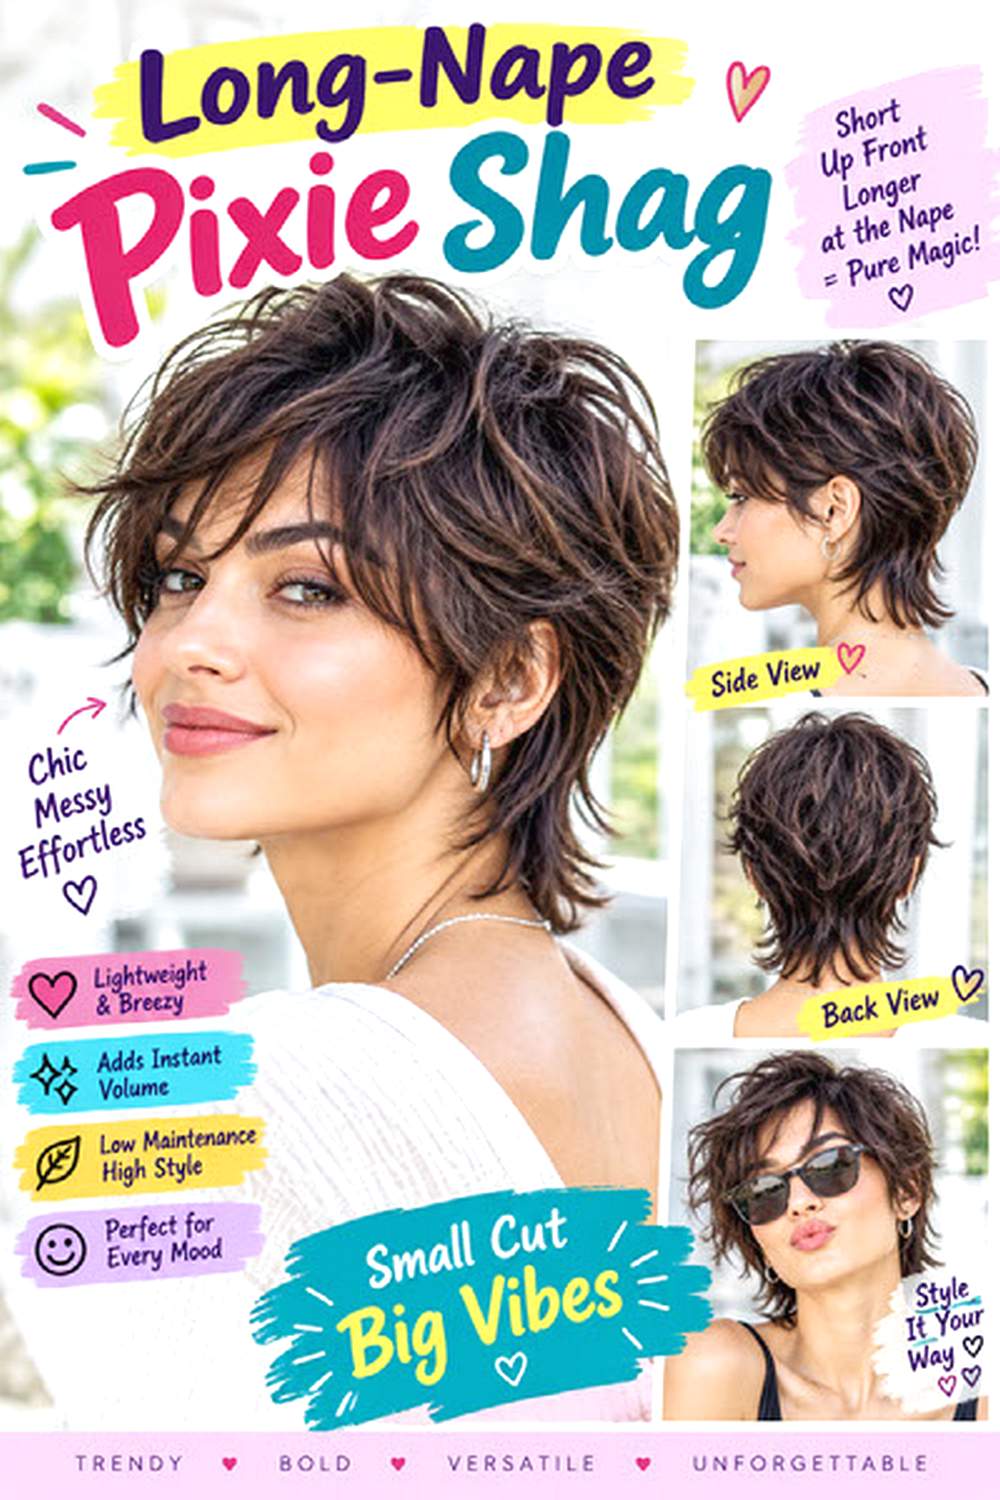
Leaving extra length through the nape changes the proportions of a pixie shag and gives it a softer, more elongated finish. The crown can remain short and layered, while narrow pieces at the back extend toward the upper neck instead of ending in a close taper. Face-framing around the temples keeps the front connected to the longer back. Straight, wavy, and medium-to-thick hair can wear this shape, and it is a useful option for someone who wants a short haircut without exposing the entire neckline. Styling is quick to moderate depending on texture. Try heat protectant, a small round brush, and light texturizing spray to give the nape movement without making it flip dramatically. Grow-out is more forgiving than a sharply tapered pixie. At the salon, show exactly how long you want the neckline and ask for the nape pieces to remain soft and connected rather than looking like a separate tail.
Pro tip:
Check how the back sits against your usual shirt collars. The wrong nape length can flip outward where it repeatedly meets fabric.
Soft Mullet-Inspired Pixie Shag
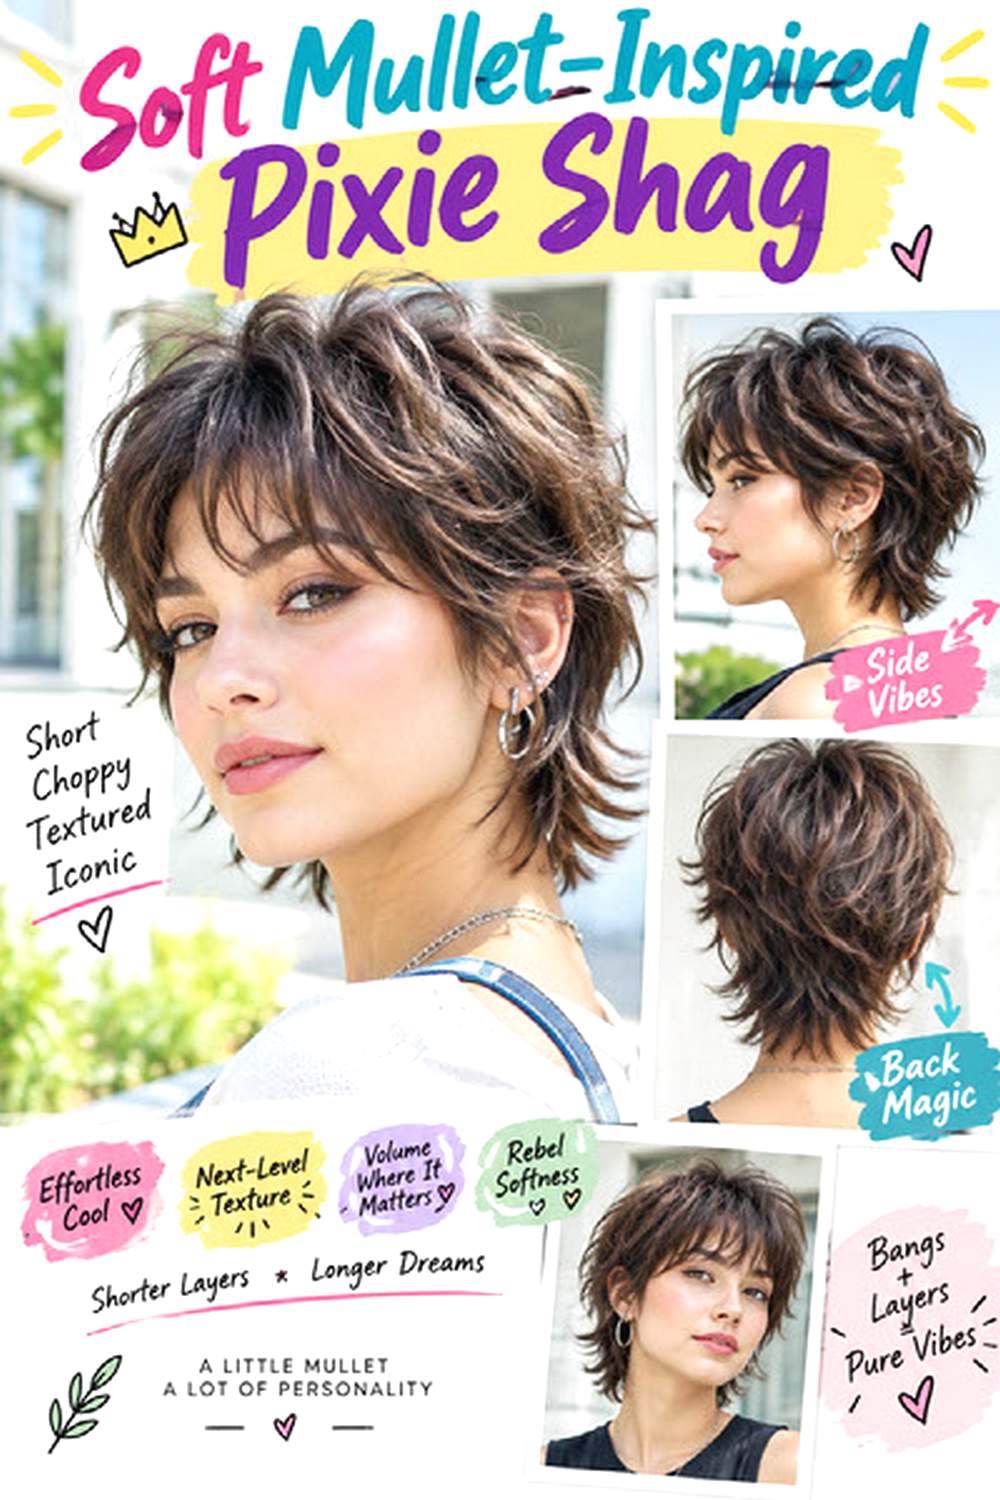
A mullet-inspired pixie shag uses contrast between a shorter crown and a slightly longer back, but keeping the transitions blended makes the result softer than a traditional mullet. The sides can sit close around the ears, with a light fringe or temple pieces balancing the longer nape. Wavy and medium-to-thick hair are especially suited to the cut because natural texture emphasizes the changing lengths. Straight hair can also wear it with a little styling for separation. Use texture mousse, a diffuser or blow-dryer, and a small amount of styling paste to encourage movement through the crown and neckline. Daily effort is usually quick, although the shorter side sections may need more frequent salon reshaping. At your appointment, explain how much contrast you want between crown and nape; a subtle difference keeps the haircut soft, while a larger gap creates a stronger mullet influence.
Pro tip:
Use a side-view reference photo as well as a front image. The crown-to-nape transition is easier to judge from the profile than from straight on.
Low-Maintenance Air-Dried Pixie Shag
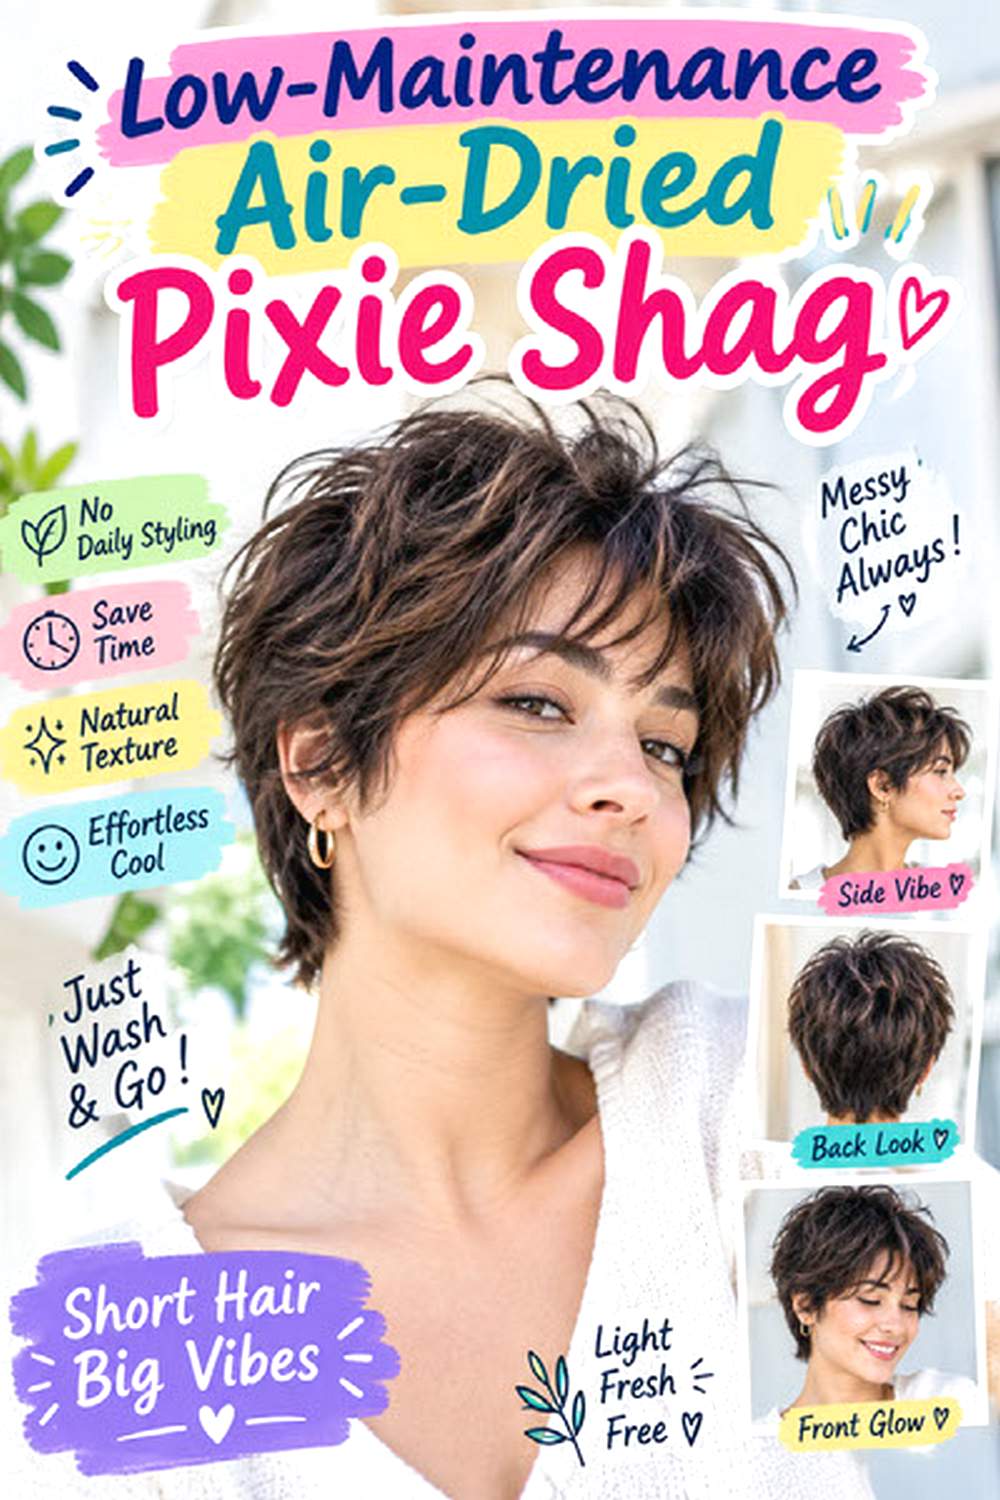
A low-maintenance pixie shag should work with the direction your hair already takes instead of requiring a fresh blowout every morning. Soft layers around the crown and sides can encourage natural bends, while a longer, relaxed fringe gives the front room to settle without precise positioning. Naturally wavy and loosely curly hair are strong candidates, though straight hair with slight movement can also suit the cut. Fine hair needs fewer layers through the lower edge, while dense hair may require hidden weight removal to keep the sides controlled. Apply leave-in conditioner and lightweight curl or wave cream, then use a wide-tooth comb before allowing the hair to air-dry. Styling time is minimal, and flattened areas can often be refreshed with water. Tell your stylist that air-drying is your normal routine so the haircut can be assessed in natural texture rather than only after salon styling.
Pro tip:
Bring a photo of your own hair air-dried with no heat. It shows your stylist exactly where cowlicks, bends, and natural volume appear.
Sleek Pixie Shag With Feathered Layers
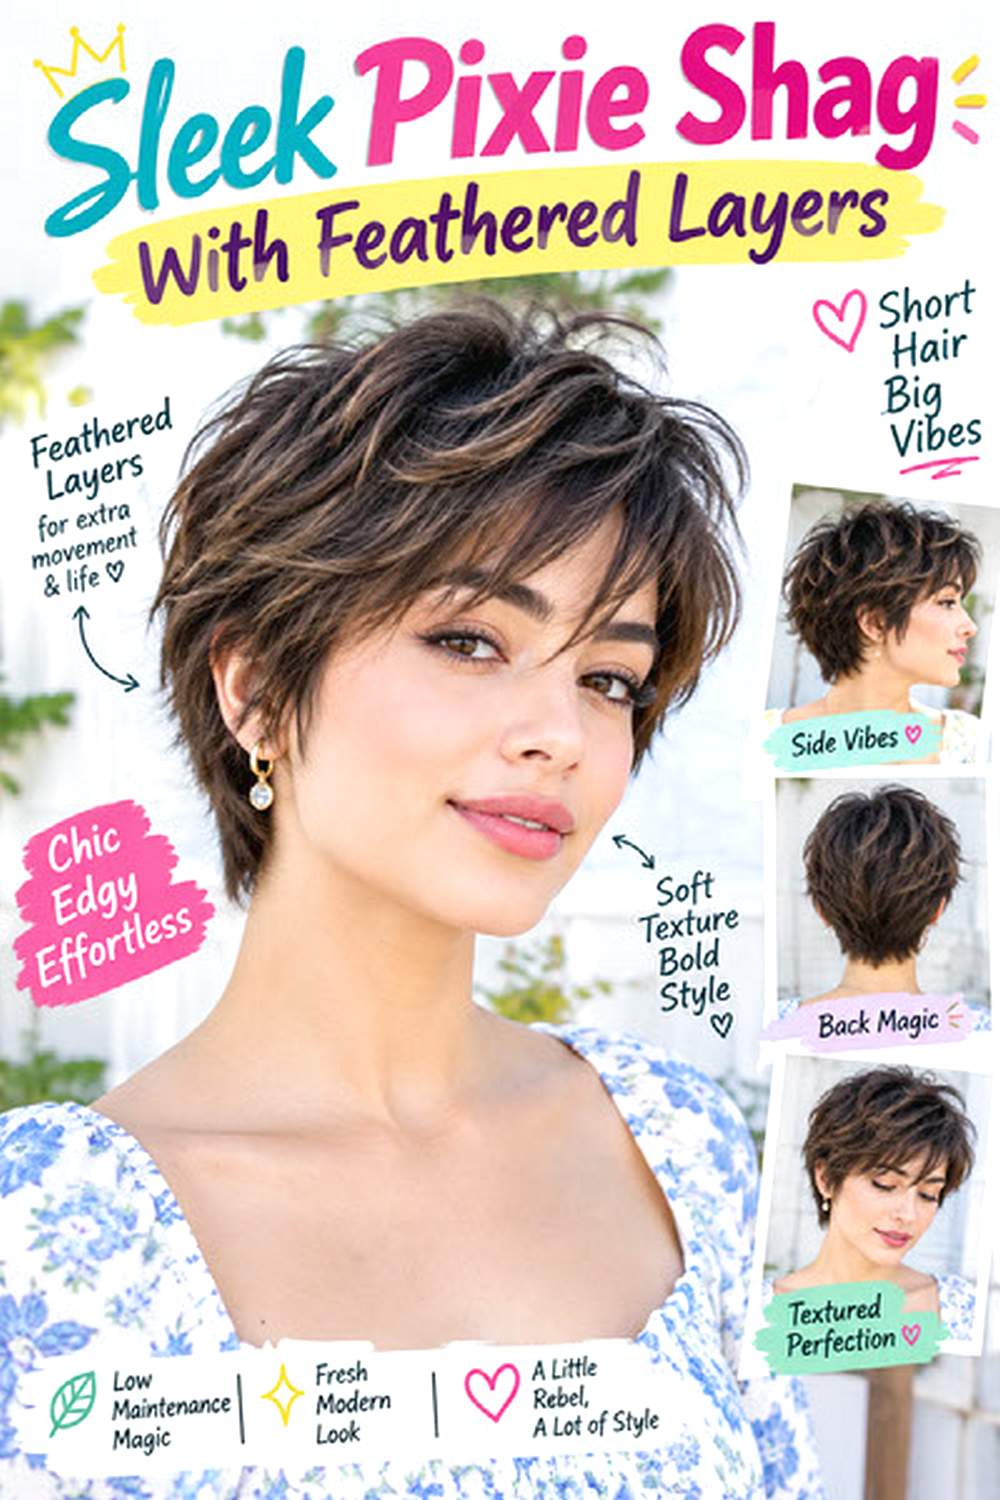
Smoothing a pixie shag creates a more controlled interpretation while still allowing its feathered layers to show. Longer top sections can sweep across the crown and forehead, with softly tapered pieces around the ears and nape instead of a blunt perimeter. Straight hair needs the least effort, while mildly wavy hair can be polished with a blow-dry. Fine to medium density works particularly well because the layered shape stays visible without excessive bulk; thicker hair may need internal weight removal first. Use heat protectant, a small paddle brush, and lightweight smoothing serum, keeping the serum mainly on the outer surface and ends. Styling takes moderate effort after washing but requires little work once the shape is set. At the salon, ask for feathering that leaves the ends soft but not transparent, with enough top length to create a smooth side sweep.
Pro tip:
Direct the blow-dryer downward along each section rather than straight at the roots; it smooths the surface while preserving the visible layer pattern.
Conclusion
Pixie shag haircuts can range from softly polished to curly, choppy, wavy, or nearly wash-and-go. The biggest differences come from crown length, fringe density, nape shape, face-framing, and how much weight is removed from the sides. Fine hair often needs fuller edges, while thick hair usually benefits from strategic internal layering. A longer fringe gives an easier grow-out, whereas shorter bangs and tight tapers need more frequent maintenance. Your best choice among these Pixie Shag Haircut Ideas for Women depends on face shape, natural texture, density, preferred length, heat tolerance, and how much styling you realistically want to do each morning.
Before Your Salon Visit
Choose one or two favorite ideas, then save clear photos showing the front, sides, crown, and nape rather than relying on a single angle. Discuss your face shape, natural texture, density, preferred length, maintenance preference, and everyday styling routine with your stylist. Point out the exact fringe length, crown layers, ear coverage, nape shape, volume, or piecey finish you want. Those details will help the stylist adapt the pixie shag to your hair instead of copying a shape that may behave very differently on another texture.
FAQs
1. Can fine hair wear a pixie shag without looking too thin?
Yes. Keep crown layering controlled, preserve density around the perimeter, and avoid excessive thinning through the ends or fringe.
2. How often does a pixie shag need trimming?
Short tapered sections and brow-length fringe tend to show growth first. Longer, softer versions can usually grow out more gradually before the overall shape needs reshaping.
3. Does a pixie shag work with naturally curly hair?
Yes. Curly hair can create much of the texture naturally, but the cut should account for shrinkage and be shaped around the dry curl pattern.
4. Can I style a pixie shag without heat every day?
Often. Wavy, curly, and softly textured hair can use air-drying, leave-in products, or light styling cream. Sleeker versions usually need more blow-drying for a controlled finish.
The hairstyle-specific caption depth and natural reader-focused guidance follow the supplied editorial references.