15 Glossy Chignon Hairstyle Ideas
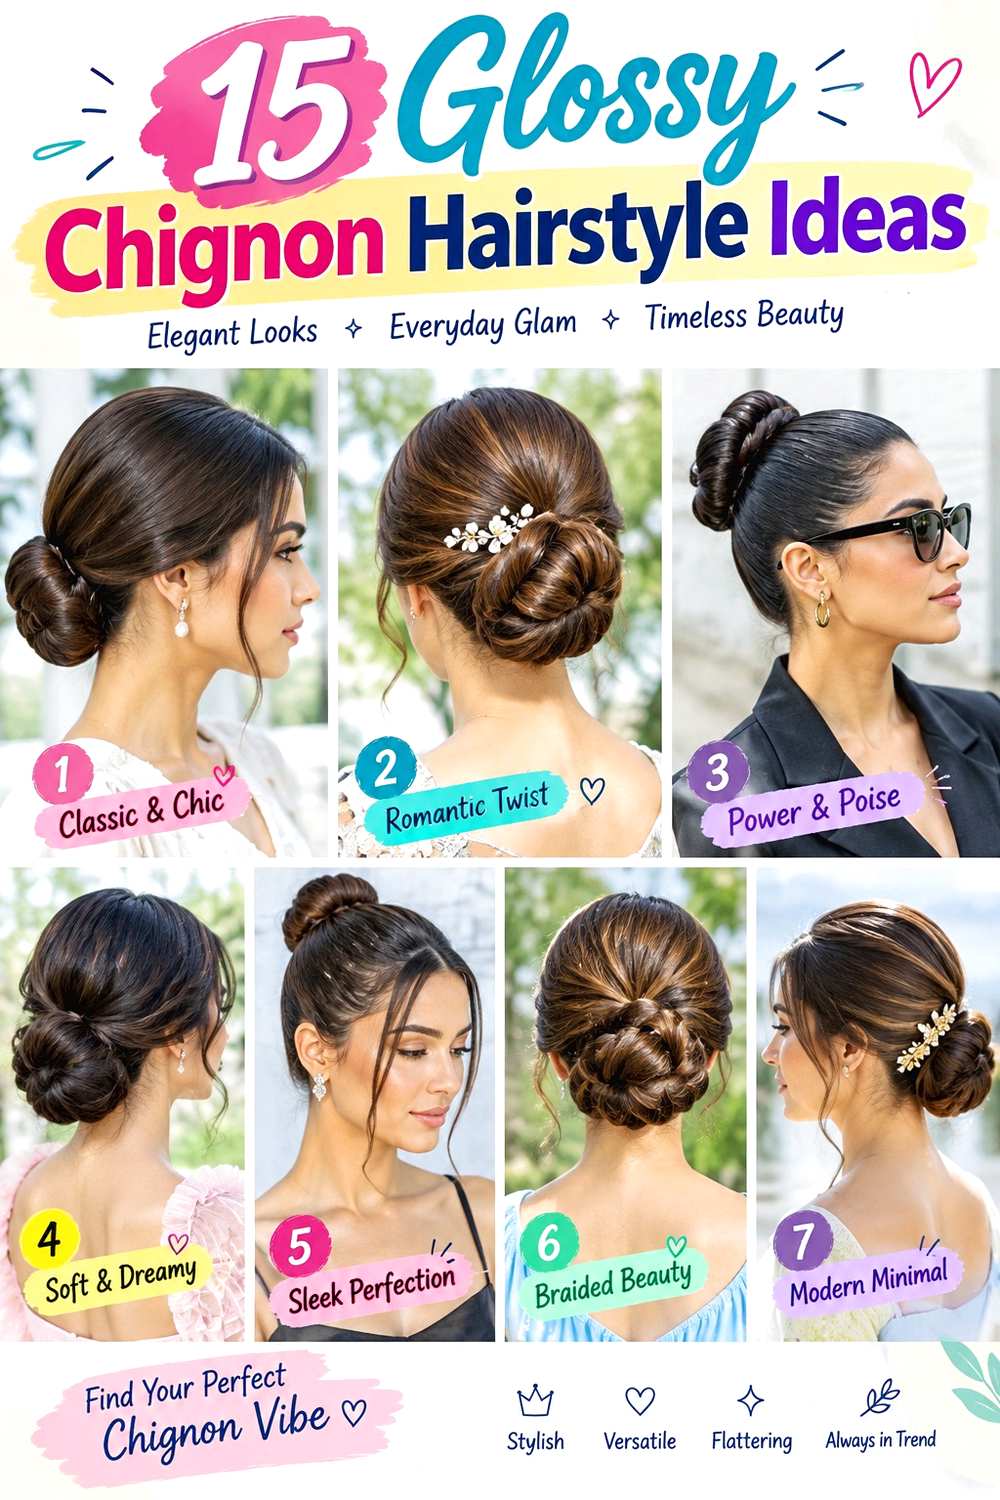
Glossy chignon hairstyles combine a tucked, coiled, knotted, or rolled updo with a controlled surface that reflects light without looking overloaded with product. Most versions sit at the nape or lower back of the head, although higher and asymmetrical placements create different proportions. Parting, fringe, face-framing pieces, crown volume, bun width, and the direction of the fold all influence the final shape. The glossy finish usually comes from careful smoothing and tidy sectioning rather than simply adding more shine product.
Medium and long hair offer the easiest length for full chignons, but shorter hair can support a compact version when enough back sections reach the anchor. Straight, wavy, curly, and coily textures can all work. Dense hair may feel more comfortable in a broader, flatter chignon, while lower-density hair often looks fuller with a smaller coil. Natural texture can also remain visible inside the bun instead of being completely flattened.
A quick refresh may involve smoothing surface flyaways, retucking an end, and replacing a loose pin. A full wash-day style takes longer because the hair must first reach the texture and dryness you want before gathering begins. Secure anchoring and comfortable tension matter more than making every strand perfectly flat.
Quick List
- Classic Low Glossy Chignon Hairstyle
- Center-Part Sleek Glossy Chignon Hairstyle
- Soft Side-Part Glossy Chignon Hairstyle
- Twisted Low Glossy Chignon Hairstyle
- Braided Glossy Chignon Hairstyle
- Side-Swept Glossy Chignon Hairstyle
- Knotted Glossy Chignon Hairstyle
- Double-Roll Glossy Chignon Hairstyle
- Curly Glossy Chignon Hairstyle
- Coily Tucked Glossy Chignon Hairstyle
- Short-Hair Mini Glossy Chignon Hairstyle
- High Glossy Chignon Hairstyle
- Off-Center Glossy Chignon Hairstyle
- Wrapped Base Glossy Chignon Hairstyle
- Face-Framing Glossy Chignon Hairstyle
Classic Low Glossy Chignon Hairstyle
A classic low chignon keeps the silhouette broad and controlled at the nape, with the ends hidden inside a smooth coil. Sweep the hair backward with a center, side, or concealed part, twist the length gently, and wrap it into a low rounded shape. The crown can sit close to the head or retain a little natural height, while fringe and shorter temple pieces may stay loose if preferred. A fuller outer curve usually looks more balanced than a very small knot on long or dense hair.
Use lightweight smoothing cream to control the surface, a boar-bristle brush to guide the hair cleanly toward the back, and bobby pins to secure the coil. Medium and long hair give the easiest overlap, while dense hair may feel better in a flatter, wider chignon. A quick refresh means smoothing flyaways and replacing any loosened pin; a full wash-day version takes longer because the hair needs to dry into the preferred finish before gathering. If the bun begins to sag, rebuild the pinning instead of adding more pressure at the scalp.
At a styling appointment, specify the exact nape height and bun width you prefer, especially if the chignon must clear a collar, veil, or neckline.
Pro tip:
Pin the chignon through its outer edge and into the denser base underneath. This distributes support more evenly than placing every pin through the center.
Make It Work for You:
If your hair is lower density, keep the chignon compact rather than spreading it widely. A smaller rounded coil can preserve a fuller-looking outline while remaining glossy.
Watch Out For:
Do not keep adding smoothing cream when the bun loosens. Product controls the surface, but a slipping chignon needs its structural pins reset instead.
Center-Part Sleek Glossy Chignon Hairstyle
A precise center part gives the glossy chignon a symmetrical front and puts more attention on the clean surface leading into the bun. Divide the hair evenly, guide both sides toward the nape, and form a smooth chignon directly at the center back. Keep the crown relatively flat but not painfully stretched, and let short fringe pieces remain free if they cannot reach the anchor comfortably. The chignon can be oval or softly rounded, with the ends tucked completely inside.
Use smoothing gel sparingly along the visible surface, a tail comb to refine the part and side sections, and bobby pins to secure the finished bun. Straight and gently wavy hair may settle into this finish quickly, while curly or coily hair can keep natural texture inside the chignon even when the outer surface is controlled. A short refresh generally means redefining the part and smoothing small flyaways. A complete wash-day style takes longer because the hair must reach the desired dry finish first. If the temples feel tight, release and regather the sides rather than adding more gel.
At a salon or styling appointment, specify how flat you want the crown, how wide the center part should remain visible, and whether the chignon should sit directly at the nape or slightly higher.
Pro tip:
Refine the center part before gathering any hair. Correcting it after the sides are secured can disturb the glossy surface and create uneven tension.
Make It Work for You:
For curly or coily hair, smooth only the visible outer sections and preserve texture inside the chignon. The sleek center-part effect remains without requiring complete straightening.
Watch Out For:
Avoid pulling both sides tighter simply to make the part look cleaner. Use careful sectioning instead so symmetry comes from placement rather than scalp tension.
Soft Side-Part Glossy Chignon Hairstyle
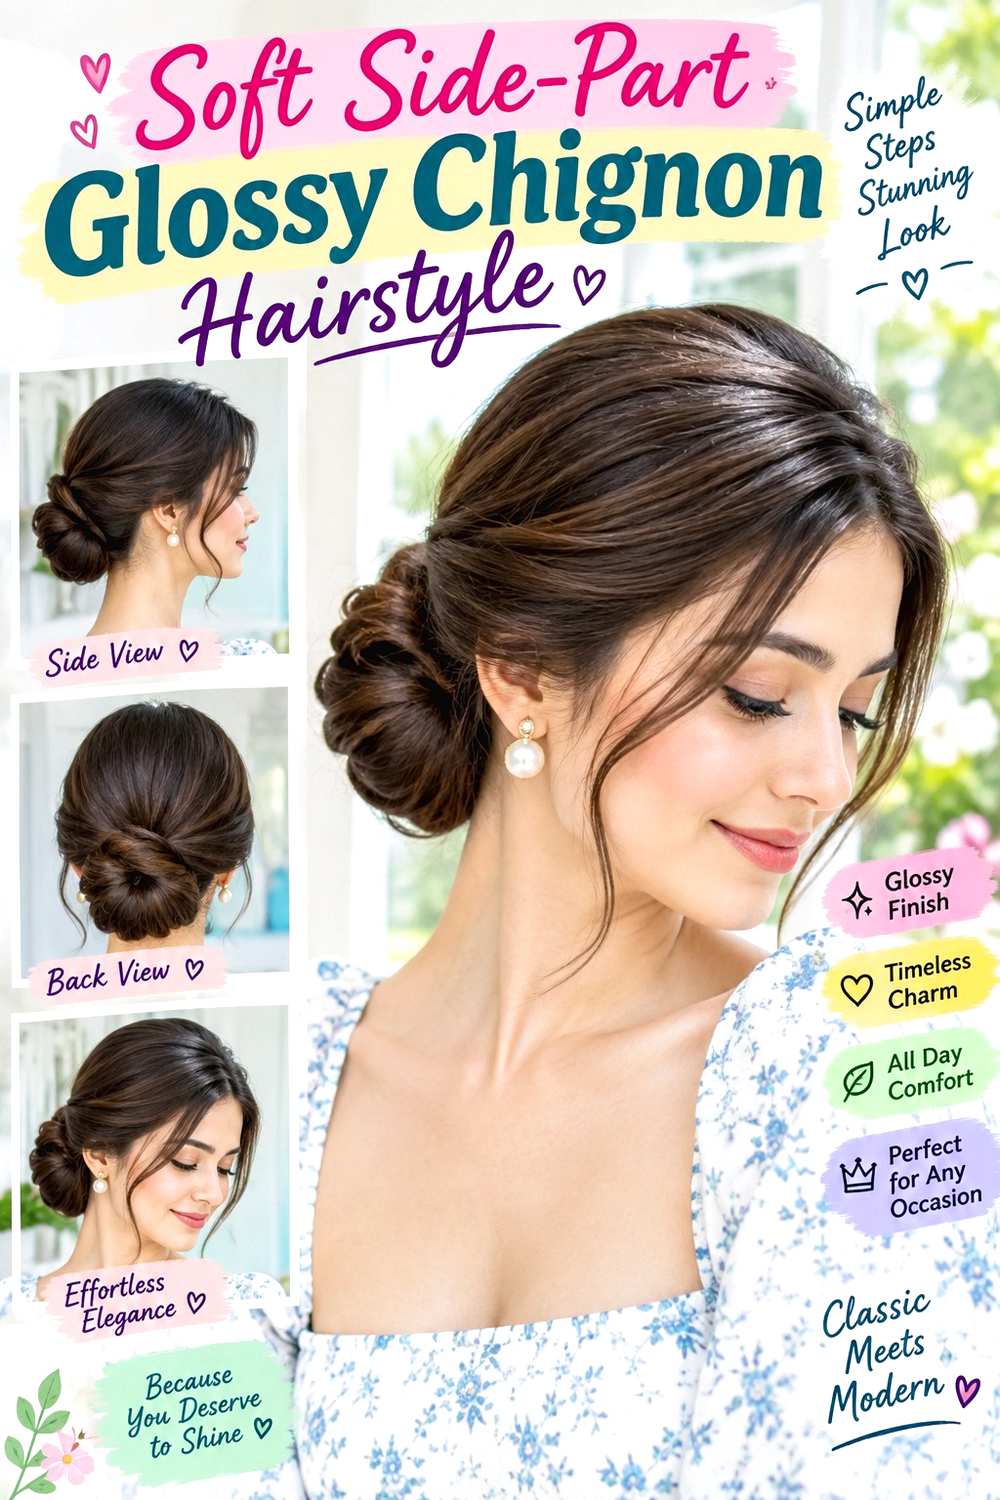
A soft side part changes the front balance without moving the chignon away from the center. Let the fuller side sweep gently across the forehead or temple, then guide both sides toward a low centered bun. Keep a small amount of lift through the crown so the side sweep connects naturally with the chignon instead of lying completely flat. The ends should disappear inside a smooth rounded coil, while short face-framing pieces can remain loose on the heavier side.
Use lightweight shine serum in a small amount for surface polish, a boar-bristle brush to guide the longer sections backward, and bobby pins to hold the chignon. Medium and long hair suit the shape, while lower-density hair generally benefits from a compact bun that does not spread too thinly. A quick refresh may involve resetting the part and smoothing the heavier front section. Full wash-day styling takes longer because the front sweep must be established before the chignon is built. If the fuller side sags, regather that section rather than pulling the opposite side tighter.
At a styling appointment, show how deep you want the side part, where the front sweep should curve, and how much crown height you want above the bun.
Pro tip:
Follow the natural growth direction on the fuller side as you brush it back. Working with that direction helps reduce bumps without requiring stronger tension.
Make It Work for You:
If your front layers are short, leave them outside the side sweep and let them frame the temple. The glossy chignon remains polished without forcing unreachable pieces.
Watch Out For:
Do not apply too much serum near the roots. Excess slip can weaken the gathered base and make the chignon move even when the surface looks smooth.
Twisted Low Glossy Chignon Hairstyle

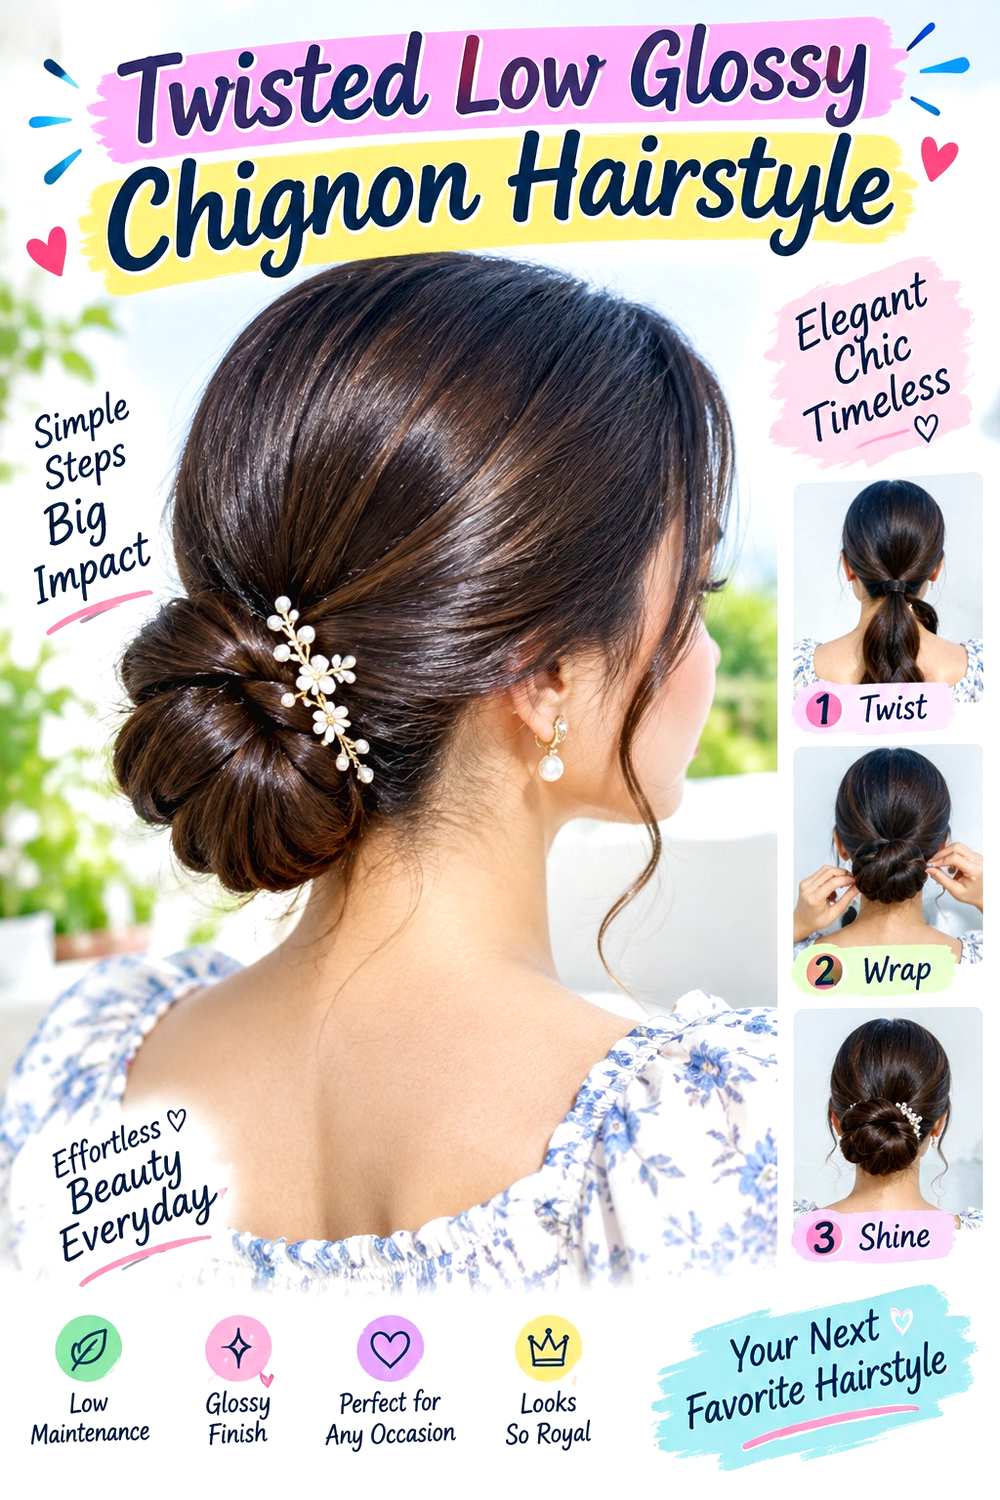
A twisted chignon shows more visible structure than a smooth coil while keeping the overall finish controlled. Gather the hair low, divide the length into two sections, twist them separately, then wrap the two ropes around each other into a broad bun. Keep the twists defined enough to remain visible but not so tight that the base pulls. A center or side part can work, and the crown may stay smooth with a little natural fullness above the nape.
Use light styling cream to control the twist surfaces, a fabric-covered elastic to establish a stable low base, and bobby pins to secure the wrapped sections. Medium and long hair provide enough length for the ropes to circle the base clearly. Dense hair may benefit from broader twists, while lower-density hair can keep them compact instead of pulling the edges apart. A quick refresh involves retucking a loose rope end and smoothing the surface. A full wash-day version takes longer because the entire base and both twists must be rebuilt.
At a styling appointment, specify how low the chignon should sit, how thick you want each rope, and whether the twist pattern should remain clearly visible or blend into a smoother rounded finish.
Pro tip:
Form both twists with similar tension before wrapping them together. Uneven ropes can make one side of the chignon project farther and weaken the balanced shape.
Make It Work for You:
For dense hair, use slightly larger rope sections and create a broad, flat chignon. This spreads the weight while preserving the visible twisted detail.
Watch Out For:
Do not twist the sections extremely tightly at the base. Strong torsion can increase scalp tension without making the finished chignon more secure.
Braided Glossy Chignon Hairstyle

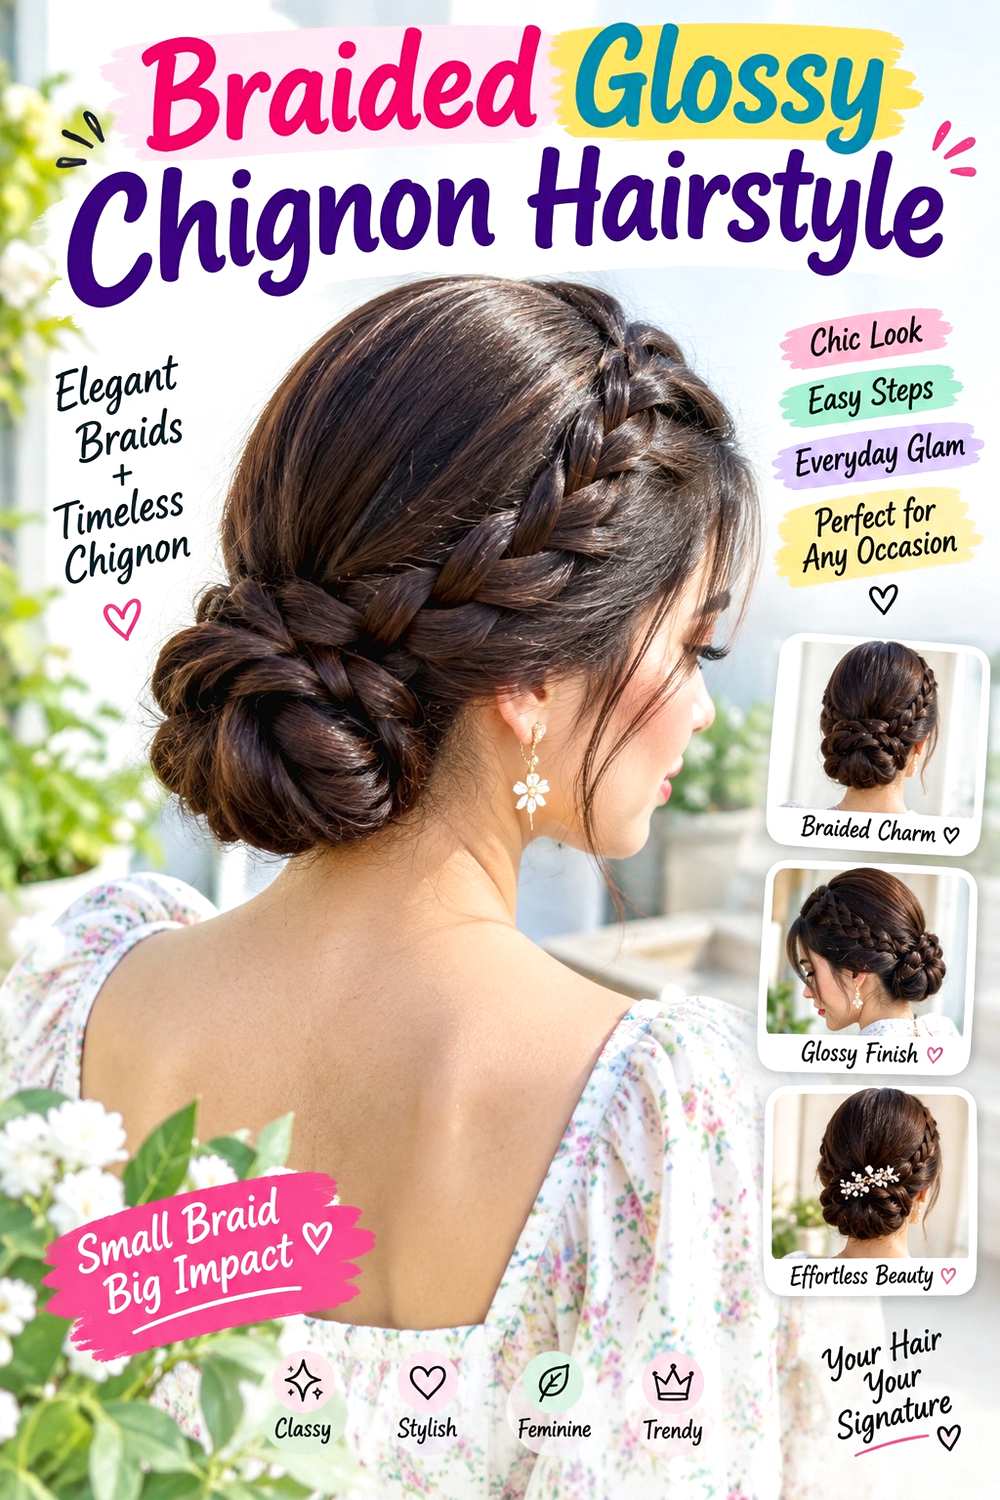
A braid introduces woven texture into the bun while the crown and sides remain smooth. Gather the hair low, create a three-strand braid through the length, and coil it around its base so the braid ridges remain visible on the outside. Keep the parting clean and the crown controlled, with face-framing pieces either fully incorporated or intentionally left loose. The finished chignon can be centered or slightly elongated horizontally depending on length and density.
Use light styling cream to smooth the gathered surface, a mini elastic to secure the braid end, and bobby pins to anchor the coiled braid. Medium and long hair work best because the braid shortens the apparent length before it is wrapped. Lower-density hair should keep the braid compact rather than heavily expanding its edges, while dense hair can support a wider woven bun. A quick refresh generally means smoothing a fuzzy braid ridge and replacing one loosened pin. A full wash-day style takes longer because the braid and chignon must both be reconstructed.
At a styling appointment, specify braid width, how much woven texture you want visible, and whether the finished bun should sit directly at the nape or slightly above it.
Pro tip:
Coil the braid with its textured surface facing outward, then pin beneath the outer ridge. This keeps the woven pattern visible without exposing most of the hardware.
Make It Work for You:
For fine or lower-density hair, avoid pulling the braid dramatically wider. A compact braid often produces a fuller-looking chignon once it is wrapped.
Watch Out For:
Do not expand the braid after the chignon is already pinned. Pulling the edges can loosen the coil and shift the glossy crown at the same time.
Side-Swept Glossy Chignon Hairstyle
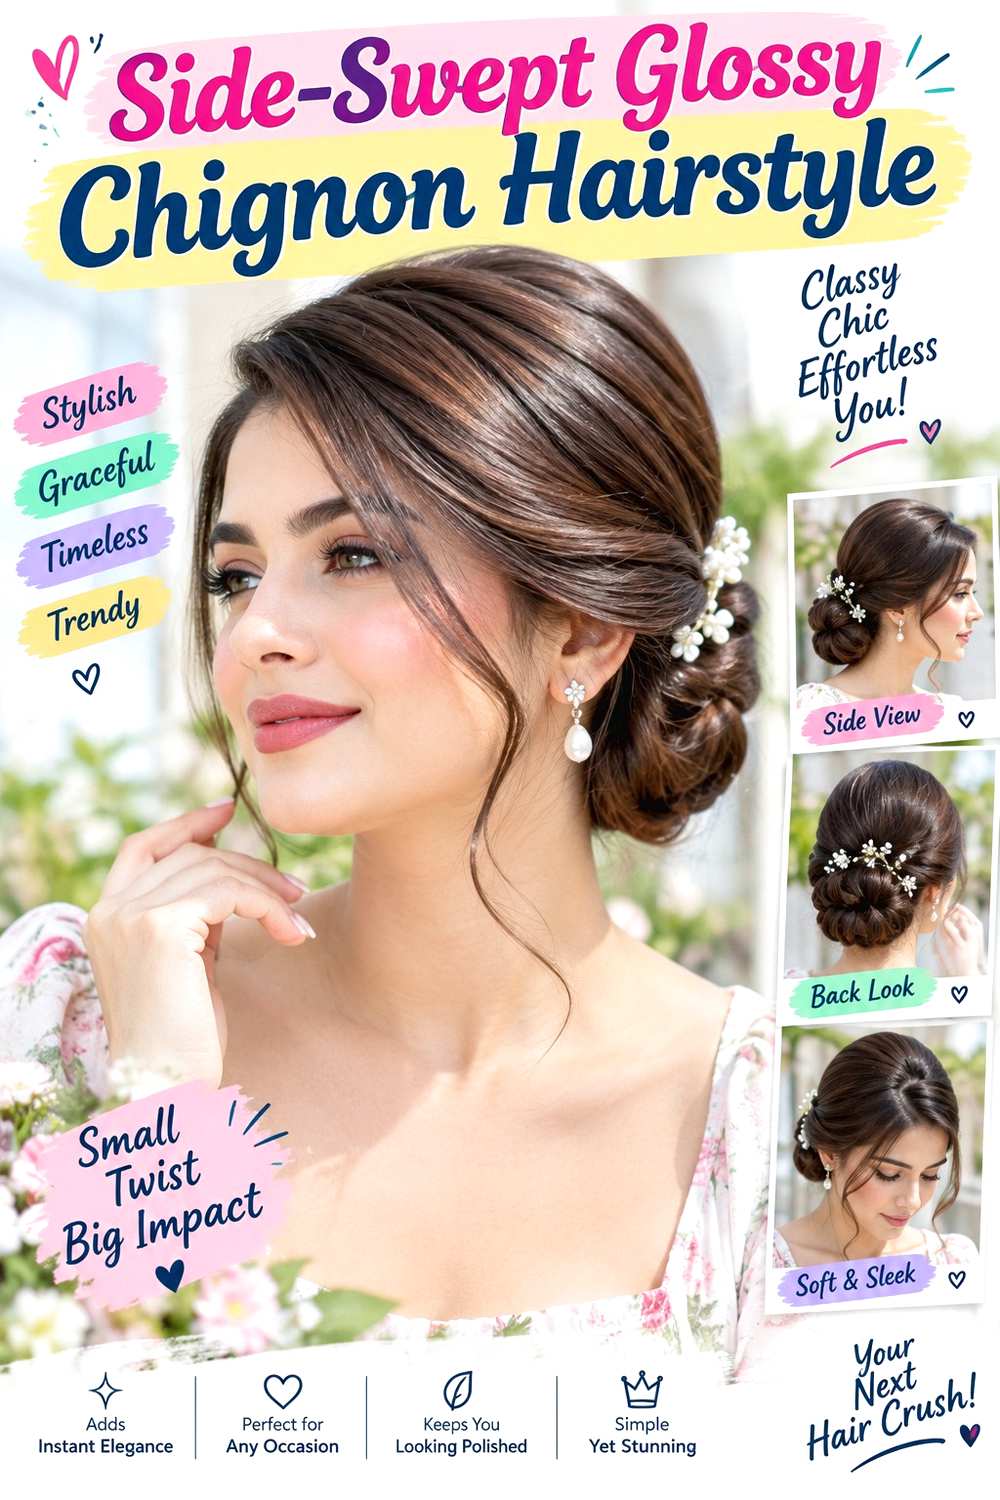
A side-swept chignon moves the bun away from the center and uses the front sweep to lead the eye toward it. Start with a side or off-center part, guide the hair diagonally across the back, and form the chignon behind one lower side of the head. Keep the opposite side smooth and broad rather than rope-tight. The chignon should remain low enough to show from a three-quarter angle, with optional face-framing pieces on the fuller front side.
Use smoothing cream to control the diagonal sweep, bobby pins to establish and secure the off-center bun, and a lightweight shine spray on the finished surface. Medium and long hair give the easiest reach across the back. A quick refresh may mean smoothing the sweep and replacing one pin; a full wash-day style takes longer because the directional base must be rebuilt before the bun is formed. If the chignon rotates toward the middle, redo the diagonal anchor rather than tightening the entire side section.
At a styling appointment, specify which side should carry the bun, how close it should sit to the ear, and whether you want the front sweep sleek or softly lifted.
Pro tip:
Build the diagonal sweep first and test its placement before forming the chignon. A stable directional base prevents the finished bun from drifting toward the center.
Make It Work for You:
If one side has shorter layers, position the chignon closer to that side. Those pieces travel less distance, making the asymmetric shape easier to secure comfortably.
Watch Out For:
Avoid positioning the bun so close to the ear that pins or folded hair rub during movement. Shift it slightly back for better comfort.
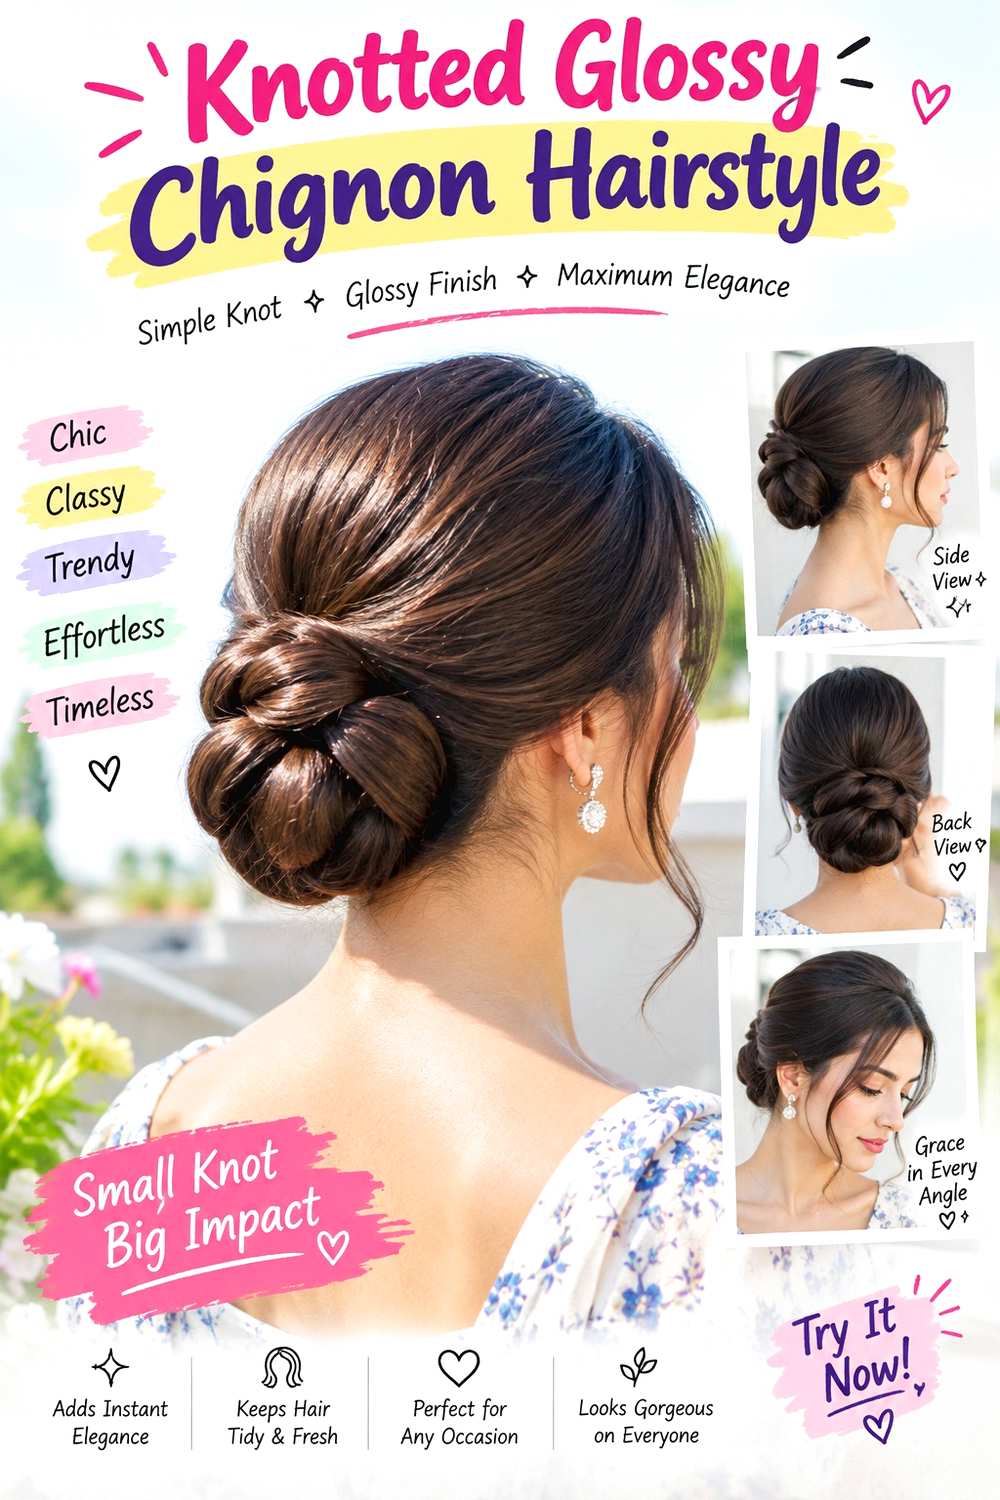
Knotted Glossy Chignon Hairstyle
A knotted chignon replaces a traditional coil with a compact fold that resembles a soft knot at the nape. Gather the hair low, divide the length into two manageable sections, loop them around each other once, then tuck the remaining ends beneath the center. Keep the outer surface smooth enough for a glossy finish while allowing the knot shape to remain visible. The crown can stay sleek or lightly lifted, and a center or side part both suit the structure.
Use flexible-hold gel for controlled surface smoothing, a mini elastic if the knot needs a discreet starting anchor, and bobby pins to hold the folded ends. Medium to long hair provides enough overlap for a recognizable knot. Dense hair may need a broader knot so the ends can tuck comfortably, while lower-density hair usually looks fuller with a compact shape. A quick refresh involves retucking a loose end and smoothing the surface; full wash-day styling takes longer because the knot must be rebuilt from its center.
At a styling appointment, specify the knot width, nape height, and whether you prefer a tight sculpted center or a slightly softer outer fold. Those details determine the finished silhouette more than additional product.
Pro tip:
Shape the knot completely before adding the final pins. This lets you balance both sides while the ends are still easy to reposition underneath.
Make It Work for You:
For very long hair, make the knot slightly wider and tuck the extra length around its underside rather than stacking everything into a bulky center.
Watch Out For:
Do not tighten the knot repeatedly to make it smaller. A broad, comfortable fold is usually more stable than forcing excess length into a compact shape.
Double-Roll Glossy Chignon Hairstyle
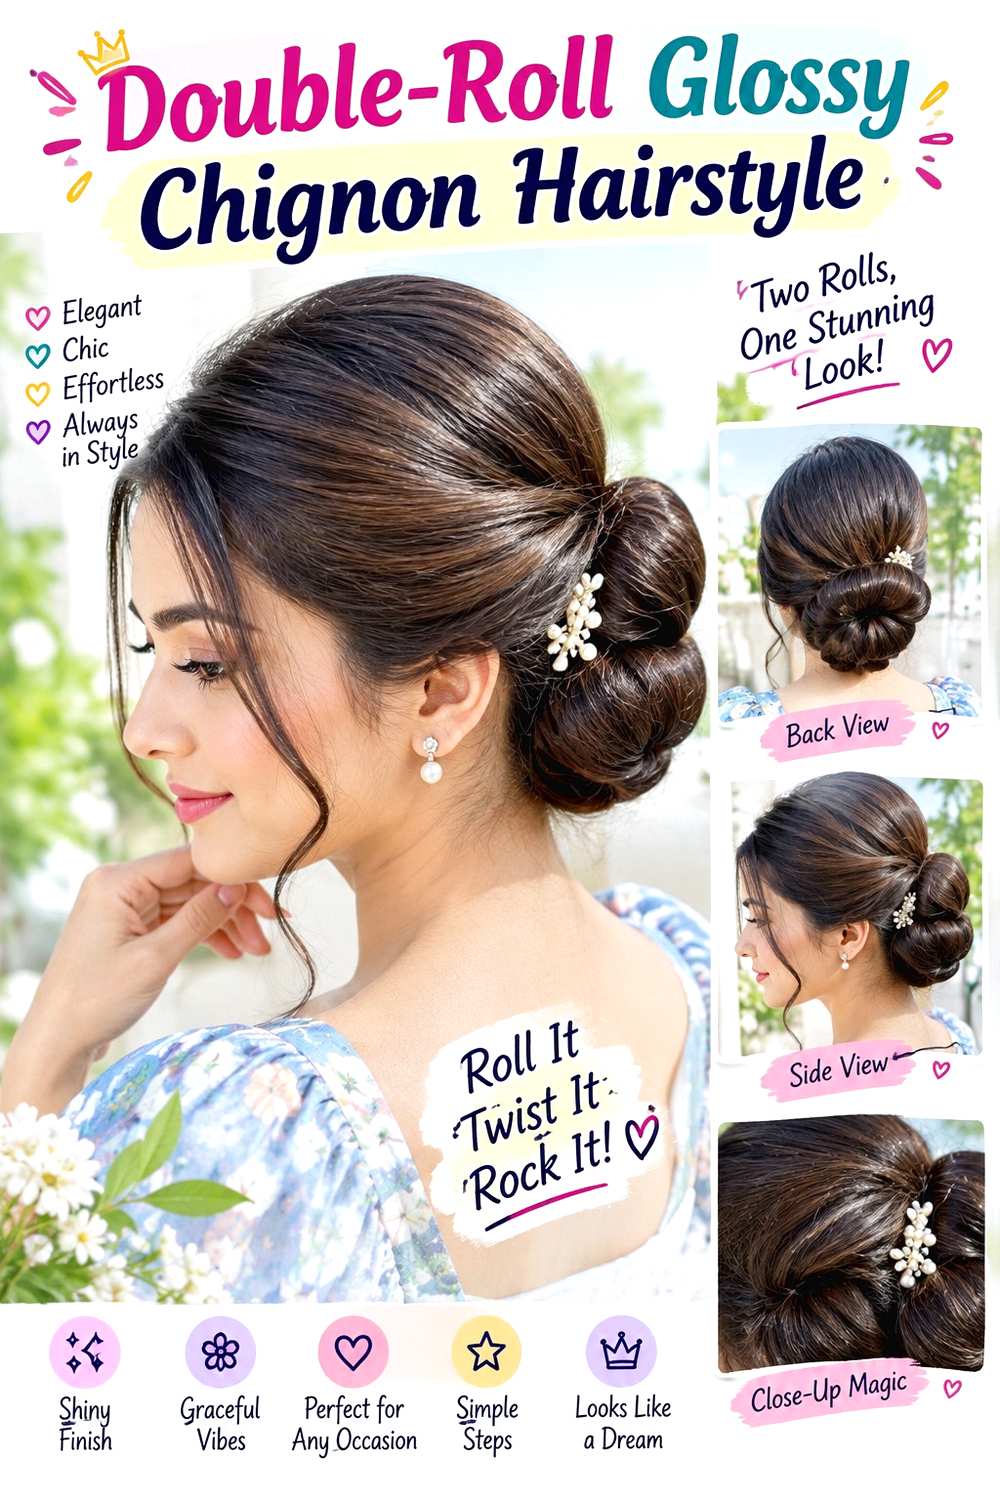
Two smooth rolls meeting at the center create a chignon with a defined seam rather than one continuous coil. Divide the hair vertically into left and right sections, roll each inward toward the middle, and tuck the lower ends beneath the joined shape. Keep the rolls similar in width while allowing the crown to stay smooth or gently lifted. A center part reinforces the symmetry, although a soft side part can make the front less formal without changing the back structure.
Use lightweight smoothing cream to control the roll surfaces, a tail comb for clean sectioning, and bobby pins to secure the center seam and lower edges. Medium and long hair work best because both sections need enough length to fold. Dense hair may feel better in broad, flatter rolls, while lower-density hair can use smaller cylinders that meet closely. A quick refresh may require rebuilding only the looser side and smoothing the seam. Full wash-day styling takes longer because both rolls must be balanced again.
At a styling appointment, specify whether you want equal rolls, how visible the center seam should be, and how low the combined chignon should sit. Even placement matters more than making both sides extremely tight.
Pro tip:
Shape both rolls before pinning the center seam permanently. Comparing them first makes it easier to correct width or height differences without disturbing the glossy surface.
Make It Work for You:
For dense hair, form wider, shallower rolls that meet smoothly at the center. This reduces concentrated bulk while keeping the double-roll structure easy to see.
Watch Out For:
Do not tighten one roll just because the other sits flatter. Rebuild the uneven side so the center seam stays balanced and comfortable.
Curly Glossy Chignon Hairstyle
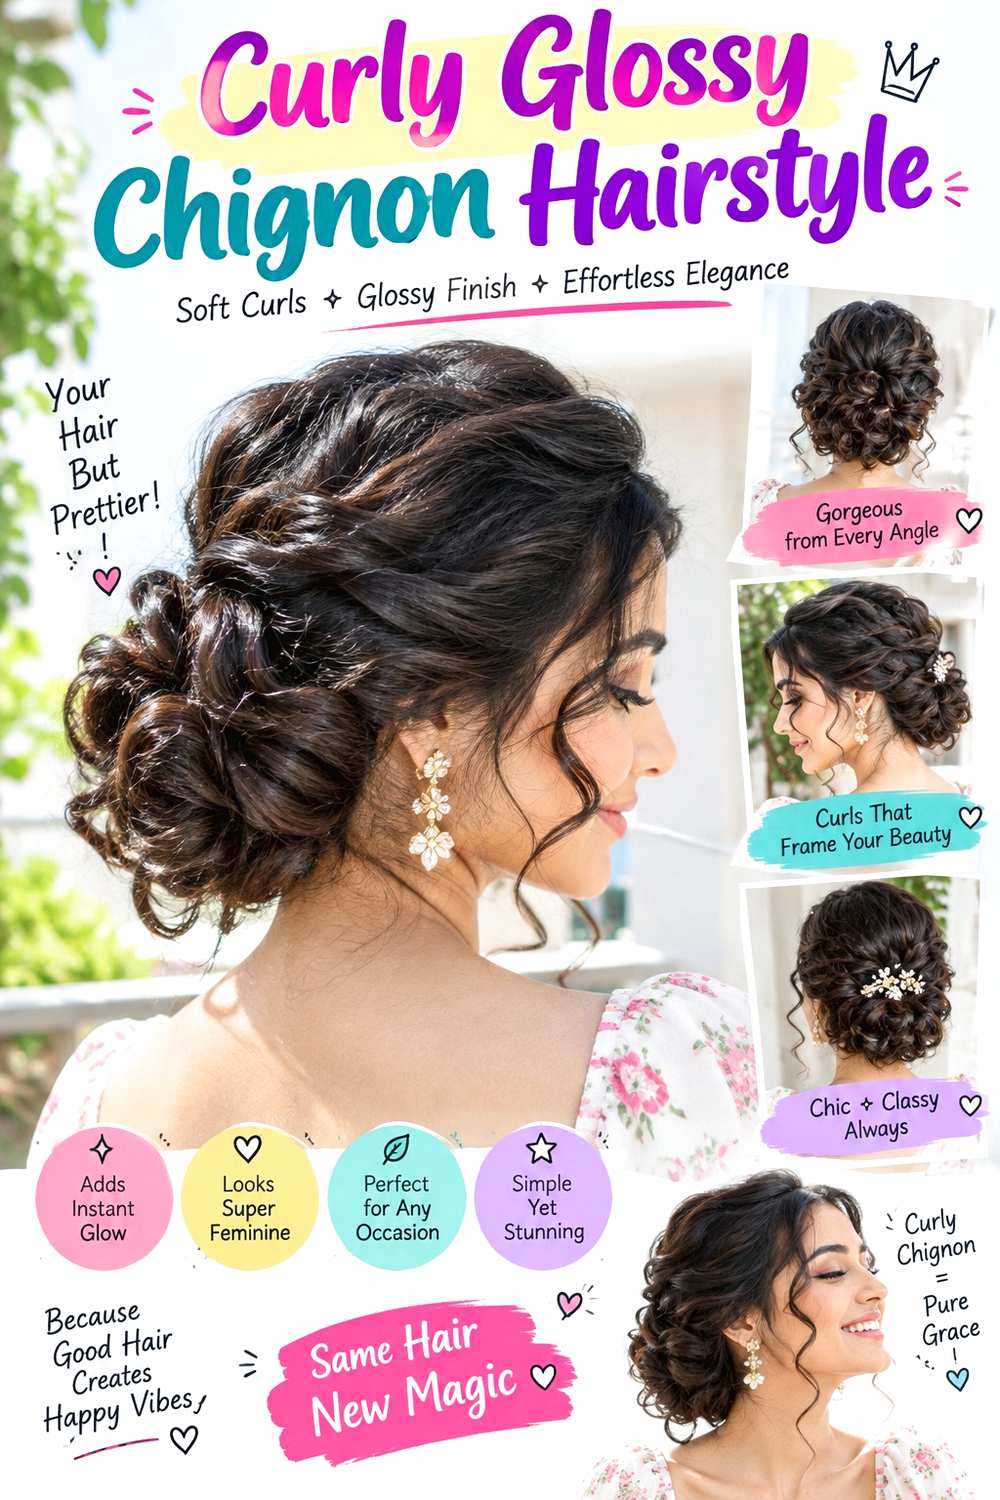
A curly chignon can keep visible texture inside the bun while the outer sections around the crown are gently controlled. Gather curls low without brushing out every curl group, then fold and pin the length into a rounded chignon. Allow a few defined curls to remain visible across the bun surface so the style does not become a completely smooth shell. Shorter curls around the temples can stay loose, and the crown may keep natural volume rather than being compressed.
Use lightweight curl gel to define the sections being gathered, bobby pins to secure the folded chignon, and a small amount of lightweight shine serum on the outer surface. A quick refresh may involve redefining a few loose curls and replacing a shifted pin. A full wash-day version takes longer because the curls should reach their intended dry shape before final tension and placement are judged. Shrinkage can change both the bun size and how tightly the sides feel, so reassess comfort after drying.
At a styling appointment, specify the chignon’s finished position on dry hair, how much curl texture should remain visible, and which face-framing curls you want intentionally left out.
Pro tip:
Choose the final chignon height after your curls have reached their usual dry volume. This makes both the bun size and root tension easier to judge.
Make It Work for You:
For tighter curls, create a broader low chignon and leave more texture visible across the surface. The glossy finish can stay controlled without flattening the entire pattern.
Watch Out For:
Do not coat the curls heavily with serum to create shine. Too much can reduce definition and make the pinned sections slippery at the anchor.
Coily Tucked Glossy Chignon Hairstyle
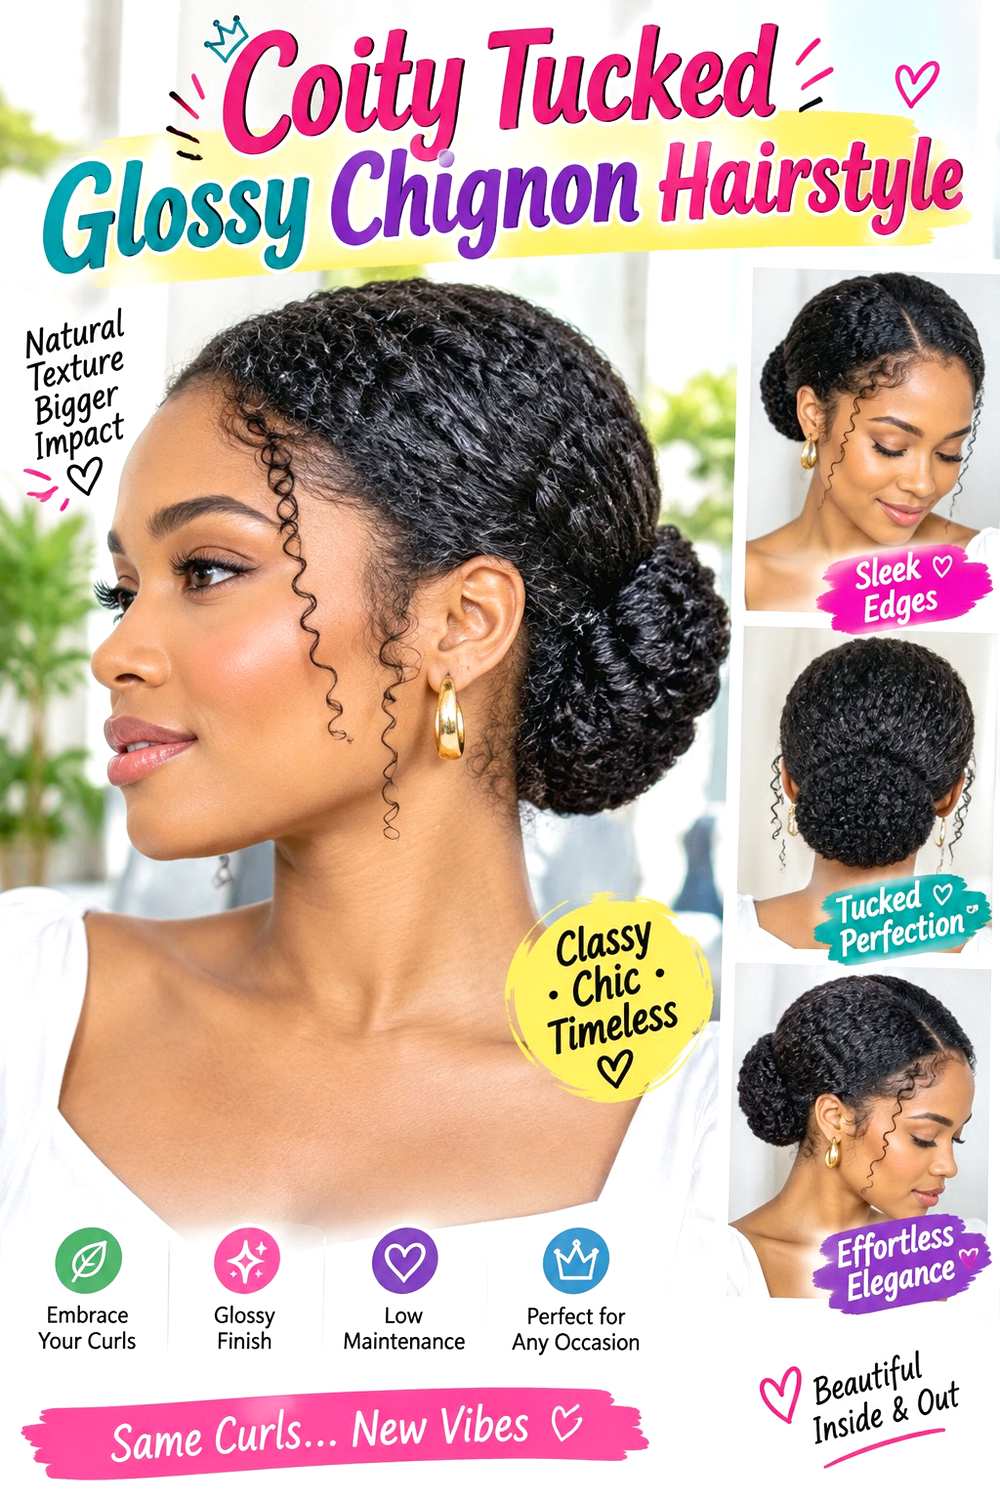
A tucked chignon lets coily hair retain body while creating a controlled low shape. Gather the hair toward the nape without pulling the crown completely flat, then fold the length inward and tuck the ends beneath the center. The result can be broad and softly rounded rather than tightly coiled. Shorter coils around the hairline may remain loose, while the visible sides can be smoothed just enough to create contrast with the fuller tucked section.
Use moisturizing leave-in conditioner for pliability, a fabric-covered elastic for an optional hidden base, and bobby pins to secure the fold. The finished size depends on density, shrinkage, and how stretched or compact the hair is when gathered. A quick refresh can involve smoothing the visible surface and replacing one loosened pin. Full wash-day styling takes longer because the hair should settle into its expected dry volume before final tension is judged. If shrinkage makes the sides feel tighter, rebuild the base with more slack instead of accepting discomfort.
At a styling appointment, specify how much crown volume you want preserved, the width of the finished tuck, and whether the ends should disappear completely or leave a little coily texture visible.
Pro tip:
Recheck comfort once the hair is fully dry. Shrinkage can change how the sides and nape feel even when the initial chignon placement seemed comfortable.
Make It Work for You:
For very dense coils, build a wider tuck across the nape instead of compressing everything into a small knot. The broader base distributes volume more comfortably.
Watch Out For:
Avoid pulling the crown flat merely to make the chignon smaller. Adjust the fold width instead so the glossy finish does not depend on excessive tension.
Short-Hair Mini Glossy Chignon Hairstyle
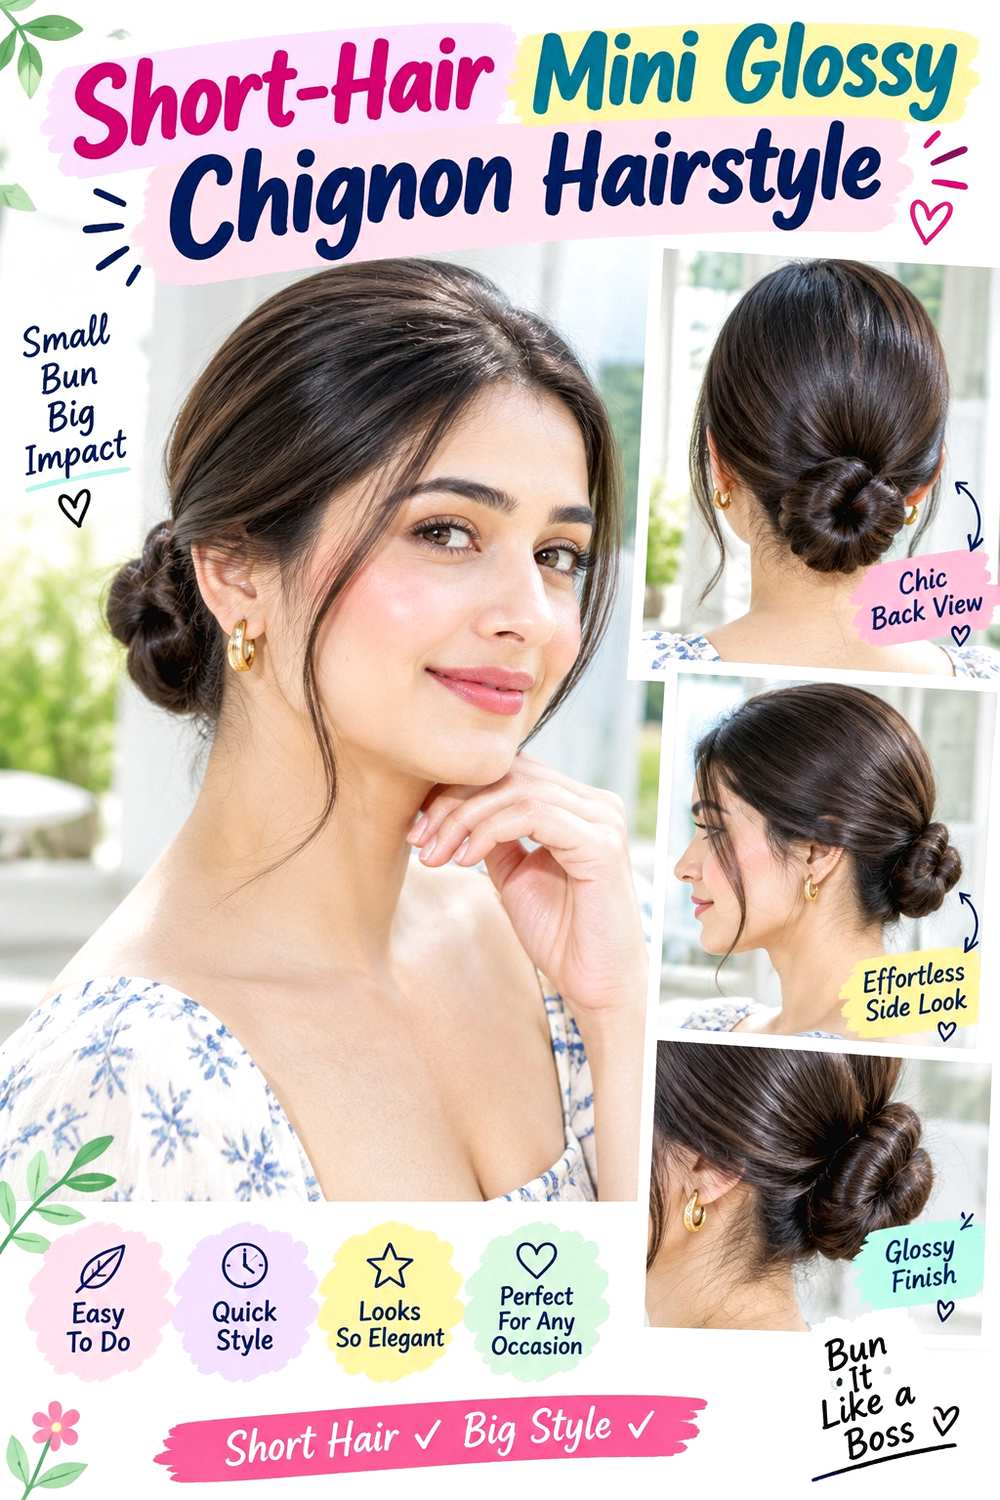
Shoulder-length hair can form a mini chignon when the shape stays close to where the longest pieces naturally overlap. Gather the back sections at the nape, fold the available length inward, and create a small rounded or horizontal tuck rather than trying to imitate a large bun. Short layers near the temples or neckline can remain loose if they do not reach comfortably. The visible surface can still look controlled and glossy even when a few intentional pieces remain outside.
Use lightweight smoothing cream for surface control, a mini elastic to establish the compact base, and bobby pins to secure short ends around the fold. A quick refresh may take only a few minutes because the chignon is small; a full wash-day version takes longer if the haircut first needs its usual drying or texture routine. If sections repeatedly escape, move the anchor closer to their natural reach rather than adding tension. Straight, wavy, curly, and coily shoulder-length hair can all use this principle.
At a styling appointment, identify the shortest pieces you want included and the exact nape height of the mini chignon. The temporary updo should adapt to the cut rather than requiring a new haircut.
Pro tip:
Build the chignon where the longest back pieces already overlap naturally. That meeting point creates a stronger mini base and reduces the need for stretched sections.
Make It Work for You:
If your lob has short face-framing layers, leave them loose and use the back sections for the chignon. The finished shape stays polished without fighting the haircut.
Watch Out For:
Do not keep pinning every short piece toward a distant center. A smaller, closer chignon is usually neater and more comfortable than an overstretched one.
High Glossy Chignon Hairstyle
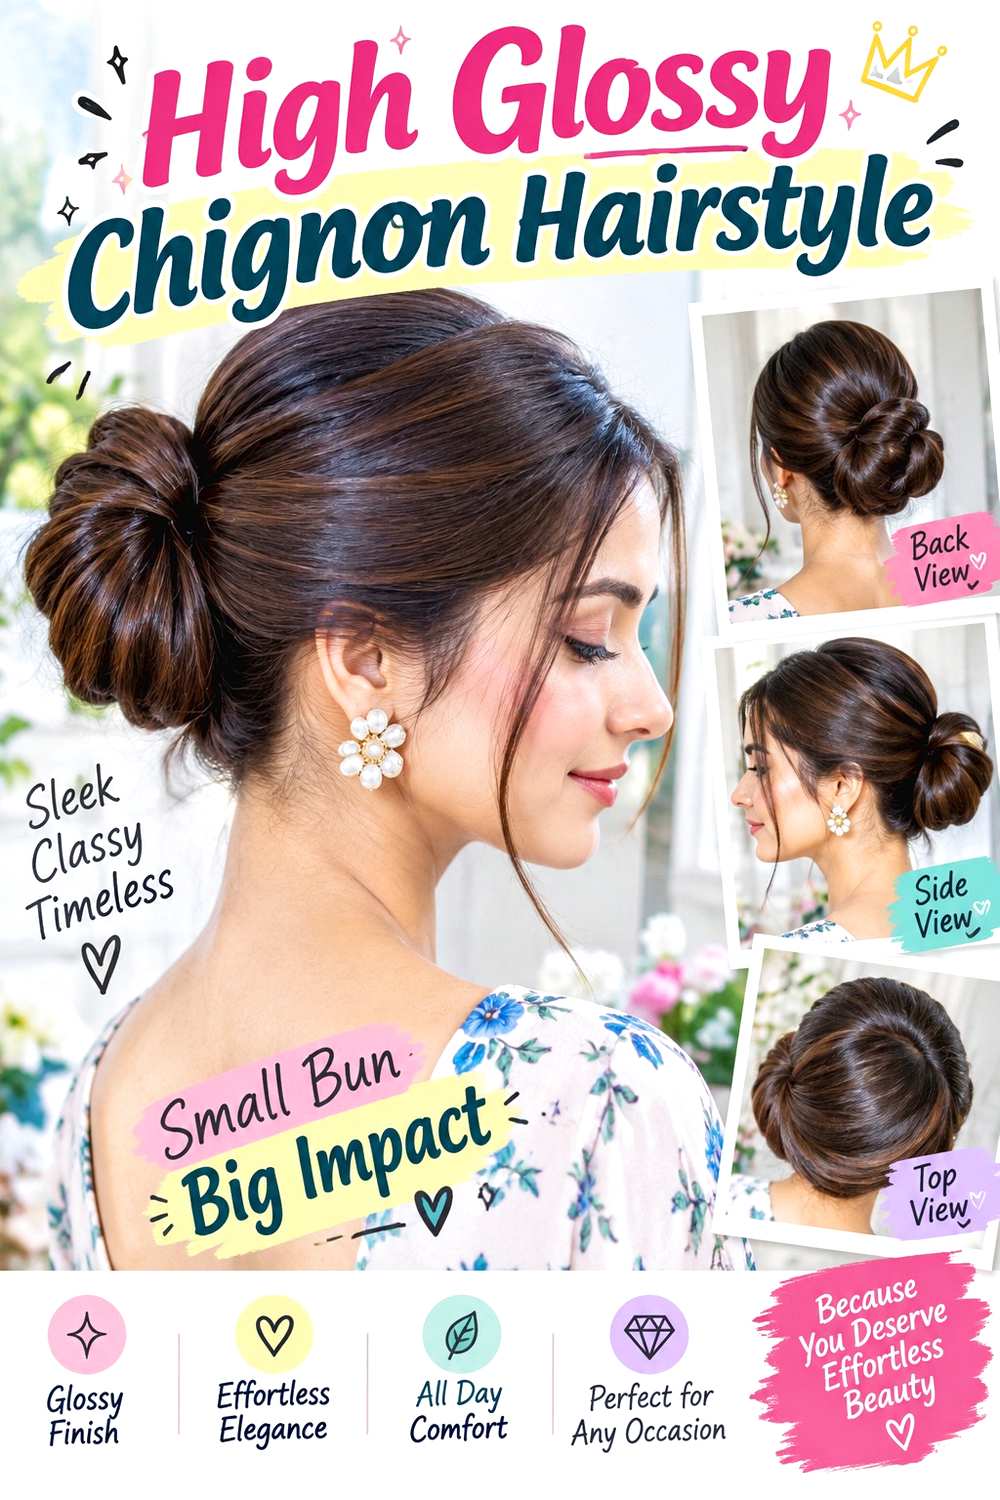
A high chignon places the bun near the crown, creating a longer neck-and-nape line and more visible height from the front. Gather the hair upward without pulling the temples painfully tight, then coil or fold the length into a rounded bun that sits securely rather than leaning backward. A center part can remain visible for a controlled front, or the hair can be swept back with a little crown softness. Fringe and short temple pieces may stay loose.
Use smoothing gel for targeted control, a fabric-covered elastic to create a dependable high base, and bobby pins to secure the chignon. Medium and long hair work well, but very dense or long hair may feel heavy at this height, making a broader bun preferable to a tall stacked coil. A quick refresh generally means smoothing flyaways and retucking the bun edge; a full wash-day style takes longer if the hair first needs drying or texture preparation. If the temples begin to pull, lower the base slightly rather than tightening it.
At a styling appointment, specify the precise bun height, width, and amount of front softness you want so the glossy finish does not come at the expense of comfort.
Pro tip:
Secure the high base with your head upright, then check temple tension before forming the chignon. This prevents the bun from feeling tighter once you move normally.
Make It Work for You:
For very long or dense hair, create a wider, flatter high chignon instead of stacking the coil upward. This spreads weight and can improve stability.
Watch Out For:
Do not treat scalp pulling as necessary for a sleek finish. Lower or loosen the base until the surface stays controlled without uncomfortable tension.
Off-Center Glossy Chignon Hairstyle
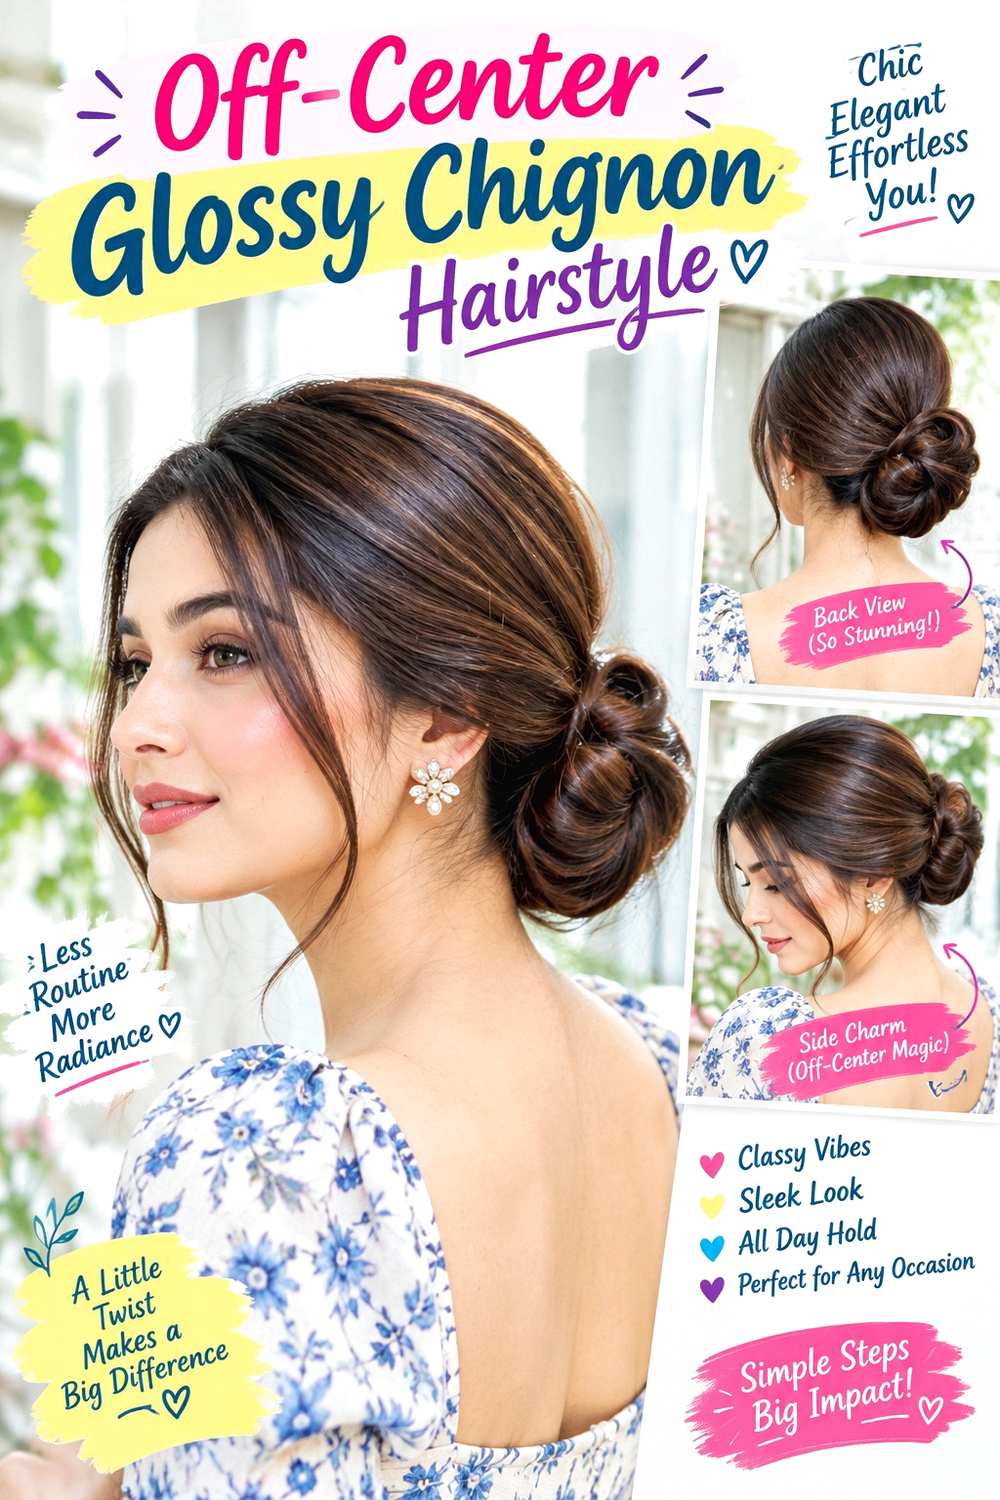
An off-center chignon moves only slightly away from the middle, creating subtle asymmetry without the dramatic sweep of a full side bun. Part the hair softly, guide the lengths toward one lower back corner, and create a smooth rounded chignon a few inches from center. Keep the opposite side broad and controlled, while the fuller side can carry a slight curve into the bun. The chignon should remain visible from the back and three-quarter view.
Use light styling cream for surface control, bobby pins to secure the directional base and bun, and lightweight serum for a restrained glossy finish. Medium and long hair give enough length to travel across the back without forcing shorter pieces. A quick refresh may involve smoothing the longer sweep and resetting a pin; a full wash-day version takes longer because the asymmetrical route must be rebuilt. If the chignon drifts farther sideways during wear, strengthen the base rather than tightening the sweep.
At a styling appointment, specify how far from center you want the bun and which side should carry it. Small changes in placement can make the result feel softly asymmetric or distinctly side-set.
Pro tip:
Mark the intended chignon position before gathering the full length. A clear target keeps the sweep controlled and prevents the bun from drifting too close to the ear.
Make It Work for You:
If one side has shorter layers, place the chignon slightly toward that side. Those pieces have less distance to travel, making the shape easier to secure.
Watch Out For:
Avoid pulling the opposite side extremely tight just to reach the off-center anchor. Bring the bun slightly inward if the sweep feels strained.
Wrapped Base Glossy Chignon Hairstyle
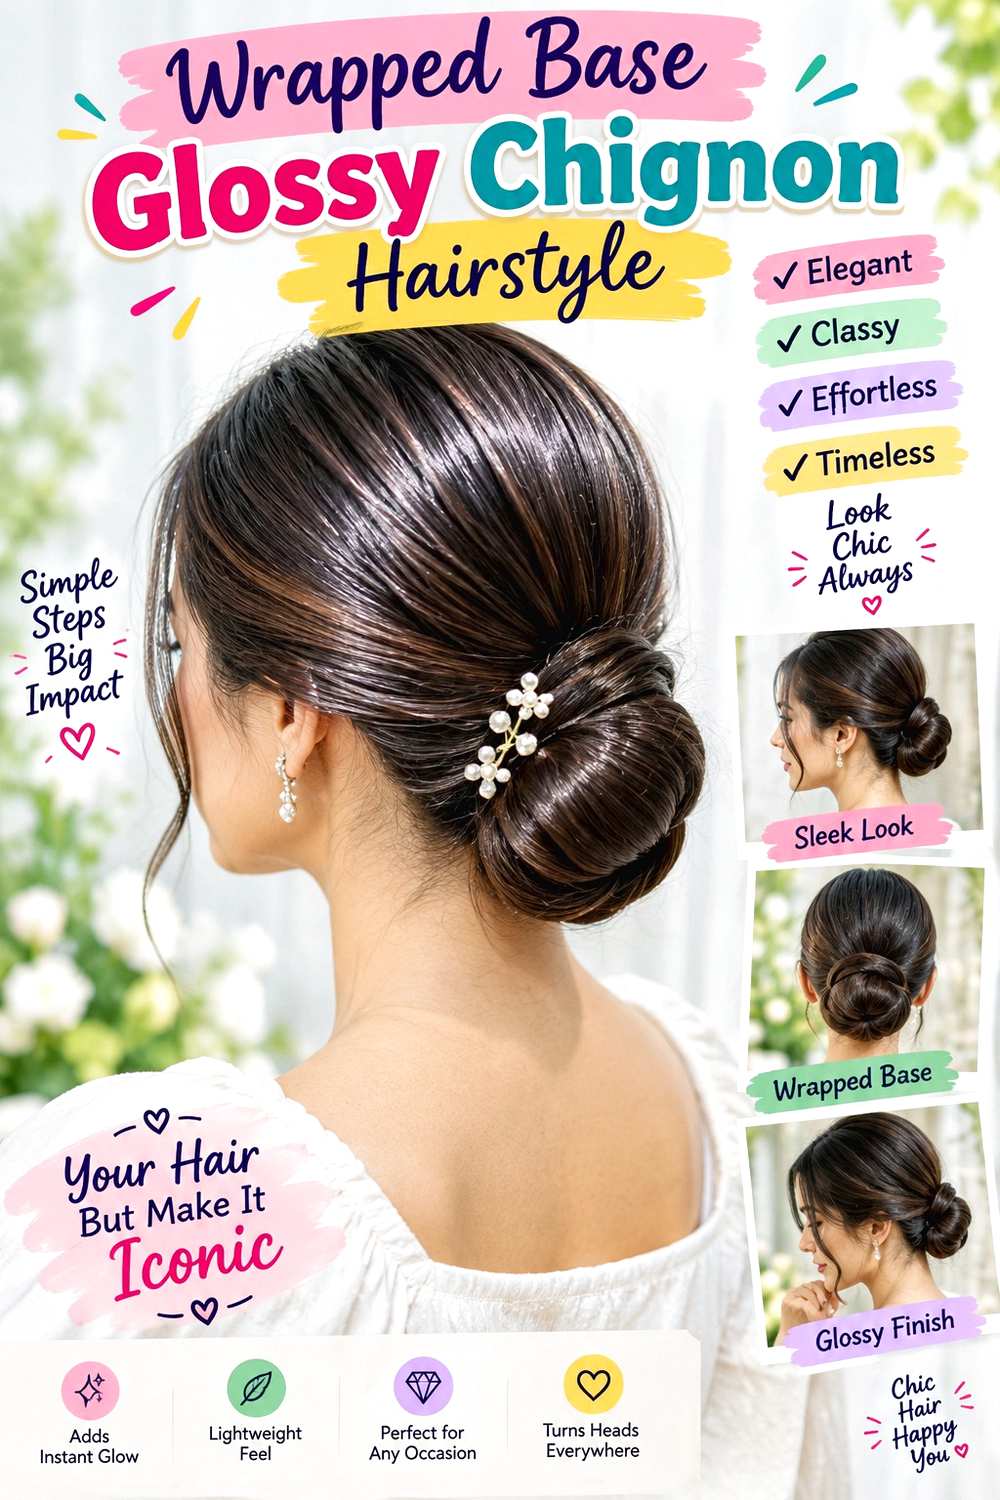
A wrapped base hides the gathering point and gives the chignon a continuous polished finish. Gather the hair low, reserve one narrow section, and form the remaining length into a rounded chignon. Once the bun is secure, smooth the reserved section around its base and tuck the end underneath so no obvious gathering point remains. A center or side part can work, while the crown may stay sleek or retain a subtle amount of lift.
Use lightweight smoothing cream to control the wrap, a fabric-covered elastic for the hidden base, and bobby pins to secure both the chignon and the wrapped section. Medium and long hair work best because enough length is needed for the bun and the separate cover. A quick refresh usually means retucking the wrap or replacing one pin. Full wash-day styling takes longer because the base must be built cleanly before the finishing section can be added. If the wrap loosens, reset it independently rather than tightening the whole bun.
At a styling appointment, specify how thick you want the wrapping section and whether it should circle the full base or cover only the most visible side.
Pro tip:
Keep the wrapping section flat as it travels around the base, then pin its end underneath. Twisting it can create a ridge that interrupts the glossy finish.
Make It Work for You:
For lower-density hair, reserve only a narrow wrapping section so most of the length remains available for the chignon. The covered base still looks intentional.
Watch Out For:
Do not borrow too much hair for the wrap. An oversized finishing section can leave the main chignon smaller or thinner than the proportions require.
Face-Framing Glossy Chignon Hairstyle
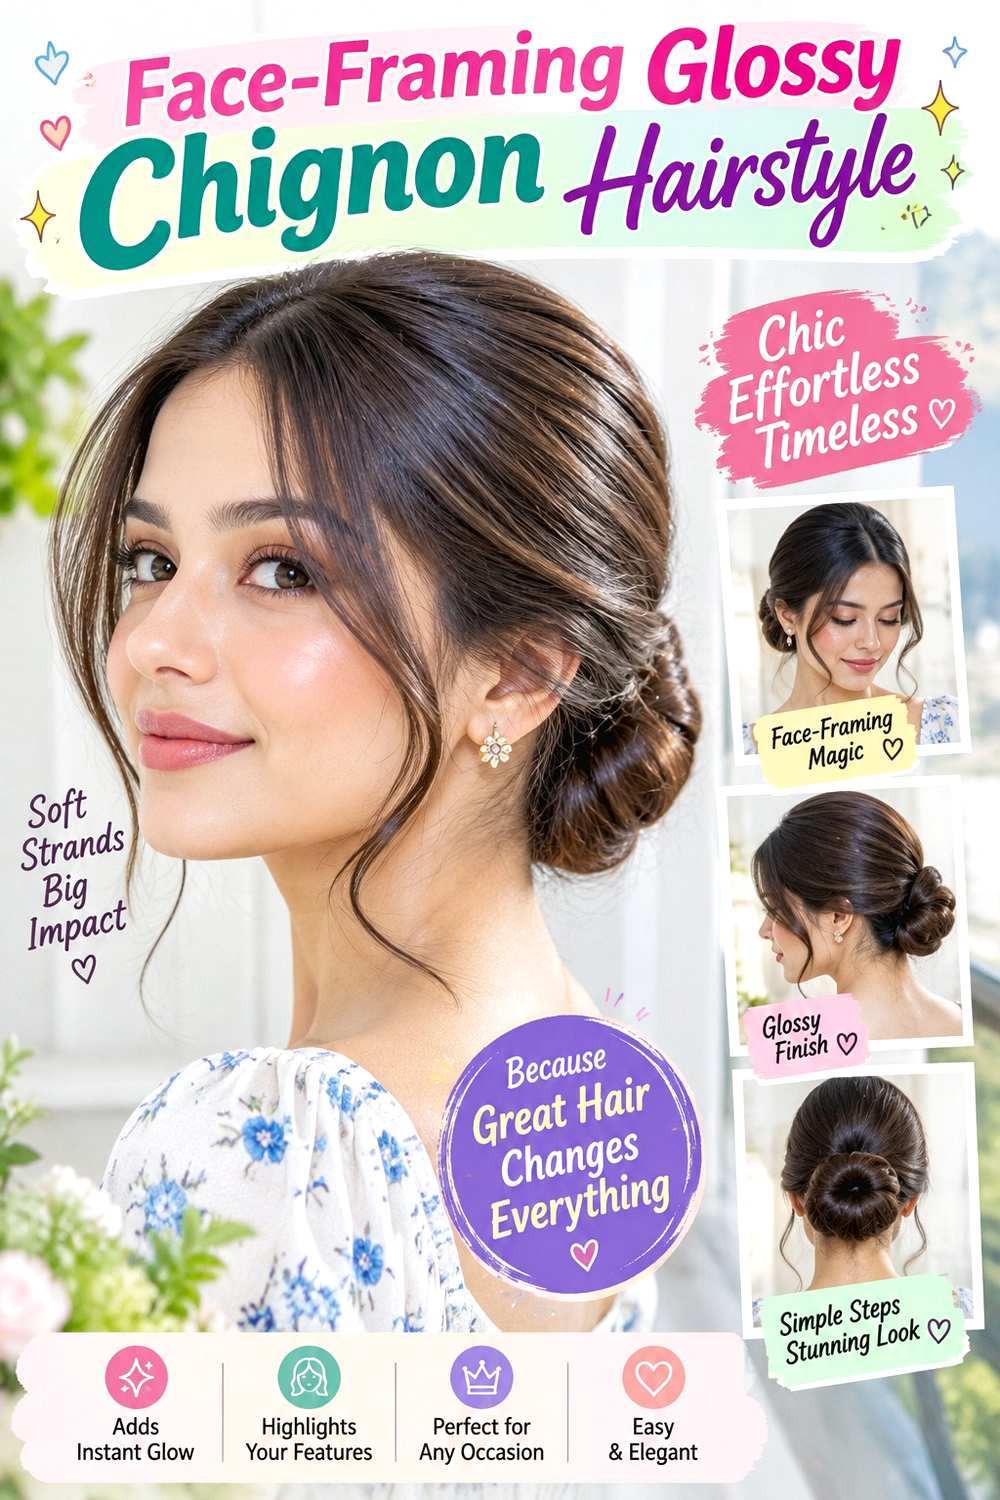
Leaving selected face-framing pieces loose softens the contrast of a polished chignon without changing its secure low structure. Separate the front pieces before gathering, then smooth the remaining hair toward the nape and build a rounded or softly folded bun. A center part can create balanced framing, while a side part allows one section to sweep more prominently. The loose pieces should look intentional in length and placement rather than appearing as strands that escaped accidentally.
Use lightweight smoothing cream on the gathered surface, a fine-tooth comb to refine the part and separate the front pieces, and bobby pins to secure the chignon. Medium and long hair work well, and existing cheekbone-, jaw-, or collarbone-length layers can provide natural framing without requiring a new cut. A quick refresh means smoothing the bun and repositioning only the loose front sections. A full wash-day version takes longer when those pieces also need their usual texture routine. If the front strands repeatedly fall into the eyes, change their placement rather than pulling the chignon tighter.
At a salon appointment, point to the exact pieces you want left out and where they should finish. Finished length matters more than a generic request for “soft framing.”
Pro tip:
Separate the face-framing pieces before building the chignon. Doing it first prevents you from tugging strands out afterward and disturbing the glossy gathered surface.
Make It Work for You:
If your front layers are curly or wavy, preserve that natural movement instead of forcing them smooth. The contrast can soften the polished chignon while retaining texture.
Watch Out For:
Do not pull random strands loose after finishing. Choose the framing sections deliberately so the front looks intentional and the chignon anchor stays undisturbed.
Conclusion
Glossy chignon hairstyle ideas can range from smooth centered coils to braided, twisted, knotted, high, and asymmetrical shapes. Medium and long hair allow larger folds, while shorter lengths often work better with a compact nape tuck. Density affects whether the bun should stay small or spread wider, and natural texture can remain visible inside curly or coily versions. Center parts create symmetry, side parts introduce movement, and loose face-framing pieces soften a polished surface. A glossy finish does not require maximum tension or heavy product; careful smoothing and dependable anchoring matter more. Choose a version that suits your length, texture, preferred bun height, face framing, and realistic styling effort, especially if you plan to wear the updo for several hours.
Before Your Salon Visit
Choose one or two favorite references and point out the exact chignon height, width, parting, crown volume, face-framing pieces, texture, and glossy finish you want. Discuss your natural texture, density, face shape, preferred length, upkeep, and normal styling routine so the shape can be adapted realistically. Because a chignon is a temporary updo, focus on secure anchoring and comfortable tension rather than requesting a haircut solely for the style. If the look must work with a veil, collar, or other accessory, mention that placement too.
FAQs
How Do You Make a Chignon Look Glossy Without Using Too Much Product?
Start with tidy sectioning and smooth the visible surface before adding extra product. A small amount of smoothing cream, gel, or serum can control flyaways, but excess product may make the anchor slippery. The goal is a controlled surface, not coating every strand until it feels heavy.
Can Curly or Coily Hair Wear a Glossy Chignon?
Yes. Curly and coily hair can keep natural texture inside the bun while the visible crown and sides are gently controlled. Straightening is not required. Consider shrinkage, dry volume, and comfortable tension when choosing the chignon size, and use a broader tuck when compressing the hair into a small knot feels restrictive.
What Hair Length Works Best for a Glossy Chignon?
Medium and long hair provide the most options for braids, wraps, rolls, and larger coils, but shoulder-length hair can form a compact nape chignon. The useful test is whether enough back length reaches the anchor comfortably. Short face-framing pieces can remain loose rather than being stretched into the bun.
How Do I Keep a Glossy Chignon Secure for Longer Wear?
Build the chignon on a stable base, distribute pins around the bun instead of relying on one point, and check comfort before finishing the surface. If the whole shape starts to sag, rebuild the anchor rather than adding more smoothing product or pushing pins randomly into the outer layer.