12 Lived-In Length Hairstyles for Fall 2026

Lived-in length is about keeping long or medium-long hair relaxed, movable, and easy to wear instead of making every layer look freshly cut or every wave perfectly styled. The shape usually relies on long layers, softened ends, grown-out fringe, natural texture, and face-framing pieces that blend smoothly into the overall length. Some versions keep a nearly one-length perimeter, while others use shag, butterfly, or internal layers to create more movement through the crown and sides.
Hair density plays a major role in choosing the right shape. Fine hair often benefits from fewer layers and stronger ends, while thick hair may need internal weight removal so the length does not feel heavy. Straight hair can use a blow-dry or loose bends for movement, while wavy and curly textures often need less heat because their natural pattern already provides softness and volume.
Maintenance is generally easier than with highly structured cuts, but lived-in does not mean neglected. Long ends still need conditioning, fringe may need occasional reshaping, and layers can lose movement as they grow. The best version balances your natural texture, density, face-framing preference, length, and normal styling routine.
Quick List
- Soft Long Layers With Grown-Out Ends Hairstyle
- Curtain Bangs With Lived-In Length Hairstyle
- Center-Part Long Shag Hairstyle
- Air-Dried Wavy Length Hairstyle
- Collarbone Face-Framing Layers Hairstyle
- Fine-Hair Long Layers With Full Ends Hairstyle
- Thick-Hair Lived-In Layers Hairstyle
- Curly Lived-In Length With Long Fringe Hairstyle
- One-Length Brunette With Soft Face Frame Hairstyle
- Long Butterfly Layers With Relaxed Ends Hairstyle
- Low-Maintenance Razor Layers Hairstyle
- Extra-Long Lived-In Waves Hairstyle
Soft Long Layers With Grown-Out Ends Hairstyle

Soft long layers keep plenty of length while removing just enough weight for the hair to move naturally. The shortest pieces can begin below the chin, leaving the perimeter full and slightly uneven rather than freshly blunt. Straight, wavy, and medium-density hair suit this shape especially well, while fine hair benefits from keeping the layers sparse. A leave-in conditioner, large round brush, and light texturizing spray help the ends bend without looking overstyled. Styling is moderate after washing but easy to refresh with a quick brush-through or a few loose bends around the front. The cut grows out smoothly because there is no short crown layer that quickly loses its place. At the salon, ask for long, blended layers that begin below the chin and preserve substantial weight through the bottom. Avoid heavy thinning at the perimeter if you want that slightly grown-out, lived-in finish to stay full rather than wispy.
Pro tip: Keep the shortest layer below the jaw if you want months of easy grow-out without the front pieces separating too sharply from the rest of the length.
Curtain Bangs With Lived-In Length Hairstyle

Curtain bangs give long hair a soft focal point without changing the overall length very much. The fringe should part near the center, skim the brows at its shortest point, and stretch toward the cheekbones before blending into longer face-framing pieces. Straight and softly wavy hair are easiest to style, though curly hair can wear a longer version that accounts for shrinkage. Medium density gives the fringe enough movement without taking too much hair from the sides. Use heat protectant, a medium round brush, and flexible hairspray to shape the front while leaving the lengths relaxed. Styling takes about five to ten minutes when the rest of the hair can air-dry or stay natural. The bangs need attention sooner than the back, but the longer edges grow out gently. At the salon, ask for a narrow curtain fringe with cheekbone-level outer pieces and keep the remaining layers long enough to preserve a loose, unforced silhouette.
Pro tip: Dry the fringe forward before splitting it so the roots stay soft; dividing it too early can create a wide center gap that looks more styled than lived-in.
Center-Part Long Shag Hairstyle
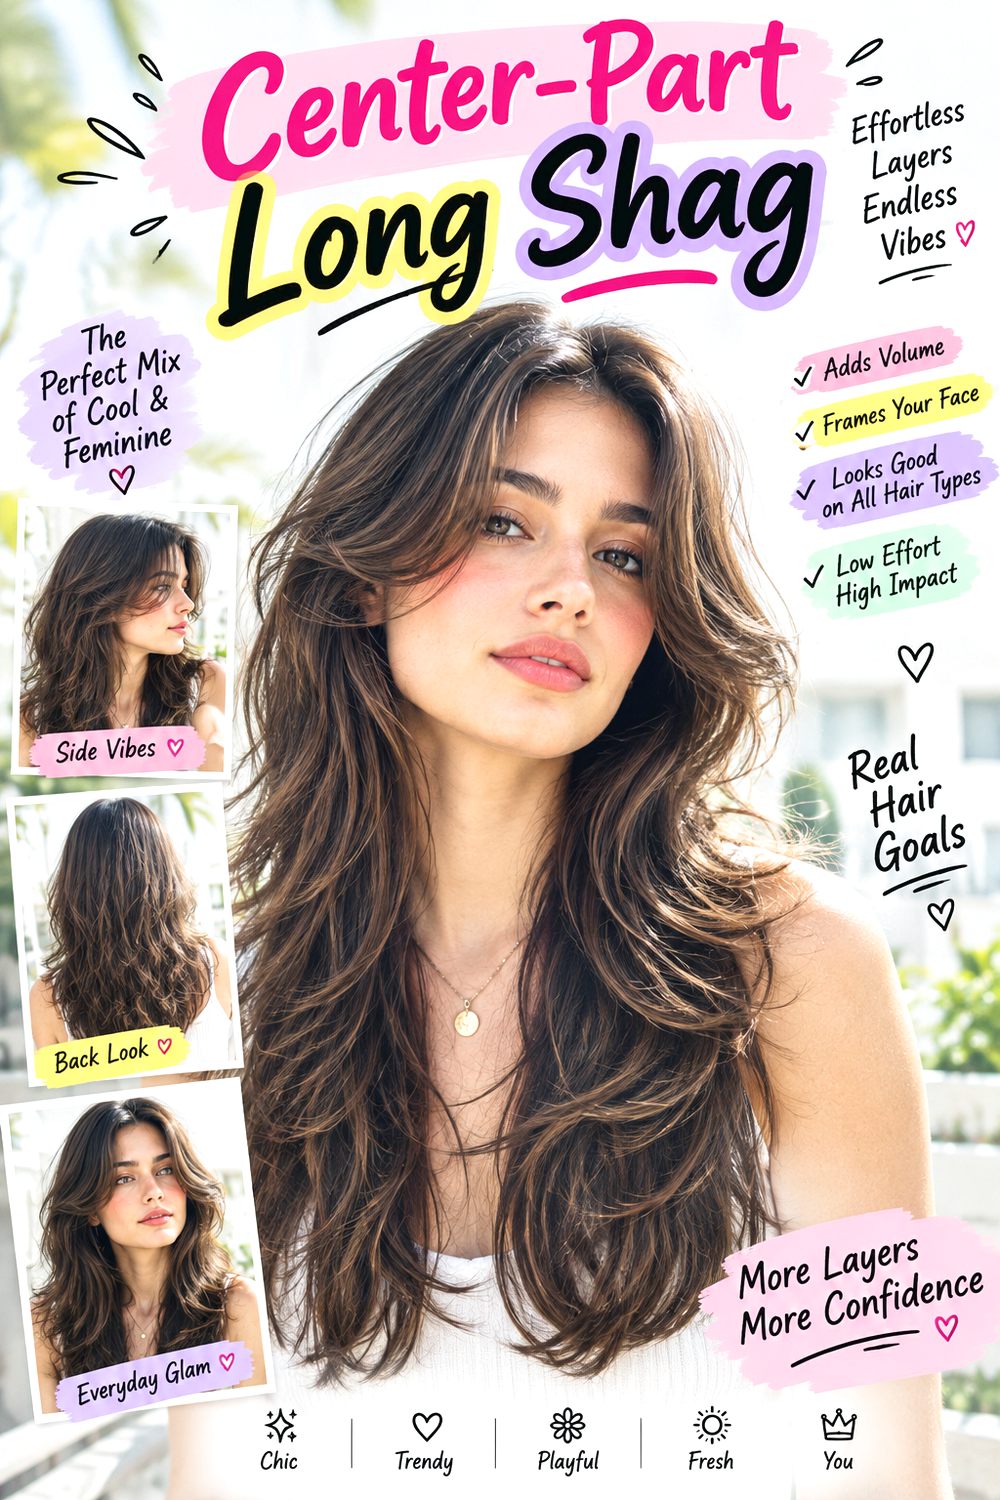
A center-part long shag creates lived-in movement through shorter crown layers, face-framing pieces, and a deliberately less-polished perimeter. The part keeps the front balanced, while the shortest layers can sit around the cheekbones and gradually extend into the longer back. Wavy medium-density hair carries the shape naturally, and thick hair may benefit from internal weight removal beneath the crown. Fine hair should keep fewer short layers so the bottom does not become thin. Work in lightweight mousse, diffuse or rough-dry the roots, then use dry texture spray through the mid-lengths. Styling is moderate on wash day and quick afterward because slight messiness suits the cut. The shag will feel heavier through the crown as it grows, so that area usually needs reshaping first. At the salon, ask for visible but connected layers rather than a dramatic mullet effect, and preserve enough length through the lower perimeter for a relaxed, substantial finish.
Pro tip: Keep the widest volume above the cheekbones and let the lower layers narrow gradually; this prevents the shag from becoming bulky around the shoulders.
Air-Dried Wavy Length Hairstyle
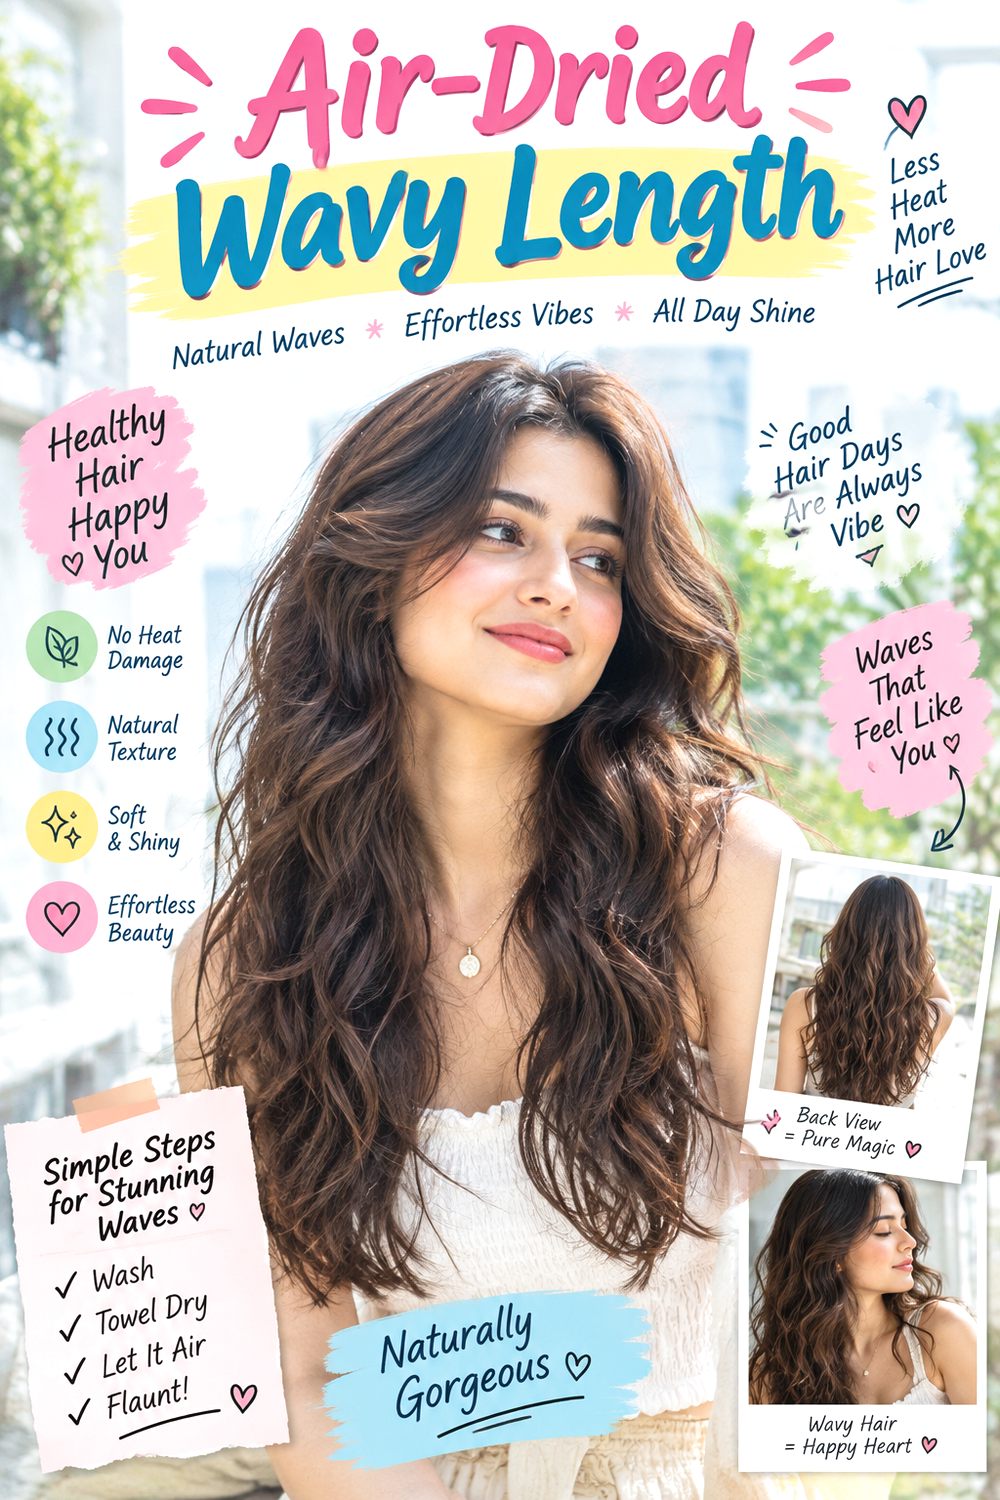
Natural wave is the main feature here, so the haircut should support the bends instead of forcing a polished blowout shape. Long, subtle layers remove weight from the mid-lengths while the ends stay reasonably full, allowing the waves to form without becoming triangular. Medium and thick wavy hair are particularly well suited, while fine waves need restrained layering to protect density. Apply leave-in conditioner, wave-enhancing mousse, and a wide-tooth comb while the hair is damp, then let it air-dry or use a diffuser briefly at the roots. Styling is easy once the cut is balanced, although humidity may require a small amount of anti-frizz cream. Refreshing usually means misting a few sections rather than restyling everything. At the salon, ask for the layers to be judged with your natural texture in mind and keep the shortest ones below the cheekbones. Avoid over-thinning the ends, which can make air-dried waves look stringy instead of softly lived-in.
Pro tip: Let your stylist see how your hair dries naturally before deciding layer placement; wave patterns can sit very differently after brushing or blow-drying.
Collarbone Face-Framing Layers Hairstyle

Face-framing layers that begin around the cheekbones and continue toward the collarbone can give long hair shape without sacrificing its overall density. The front pieces move independently, while the back stays mostly long and solid for a calm, wearable finish. Straight, wavy, and medium-density hair respond especially well, and fine hair can use a smaller number of front layers to avoid losing fullness. A heat protectant, medium round brush, and light styling cream are useful when you want the face frame to curve away from the cheeks. Styling is moderate for a polished blowout but quick if natural texture already creates movement. Because the layers are long, they grow out smoothly and do not demand frequent reshaping. At the salon, specify the exact shortest point you want near the face and ask for a gradual connection into the collarbone area. Keep the back perimeter stronger if you want the haircut to stay relaxed rather than heavily layered.
Pro tip: If you often tuck your hair behind your ears, keep the shortest framing piece long enough to stay tucked instead of springing forward around the cheek.
Fine-Hair Long Layers With Full Ends Hairstyle

Fine hair usually looks more substantial when the perimeter stays strong and the long layers are kept minimal. This version uses only a few internal or surface layers to create movement while protecting the density through the bottom. The front can have a light jaw-length face frame, but the crown should remain mostly intact so the ends do not separate too much. Straight and softly wavy fine hair are ideal for the shape. Use volumizing mousse at the roots, a large round brush for lift, and a lightweight texture spray only through the mid-lengths. Styling is quick to moderate and should avoid heavy oils that can collapse the hair. The grow-out is easy because there are no short layers to lose their placement. At the salon, ask for a dense perimeter, limited layering below the chin, and no aggressive thinning shears. The goal is subtle movement with enough end weight to keep long fine hair looking balanced.
Pro tip: Ask for a dry check of the perimeter after styling; fine ends can appear much thinner once lifted and separated than they do while damp.
Thick-Hair Lived-In Layers Hairstyle

Thick hair can feel heavy through long lengths, so this version relies on internal layering rather than aggressively thinning the visible ends. Hidden weight removal through the sides and back allows the hair to move while the perimeter stays full and substantial. Wavy, straight, and coarse textures all benefit, especially when the natural density tends to expand around the shoulders. Use anti-frizz cream before drying, a paddle brush or diffuser depending on texture, and a lightweight serum through the ends. Styling takes moderate time simply because dense hair takes longer to dry, but a well-cut shape should reduce the need for repeated heat. As the internal layers grow, the hair may begin feeling bulky before it looks obviously overgrown. At the salon, ask for weight removal beneath the surface and keep the outer layers long enough to preserve a relaxed silhouette. Avoid excessive thinning at the bottom, which can make thick hair puff above a weak, wispy perimeter.
Pro tip: Show your stylist the area where your hair expands after air-drying so bulk can be removed there instead of thinning the entire length evenly.
Curly Lived-In Length With Long Fringe Hairstyle

Long curls with a soft, grown-out fringe create a relaxed shape that feels intentional without looking freshly sculpted. The fringe should sit around the brows to cheekbones when dry, blending into longer curls at the temples rather than forming a dense straight line. Medium and thick curly hair carry the fullness well, while finer curls benefit from keeping the lower layers longer. Use moisturizing leave-in conditioner, curl cream, and a diffuser to encourage definition without stretching away the natural movement. Wash-day styling takes more time, but daily refreshing can be quick with water and finger shaping. Shrinkage matters more than exact wet length, especially around the fringe. At the salon, ask the stylist to assess the curls in their natural dry pattern and keep the front long enough to separate comfortably. Preserve density through the nape and lower lengths so the haircut stays full as the fringe and face-framing pieces gradually grow.
Pro tip: Choose your shortest fringe point based on completely dry curls; damp measurements can make the finished fringe spring much higher than expected.
One-Length Brunette With Soft Face Frame Hairstyle

A mostly one-length cut can still feel lived-in when the front is softened with a small amount of face framing rather than full layering. The perimeter remains dense and even through the back, while a few pieces around the jaw or chin break up the front edge. Straight, wavy, fine, and medium-density hair can all benefit from this restrained shape because it preserves maximum fullness. Use a smoothing leave-in, paddle brush, and lightweight shine serum if you want a polished surface, or let natural texture add a more relaxed finish. Styling is quick because there are few layers to control, and the grow-out is particularly forgiving. Ends may simply need periodic dusting when they start to look dry. At the salon, ask for a strong one-length perimeter with face-framing beginning no higher than the jaw. Keep the front pieces subtle and connected so the cut does not shift into a heavily layered look as it grows.
Pro tip: If you want the cut to stay low-maintenance, keep the face frame below the chin so it blends back into the perimeter without frequent reshaping.
Long Butterfly Layers With Relaxed Ends Hairstyle
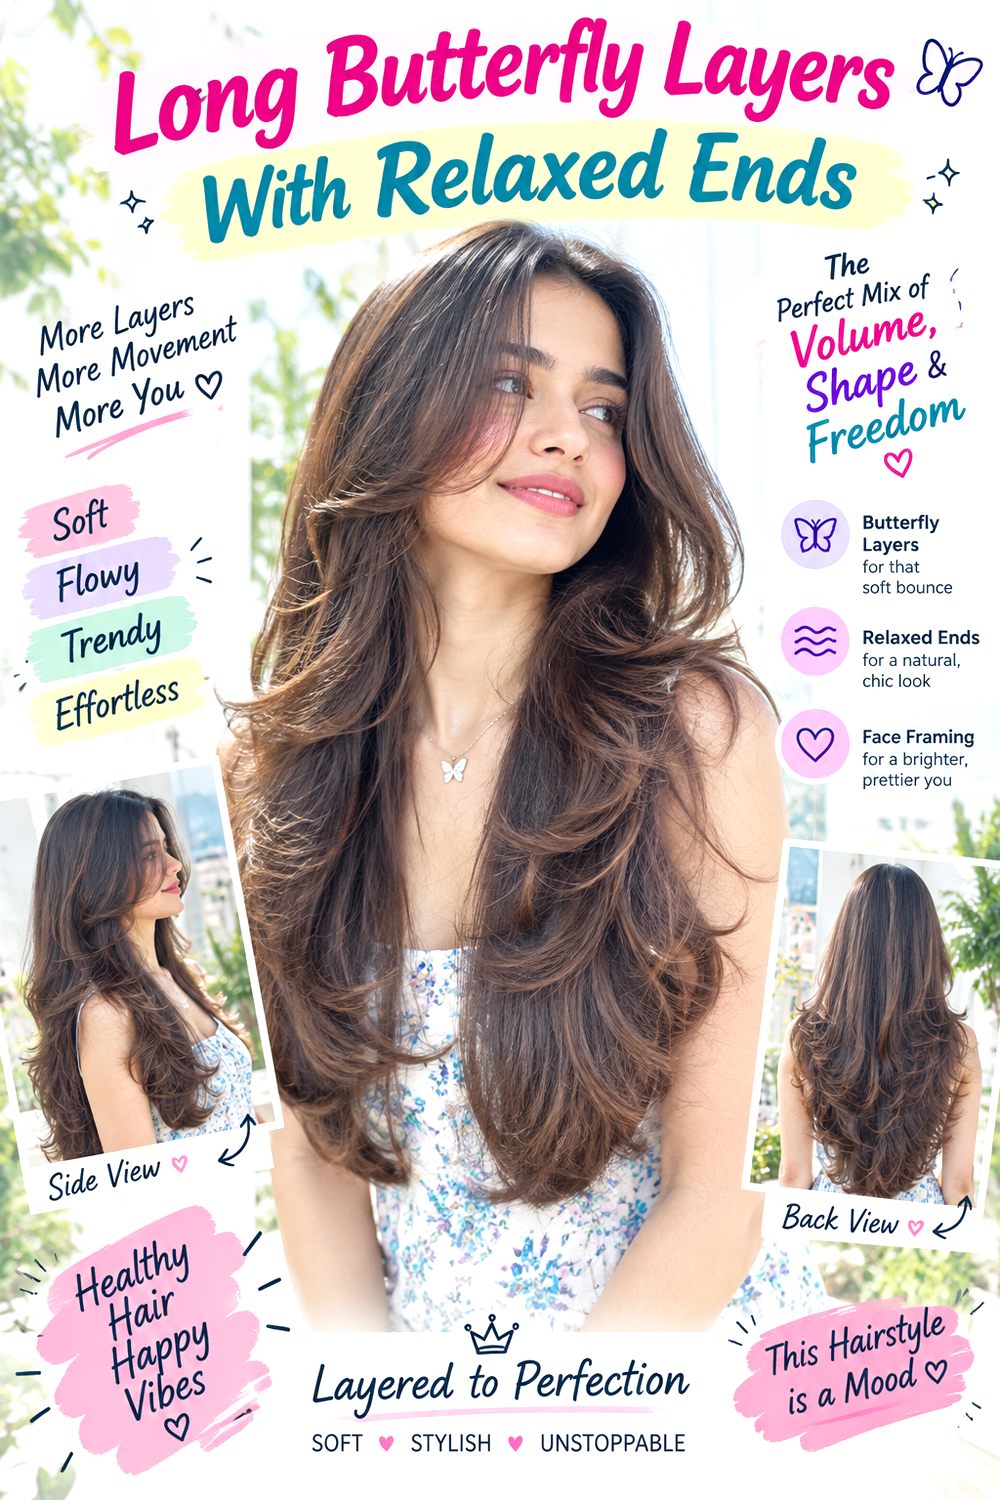
Butterfly layers create more lift around the face and upper lengths while preserving a long, flowing perimeter. The shortest pieces can begin near the cheekbones, then fan into longer sections around the shoulders and back. Medium and thick straight or wavy hair support the layered movement best, while fine hair should use a lighter version to protect the ends. Apply heat protectant, use a large round brush for the front sections, and finish with flexible hairspray rather than a stiff setting spray. Styling needs more time when you want a full blowout, but the haircut can also be worn with softer natural bends for a lived-in result. The face layers will lose their airy movement before the total length needs trimming. At the salon, ask for the shortest butterfly layer to stay long enough to tuck behind the ear and keep the bottom perimeter full. Relaxed ends should look soft, not heavily feathered or thinned.
Pro tip: Style the upper layers away from the face but leave the bottom more relaxed; too much curl through every layer can make the cut feel overly finished.
Low-Maintenance Razor Layers Hairstyle
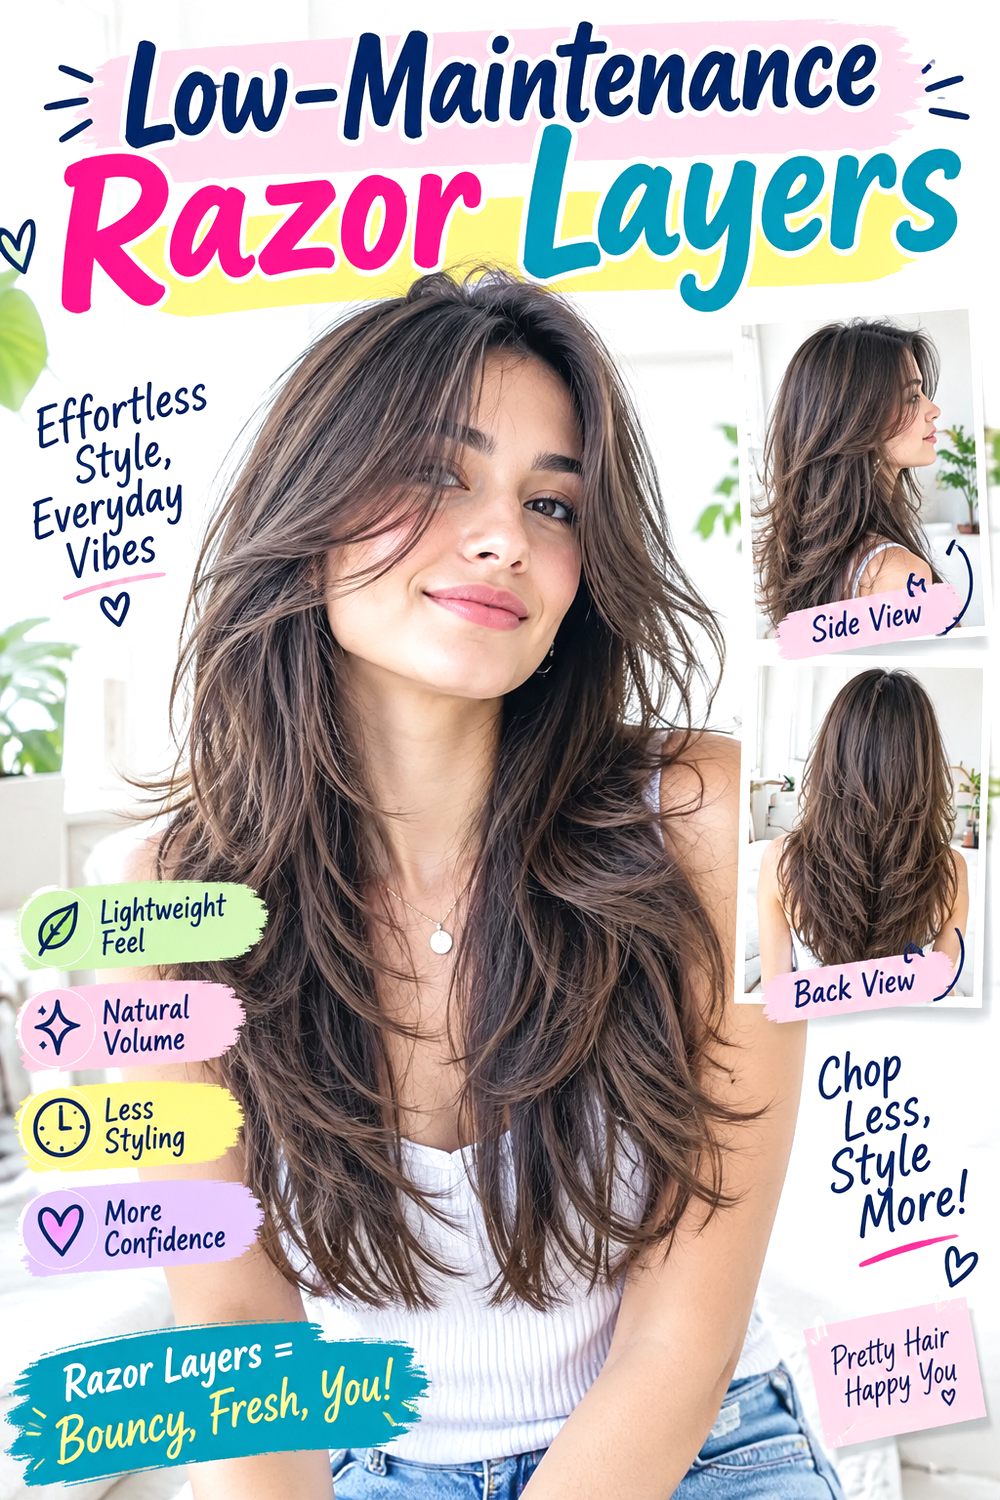
Razor layers can give long hair a softer, less precise edge when they are used selectively rather than throughout the entire cut. The ends taper lightly, and the face frame blends into the lengths with narrow pieces that move easily. Straight and gently wavy medium-density hair show this texture most clearly. Fine hair needs careful restraint, while coarse or fragile hair may be better suited to scissor texturizing if razor work makes the ends feel rough. Use a lightweight leave-in conditioner, dry texture spray, and heat protectant when adding loose bends. Styling is quick because the cut is designed to look good with a slightly undone finish. The tapered edges also grow out softly without an obvious line. At the salon, ask for razor work mainly through selected surface layers and front pieces while keeping the lower perimeter strong. Avoid razoring every section equally, which can remove too much density and make the length look overly wispy.
Pro tip: Ask your stylist to keep the razor away from the most fragile ends if your hair is dry; selective surface texture gives movement without sacrificing the perimeter.
Extra-Long Lived-In Waves Hairstyle

Extra-long waves work best when the haircut keeps movement through the lengths without breaking up the bottom too aggressively. Long layers can begin below the shoulders, leaving the upper section calm and the lower half loose and flowing. Naturally wavy medium or thick hair needs minimal manipulation, while straight hair can create the same relaxed movement with large rollers or a wide-barrel curling iron. Use heat protectant, a wide-tooth comb, and lightweight texturizing spray to encourage separation without making the ends dry. Styling takes moderate time because of the length, but later refreshes are easy if only a few front pieces need reshaping. Long hair also needs regular conditioning to prevent the oldest ends from looking worn. At the salon, ask for long layers that start low and preserve a substantial perimeter. Keep the shortest pieces well below the chin so the hairstyle reads as flowing length first and layered texture second.
Pro tip: Refresh only the front and top waves on day two or three; re-curling the full length adds unnecessary heat and can make the finish look too uniform.
Conclusion
Lived-In Length Hairstyles for Fall 2026 work best when the haircut supports natural movement instead of demanding a freshly styled finish every morning. Long layers can be low and subtle, butterfly-inspired, shaggy, curly, or almost invisible, while fringe can range from grown-out curtain bangs to a soft curly front. End density also matters: fine hair often needs a stronger perimeter, while thick hair may need internal bulk removal.
The right version depends on face shape, natural texture, density, preferred length, styling effort, and maintenance tolerance. Focus on where the shortest layer begins, how full the ends remain, and how much natural texture you want to use. Those details make lived-in length practical rather than simply undone.
Before Your Salon Visit
Choose one or two favorite ideas and save clear photo references that show the front, sides, and ends. Discuss your face shape, natural texture, density, preferred length, maintenance level, and normal styling routine with your stylist. Point out the exact layers, fringe, face-framing position, perimeter weight, amount of volume, and end finish you like. If your reference is wavy or curly, explain whether that texture is natural or heat-styled so the haircut can be planned around what your hair actually does every day.
FAQs
Are lived-in length hairstyles good for fine hair?
Yes. Fine hair usually works best with fewer long layers, a strong perimeter, and restrained face-framing so movement is added without sacrificing too much density.
Can lived-in length work without daily heat styling?
Yes. Wavy and curly textures can often air-dry or diffuse, while straight hair can use lightweight mousse, rollers, or occasional loose bends instead of full daily heat styling.
How often do long lived-in layers need reshaping?
They generally tolerate grow-out well. The crown, fringe, or face-framing pieces may lose their intended movement before the overall length needs trimming, so maintenance can focus on those areas first.
What should I ask my stylist for if I want a truly lived-in finish?
Ask for soft transitions, realistic face-framing, preserved end weight, and layers that work with your natural texture. Avoid over-thinning or placing short layers higher than you are comfortable styling.